Fix Background Intelligent Transfer Service won’t start: For Windows Update to function Background Intelligent Transfer Service (BITS) is very important as it basically acts as a download manager for Windows Update. BITS transfers files between client and server in the background and also provide progress information when needed. Now if you are having issues in downloading updates then it will be most probably caused because of BITS. Either the configuration of BITS is corrupted or BITS is not able to start.
If you will go to services window you will find out that Background Intelligent Transfer Service (BITS) won’t start. These are the type of errors which you will face while trying to start BITS:
Background intelligent transfer service did not start properly
Background intelligent transfer service will not start
Background intelligent transfer service has stopped working
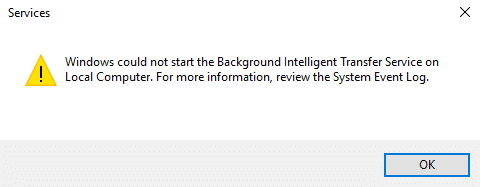
Windows could not start the Background Intelligent Transfer service on the local computer. For more information review the system event log. If this is a non-Microsoft service contact the service vendor and refer to service-specific error code -2147024894. (0x80070002)
Now if you are facing a similar issue with BITS or with Windows update then this post is for you. Without wasting any time let’s see how to actually Fix Background Intelligent Transfer Service won’t start issue with the below-listed troubleshooting guide.
ዳራ አስተካክል የማሰብ ችሎታ ማስተላለፍ አገልግሎት አይጀምርም።
የሆነ ችግር ከተፈጠረ ልክ የመልሶ ማግኛ ነጥብ መፍጠርዎን ያረጋግጡ።
Method 1: Start BITS from Services
1.Press Windows Keys + R then type services.msc እና ኢትን ጠቅ ያድርጉ.

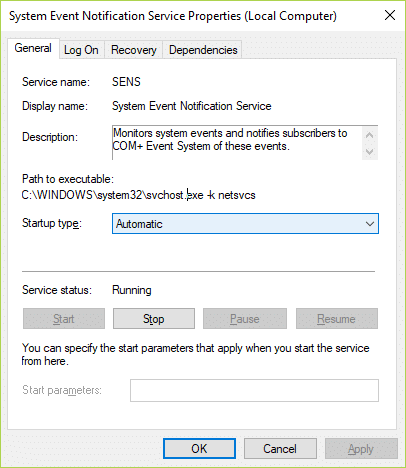
2.Now find BITS and then double click on it.
3.Make sure the Startup type is set to ራስ-ሰር and the service is running, if not then click on ጀምር አዝራር.

4. አፕሊኬሽን ጠቅ ያድርጉ እና እሺን ይከተሉ።
5.Reboot your PC and again try to update Windows.
Method 2: Enable dependent Services
1.Press Windows Keys + R then type services.msc እና ኢትን ጠቅ ያድርጉ.
2.Now find the below-listed services and double click on each of them to change their properties:
የተርሚናል አገልግሎቶች
የርቀት ሂደት ጥሪ (አር.ሲ.)
System Event Notification
Windows Management Instrumentation Driver Extensions
COM+ Event System
የዲሲOM አገልጋይ ሂደት አስጀማሪ
![]()
3.Make sure their Startup type is set to ራስ-ሰር and the above services are running, if not then click on ጀምር አዝራር.
4. አፕሊኬሽን ጠቅ ያድርጉ እና እሺን ይከተሉ።
ለውጦችን ለማስቀመጥ እና መቻልዎን ለማየት ፒሲዎን እንደገና ያስነሱ 5 Fix Background Intelligent Transfer Service won’t start.
ዘዴ 3: የስርዓት ፋይል አረጋጋጭ አሂድ
1. ዊንዶውስ ቁልፍ + X ን ይጫኑ ከዚያም ን ይጫኑ የትእዛዝ ጥያቄ (አስተዳዳሪ)።

2.አሁን የሚከተለውን በ cmd ውስጥ ያስገቡ እና አስገባን ይምቱ።
Sfc/scannow sfc /scannow /offbootdir=c: /offwindir=c:windows (ከላይ ካልተሳካ ይህን ይሞክሩ)

3. ከላይ ያለው ሂደት እስኪጠናቀቅ ይጠብቁ እና አንዴ እንደጨረሱ የእርስዎን ፒሲ እንደገና ያስጀምሩ.
ዘዴ 4: የዊንዶውስ ዝመና መላ ፈላጊን ያሂዱ
1. በዊንዶውስ ፍለጋ አሞሌ ውስጥ "መላ ፍለጋን" ይተይቡ እና ጠቅ ያድርጉ ችግርመፍቻ.

2.ቀጣይ, ከግራ መስኮት መቃን ይምረጡ ሁሉንም ይመልከቱ.
3.ከዚያ የኮምፒዩተር ችግሮችን መላ ፈልግ ከሚለው ዝርዝር ውስጥ ይምረጡ Windows Update.

4.Follow on-screen instructions and let the Windows Update Troubleshoot run.

5.Restart your PC and see if you are able to Fix Background Intelligent Transfer Service won’t start.
Method 5: Run DISM Tool
1. ዊንዶውስ + X ን ይጫኑ እና Command Prompt (አስተዳዳሪ) የሚለውን ይምረጡ.
2. የሚከተለውን ትዕዛዝ በ cmd ይተይቡ እና ከእያንዳንዱ በኋላ አስገባን ይምቱ.
ሀ) ዲስም / ኦንላይን / ማጽጃ-ምስል / CheckHealth ለ) Dism / በመስመር ላይ / ማጽጃ-ምስል / ስካን ጤና ሐ) Dism / በመስመር ላይ / ማጽጃ-ምስል / ወደነበረበት መመለስ ጤና

3. የ DISM ትዕዛዙ እንዲሄድ እና እስኪጠናቀቅ ድረስ ይጠብቁ.
4. ከላይ ያለው ትዕዛዝ የማይሰራ ከሆነ ከታች ያለውን ይሞክሩ፡-
Dism / Image: C: ከመስመር ውጭ / ማጽጃ-ምስል / ጤናን ወደነበረበት መመለስ / ምንጭ: c: testmountwindows Dism / የመስመር ላይ / ማጽጃ-ምስል / ጤናን ወደነበረበት መመለስ / ምንጭ: c: testmountwindows / LimitAccess
ማስታወሻ: C: RepairSource ዊንዶውስ የጥገና ምንጭዎ ባሉበት ቦታ (የዊንዶውስ መጫኛ ወይም የመልሶ ማግኛ ዲስክ) ይተኩ።
ለውጦችን ለማስቀመጥ እና መቻልዎን ለማየት ፒሲዎን እንደገና ያስነሱ 5 Fix Background Intelligent Transfer Service won’t start, ካልሆነ ወደሚቀጥለው ዘዴ ይቀጥሉ.
Method 6: Reset the Download Queue
1. ይጫኑ የዊንዶውስ ቁልፍ + R then type the following and hit Enter:
%ALLUSERSPROFILE%Application DataMicrosoftNetworkDownloader
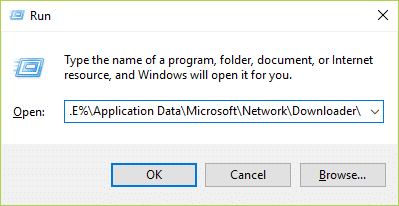
2.Now look for qmgr0.dat and qmgr1.dat, if found make sure to delete these files.
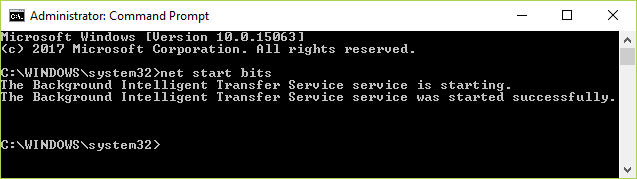
3. ዊንዶውስ ቁልፍ + X ን ይጫኑ ከዚያ ይምረጡ Command Prompt (በአስተዳደሩ).
4. የሚከተለውን ትዕዛዝ በ cmd ይተይቡ እና አስገባን ይጫኑ.
የተጣራ የመጀመሪያ ቢት
5.Again try to update window and see if it works.
ዘዴ 7: Registry Fix
1. ዊንዶውስ ቁልፍ + R ን ይጫኑ ከዚያም ይተይቡ ሒደት እና ለመክፈት Enter ን ይምቱ መዝገብ ቤት አዘጋጅ ፡፡

2. ወደሚከተለው የመመዝገቢያ ቁልፍ ዳስስ
HKEY_LOCAL_MACHINESYSTEMCurrentControlSetControlBackupRestoreFilesNotToBackup
3.If the above key exists then continues, if not then right-click on BackupRestore እና ይምረጡ አዲስ > ቁልፍ።
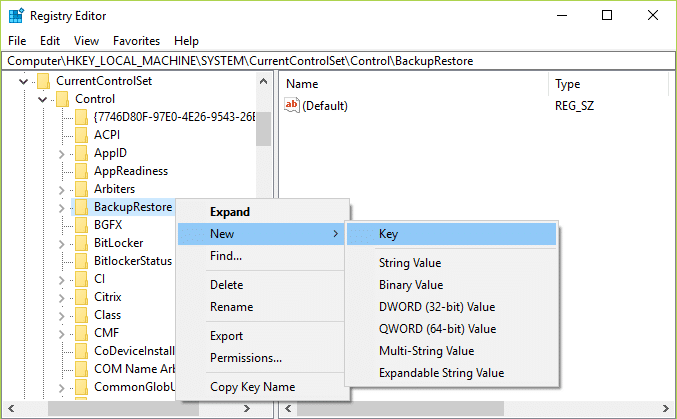
4.Type FilesNotToBackup and then hit Enter.
5.Exit Registry Editor and press Windows Key + R then type services.msc እና ኢትን ጠቅ ያድርጉ.
6.Find ቢት and double-click on it. Then in the አጠቃላይ ትርላይ ጠቅ ያድርጉ ጀምር.
ለእርስዎ የተመከሩ
ያ ነው በተሳካ ሁኔታ ያለህ ዳራ አስተካክል የማሰብ ችሎታ ማስተላለፍ አገልግሎት አይጀምርም። ግን ይህንን መመሪያ በተመለከተ አሁንም ማንኛቸውም ጥያቄዎች ካሉዎት በአስተያየቱ ክፍል ውስጥ ለመጠየቅ ነፃነት ይሰማዎ።

