If you have 2 in 1 Windows device such as Tablets, you would be familiar with the importance of the screen rotation feature. Users report that the screen rotation feature has stopped working & the Screen Rotation Lock option is greyed out. If you’re facing this issue, then don’t worry as this is just a setting issue which means it can be easily fixed. This guide will walk you through the steps to fix rotation lock greyed out in Windows 10.
Here are issues which can be resolved using this guide:
- Rotation lock missing
- Auto Rotate not working
- Rotation lock greyed out.
- Screen rotation not working
Fix Rotation Lock greyed out in Windows 10
Не забравяйте да създадете точка за възстановяване, в случай че нещо се обърка.
Method – 1: Enable Portrait Mode
One of the methods to fix this problem is to rotate your screen in portrait mode. Once you rotate it to portrait mode, most probably your rotation lock would start working, i.e. clickable again. In case your device is not rotating into portrait mode automatically, try to do it manually.
1. Натиснете Windows Key + I to open Settings then click on the Система иконата.

2. Уверете се, че сте избрали Дисплей от лявото меню.
3. Намерете Orientation section where you need to choose Портрет от падащото меню.
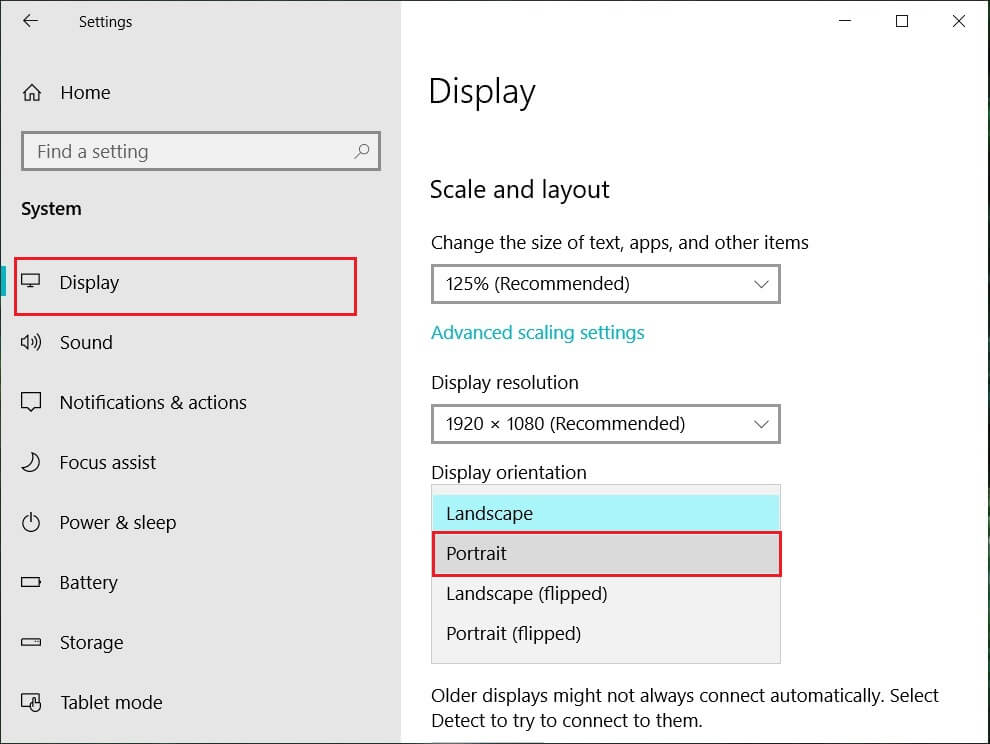
4. Your device will automatically turn into portrait mode.
Method – 2: Use your device in tent mode
Some users, particularly Dell Inspiron, experienced that when their rotation lock is greyed out, the only way to solve this problem is to put your device in Tent Mode.
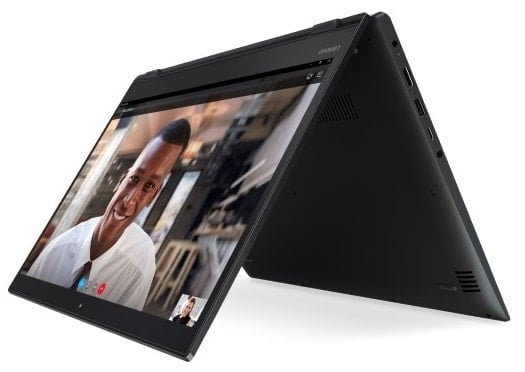
Изображение на кредит: Microsoft
1. You need to put your device in Tent Mode. If your display is upside down, you need not worry.
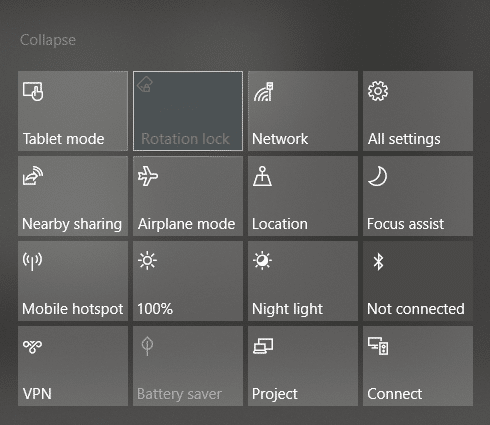
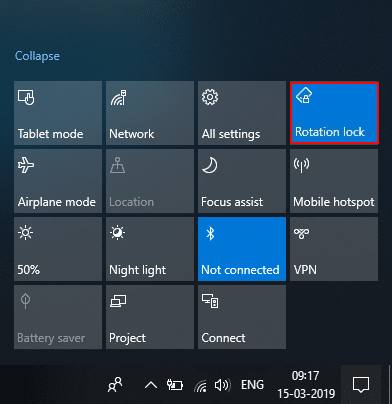
2. Сега кликнете върху Център за действие на Windows, Заключване на въртене will be working. Here you need to turn it off if you want so that your device rotate properly.
Method – 3: Disconnect your keyboard
If rotation lock is greyed in your Dell XPS and Surface Pro 3 (2-in-1 device), you need to disconnect your keyboard, and many users reported that disconnecting the keyboard solves the rotation lock problem. If you own different devices, you can still use this method to fix rotation lock greyed out in Windows 10 issue.
Method – 4: Switch to Tablet Mode
Many users experienced that this rotation greyed out the problem by switching their device into Tablet Mode. If it is switched automatically, it is good; otherwise, you can do it manually.
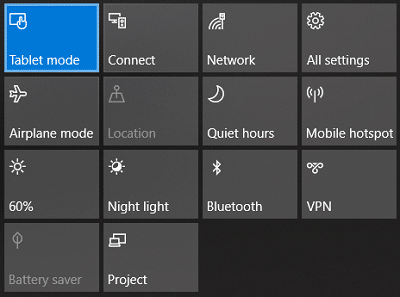
1. Кликнете върху Център за действие на Windows.
2. Ето, ще намерите Режим на таблет option, Click on It.
OR
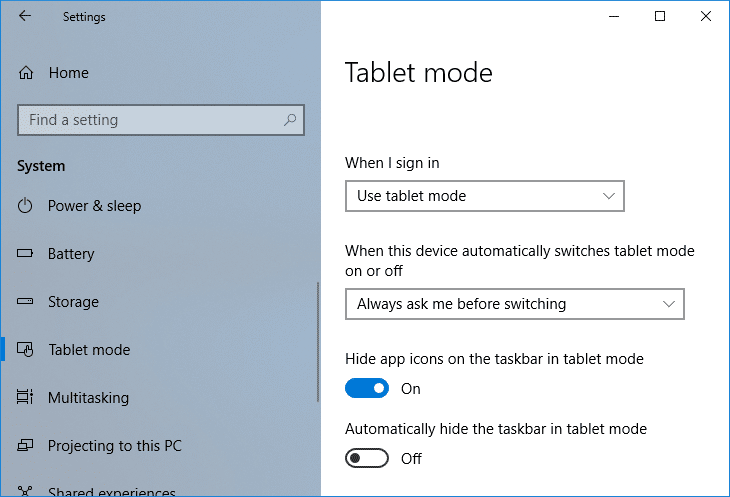
1. Натиснете клавиша Windows + I, за да отворите Настройки след това кликнете върху Система иконата.
2. Here it would help if you located Режим на таблет option under the left window pane.
3. Now from the “When I sign in” drop-down, select “Използвайте режим на таблет".
Method – 5: Change LastOrientation Registry Value
If you still experience a problem, you can solve it by changing some registry values.
1. Press Windows +R and enter регентство след това натиснете Enter.

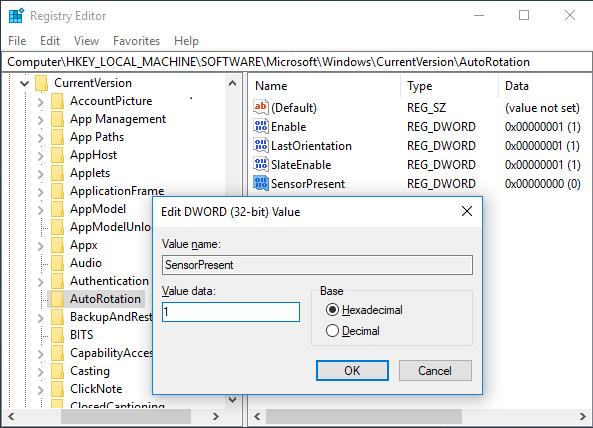
2. Once registry editor opens, you need to navigate to the below path:
HKEY_LOCAL_MACHINESOFTWAREMicrosoftWindowsCurrentVersionAutoRotation
Забележка: Follow the above folders one by one to locate Auto Rotation.
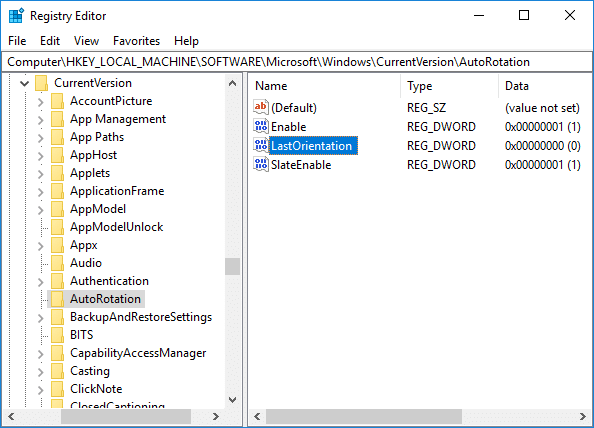
3. Уверете се, че select AutoRotation след това в десния панел на прозореца щракнете двукратно върху Last Orientation DWORD.
4. Now enter 0 under Value data field и кликнете върху OK.
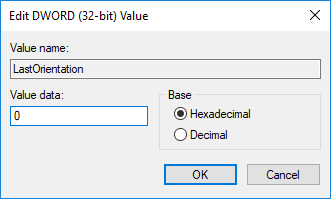
5. Ако има SensorPresent DWORD, double-click on it and set its стойност до 1.
Method – 6: Check Sensor Monitoring Service
Sometimes services of your device can cause a rotation lock problem. Therefore, we can get it sorted with Windows Monitoring services feature.
1. Натиснете Windows + R и въведете services.msc и натиснете Enter.

2. Once the services window opens, find the Sensor Monitoring services option и кликнете два пъти върху него.
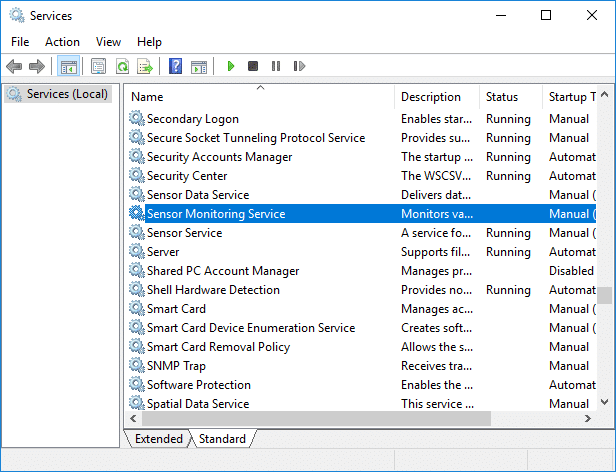
3. Now, from the Startup type drop-down select автоматичен и след това кликнете върху Старт бутон to start the service.
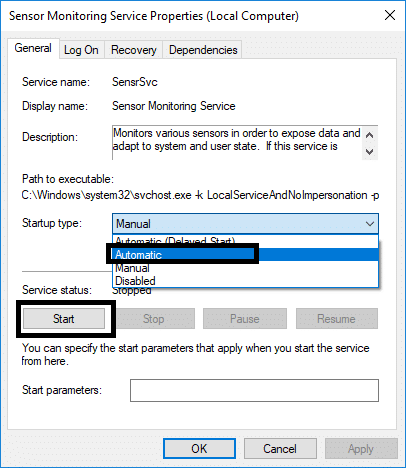
4. Finally, click Apply followed by OK to save the settings, and you can reboot the system to apply the changes.
Method – 7: Disable YMC service
If you are using a Lenovo Yoga device and experiencing this problem, you can fix rotation lock grayed out in the Windows 10 issue by disabling YMC service.
1. Windows + R type services.msc и натиснете Enter.
2. Намерете YMC services и щракнете двукратно върху него.
3. Set the Startup type to Забранен and click Apply, followed by OK.
Method – 8: Update Display Drivers
One reason for this problem could be the driver update. If your respective driver for the monitor is not updated, it can cause the Rotation Lock greyed out in Windows 10 Issue.
Manually Update Graphics Drivers using Device Manager
1. Натиснете клавиша Windows + R, след което въведете devmgmt.msc и натиснете Enter, за да отворите Мениджър на устройства.

2. След това разгънете Дисплейни адаптери and right-click on your Graphics Card and select Активиране.

3. Once you have done this again right-click on your graphics card and select “Актуализиране на драйвера".

4. Изберете „Търсене автоматично за актуализиран софтуер на драйвера” и го оставете да завърши процеса.

5. If the above steps helped fix the issue then very good, if not then continue.
6. Again right-click on your graphics card and select “Актуализиране на драйвера”, но този път на следващия екран изберете „Разгледайте компютъра ми за софтуер за драйвери."

7. Сега изберете „Позволете ми да избирам от списък с наличните драйвери на моя компютър"

8. И накрая, select the latest driver от списъка и кликнете върху него Next.
9. Let the above process finish and restart your PC to save changes.
Follow the same steps for the integrated graphics card (Intel in this case) to update its drivers. See if you’re able to Fix Rotation Lock greyed out Issue, if not then continue with the next step.
Automatically Update Graphics Drivers from Manufacturer Website
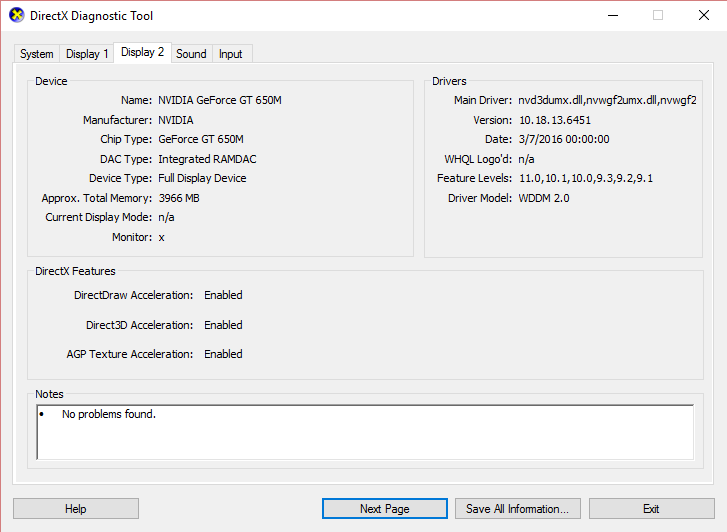
1. Press Windows Key + R and in the dialog box type “dxdiag” и натиснете Enter.

2. After that search for the display tab (there will be two display tabs one for the integrated graphics card and another one will be of Nvidia’s) click on the Display tab and find out your graphics card.
3. Now go to the Nvidia driver уебсайт за изтегляне and enter the product details which we find out.
4. Search your drivers after inputting the information, click Agree and download the drivers.

5. After successful download, install the driver, and you have successfully updated your Nvidia drivers manually.
Method – 9: Remove Intel Virtual Buttons Driver
Some users reported that Intel Virtual button drivers cause rotation lock problem on your device. To solve this problem, you can uninstall the driver.
1. Open Device manager on your device by pressing Windows + R and type devmgmt.msc and hit Enter or press Windows X and choose Device Manager from the options list.
2. Once Device manager box is opened locate Intel virtual buttons driver.
3. Right-click on it and choose Деинсталиране.
Препоръчва се:
Надявам се, че тази статия е била полезна и сега можете лесно Fix Rotation Lock greyed out in Windows 10, но ако все още имате въпроси относно този урок, не се колебайте да ги зададете в секцията за коментари.
")
