If you don’t see Wireless Adapter under Network Connections neither there is a Network adapter tab under device manager then it seems like your Network Adapter is missing or not detected on your Windows 10 which is a serious issue because you won’t be able to access the Internet until the issue is resolved. In short, when you click on the Wireless icon on the system tray there won’t be any device listed in order to connect to the Internet and if you open Device Manager then you won’t see the Network Adapter tab.
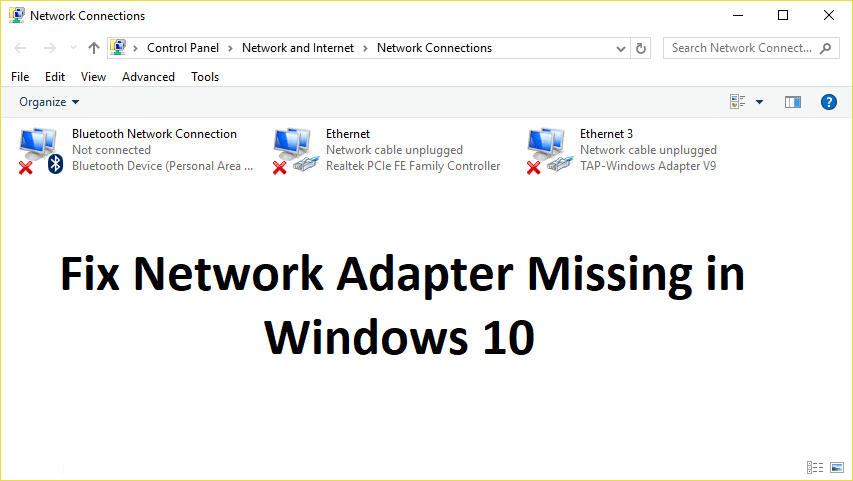
These are the reasons behind the Network Adapter missing issue:
- Network adapter missing in Device manager
- No Network Adapters showing in Device Manager
- Network Adapter Not Detected
- Network Adapter Not Found Windows 10
- No Network Adapter In Device Manager
The main cause of this issue seems to be outdated, incompatible or corrupted Network Adapter drivers. If you have recently upgraded from previous versions of Windows then it’s possible that the old drivers will not work with the new Windows and hence the issue. So without wasting any time let’s see how to actually Fix Network Adapter Missing in Windows 10 issue with the below-listed troubleshooting steps.
Note: Just make sure to uninstall any VPN software on your PC before continuing.
Corregiu l'adaptador de xarxa que falta a Windows 10
Assegureu-vos de crear un punt de restauració per si alguna cosa va malament.
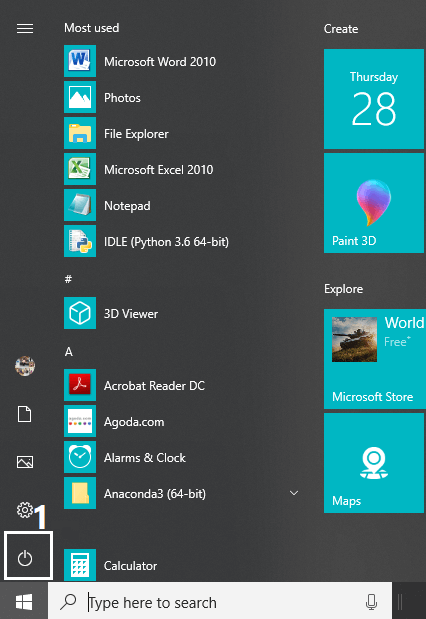
Method 1: Reboot your Computer
La majoria de nosaltres coneixem aquest truc tan bàsic. Reiniciar l'ordinador de vegades pot solucionar qualsevol conflicte de programari donant-li un nou començament. Per tant, si sou algú que preferiu posar el seu ordinador en suspensió, reiniciar-lo és una bona idea.
1. Feu clic al menú d'inici i després feu clic al Botó d'encendre disponible a la cantonada inferior esquerra.
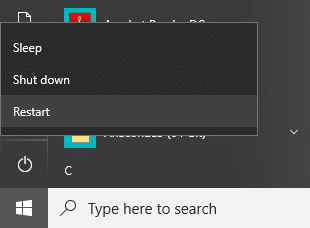
2. A continuació, feu clic al botó Reinicia opció i el vostre ordinador es reiniciarà.
Després de reiniciar l'ordinador, comproveu si el vostre problema s'ha resolt o no.
Method 2: Flush DNS and Reset Winsock Components
1. Open elevated Command Prompt.
2. Ara escriviu l'ordre següent i premeu Intro després de cada una:
ipconfig / release
ipconfig / flushdns
ipconfig / renew

3. Torneu a obrir el símbol del sistema i escriviu l'ordre següent un per un i premeu Intro després de cada un:
ipconfig /flushdns
nbtstat –r
netsh int ip reset
netsh winsock reset
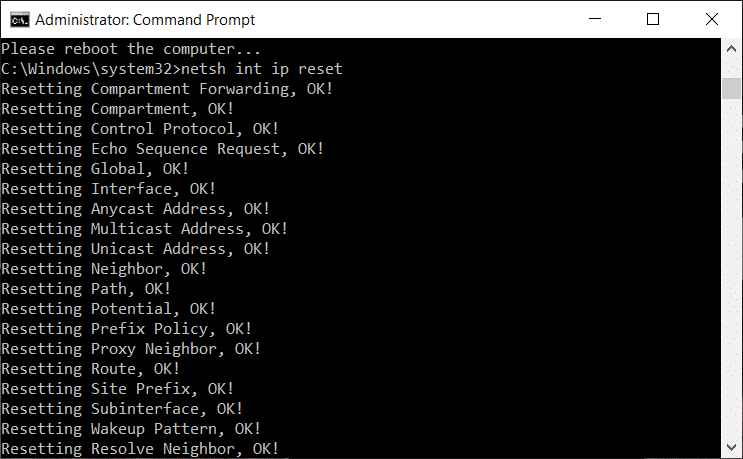
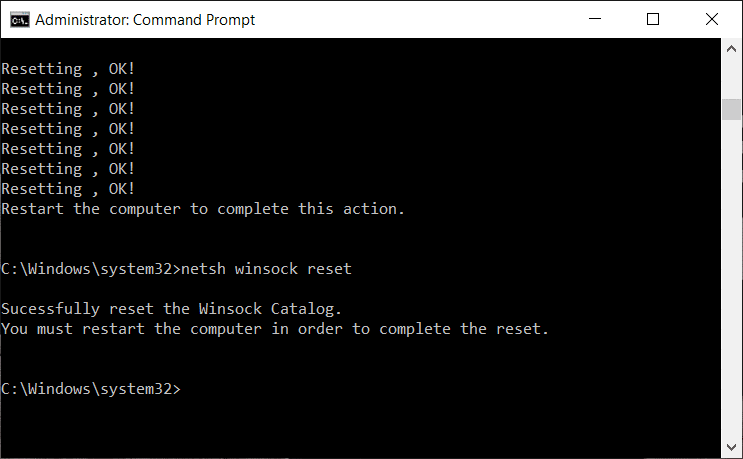
4. Reboot to apply changes. Flushing DNS seems to Fix Network Adapter Driver Issues on Windows 10.
Method 3: Run WWAN AutoConfig Service
1. Premeu la tecla Windows + R i després escriviu services.msc i prem Entrar.

2. Troba WWAN AutoConfig Service in the list (press W to reach to the end of the list quickly).
3. Feu doble clic a sobre WWAN AutoConfig Service.
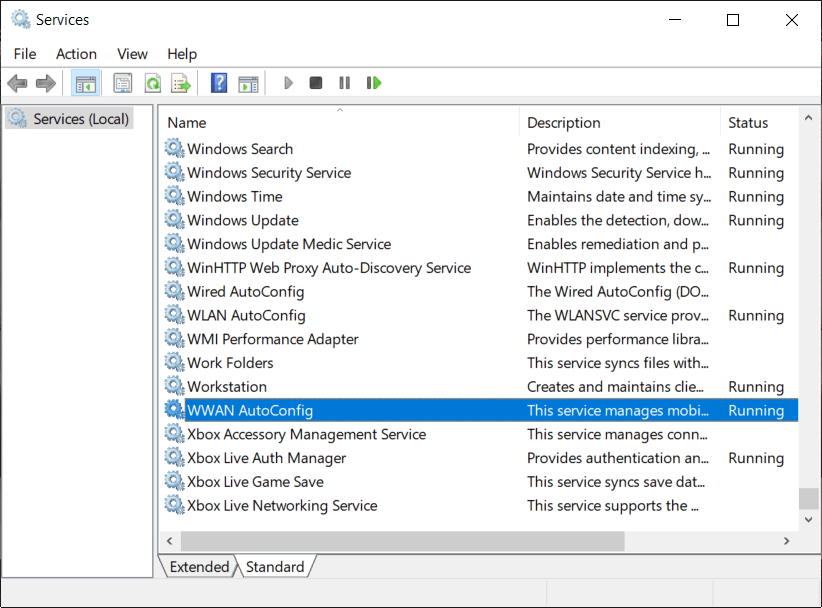
4. If the service is already running then click on Stop, then from the Startup type drop-down select Automàtic.
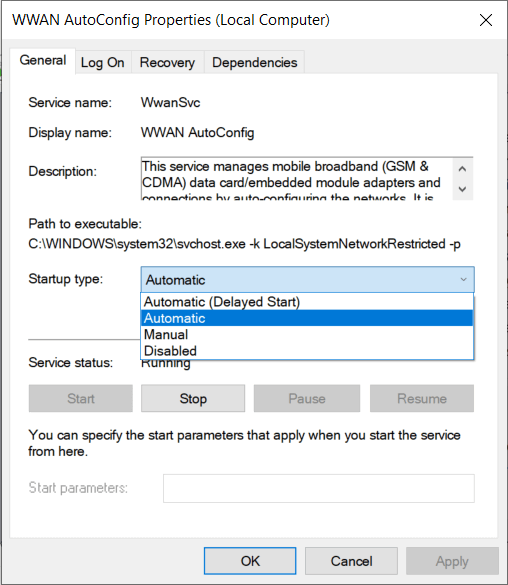
5. Click Apply followed by OK.
6. Feu clic amb el botó dret al ratolí WWAN AutoConfig Service i seleccionar Començar.
Mètode 4: actualitzeu els controladors de l'adaptador de xarxa
1. Premeu la tecla Windows + R i escriviu "devmgmt.msc” al quadre de diàleg Executar per obrir-lo gestor de dispositius.

2. Ampliar Adaptadors de xarxai, a continuació, feu clic amb el botó dret al vostre Controlador Wi-Fi (per exemple, Broadcom o Intel) i seleccioneu Actualitzeu el programari del controlador.

3. Ara seleccioneu “Cerca automàticament el programari de controladors actualitzat".
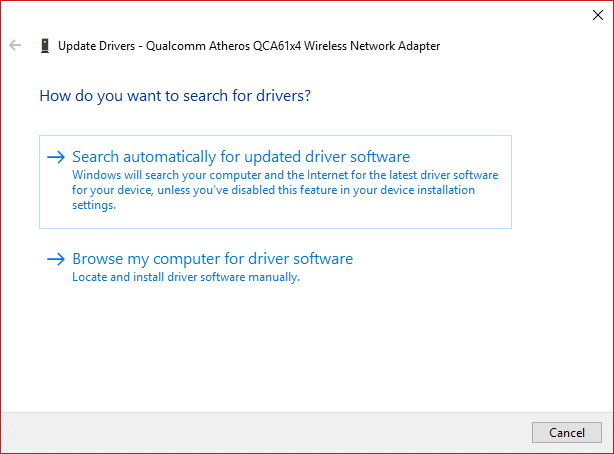
4. Ara Windows will automatically search for the Network driver update and if new update is found, it will automatically download and install it.
5. Un cop acabat, tanqueu-ho tot i reinicieu el vostre PC.
6. Si encara estàs davant del Network Adapter Missing in Windows 10 issue, then again right-click on your WiFi controller and select Actualitza el controlador al Gestor de dispositius.
7. Ara, a l'Actualització del programari del controlador de Windows, seleccioneu “Navegueu pel meu ordinador per obtenir programari de controladors."

8. Ara seleccioneu “Permeteu-me triar entre una llista de controladors disponibles al meu ordinador."

9. Intenta fer-ho actualitzeu els controladors de les versions enumerades (assegureu-vos de marcar el maquinari compatible).
10. Si l'anterior no va funcionar, aneu a lloc web del fabricant per actualitzar els controladors.

11. Baixeu i instal·leu el controlador més recent des del lloc web del fabricant i reinicieu l'ordinador.
Method 5: Uninstall Network Adapter Drivers
1. Premeu la tecla Windows + R i després escriviu "devmgmt.msc” i premeu Enter per obrir el Gestor de dispositius.
2. Amplieu Adaptadors de xarxa i cerqueu el nom de l'adaptador de xarxa.
3. Assegureu-vos que anoteu el nom de l'adaptador en cas que alguna cosa surt malament.
4. Right-click on your network adapter and uninstall it.

5. It will ask for confirmation seleccioneu Sí.
6. Restart your PC and Windows will automatically install the network adapter drivers again.
7. If the drivers are not installed automatically then again open the Device Manager.
8. From the Device Manager menu, click on acció després feu clic a "Escaneja els canvis de maquinari".

Mètode 6: assegureu-vos que Windows estigui actualitzat
1. Premeu Windows Key + I to open Settings then click on Actualització i seguretat.
![]()
2. From the left-hand side, menu click on Actualització de Windows.
3. Now click on the “Buscar actualitzacions” button to check for any available updates.

4. If any updates are pending then click on Download & Install updates.

5. Once the updates are downloaded, install them and your Windows will become up-to-date.
6. After the updates are installed reboot your PC to save changes.
Method 7: Run Network Adapter Troubleshooter
1. Premeu la tecla Windows + I per obrir Configuració i feu clic a Actualització i seguretat.
![]()
2. Al menú de l'esquerra, seleccioneu Resolució de problemes.
3. A Resolució de problemes, feu clic a Connexions a Internet i feu clic a Executeu el solucionador de problemes.

4. Seguiu les instruccions més a la pantalla per executar l'eina de resolució de problemes.
5. Si l'anterior no ha solucionat el problema, des de la finestra de resolució de problemes, feu clic a Adaptador de xarxa i feu clic a sobre Executeu el solucionador de problemes.
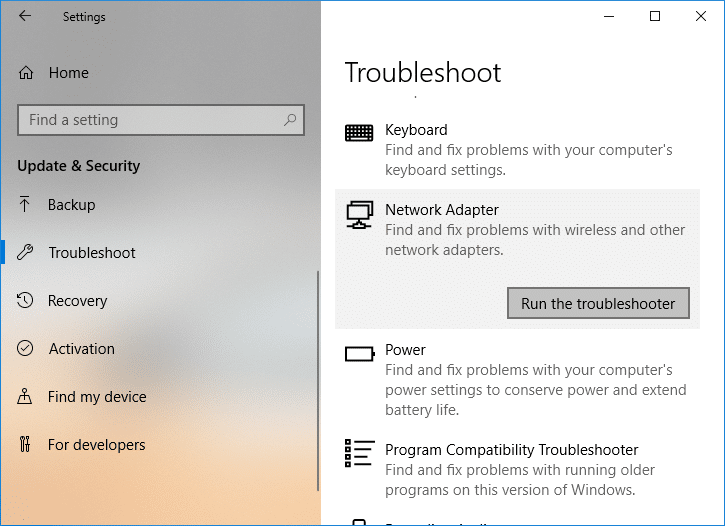
5. Reinicieu l'ordinador per desar els canvis i veure si podeu fer-ho fix the Network Adapter Missing issue.
Mètode 8: instal·leu el programari Intel PROSet/Wireless
De vegades, el problema es deu a un programari Intel PROSet obsolet, per tant sembla que l'actualitzar fix Network Adapter Missing in Windows 10 issue. Per tant, anar aquí i descarregueu la darrera versió de PROSet/Wireless Software i instal·leu-la. Aquest és un programari de tercers que gestiona la vostra connexió WiFi en lloc de Windows i si el programari PROset/Wireless està obsolet, pot provocar problemes amb els controladors. Adaptadors de xarxa sense fil. Hence, read How to Update Network Adapter Drivers on Windows 10.
Mètode 9: Restableix la connexió de xarxa
1. Premeu la tecla Windows + I per obrir Configuració i feu clic a Xarxa i Internet.

2. Al menú de l'esquerra, seleccioneu Estat.
3. Ara desplaceu-vos cap avall i feu clic a S'ha reiniciat la xarxa a la part inferior.

4. Torneu a fer clic a "Reinicialitza ara” a la secció de restabliment de la xarxa.

5. This will successfully reset your network adapter and once it is complete the system will be restarted.
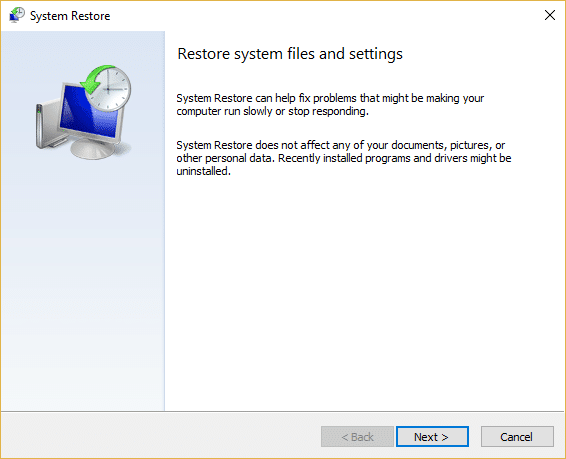
Mètode 10: feu una restauració del sistema
System Restore always works in resolving the error, therefore System Restore can definitely help you in fixing this error. So without wasting any time run system restore in order to resolve Network Adapter Missing issue.
Method 11: Using elevated Command Prompt
1. Premeu la tecla Windows + X i després seleccioneu Indicador d'ordres (Admin).

2. Escriviu l'ordre següent a cmd i premeu Enter:
netcfg –sn
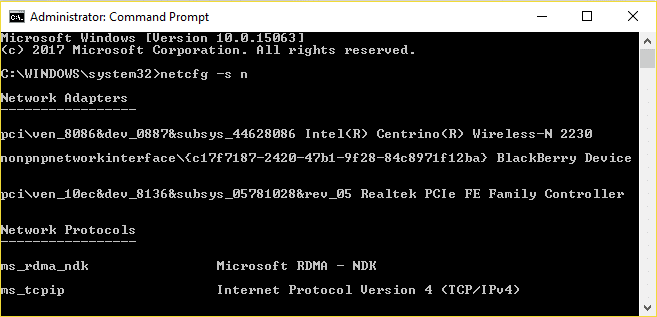
3. This will display a list of networking protocols and in that list find DNI_DNE.
4. If DNI_DNE is listed then type the following command into cmd:
reg delete HKCRCLSID {988248f3-a1ad-49bf-9170-676cbbc36ba3} / va / f
netcfg -v -o dni_dne
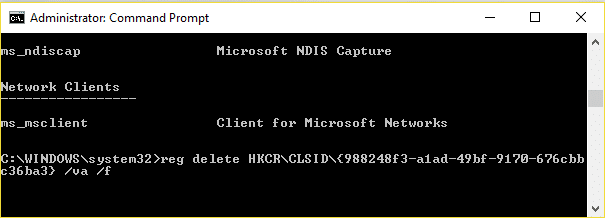
5. If you don’t see DNI_DNE listed then only run the command netcfg -v -u dni_dne.
6. Now if you receive the error 0x80004002 after trying to run the above command then you need to delete the above key manually.
7. Premeu la tecla Windows + R i després escriviu regedit i prem Entrar.

8. Navigate to the following Registry Key:
HKEY_CLASSES_ROOTCLSID{988248f3-a1ad-49bf-9170-676cbbc36ba3}
9. Delete this key and then again type netcfg -v -o dni_dne command in cmd.
10. Reinicieu l'ordinador per desar els canvis.
Recomanat per a vostè:
Això és el que tens amb èxit Corregiu l'adaptador de xarxa que falta a Windows 10 però si encara teniu cap pregunta sobre aquesta publicació, no dubteu a preguntar-les a la secció de comentaris.

