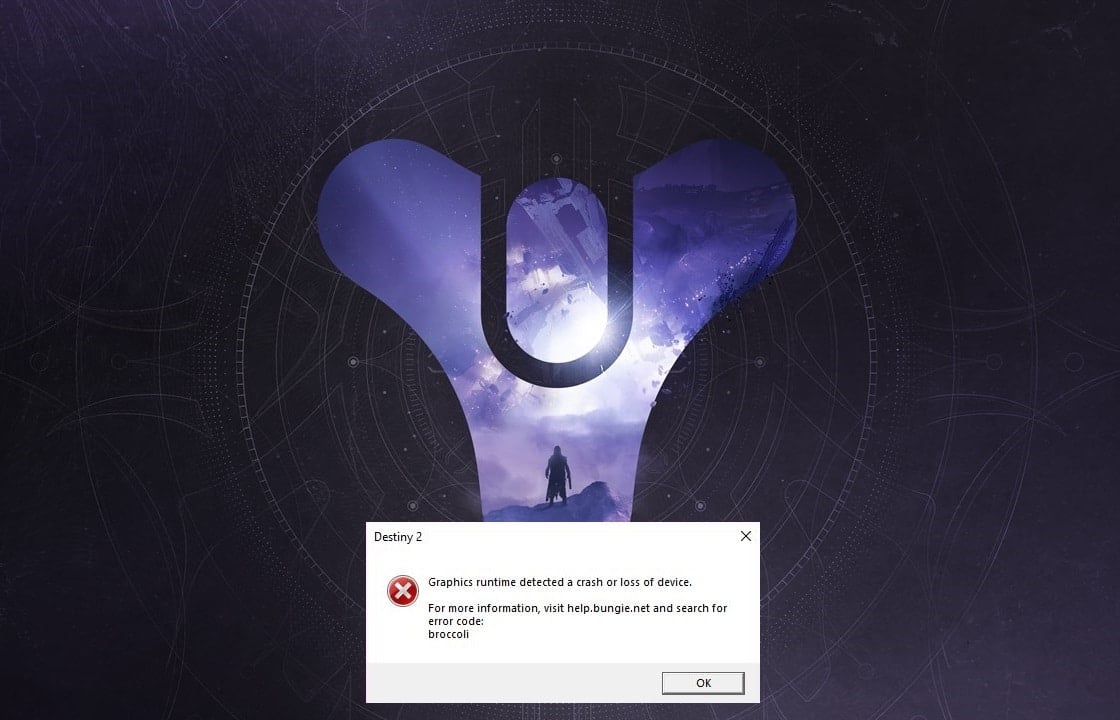
Destiny 2 is a multiplayer shooting game that is hugely popular amongst gamers today. Bungie Inc developed this game and released it in 2017. It is now available on Windows computers along with PlayStation 4/5 and Xbox models – One/X/S. Since it is an online-only game, you would require a stable and high-speed internet connection on your device to play it. Many users reported some issues while playing this game on their Windows systems, majorly: error code broccoli and error code Marionberry. Keep reading to learn more about Destiny 2 Error Code Broccoli and the methods to fix it.
Comu Fix u distinu 2 Error Code Broccoli on Windows 10
Here are the general reasons why this error occurs while playing Destiny 2:
- Overclocked GPU: All Graphics Processing Units are set to run at a particular speed called the velocità di basa which is set by the device manufacturer. On some GPUs, users can boost their performance by increasing the GPU speed to a level higher than the base speed. However, overclocking the GPU may cause the Broccoli error.
- Full-screen glitch: You are more likely to face Destiny 2 error code Broccoli if you are using NVIDIA GeForce GPU.
- Outdated Windows version: If the Windows operating system is working on an outdated version, then the system will not update the GPU drivers on the PC. You need to ensure that you have the latest version of Windows installed.
- Corrupted/Outdated Graphics card drivers: The Destiny 2 error code Broccoli can occur if the graphic drivers on your PC are outdated or corrupt. Destiny 2 requires compatible graphics card and updated graphics card drivers so that your gaming experience is smooth and error-free.
To fix Destiny 2 error code Broccoli, try the methods written below, one-by-one, to find a possible solution for your Windows 10 system.
Method 1: Run Game in Windowed Mode (NVIDIA)
This method is applicable only if you use NVIDIA GeForce Experience to play Destiny 2. Since GeForce Experience might force the game into Full-screen mode, leading to error code Broccoli learn How to Manually Add Game to GeForce Experience learn How to Manually Add Game to GeForce Experience. Follow the steps below to force the game to run in Windowed Mode instead:
1. Lanciate u Nvidia GeForce Caprioli Applicazione.
2. Andate à a Home tabulazione è selezziunate u distinu 2 from the list of games displayed on the screen.
3. Scroll down è cliccate nant'à u Icona di u strumentu to launch settings.
4. Cliccate nant'à Modu Display sottu Impostazioni personalizzate è selezziunate Windowed da u menù.
5. Infine, cliccate nantu Apply per salvà i cambiamenti.
6. Launch u distinu 2 è permette Full screen mode from here instead. Refer highlighted section in the pic below.
Metudu 2: Update Windows
The developers named the error code Broccoli to indicate the inconsistencies with the Graphics card drivers and Windows OS. If the graphics card driver updates are handled by the Windows Update service on your PC, it is necessary to ensure that no Windows updates are pending. Follow the given steps to update Windows:
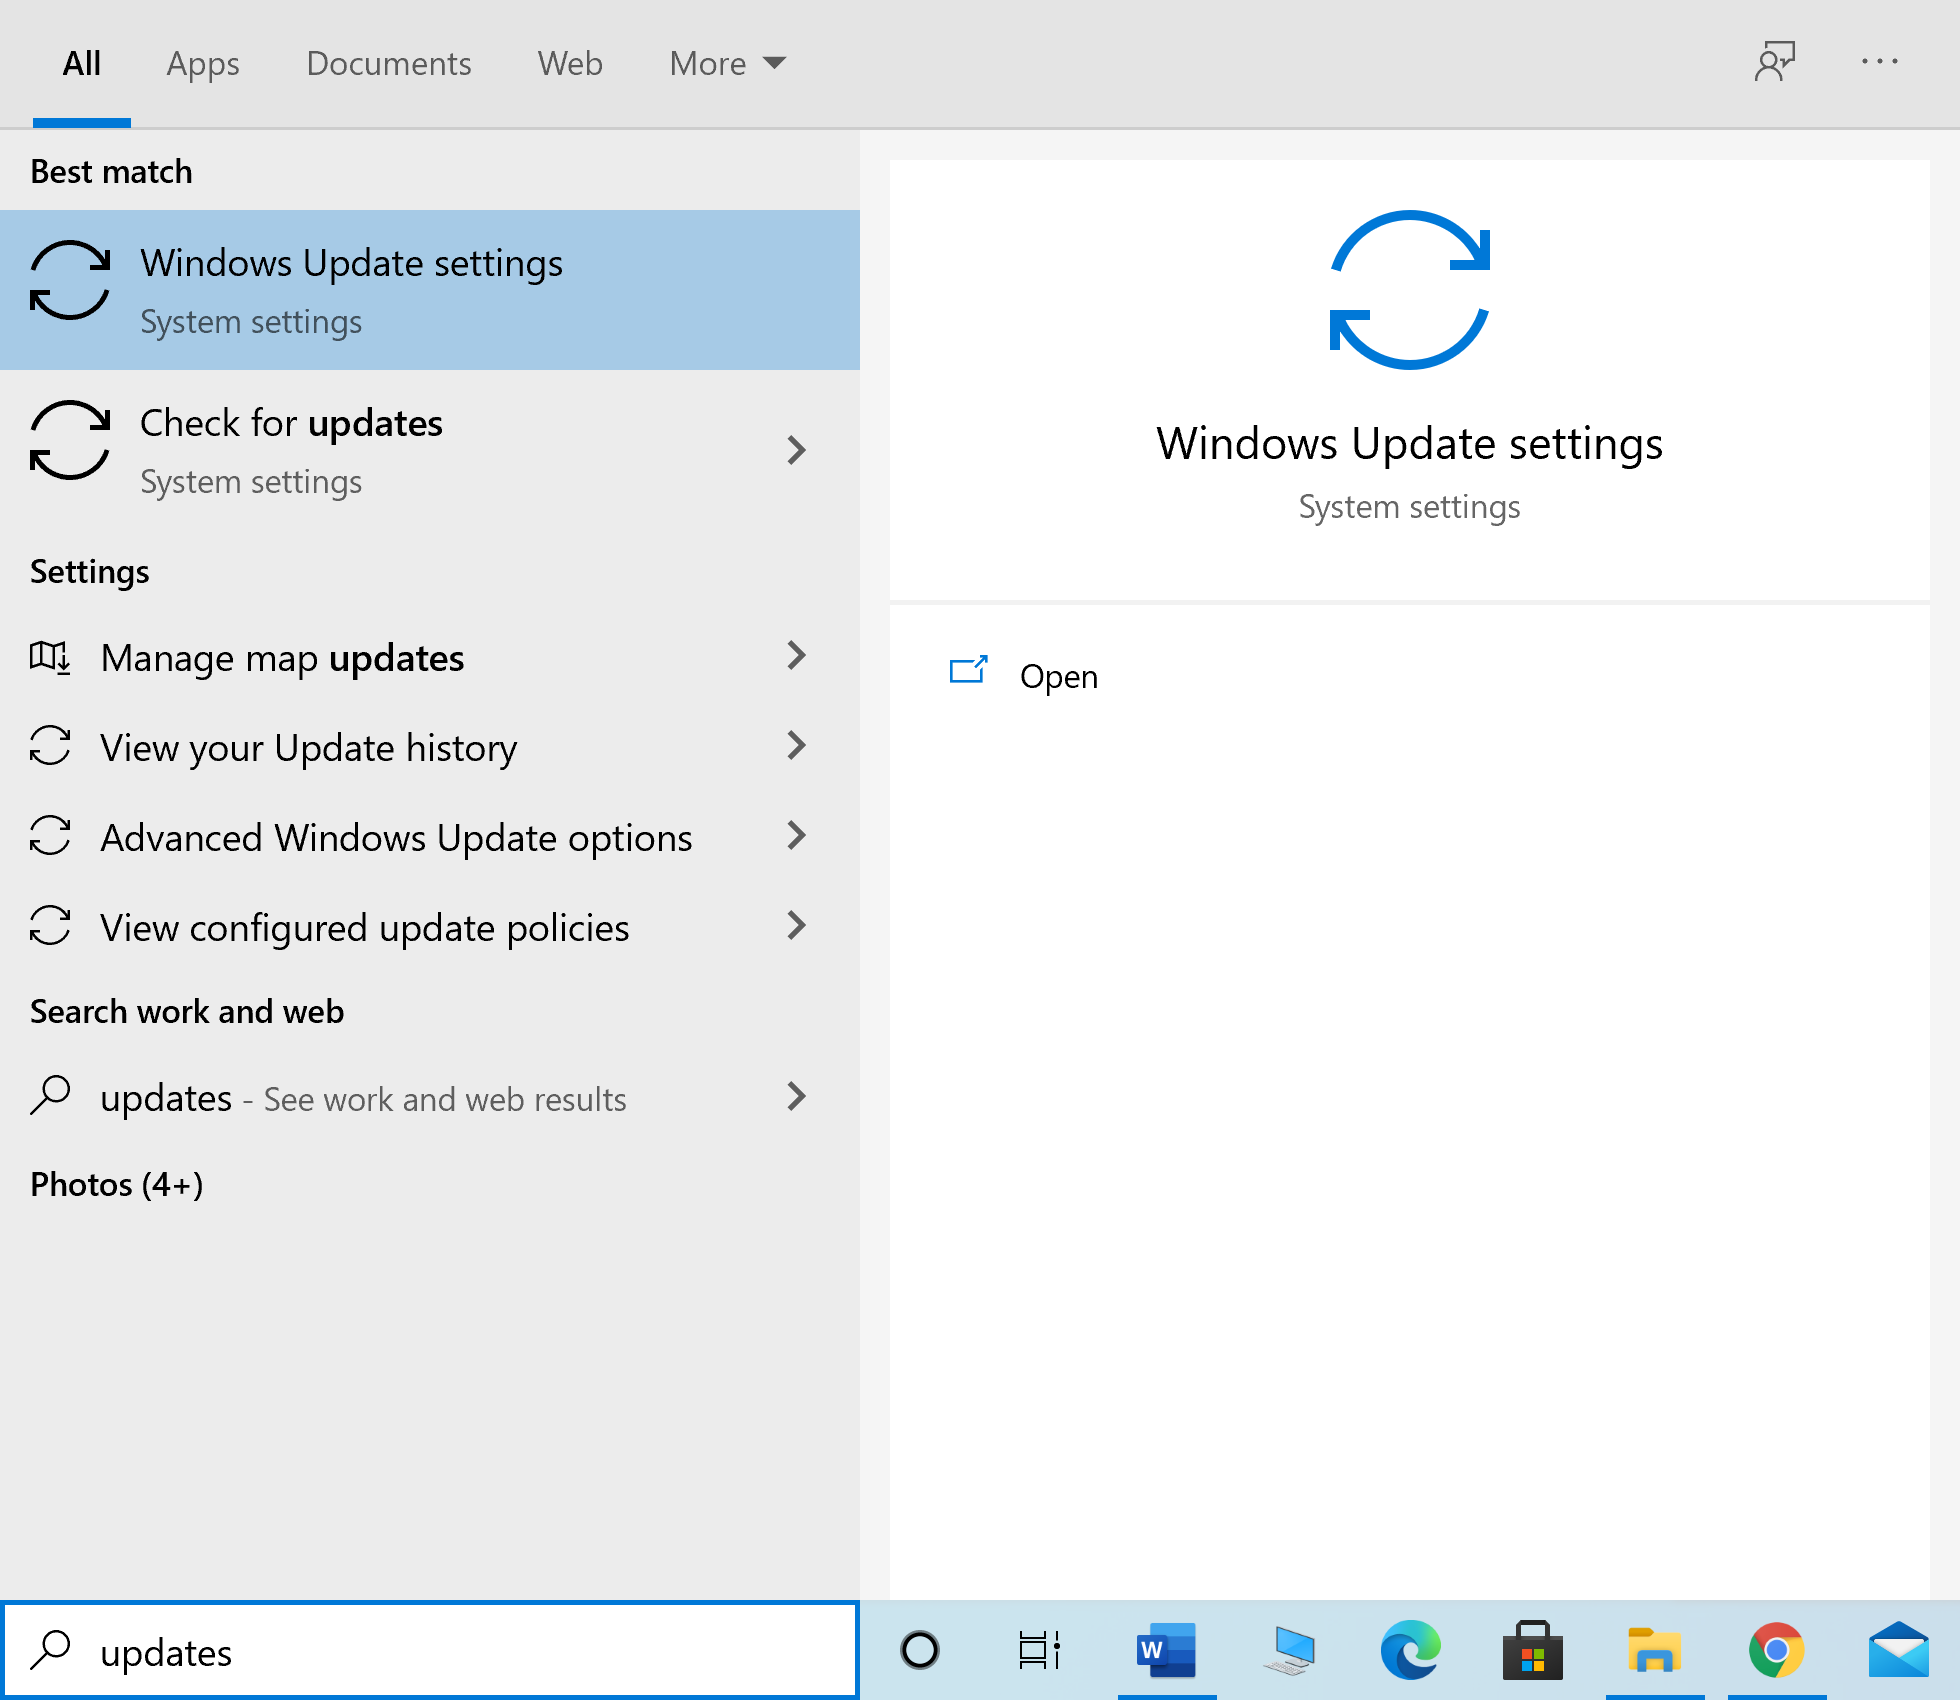
1. Type fighja in ricerca di Windows box. Launch the Paràmetri di Windows Update from the search result, as shown.
2. Cliccate nant'à Verificate per aghjurnà from the right pane, as depicted.
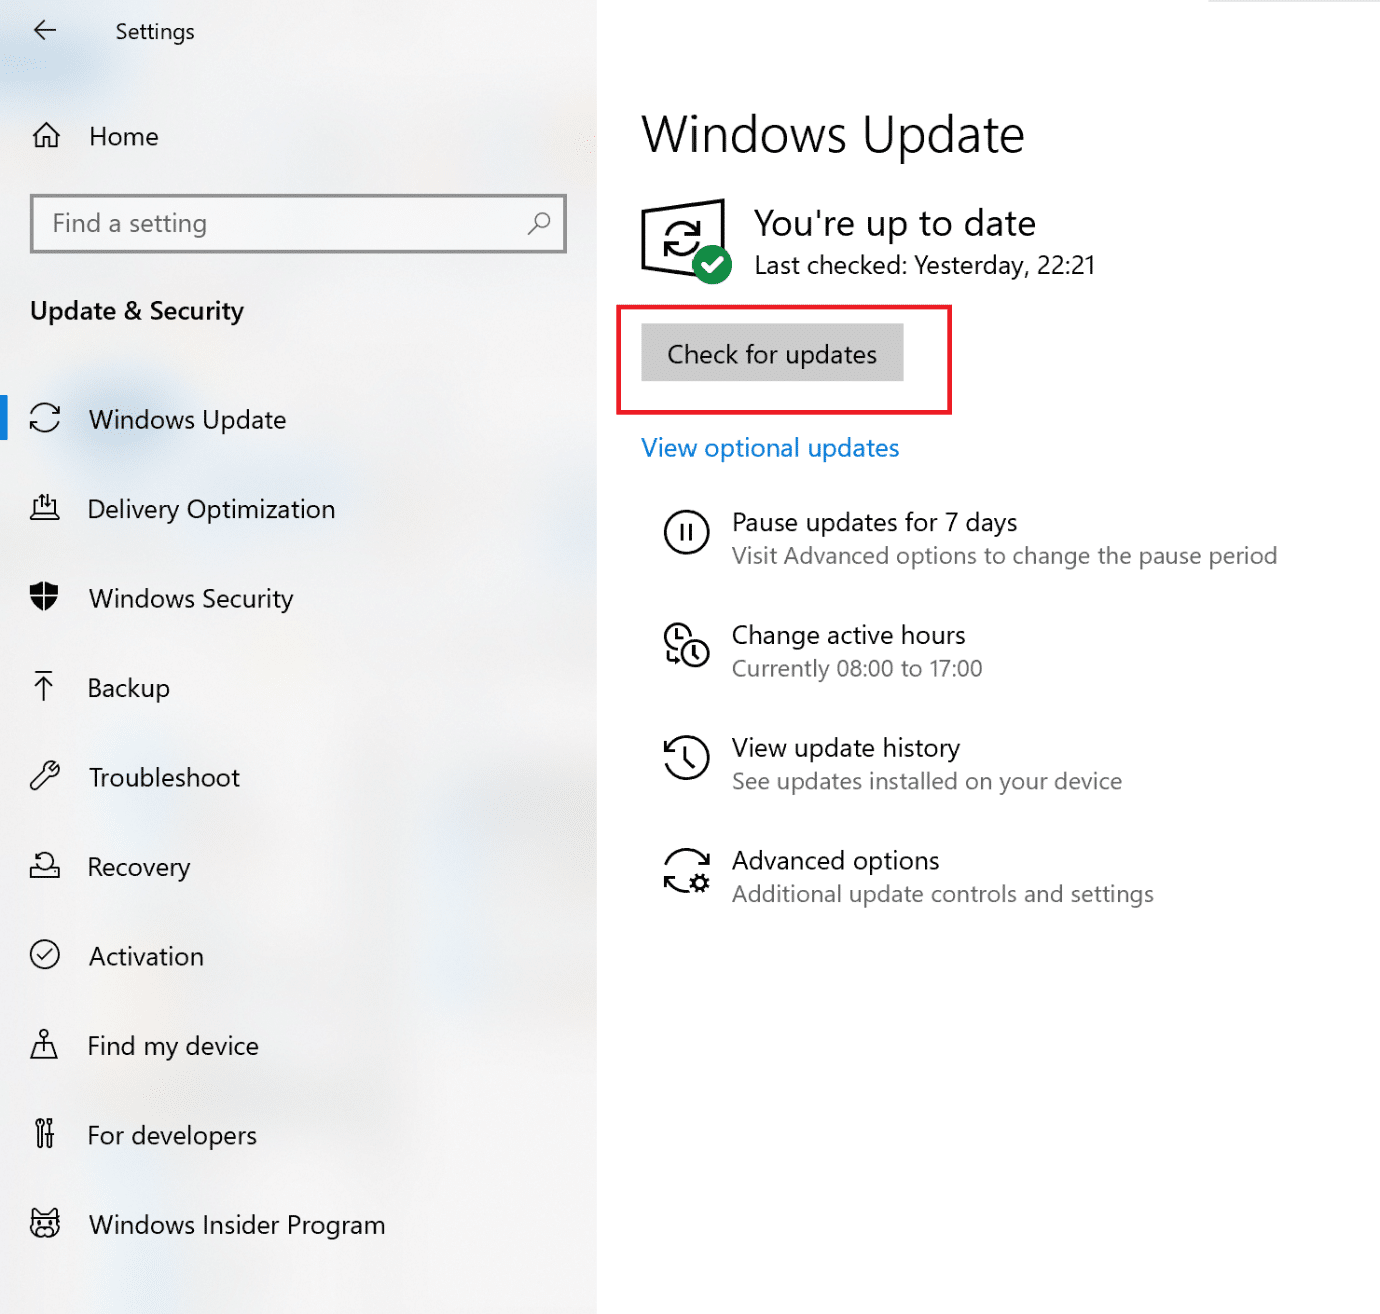
3 Aspettate for Windows to search for and install any pending updates.
nota: Your PC may need to restart several times during the update process. Return to Windows Update settings to install all available updates, after every restart.
After the process is complete, launch Destiny 2 and see if the game launches without Broccoli error. If not, there may be issues with Graphics card drivers which will be dealt with in succeeding methods.
Also Read: L'aghjurnamenti di Windows bloccati? Eccu uni pochi di cose chì pudete pruvà!
Method 3: Reinstall Graphics Card Drivers
If the above methods did not work for you, you need to update Graphics card drivers on your PC to eliminate the issue of corrupt and/or outdated drivers. This can possibly resolve Destiny 2 error code Broccoli.
Given below are two options:
- update graphics card drivers using Device Manager.
- update the drivers by reinstalling them manually.
Option 1: Automatically Update Graphics Card Drivers
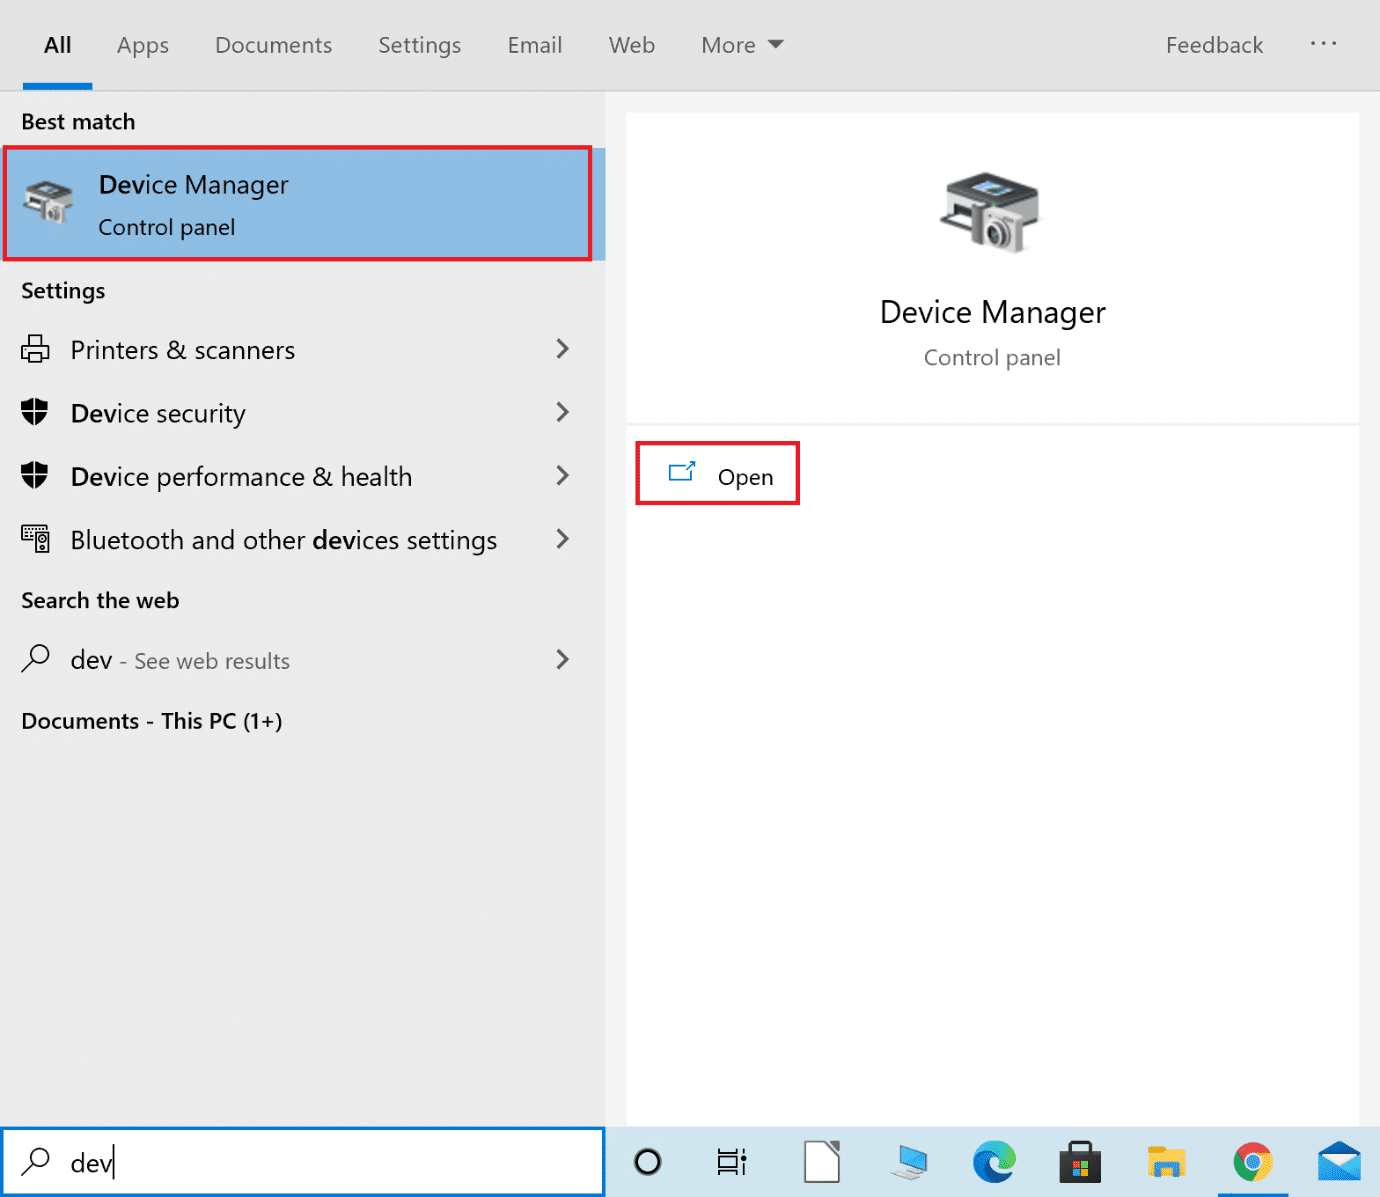
1. Type Gestore di u dispusitivu in u ricerca di Windows box and launch the app from there.
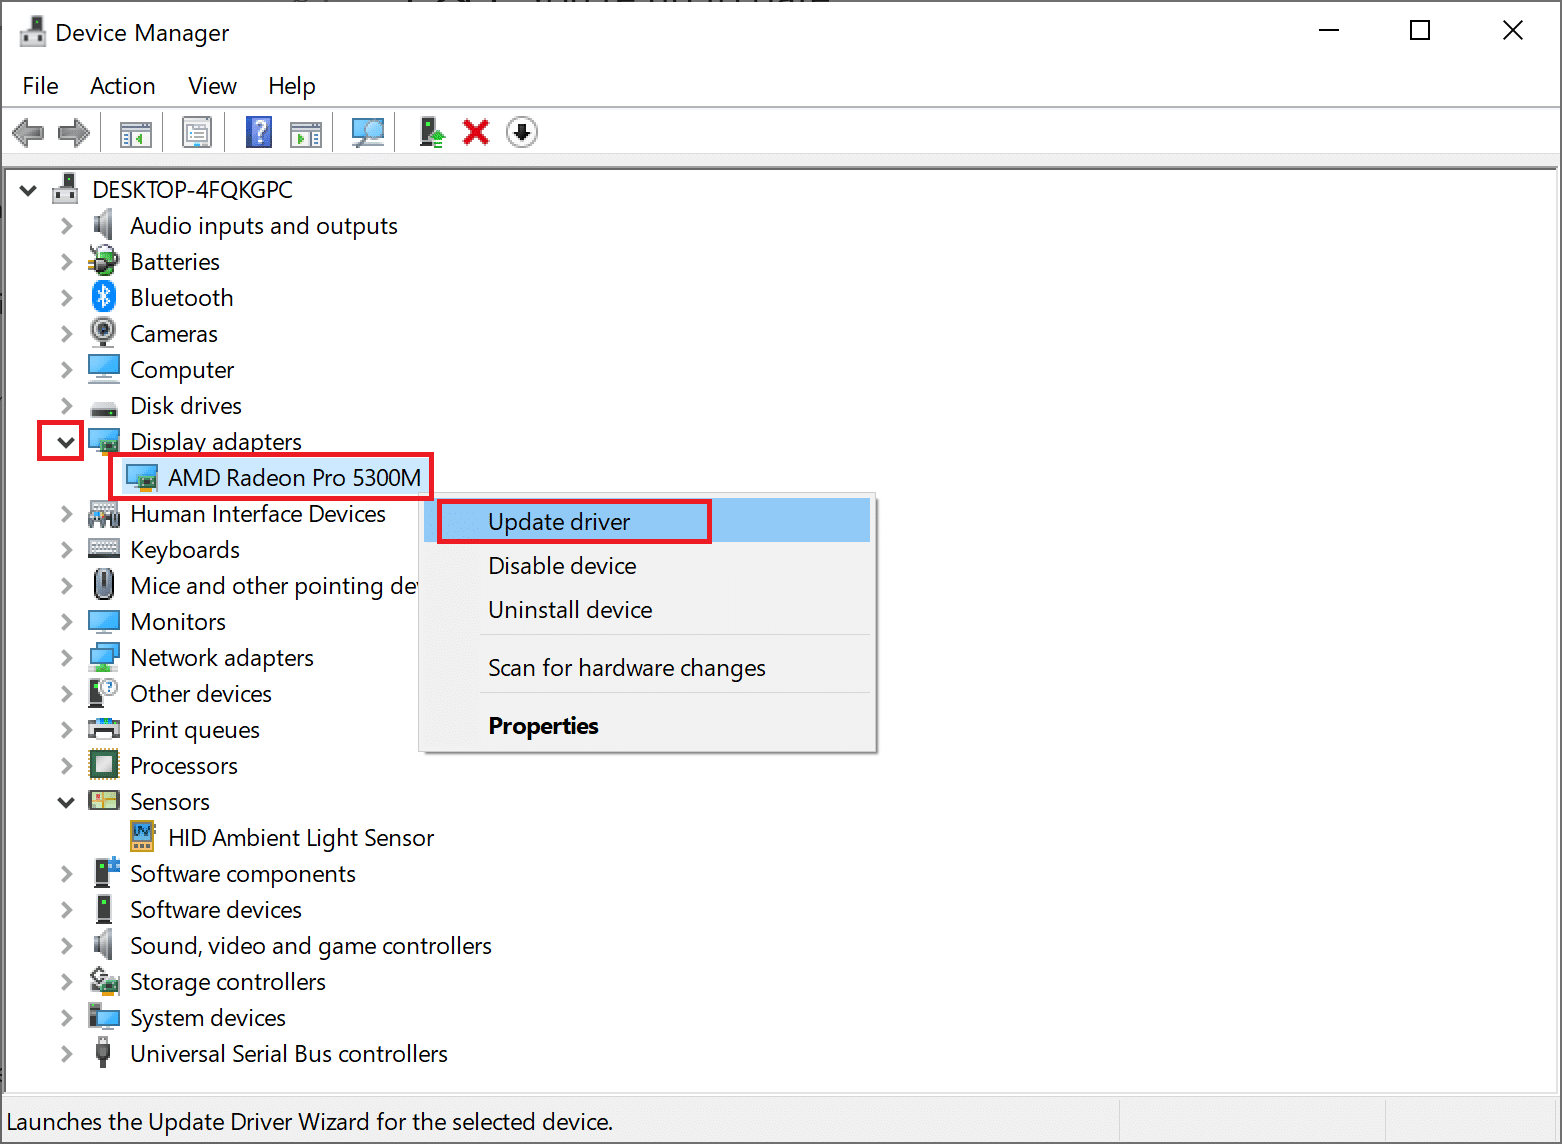
2. Cliccate nantu à u freccia falata accantu à Apparecchi di cunnessione espansione.
3. Right-click on your Graphics card driver and select Prughjettu di l'aghjuntu from the drop-down menu, as depicted below.
4. In the pop-up box that follows, click on the option titled Ricerca automaticamente per i drivers, cum'è evidenziatu quì sottu.
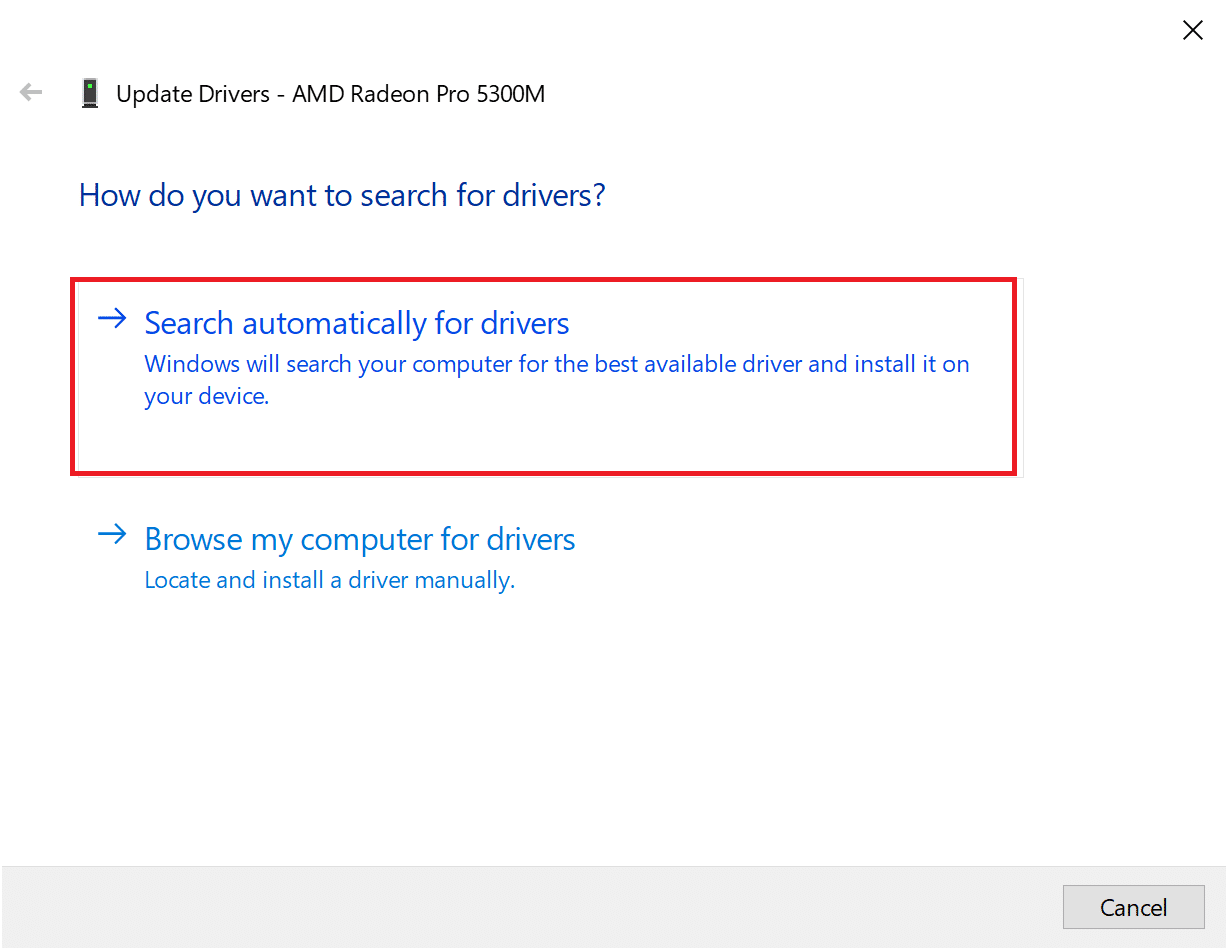
5. Aspettate for your PC to install updated drivers if any are found.
6. Restart the computer and launch the game.
If the above option did not work, you need to manually update the graphics card drivers by reinstalling them on your computer. Read below to do so.
Option 2: Manually Update Drivers by Reinstallation
This process has been explained for users of AMD graphic cards and NVIDIA graphics cards. If you use any other graphics card, ensure to follow the correct steps to reinstall those.
Reinstall AMD Graphic Drivers
1. Download AMD Cleanup Utility da quì.
2. Once the file is downloaded, right-click on it and select Executà cum'è amministratore.
3. Cliccate nant'à Iè nantu à u AMD Cleanup Utility pop-up box to enter Ambiente di ripresa di Windows.
4. Once in Moda sicura, follow the instructions on the screen to complete the uninstallation process.
5. The AMD Cleanup Utility will completely remove AMD drivers without leaving leftover files on your system. Of course, if there are any corrupt AMD files, those will be removed too. After the process is complete, your machine will restituisce automaticamente. Clicca qui di leghje più.
6. Visitate u official AMD website è cliccà nantu à u Tags Now option displayed at the bottom of the screen, to download the latest drivers for your PC.
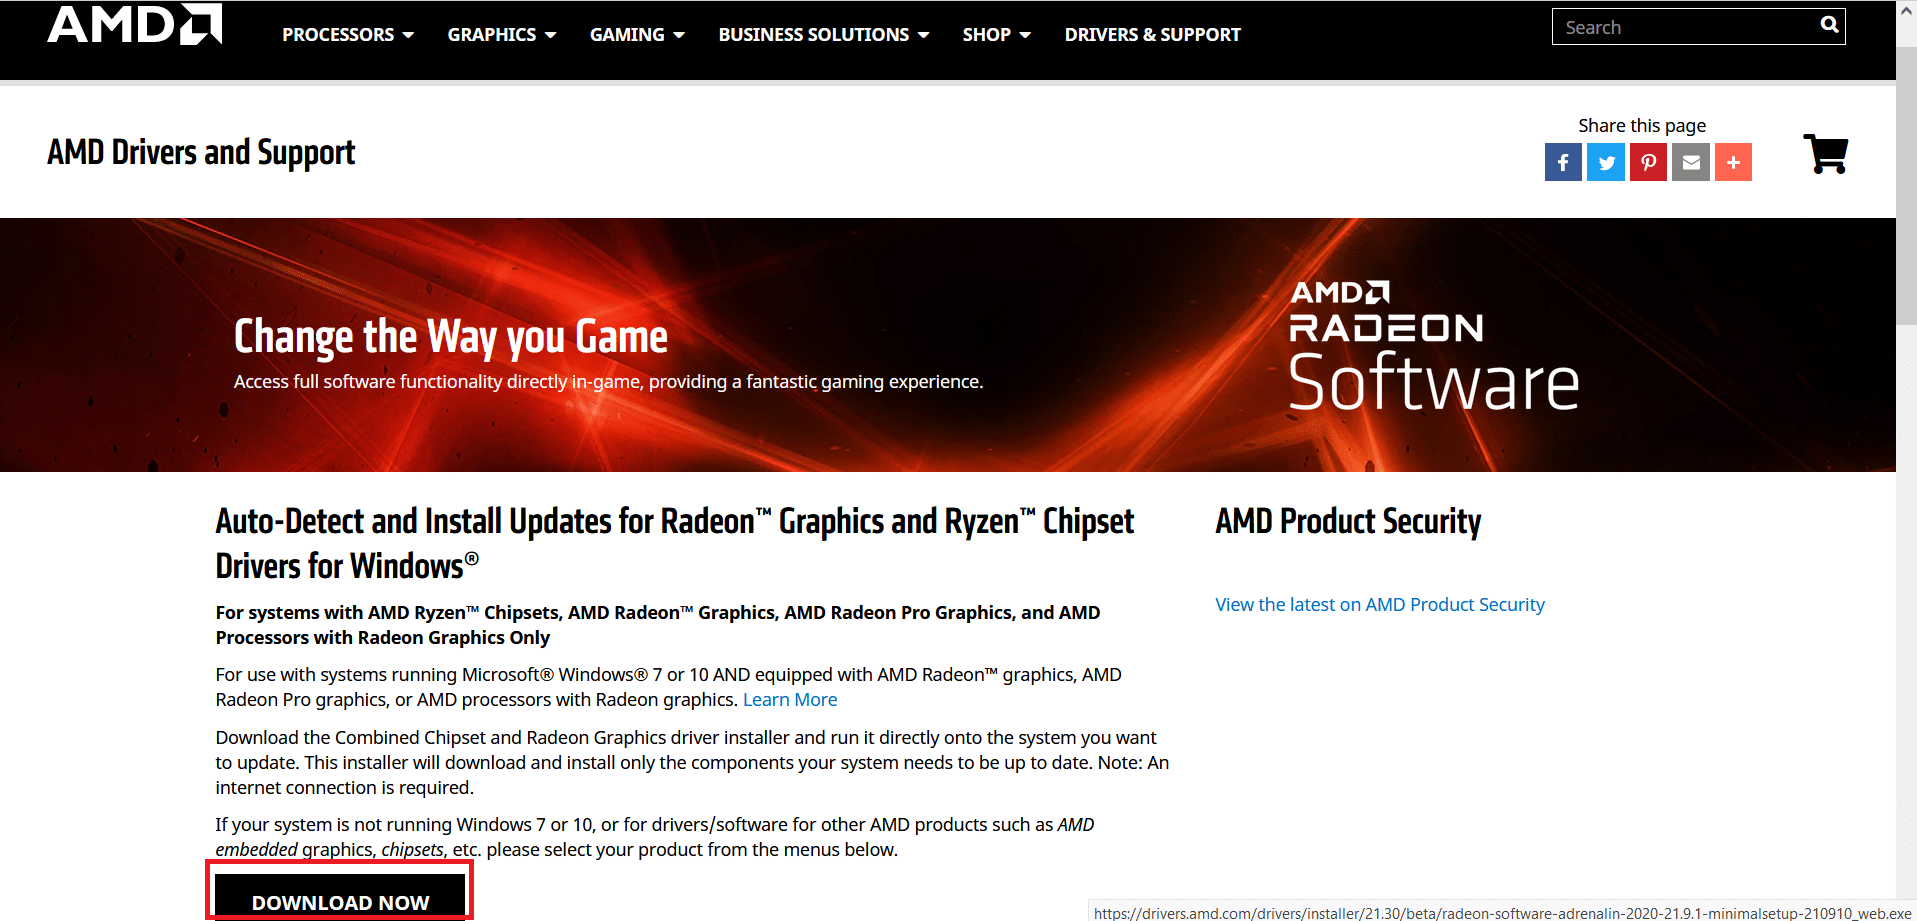
7. On the AMD Radeon Software Installer, click on Versione cunsigliata to determine the most suitable drivers for the AMD hardware on your PC. stallà elli.
8. Follow the instruction on-screen to finish the installation. Once done, riavvia l'urdinatore and enjoy playing Destiny 2.
Reinstall NVIDIA Graphics Cards
1. Type Aghjustate o sguassate programmi in u ricerca di Windows box and launch it from the search result, as shown.
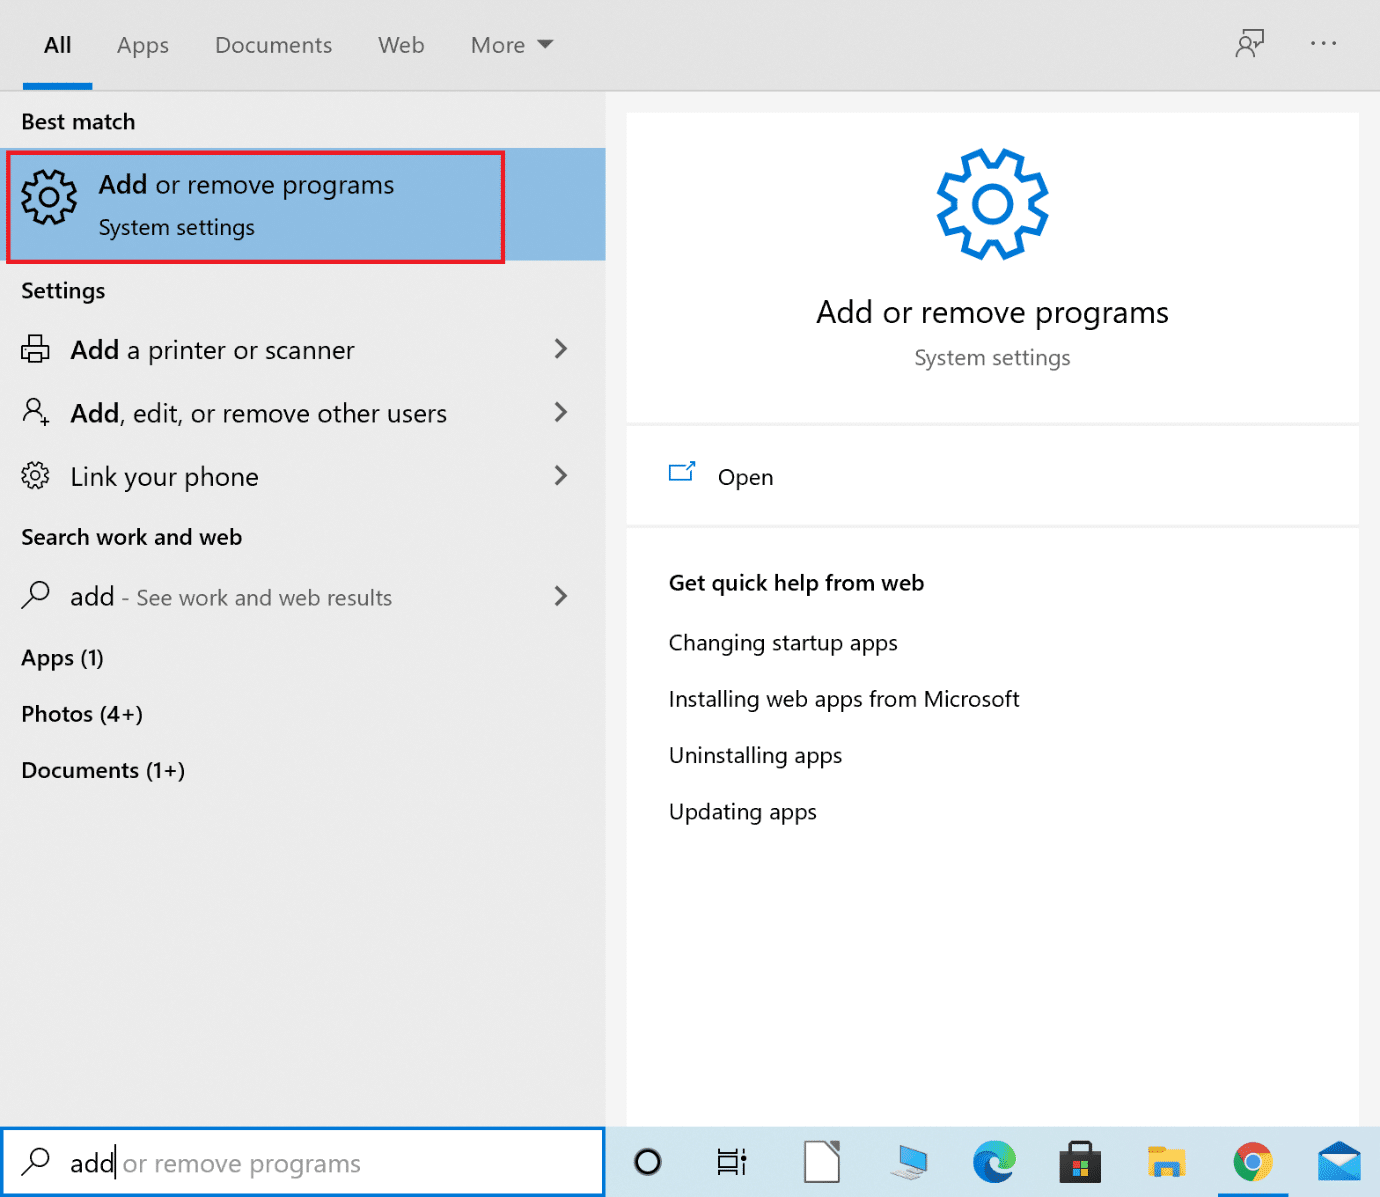
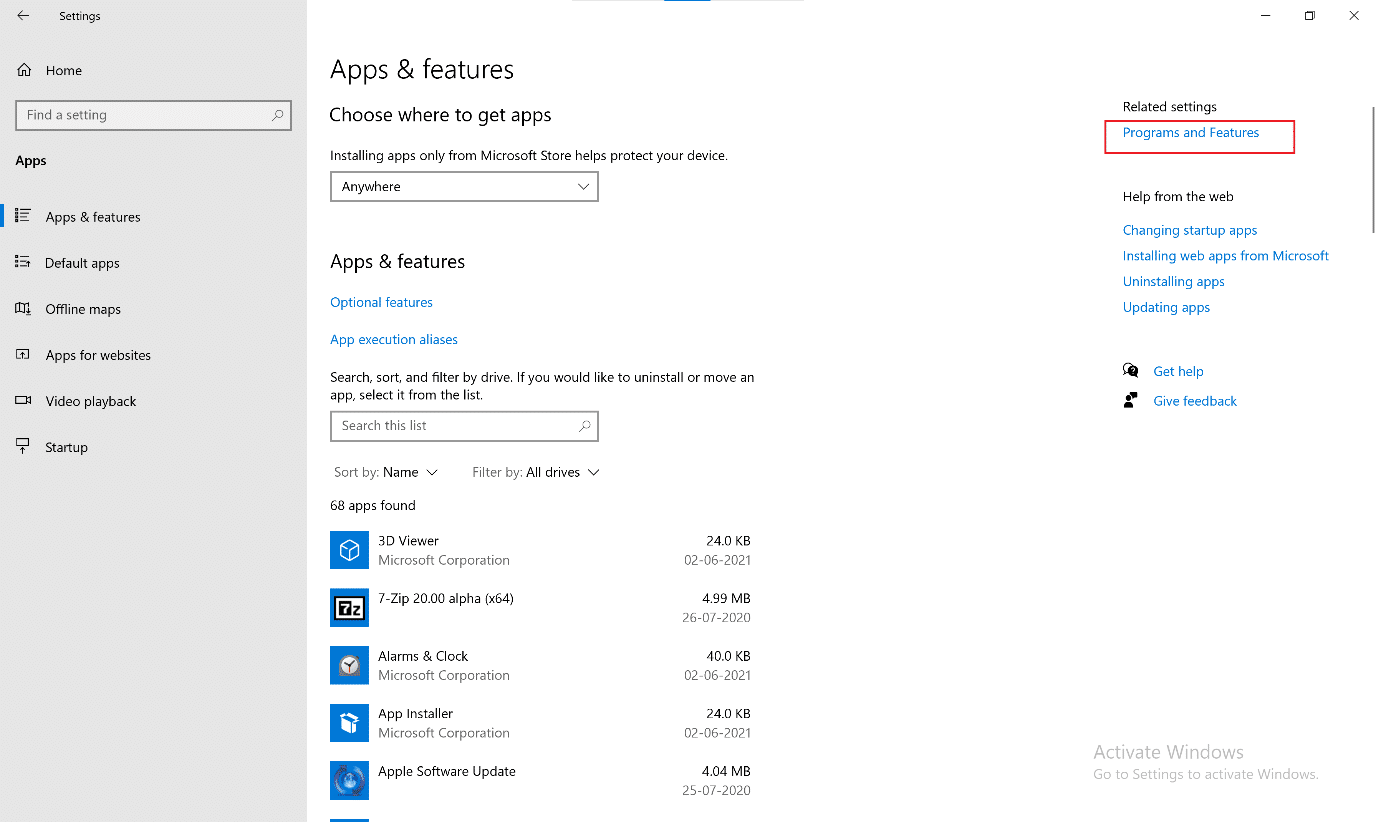
2. Cliccate nant'à Programmi e Features sottu Impostazioni relative from the right side of the screen.
3. Cliccate nantu à u freccia falata accantu à Change your view icona cum'è mostra.
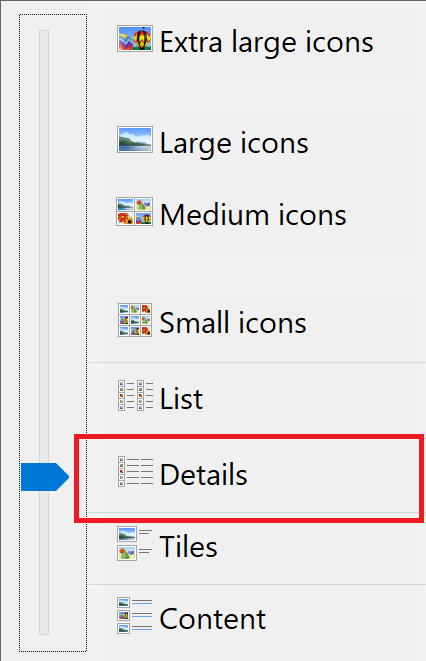
4. Select Details from the list to view apps along with the name of the publisher, date of installation, and the version installed.
![]()
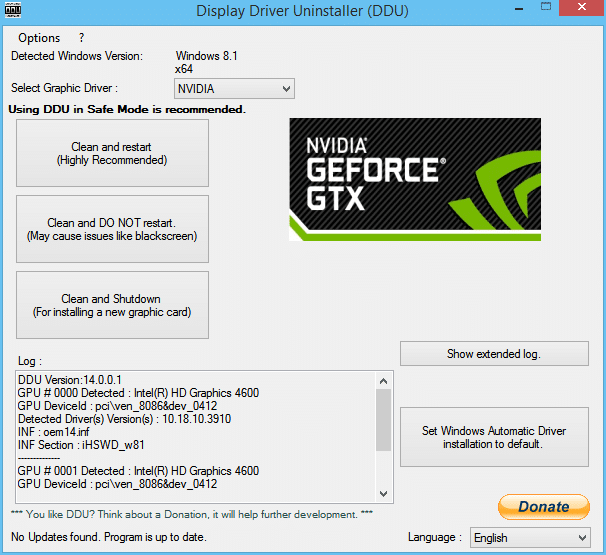
5. Select all instances of apps and programs published by NVIDIA. Right-click on each and select Uninstall.
nota: In alternativa, pudete aduprà Uninstaller di Driver Display to uninstall NVIDIA GeForce as well.
6. Restart l'urdinatore una volta fattu.
7. Allora, visitate u Nvidia official website è cliccà nantu Download to download the latest GeForce Experience.

8. Click on the downloaded file to Run the set-up utility.
9. Dopu, Scie à to your Nvidia account and click on the segne tab. Install all the recommended drivers.
Also Read: Fix a carta grafica micca rilevata in Windows 10
Method 4: Toggle off Game Mode
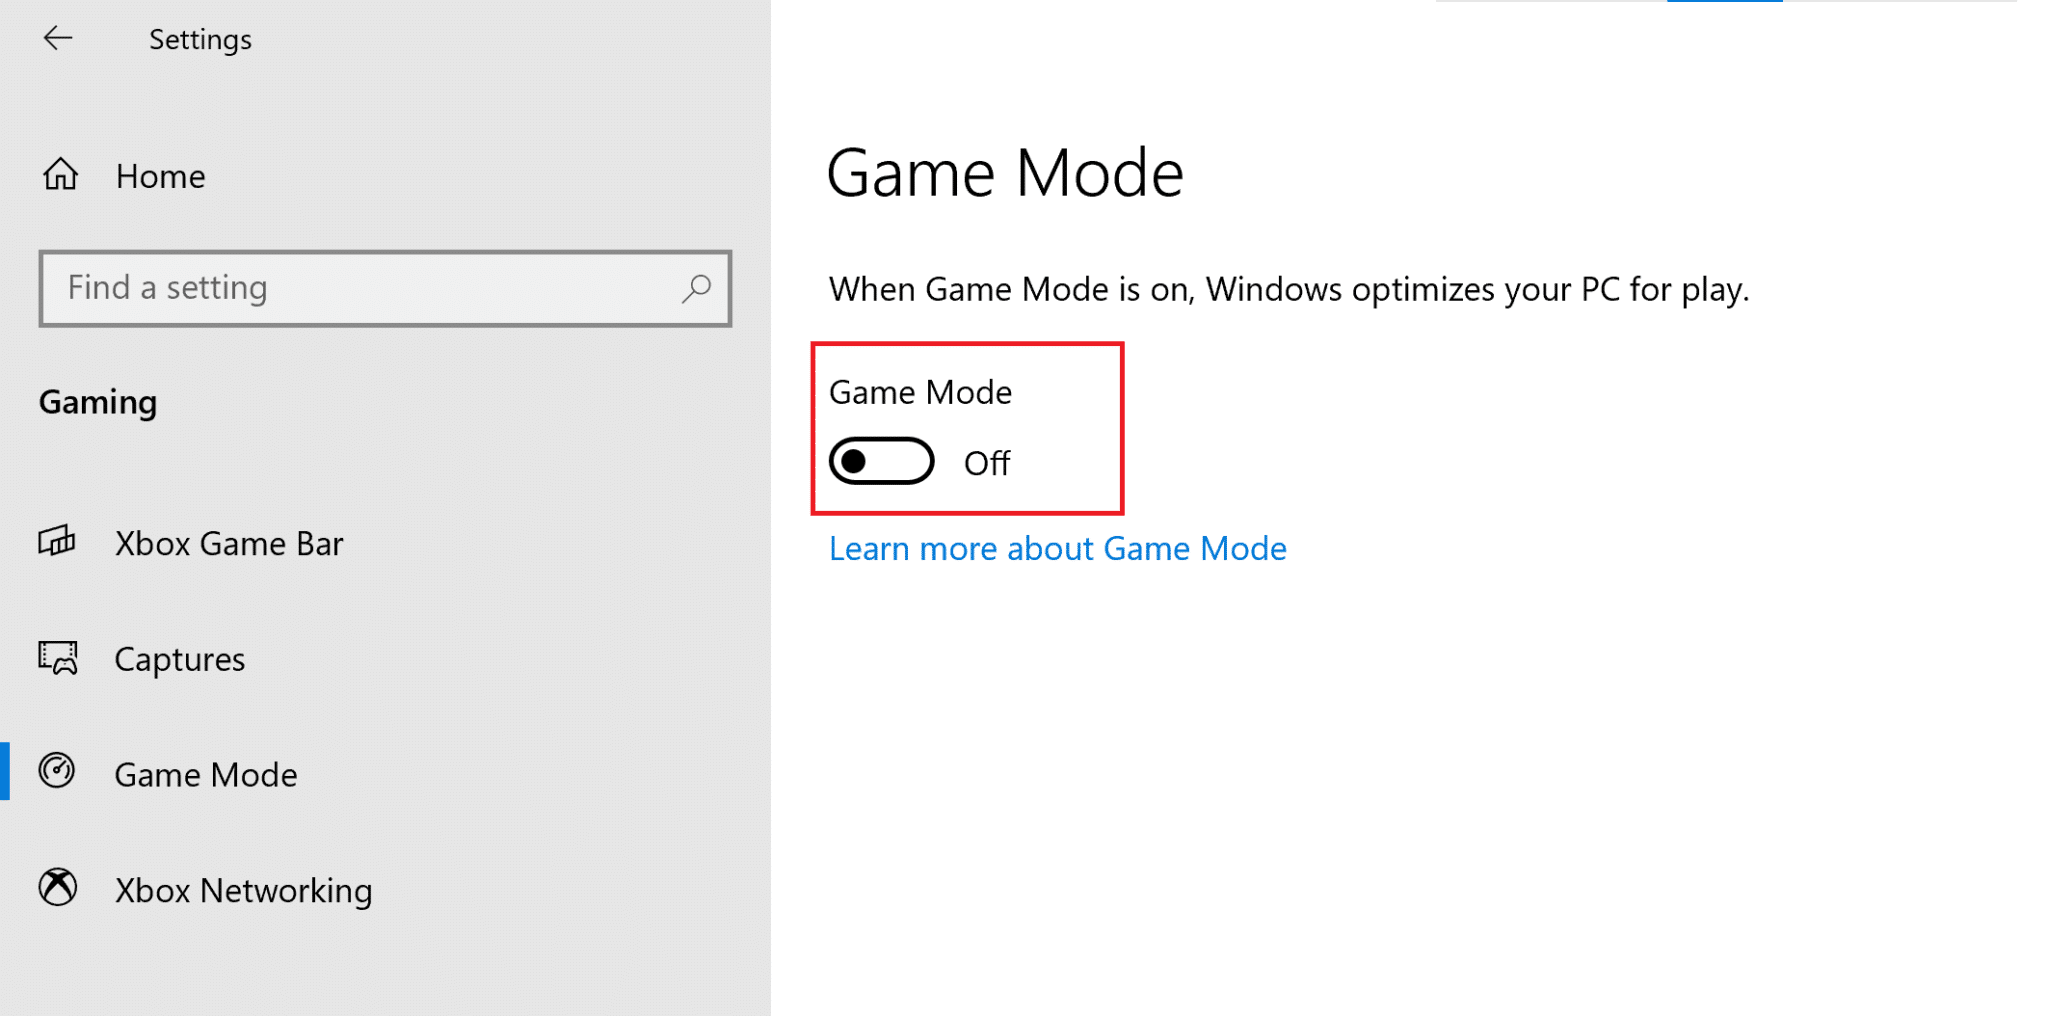
The Windows 10 feature of Game Mode can boost the gaming experience and performance of your PC. Nevertheless, many users have reported that disabling this feature is a potential Destiny 2 error code Broccoli fix. Here’s how you can turn off Game Mode in Windows 10 systems:
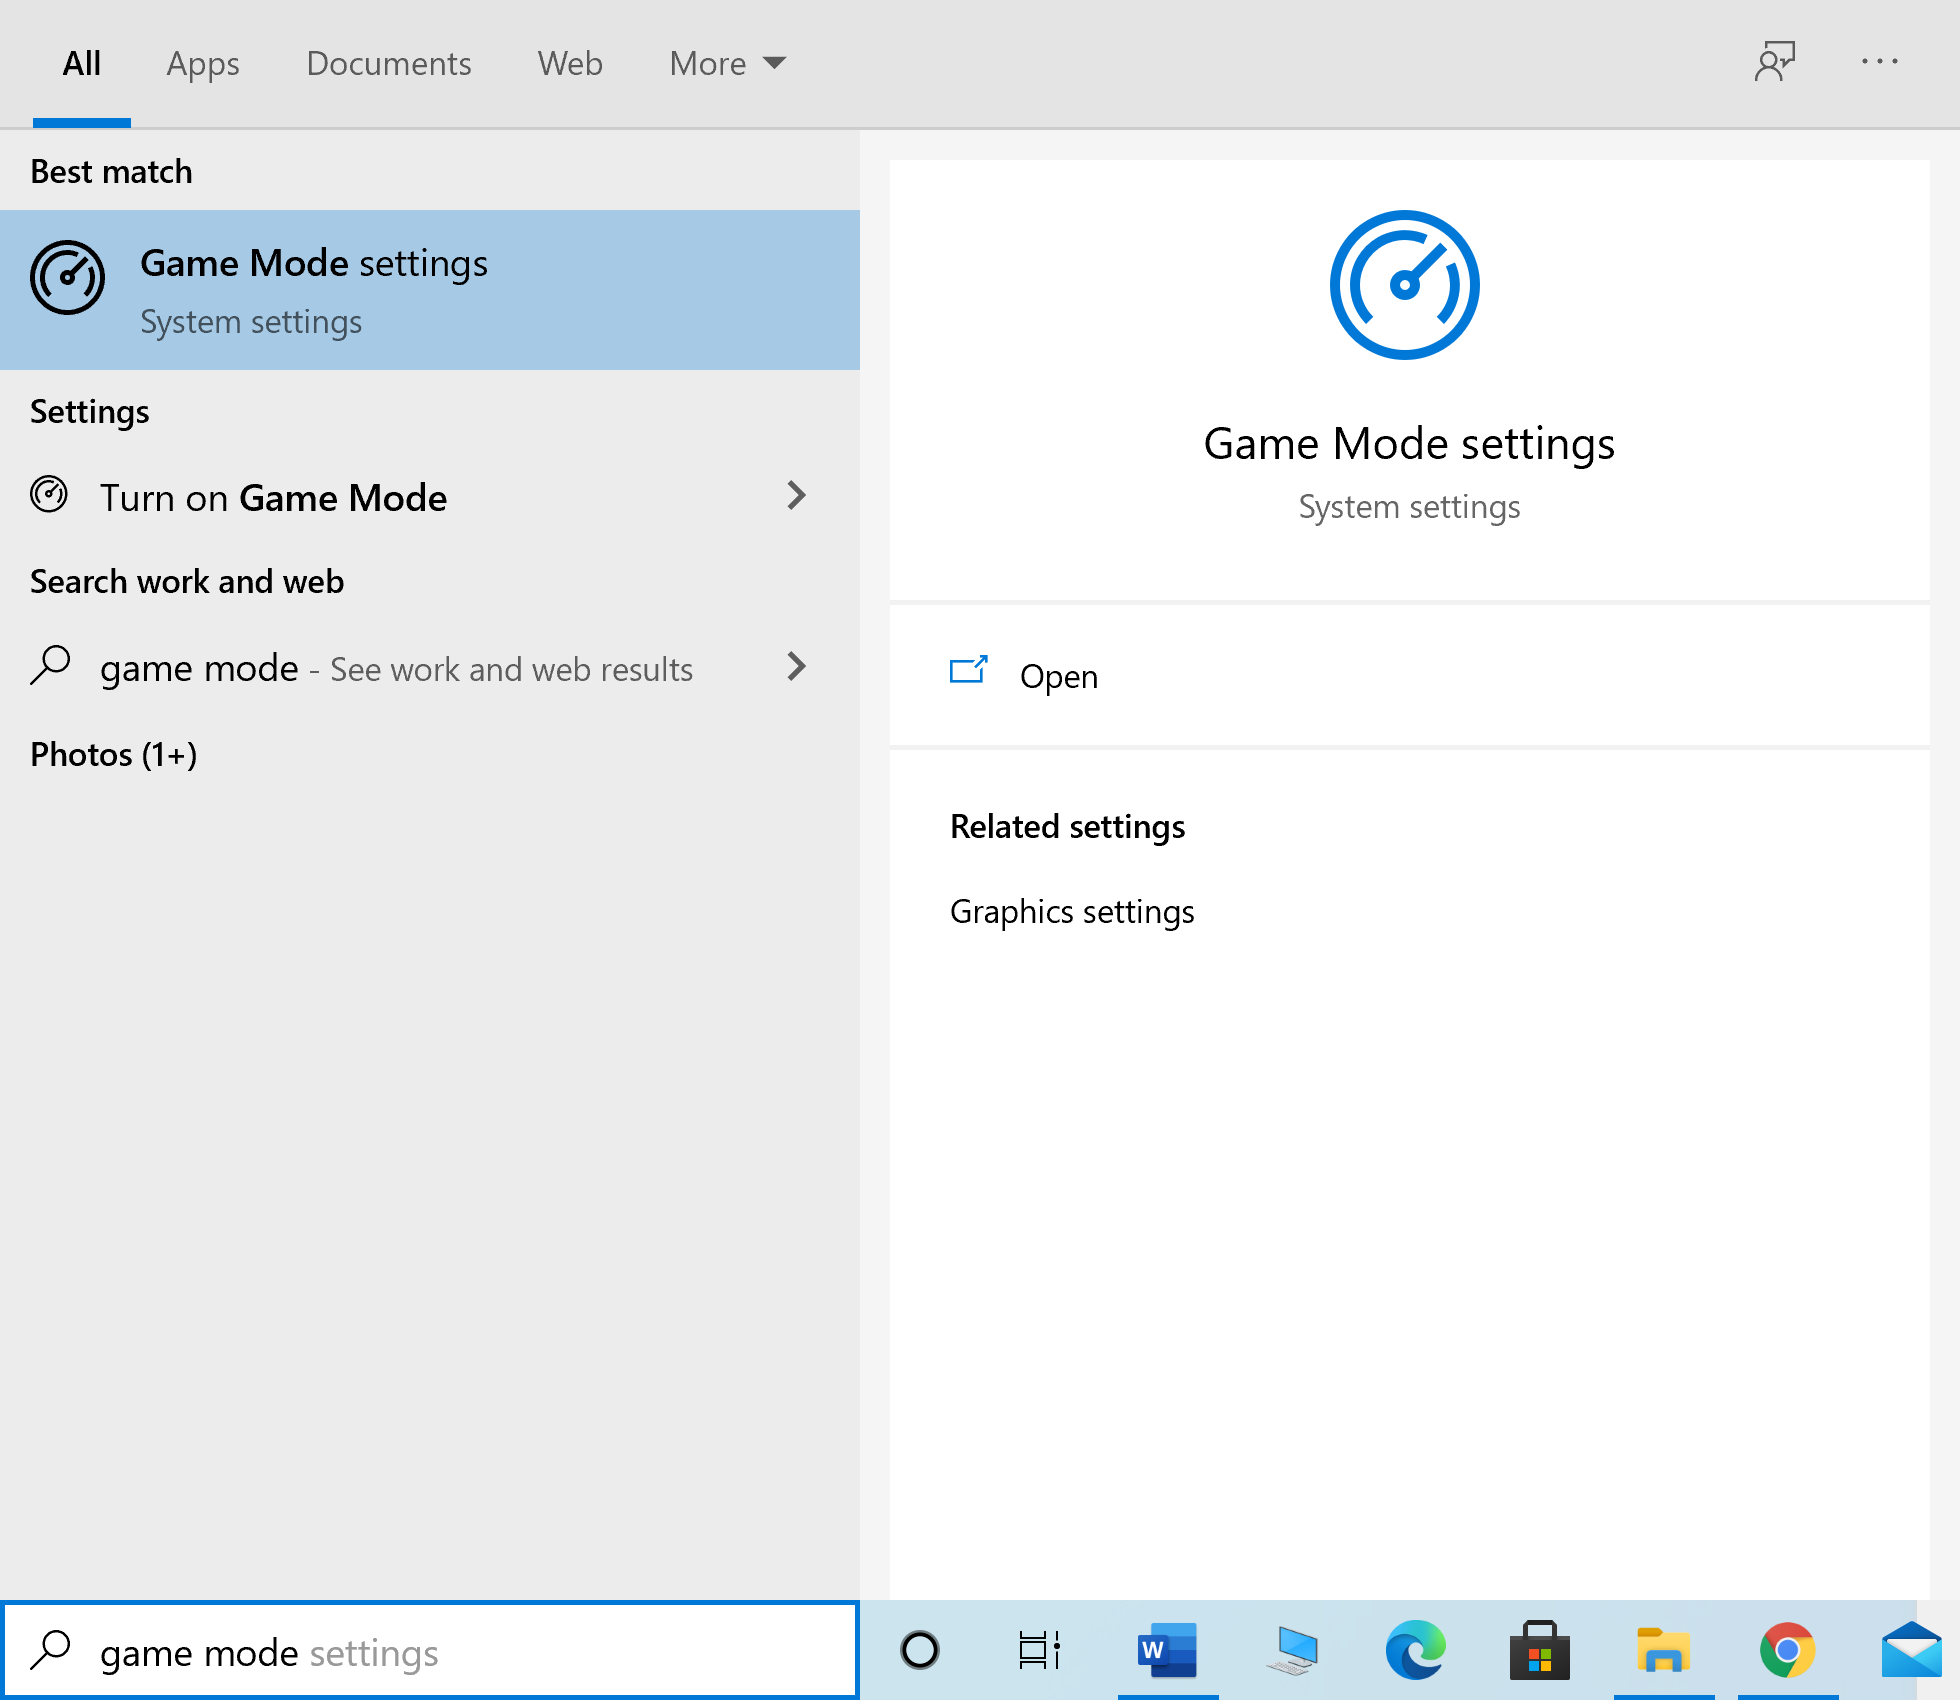
1. Type Game mode settings in u ricerca di Windows box. Click on Open from the right window.
2. Basculate u Game Mode off quì sottu.
Method 5: Check Integrity of Destiny 2 Files (For Steam)
If you use Steam to play Destiny 2, you need to verify the integrity of game files so that the installed version of the game matches the latest version available on Steam servers. Read our guide on How to Verify the Integrity of Game Files on Steam here.
Method 6: Enable Multi-GPU settings (If applicable)
This method is applicable if you use two graphic cards and are facing the Destiny 2 Broccoli error. These settings allow the PC to combine multiple graphic cards and use combined graphics processing power. Follow the listed steps to enable the said settings for NVIDIA and AMD, as the case may be.
Per NVIDIA
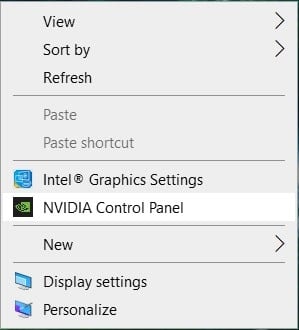
1. Cliccate cù u dirittu nantu à u Desktop è selezziunate Pannellu di Control NVIDIA.
2. Cliccate nant'à Configurate SLI, Surround, PhysX, from the left pane of the NVIDIA Control Panel.
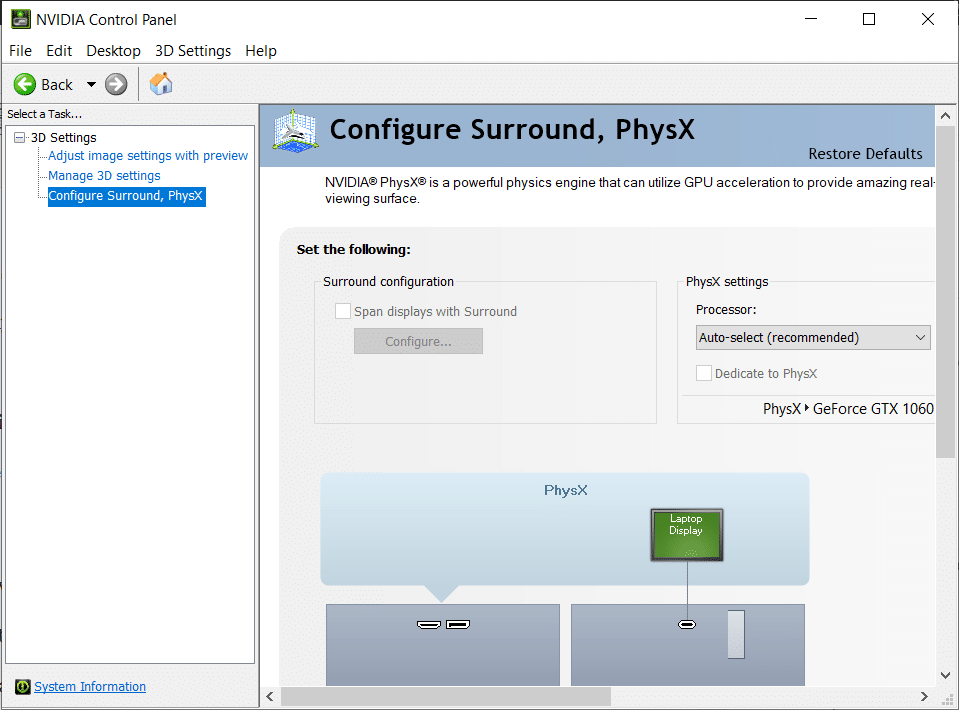
3. Cliccate nant'à Maximize 3D performance sottu Cunfigurazione SLI. Cruciani i cambiamenti.
nota: The Scalable Link Interface (SLI) is the brand name for the NVIDIA multi-GPU setting.
4. Restart u vostru sistema and launch the game to check if the issue is resolved.
Per AMD
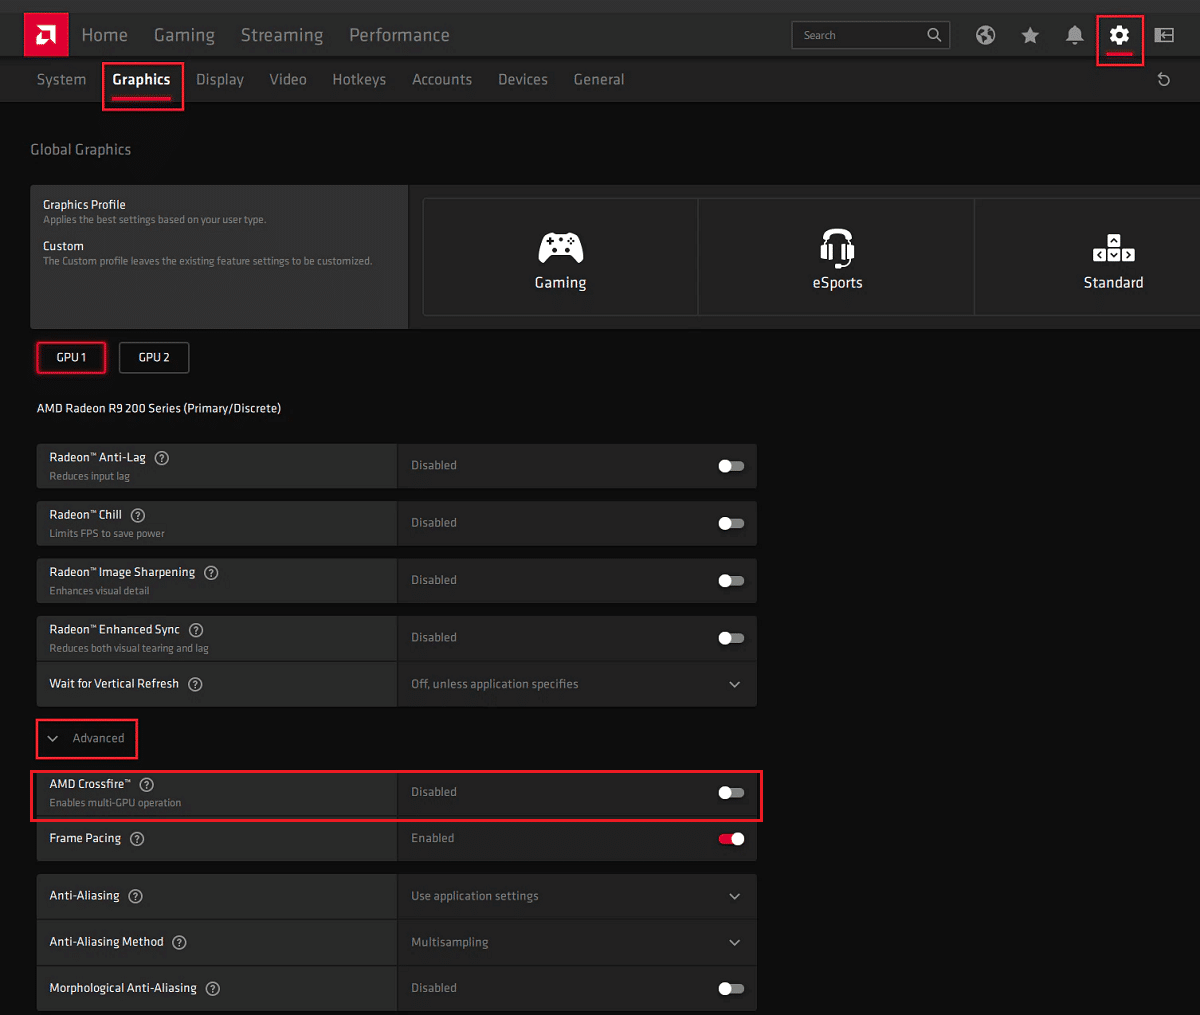
1. Right-cliccate nant'à u vostru Desktop è cliccà nantu AMD Radeon Software.
2. Cliccate nantu à u Iconu di cunfigurazione from the top right corner of the AMD Software window.
3. Dopu, andate à u Grafiche tabulazione.
4. Scorri finu à u Advanced sezione è attivate AMD Crossfire to enable multi-GPU settings.
nota: CrossFire is the brand name for the AMD multi-GPU setting.
5. Restart the PC, and launch Destiny 2. Check if you’re able to fix Destiny 2 Error Code Broccoli.
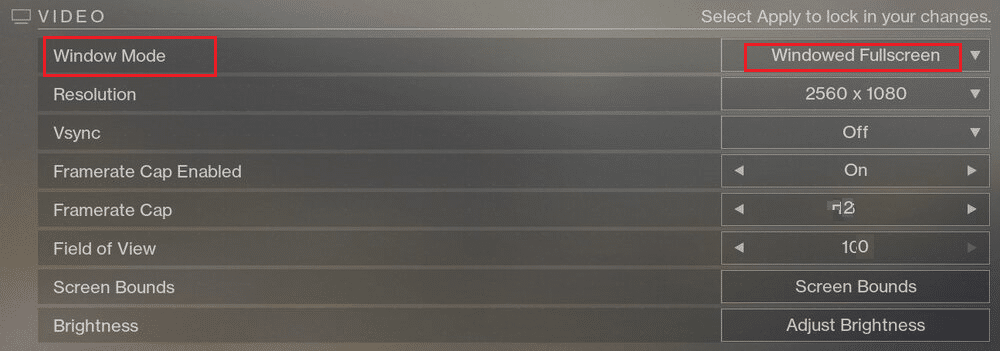
Method 7: Change Graphic Settings on Destiny 2
In addition to modifying graphics settings associated with GPU, you can do similar modifications in the game itself. This will help avoid issues arising out of graphics inconsistency like Destiny 2 error code Broccoli. Here’s how to alter graphics settings in Destiny 2:
1. Launch u distinu 2 in u vostru pc.
2. Cliccate nant'à Aperturazione aperta to view the available settings.
3. Next, cliccate nant'à u Video tabulazione da u pane di manca.
4. Dopu, selezziunate v-sincronia from Off to On.
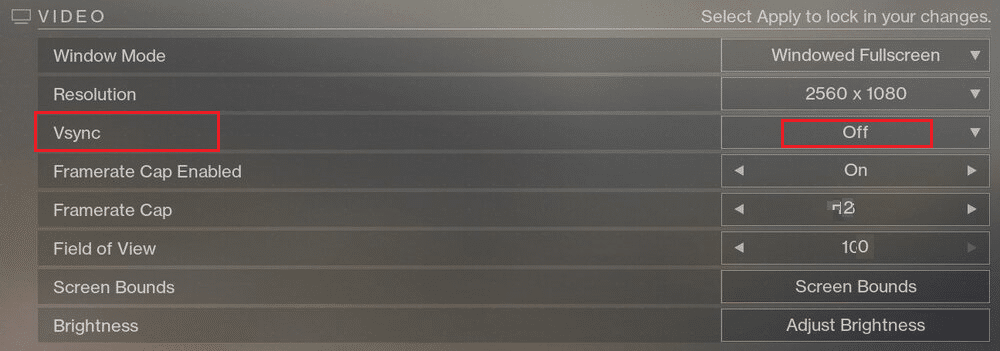
5. Dopu, Enable Framerate Cap è mette à 72 from the drop-down, as illustrated below.
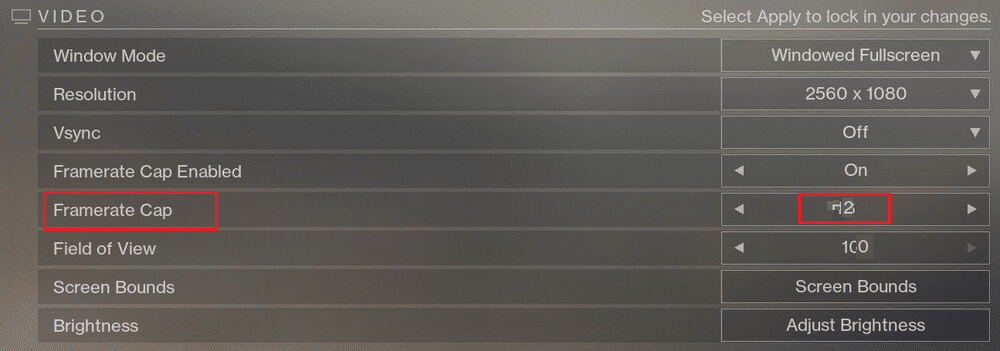
6. Cruciani the settings and launch the game.
Also Read: Fix Unreal Engine Exiting Due To D3D Device Being Lost
Method 8: Change Game Properties
You can change settings for the executable file of the game to potentially fix the Broccoli error code. Follow the given steps to do the same.
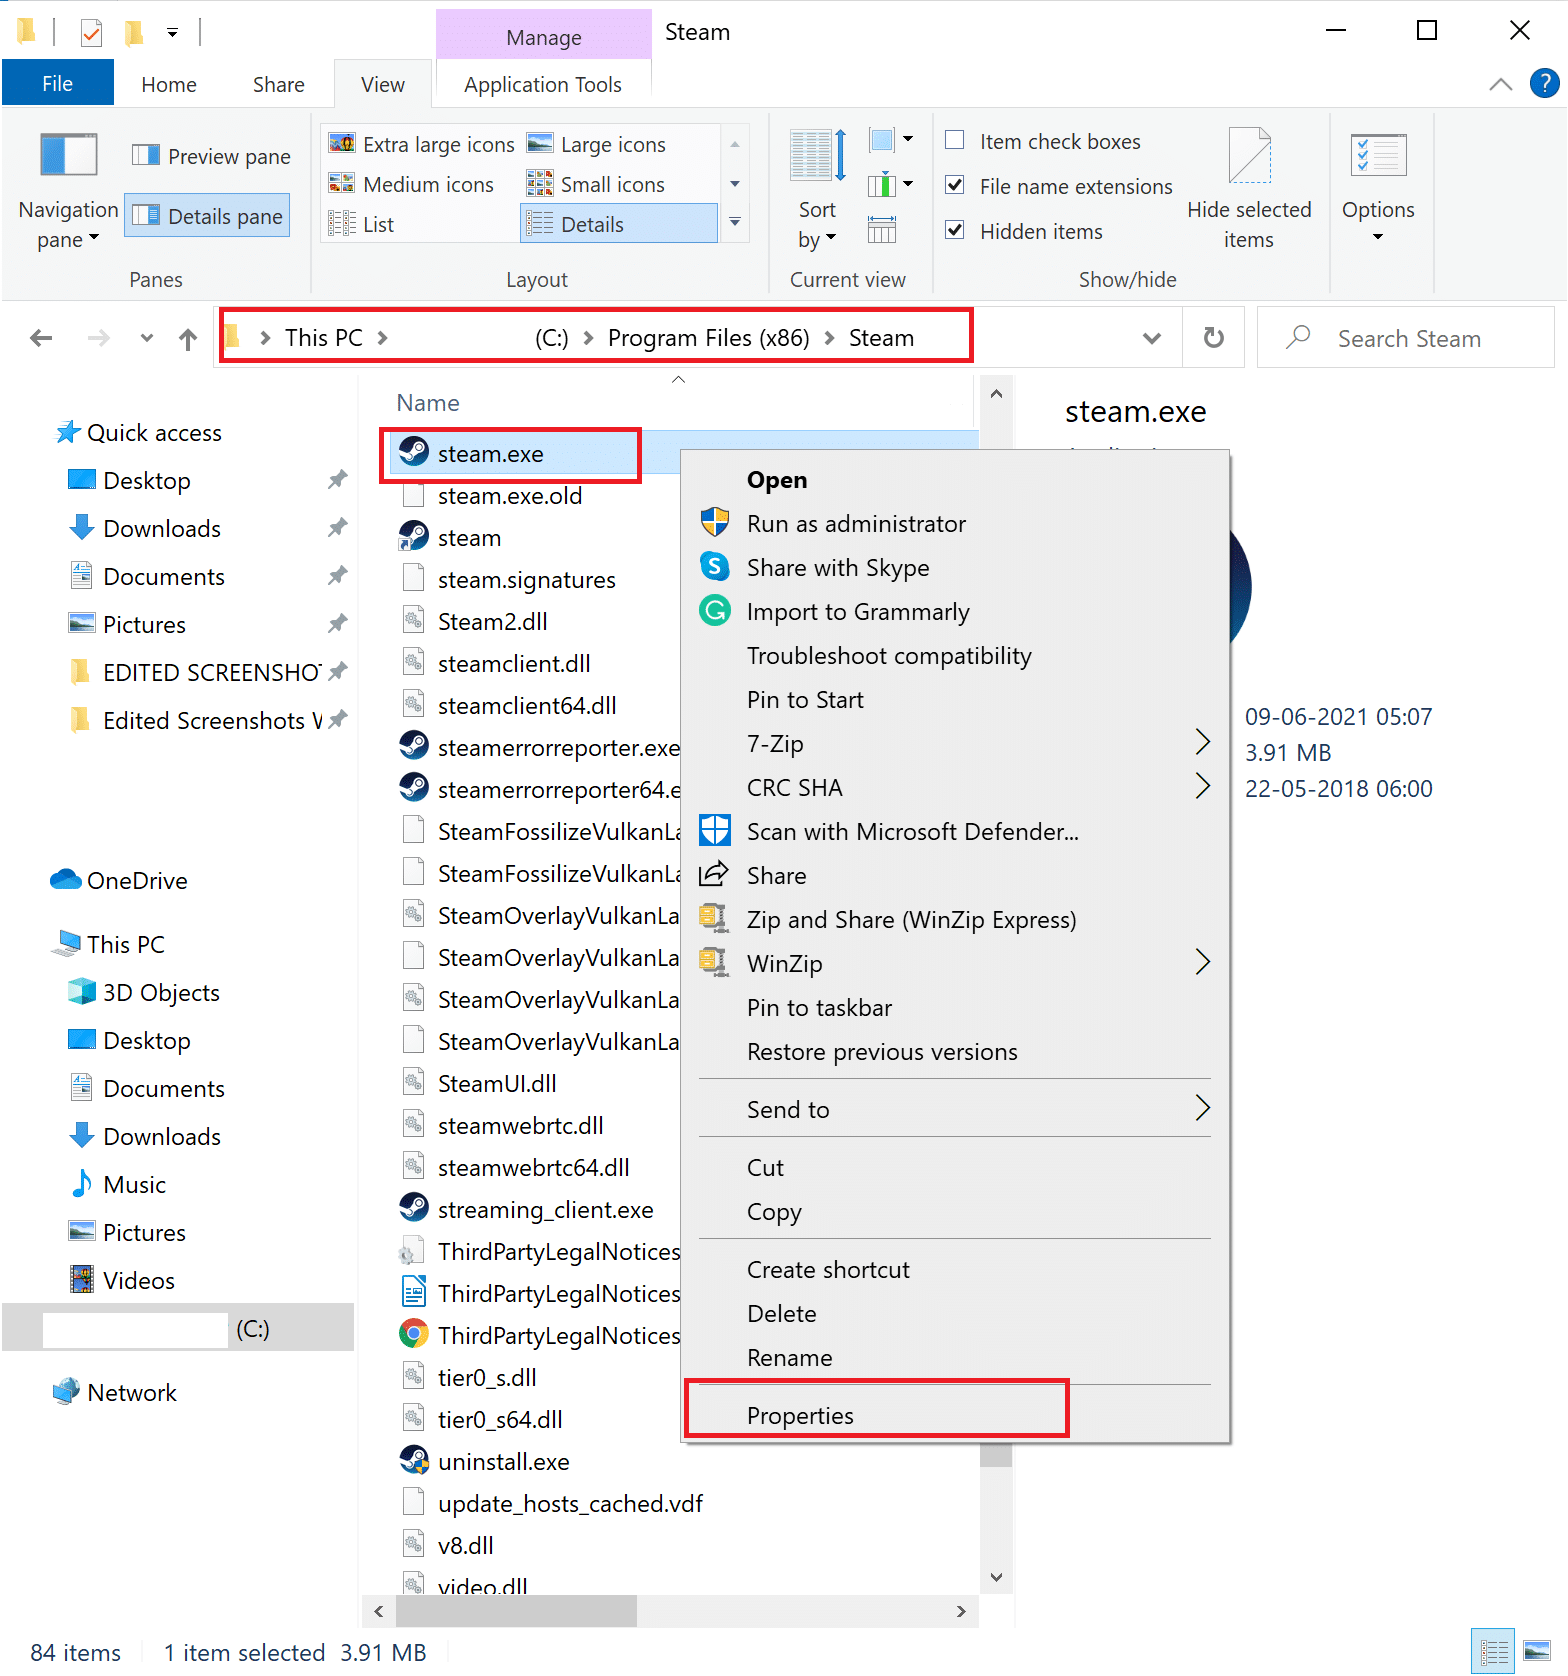
1. Launch File Explorer and go to C: > Program files (x86).
nota: If you have installed the game elsewhere, navigate to the appropriate directory.
2. Grapi lu Destiny 2 folder. Cliccate cù u dirittu nantu à u cartulare .exe of the game and select Joint.
nota: Below is an example shown using vapore.
3. Dopu, andate à u Sistemi scheda in Joint window. Click on the option titled Cancia.
4. Assicuratevi chì Cuntrollu cumpletu is enabled for all users, as depicted below.
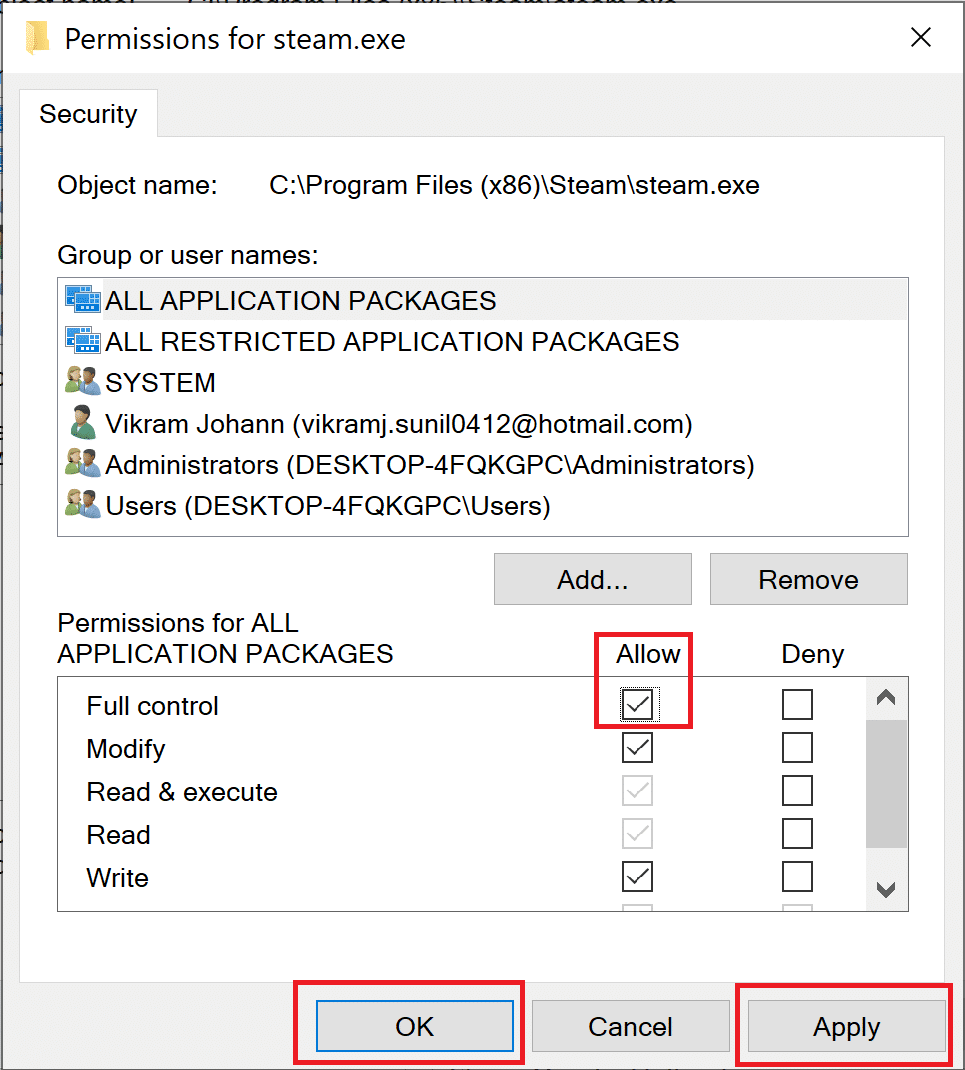
5. Cliccate nant'à Dumandà> OK to save changes as highlighted above.
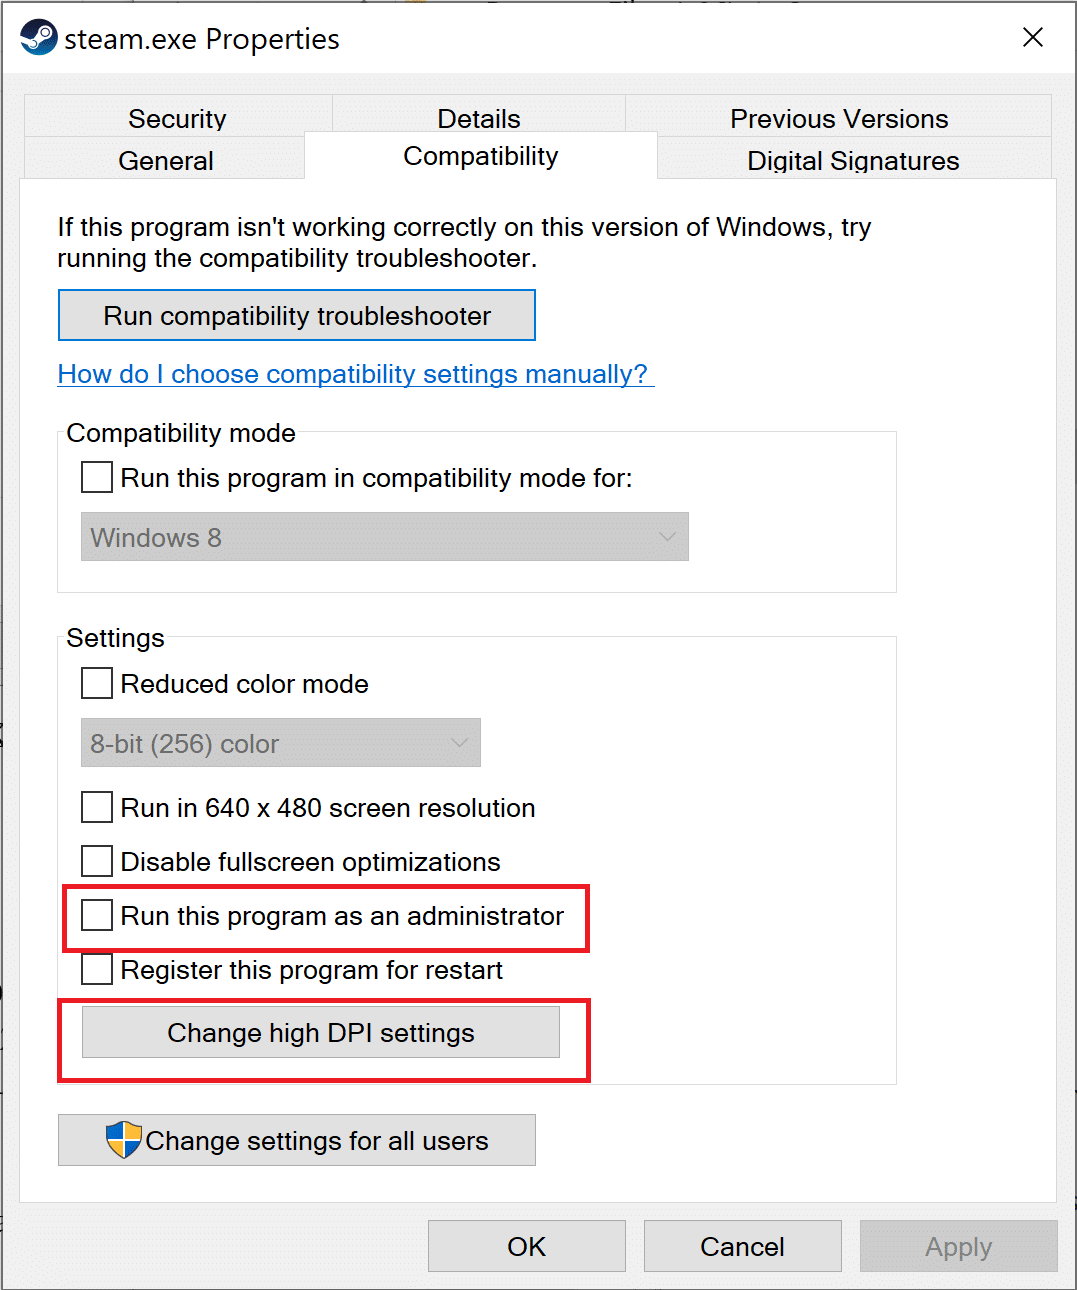
6. Next, cambià à u Vincenti tab and check the box next to the option titled Eseguite stu prugrammu cum'è amministratore.
7. Allora, cliccate nant'à Cambia i paràmetri DPI altu cum'è mostra evidenziatu.
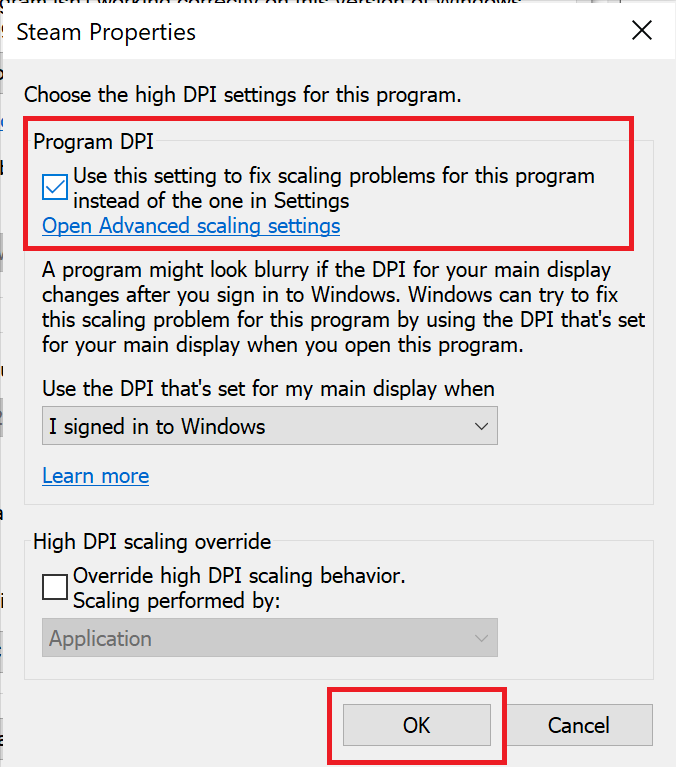
8. Here check the box under Program DPI. Cliccate nant'à OK per salvà a scatula.
Method 9: Set Destiny 2 as High Priority
To ensure that the CPU resources are reserved for Destiny 2 gameplay, you need to set it as a high-priority task in Task Manager. When your PC prefers to utilize the CPU for Destiny 2, there are lesser chances that the game will crash. Follow these steps to prioritize Destiny 2 and in turn, fix Destiny 2 Error Code Broccoli on Windows 10:
1. Type Task Manager in ricerca di Windows box. Launch it from the search result by clicking Open.

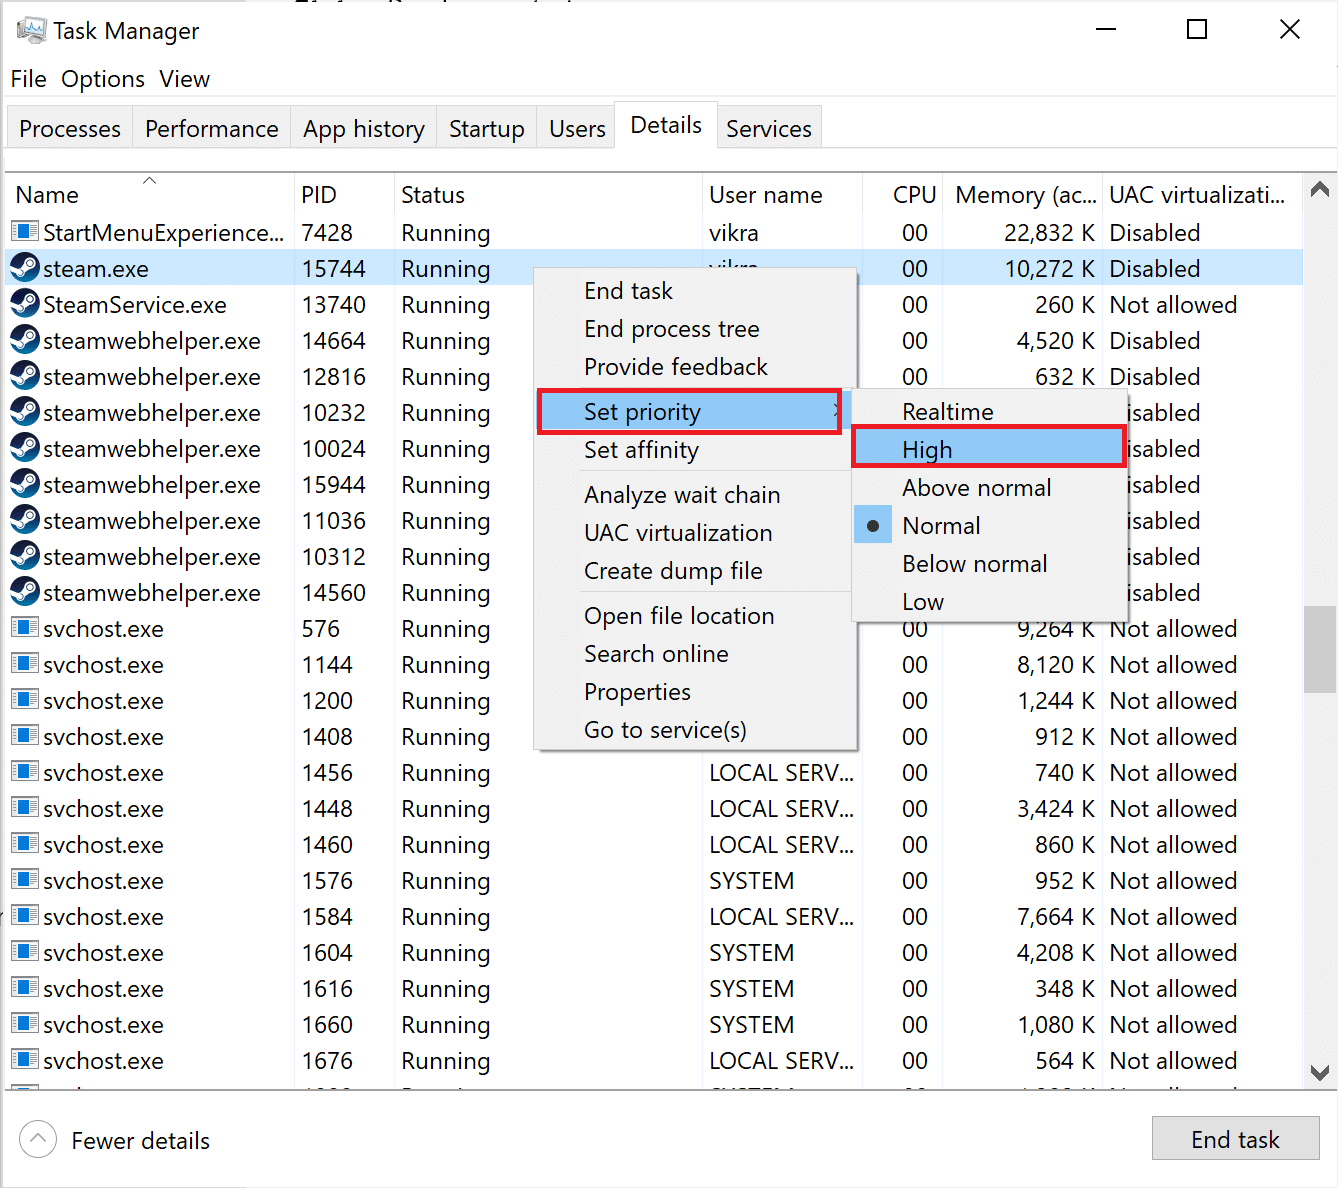
2. Andate à a Details scheda in Task Manager finestra.
3. Cliccate cù u buttone drittu u distinu 2 è cliccà nantu Set priority > High, as explained in the given pic.
4. Repeat the same process for Battle.net, vapore, or any application that you use to launch Destiny 2.
Also Read: Cumu cambià a Priorità di Processu CPU in Windows 10
Method 10: Reinstall Destiny 2
There might be corrupt installation files or game files. To clean your system of corrupt game files, you need to reinstall the game, as follows:
1. Launch Aghjustate o sguassate programmi window as explained in Mètode 3 during Reinstallation of Graphics drivers.
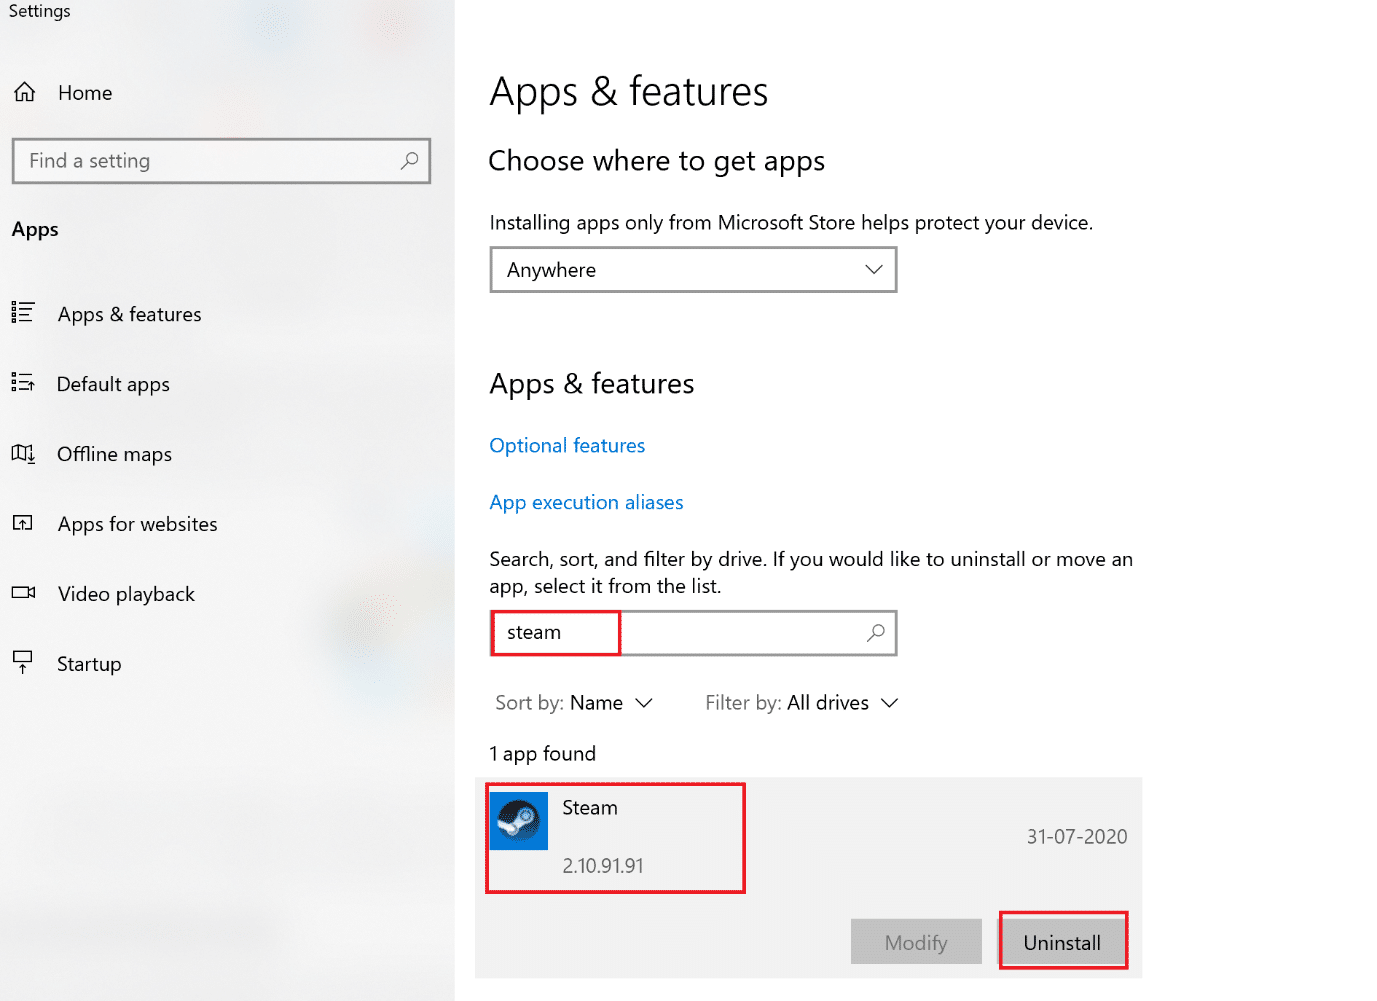
2. Type u distinu 2 in u Cerca sta lista text box, as shown.
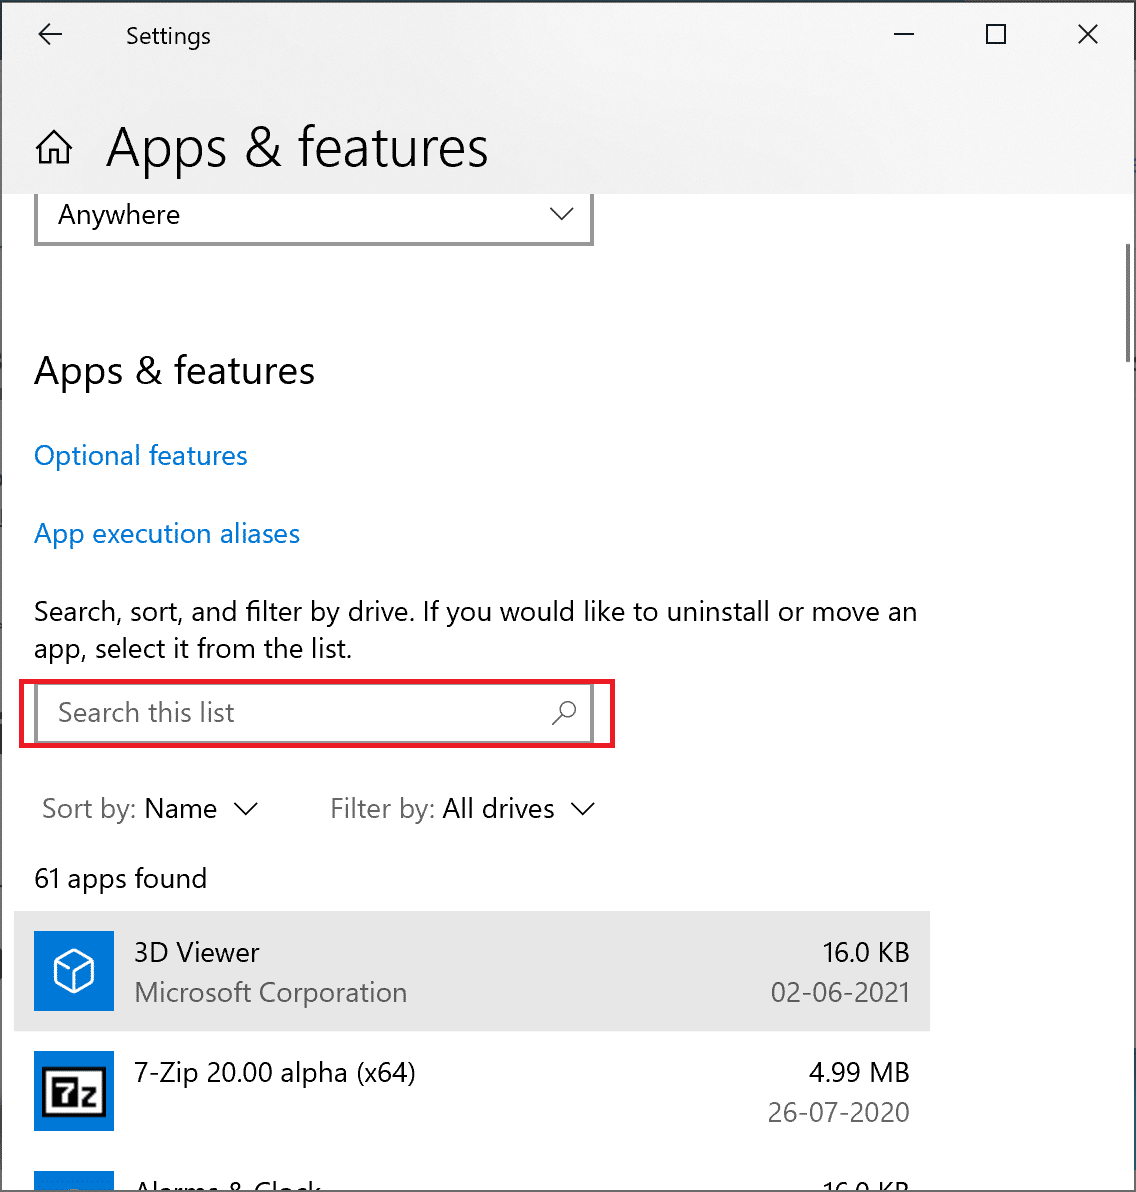
3. Cliccate nant'à u distinu 2 in the search result and select Uninstall.
nota: Below is an example is given using vapore.
4. Aspettate for the game to be uninstalled.
5. Lanciari Steam or the application that you use to play games and reinstall Destiny 2.
Corrupt game files on your PC, if any, are now deleted and the Destiny 2 Broccoli error code rectified.
Metudu 11: Run Diagnostic di Memoria di Windows
In case, the said error still persists, there is a probability of hardware problems with your computer. To diagnose these problems, implement this method. The Windows Memory Diagnostic app will scan the hardware components of your computer to search for problems. For example, if the RAM on your PC is malfunctioning, the diagnostic app will give information about it so that you can get the RAM checked or replaced. Similarly, we shall run this tool to have problems diagnosed with system hardware that is affecting gameplay.
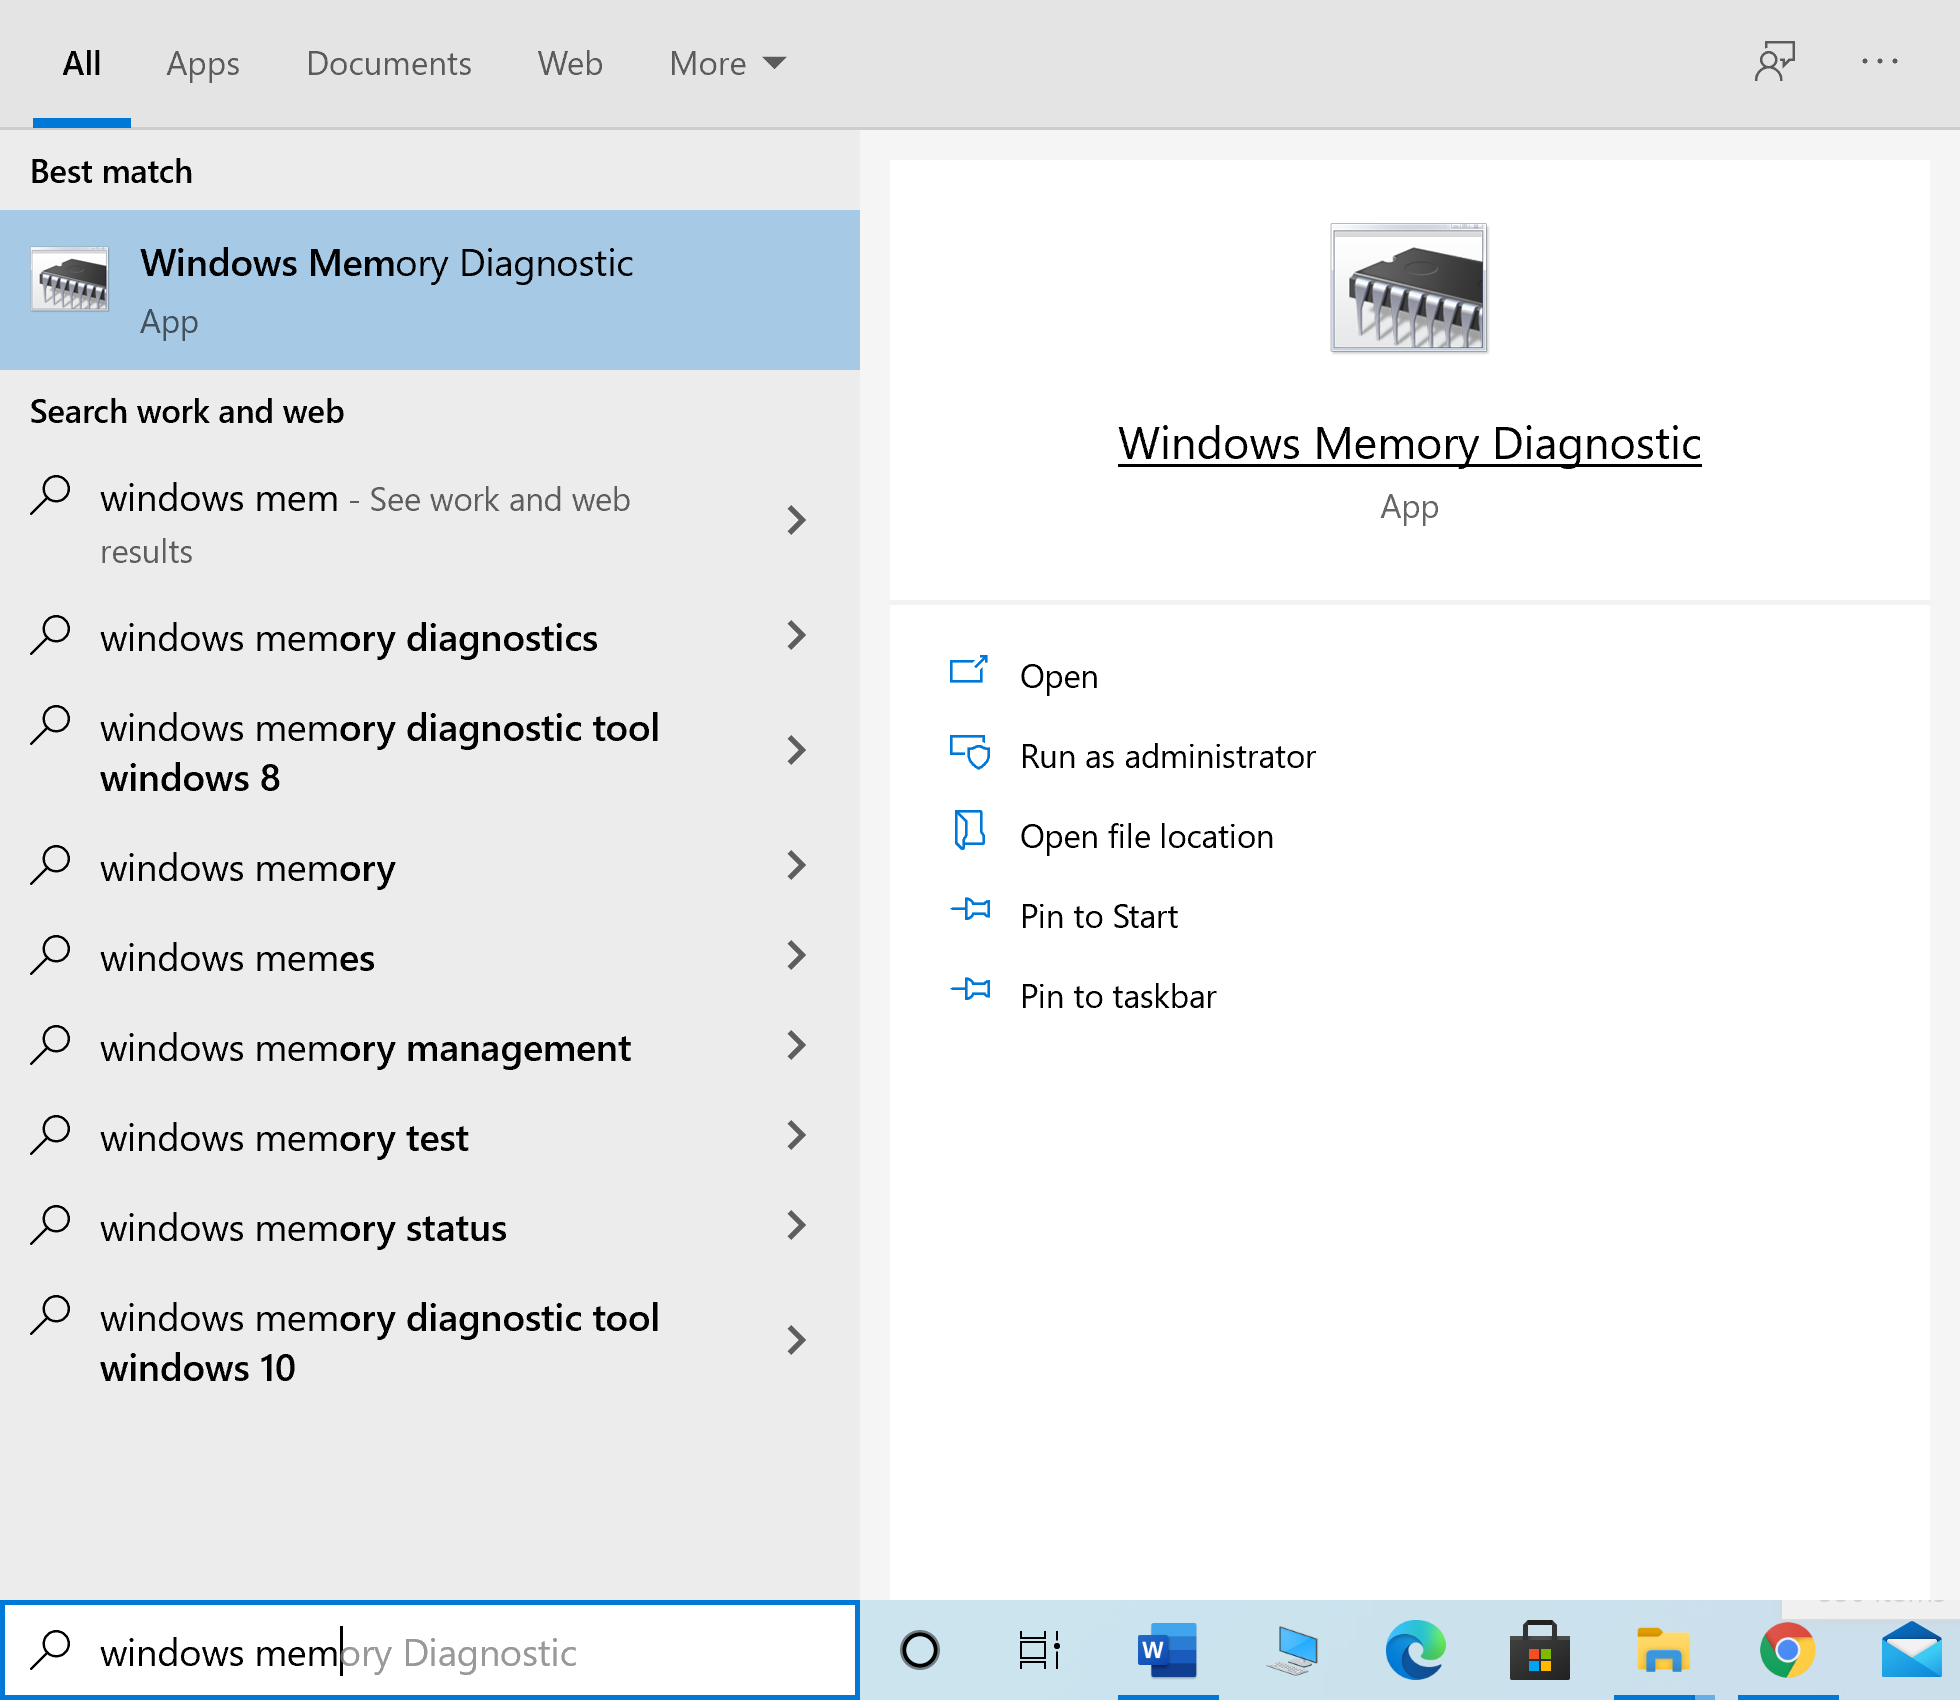
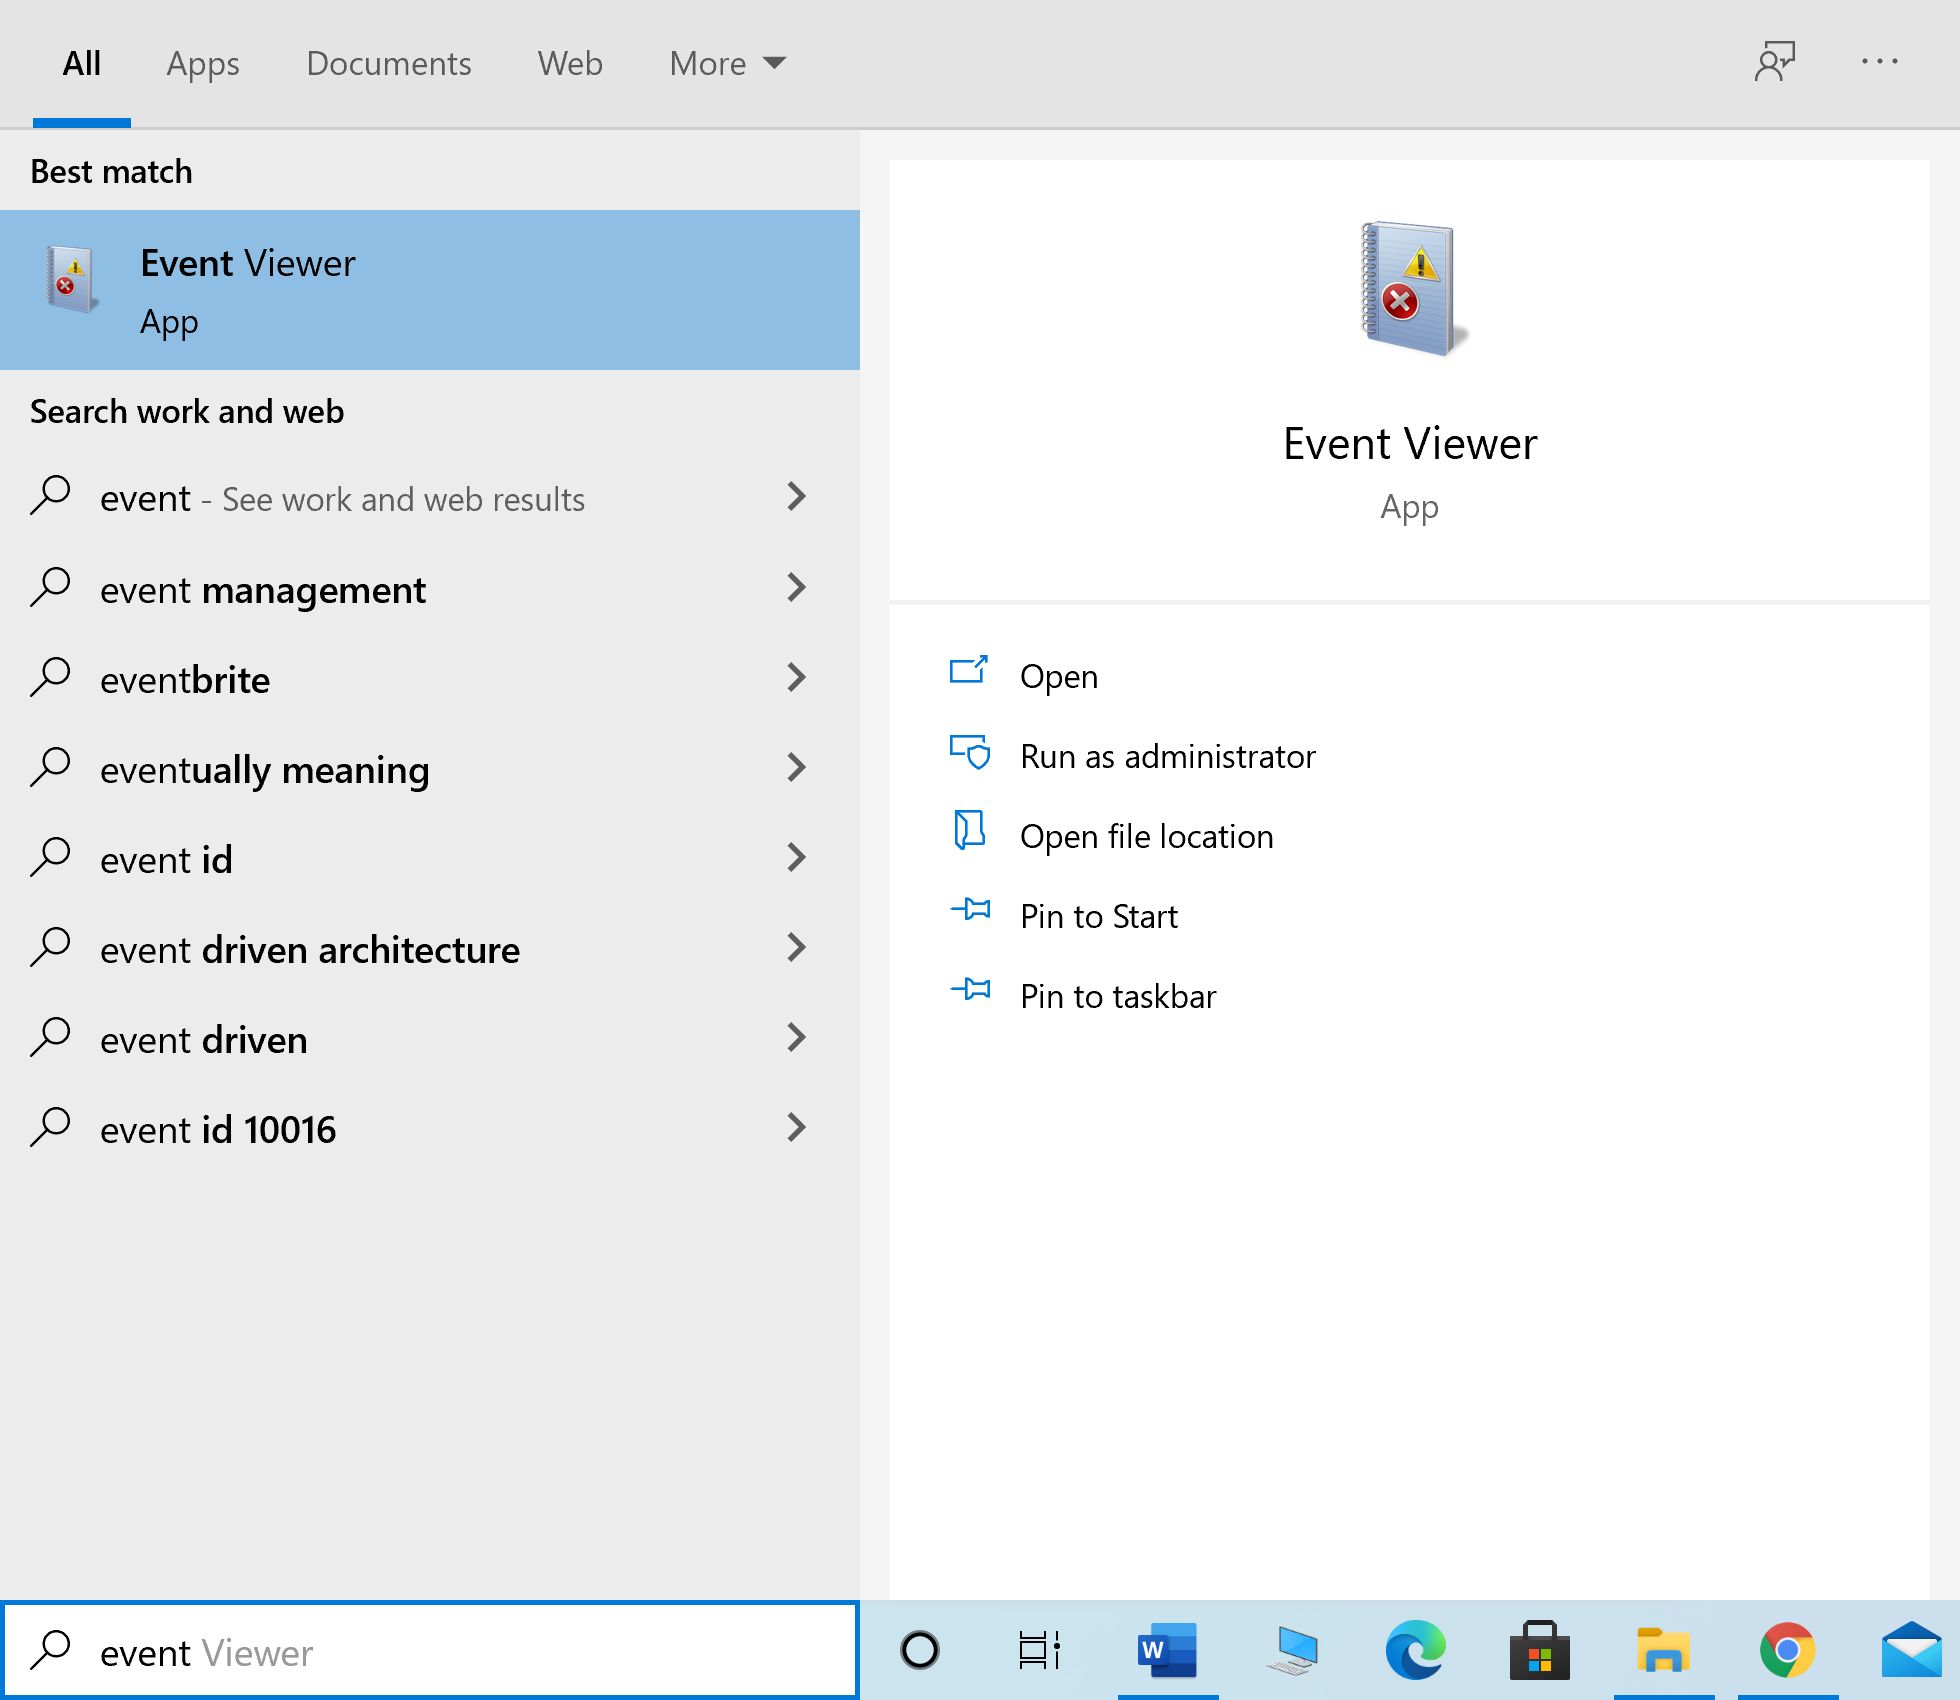
1. Type Diagnosticu di Memoria di Windows in u ricerca di Windows box. Open it from here.
2. Cliccate nant'à Ripigliate avà è verificate i prublemi (cunsigliatu) in a finestra nova.
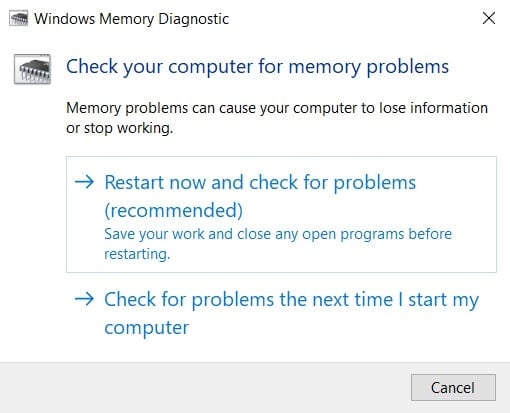
3. The computer will restituisce and begin the diagnostics.
nota: The process may take a while. Do not switch off the machine during the process.
4. The computer will reboot quandu u prucessu hè cumpletu.
5. To view the diagnostic information, go to Visor di avvene, cumu mostratu.
6. Navigate à Registri Windows> Sistema from the left pane of the Event Viewer window.
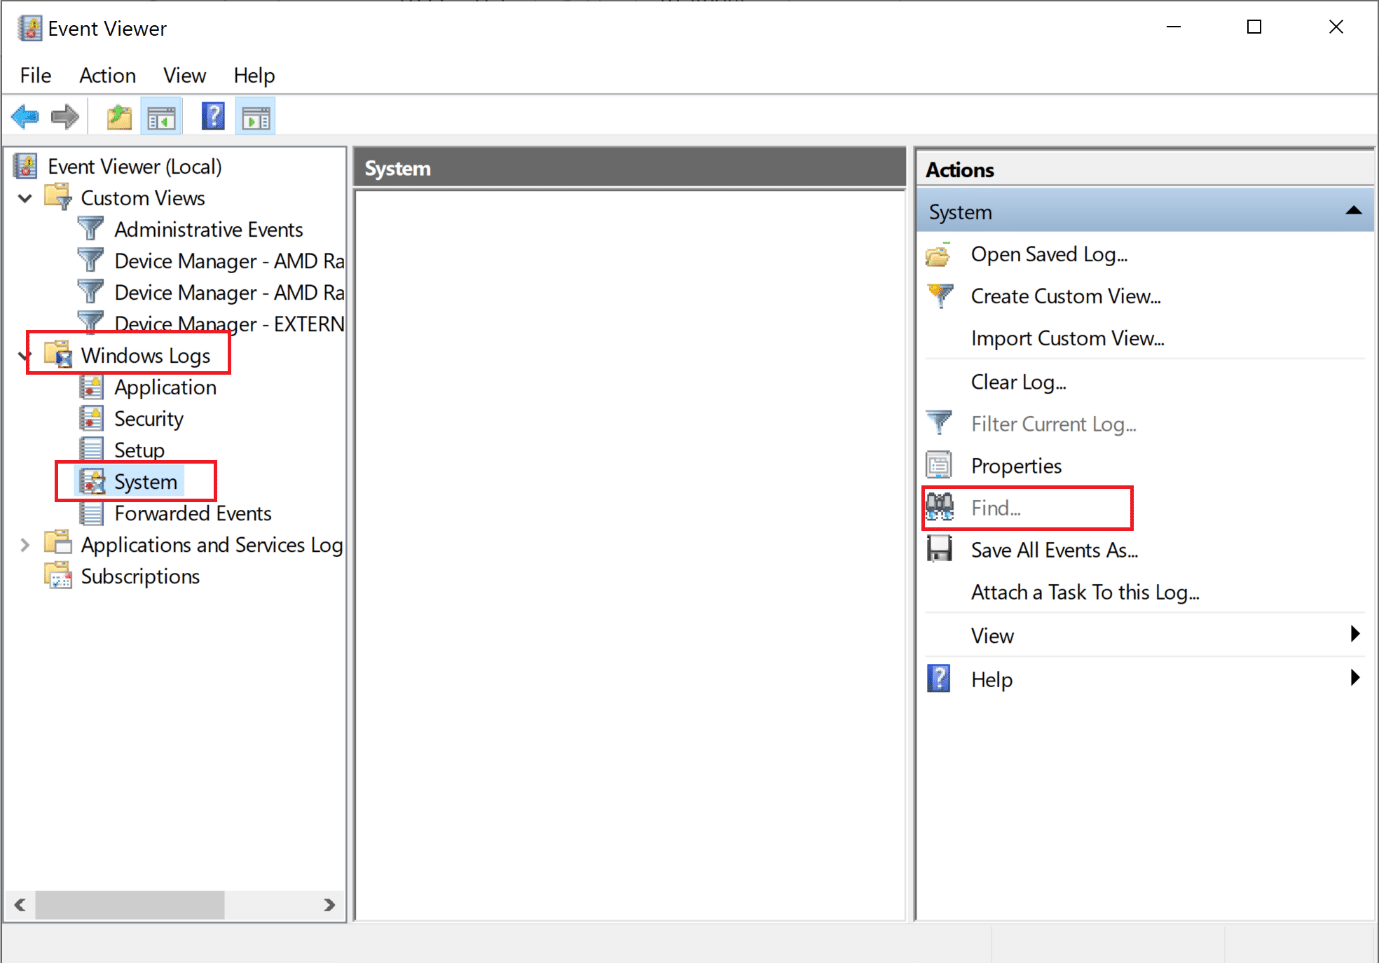
7. Cliccate nant'à truvà da u Actions pane on the right-hand side.
8. Type Diagnosticu di memoria è selezziunate Truvà Dopu.
9. Check the Event Viewer window for information displayed about hardware difettu, s'ellu ci hè.
10. If the hardware is found to be defective, get it checked or replaced by a technician.
ricumandatu:
Speremu chì sta guida hè stata utile è pudete fix Destiny 2 error code Broccoli on your Windows 10 laptop/desktop. Do let us know which method worked the best for you. Also, if you have any questions or suggestions regarding this article, feel free to drop them in the comments section below.

