Are you facing issues with Realtek High Definition Audio Driver? Is Realtek HD Audio Manager missing from your Windows 10 Taskbar? Or there is no sound coming from your speakers in Windows 10? If you are finding the answer to the above questions, then you’re in the right place as today we will see How to Fix Realtek High Definition Audio Driver Issue.
Realtek HD Audio Manager is one of the best tools available for managing all your audio/sound needs in Windows 10. But what happens when you can’t find the Realtek HD Audio Manager icon on the Taskbar? Most of the users facing this issue complain that they are only having this issue after the Windows 10 upgrade or update.
There can be numerous underlying causes for this issue, but the main problem seems to be corrupt or outdated Realtek audio drivers. And if that’s the case, this issue can be fixed by re-installing Realtek audio drivers. Anyway, without wasting any time, let’s see How to Fix Realtek High Definition Audio Driver Issue.
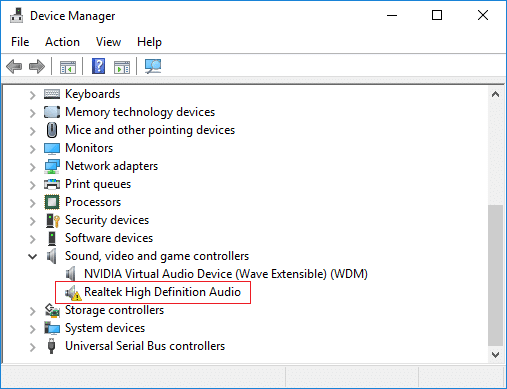
Bemærk: Open Device Manager by pressing Windows Key + R then type devmgmt.msc and hit Enter. Next, expand Sound, video and game controllers and then check if you can see a gult udråbstegn på "Realtek High Definition Audio“. If you can see the yellow exclamation mark then its confirm that this is a driver issue.
Fix Realtek High Definition Audio Driver Issue
Sørg for at oprette et gendannelsespunkt, hvis noget går galt.
Method 1: Reinstall Realtek HD Audio Drivers
1. Open your favourite web browser, then navigate to this website.
https://www.realtek.com/en/component/zoo/category/pc-audio-codecs-high-definition-audio-codecs-software
2. Make sure to download the proper driver according to your system architecture.
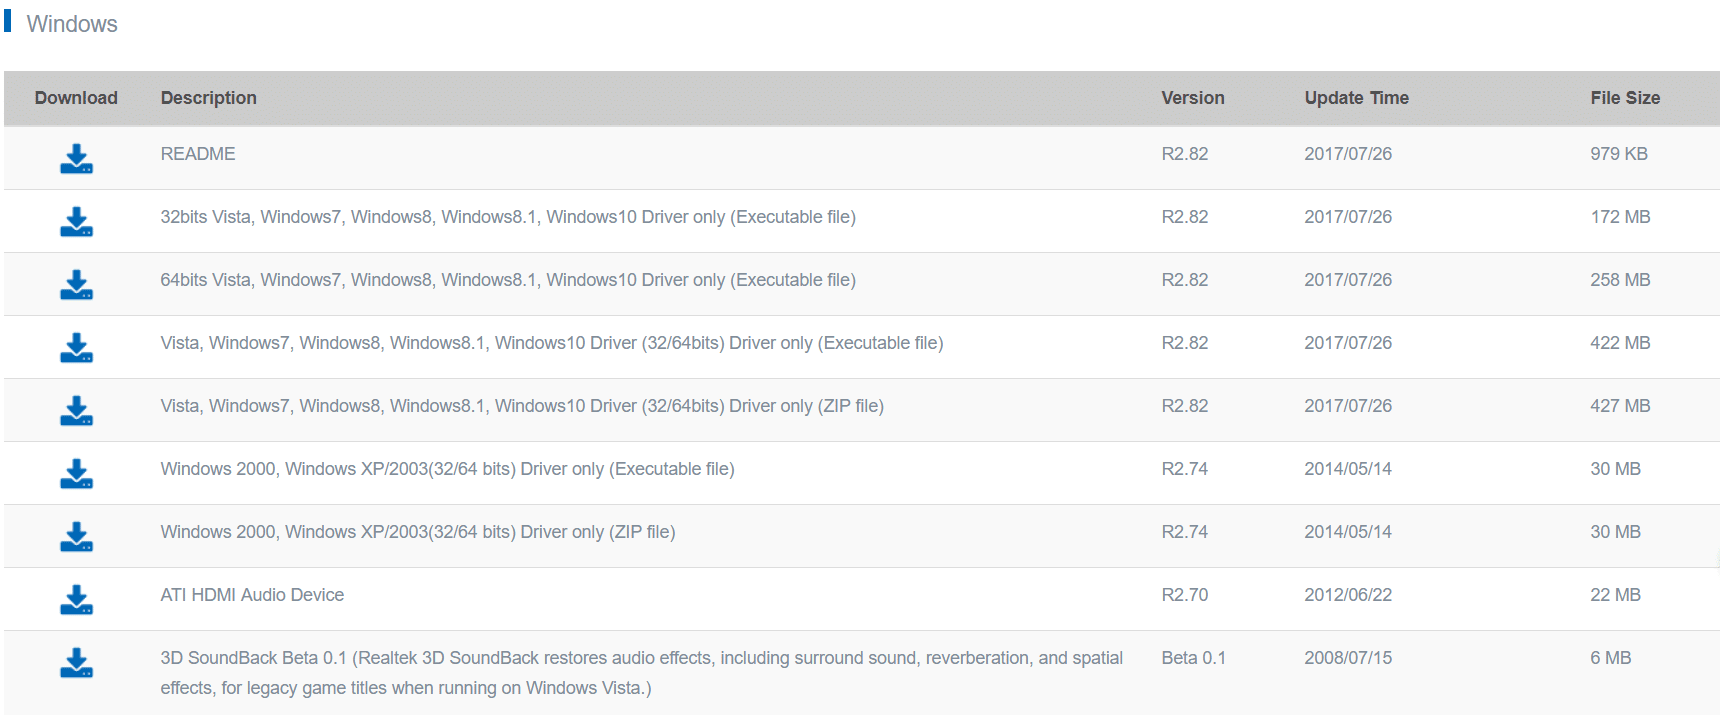
3. Once the file is downloaded, double-click on the setup file and follow the on-screen instructions to install the latest Realtek High Definition Audio drivers.
Method 2: Manually Update Realtek Audio Drivers
1. Tryk på Windows-tasten + R og skriv derefter devmgmt.msc og tryk Enter for at åbne Enhedshåndtering.

2. Expand “Lyd-, video- og game controllers” and then right-click on “Realtek High Definition Audio” & select Opdater driver.
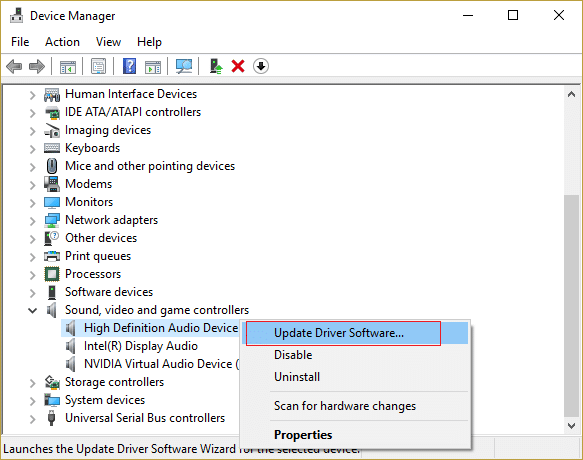
3. On the next window, click on “Søg automatisk efter opdateret driver software".

4. In case you already have the updated driver, then the following window will appear. If not then Windows will automatically update Realtek Audio drivers to the latest update available.
5. Once finished, reboot your PC to save changes.
If you’re still facing the Realtek High Definition Audio Driver Issue then you need to manually update the drivers, follow this:
6. If it wasn’t able to update your drivers then again right-click on “Realtek High Definition Audio” & select Opdater driver.
7. Denne gang skal du vælge "Gennemse min computer til driver software."

8. Vælg derefter "Lad mig vælge fra en liste over enhedsdrivere på min computer."

9. Vælg den relevante driver fra listen og klik Næste.
10. Lad processen fuldføre, og genstart derefter din pc.
11. Alternatively, go to your manufacturer’s website and download the latest drivers.
Metode 3: Brug Tilføj ældre til at installere drivere, der understøtter ældre lydkort
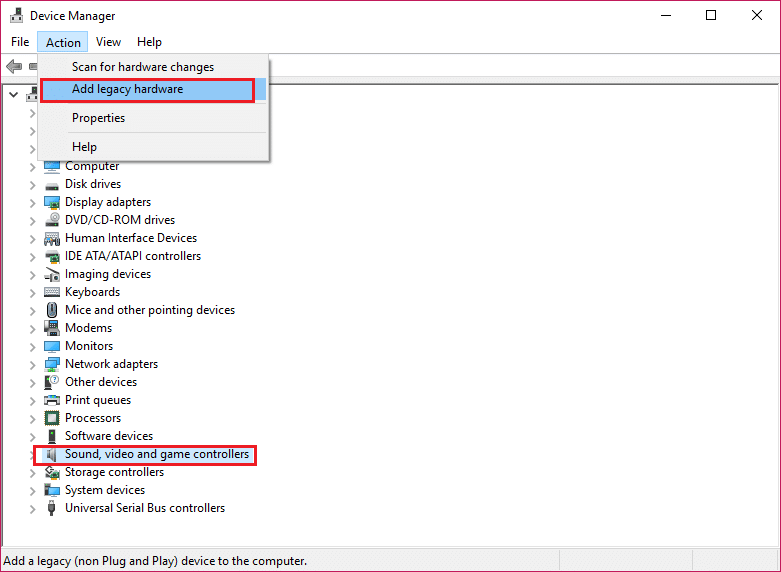
1. Tryk på Windows-tasten + R og skriv derefter "devmgmt.msc” (uden anførselstegn) og tryk på Enter for at åbne Enhedshåndtering.
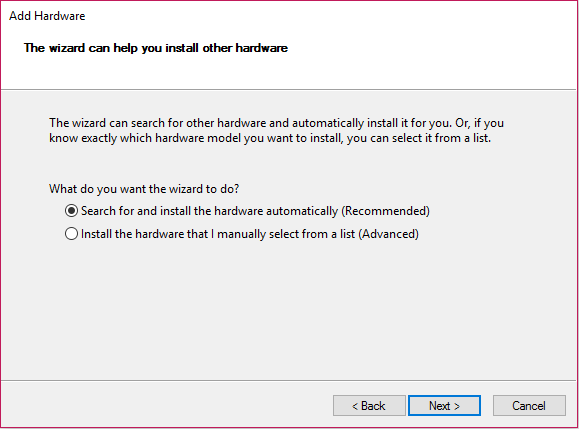
2. In Device Manager, select Lyd-, video- og game controllers og klik derefter på Handling > Tilføj ældre hardware.
3. klik Næste, Vælg 'Søg efter og installer hardwaren automatisk (anbefales). '
4. Reboot your system to save changes and see if you’re able to Fix Realtek High Definition Audio Driver Issue.
Method 4: Uninstall Realtek High Definition Audio Driver
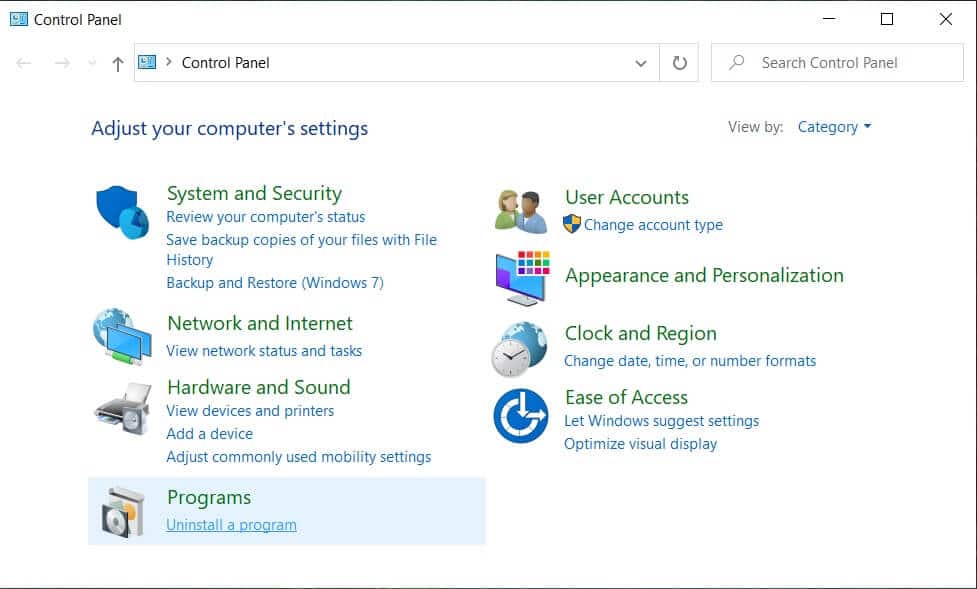
1. Søg efter kontrolpanel from the Start Menu search bar and click on it to open the Kontrolpanel.

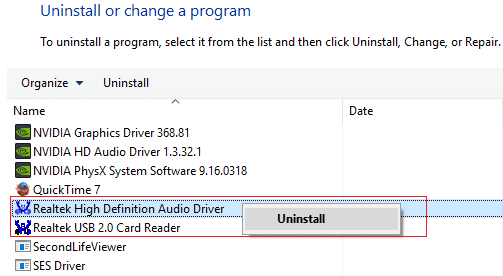
2. Klik på Fjern et program og søg derefter efter Indtastning af Realtek High Definition Audio Driver.
3. Højreklik på den og vælg Afinstaller.
4. Genstart din pc, og åbn Enhedshåndtering.
5. Klik på Handling og derefter "Scan for hardwareændringer."

6. Dit system vil automatisk install the Realtek High Definition Audio Driver.
Method 5: Disable Microsoft UAA Bus Driver for High Definition Audio
1. Tryk på Windows-tasten + R og skriv derefter devmgmt.msc og tryk enter for at åbne Enhedshåndtering.
2. Udvid System Devices og højreklik på Microsoft UAA Bus Driver til High Definition Audio Vælg derefter Deaktiver.
3. Besøg nu Realtek to download the latest driver, and it should now install without any problem.
Anbefalet:
Det er det, du har lært med succes How to Fix Realtek High Definition Audio Driver Issue men hvis du stadig har spørgsmål vedrørende denne tutorial, er du velkommen til at spørge dem i kommentarens sektion.

