The main cause of this error is still unknown, but there are various reasons why this problem occurs. Few of them are Windows Firewall might be disabled, malware infection, Incorrect date & time configuration, corrupted application package etc. Now Windows Store is an important component of Windows as it enables you to download different kinds of application required for personal or professional use.
Imagine not being able to download any Windows store application, that’s exactly what happens in this case. But don’t worry troubleshooter is here to fix this issue, follow the below-listed methods one by one and by the end of this guide, Windows Store would be back to normal.
There are few things which you should make sure of before continuing with the below-listed troubleshooting steps:
- Sometimes Family Saftey Settings blocks some apps due to which you may not be able to access the particular app on the Store. Check if the problem occurs on all the other apps or some particular apps. If this issue occurs only on selected apps, then turn off the Family Saftey Settings.
- If you recently made some changes on the system but forgot to restart your PC, you might not access Windows Store. Make sure to restart your system after Windows Update and see if the problem is resolved or not.
Behebung: Keine Schaltfläche „Installieren“ im Windows Store
Stellen Sie sicher, dass Sie einen Wiederherstellungspunkt erstellen, für den Fall, dass etwas schief geht.
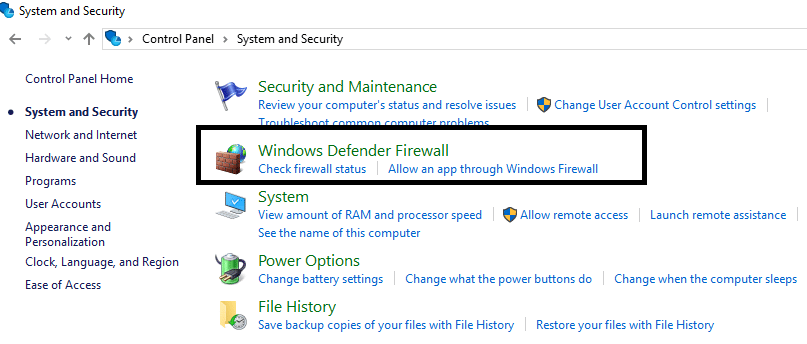
Method 1: Turn ON the Windows Firewall
Windows Store doesn’t let you access the apps until you make sure that the Windows Firewall is enabled.
1.Drücken Sie die Windows-Taste + I und wählen Sie dann aus Systemsteuerung.

2. Klicken Sie anschließend auf System und Sicherheit.
3.Klicken Sie dann auf Windows-Firewall.
4.Now from the left window pane click on Schalten Sie die Windows-Firewall ein oder aus.
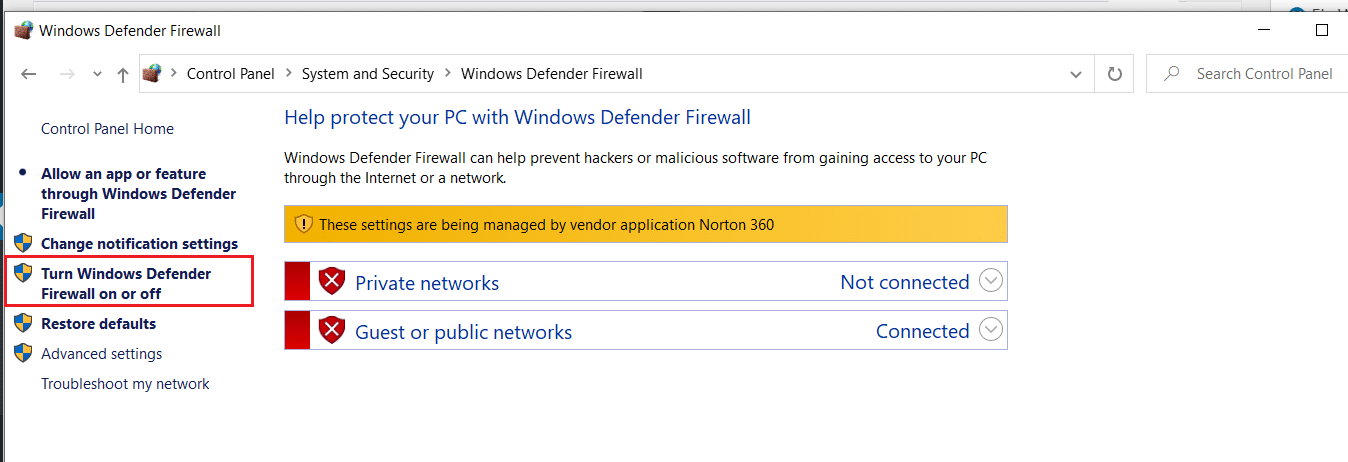
5. Auswählen Aktivieren Sie die Windows-Firewall for both private and public network settings and then restart your PC
After you are done, try to install the app again on the Windows Store and this time it should work out fine.
Methode 2: Stellen Sie sicher, dass Datum und Uhrzeit Ihres PCs korrekt sind
1. Der rechten Maustaste auf on Uhrzeit wird in der unteren rechten Ecke Ihres Bildschirms angezeigt. Klicken Sie dann auf Datum/Uhrzeit anpassen.
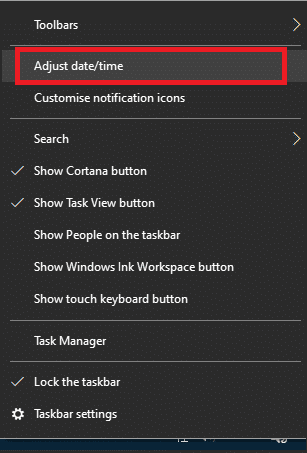
2. Make sure that both options labelled Stellen Sie die Uhrzeit automatisch ein und Stellen Sie die Zeitzone automatisch ein gewesen behindert. Klicken Sie auf Change.
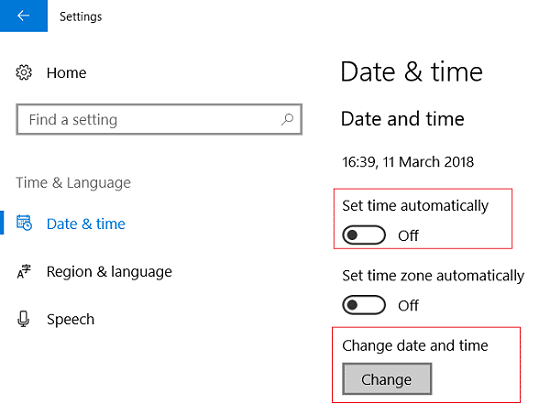
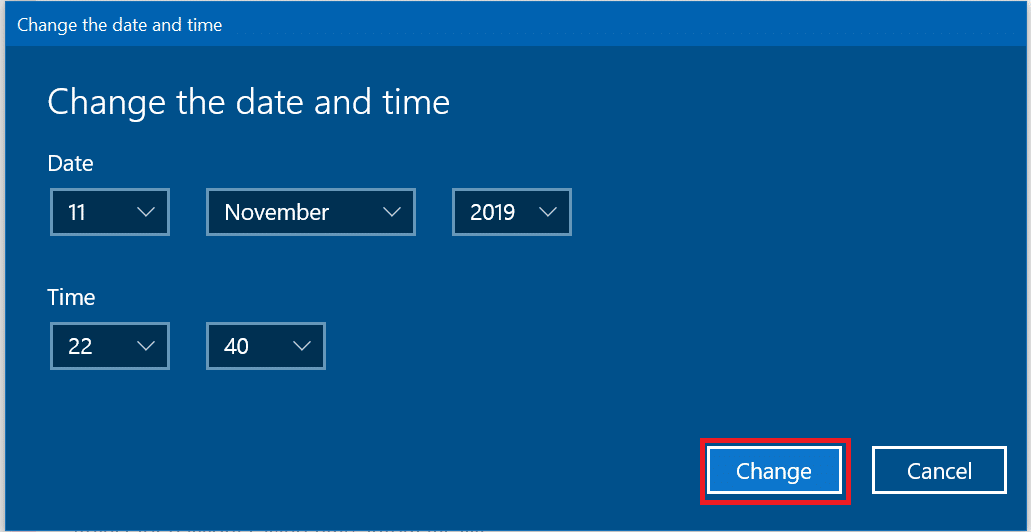
3. Enter korrektes Datum und Uhrzeit und dann auf klicken Change Änderungen anwenden.
4. Sehen Sie, ob Sie dazu in der Lage sind Fix Your Connection is Not Private Error In Chrome.
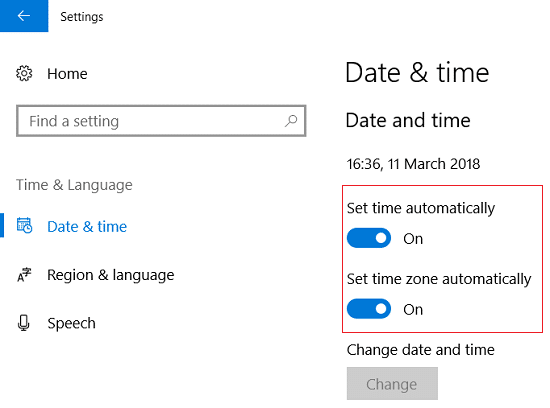
5. If this doesn’t help then Ermöglichen sowohl die Zeitzone einstellen Automatisch und Datum und Uhrzeit automatisch einstellen options. If you have an active internet connection, your Date and Time settings will get updated automatically.
Lesen Sie auch: 4 Möglichkeiten, Datum und Uhrzeit in Windows 10 zu ändern
Methode 3: Löschen Sie den Windows Store-Cache
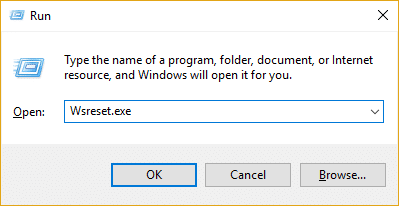
1. Drücken Sie die Windows-Taste + R und geben Sie dann „wsreset.exe“ und drücken Sie die Eingabetaste.
2. Sobald der Vorgang abgeschlossen ist, starten Sie Ihren PC neu.
Methode 4: Store-App erneut registrieren
1. Öffnen Eingabeaufforderung als Administrator.

2. Run below PowerShell command
PowerShell -ExecutionPolicy Unrestricted -Command „& {$manifest = (Get-AppxPackage Microsoft.WindowsStore).InstallLocation + 'AppxManifest.xml' ; Add-AppxPackage -DisableDevelopmentMode -Register $manifest}“
Or
Get-AppXPackage -Alle Benutzer | Foreach {Add-AppxPackage -DisableDevelopmentMode -Registrieren "$ ($ _. InstallLocation) AppXManifest.xml"}

3. Once done, close command prompt and Restart your PC.
This step re-register Windows Store apps which should automatically Behebung: Keine Schaltfläche „Installieren“ im Windows Store Problem.
Method 5: Make sure Windows is Up to Date
1. Drücken Sie Windows-Taste + Ich öffne die Einstellungen und klicke dann auf Update & Sicherheit.
![]()
2. Klicken Sie auf der linken Seite auf das Menü Windows Update.
3. Klicken Sie nun auf das „Check for updates“, um nach verfügbaren Updates zu suchen.

4. Wenn Updates anstehen, klicken Sie auf Updates herunterladen und installieren.

5. Sobald die Updates heruntergeladen sind, installieren Sie sie und Ihr Windows wird auf dem neuesten Stand sein.
Methode 6: Führen Sie CCleaner und Malwarebytes aus
1. Herunterladen und installieren CCleaner & Malwarebytes.
2. Führen Sie Malwarebytes aus und lassen Sie Ihr System nach schädlichen Dateien scannen. Wenn Malware gefunden wird, wird sie automatisch entfernt.

3. Führen Sie nun CCleaner aus und wählen Sie Benutzerdefinierte Reinigung.
4. Wählen Sie unter Custom Clean die aus Windows-Registerkarte und markieren Sie die Standardeinstellungen und klicken Sie auf Analysieren.

5. Stellen Sie nach Abschluss der Analyse sicher, dass Sie die zu löschenden Dateien entfernen.

6. Klicken Sie abschließend auf Laufreiniger klicken und CCleaner seinen Lauf lassen.
7. Um Ihr System weiter zu reinigen, Wählen Sie die Registerkarte Registrierung, und stellen Sie sicher, dass Folgendes aktiviert ist:

8. Klicken Sie auf Nach Problemen suchen Schaltfläche und erlauben Sie CCleaner zu scannen, dann klicken Sie auf die Löse ausgewählte Probleme .

9. Wenn CCleaner fragt: „Möchten Sie Änderungen an der Registrierung sichern?" Wählen Sie Ja.
10. Sobald Ihre Sicherung abgeschlossen ist, klicken Sie auf Beheben Sie alle ausgewählten Probleme .
11. Starten Sie Ihren PC neu, um die Änderungen zu speichern.
Method 7: Perform Clean Boot in Windows
Sometimes 3rd party software can conflict with Windows Store and therefore, you should not install any apps from the Windows apps store. In order Fix No Install Button in Windows Store problem, you need to perform a clean boot in your PC and diagnose the issue step by step.
Method 8: Run Windows Update and Windows Store Apps troubleshooter
1.Type troubleshooting in the Windows Search bar and click on Fehlerbehebung.
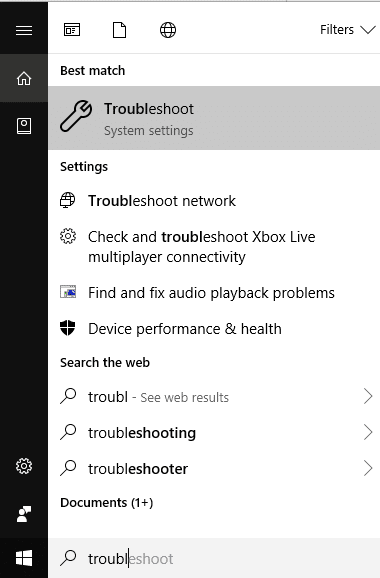
2.Als nächstes wählen Sie im linken Fensterbereich aus Alle ansehen.
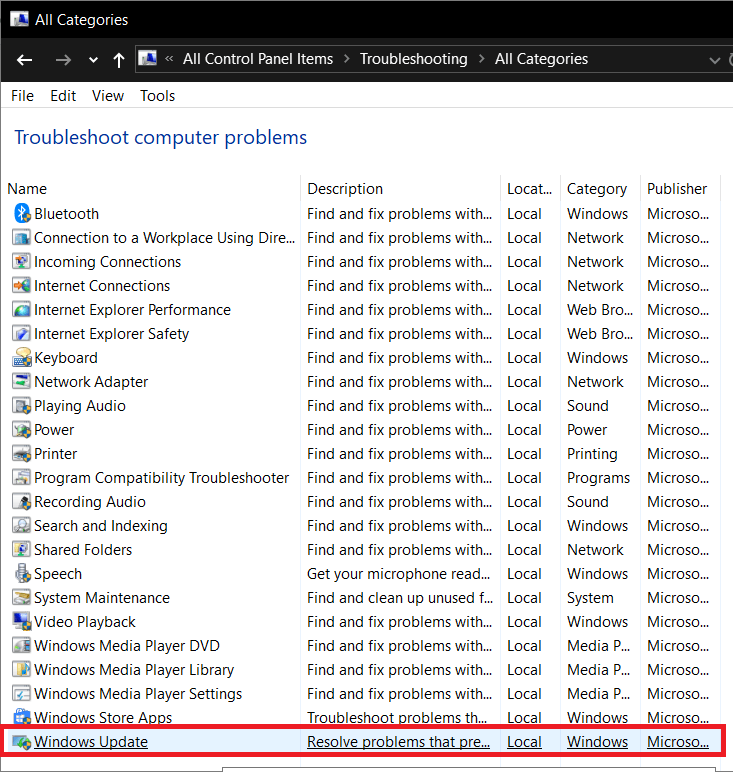
3. Wählen Sie dann aus der Liste Computerprobleme beheben aus Windows Update.
4. Follow on-screen instruction and let the Windows Update Troubleshoot run.

5. Now again go back to the View all window but this time select Windows Store Apps. Run the troubleshooter and follow on-screen instructions.
6. Restart your PC and again try to install apps from Windows Store.
Empfohlen:
Das ist es, was Sie erfolgreich haben Behebung: Keine Schaltfläche „Installieren“ im Windows Store Wenn Sie jedoch noch Fragen zu diesem Beitrag haben, können Sie diese gerne im Kommentarbereich stellen.

