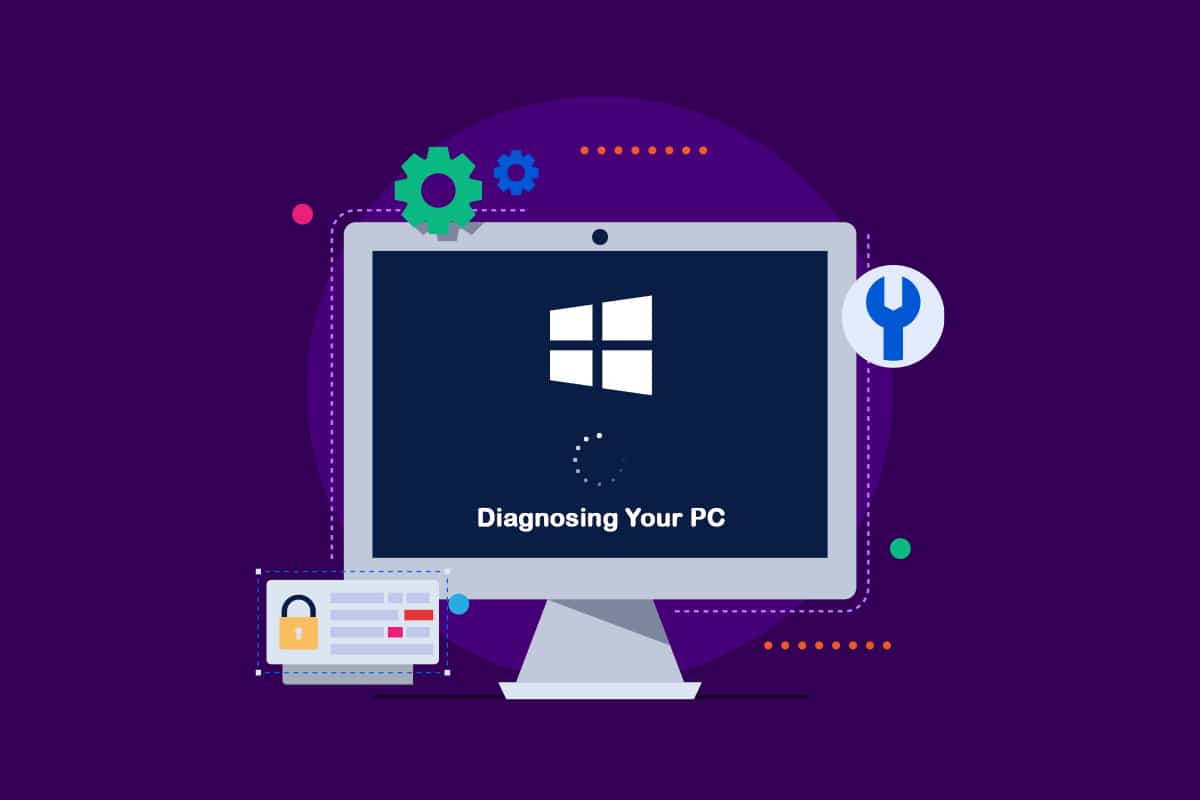
After installing the latest Windows feature update, your PC may be trapped in an automated repair cycle. This article will give you various troubleshooting techniques if you’re attempting to locate a repair approach that will allow you to resolve diagnosing your PC Windows 10 issue. So, continue reading to fix diagnosing your PC stuck issue on Windows 10.
How to Fix Stuck on Diagnosing your PC in Windows 10
We looked into this diagnosing your PC stuck issue by looking at multiple user reports and tried various repair strategies suggested by some impacted users. As it turns out, various conditions make your system trapped inside the diagnosing your PC screen. Here’s a list of circumstances that might lead to this issue on Windows 10.
- Beschädigung der Systemdatei: Corrupted system files might also cause the System Diagnostic tool to appear at every system start-up. If this utility is also corrupted, it will be stuck in a loop.
- Inadequate System Space: As it turns out, this problem of this issue can also arise when the system lacks sufficient storage capacity to load all the programs and services required for the starting operation.
- Glitched Automated Repair Utility: This issue has been reported by multiple customers to be caused by mysterious system drive troubles. In this instance, the Automatic Repair program will try to open at every restart in an attempt to fix the problem, but it will be unable to locate the source of the problem.
- Faulty BCD Data: Corrupted booting data might also cause this issue in severe conditions, which prevents the starting process from finishing.
Some afflicted customers have attempted rebooting their computers to get rid of this problem but have claimed that their computers go into a dark screen, show the logo, and then return to the Diagnostic PC page. The operating system indicates that your device has been diagnosed, but there might be no progress made. You can follow the below methods to resolve the issue.
Method 1: Perform Hard Reboot
You can do a hard reboot if your Windows is unable to boot due to the Preparing Automatic Repair or Diagnosing your PC issue.
1. Ziehen Sie den Netzstecker AC Adapter und entfernen Sie die austauschbare Akkus vom Gerät.
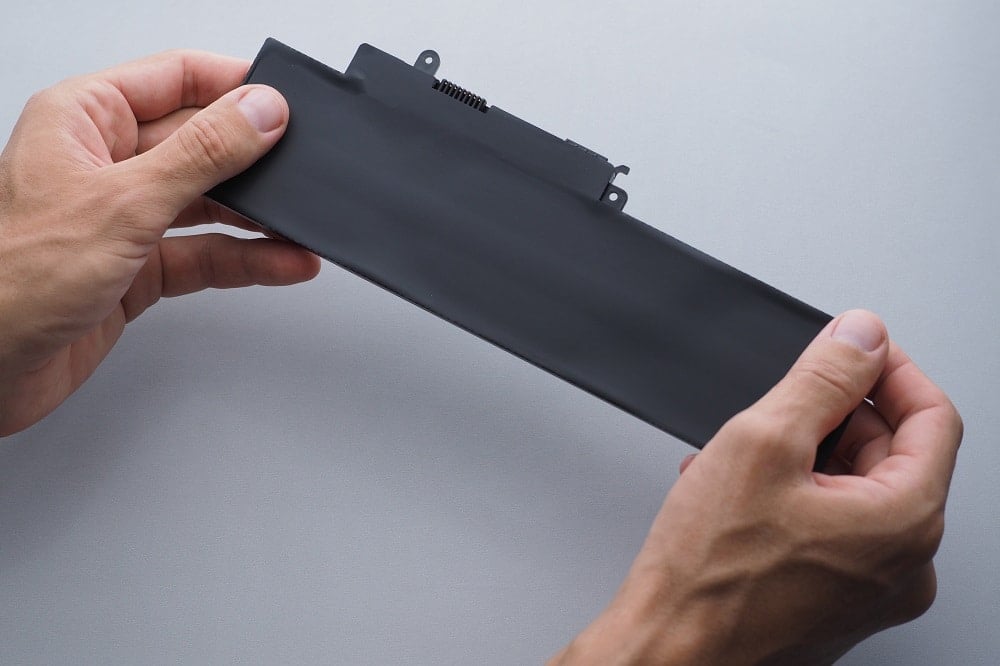
2. Check if it boots up normally by pressing and holding the Power-Taste für 20 Sekunden.
If this technique fails, try one of the following options.
Lesen Sie auch: So beheben Sie den WDF_VIOLATION-Fehler in Windows 10
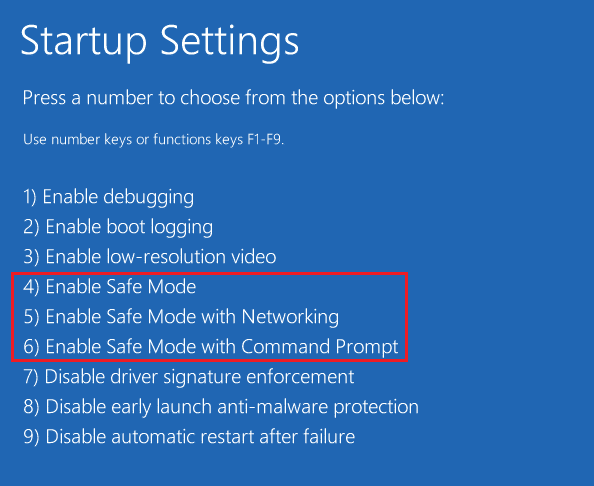
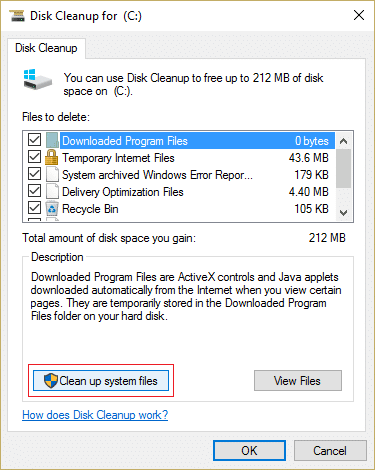
Methode 2: Starten Sie im abgesicherten Modus und löschen Sie den Speicherplatz
As some users have discovered, this issue can also occur when the system does not have enough capacity to start. Several individuals in a similar position have overcome the problem by running their machines in Safe Mode and freeing up some space. Follow our guide on How to Boot to Safe Mode in Windows 10.
Then, perform Disk cleanup by following our guide to run Disk Cleanup.
If diagnosing your PC Windows 10 problem persists, follow the next procedure below.
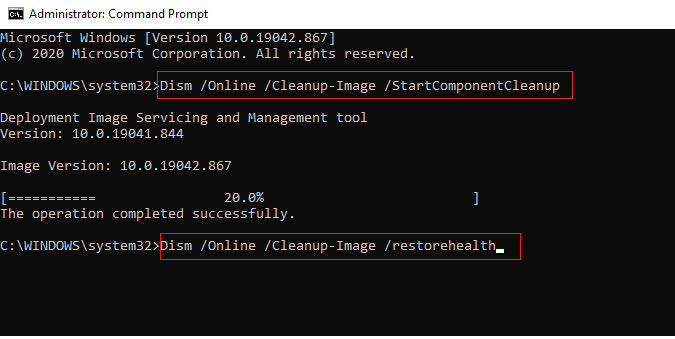
Methode 3: Systemdateien reparieren
It’s also possible that this problem is caused by System File corruption. These corrupted files might prevent the booting procedure from finishing. You’ll have to run the scans before the Booting phase since you can’t go beyond the Diagnostics page. Read our guide on How to Repair System Files on Windows 10.
Lesen Sie auch: Fix: Der Computer wurde nicht erneut synchronisiert, da keine Zeitdaten verfügbar waren
Method 4: Run System Restore Utility
You may be dealing with a serious corruption problem that can’t be treated traditionally. When faced with a circumstance like this, the best action is to take a damage-control strategy. Most start-up troubles caused by system file corruption can be resolved by returning the machine to a healthy condition in which all components are working properly. Follow the below steps.
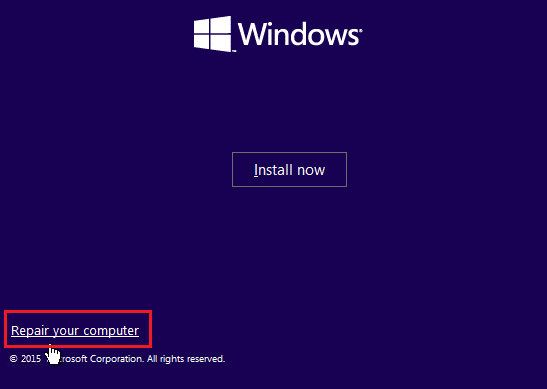
1. Setzen Sie die ein Installations-CD und Starten Sie Ihren PC neu.
2. Drücken Sie eine beliebige Taste Schlüssel to start up the installation media when you see the booting screen.
3. When Windows Setup has finished loading, click on Computer reparieren.
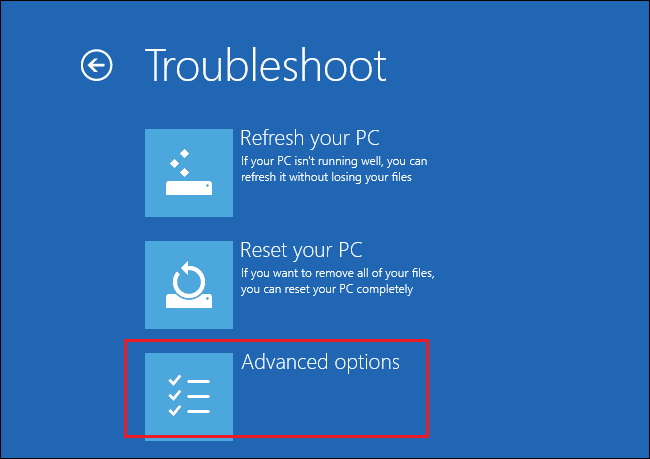
4. Greifen Sie auf die Problembehandlung menu from the first repair menu.
5. Klicke auf Erweiterte Optionen from the Troubleshoot menu.
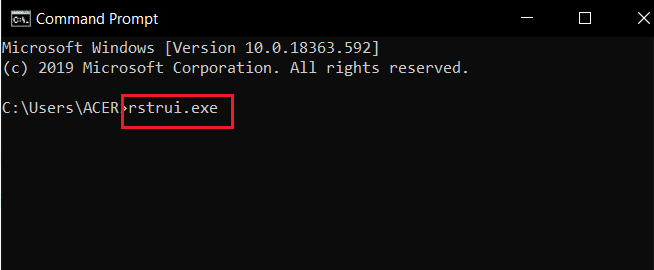
6. Dann klicken Sie auf Eingabeaufforderung from the list of available utilities.
7. Zum Öffnen der Systemwiederherstellung program, type the rstrui.exe Befehl in die Eingabeaufforderung Fenster und drücken Sie die Enter-Taste.
8. Klicke auf Weiter once you’ve reached the first screen.
9. Nun, Tick the option labeled Zeigen mehr Wiederherstellungspunkte.
10. Once you’ve done so, go through each restoration Schnappschuss and pick one taken before the Diagnostics problem.
11. To go on to the next option, choose the suitable für Ihre privaten Foto und klicken Sie auf Weiter.
12. Klicken Sie nun auf Endziel.
Your system will restart automatically after restoring, and the old machine will be fixed at the next system starting.
Methode 5: BCD neu erstellen
In Windows 10, you’ll get the Preparing Automatic Repair error if the boot files are missing or damaged. As a result, some users will re-build the boot record using the procedures below.
1. Insert the Windows bootable installation CD into the PC displaying the error message Preparing Automatic Repair or Diagnosing your PC.
2. Start your computer by booting from the CD installieren.
3. To continue, choose your Sprache Einstellungen und klicken Sie auf Weiter .
4 Wählen Reparatur dein Computer.
5 Wählen Problembehandlung.
6 Wählen Eingabeaufforderung.
7. Enter the instructions below into the prompt, and press the Enter-Taste nach jedem.
bootrec / fixmbr
bootrec / fixboot
bootrec / scanos
bootrec / RebuildBcd
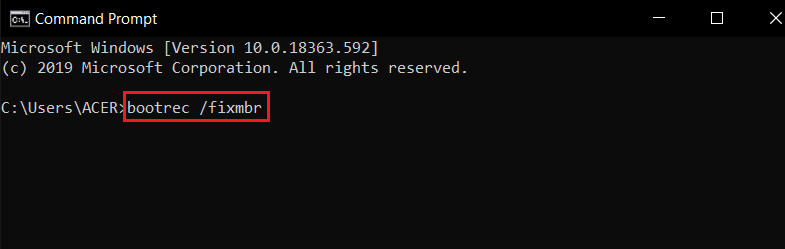
8. Then, type the command wunsch und drücke die Enter-Taste.
9. Endlich, Starten Sie den PC neu.
Lesen Sie auch: So beheben Sie den Windows Update-Fehler 80072ee2
Methode 6: Deaktivieren Sie die automatische Starthilfe
If this happens, the Automatic Start-up Repair software will launch at every system start-up. However, if the utility is broken, you might not be able to go past the start-up screen. Therefore, disabling this software would prevent the Diagnosing your PC screen from appearing.
1. As soon as you see the introductory screen, press the F8 key repeatedly to get to the Erweiterte Startoptionen Menü.
2 Wählen Abgesicherten Modus mit Vernetzung from the Advanced Boot Options menu by pressing the F5-Taste or using the arrow keys.
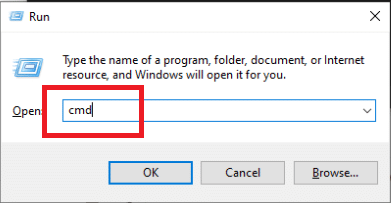
3. When the booting routine is complete, press Windows + I-Tasten um das zu starten Dialogfeld ausführen.
4. Art cmd und schlagen Strg + Umschalt + Eingabetaste ein öffnen erhöhte Eingabeaufforderung.
5. Klicke auf Ja in der Eingabeaufforderung.
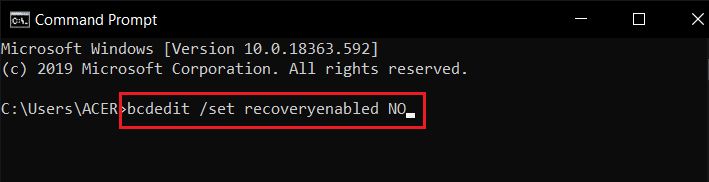
6. Geben Sie Folgendes ein Befehl und drücken Sie Enter-Taste.
bcdedit / set recoveryenabled NEIN
7. Sobald der Vorgang abgeschlossen ist, Wiederaufnahme Ihr Gerät.
If diagnosing your PC Windows 10 problem persists or you don’t get a different error, continue the next procedure.
Methode 7: Updates deinstallieren
If the update fails to install properly on your device, you might face this issue. Follow the below steps to resolve the discussed issue.
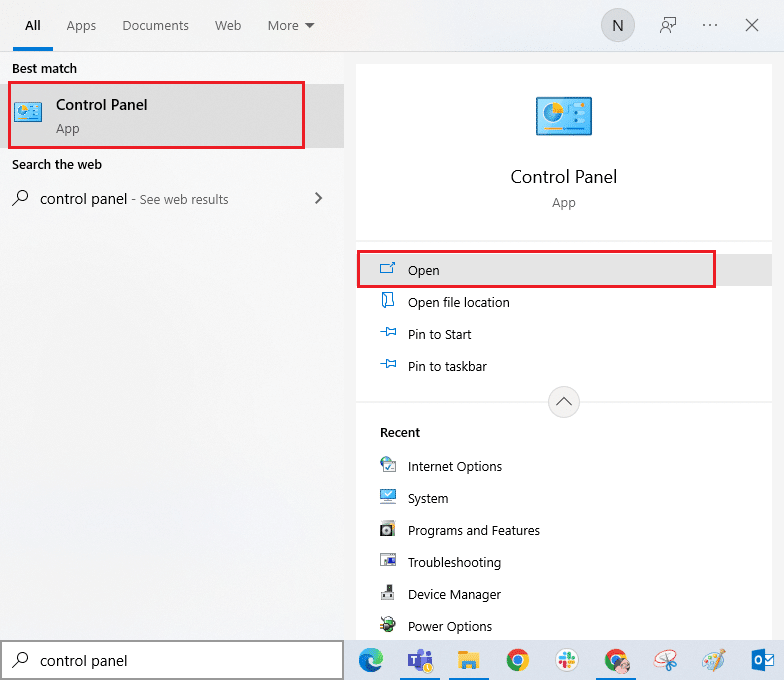
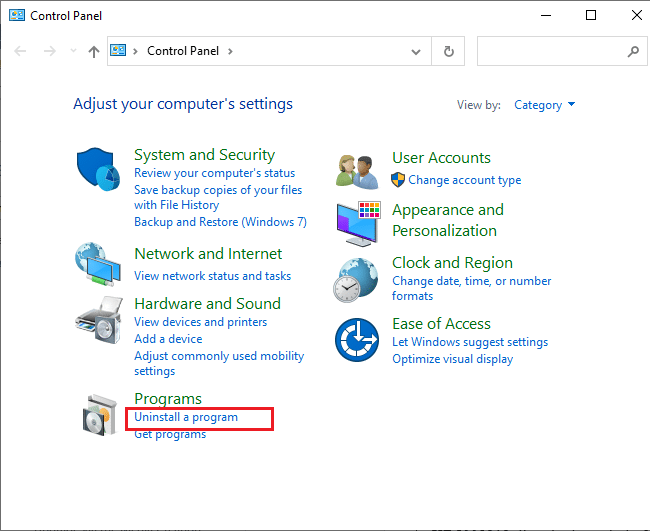
1. Schlagen Sie die Windows-Taste und Typ Systemsteuerung, dann klicken Sie auf Offen.
2. Klicken Sie nun auf Programm deinstallieren Option unter dem Programme Menü wie abgebildet.
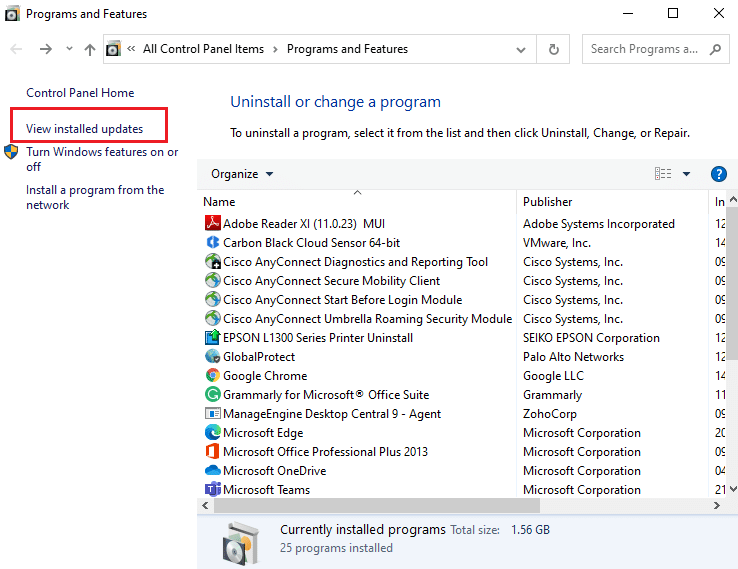
3. Klicken Sie nun auf Installierte Updates anzeigen im linken Bereich, wie gezeigt.
4. Suchen Sie nun nach dem neuesten Update und wählen Sie es aus Installiert auf der Datum eingeben und anklicken Deinstallieren Option wie unten dargestellt.
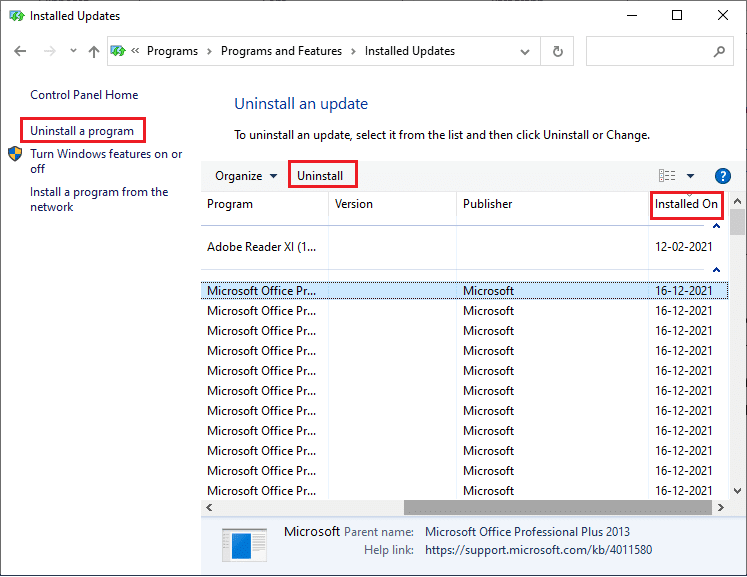
5. Bestätigen Sie abschließend die Eingabeaufforderung und Starten Sie den PC neu.
Check if diagnosing your PC stuck issue persists or not.
Lesen Sie auch: 7 Möglichkeiten, den BSOD-Fehler iaStorA.sys unter Windows 10 zu beheben
Method 8: Perform Repair Install
If none of the above-mentioned repair methods have worked, you’re probably dealing with a serious case of system corruption that can’t be fixed using normal methods. In this case, the only way to repair the problem is to reset every Windows component, including any booting-related tasks causing the Automatic Repair loop. You may always perform a clean installation but bear in mind that doing so will lose any saved data within your Windows system. If you choose a clean install, all your personal data, applications, games, documents, and other media will disappear. Read our guide on How to do a Clean Install of Windows 10 and implement the same.
Empfohlen:
We hope you found this information useful and that you were able to resolve stuck on diagnosing your PC in Windows 10 problem. Please let us know which technique was the most beneficial for you. Please use the form below if you have any queries or comments. Also, let us know what you want to learn next.

