Although not the most powerful on the market today, Windows 10 has its own hidden video editor that gets the job done. It’s a feature of the Photos app and is what remains of the Story Remix app that Windows 10 came out with back in 2017.
The Windows 10 Video Editor works sort of like the Windows Movie Maker. You can create your own home movies and slideshows or edit other already created ones either manually or automatically.
So, if you’re unable to get your hands on a more powerful editor due to time, cost, or whatever the reason, Windows 10 Video Editor should work in a pinch. Since you likely have no idea where it’s located, we’d like to take you on a short tour.
How To Use The Windows 10 Video Editor
You won’t have to download anything as the Windows 10 Video Editor already comes included in all Windows 10 PCs. The editor is capable of performing basic edits and has a pretty easy-to-use interface. If you’d like to test it out, you can follow the steps we’ve presented in this article.
Bearbeiten & erstellen
- Open a video file by right-clicking it and selecting Open With > Photos.
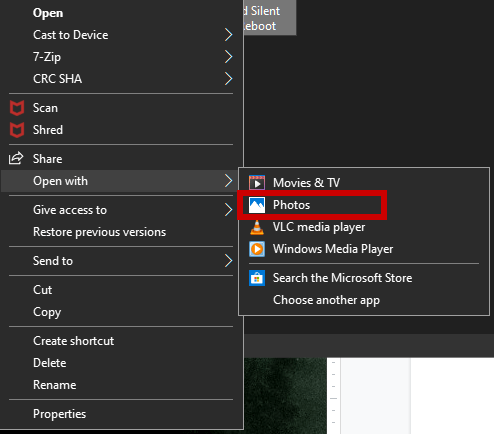
- This will cause the video to begin playing in the Fotos App.
- To begin edits, open the Bearbeiten & erstellen drop-menu.
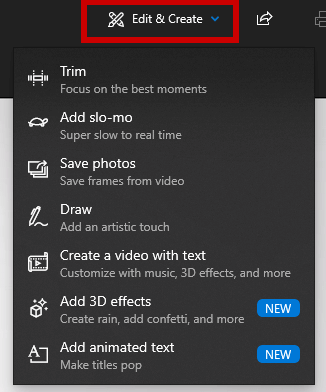
- It will contain various tools for editing purposes you can begin using right away.
- Sie können verwenden Trim to breakdown a video into sections. To do this, drag the pins on the playback bar to the beginning and end time of the scene you want to keep. The blue pin will let you see what’s going on in the specific scene. Then click the Play button to see the scene in motion.
- Add Slo-mo allows you to apply a slower speed to your video.
- Speichern Sie Fotos lets you snap a photo of a frame within the video to save.
- To draw attention to a part in a scene you can break out your artistic skills and draw directly on the video using the Unentschieden tool. It provides various stroke selections like ballpoint pen, pencil, calligraphy pen, an eraser tool, and all in an assortment of colors.
Making Additions To Your Video Project
Adding text, animated text, 3D effects, or music to your video project will really make it stand out. These are what Create a Video With Text und 3D-Effekte hinzufügen tools are for.
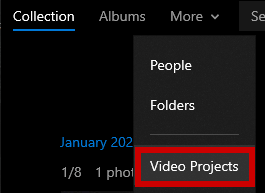
- To begin a custom video project, launch the Fotos App, klicken Sie auf MehrWählen Videoprojekte.
- Klicken Sie auf die blaue Neues Videoprojekt option, and give it a name.
- You can then begin adding photos and videos to the project by clicking the + Hinzufügen .
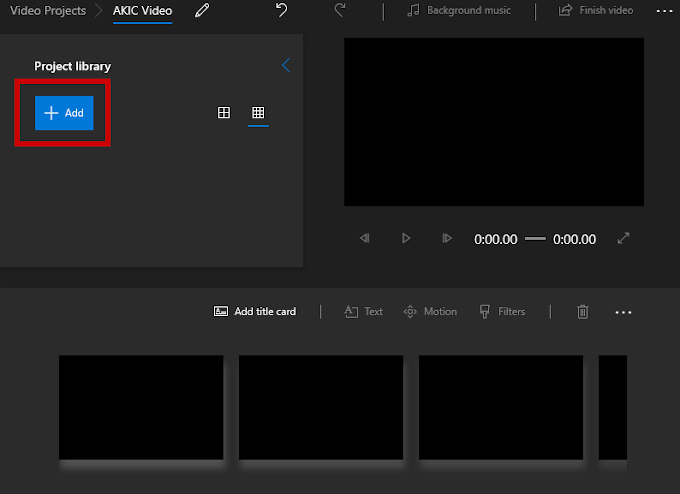
- You’ll need to add at least one video or photo to begin the project. You can combine them together, choose one or the other, or create a slideshow of photos. Choice is yours.
- Everything you add will be shown in the Project library. To add items placed in the Project Library to your Storyboard, you can drag and drop them.
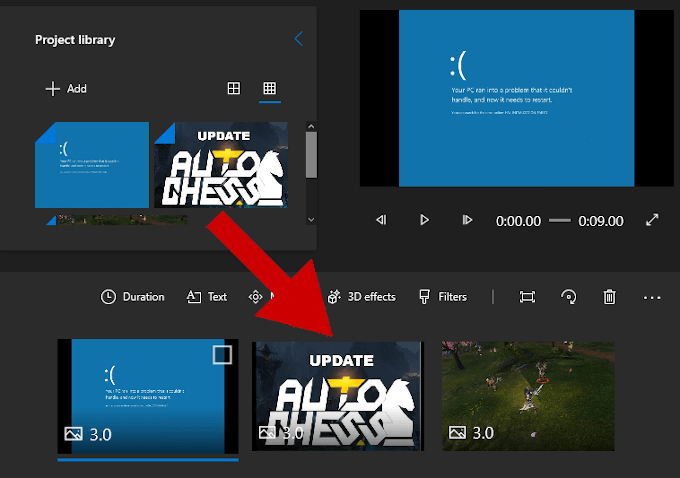
- Once a video has been added, some editing tools will appear in the Storyboard pane.

- Neben der Trim Werkzeug, du kannst Resize the video (remove black bars from different aspect ratios), add visual Filter (Sepia, Pixel, etc.), insert Text, sich bewerben Bewegung effects (varying camera styles), and insert 3D-Effekte (falling snow, rain, lightning, explosions, and more.)
- Dragging everything at once into the Storyboard means that everything will be edited together. To focus on a single video or image, add only that video or image to the Storyboard, make your edits, and then export it to a new file.
- To add that single file back into the project to go along with other photos and videos, you can simply + Hinzufügen it back into the Project Library.
- For lengthier projects you can avoid individual customization and instead opt to use Themes.
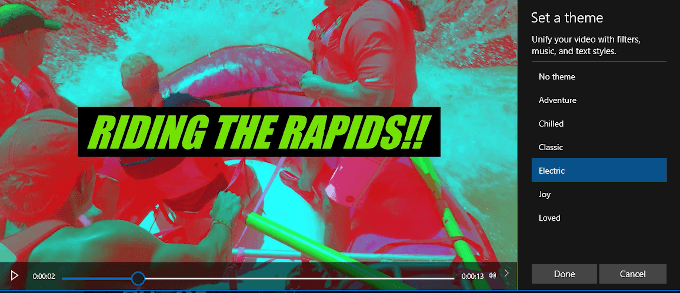
- It can be found on the top bar of the window and allows you to choose a theme that contains filters, music, and text styles that work well together. You’ll be presented with a video preview of how everything will look before going forward with a final decision.
- You can add a few tunes to the project by clicking the Hintergrundmusik .

- There are already a few music options loaded into the Photos app from which to choose. For your own music entries, you’ll need to select Benutzerdefiniertes Audio.
- To adjust the orientation of your video there’s an Streckung button located on the toolbar.
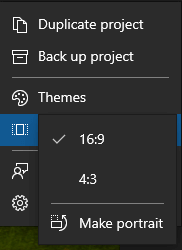
- This will allow you to swap the video between Landscape (16:9, 4:3) und Portrait (9:16, 3:4).
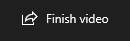
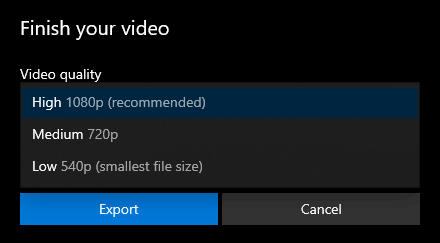
- Once you’re happy with the project and have added the final touch ups, click Video beenden, located at the top-right of the window.
- Zur Cloud hinzufügen used to be an option if you’d prefer to keep all projects saved to Microsoft’s Cloud. However, as of 2020 this option has been removed. Instead, the only options you’re provided is what video quality you’d like to save the video in and if you’d like to use accelerated encoding.
- The video projects will appear in the Photos app under Videoprojekte. When exporting to your PC, Photos app will let you know where they have been stored.

