Deployment Image Servicing and Management (DISM) is a command-line tool which can be used to service and repair Windows Image. DISM can be used to service a Windows image (.wim) or a virtual hard disk (.vhd or .vhdx). The following DISM command is most commonly used:
DISM / Online / Καθαρισμός-Εικόνα / Επαναφορά Υγείας
A few users are reporting that they are facing the DISM error 0x800f081f after running the above command and the error message is:
Error 0x800f081f, The source files could be found. Use the “Source” option to specify the location of the files that are required to restore the feature.
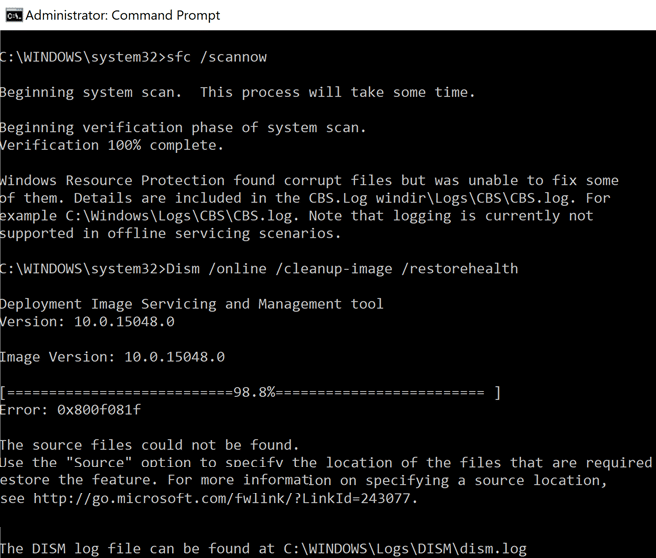
The above error message clearly states that the DISM could not repair your computer because the file required to fix the Windows Image is missing from the source. So without wasting any time let’s see how to Fix DISM Error 0x800f081f in Windows 10 with the help of the below-listed guide.
Fix DISM Error 0x800f081f in Windows 10
Method 1: Run DISM Cleanup Command
1. Ανοίξτε τη γραμμή εντολών. Ο χρήστης μπορεί να εκτελέσει αυτό το βήμα αναζητώντας «cmd» Και στη συνέχεια πατήστε Enter.

2. Πληκτρολογήστε την ακόλουθη εντολή στο cmd και πατήστε Enter:
dism.exe / online / Cleanup-Image / StartComponentCleanup
sfc / scannow

3.Once the above commands are finished processing, type DISM command into cmd and hit Enter:
Dism /Online /Cleanup-Image /restoreHealth

4. Δείτε αν μπορείτε Fix DISM Error 0x800f081f in Windows 10, αν όχι τότε συνεχίστε με την επόμενη μέθοδο.
Method 2: Specify the Correct DISM Source
1. Download Windows 10 Image using Windows Media Creation Tool.
2. Κάντε διπλό κλικ στο MediaCreationTool.exe file to launch the application.
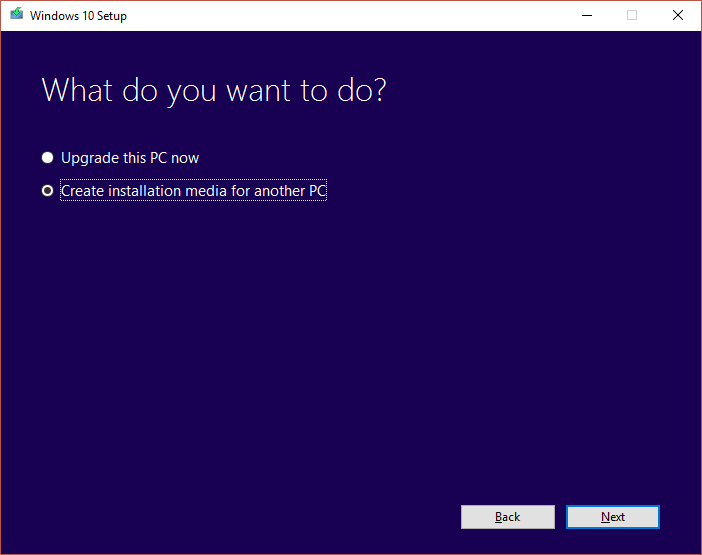
3. Accept License terms then select “Δημιουργήστε μέσα εγκατάστασης για άλλο υπολογιστή» και κάντε κλικ στο Επόμενο.
4. Now the language, edition, and architecture will automatically be selected according to your PC configuration but if you still want to set them yourself uncheck the option at the bottom saying “Χρησιμοποιήστε τις προτεινόμενες επιλογές για αυτόν τον υπολογιστή. "

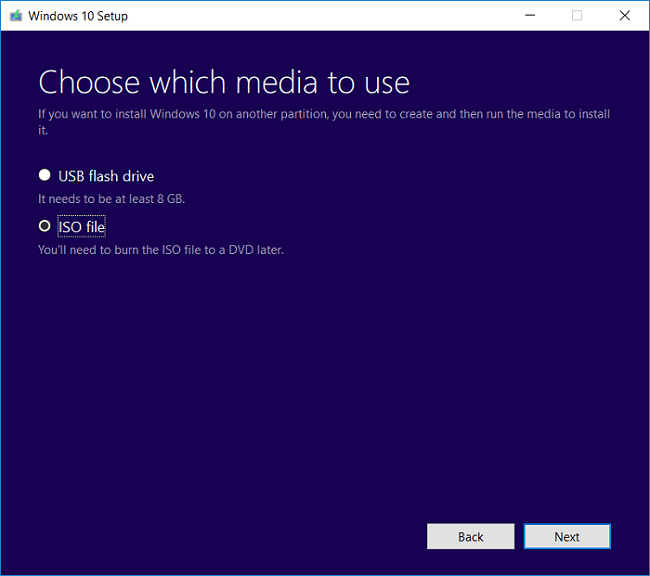
5. Στις «Επιλέξτε ποια μέσα θα χρησιμοποιήσετε”Επιλογή οθόνης ISO αρχείο και κάντε κλικ στο κουμπί Επόμενο.
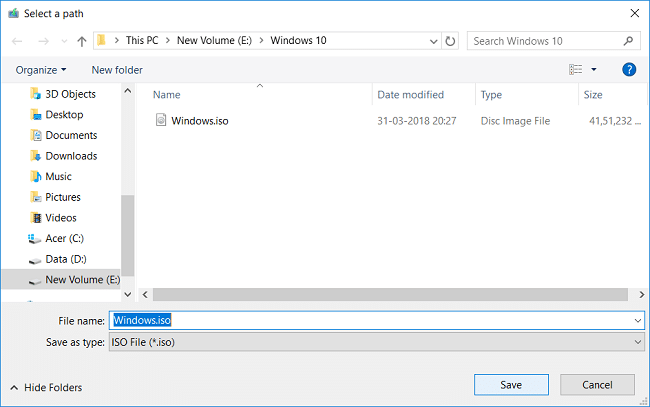
6. Specify the download location και κάντε κλικ στο κουμπί Αποθήκευση.
7. Once the ISO file is download, right-click on it and select Βουνό.
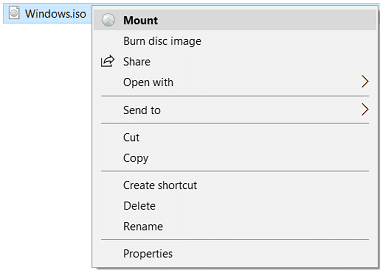
Σημείωση: Θα πρέπει να download Virtual Clone Drive or Daemon tools to mount ISO files.
8. Open the mounted Windows ISO file from File Explorer and then navigate to sources folder.
9. Κάντε δεξί κλικ στο install.esd file under sources folder then select copy and paste it to C: drive.

10. Πατήστε Windows Key + X και μετά επιλέξτε Γραμμή εντολών (διαχειριστής).
11. Τύπος cd and hit Enter to go to the root folder of C: drive.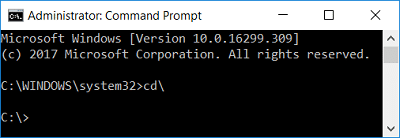
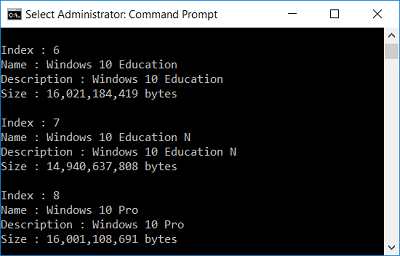
12. Now type the following command into cmd hit Enter:
dism / Get-WimInfo /WimFile:install.esd
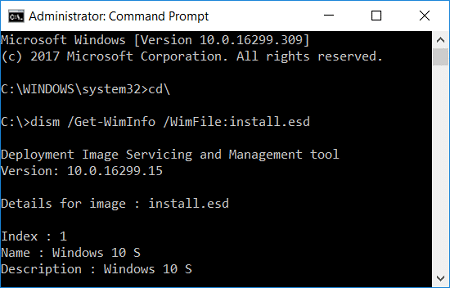
13. A list of Indexes will be displayed, according to your version of Windows note down the index number. For example, if you have Windows 10 Education edition, then the index number will be 6.
14. Again type the following command into cmd and hit Enter:
dism /export-image /SourceImageFile:install.esd /SourceIndex:IndexNumber /DestinationImageFile:install.wim /Compress:max /CheckIntegrity
Σημαντικό: Αντικαταστήστε το IndexNumber according to your Windows 10 installed version.
15. In the example which we took on step 13, the command will be:
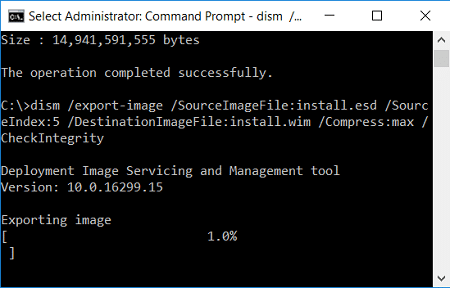
dism /export-image /SourceImageFile:install.esd /SourceIndex:5 /DestinationImageFile:install.wim /Compress:max /CheckIntegrity
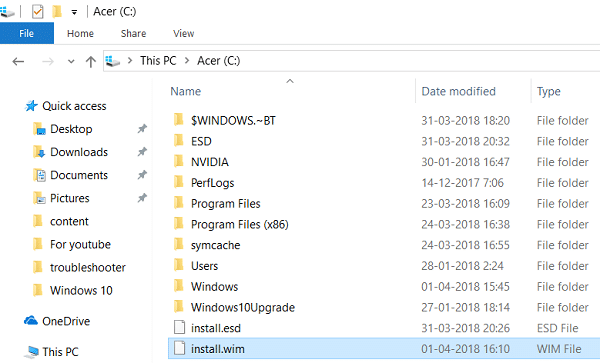
16. Once the above command finished execution, you will find the install.wim file created on the C: drive.
17. Again open the Command Prompt with admin rights then type the following command one by one and hit Enter after:
DISM / Online / Εικόνα εκκαθάρισης / StartComponentCleanup
DISM /Online /Cleanup-Image /AnalyzeComponentStore

18. Now type the DISM /RestoreHealth command with the Source Windows file:
DISM /Online /Cleanup-Image /RestoreHealth /Source:WIM:c:install.wim:1 /LimitAccess

19. After that run System File Checker to complete the repair process:
Sfc /Scannow
Συνιστάται:
Αυτό είναι που έχεις με επιτυχία Fix DISM Error 0x800f081f in Windows 10 αλλά αν εξακολουθείτε να έχετε ερωτήσεις σχετικά με αυτήν την ανάρτηση, μην διστάσετε να τις ρωτήσετε στην ενότητα των σχολίων.

