The autofill feature is an important part of the Outlook program. AutoComplete allows you to enter an entire email while composing a message with just one email initial. This feature helps you save time and gives you quick access to emails. However, sometimes users may experience Outlook AutoComplete not working issue; this issue can be caused for various reasons, such as an outdated Office version or bugs with the Outlook program. In this guide, we will discuss methods to resolve Outlook Address AutoComplete not working issue on your Outlook.

How to Fix Outlook AutoComplete Not Working Correctly
There can be various reasons for Outlook Autofill email address not working on your Outlook account; some of the most common reasons are mentioned here.
- If you have disabled AutoComplete in Outlook, you won’t be able to use this feature.
- Bugs and glitches with the Outlook program can also cause this issue.
- Issues with a user profile can also cause AutoComplete feature not working issue.
- Corrupt Outlook Add-ins can also cause this issue.
- Corrupt Outlook data PST files can also cause this issue with Outlook.
- Outdated or corrupt Microsoft Office updates can also cause this issue.
- A corrupt RoamCache folder can also cause this issue with Outlook.
Following are the troubleshooting methods to solve this problem.
Method 1: Enable AutoComplete in Outlook
If you have not enabled the AutoComplete feature in Outlook, you will not be able to use this feature. You will have to manually enable AutoComplete to resolve this Outlook address AutoComplete not working issue. You can follow these simple steps to enable AutoComplete in Outlook.
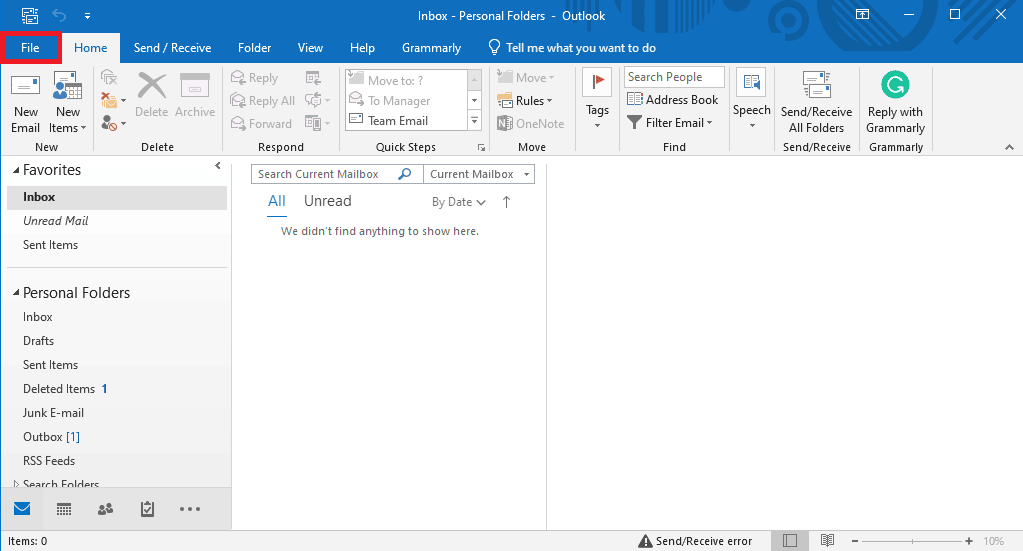
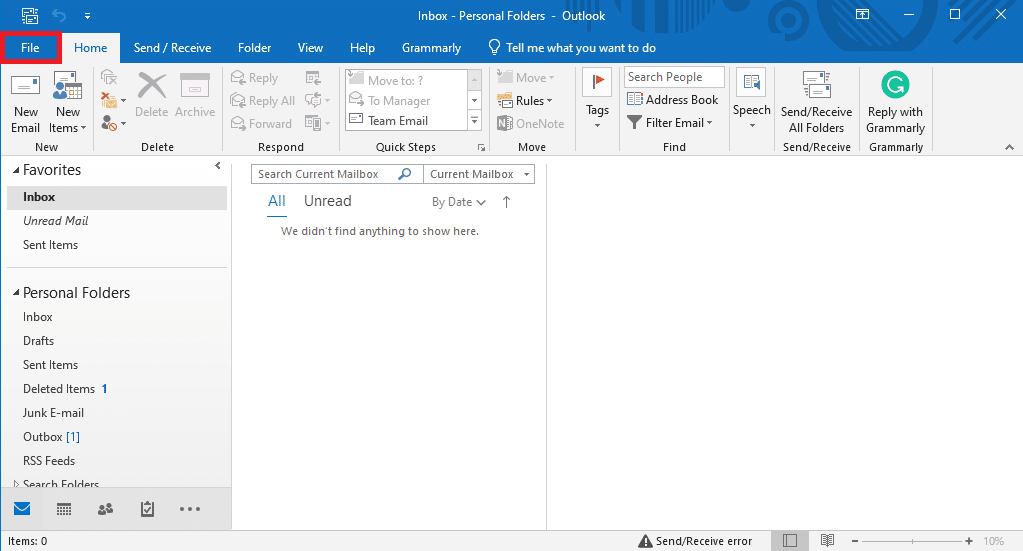
1. ανοιχτό Outlook, και περιηγηθείτε στο Αρχεία from the top-left side of the window.
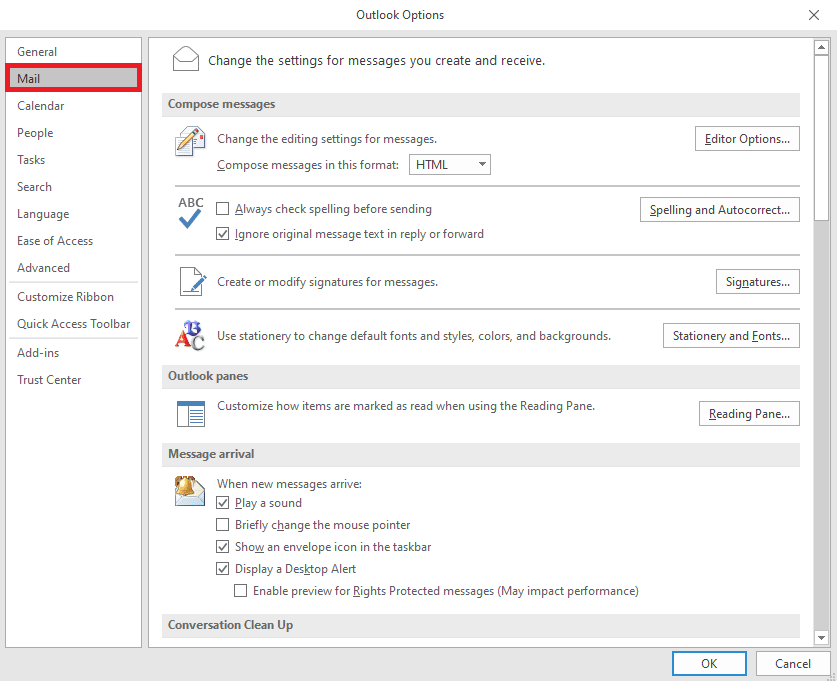
2. Here, from the left-side panel, click on Επιλογές.

3. Πλοηγηθείτε στο Ταχυδρομείο Tab.
4. Scroll down here, and locate Αποστολή μηνυμάτων επιλογές.
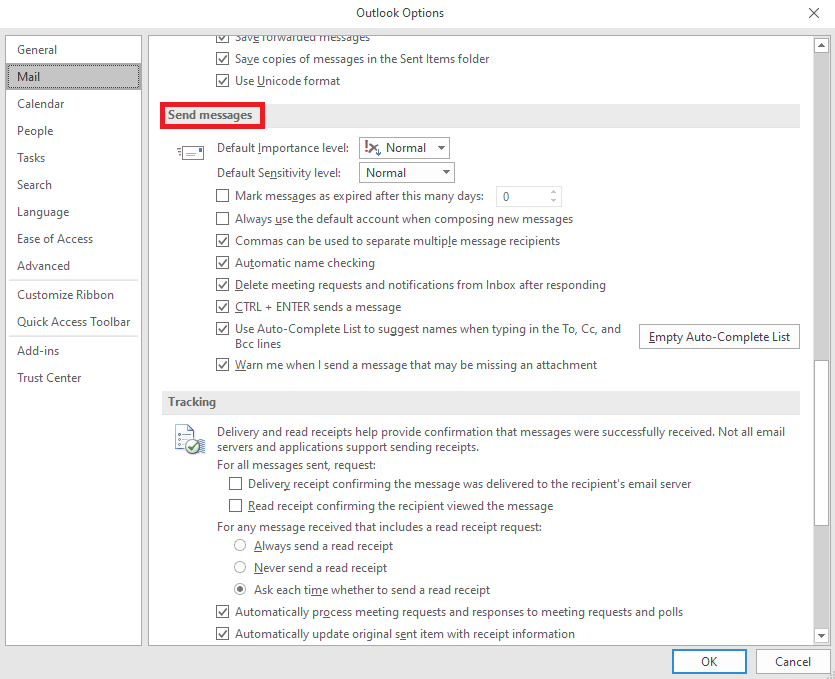
5. Here, check the Χρησιμοποιήστε τη λίστα αυτόματης συμπλήρωσης για να προτείνετε ονόματα κατά την πληκτρολόγηση στις γραμμές Προς, Cc και Bcc.
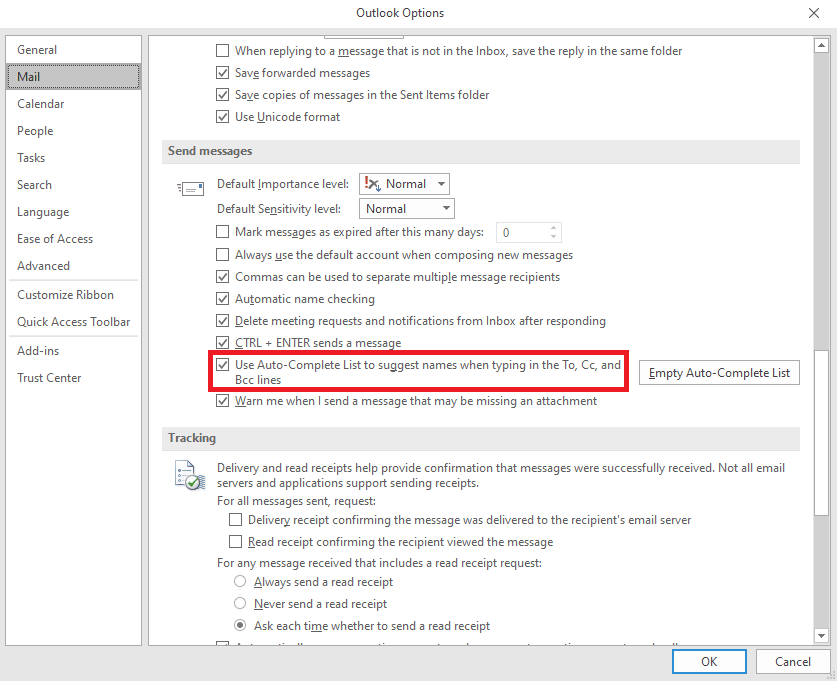
6. If you find this option already checked, click on the Κενή λίστα αυτόματης συμπλήρωσης.
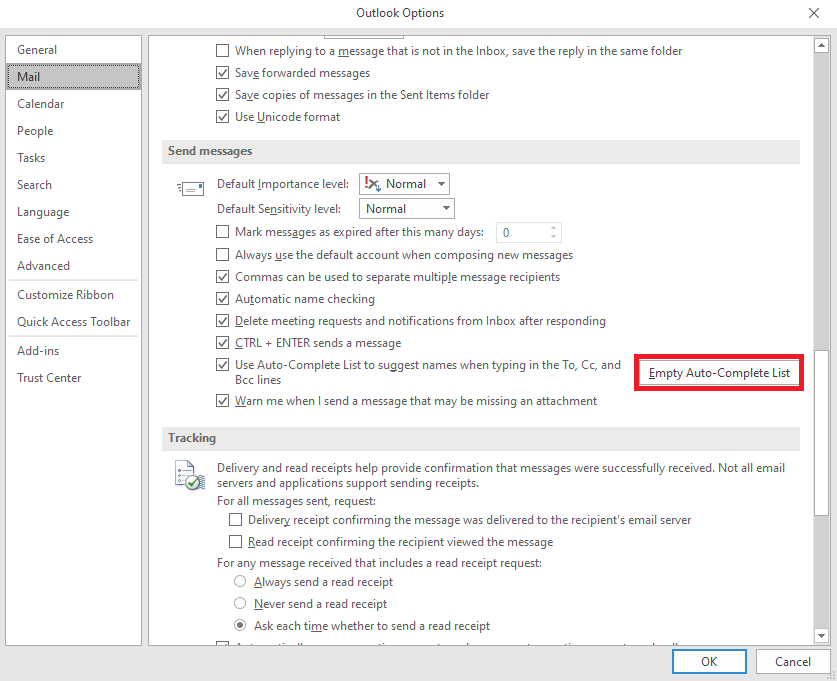
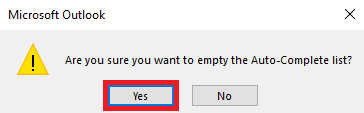
7. κλικ Ναι για να επιβεβαιώσετε τη δράση.
Method 2: Run Outlook in Safe Mode
Running programs in safe mode can help you avoid various issues. You can use safe mode to make the troubleshooting process easier and avoid hardware issues. You can follow these simple steps to run Outlook in safe mode to resolve Outlook autocomplete not working issue.
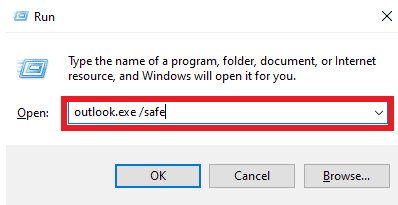
1. Τύπος Πλήκτρα Windows + R για να ανοίξετε το Run dialog box.
2. Στο παράθυρο διαλόγου Εκτέλεση, πληκτρολογήστε Outlook.exe/safe και πατήστε το Εισάγετε κλειδί.
Διαβάστε επίσης: Fix Outlook Trying to Connect to Server on Windows 10
Method 3: Run Outlook with Different Profile
Make sure the Outlook issue is happening only in your Outlook program and not on the entire system. You can try to log in to Outlook with a different profile. You can also add a different account on Outlook.
1. ανοιχτό θέα on your computer, and click on Αρχεία.
2. Στο Πληροφορίες Λογαριασμού page, locate and click on Προσθήκη λογαριασμού.
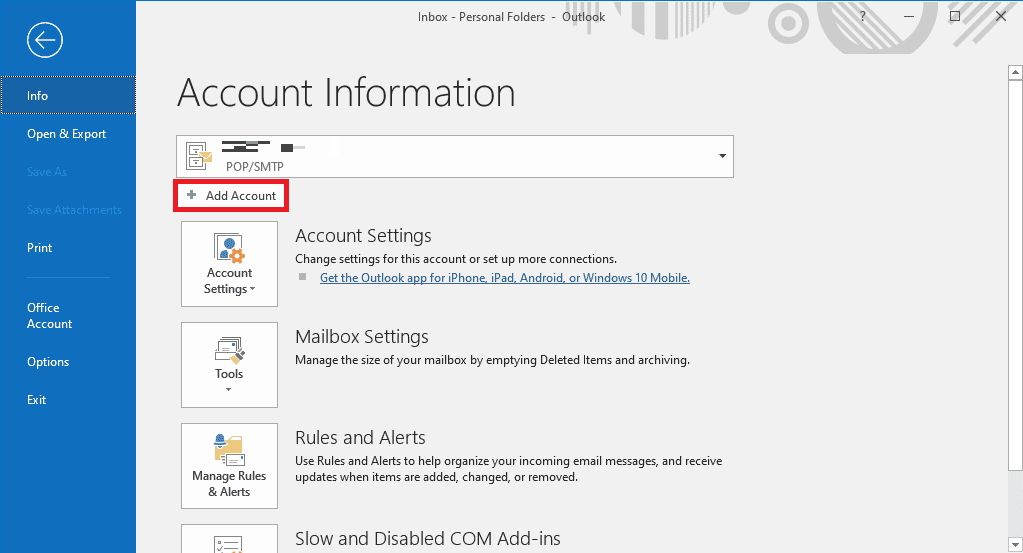
3. Πληκτρολογήστε το τα διαπιστευτήρια σύνδεσης for a different account.
Method 4: Disable Outlook Add-Ins
Sometimes, the issue can be caused by an Outlook Add-in. Ad-ins can be very useful and help you organize your Outlook application. However, if Outlook Add-ins get corrupt for some reason, you may experience various issues, such as AutoComplete not working on Outlook. To resolve these issues, you can try to disable Outlook Add-ins. You can follow these simple steps to disable Outlook Add-ins.
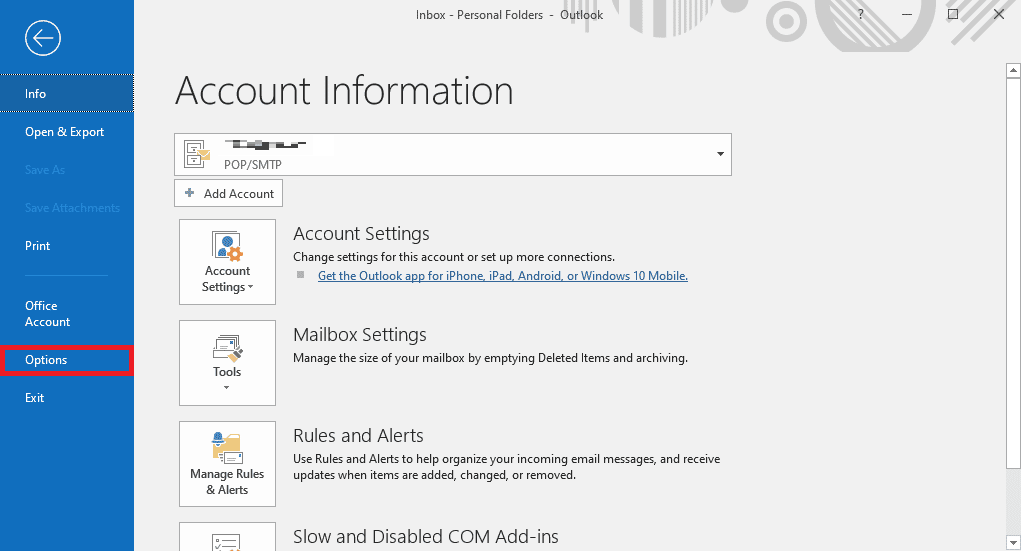
1. ανοιχτό θέα on your computer and navigate to Αρχεία.

2. Here, from the left-side panel, click on Επιλογές.
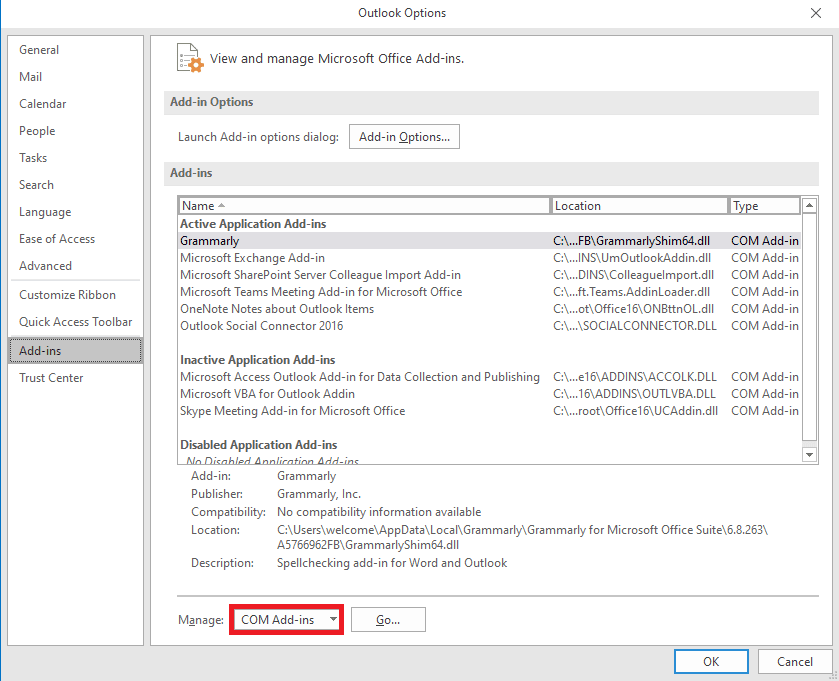
3. Now, locate and navigate to Add-ins.

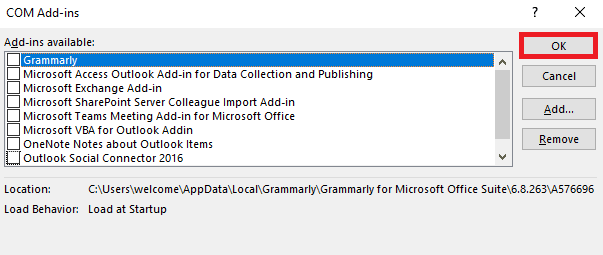
4. Εδώ, εντοπίστε το Διαχειριστείτε drop-down και επιλέξτε COM πρόσθετα.
5. Τώρα, κάντε κλικ Go.
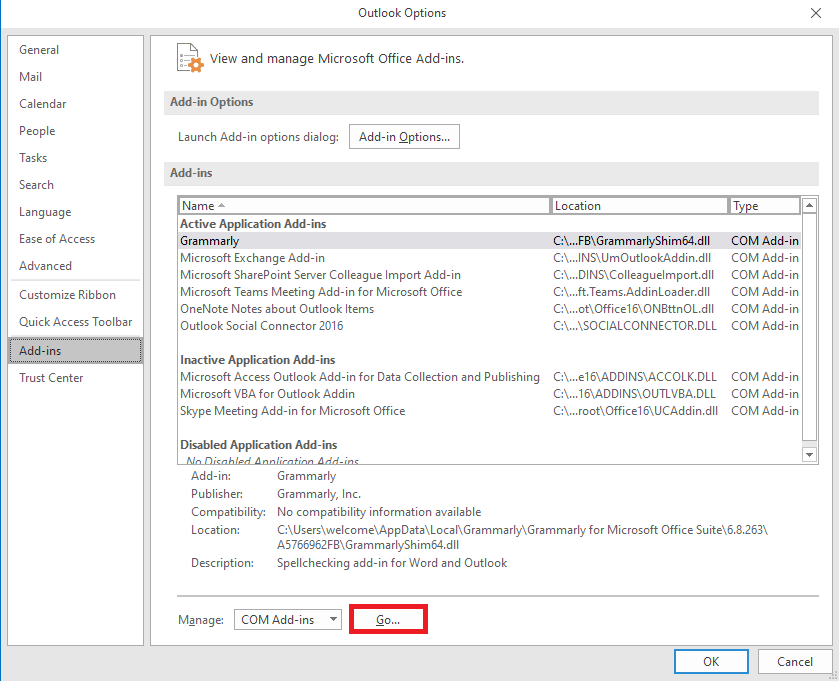
6. Εδώ, καταργήστε την επιλογή all the Add-ins and then click OK.
Method 5: Repair Outlook Data PST File
PST, or Personal Table Storage, files store Outlook emails; if this file is corrupt or causing issues, you may experience Outlook address AutoComplete not working error. You can use the Inbox repair tool to help you figure out a solution for this issue. Follow these simple steps to execute this method.
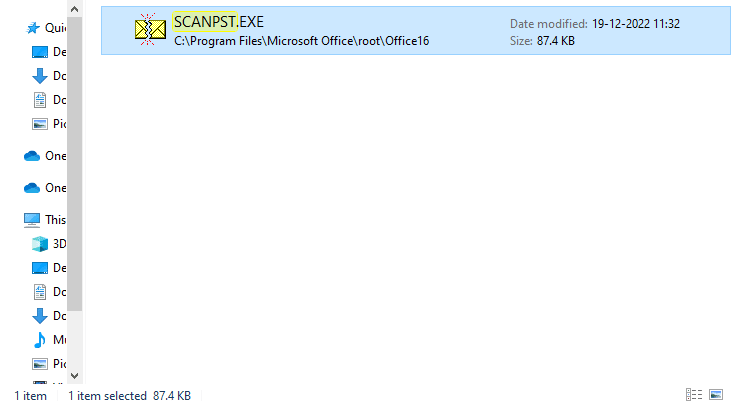
1. Ανοίξτε το θέα φάκελο Εξερεύνηση αρχείων.
C: Πρόγραμμα αρχείωνMicrosoft OfficerootOffice16
2. Κάντε κλικ στο SCANST.EXE αρχείο.
3. Τώρα, επιλέξτε το Αναζήτηση option to locate the file you wish to scan.
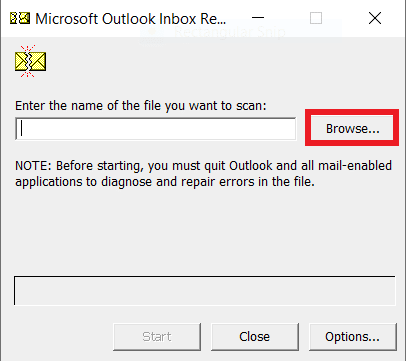
4. In the new dialog box, click on Αρχική.
5. Τέλος, κάντε κλικ στο επισκευή to fix all the PST file issues.
If this method does not fix Outlook autocomplete not working issue, move on to the next method.
Διαβάστε επίσης: How to Recover Deleted Draft in Outlook 365
Method 6: Update Microsoft Office
If the Microsoft Office program is experiencing bugs and glitches, updating it can help you fix the issues. An outdated Microsoft Office can make your Outlook vulnerable to bugs and other application issues. Therefore, manually updating Office is a great way to fix not just the AutoComplete issues but also other underlying issues with the Microsoft Office package. You can follow these simple steps to update Microsoft Office from the Microsoft Outlook program.
1. ανοιχτό θέα on your computer and navigate to Αρχεία.

2. From the left-side panel, click on the Λογαριασμός γραφείου.
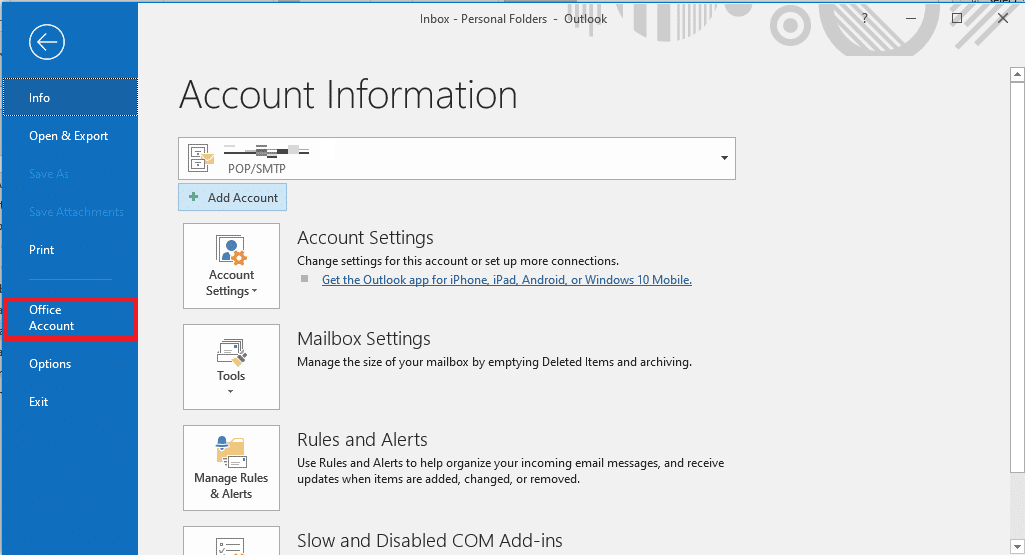
3. Here, locate Office ενημερώσεις.
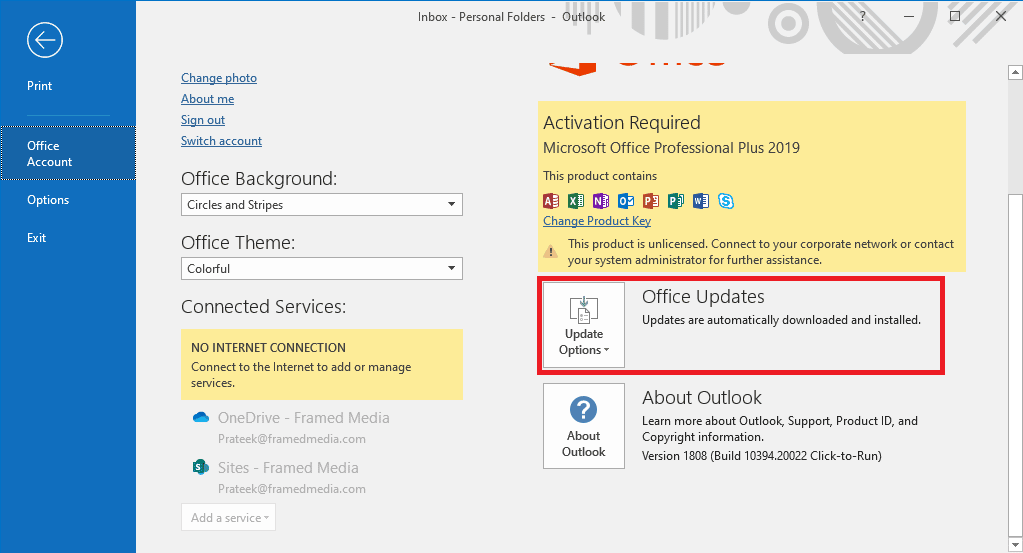
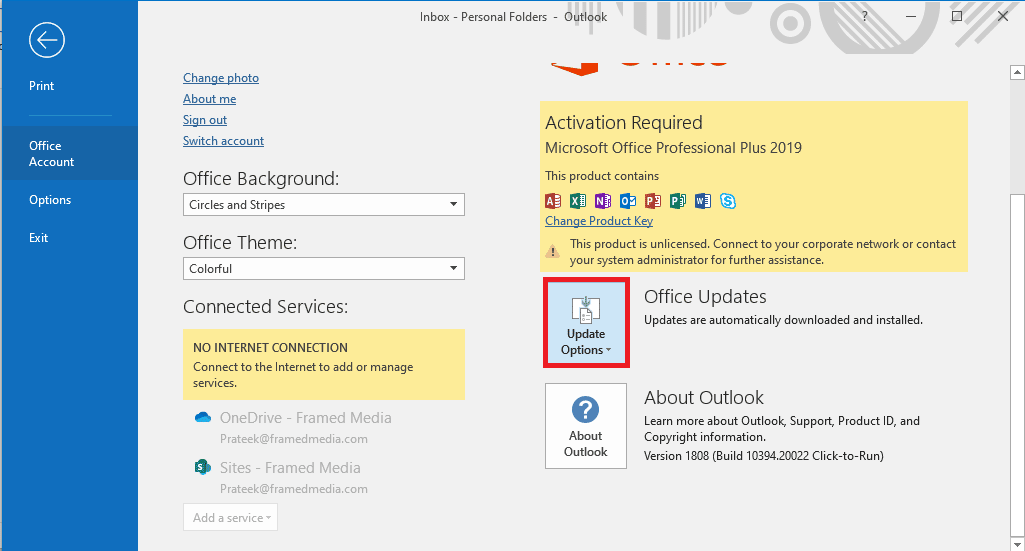
4. Τώρα, κάντε κλικ στο Επιλογές ενημέρωσης drop-down.
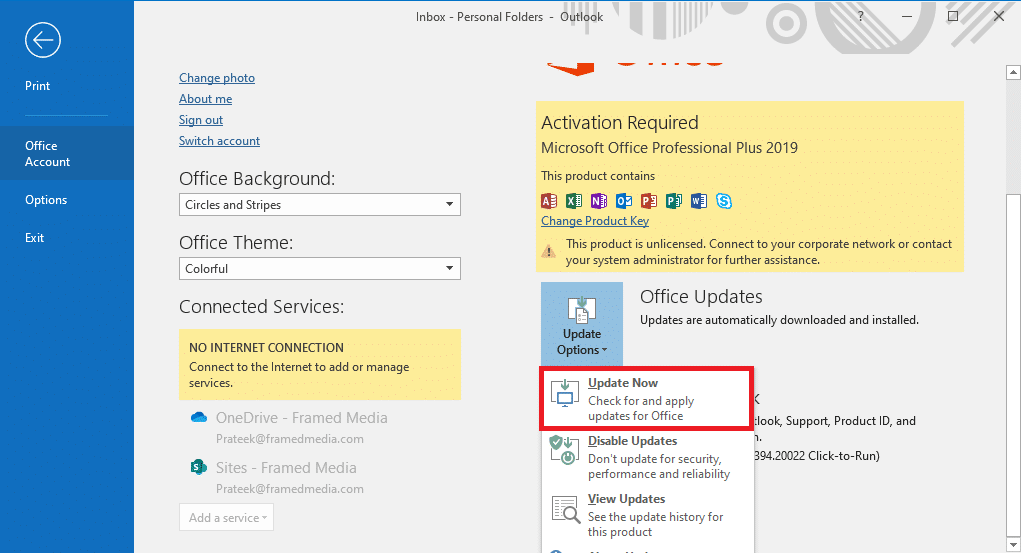
5. Τέλος, κάντε κλικ στο Ενημέρωση τώρα.
If this method does not fix Outlook Autofill email address not working issue, move on to the next method.
Method 7: Rename RoamCache Folder
If you have enabled the AutoComplete feature but still have the issue, it can be due to a corrupt RoamCache folder. You can fix this issue by resetting the AutoComplete folder. You will only need to rename the RoamCache folder in the directory. You can rename the RoamCache folder for both, a home email account and a Microsoft Exchange server account.
Option I: Rename RoamCache Folder for Home Email Account
You can follow these simple steps to rename the RoamCache folder in a home email account.
1. ανοιχτό θέα on your computer and navigate to Αρχεία.

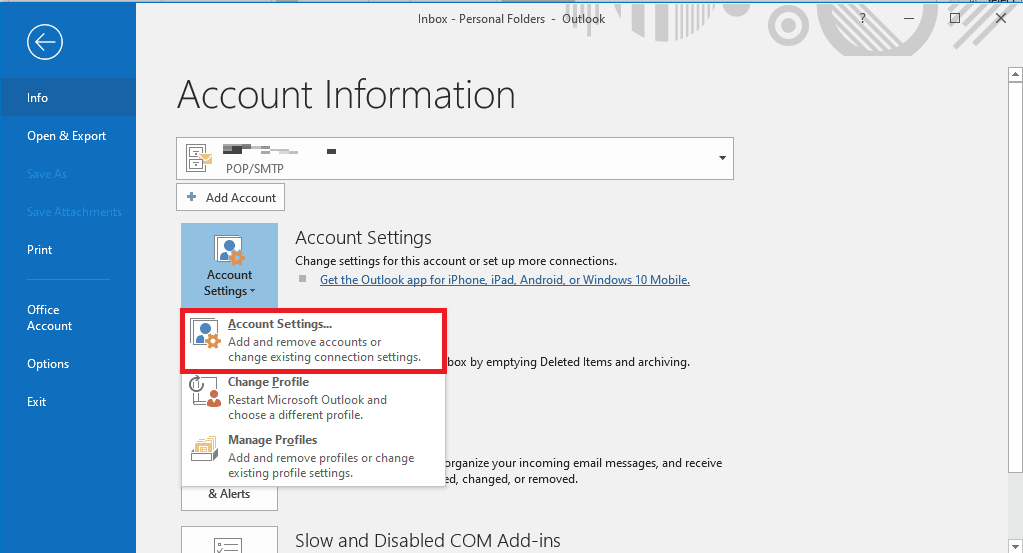
2. Τώρα, κάντε κλικ στο Ρυθμίσεις λογαριασμού drop-down and then select Ρυθμίσεις λογαριασμού.

3. Here, select your Home Email Account.
4. Κλεισιμο the Outlook program.
5. Τύπος Πλήκτρα Windows + E για να ανοίξετε Εξερεύνηση αρχείων.
6. Μεταβείτε στην ακόλουθη τοποθεσία μονοπάτι.
%LOCALAPPDATA%MicrosoftOutlook

7. Εδώ, εντοπίστε το RoamCache φάκελο.

8. Rename this folder with a new name.
Διαβάστε επίσης: Fix Your Microsoft Exchange Administrator Has Blocked This Version of Outlook
Option II: Rename RoamCache Folder for Microsoft Exchange Server Account
You can follow these simple steps to rename the RoamCache folder in a Microsoft Exchange server account to solve Outlook address AutoComplete not working issue.
1. ανοιχτό θέα on your computer and navigate to Αρχεία.

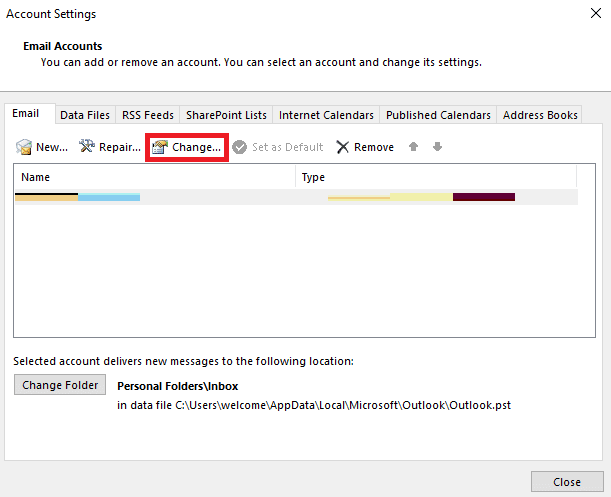
2. Τώρα, κάντε κλικ στο Ρυθμίσεις λογαριασμού drop-down and then select Ρυθμίσεις λογαριασμού.
3. Here, select your Microsoft Exchange Server Account.
4. Τώρα, κάντε κλικ στο Αλλαγή.
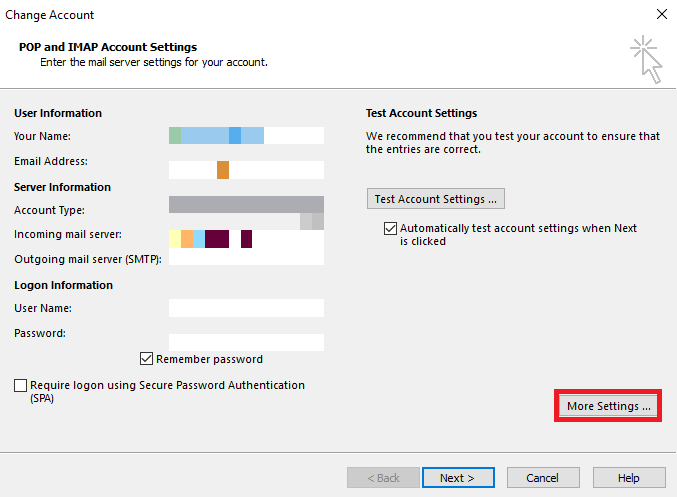
5. Εδώ, κάντε κλικ στο περισσότερες Ρυθμίσεις.
6. Πλοηγηθείτε στο Προηγμένη Tab.
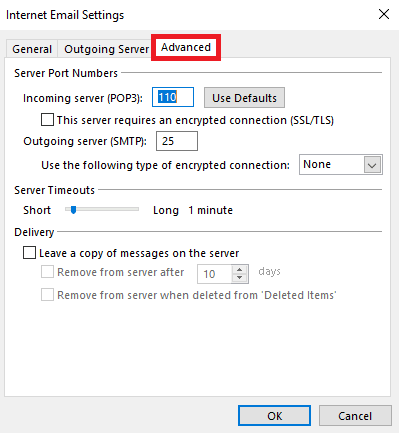
7. Unselect the Χρησιμοποιήστε τη λειτουργία Cached Exchange πλαίσιο και επιλέξτε Επόμενο.
8. Τέλος, κάντε κλικ στο φινίρισμα.
9. Κλείστε το θέα προγράμματος.
10. Τύπος Πλήκτρα Windows + E να ανοίξει ταυτόχρονα Εξερεύνηση αρχείων.
11. Στο Εξερεύνηση αρχείων, navigate to the following location μονοπάτι.
%LOCALAPPDATA%MicrosoftOutlook
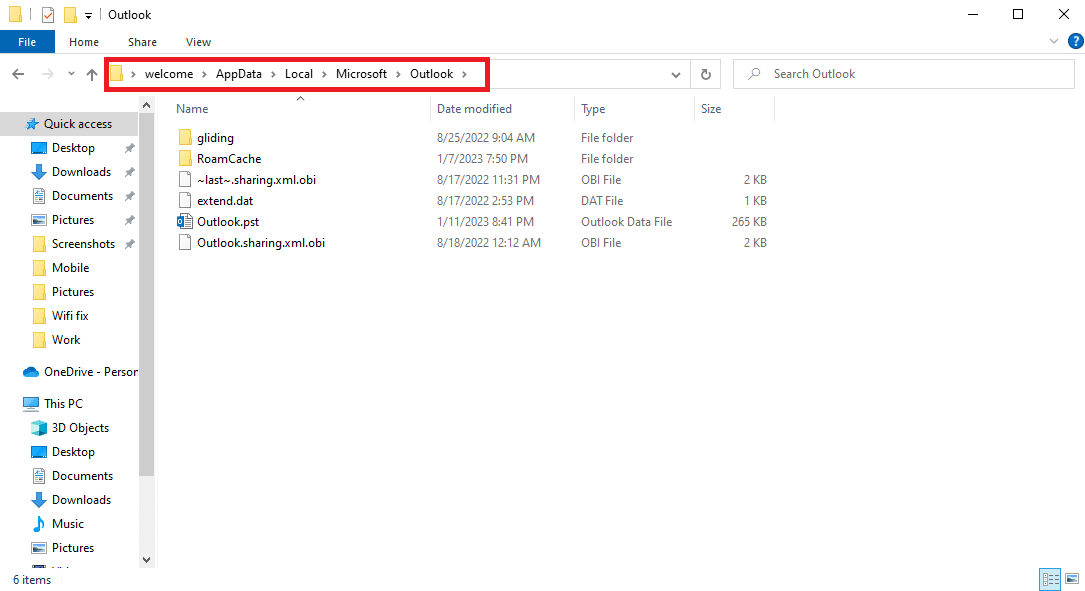
12. Εδώ, εντοπίστε το RoamCache φάκελο.
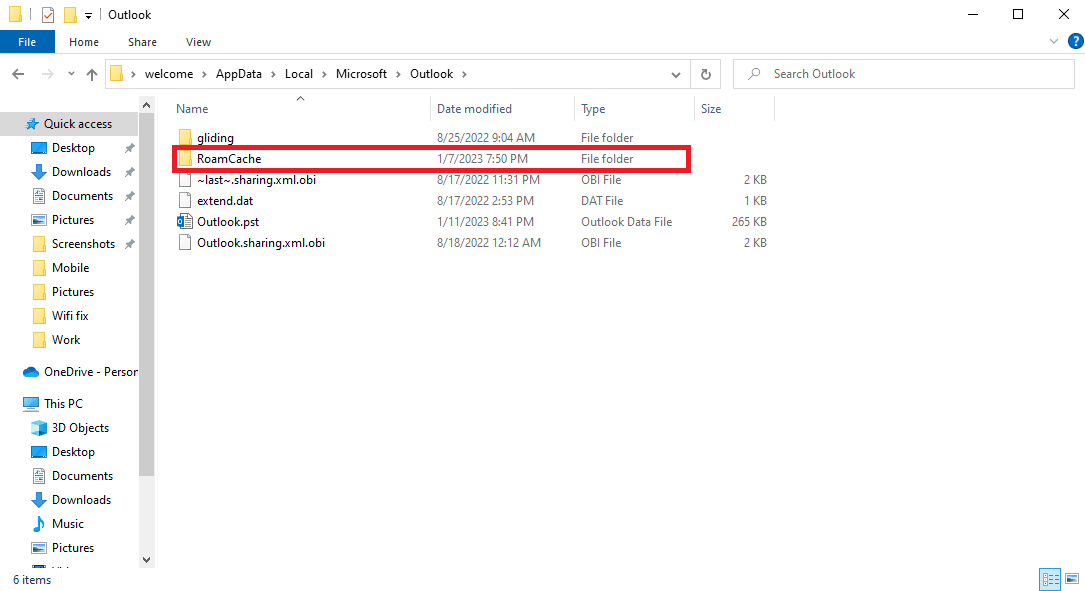
13. Rename this folder to old_RoamCache.
14. Τώρα, ανοίξτε το θέα program and follow the steps mentioned above to navigate to the Χρησιμοποιήστε τη λειτουργία Cached Exchange επιλογή.
15. Ελεγξε το Use Cached Exchange Mode.
16. Τέλος, επανεκκινήστε την εφαρμογή Outlook.
Συνιστάται:
Ελπίζουμε ότι αυτός ο οδηγός ήταν χρήσιμος για εσάς και μπορέσατε να το διορθώσετε Outlook AutoComplete not working θέμα. Ενημερώστε μας ποια μέθοδος λειτούργησε για εσάς. Εάν έχετε οποιεσδήποτε προτάσεις ή απορίες για εμάς, ενημερώστε μας στην ενότητα σχολίων.

