Are you facing issues with Realtek High Definition Audio Driver? Is Realtek HD Audio Manager missing from your Windows 10 Taskbar? Or there is no sound coming from your speakers in Windows 10? If you are finding the answer to the above questions, then you’re in the right place as today we will see How to Fix Realtek High Definition Audio Driver Issue.
Realtek HD Audio Manager is one of the best tools available for managing all your audio/sound needs in Windows 10. But what happens when you can’t find the Realtek HD Audio Manager icon on the Taskbar? Most of the users facing this issue complain that they are only having this issue after the Windows 10 upgrade or update.
There can be numerous underlying causes for this issue, but the main problem seems to be corrupt or outdated Realtek audio drivers. And if that’s the case, this issue can be fixed by re-installing Realtek audio drivers. Anyway, without wasting any time, let’s see How to Fix Realtek High Definition Audio Driver Issue.
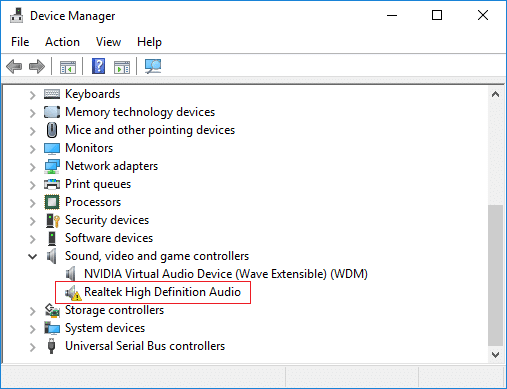
Σημείωση: Open Device Manager by pressing Windows Key + R then type devmgmt.msc and hit Enter. Next, expand Sound, video and game controllers and then check if you can see a κίτρινο θαυμαστικό επί "Realtek ήχου υψηλής πιστότητας“. If you can see the yellow exclamation mark then its confirm that this is a driver issue.
Fix Realtek High Definition Audio Driver Issue
Φροντίστε να δημιουργήσετε ένα σημείο επαναφοράς σε περίπτωση που κάτι πάει στραβά.
Method 1: Reinstall Realtek HD Audio Drivers
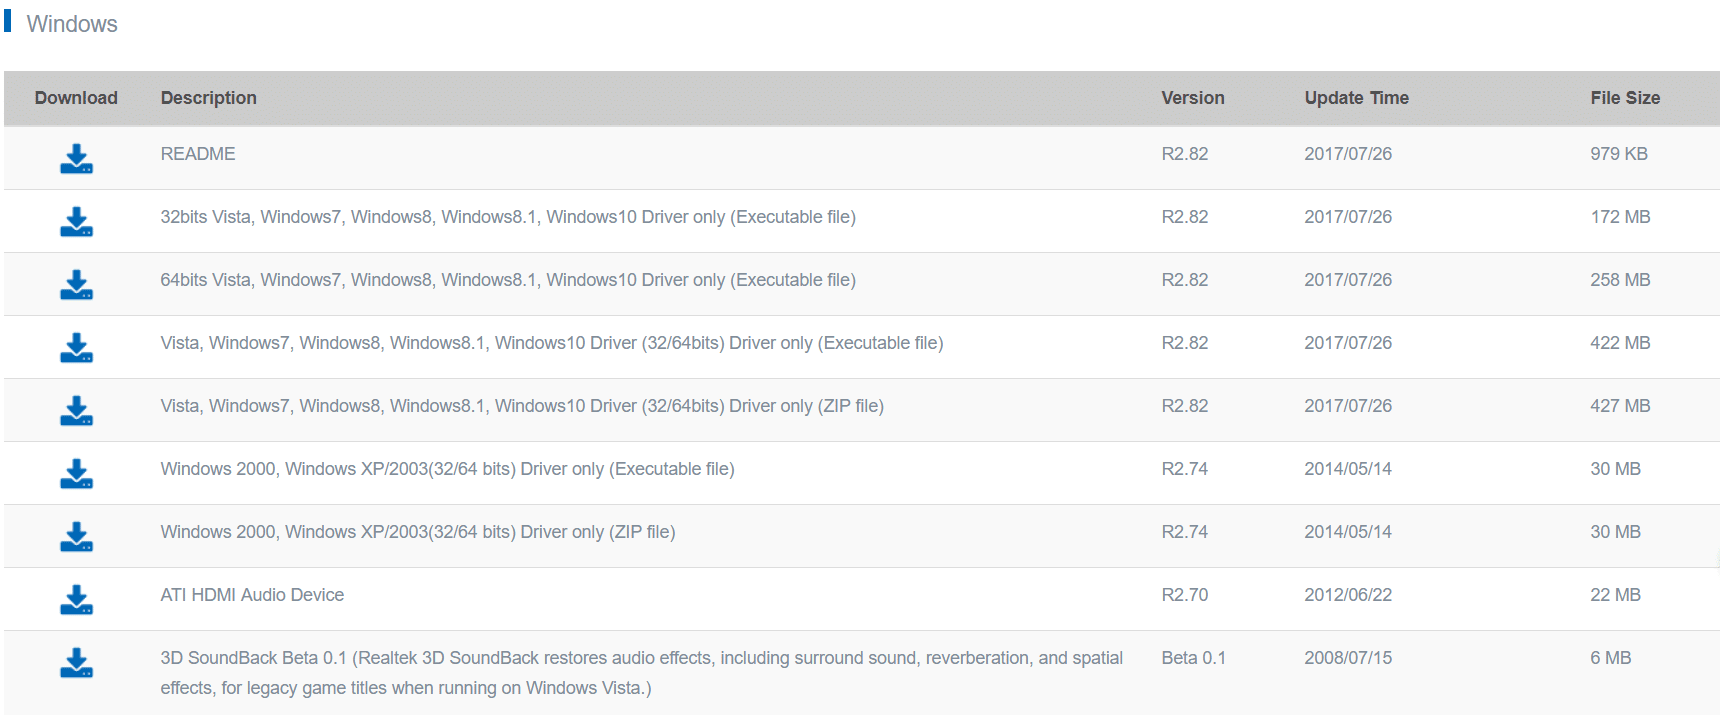
1. Open your favourite web browser, then navigate to this website.
https://www.realtek.com/en/component/zoo/category/pc-audio-codecs-high-definition-audio-codecs-software
2. Make sure to download the proper driver according to your system architecture.
3. Once the file is downloaded, double-click on the setup file and follow the on-screen instructions to install the latest Realtek High Definition Audio drivers.
Method 2: Manually Update Realtek Audio Drivers
1. Πατήστε Windows Key + R και μετά πληκτρολογήστε devmgmt.msc και πατήστε Enter για άνοιγμα Διαχειριστή της συσκευής.

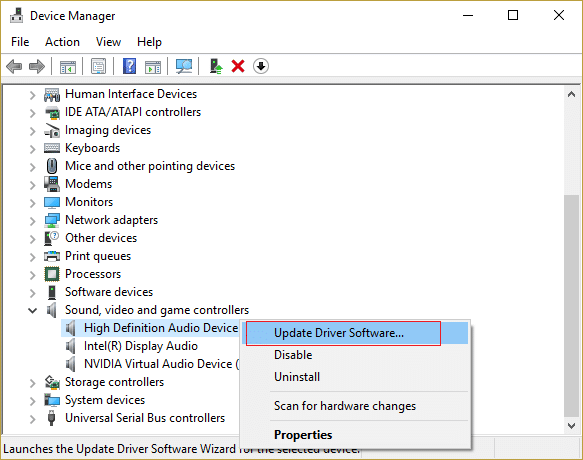
2. Expand “Ελεγκτές ήχου, βίντεο και παιχνιδιών” and then right-click on “Realtek ήχου υψηλής πιστότητας” & select Ενημέρωση προγράμματος οδήγησης.
3. On the next window, click on “Αναζήτηση αυτόματα για ενημερωμένο λογισμικό προγράμματος οδήγησης".

4. In case you already have the updated driver, then the following window will appear. If not then Windows will automatically update Realtek Audio drivers to the latest update available.
5. Once finished, reboot your PC to save changes.
If you’re still facing the Realtek High Definition Audio Driver Issue then you need to manually update the drivers, follow this:
6. If it wasn’t able to update your drivers then again right-click on “Realtek ήχου υψηλής πιστότητας” & select Ενημέρωση προγράμματος οδήγησης.
7. Αυτή τη φορά, επιλέξτε "Περιηγηθείτε στον υπολογιστή μου για λογισμικό προγράμματος οδήγησης."

8. Στη συνέχεια, επιλέξτε «Επιτρέψτε μου να διαλέξω από μια λίστα προγραμμάτων οδήγησης συσκευών στον υπολογιστή μου."

9. Επιλέξτε το κατάλληλο οδηγός από τη λίστα και κάντε κλικ στο κουμπί Επόμενο.
10. Αφήστε τη διαδικασία να ολοκληρωθεί και μετά επανεκκινήστε τον υπολογιστή σας.
11. Alternatively, go to your manufacturer’s website and download the latest drivers.
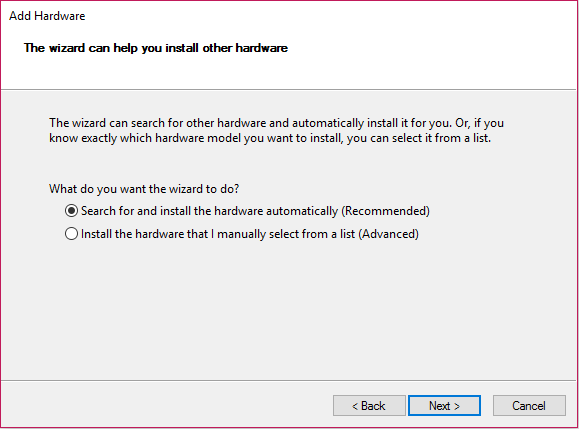
Μέθοδος 3: Χρησιμοποιήστε την προσθήκη παλαιού τύπου για να εγκαταστήσετε προγράμματα οδήγησης για την υποστήριξη παλαιότερης κάρτας ήχου
1. Πατήστε Windows Key + R και μετά πληκτρολογήστε "devmgmt.msc” (χωρίς εισαγωγικά) και πατήστε enter για να ανοίξετε τη Διαχείριση Συσκευών.
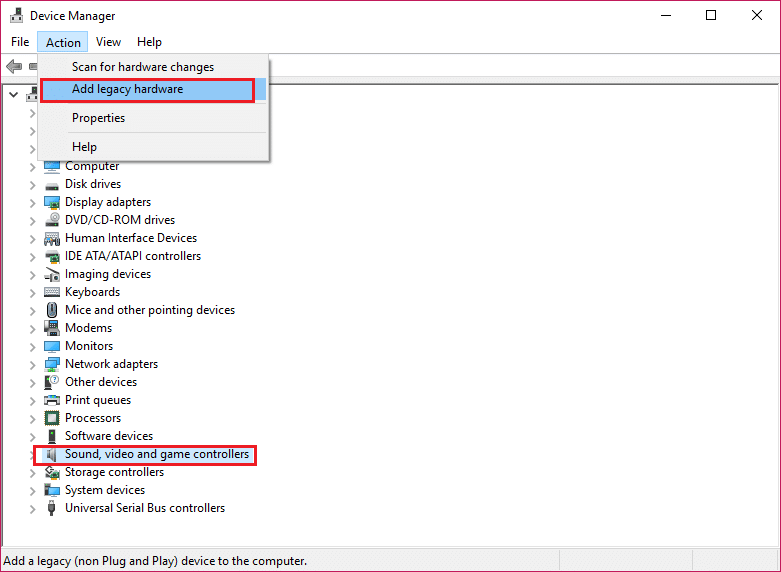
2. In Device Manager, select Ελεγκτές ήχου, βίντεο και παιχνιδιών και έπειτα κάντε κλικ στο Ενέργεια > Προσθήκη υλικού παλαιού τύπου.
3. κλικ Επόμενο, επιλέξτε "Αναζήτηση και εγκατάσταση του υλικού αυτόματα (Συνιστάται)".
4. Reboot your system to save changes and see if you’re able to Fix Realtek High Definition Audio Driver Issue.
Method 4: Uninstall Realtek High Definition Audio Driver
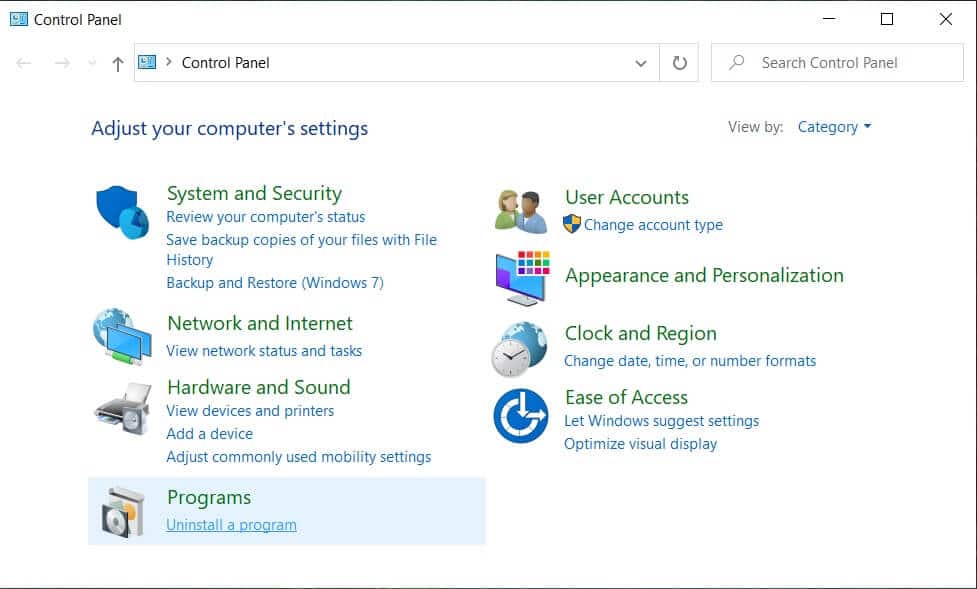
1. Αναζήτηση για το πίνακα ελέγχου από τη γραμμή αναζήτησης του μενού Έναρξη και κάντε κλικ σε αυτήν για να ανοίξετε το Πίνακας Ελέγχου.

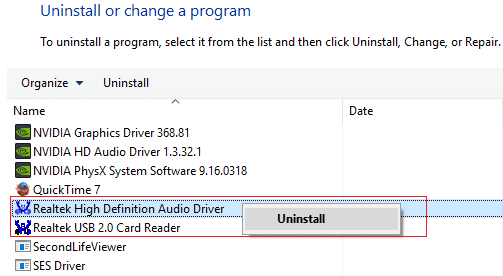
2. Κάντε κλικ στο Κατάργηση εγκατάστασης ενός προγράμματος και μετά αναζητήστε Είσοδος προγράμματος οδήγησης ήχου υψηλής ευκρίνειας Realtek.
3. Κάντε δεξί κλικ πάνω του και επιλέξτε απεγκατάσταση.
4. Επανεκκινήστε τον υπολογιστή σας και ανοίξτε Διαχείριση Συσκευών.
5. Κάντε κλικ στο Action και στη συνέχεια στο "Σάρωση για αλλαγές υλικού."

6. Το σύστημά σας θα γίνει αυτόματα install the Realtek High Definition Audio Driver.
Method 5: Disable Microsoft UAA Bus Driver for High Definition Audio
1. Πατήστε Windows Key + R και μετά πληκτρολογήστε devmgmt.msc και πατήστε enter για να ανοίξει Διαχειριστή της συσκευής.
2. Αναπτύξτε Συσκευές Συστήματος και κάντε δεξί κλικ επάνω Πρόγραμμα οδήγησης διαύλου Microsoft UAA για ήχο υψηλής ευκρίνειας Στη συνέχεια επιλέξτε Καθιστώ ανίκανο.
3. Τώρα επισκεφθείτε Realtek to download the latest driver, and it should now install without any problem.
Συνιστάται:
Αυτό είναι που έχεις μάθει με επιτυχία How to Fix Realtek High Definition Audio Driver Issue αλλά αν εξακολουθείτε να έχετε απορίες σχετικά με αυτό το σεμινάριο, μπορείτε να τις ρωτήσετε στην ενότητα των σχολίων.

