Millions of corporate offices and domestic industries use Epson scanners for their documentation processes. These Epson scanners are available as standalone or integrated models with a printer. Amidst many scanners in the world, Epson printers are known for their robustness and feature in scanning documents. Although these scanners have many advantages, few users complain Epson scan cannot communicate with the scanner Windows 10 issue. If you are also facing the same problem, we will help you fix the Epson scanner communication error with the help of effective troubleshooting hacks. So, continue reading to resolve Epson scanner cannot communicate issue.
How to Fix Epson Scanner Cannot Communicate in Windows 10
In this section, we have gathered a list of reasons why epson scan cannot communicate with the scanner issue on your Windows 10 PC. Analyze them deeply to pick the correct troubleshooting method accordingly.
- The scanning software is not running with administrative privileges. Hence, a proper connection is not established.
- The network adapter is not effectively communicating with the scanner.
- Few other background tasks are interfering with the scanner.
- Few essential background services are not running on PC.
- There are corrupt or broken files on your computer.
- Presence of malware or viruses.
- You are using an outdated version of the Windows operating system.
- The proxy connection is preventing the scanning operations.
- The scanner drivers are not compatible.
- The overprotective antivirus or firewall program is interfering with the functions.
Here are some effective troubleshooting methods to help you fix the Epson scanner communication error on your Windows 10 PC.
Metodo 1: Bazaj Problemo-Metodoj
Following are a few basic methods that you can follow;
1A. Fermu Fonajn Taskojn
Several users have confirmed that the Epson scanner communication error can be resolved by closing all the background tasks running on your PC. To implement the task, follow our guide on How to End Task in Windows 10 and proceed as instructed.
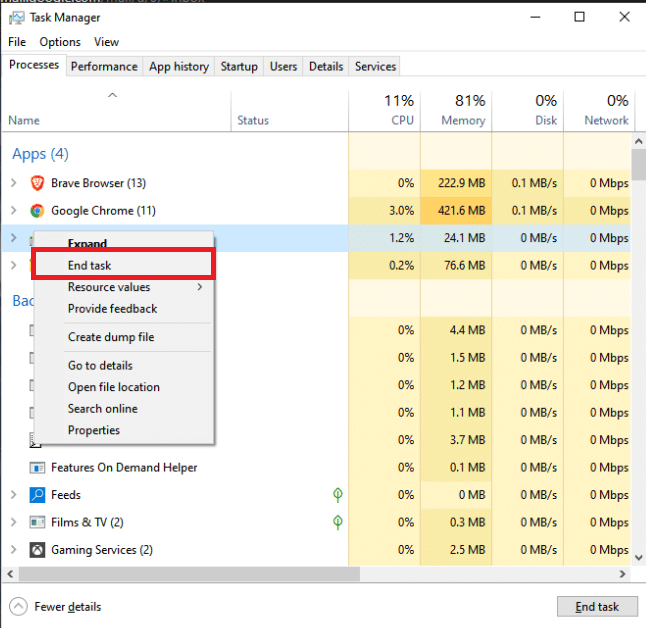
Once you have closed all the background processes, check if you could use the Epson scanner without any issues.
1B. Switch to Short USB Cables
Although many tech professionals suggest that devices can be connected through very long USB cables, this may lead to signal loss between the scanner and the network. If you have located the scanner in another corner of the room, try relocating it and connecting it using a short USB cable. Try this temporarily and check if this works or not. If it resolves the Epson scan cannot communicate with the scanner Windows 10 issue, the culprit is the long USB cables.
1C. Disable Proxy Server
Sometimes, with inappropriate network configurations on your Windows 10 computer, you will face communication errors of Epson scanners. If you have installed any VPN service or use proxy servers on your PC, read our guide on How to Disable VPN and Proxy on Windows 10 guide and implement the steps as instructed in the article.
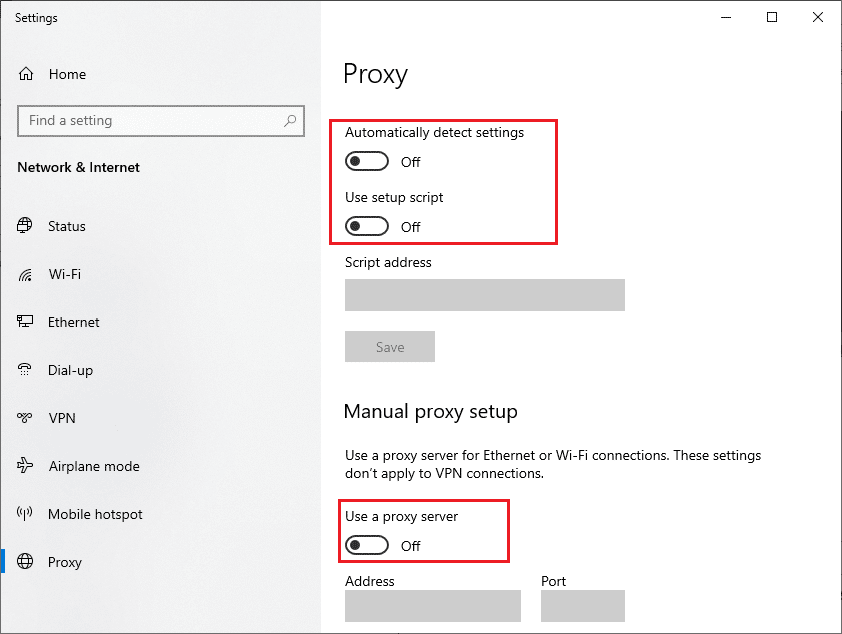
After disabling the VPN client and proxy servers, check if you have fixed the communication error of Epson scanners. Still, if you face the same problem, try connecting to a movebla hotspot.
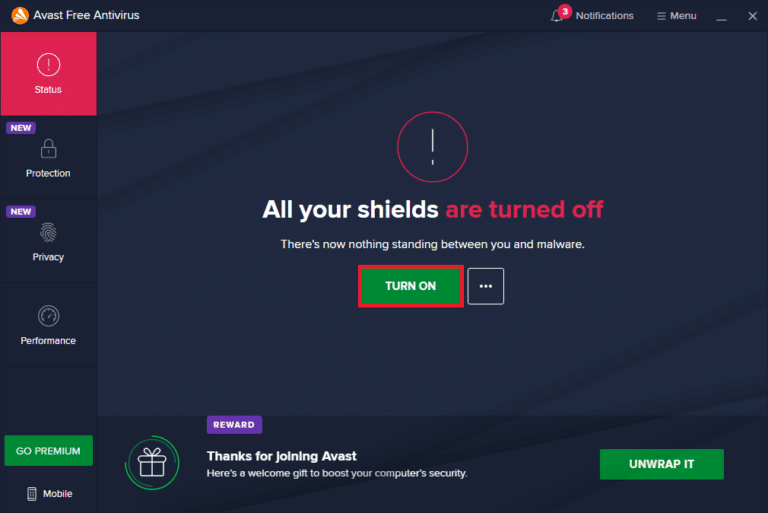
1D. Disable Antivirus Temporarily (If Applicable)
Your antivirus program may mistakenly prevent any updated features of Windows apps like Epson. Several Windows users identified many compatibility issues. They are difficult to tolerate and rectify. You are advised to temporarily disable any inbuilt or third-party antivirus software to resolve the communication error of Epson scanners. Read our guide on How to Disable Antivirus Temporarily on Windows 10 and follow the instructions to disable your Antivirus program temporarily on your PC.
Ankaŭ Legu: Kiel Malinstali McAfee LiveSafe en Vindozo 10
1E. Update Windows
You can also eradicate communication errors of Epson scanners in your computer by updating your operating system. Always ensure if you have updated your Windows Operating System and if any updates are pending in action, use our guide on How to Download and Install Windows 10 Latest Update.
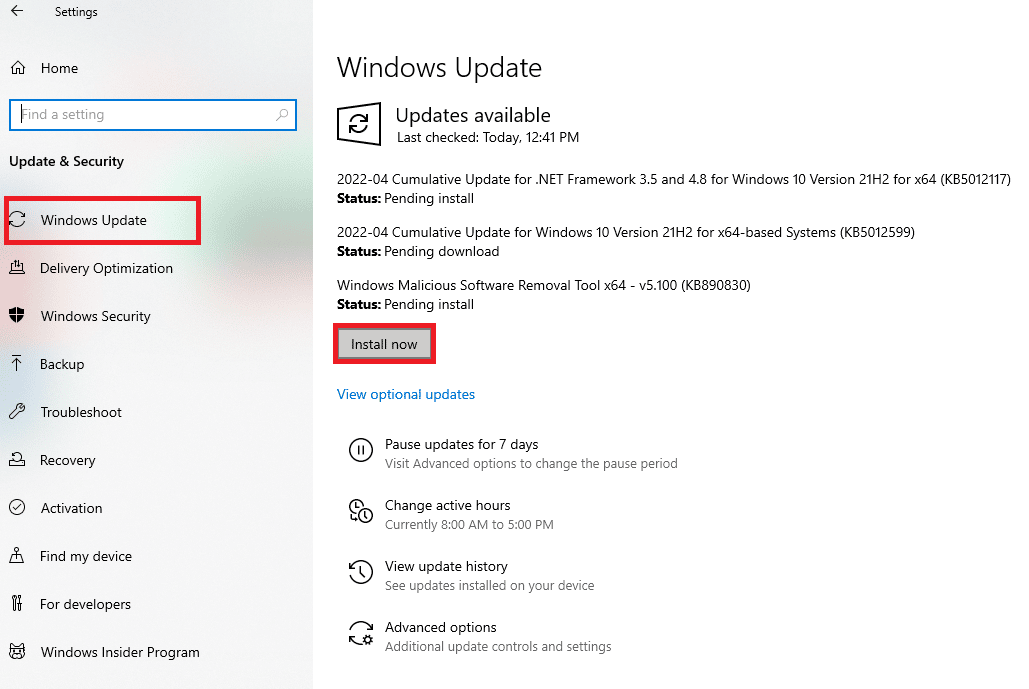
After updating your Windows operating system, check whether you can connect to your scanner.
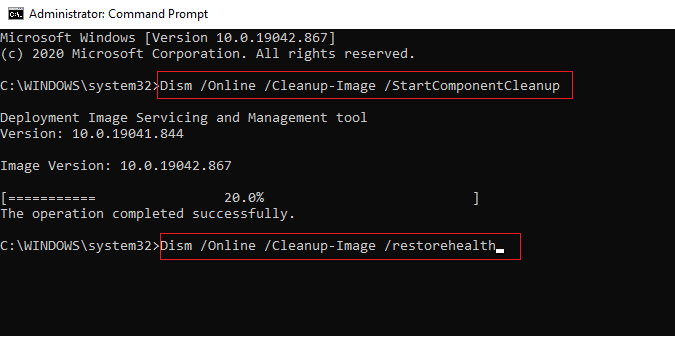
1F. Repair System Files
If corrupt system files are in your Windows Operating system, your PC may face many Internet connectivity issues. If you are experiencing communication errors with Epson scanners very recently, there are some chances that your computer files have become corrupt or damaged. Windows 10 PC has inbuilt repair tools like SFC (System File Checker) and DISM (Deployment Image Servicing and Management) that will help you fix all the corrupt files. Read our guide on How to Repair System Files on Windows 10 and follow the steps as instructed to repair all your corrupt files.
1G. Run Malware Scan
The presence of viruses causes conflicts and errors like communication errors of Epson scanners. So, install reliable antivirus software on your computer and run a complete scan. If you are confused about running a malware scan, our guide on How do I Run a Virus Scan on my Computer? will help you do so.
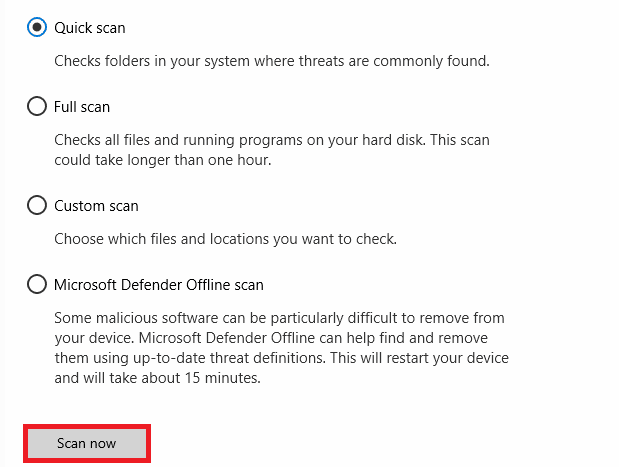
Also, if you want to remove malware from your computer, check our guide on How to Remove Malware from your PC in Windows 10.
Method 2: Run Scanner Software with Admin Privileges
You must first try to run the scanning application with admin rights. Several apps and programs that require input from any external source will require admin rights. Hence, follow the below-mentioned steps to do the same.
1. Dekstre alklaku la Skanado Epson mallonga vojo on the desktop and select Propraĵoj.
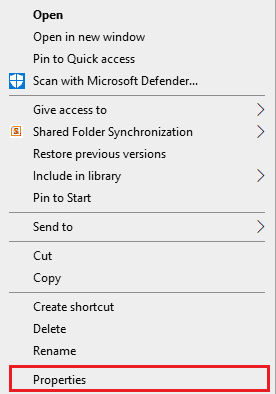
2. Poste, ŝanĝu al la kongruo langeto kaj kontrolu la skatolon Ruli ĉi tiun programon kiel administranto.
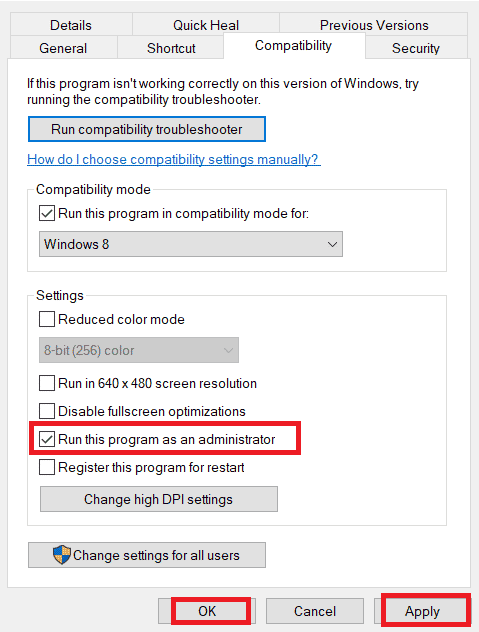
3. Fine, alklaku Apliki> Bone por savi la ŝanĝojn.
Ankaŭ Legu: Kiel Trovi Administran Pasvorton En Vindozo 10
Metodo 3: Kuru Reto-Problemon
To fix various internet connectivity issues, you can use the inbuilt tool provided in Windows 10 PC whenever needed. You can analyze and diagnose common network-related issues using the Windows network troubleshooter tool. It is a systematic process that, when implemented step by step, will help you fix the Epson scanner that cannot communicate issue. Follow our guide on How to Troubleshoot Network Connectivity Problems on Windows 10 to fix all network-related issues using a Network Adapter troubleshooter.

You can use the steps mentioned in the guide to diagnose Wi-Fi connections, Ethernet, and all network adapters on your Windows 10 PC. Finally, check if you have fixed the communication error of Epson scanners.
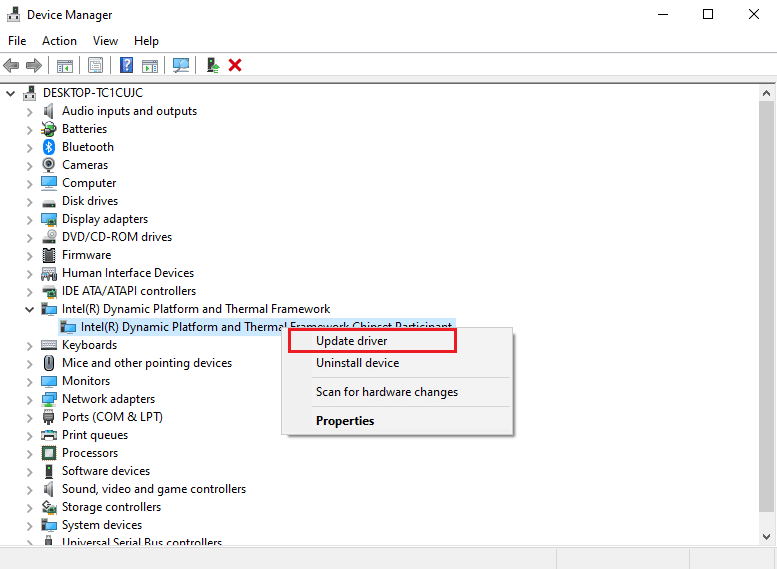
Method 4: Update Scanner Drivers
Device drivers establish a connecting link between your computer’s hardware and operating system. Also, faulty or corrupt drivers lead to a communication error in Epson scanners. Many users have reported that updating WLAN drivers have helped them fix the issue. You are advised to update scanner drivers to improve the reliability of your network adapters, fix compatibility issues, and resolve communication error. Follow our guide on How to Update Device Drivers on Windows 10 to do so. Make sure you expand Image devices kiel montrita sube.
Ankaŭ Legu: Fix Set User Settings to Driver Failed in Windows 10
Method 5: Roll Back Scanner Drivers
When you roll back your drivers, all the current versions of the hardware device will be uninstalled, and previously installed drivers will be installed on your PC. This feature will be very helpful when any new driver update does not work well with your computer. Follow the steps as instructed in our guide on How to Rollback Drivers on Windows 10 to fix the Epson scanner communication error.
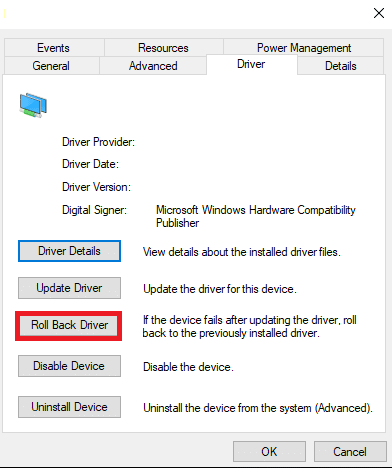
After your Windows 10 computer has installed the previous version of drivers, check if you have fixed the communication error of Epson scanners.
Method 6: Reinstall Scanner Drivers
Incompatible drivers must be reinstalled to fix the Epson scanner cannot communicate problem. You are advised to reinstall device drivers only if you cannot attain any fix by updating them. Steps to reinstall drivers are very easy, and you can do so by using a third-party application or manually. Follow our guide on How to Uninstall and Reinstall Drivers on Windows 10 to reinstall drivers on your Windows 10 computer. Make sure you expand Image devices kiel montrita sube.
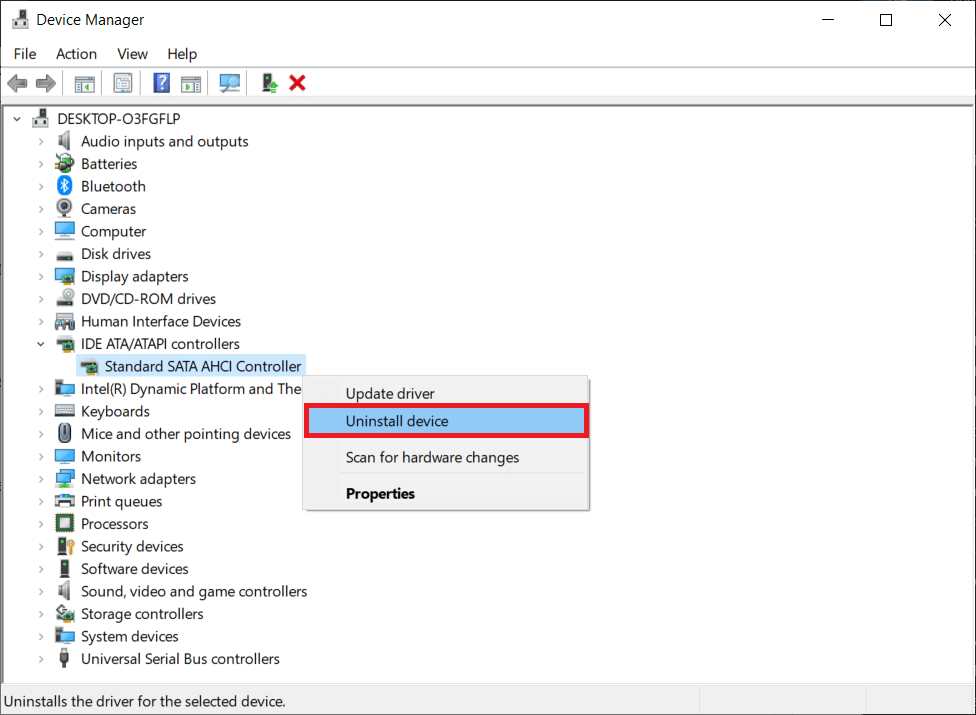
After reinstalling scanner drivers, check if you have fixed the communication error of Epson scanners.
Ankaŭ Legu: Ripari eraron pri Bluetooth-ŝoforo en Windows 10
Method 7: Restart Shell Hardware Detection Service
The Shell Hardware Detection service detects whether any other hardware is connected to your system or not and detects all the scanners, storage devices, and printers connected to your device. It provides notifications for AutoPlay hardware events. If this service is stopped for any reason, you will face an Epson scanner cannot communicate error. Follow the below-mentioned steps to restart this service:
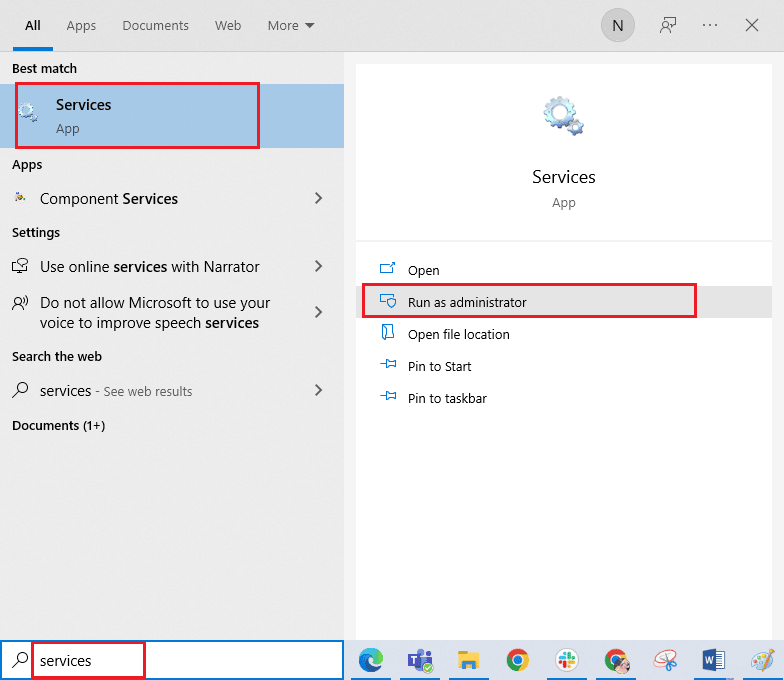
1. Tajpu servoj en la serĉmenuo kaj alklaku Ruli kiel administranto.
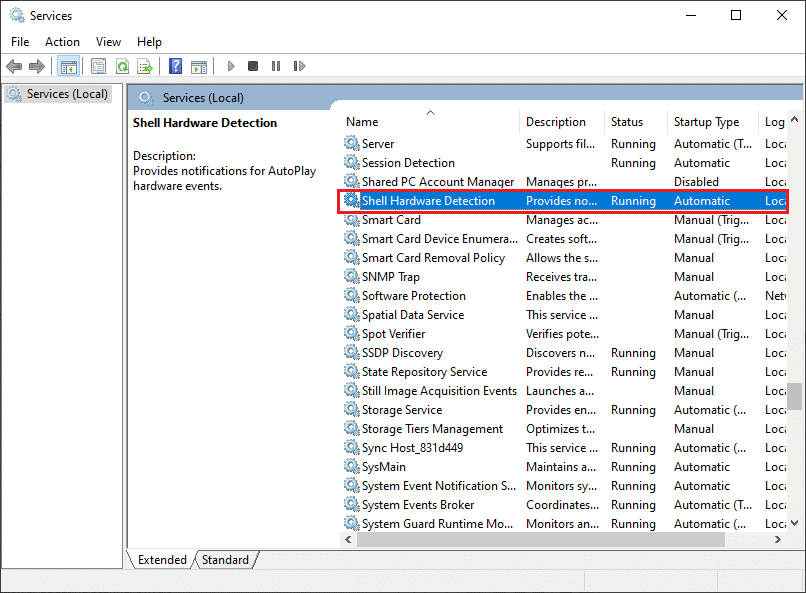
2. Nun, rulumu malsupren kaj duoble alklaku la Shell Hardware Detection servo.
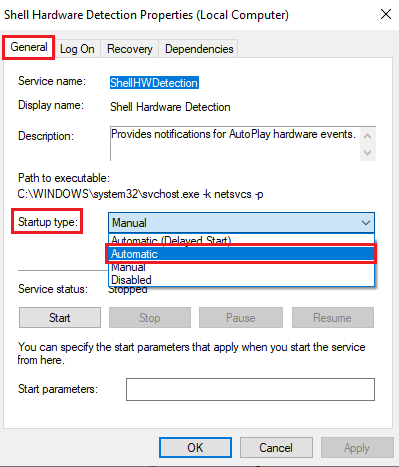
3. In the new pop-up window, select the Startup-tipo al aŭtomata.
Noto: se la Serva stato is Ĉesis, alklaku la komenco butono. Se la Serva stato is kurante, alklaku ĉesigi kaj Komencu ĝin denove.
4. Alklaku Apliki> Bone por savi la ŝanĝojn.
5. Unplug your scanner and wait for a while. Re-plug it back.
6. Ripetu la samajn paŝojn por Windows Image Acquisition Service and check if this works or not.
Method 8: Fix Wireless Connection
In several cases, the Epson scan program on your PC fails to establish the connection between the LAN addresses automatically. This happens more often when you use a wireless network. Even though you can find the addresses within the app, this does not always work. Hence, manually add the address as instructed below.
1. Tajpu Epson Scan Agordoj in the search menu. Now, click on malfermita.
2. In the Scan Settings, select Aldoni opcio sub Network Scanner Address.
Noto: Ensure you select the correct scanner with the help of the Elektu Skanilon drop-down menu at the top.
3. Now, a screen to enter the address will pop up. Follow the below-mentioned steps to find the correct address.
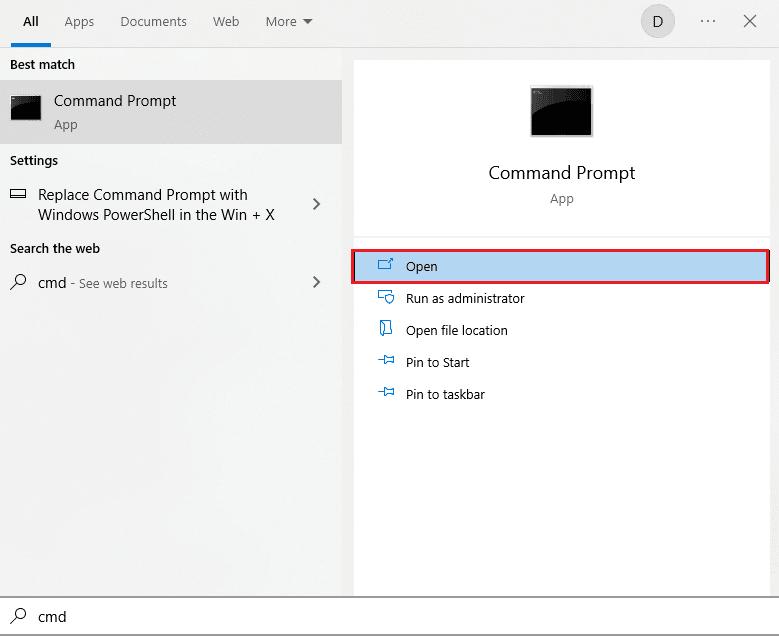
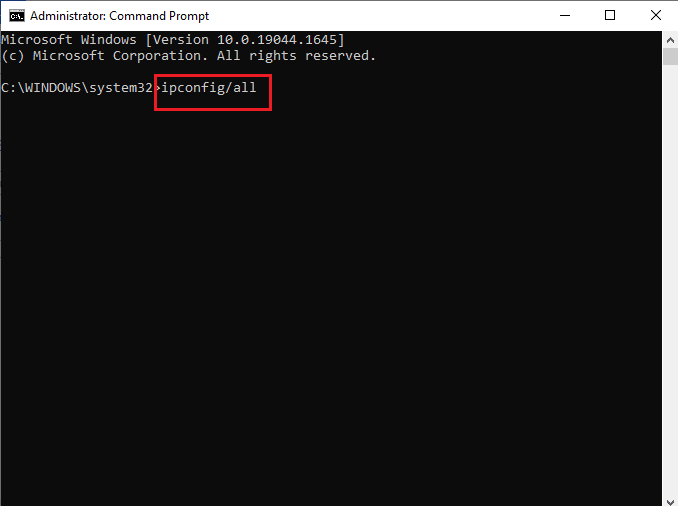
4. Tajpu cmd in the search bar and click on malfermita.
5. Poste, tajpu ipconfig / ĉiuj komandu kaj frapu la Enigu ŝlosilon.
6. Now, note down the Defaŭlta Enirejo detail from the window.
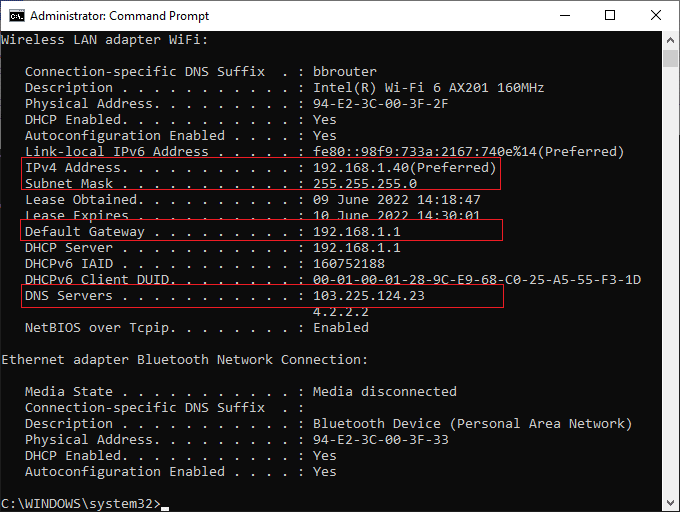
7. Copy this adreso (here, 192.168.1.1) and type it in your browser to access your router.
8. Note down the list of devices connected to the network. On the same screen, you can find the IP address of your scanner. Note down its value.
9. Tiam, iru al la Aldoni window of the Scan settings window and type the IP address of your scanner under Enigu adreson menuo.
10. Alklaku OK por savi la ŝanĝojn.
Noto: Vi ankaŭ povas alklaki testo to ensure the connection is successful.
Ankaŭ Legu: Ripari Via Komputilo Ŝajnas Ĝuste Agordita Sed DNS Ne Respondas en Vindozo 10
Method 9: Turn Off Password Protected Sharing
The Password Protected sharing setting is intended to keep the sharing of files and folders safe and secure. If this setting is turned on, the users connected to your network cannot access the files on your PC unless the privacy password is typed in manually. Several reports suggest that this feature triggers an Epson scan cannot communicate with the scanner error. Hence, you have to disable this setting, reconnect the scanner, and check if this works or not.
Noto: You must always turn on the setting if things do not go smoothly.
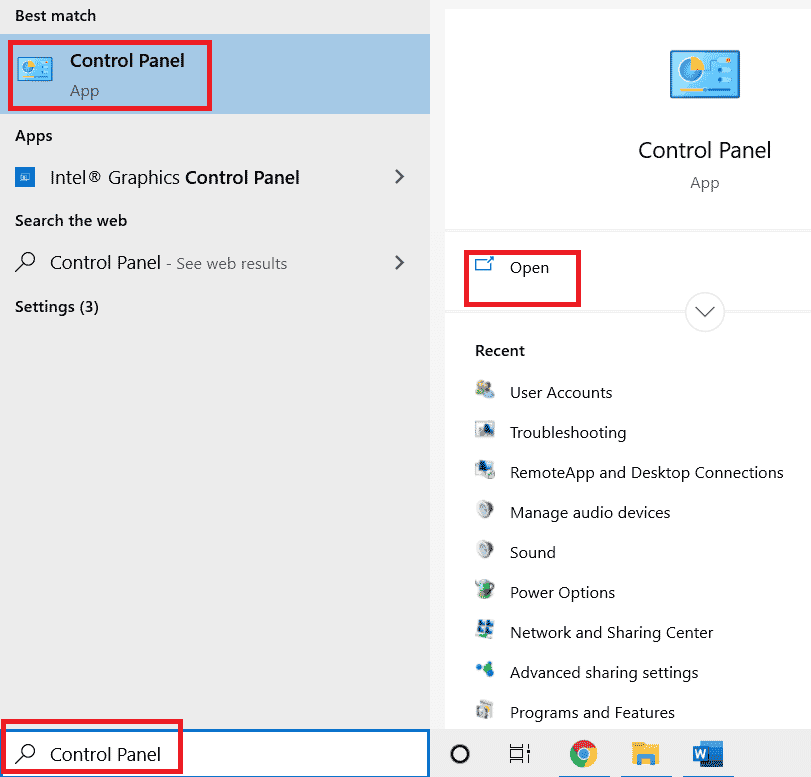
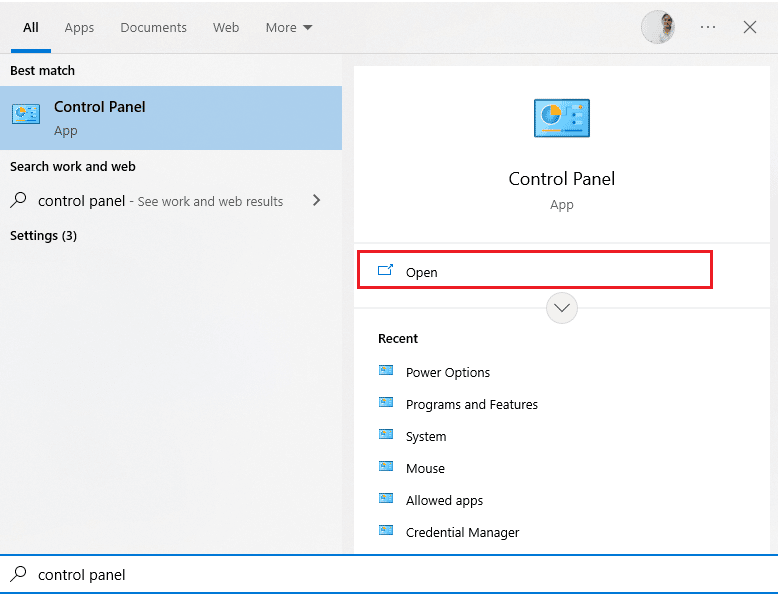
1. Tajpu kontrolo Panelo in the search bar and click on malfermita.
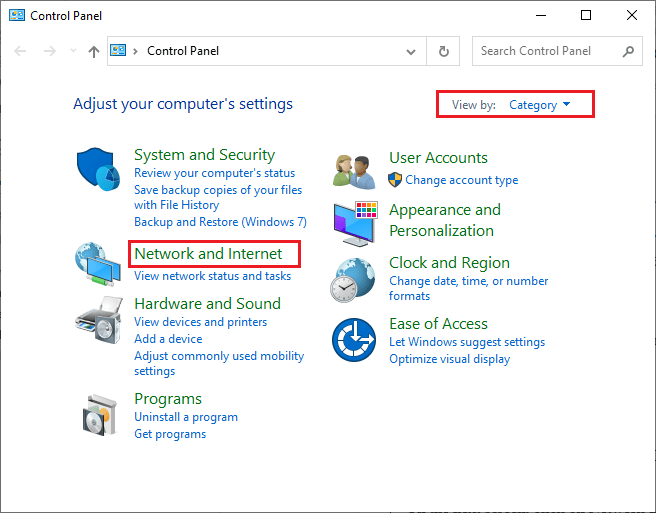
2. Then, set the Rigardu per as kategorio kaj alklaku Reto kaj Interreto.
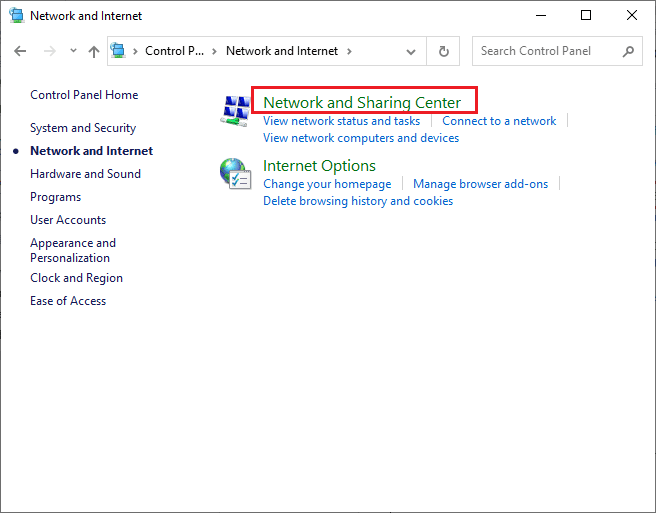
3. Nun, alklaku Reto kaj Sharing Centro kiel bildigite.
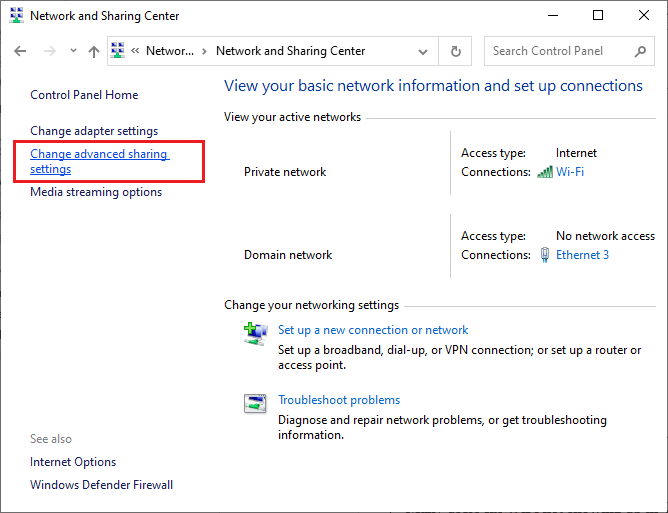
4. Nun, alklaku la Ŝanĝi antaŭenajn interŝanĝajn agordojn ligilo kiel montrite.
5. Pligrandigi la Ĉiuj Retoj sekcio kaj alklaku la Malŝalti komunan protektitan pasvorton elekto.
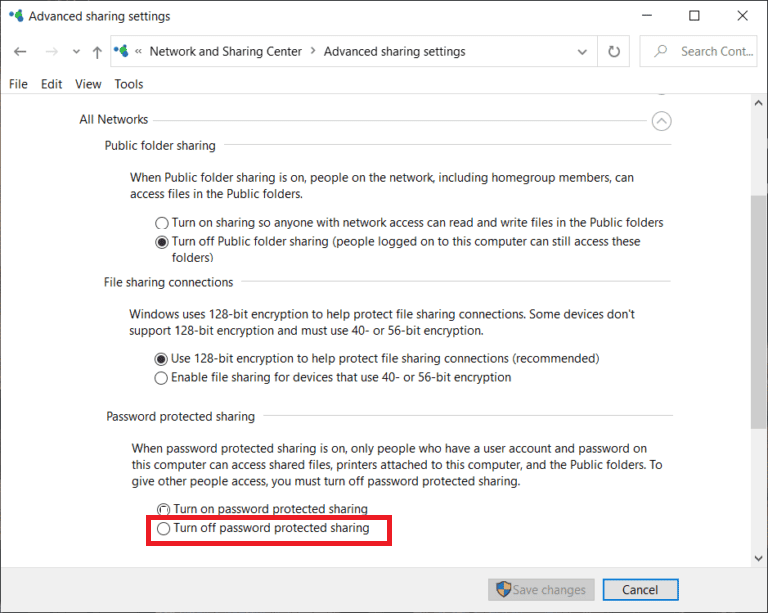
6. Nun, alklaku Konservu ŝanĝojn and unplug the scanner for a minute. Rekonekti your scanner and check if the connection error has vanished or not.
Method 10: Change Ports from LPT1 to USB 001
An old Line Print Terminals technology was used earlier to connect your printers and scanners. Now, most printers and scanners have switched to USB. Hence, check if USB is used in your device and whether this works. This method effectively fixes the Epson scanner cannot communicate if you face the problem after upgrading to Windows 10.
1. Batu la Vindozo-ŝlosilo kaj tajpu Kontrolo panelo. Poste, alklaku malfermita.
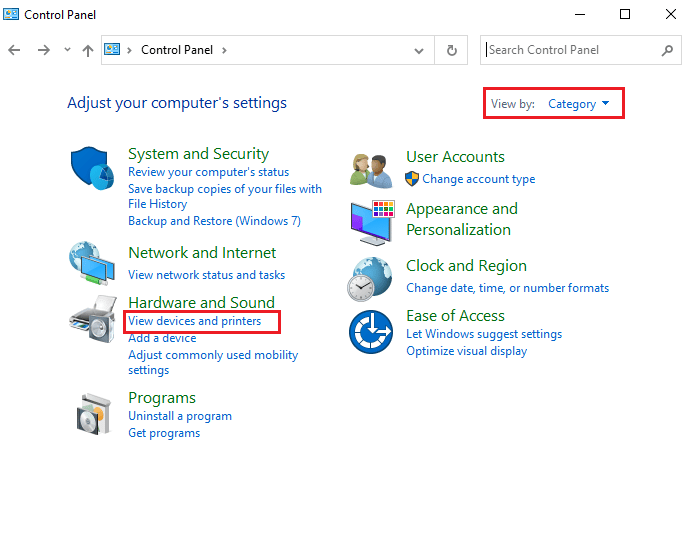
2. Nun, starigu Rigardu per as kategorio kaj alklaku Vidi aparatojn kaj presilojn kiel montrite.
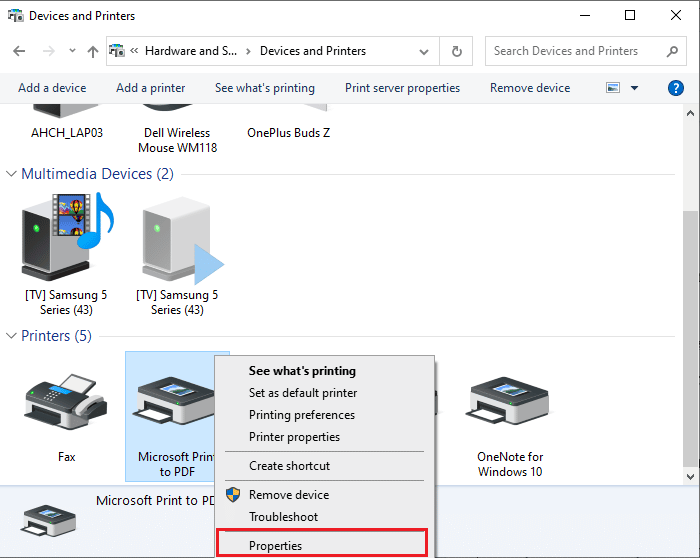
3. Nun, dekstre alklaku vian printilo kaj elektu Propraĵoj.
4. Ŝanĝu al la havenoj tab and change the ports from LPT1 al USB 001.
5. Save the changes by clicking Apliki> Bone. Then, unplug your device and connect it back after a while.
Ankaŭ Legu: Ripari Potenton sur la USB-Haveno en Vindozo 10
Method 11: Modify Windows Defender Firewall Settings
You will also face an Epson scan cannot communicate with the scanner due to an over-reactive or over-protective antivirus suite on your Windows 10 computer. This prevents the connection link between the launcher and the network. So, to fix this problem, you can whitelist Epson in your Firewall settings or disable the firewall protection temporarily.
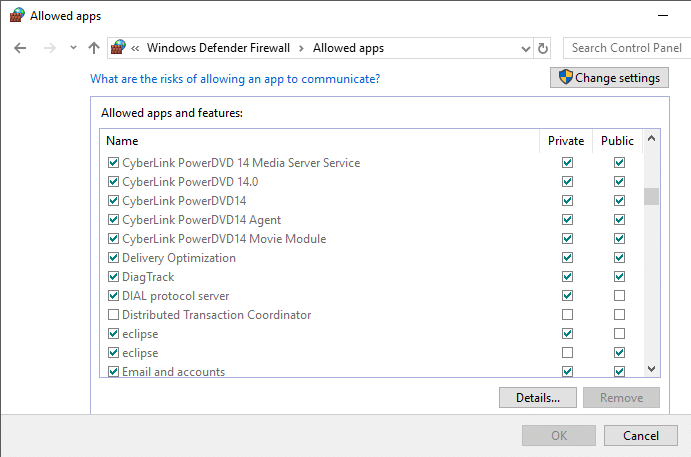
Option I: Whitelist escndv.exe
Permesi C:WINDOWStwain_32escndvescndv.exe in your Windows Defender Firewall, follow our guide on Allow or Block Apps through the Windows Firewall and implement the steps as instructed.
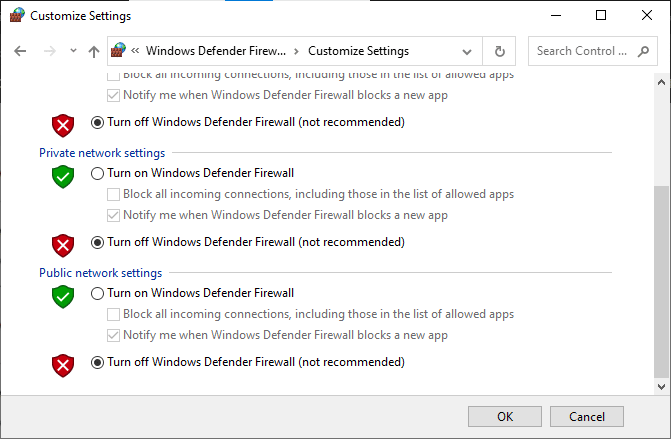
Opcio II: Malebligu Fajromuron (Ne Rekomendita)
Se vi ne scias kiel malŝalti Windows Defender Firewall, nia gvidilo pri Kiel Malŝalti Windows 10 Firewall helpos vin fari tion.
Ankaŭ Legu: How to Perform Windows Defender Definition Update
Opcio III: Krei Novan Regulon en Fajromuro
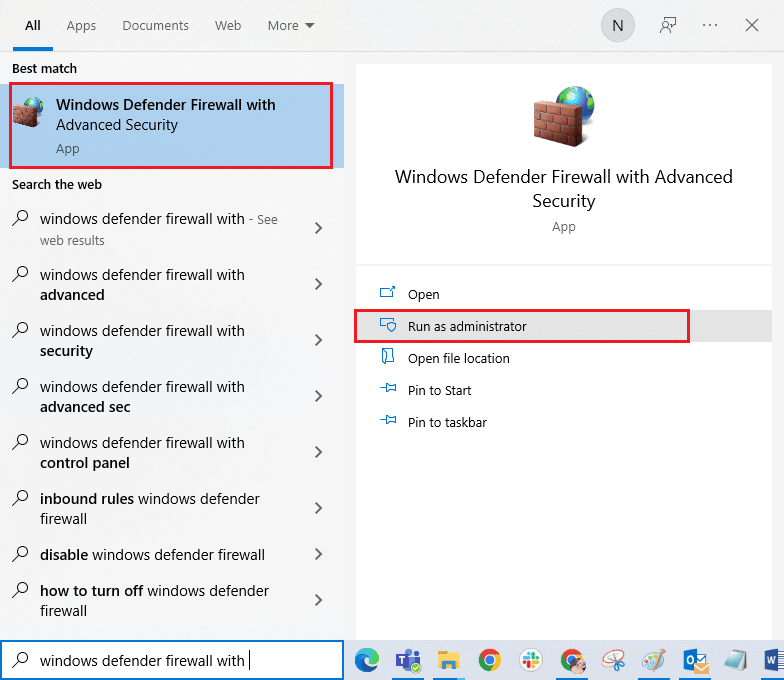
1. Batu la Vindozo-ŝlosilo kaj tajpu Windows Defender Firewall kun Altnivela Sekureco. Poste, alklaku Ruli kiel administranto.
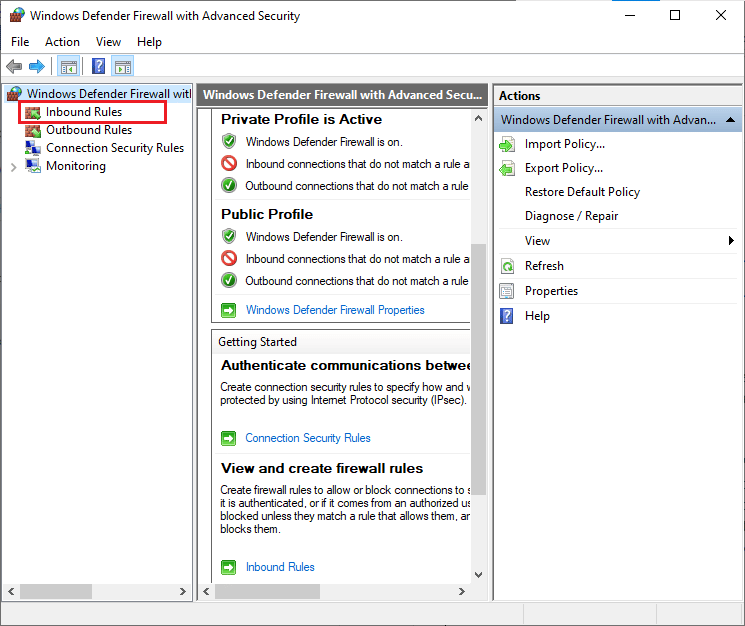
2. Alklaku Envenantaj Reguloj as depicted in the left pane.
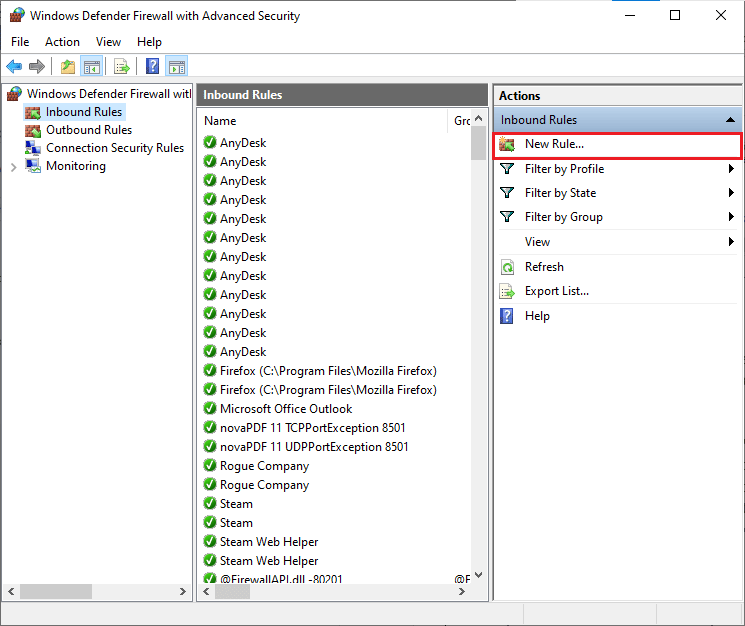
3. Alklaku Nova Regulo... as shown in the right pane.
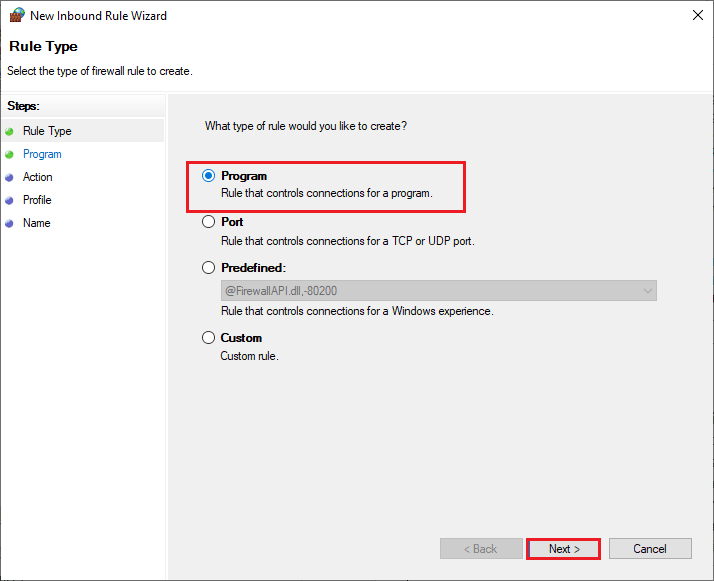
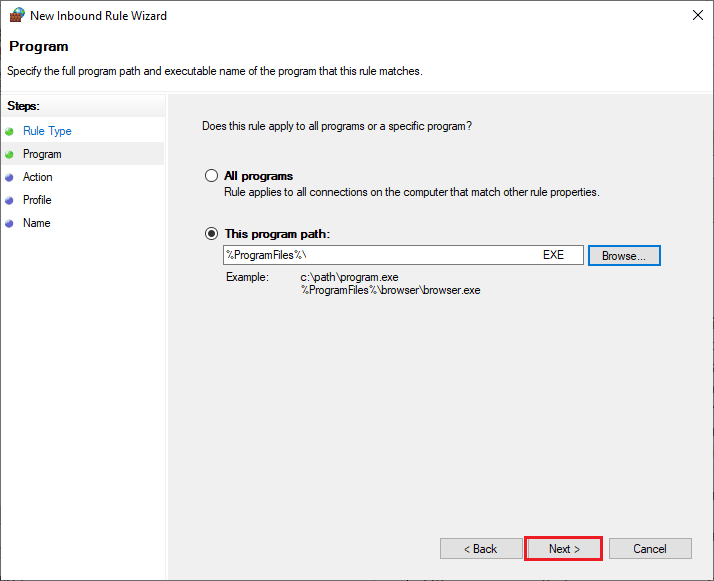
4. Ensure to select the programo opcio sub Kian regulon vi ŝatus krei? menuo kaj alklaku Sekva> kiel montrite.
5. Tiam, alklaku la Foliumi ... butono responda al Ĉi tiu programa vojo: kiel montrite.

6. Iru al la C:WINDOWStwain_32escndvescndv.exe path and duobligu klaku sur la agordi dosiero. Poste, alklaku la malfermita butonon.
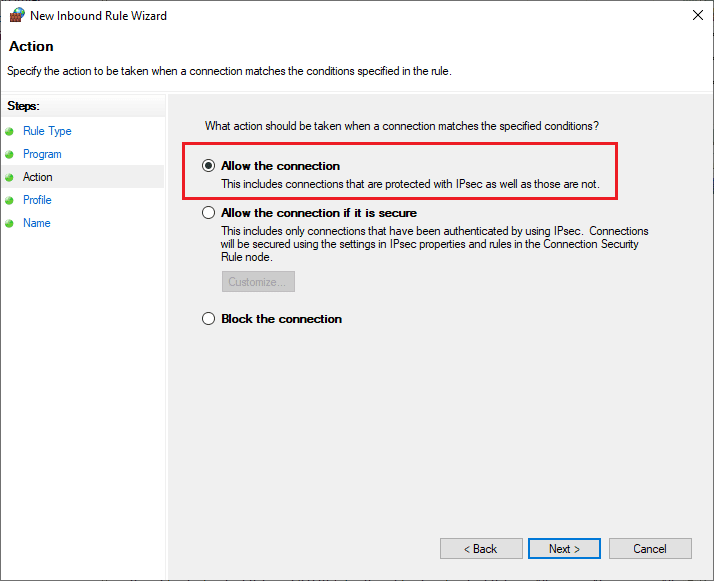
7. Alklaku Sekva> en la Nova Envenanta Regulo Sorĉisto fenestro.
8. Nun, elektu la radio-butono apud Permesu la konekton kaj alklaku Sekva> kiel bildigite.
9. Certigu Domajno, Privata kaj Publika skatoloj estas elektitaj kaj alklaku Sekva>.
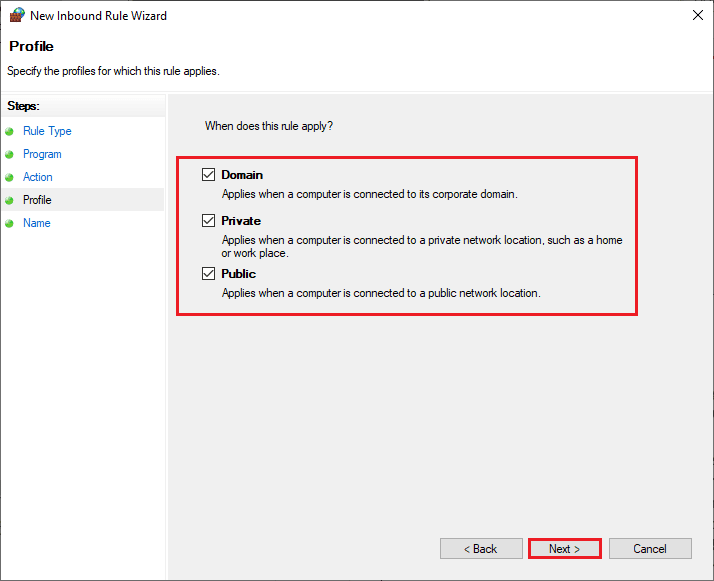
10. Finally, add a nomo to your new rule and click on finpoluro.
rekomendita:
We hope that this guide was helpful and you would have learned how to fix Epson scanner cannot communicate in Windows 10. Let us know how this article has helped you the best. Also, if you have any queries/suggestions regarding this article, feel free to drop them in the comments section.

