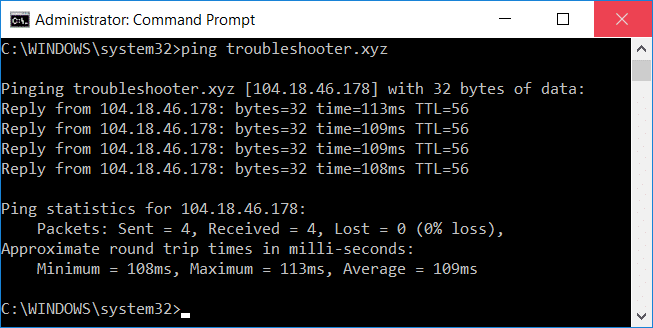
Fix High Ping on Windows 10: It becomes really irritating for online gamers who use the internet for playing games to have a high ping on your system. And having a high ping is definitely not good for your system and while playing online having high ping doesn’t help at all. Sometimes, you will get such pings when you have high configuration system. Ping can be defined as the computational speed of your connection or, more particularly, the estado latente of its connection. If you facing problems while playing the game due to the interruption of such above-mentioned issue, here is an article for you that will show some methods through which you can reduce ping latency on your Windows 10 system.
5 formas de arreglar un ping alto en Windows 10
Asegúrate de crear un punto de restauración en caso de que algo salga mal.
Method 1: Disable Network Throttling using Registry
1.Press Windows Key + R to open Run then type regedit y presione Enter para abrir Editor de registro.

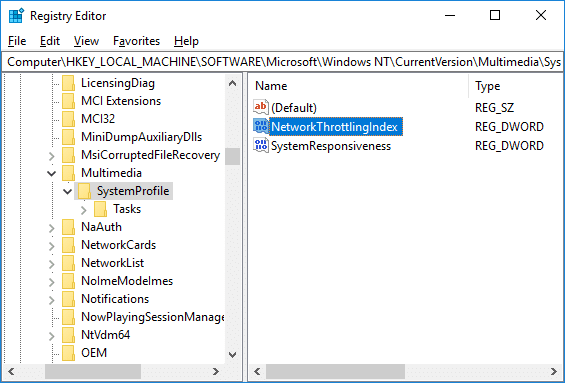
2. Navegue hasta la siguiente clave de registro:
HKEY_LOCAL_MACHINESOFTWAREMicrosoftWindows NTCurrentVersionMultimediaSystemProfile
3.Select SystemProfile then in the right window pane double-click on “Índice de regulación de la red.
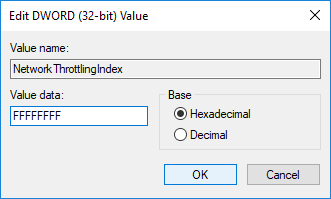
4.First, make sure the Base is selected as “Hexadecimal” then in the value data field type “FFFFFFFF"Y haga clic en Aceptar.
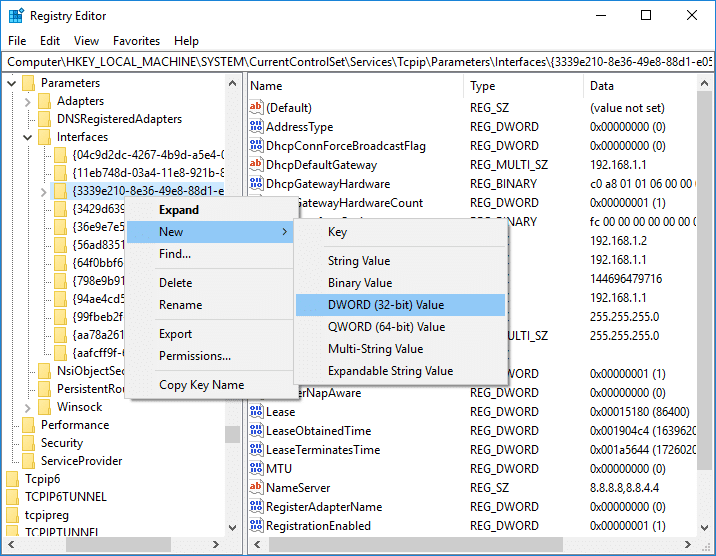
5.Ahora navegue hasta la siguiente clave de registro:
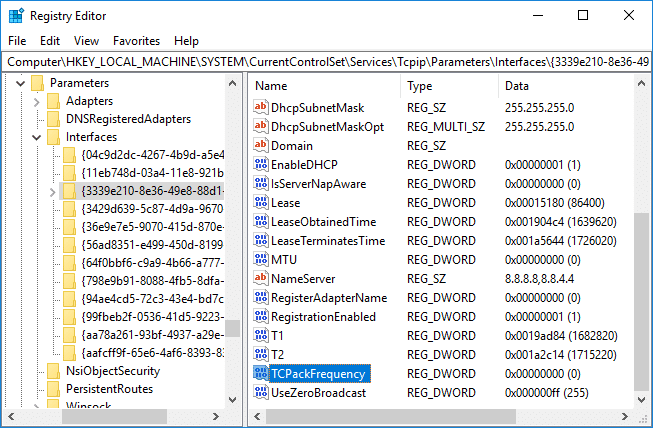
HKEY_LOCAL_MACHINESYSTEMCurrentControlSetServicesTcpipParametersInterfaces
6.Here you need to select a subclave (folder) which represents your conexión de red. To identify the correct folder you need to check the subkey for your IP address, gateway, etc information.

7.Now right-click on the above subkey then select Nuevo > Valor DWORD (32 bits).
8.Name this newly created DWORD as “TCPackFrequency"Y presiona Enter.
9.Similarly, again create a new DWORD and name it as “TCP sin demora.
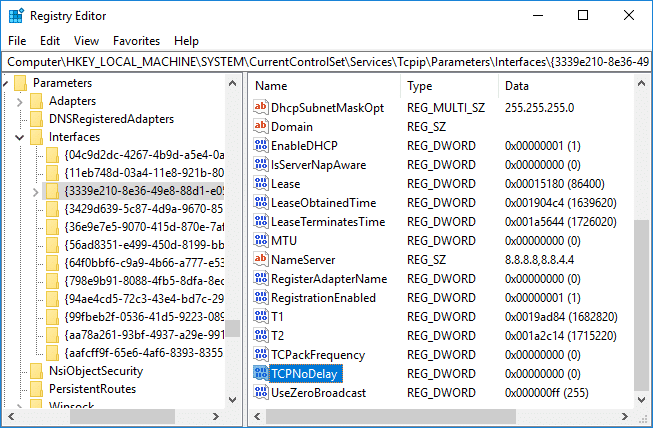
10.Set the Value of both “TCPackFrequency” & “TCP sin demora” DWORD to 1 & click OK to save changes.

11.A continuación, navegue hasta la siguiente clave de registro:
HKEY_LOCAL_MACHINESOFTWAREMicrosoftMSMQ
12.Right-click on MSMQ then select Nuevo > Valor DWORD (32 bits).
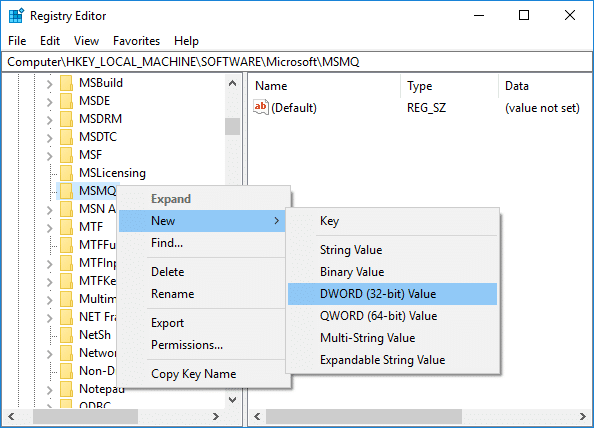
13.Name this DWORD as “TCP sin demora"Y presiona Enter.
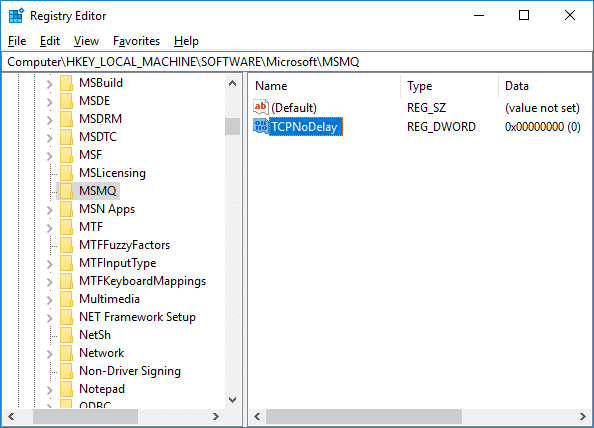
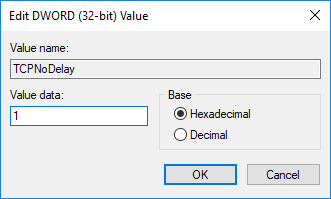
14.Double-click on “TCP sin demora” then set the value as 1 bajo fecha valor field and click OK.
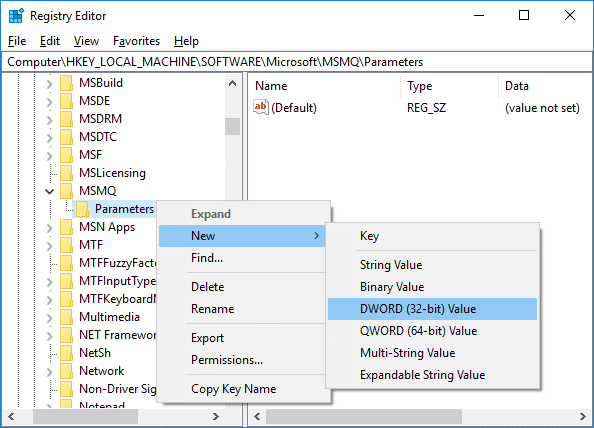
15.Expandir MSMQ key and make sure it has parámetros sub-clave.
16.If you can’t find parámetros folder then right-click on MSMQ & Seleccione Nuevo > Clave.
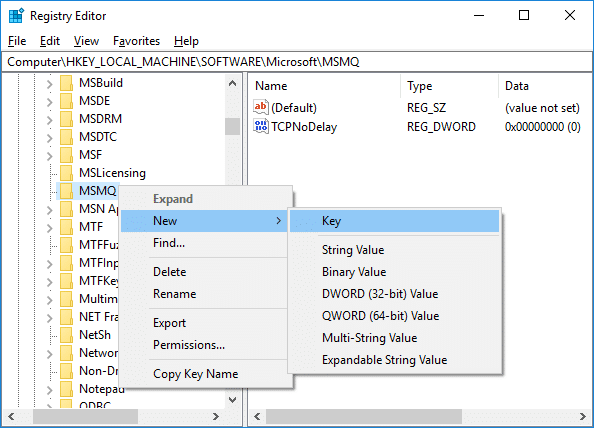
17. Nombra esta clave como parámetros & hit Enter.
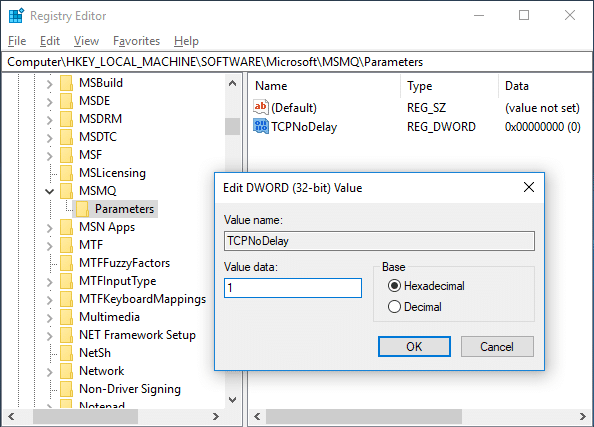
18.Haga clic derecho en parámetros & Seleccione Nuevo > Valor DWORD (32 bits).
19.Name this DWORD as “TCP sin demora” and set it’s value to 1.
20.Click OK to save changes and reboot your PC.
Method 2: Disable Apps with High Network Usage using Task Manager
Usually, Windows 10 permits its users to observe which applications are employing or eating up the most network bandwidth in the background.
1.Press Ctrl + Shift + Esc llaves juntas para abrir Administrador de tareas.

2.Haga clic en "Más detalles” to expand Task Manager.
3.You can sort the “Nuestra red” column of Task Manager in descending order which will allow you to see those applications which are taking the most bandwidth.
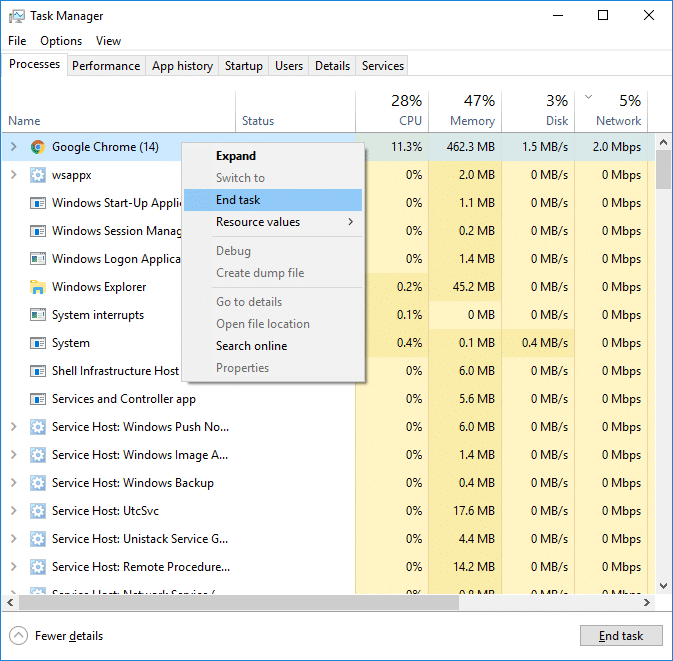
4.Close esas aplicaciones que se eating a high amount of bandwidth,
Nota: Don’t close the processes which are a system process.
Method 3: Disable Windows Auto-Updates
Windows usually download system updates with no notification or permission. Hence it may eat up your internet with high ping & slow your game. That time you cannot hiatus an update which has already started; & may ruin your online game experience. So you can stop your Windows update so that it doesn’t eat up your internet bandwidth.
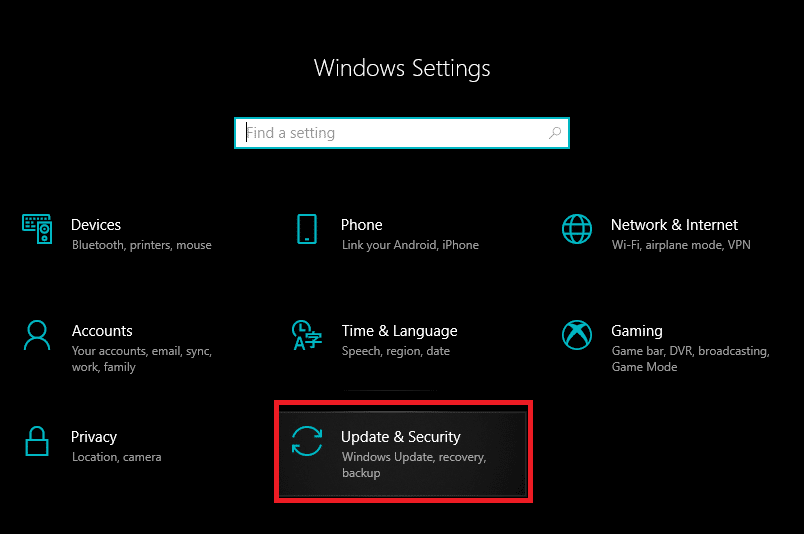
1.Press Windows Key + I to open Settings then click on “Actualización y seguridadIcono
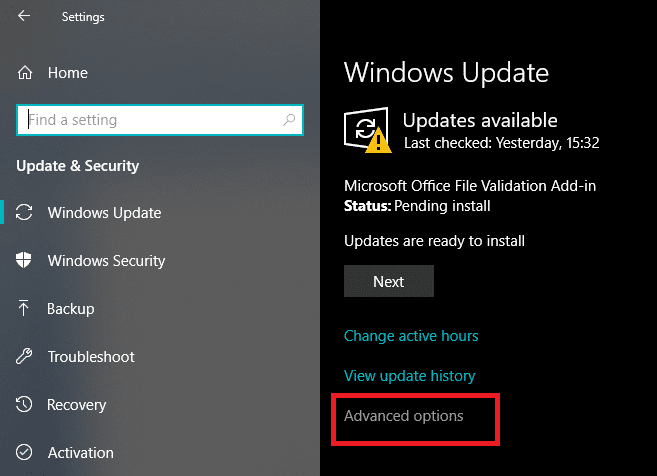
2.From the left-hand window select “Windows Update".
3.Now under Windows Update click on “Avanzado"Opciones.
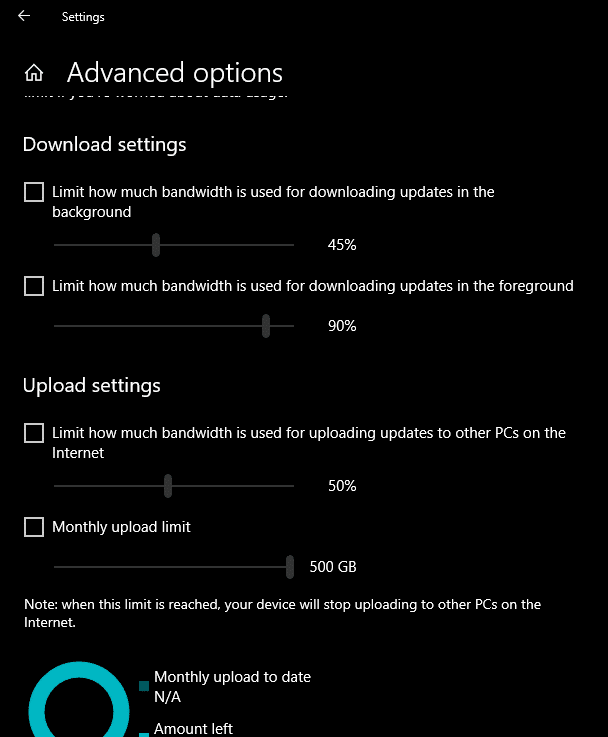
4.Now look for “Optimización de entrega” option & click on it.

5.Vuelva a hacer clic en "Opciones avanzadas".

6.Ahora adjust your Download & Upload Bandwidth porcentaje.
If you don’t want to mess System updates then another way to Fix High Ping on Windows 10 issue is to set your network connection as dosificada. This will let system think that you’re on a metered connection and hence it will not download the Windows updates automatically.
1.Haga clic en el Botón de Inicio luego ve a Ajustes.
2.From Settings window click on “Red e InternetIcono
![]()
3.Now make sure you select Ethernet option from the left window pane.
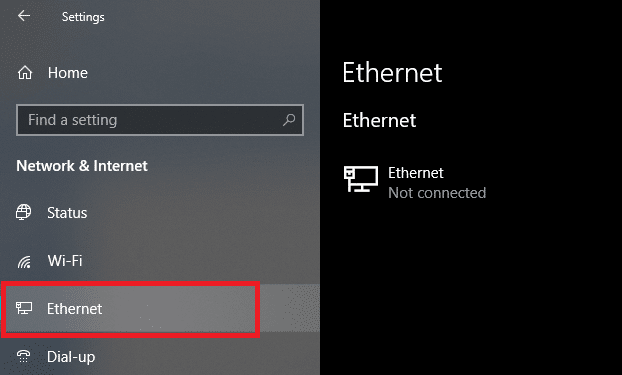
4.Choose the Network which you currently connected to.
5.Turn ON the toggle for “Establecer como conexión medida".

Método 4: restablecer la conexión de red
1.Presione la tecla Windows + I para abrir Configuración y luego haga clic en Red e Internet.

2.Desde el panel izquierdo de la ventana, haga clic en Estado.
3.Desplácese hacia abajo y haga clic en Restablecimiento de red.

4.En la siguiente ventana haga clic en Reiniciar ahora.

5.If asks for confirmation select Yes.
6.Reinicie su PC para guardar los cambios y ver si puede Fix High Ping on Windows 10 Issue.
Método 5: deshabilitar el sentido WiFi
1.Presione la tecla Windows + I para abrir Configuración y luego haga clic en Red e Internet.
2. Ahora haga clic en Wi-Fi from the left window pane and make sure to Disable everything under Wi-Fi Sense.
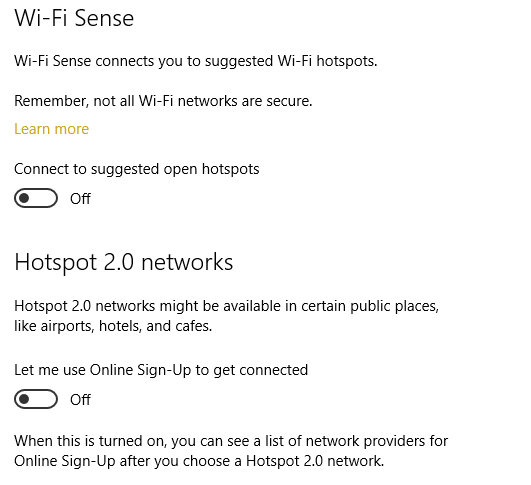
3.Also, make sure to disable Hotspot 2.0 networks and Paid Wi-Fi services.
Recomendado:
Espero que este artículo haya sido útil y ahora puedas fácilmente Fix High Ping on Windows 10, pero si todavía tiene alguna pregunta sobre esta guía, no dude en hacerla en la sección de comentarios.

