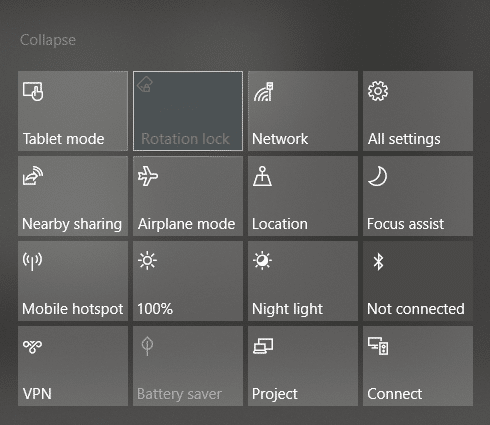
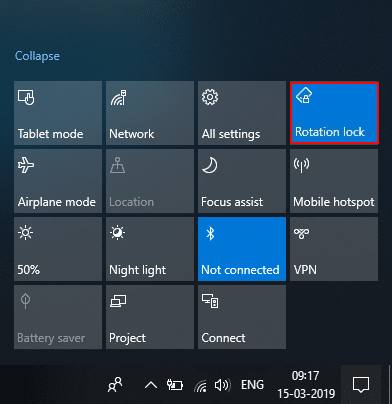
If you have 2 in 1 Windows device such as Tablets, you would be familiar with the importance of the screen rotation feature. Users report that the screen rotation feature has stopped working & the Screen Rotation Lock option is greyed out. If you’re facing this issue, then don’t worry as this is just a setting issue which means it can be easily fixed. This guide will walk you through the steps to fix rotation lock greyed out in Windows 10.
Here are issues which can be resolved using this guide:
- Rotation lock missing
- Auto Rotate not working
- Rotation lock greyed out.
- Screen rotation not working
Fix Rotation Lock greyed out in Windows 10
Asegúrate de crear un punto de restauración en caso de que algo salga mal.
Method – 1: Enable Portrait Mode
One of the methods to fix this problem is to rotate your screen in portrait mode. Once you rotate it to portrait mode, most probably your rotation lock would start working, i.e. clickable again. In case your device is not rotating into portrait mode automatically, try to do it manually.
1. Prensa Windows Key + I to open Settings then click on the System del icono.

2.Asegúrate de seleccionar Pantalla en el menú de la izquierda.
3. Localice el Orientation section where you need to choose Retrato En el menú desplegable.
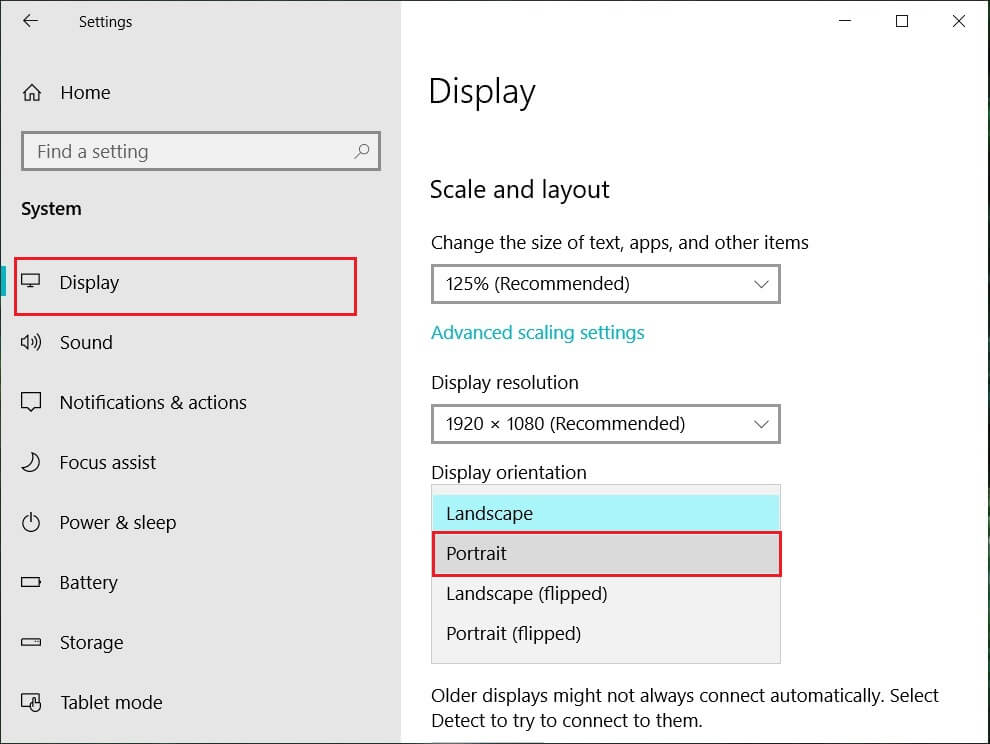
4. Your device will automatically turn into portrait mode.
Method – 2: Use your device in tent mode
Some users, particularly Dell Inspiron, experienced that when their rotation lock is greyed out, the only way to solve this problem is to put your device in Tent Mode.
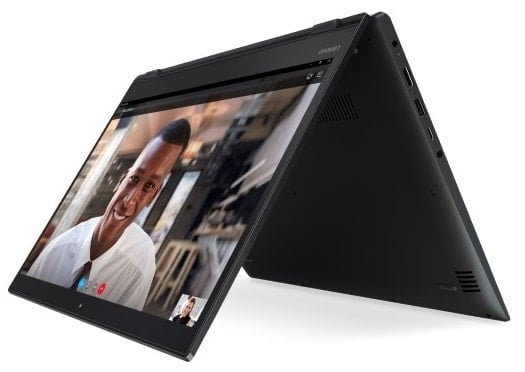
Crédito de la imagen: Microsoft
1. You need to put your device in Tent Mode. If your display is upside down, you need not worry.
2. Ahora haga clic en el Centro de actividades de Windows, Bloqueo de rotacion will be working. Here you need to turn it off if you want so that your device rotate properly.
Method – 3: Disconnect your keyboard
If rotation lock is greyed in your Dell XPS and Surface Pro 3 (2-in-1 device), you need to disconnect your keyboard, and many users reported that disconnecting the keyboard solves the rotation lock problem. If you own different devices, you can still use this method to fix rotation lock greyed out in Windows 10 issue.
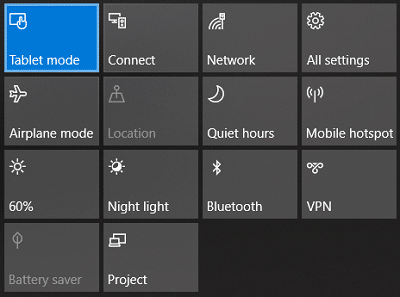
Method – 4: Switch to Tablet Mode
Many users experienced that this rotation greyed out the problem by switching their device into Tablet Mode. If it is switched automatically, it is good; otherwise, you can do it manually.
1. Haga clic en el Centro de actividades de Windows.
2. Aquí encontrarás Modo Tablet option, Click on It.
O
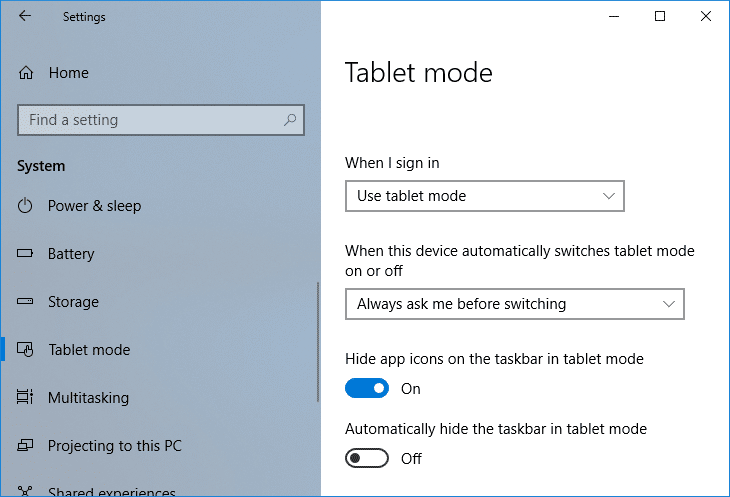
1. Presione la tecla Windows + I para abrir Ajustes luego haz clic en System del icono.
2. Here it would help if you located Modo Tablet option under the left window pane.
3. Now from the “When I sign in” drop-down, select “Usar modo tableta".
Method – 5: Change LastOrientation Registry Value
If you still experience a problem, you can solve it by changing some registry values.
1. Press Windows +R and enter regedit luego presiona Enter.

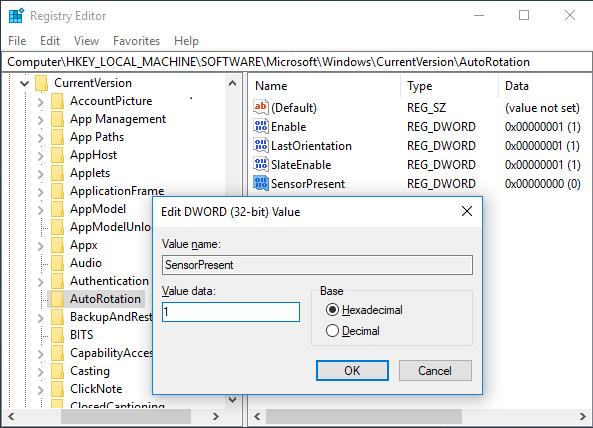
2. Once registry editor opens, you need to navigate to the below path:
HKEY_LOCAL_MACHINESOFTWAREMicrosoftWindowsCurrentVersionAutoRotation
Nota: Follow the above folders one by one to locate Auto Rotation.
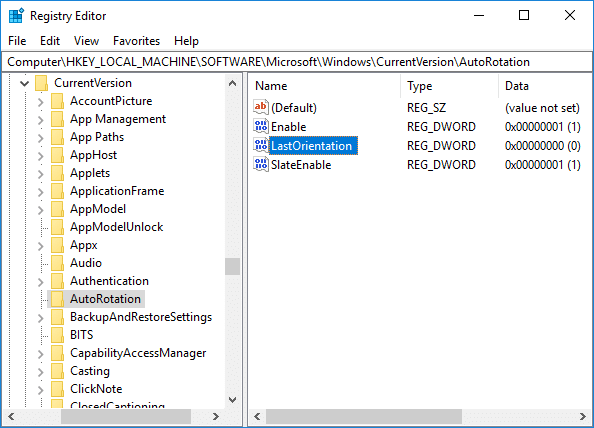
3. Asegurate que select AutoRotation luego, en el panel derecho de la ventana, haga doble clic en Last Orientation DWORD.
4. Ahora ingrese 0 under Value data field y haga clic en Aceptar.
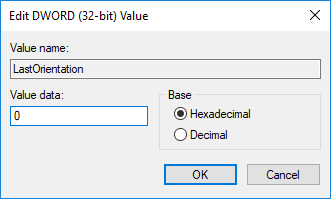
5. Si hay SensorPresente DWORD, double-click on it and set its valor para 1.
Method – 6: Check Sensor Monitoring Service
Sometimes services of your device can cause a rotation lock problem. Therefore, we can get it sorted with Windows Monitoring services feature.
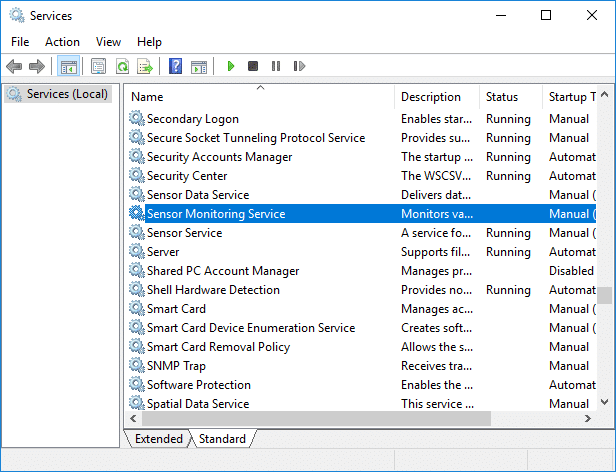
1. Presione Windows + R y escriba services.msc y presiona Enter.

2. Once the services window opens, find the Sensor Monitoring services option y haga doble clic en él.
3. Now, from the Startup type drop-down select Automático y luego haga clic en el Botón de inicio para comenzar el servicio
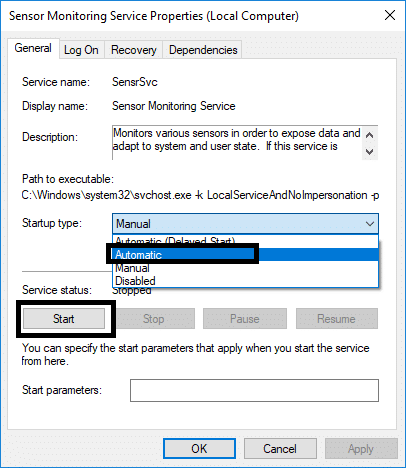
4. Finally, click Apply followed by OK to save the settings, and you can reboot the system to apply the changes.
Method – 7: Disable YMC service
If you are using a Lenovo Yoga device and experiencing this problem, you can fix rotation lock grayed out in the Windows 10 issue by disabling YMC service.
1. Windows + R type services.msc y presiona Enter.
2. Localizar YMC services y haga doble clic en él.
3. Establezca el tipo de inicio en Discapacitado and click Apply, followed by OK.
Method – 8: Update Display Drivers
One reason for this problem could be the driver update. If your respective driver for the monitor is not updated, it can cause the Rotation Lock greyed out in Windows 10 Issue.
Manually Update Graphics Drivers using Device Manager
1. Presione la tecla Windows + R y luego escriba devmgmt.msc y presiona enter para abrir Administrador de dispositivos.

2. A continuación, expanda Adaptadores de pantalla y haga clic derecho en su tarjeta gráfica y seleccione Habilitar.

3. Una vez que hayas hecho esto nuevamente, haz clic derecho en tu tarjeta gráfica y selecciona “Actualizar controlador".

4. Seleccione "Busque automáticamente el software de controlador actualizado”Y dejar que termine el proceso.

5. If the above steps helped fix the issue then very good, if not then continue.
6. Nuevamente haga clic derecho en su tarjeta gráfica y seleccione "Actualizar controlador”pero esta vez en la siguiente pantalla seleccione “Buscar mi computadora para el software del controlador."

7. Ahora selecciona “Permítame elegir de una lista de controladores disponibles en mi computadora."

8. Finalmente, seleccione el controlador más reciente de la lista y haga clic Siguiente.
9. Deje que finalice el proceso anterior y reinicie su PC para guardar los cambios.
Sigue los mismos pasos para la tarjeta gráfica integrada (Intel en este caso) para actualizar sus controladores. A ver si eres capaz de Fix Rotation Lock greyed out Issue, si no, continúe con el siguiente paso.
Actualice automáticamente los controladores de gráficos desde el sitio web del fabricante
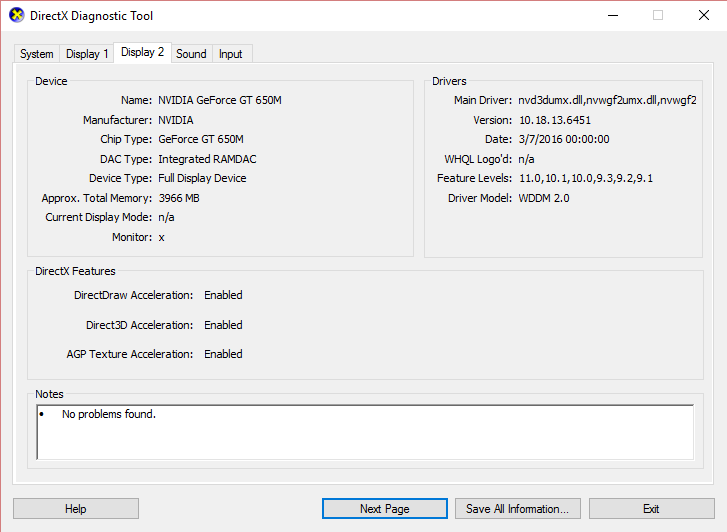
1. Presione la tecla Windows + R y en el cuadro de diálogo escriba "dXDIAG”Y presione enter.

2. Después de eso, busque la pestaña de visualización (habrá dos pestañas de visualización, una para la tarjeta gráfica integrada y otra será de Nvidia), haga clic en la pestaña Pantalla y busque su tarjeta gráfica.
3. Ahora ve al controlador de Nvidia. descargar sitio web e introduzca los detalles del producto que descubrimos.
4. Busque sus controladores después de ingresar la información, haga clic en Aceptar y descargue los controladores.

5. Después de una descarga exitosa, instale el controlador y habrá actualizado exitosamente sus controladores Nvidia manualmente.
Method – 9: Remove Intel Virtual Buttons Driver
Some users reported that Intel Virtual button drivers cause rotation lock problem on your device. To solve this problem, you can uninstall the driver.
1. Open Device manager on your device by pressing Windows + R and type devmgmt.msc and hit Enter or press Windows X and choose Administrador de dispositivos de la lista de opciones.
2. Once Device manager box is opened locate Intel virtual buttons driver.
3. Haga clic derecho sobre él y elija Desinstalar.
Recomendado:
Espero que este artículo haya sido útil y ahora puedas fácilmente Fix Rotation Lock greyed out in Windows 10, pero si todavía tienes alguna pregunta sobre este tutorial, no dudes en hacerla en la sección de comentarios.
")
