Fix The Service Couldn’t Be Started Windows Defender Error 0x80070422: Windows Defender is a malware protection software which is inbuilt into Windows 10. Now it is used widely by Windows users because it’s reliable, but in some cases, users also installed 3rd party Antivirus software such as Norton, Quick Heal etc which is not recommend because they corrupt the files of Windows Defender. Once you completely uninstall 3rd party antivirus you won’t be able to use Windows Defender properly because files required by it have already been corrupted and can no longer be used.
“The service couldn’t be started.
The service cannot be started, either because it is disabled or because it has no enabled devices associated with it.”
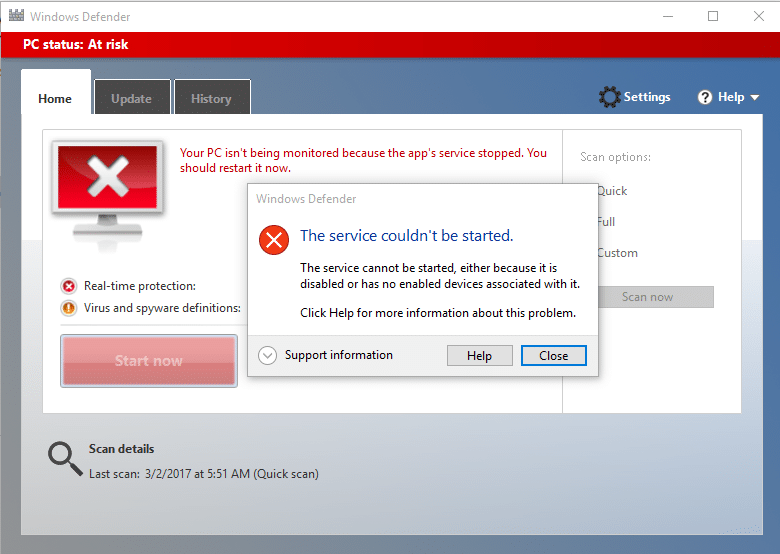
Windows Defender is turned off when you use a 3rd party Antivirus and once you uninstall the Antivirus software you won’t be able to turn ON Windows Defender. If you try to enable Windows Defender you will face the error “The Service Couldn’t Be Started” with error code 0x80070422. So without wasting any time let’s see how to actually Fix The Service Couldn’t Be Started Windows Defender Error 0x80070422 with the help of below-listed troubleshooting guide.
Fix The Service Couldn’t Be Started Windows Defender Error 0x80070422
Looge kindlasti taastepunkt juhuks, kui midagi läheb valesti.
1. meetod: käivitage SFC ja CHKDSK
1. Vajutage Windows Key + X ja seejärel klõpsake nuppu Käsuviip (admin).

2. Nüüd tippige cmd-sse järgmine tekst ja vajutage sisestusklahvi:
Sfc /scannow sfc /scannow /offbootdir=c: /offwindir=c:windows (Kui ülaltoodud ei õnnestu, proovige seda)

3. Oodake, kuni ülaltoodud protsess lõpeb, ja pärast seda taaskäivitage arvuti.
4. Järgmisena käivitage CHKDSK siit Parandage failisüsteemi vead Check Disk Utility (CHKDSK) abil.
5. Laske ülaltoodud protsess lõpule viia ja taaskäivitage arvuti muudatuste salvestamiseks.
Method 2: Temporarily Disable 3rd party Antivirus
1. Paremklõpsake ikooni Viirusetõrjeprogrammi ikoon süsteemses salves ja valige Keela.

2. Järgmisena valige ajavahemik, mille jaoks Viirusetõrje jääb keelatuks.

Märkus. Valige väikseim võimalik aeg, näiteks 15 minutit või 30 minutit.
3.Once done, again try to run Windows Defender and check if the error resolves or not.
4. Vajutage Windows Key + X ja seejärel valige Kontrollpaneel.

5. Järgmisena klõpsake nuppu Süsteem ja turvalisus.
6. Seejärel klõpsake nuppu Windowsi tulemüür.

7. Nüüd klõpsake vasakpoolsel aknapaanil nuppu Lülita Windowsi tulemüür sisse või välja.

8.Valige Lülita Windowsi tulemüür välja ja taaskäivitage arvuti. Again try to open Windows Defender and see if you’re able to Fix The Service Couldn’t Be Started Windows Defender Error 0x80070422.
Kui ülaltoodud meetod ei tööta, järgige tulemüüri uuesti sisselülitamiseks täpselt samu samme.
3. meetod: veenduge, et Windows on ajakohane
1. Vajutage Windows Key + I ja seejärel valige Värskendamine ja turvalisus.

2. Järgmiseks klõpsake uuesti Kontrolli uuendusi ja installige kindlasti kõik ootel olevad värskendused.

3. Pärast värskenduste installimist taaskäivitage arvuti ja vaadake, kas saate seda teha Fix The Service Couldn’t Be Started Windows Defender Error 0x80070422.
Method 4: Make sure Windows Defender service is set to Automatic
Märge: If Windows Defender service is grayed out in Services Manager then follow this post.
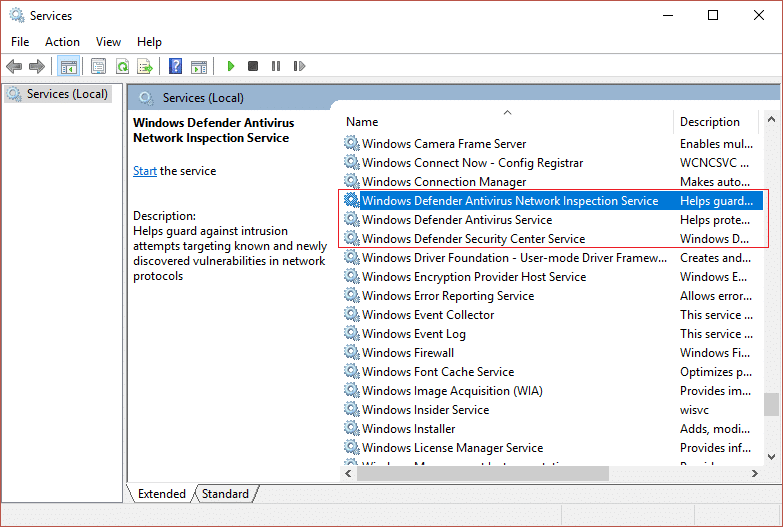
1. Vajutage Windows Key + R ja seejärel tippige services.msc ja vajuta Enter.

2.Find the following services in the Services window:
Windows Defender Antivirus Network Inspection Service
Windows Defender Antivirus Service
Windows Defender Security Center Service
3.Double-click on each of them and make sure their Startup type is set to Automaatne and click Start if the services are not already running.
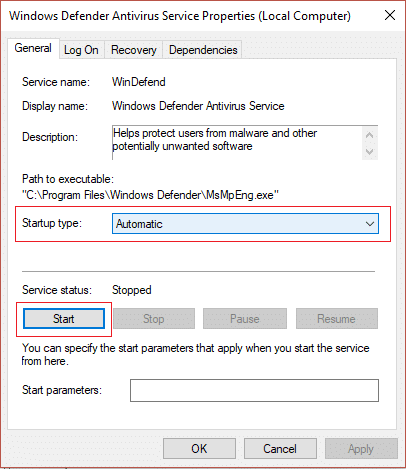
4. Klõpsake nuppu Rakenda ja seejärel OK.
5. Taaskäivitage arvuti, et muudatused salvestada ja kontrollida, kas saate seda teha Fix The Service Couldn’t Be Started Windows Defender Error 0x80070422.
Method 5: Enable Windows Defender through Registry Editor
1. Vajutage Windows Key + R ja seejärel tippige regedit ja vajuta Enter.

2. Liikuge järgmisele registrivõtmele:
HKEY_LOCAL_MACHINESYSTEMCurrentControlSetServicesWinDefend
3.Now right-click on WinDefend ja valige Load.
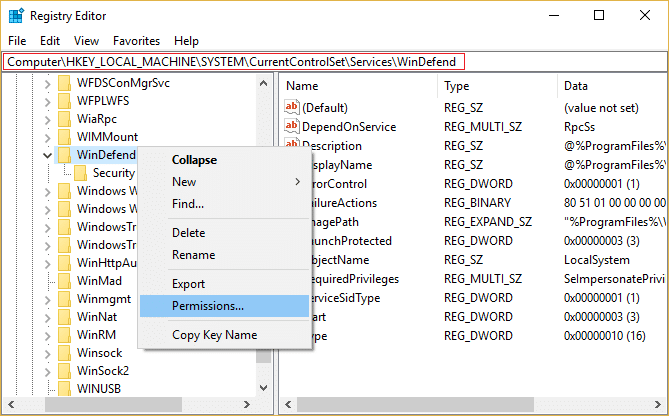
4.Follow this guide in order to take full control or ownership of the above registry key.
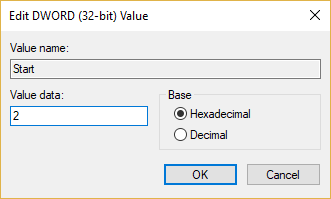
5.After that make sure you have selected WinDefend then in the right window double-click on Start DWORD.
6.Change the value to 2 in the value data field and click OK.
7.Close Registry Editor and reboot your PC.
8.Again try to enable Windows Defender and this time it should work.
6. meetod: käivitage CCleaner ja Malwarebytes
1. Laadige alla ja installige CCleaner & Pahavarabaidid.
2.Käivitage Malwarebytes ja laske sellel skannida teie süsteemi kahjulike failide suhtes.
3. Kui leitakse pahavara, eemaldab see need automaatselt.
4. Nüüd jookse CCleaner ja jaotises "Puhastaja" Windowsi vahekaardi all soovitame kontrollida järgmisi puhastatavaid valikuid:

5. Kui olete veendunud, et õiged punktid on kontrollitud, klõpsake lihtsalt Run Cleaner, ja lase CCleaneril oma rada kulgeda.
6. Süsteemi täiendavaks puhastamiseks valige vahekaart Registry ja veenduge, et on märgitud järgmised asjad:

7. Valige Scan for Issue ja lubage CCleaneril skannida, seejärel klõpsake Parandage valitud probleemid.
8. Kui CCleaner küsibKas soovite registri muudatused varundada?” valige Jah.
9. Kui varundamine on lõpetatud, valige Fix All Selected Issues.
10. Taaskäivitage arvuti, et muudatused salvestada ja kontrollida, kas saate seda teha Fix The Service Couldn’t Be Started Windows Defender Error 0x80070422.
Method 7: Refresh or Reset your PC
1.Press Windows Key + I to open Settings then select Värskendamine ja turvalisus.
2.From left-hand menu select Taastamine ja klõpsake "Alustamine” under Reset this PC.

3.Select the option to Hoidke oma failid.

4.Follow the instructions on the screen to complete the process.
5.This will take some time and your computer will restart.
8. meetod: installige Windows 10
See meetod on viimane abinõu, sest kui midagi ei õnnestu, parandab see meetod kindlasti kõik teie arvutiga seotud probleemid. Remont Installige lihtsalt kohapealse värskenduse abil, et parandada süsteemiga seotud probleeme ilma süsteemis olevaid kasutajaandmeid kustutamata. Järgige seda artiklit, et näha, kuidas Windows 10 installimist hõlpsalt parandada.
Sulle soovitatud:
See on kõik, olete edukalt hakkama saanud Fix The Service Couldn’t Be Started Windows Defender Error 0x80070422 kuid kui teil on selle juhendi kohta veel küsimusi, küsige neid kommentaaride jaotises.

