If a WiFi network has the ‘limited connectivity’ sign next to it, it means that you’re connected to the network but do not have access to the internet. The main reason for this issue is that the DHCP server is not responding. And when the DHCP server doesn’t respond the computer automatically assigns an IP address to itself because the DHCP server was unable to assign the IP address. Hence the ‘Limited or No connectivity’ error.
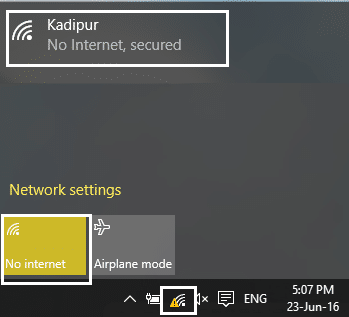
Fix limited access or no connectivity WiFi issues
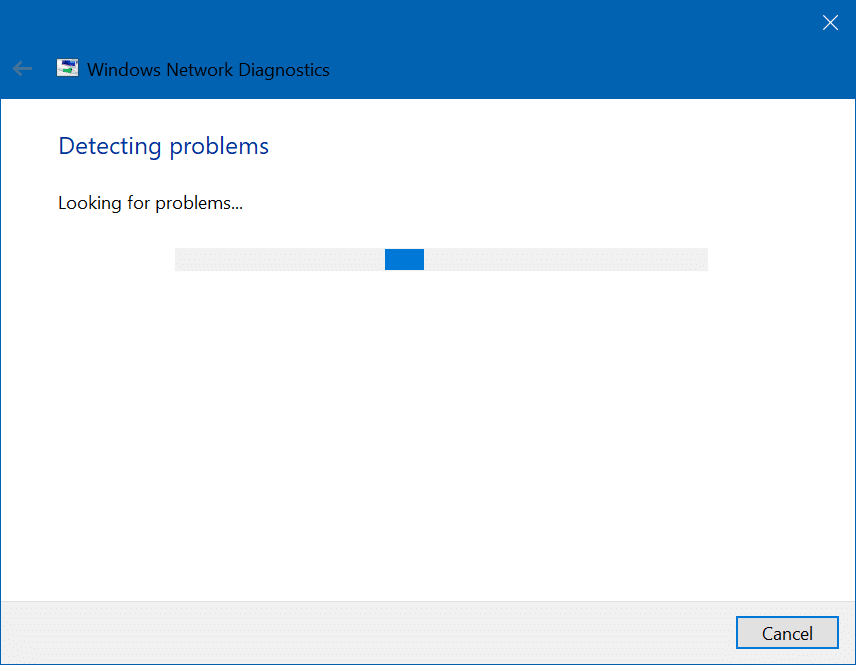
Method 1: Run Network troubleshooter
1. Egin klik eskuineko botoiarekin sareko ikonoa at the taskbar and click on Troubleshoot problems.
![]()
2. The Network Diagnostics window will open. Follow the on-screen instructions to run the Troubleshooter.
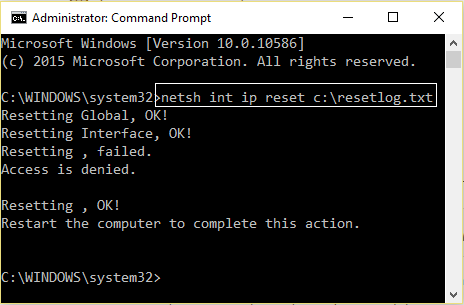
2. metodoa: berrezarri TCP / IP
1. Right-click on the Windows button and select “Command Prompt(Admin).”

2. Idatzi komando hau: netsh int ip reset c:resetlog.txt
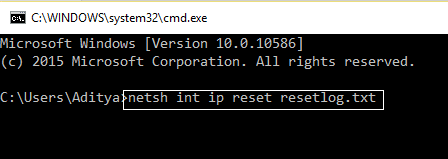
3. If you don’t want to specify the directory path then use this command: netsh int ip reset resetlog.txt
4. Berrabiarazi ordenagailua.
Method 3: Change Bitdefender firewall settings (Or your Antivirus Firewall)
1. Open Settings of Bitdefender Internet Security and choose Suebakia.
2. Egin klik "Ezarpen aurreratuak"Botoia.
3. Make sure that “Gaitu Interneteko konexioa partekatzea” markatuta dago.
OHARRA: If you don’t have the above setting then disable “Block Internet Connection Sharing” instead of above.
4. Click the OK button to save changes.
5. And if it doesn’t work try disabling your Antivirus Firewall and enabling Windows Firewall.
For maximum people changing firewall settings fixes the limited access or no connectivity WiFi problem, but if it didn’t work for you don’t lose hope we still have a long way to go, so follow the next method.
Method 4: Change adapter settings
1. Open the Bitdefender, then select Protection module eta klik Firewall feature.
2. Make sure the Firewall is turned ON and then go to the Adapters tab and perform the following changes:
Set Network type to "Home/Office"
Set Stealth Mode to "Off"
Set Generic to "On"
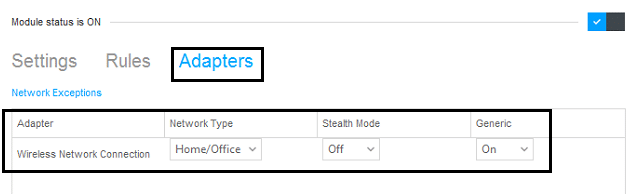
3. Restart your PC to apply these changes.
Method 5: Wake up your Wi-Fi Adapter
1. Eskuin-klikatu on the network icon in the notification area and select Ireki Network & Internet Settings.

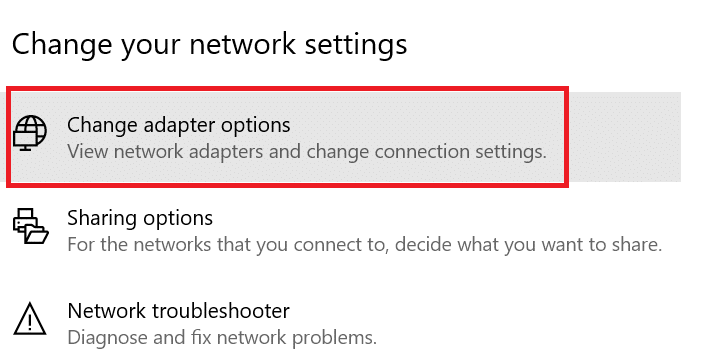
2. Under Aldatu sareko ezarpenak, egin klik gainean Change Adapter Options.
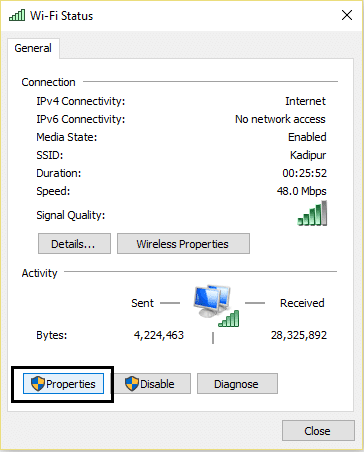
3. Egin klik zure gainean WiFi sarea eta hautatu Propietateak.
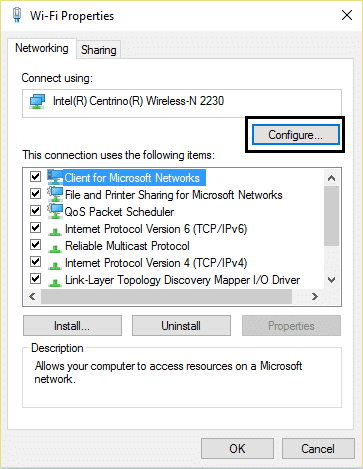
4. Now in WiFi propietateak klik egin Konfiguratu.
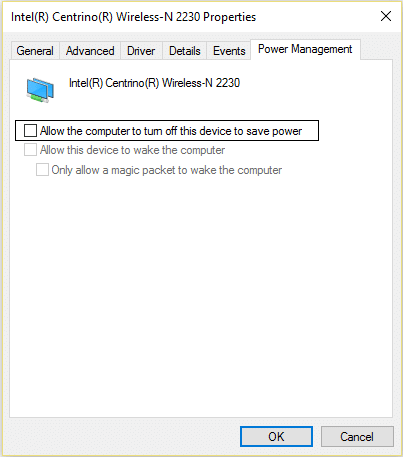
5. Go to the Power Management tab and uncheck “Baimendu ordenagailuari gailu hau itzaltzeko energia aurrezteko."
6. Berrabiarazi ordenagailua.
6. metodoa: Erabili Google DNS
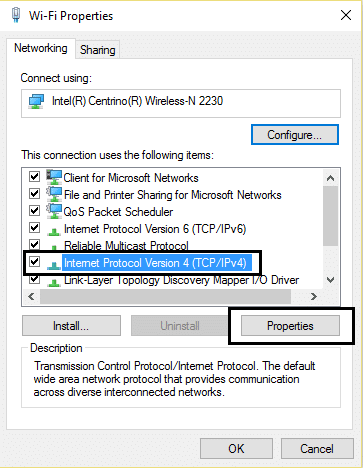
1. Again go to your Wi-Fi properties.
2. Orain hautatu Internet protokoloaren bertsioa 4 (TCP / IPv4) eta sakatu Propietateak.
3. Check the box saying “Erabili honako DNS zerbitzari helbideak” and enter the following:
Preferred DNS server: 8.8.8.8
Ordezko DNS zerbitzaria: 8.8.4.4
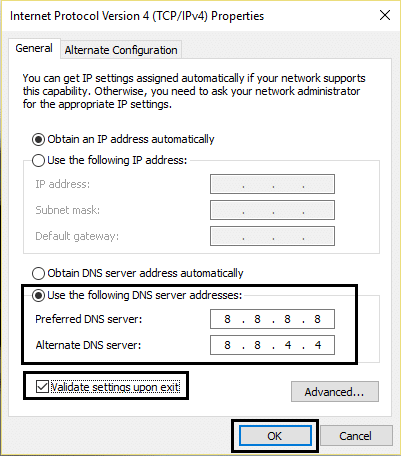
4. Click OK to save, then click close and berrabiarazi zure ordenagailua
Method 7: Reset TCP/IP Auto-tuning
1. Right-click on the Windows key and select “Komando-gonbita (administratzailea)."
2. Type the following commands:
netsh int tcp set heuristics desgaituta netsh int tcp set global autotuninglevel=desgaituta netsh int tcp set global rss=gaituta
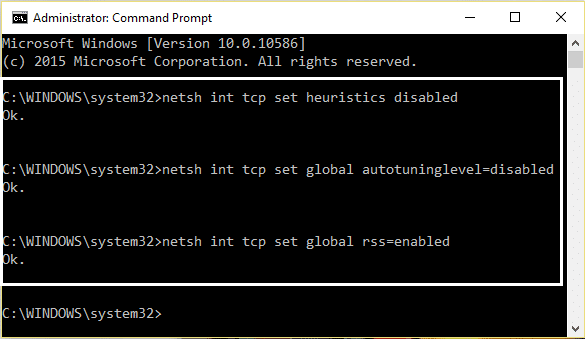
3. Berrabiarazi ordenagailua.
Method 8: Enable Download over metered connections
1. Egin klik gainean Windows tekla eta hautatu Ezarpenak.
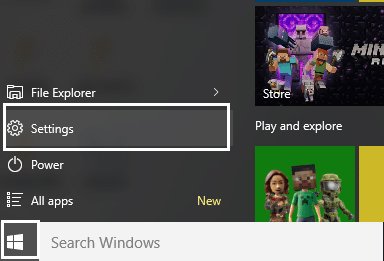
2. Now in settings click on Sarea eta Internet.

3. Here you will see Aukera aurreratuak, egin klik gainean.
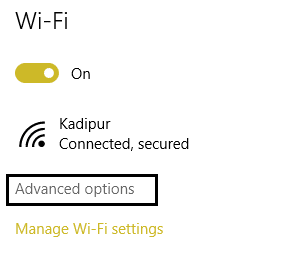
4. Make sure your Metered connection is set to ON.
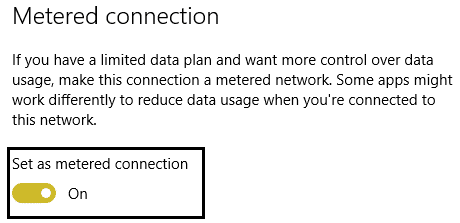
5. Berrabiatu aldaketak aplikatzeko.
Yeah, I admit, this is a stupid step but hey for some people it worked out so why not try it and who knows your limited access or no connectivity WiFi issues may be fixed.
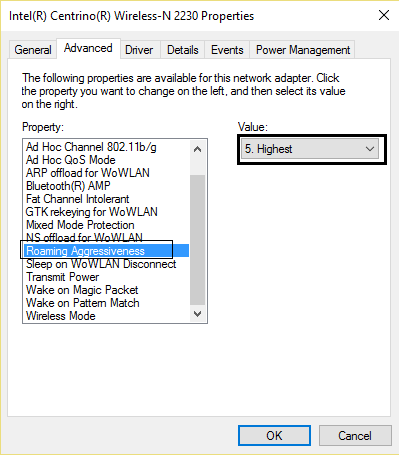
Method 9: Set Roaming Aggressiveness to Maximum
1. Eskuin-klikatu on the network icon in the notification area and select Ireki Network & Internet Settings.
2. Under Aldatu sareko ezarpenak, egin klik gainean Change Adapter Options.
3. Orain hautatu zure Wi-fi eta klikatu Propietateak.
4. Inside Wi-Fi properties click on Konfiguratu.
5. Joan nabigatzera the Advanced tab eta aurkitu Ibiltaritzako erasokortasuna ezarpena.
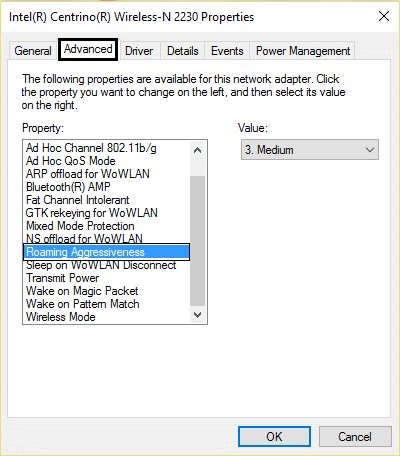
6. Change the value from Medium to Highest eta egin klik Ados botoian.
7. Berrabiatu aldaketak aplikatzeko.
10. metodoa: eguneratu kontrolatzaileak
1. Press Windows key + R and type “devmgmt.msc” in Run dialogue box to open the Gailu kudeatzailea.

2. Zabaldu Network moldagailueta egin klik eskuineko botoiarekin zure gainean Wi-Fi kontrolagailua(adibidez, Broadcom edo Intel) eta hautatu Eguneratu kontrolatzaileak.

3. In the Update Driver Software Windows, select “Arakatu nire ordenagailua kontrolatzailearen softwarearentzat."

4. Orain hautatu “Utzi nire ordenagailuko gailuen kontrolatzaileen zerrenda batetik."

5. Saiatu eguneratu kontrolatzaileak zerrendatutako bertsioetatik.
6. If the above didn’t work then go to the fabrikatzailearen webgunea to update drivers: https://downloadcenter.intel.com/
7. Berrabiatu aldaketak aplikatzeko.
Era berean, baliteke duzu nahi:
I hope by now any one of the methods must have worked for you to fix limited access or no connectivity WiFi issues. If you still have any queries regarding this guide please feel free to ask them in the comments.
![[SOLVED] keyboard has stopped working on Windows 10](https://lbsite.org/wp-content/uploads/2023/01/Solved-keyboard-has-stopped-working-on-Windows-10.png "[SOLVED] keyboard has stopped working on Windows 10")
