Windows PowerShell is a task-based command-line shell and scripting language designed especially for system administration. You may have seen many of my tutorials where I have mentioned the use of PowerShell. Still, many people are not aware of how to open Elevated Windows PowerShell in Windows 10. While most of us are aware with Command Prompt and how to open elevated Command Prompt but not many of the users are aware of the use of the Windows PowerShell.
The Windows PowerShell is an advanced version of Command Prompt which has ready to use cmdlets (pronounced “command-let”) which can be used to troubleshoot various issues with the operating system. PowerShell includes more than one hundred basic core cmdlets, and you can also write your own cmdlets. Anyway, without wasting any time, let’s see How to Open Elevated Windows PowerShell in Windows 10 with the help of the below-listed tutorial.
7 روش برای باز کردن پاورشل بالابر ویندوز در ویندوز 10
مطمئن شوید که یک نقطه بازیابی را فقط در صورتی که مشکلی پیش بیاید ایجاد کنید.
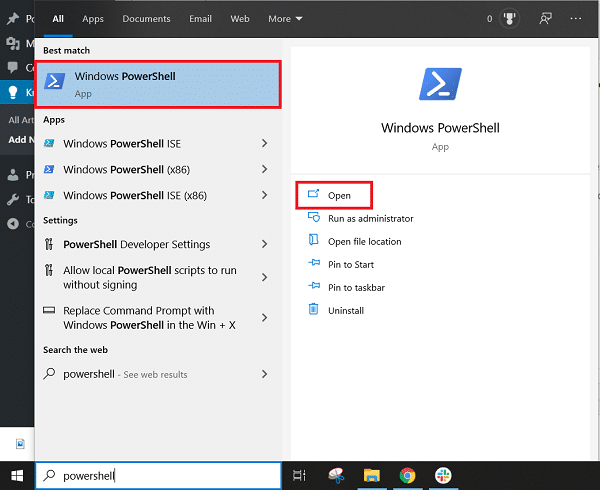
Method 1: Open Elevated Windows PowerShell in Windows 10 Search
1. Search for Windows PowerShell با در نوار جستجو و کلیک کنید اجرا به عنوان مدیر
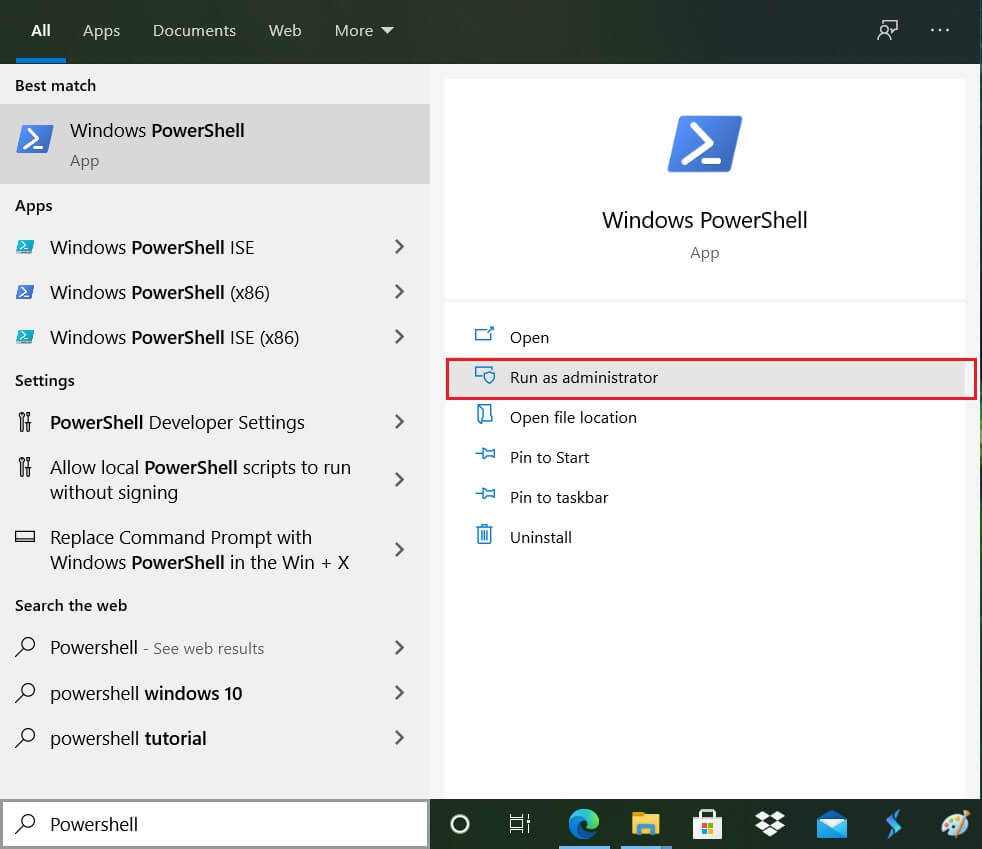
2. If you wish to open unelevated PowerShell, then click on it from the search result.
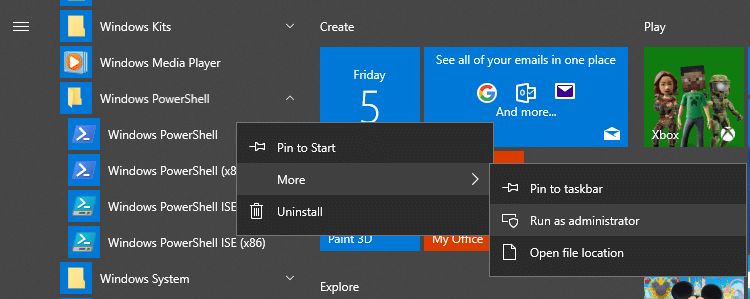
1. Press Windows Key to open منوی شروع.
2. Now Scroll down to the bottom of the list where you will find Windows PowerShell folder.
3. Click on the above folder to expand its content, now right-click on Windows PowerShell and select اجرا به عنوان مدیر
Method 3: Open Elevated Windows PowerShell from Run Window
1. Windows Key + R را فشار دهید و سپس تایپ کنید PowerShell با و وارد شوید

2. Windows PowerShell will launch, but if you want to open elevated PowerShell then type the following command into PowerShell window and hit Enter:
Start-Process PowerShell -Verb runAs
Method 4: Open Elevated Windows PowerShell from Task Manager
1 مطبوعات Ctrl + Shift + Esc Task Manager را باز کنید.
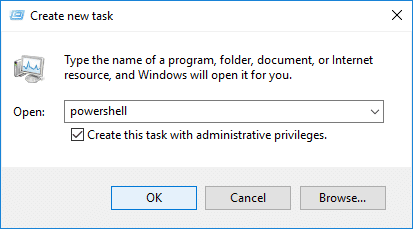
2. From the Task Manager menu, click on فایل، then select “کار جدید را اجرا کنید".
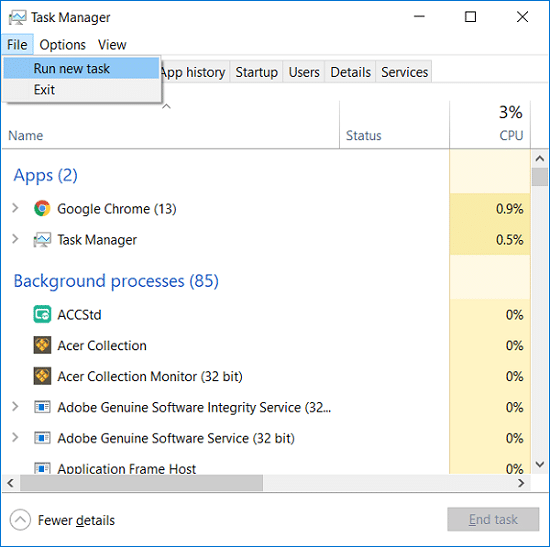
3. حالا تایپ کنید PowerShell با و علامت زدن "این کار را با امتیازات اداری ایجاد کنید"و کلیک کنید OK را بزنید.
Method 5: Open Elevated Windows PowerShell in File Explorer
1. Press Windows Key + E to open File Explorer then navigate to the folder or drive where you want to open the PowerShell.
2. Now from the File Explorer ribbon click on File then hover your mouse on “Open Windows PowerShell” سپس کلیک کنید Open Windows PowerShell as administrator.

OR
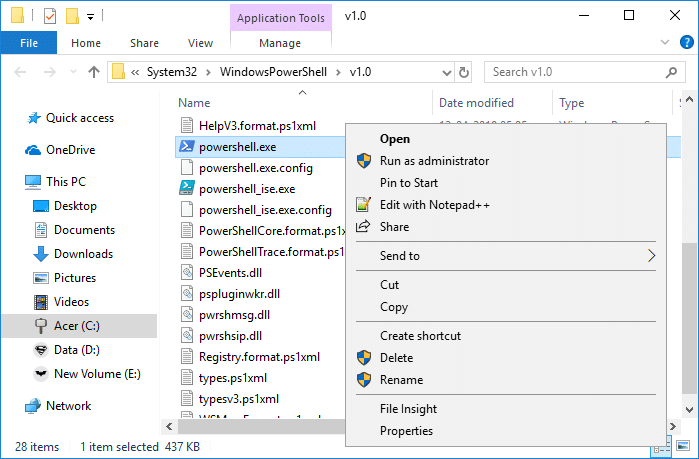
1. Navigate to the following location in the File Explorer:
C:WindowsSystem32WindowsPowerShellv1.0
2. Right-click on powershell.exe then select اجرا به عنوان مدیر
Method 6: Open Elevated Windows PowerShell in Command Prompt
1. Press Windows Key + Q to bring up search then type خط فرمان سپس روی آن کلیک راست کرده و انتخاب کنید اجرا به عنوان مدیر
توجه داشته باشید: You can open Elevated Command Prompt using any method you like.
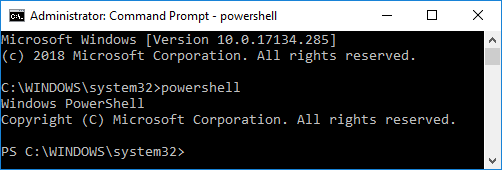
2. Now type the following command into cmd and hit Enter:
PowerShell با
1. Go to Start menu search and type PowerShell را and click on the search result.
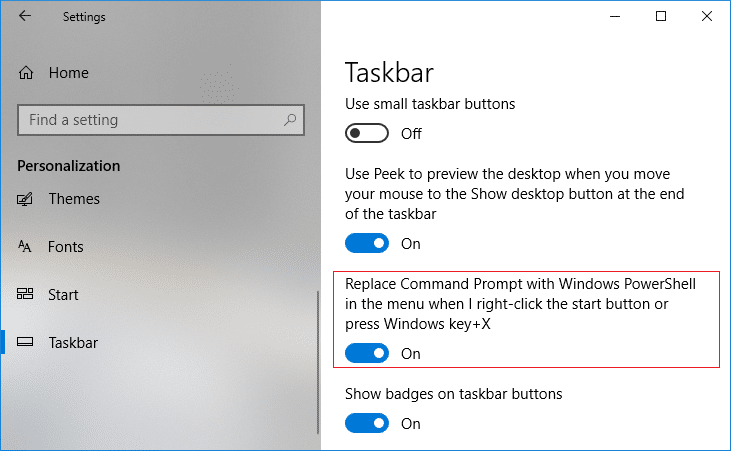
2. If you don’t see PowerShell in the Win + X menu then press Windows Key + I to open Settings.
3. Now click on Personalization then from the left-hand menu select وظیفه
4 مطمئن شوید که ضامن را فعال کنید زیر "Replace Command Prompt with Windows PowerShell in the menu when I right-click the start button or press Windows key + X".
5. Now again follow step 1 to open Elevated Windows PowerShell.
توصیه می شود:
این همان چیزی است که شما با موفقیت یاد گرفته اید How to Open Elevated Windows PowerShell in Windows 10 you have but if you still have any queries regarding this tutorial then feel free to ask them in the comment’s section.

