Export and Import Default App Associations in Windows 10: Windows support different programs to open a particular type of application, for example, a text file can be opened with notepad as well as WordPad and you can also associate a particular type of file to open with your favorite programs. For example, you can associate the .txt files to always open with notepad. Now once you associate the file type with the default application, you want to stay them as it is but sometimes Windows 10 resets them to Microsoft-recommended defaults.
Whenever you upgrade to a newer build, Windows typically reset your app associations to default and thus you lose all your customization and app associations in Windows 10. In order to avoid this scenario you could export your default app associations and whenever needed you can easily import them back. So without wasting any time let’s see How to Export and Import Default App Associations in Windows 10 with the help of the below-listed tutorial.
Export and Import Default App Associations in Windows 10
مطمئن شوید که یک نقطه بازیابی را فقط در صورتی که مشکلی پیش بیاید ایجاد کنید.
Method 1: Export Custom Default App Associations in Windows 10
1. Windows Key + X را فشار دهید و سپس انتخاب کنید Command Prompt (مدیر).

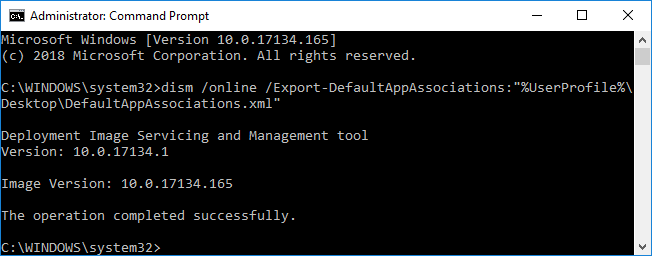
2.Copy & paste the below command into cmd and hit Enter:
dism /online /Export-DefaultAppAssociations:"%UserProfile%DesktopDefaultAppAssociations.xml"
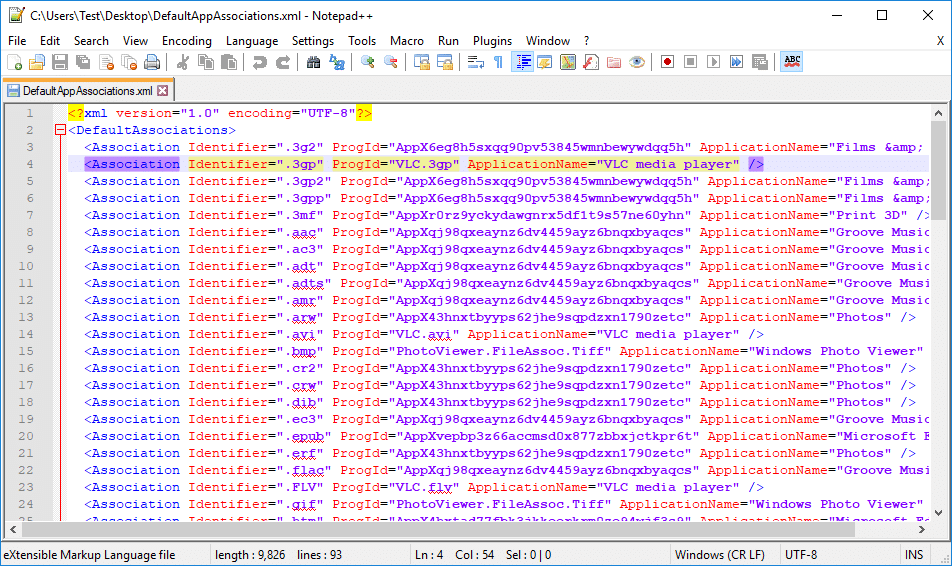
توجه داشته باشید: As soon as you hit Enter, there would be a new file on your desktop with the name “DefaultAppAssociations.xml” which would contain your custom default app associations.

3.You can now use this file to import your custom default app associations at any time you want.
4.Close the elevated command prompt and then restart your PC.
Method 2: Import Custom Default App Associations for New Users in Windows 10
You can either use the above file (DefaultAppAssociations.xml) to import your custom default app associations or import them for a new user.
1.Login to your desired user account (Either your user account or the new user account).
2.Make sure to copy the above-generated file (DefaultAppAssociations.xml) to the user account you just logged into.

توجه داشته باشید: Copy the file to the desktop for the particular user account.
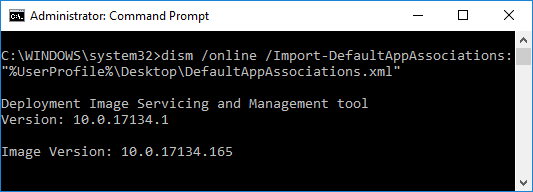
3.Now copy & paste the following command into cmd and hit Enter:
dism /online /Import-DefaultAppAssociations:"%UserProfile%DesktopDefaultAppAssociations.xml"
4.As soon as you hit Enter you will set a custom default app associations for the particular user account.
5.Once done, you can now close the elevated command prompt.
Method 3: Completely Remove Custom Default App Associations
1. Windows Key + X را فشار دهید و سپس انتخاب کنید Command Prompt (مدیر).

2.Copy & paste the below command into cmd and hit Enter:
Dism.exe /Online /Remove-DefaultAppAssociations
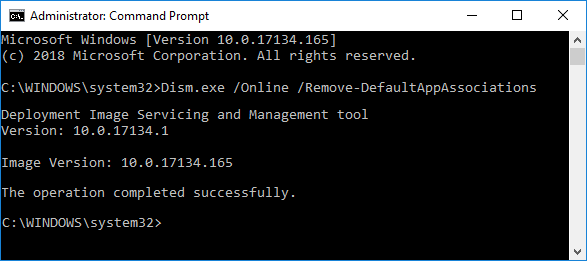
3.Once the command finish processing, close the elevated command prompt.
توصیه می شود:
این همان چیزی است که شما با موفقیت یاد گرفته اید How to Export and Import Default App Associations in Windows 10 اما اگر هنوز در مورد این آموزش سوالی دارید، در قسمت نظرات بپرسید.

![USB Device Not Working in Windows 10 [SOLVED]](https://lbsite.org/wp-content/uploads/2023/01/Fix-USB-Device-Not-Working-in-Windows-10-SOLVED.jpg "USB Device Not Working in Windows 10 [SOLVED]")