If you have 2 in 1 Windows device such as Tablets, you would be familiar with the importance of the screen rotation feature. Users report that the screen rotation feature has stopped working & the Screen Rotation Lock option is greyed out. If you’re facing this issue, then don’t worry as this is just a setting issue which means it can be easily fixed. This guide will walk you through the steps to fix rotation lock greyed out in Windows 10.
Here are issues which can be resolved using this guide:
- Rotation lock missing
- Auto Rotate not working
- Rotation lock greyed out.
- Screen rotation not working
Fix Rotation Lock greyed out in Windows 10
مطمئن شوید که یک نقطه بازیابی را فقط در صورتی که مشکلی پیش بیاید ایجاد کنید.
Method – 1: Enable Portrait Mode
One of the methods to fix this problem is to rotate your screen in portrait mode. Once you rotate it to portrait mode, most probably your rotation lock would start working, i.e. clickable again. In case your device is not rotating into portrait mode automatically, try to do it manually.
1 مطبوعات ویندوز کلید + من to open Settings then click on the سیستم آیکون.

2. Make sure to select نمایش دادن از منوی سمت چپ
3. مکان را پیدا کنید Orientation section where you need to choose تصویر از منوی کشویی
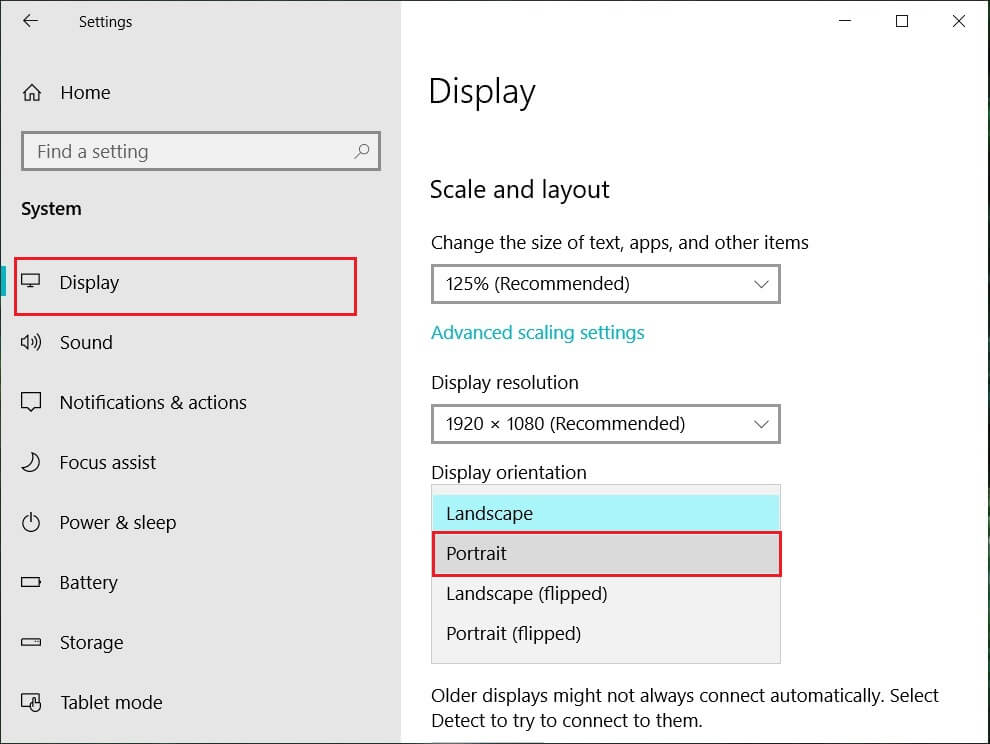
4. Your device will automatically turn into portrait mode.
Method – 2: Use your device in tent mode
Some users, particularly Dell Inspiron, experienced that when their rotation lock is greyed out, the only way to solve this problem is to put your device in Tent Mode.
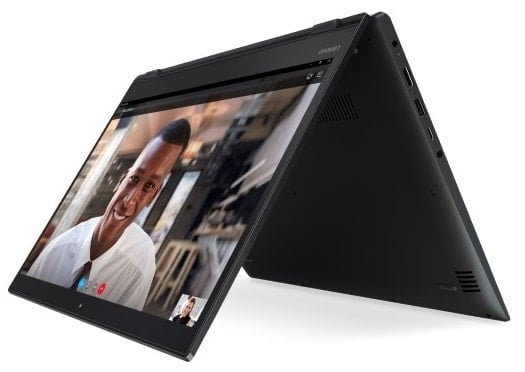
تصویر های اعتباری: مایکروسافت
1. You need to put your device in Tent Mode. If your display is upside down, you need not worry.
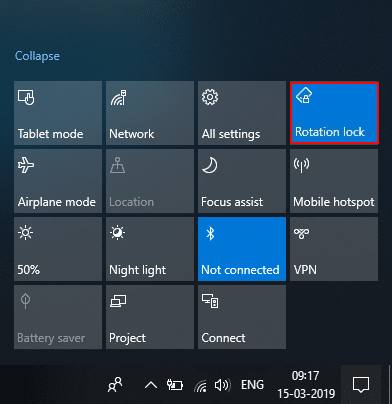
2. اکنون بر روی کلیک کنید Windows Action Center, قفل چرخش will be working. Here you need to turn it off if you want so that your device rotate properly.
Method – 3: Disconnect your keyboard
If rotation lock is greyed in your Dell XPS and Surface Pro 3 (2-in-1 device), you need to disconnect your keyboard, and many users reported that disconnecting the keyboard solves the rotation lock problem. If you own different devices, you can still use this method to fix rotation lock greyed out in Windows 10 issue.
Method – 4: Switch to Tablet Mode
Many users experienced that this rotation greyed out the problem by switching their device into Tablet Mode. If it is switched automatically, it is good; otherwise, you can do it manually.
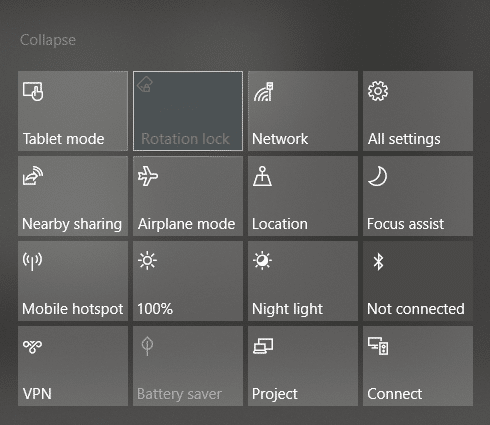
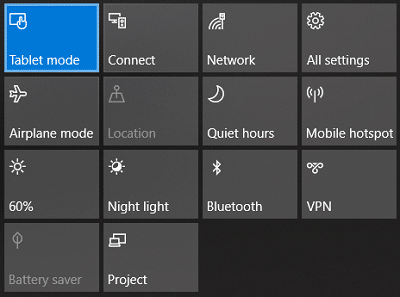
1. در را کلیک کنید Windows Action Center.
2. در اینجا خواهید یافت حالت قرص option, Click on It.
OR
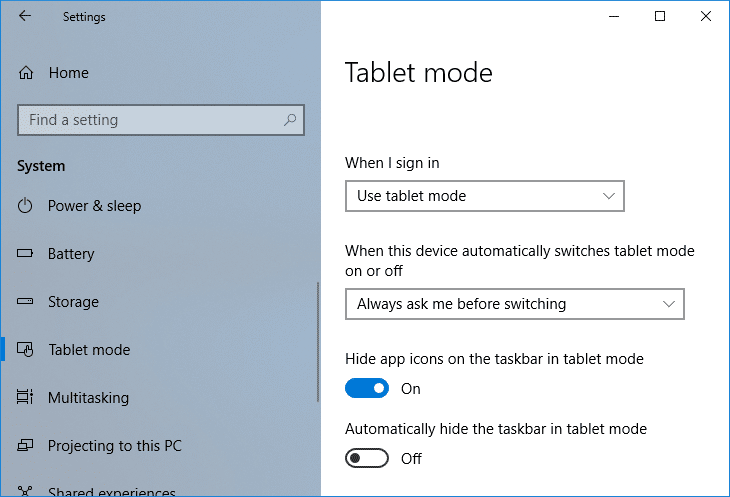
1. کلید Windows + I را فشار دهید تا باز شود تنظیمات سپس روی آن کلیک کنید سیستم آیکون.
2. Here it would help if you located حالت قرص option under the left window pane.
3. Now from the “When I sign in” drop-down, select “از حالت تبلت استفاده کنید".
Method – 5: Change LastOrientation Registry Value
If you still experience a problem, you can solve it by changing some registry values.
1. Press Windows +R and enter regedit را سپس وارد شوید.

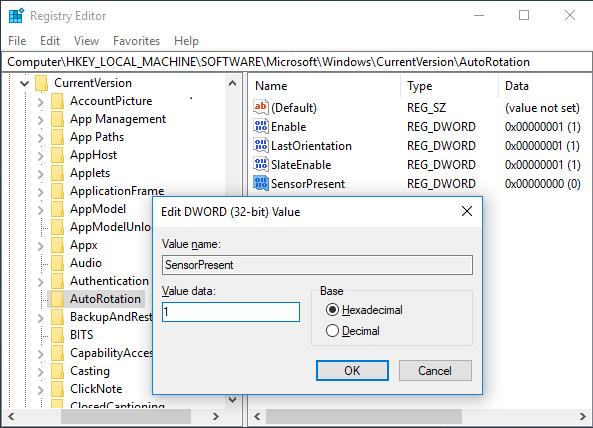
2. Once registry editor opens, you need to navigate to the below path:
HKEY_LOCAL_MACHINESOFTWAREMicrosoftWindowsCurrentVersionAutoRotation
توجه داشته باشید: Follow the above folders one by one to locate Auto Rotation.
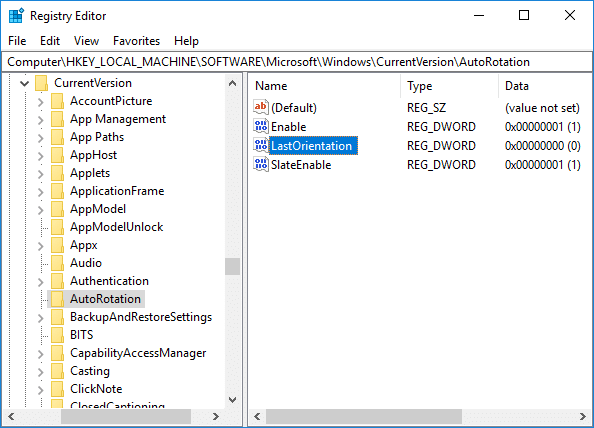
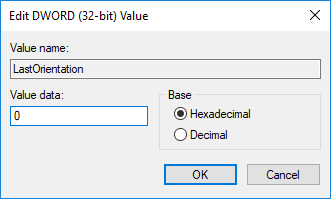
3 مطمئن شوید که select AutoRotation سپس در پنجره سمت راست روی آن دوبار کلیک کنید Last Orientation DWORD.
4. Now enter 0 under Value data field و تأیید را کلیک کنید.
5. اگر وجود دارد SensorPresent DWORD, double-click on it and set its مقدار تا 1 است.
Method – 6: Check Sensor Monitoring Service
Sometimes services of your device can cause a rotation lock problem. Therefore, we can get it sorted with Windows Monitoring services feature.
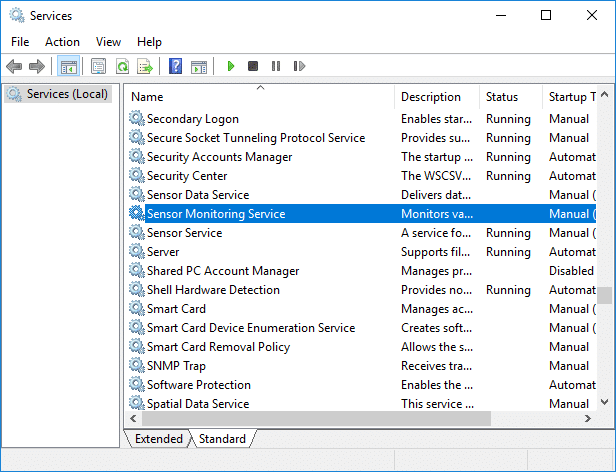
1. Windows + R را فشار دهید و تایپ کنید services.msc را و وارد شوید

2. Once the services window opens, find the Sensor Monitoring services option and double click on it.
3. Now, from the Startup type drop-down select اتوماتیک و سپس بر روی کلیک کنید دکمه شروع to start the service.
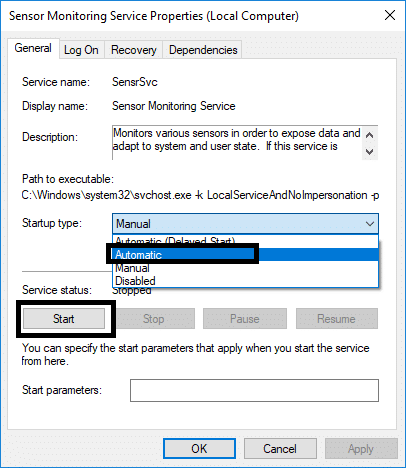
4. Finally, click Apply followed by OK to save the settings, and you can reboot the system to apply the changes.
Method – 7: Disable YMC service
If you are using a Lenovo Yoga device and experiencing this problem, you can fix rotation lock grayed out in the Windows 10 issue by disabling YMC service.
1. Windows + R type services.msc را و وارد شوید
2. پیدا کردن YMC services و روی آن دوبار کلیک کنید.
3. نوع Startup را بر روی تنظیم کنید غیر فعال and click Apply, followed by OK.
Method – 8: Update Display Drivers
One reason for this problem could be the driver update. If your respective driver for the monitor is not updated, it can cause the Rotation Lock greyed out in Windows 10 Issue.
بهروزرسانی دستی درایورهای گرافیک با استفاده از Device Manager
1. Windows Key + R را فشار دهید و سپس تایپ کنید devmgmt.msc و اینتر را بزنید تا باز شود مدیریت دستگاه.

2. بعد، گسترش دهید آداپتورهای صفحه نمایش و روی کارت گرافیک خود کلیک راست کرده و انتخاب کنید فعال کردن

3. پس از انجام مجدد این کار، بر روی کارت گرافیک خود کلیک راست کرده و " را انتخاب کنید.بهروزرسانی درایور".

4 انتخاب کنید "به طور خودکار جستجو برای نرم افزار راننده به روز شدهو اجازه دهید این فرآیند را به پایان برساند.

5. If the above steps helped fix the issue then very good, if not then continue.
6. دوباره بر روی کارت گرافیک خود کلیک راست کرده و “بهروزرسانی درایور” اما این بار در صفحه بعدی ” را انتخاب کنیدرایانه من را برای نرم افزار راننده مرور کنید."

7. اکنون “اجازه بدهید از یک لیست از درایورهای موجود در رایانه خود انتخاب کنم"

8. سرانجام ، آخرین درایور را انتخاب کنید از لیست و کلیک کنید بعدی.
9. اجازه دهید فرآیند بالا به پایان برسد و کامپیوتر خود را مجددا راه اندازی کنید تا تغییرات ذخیره شود.
برای به روز رسانی درایورهای کارت گرافیک یکپارچه (در این مورد اینتل) مراحل مشابهی را دنبال کنید. ببین میتونی Fix Rotation Lock greyed out Issue، اگر نه، سپس به مرحله بعدی ادامه دهید.
بهروزرسانی خودکار درایورهای گرافیک از وبسایت سازنده
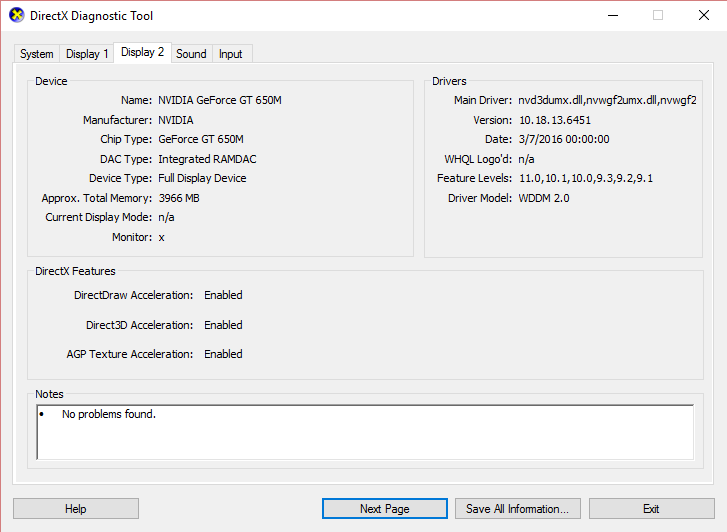
1. Windows Key + R را فشار دهید و در کادر محاوره ای تایپ کنیدdxdiag” و اینتر را بزنید.

2. بعد از آن سربرگ نمایشگر را جستجو کنید (دو برگه نمایشگر یکی برای کارت گرافیک یکپارچه و دیگری مربوط به انویدیا خواهد بود) روی تب Display کلیک کنید و کارت گرافیک خود را پیدا کنید.
3. حالا به درایور Nvidia بروید وب سایت بارگیری و جزئیات محصول را که متوجه می شویم وارد کنید.
4. پس از وارد کردن اطلاعات درایورهای خود را جستجو کنید، روی Agree کلیک کنید و درایورها را دانلود کنید.

5. پس از دانلود موفقیت آمیز، درایور را نصب کنید و درایورهای Nvidia خود را با موفقیت به صورت دستی آپدیت کرده اید.
Method – 9: Remove Intel Virtual Buttons Driver
Some users reported that Intel Virtual button drivers cause rotation lock problem on your device. To solve this problem, you can uninstall the driver.
1. Open Device manager on your device by pressing Windows + R and type devmgmt.msc and hit Enter or press Windows X and choose مدیریت دستگاه from the options list.
2. Once Device manager box is opened locate Intel virtual buttons driver.
3. Right-click on it and choose حذف کردن
توصیه می شود:
امیدوارم این مقاله مفید بوده باشد و اکنون به راحتی بتوانید Fix Rotation Lock greyed out in Windows 10، اما اگر هنوز در مورد این آموزش سوالی دارید، در قسمت نظرات بپرسید.
")
