Windows 11 provides many new computer management tools, allowing users to customize their accounts to best fit their needs. For example, you can easily adjust the account type, personalize features, and optimize your PC’s security settings.
In this tutorial, we’ll explain how to manage your user account settings on the Windows 11 operating system.
How to Add Accounts on Windows 11
ویندوز 11 allows you to easily share the device with multiple people while maintaining your own settings and keeping your personal files private. All you need to do is add an account.
How to Add a Microsoft Account
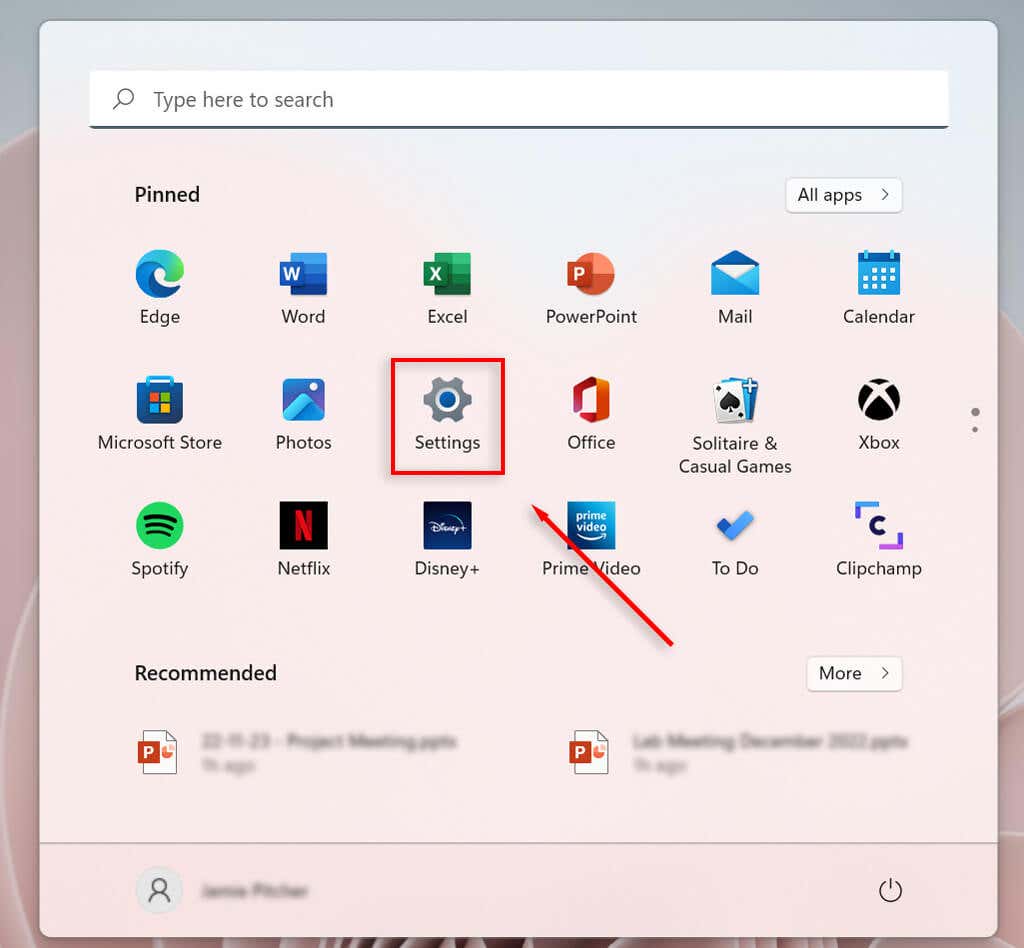
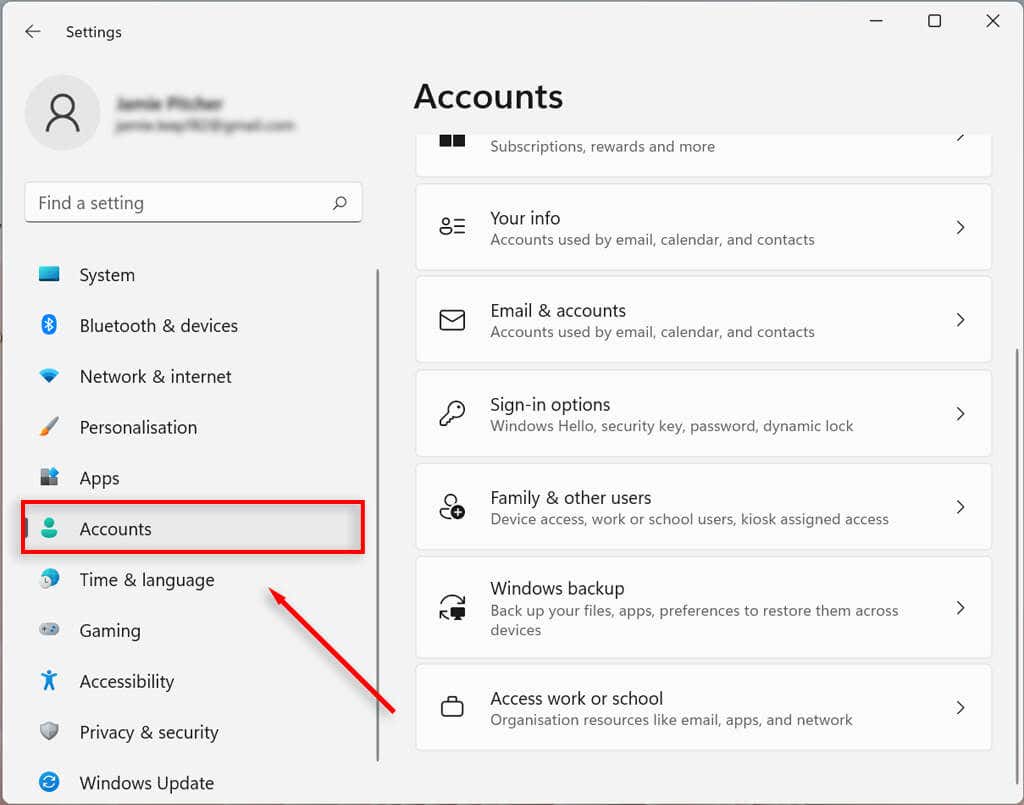
- In the Start menu, open the تنظیمات نرم افزار.
- انتخاب کنید حساب ها.

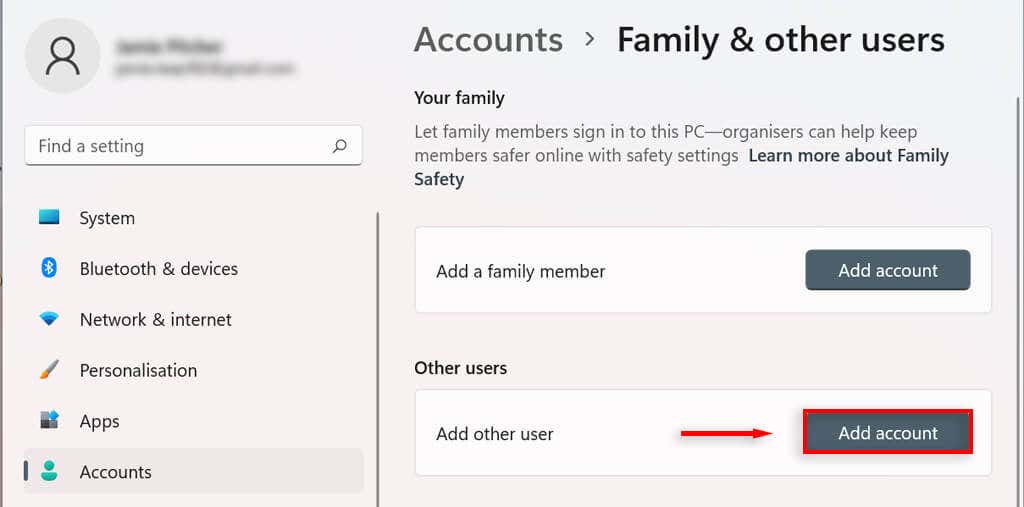
- را انتخاب کنید خانواده و سایر کاربران (This may show up as “Family”).

- بر اساس دیگر کاربران بخش، انتخاب کنید اضافه کردن حساب.
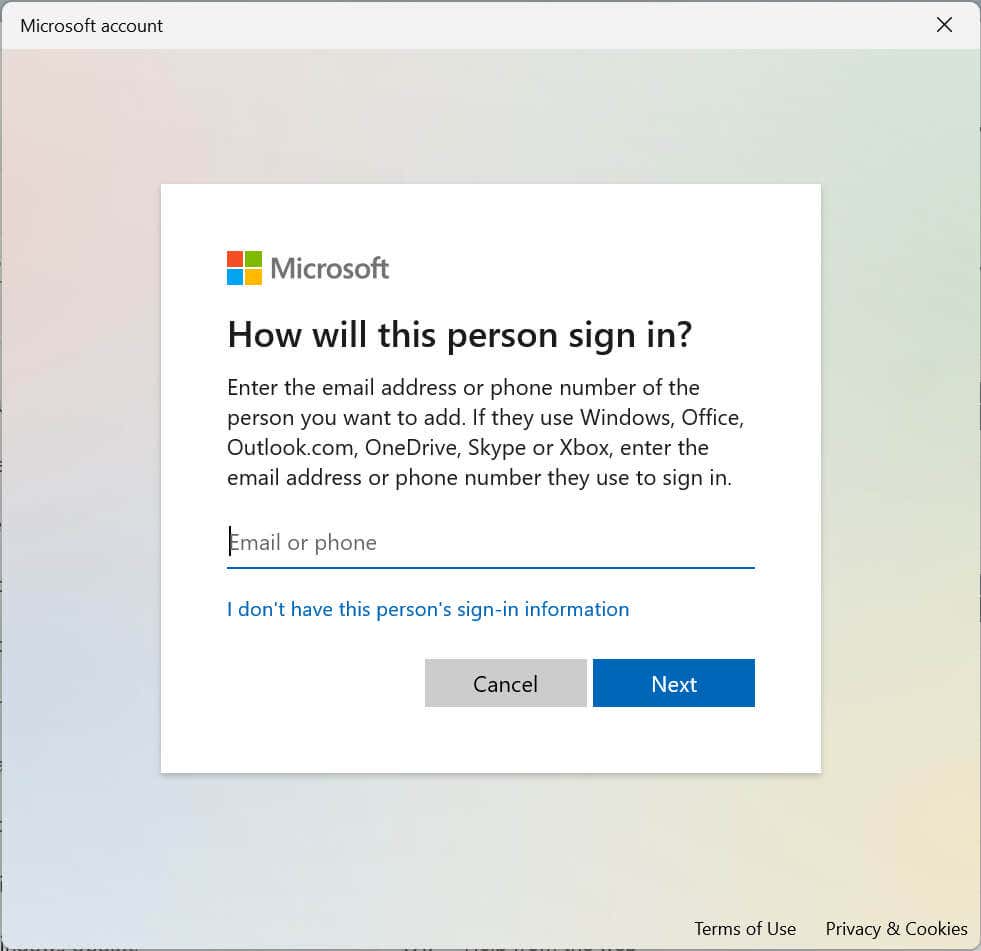
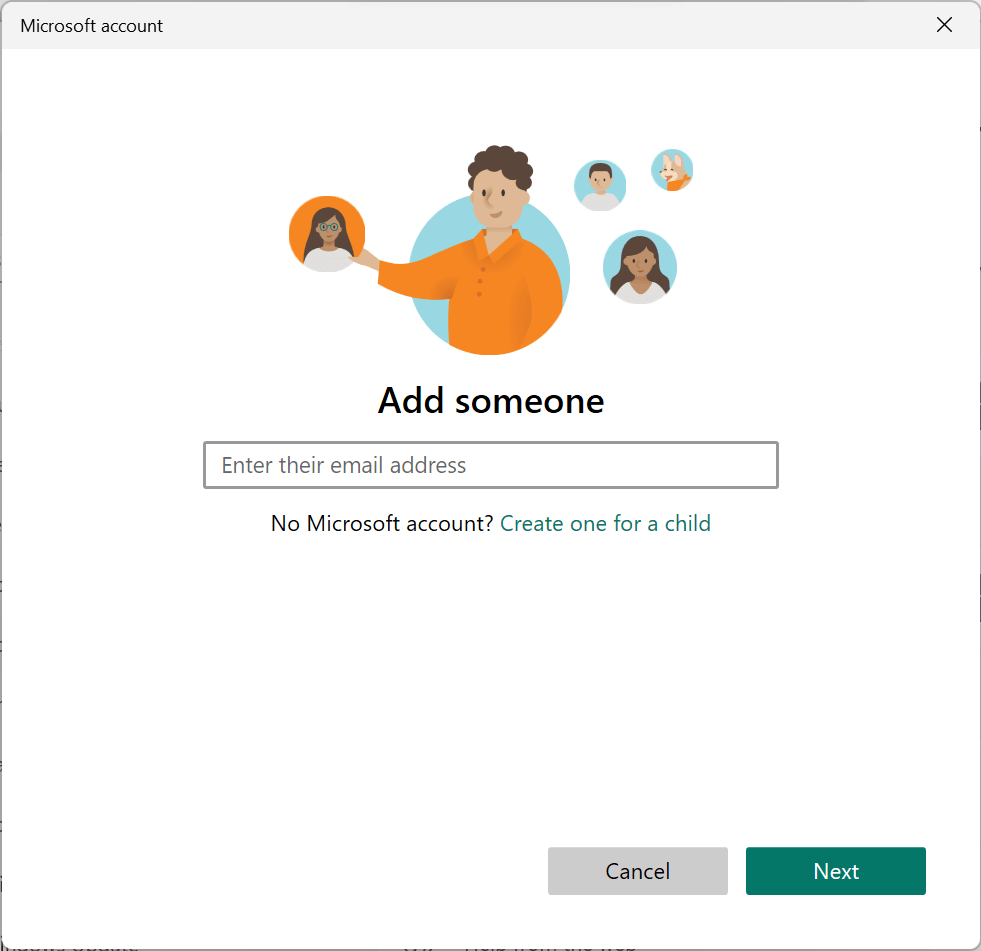
- Enter the email address or phone number of the new user and select بعدی.
- انتخاب کنید پایان.
How to Create a Local Account
You can create a local or offline account without needing a Microsoft account. This account can only be accessed on the computer it was created on.
- باز کن تنظیمات.
- انتخاب کنید حساب ها.
- را انتخاب کنید خانواده و سایر کاربران.
- تحت Other users, در کنار Add other کاربر را انتخاب کنید اضافه کردن حساب.
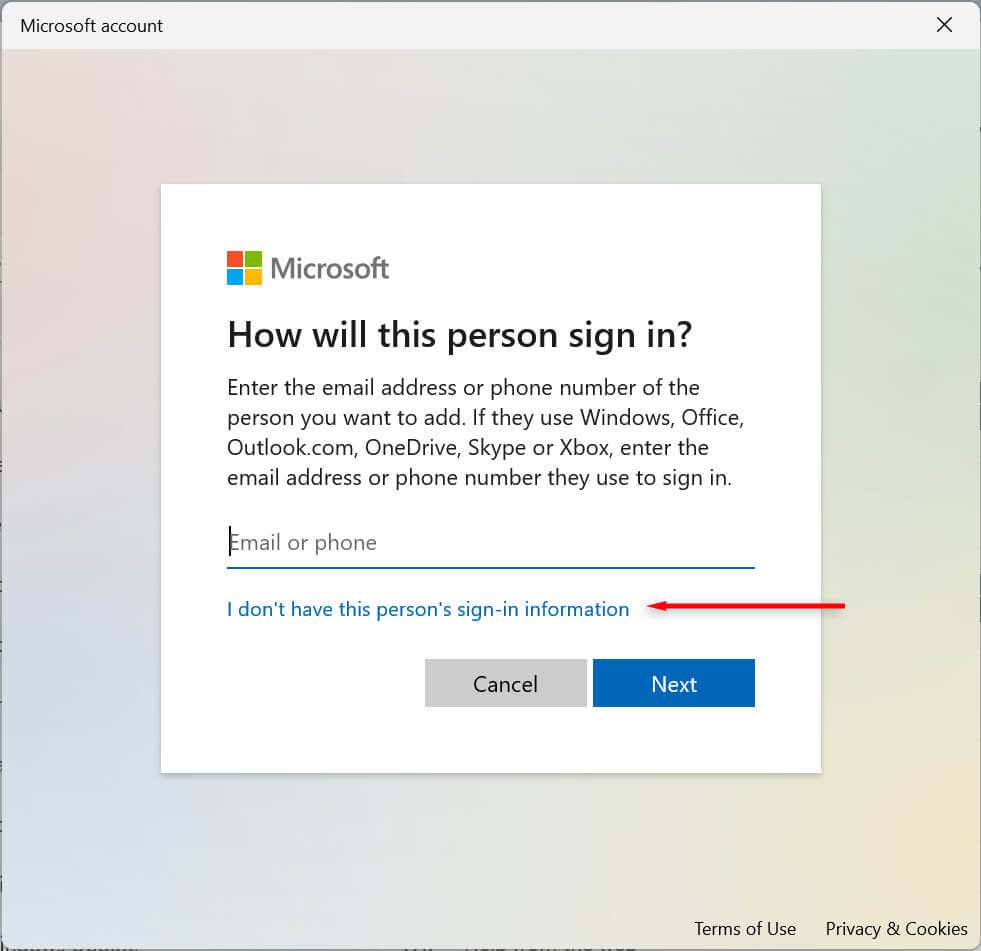
- In the new dialog box, choose I don’t have this person’s sign-in information.
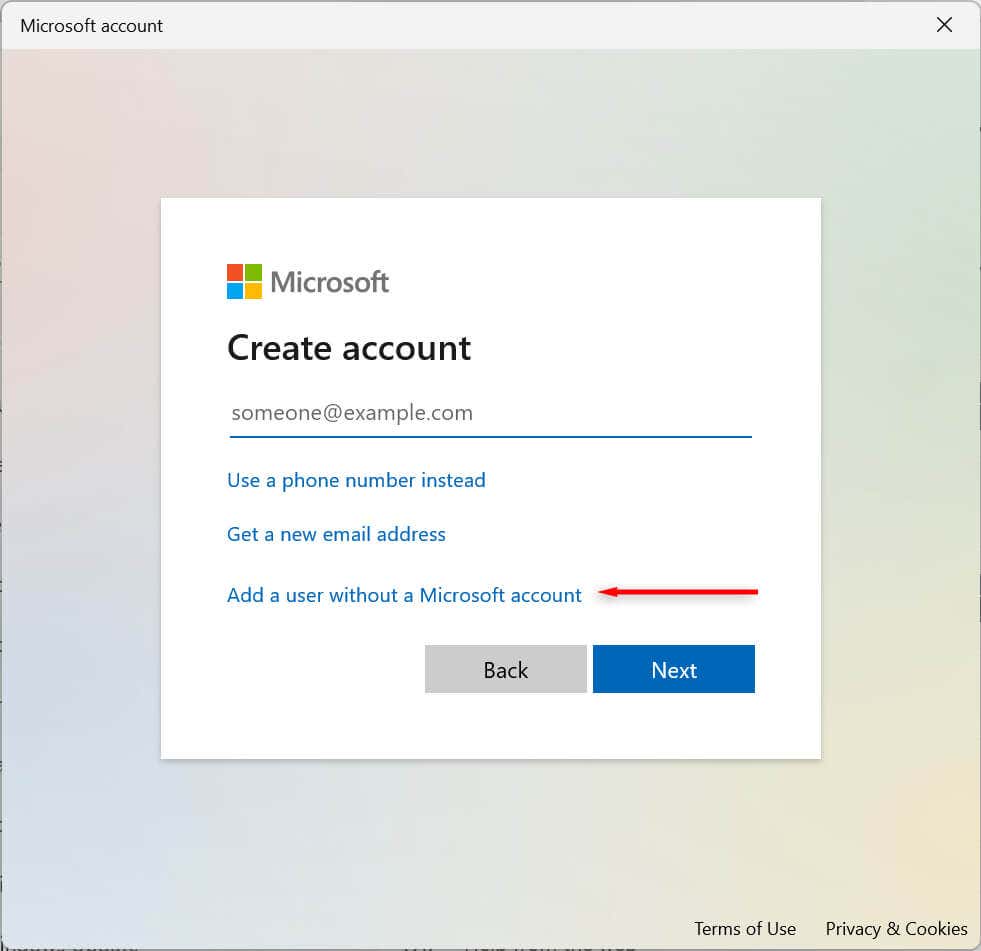
- انتخاب کنید بدون کاربر اضافه کنید حساب کاربری مایکروسافت.
- Enter the account name, create a password for the account, and fill in the security questions. Then, choose بعدی.
How to Add a Family Member Account
You can also manage your family members, allowing each person to have their own desktop, settings, apps, and personal files. There are two family account types: Child and Adult.
A Child account offers a controlled environment. The child can use the device as normal, but the organizer sets their permissions and activities, enforces limits on apps and games, limits screen time, and tracks user activity.
An Adult account is the same as a traditional local account, but enables control over Child accounts.
To add a family member account:
- باز کن تنظیمات.
- را انتخاب کنید حساب ها.
- انتخاب کنید خانواده و سایر کاربران.
- بعد به اضافه کردن اعضای خانواده، انتخاب کنید اضافه کردن حساب.
- Confirm the email address of the person you want to add.
- را انتخاب کنید بعدی.
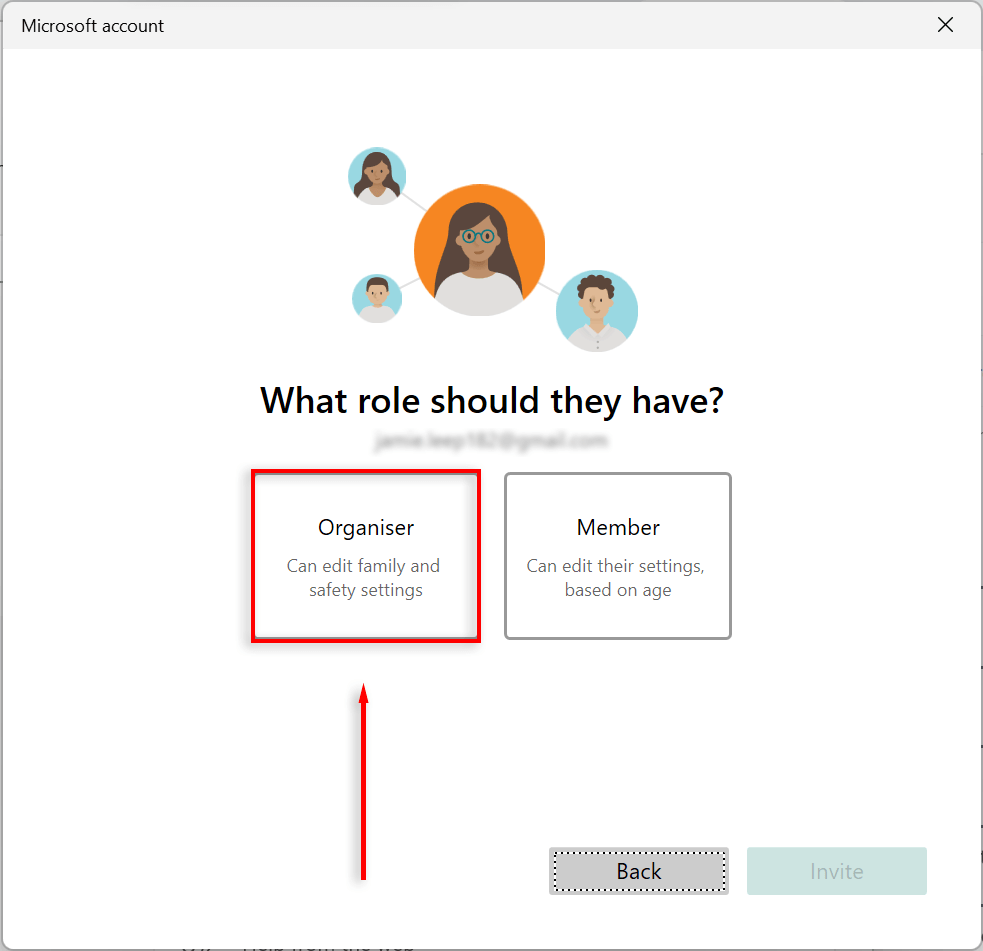
- را انتخاب کنید عضو option to add a child account, and select برگزار کننده to add an adult one. Then, Press the دعوت را فشار دهید.
- باز کردن invitation email you received and press قبول دعوت سپس همین الان ملحق شوید، همین الان بپیوندید. This may not be necessary.
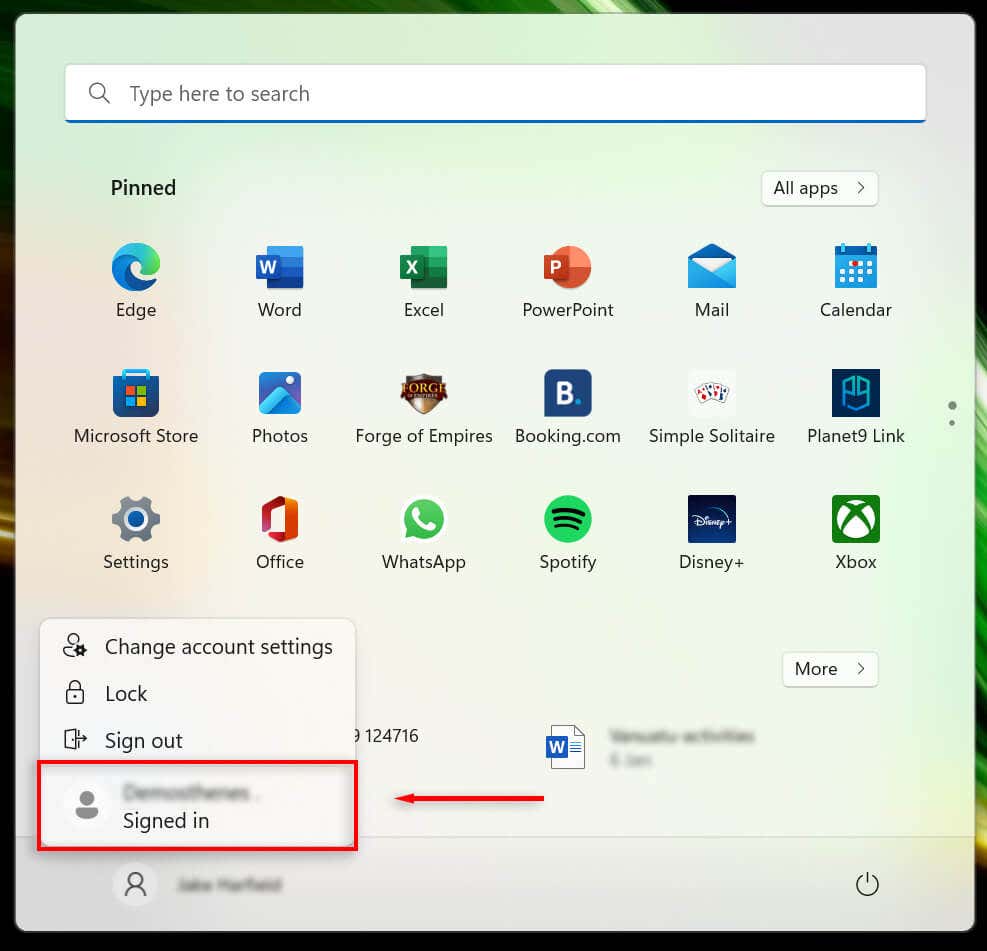
- را فشار دهید منوی شروع, click your نماد کاربر, and select the added family account to sign out of your current account.
- Sign in with the family account’s Microsoft account credentials and let the PC set up your new user account. This may take some time.
- را انتخاب کنید حالا بروید option or set up your account as desired. Create a عناوین خبری if you’d like one. Finally, select OK.
توجه داشته باشید: There’re many ways to add accounts in Windows 11, including by using the netplwiz tool and Command Prompt. See our tutorial on creating local users and groups to explore these options.
How to View Account Details
Windows 11 lets you view and customize your account details. To see your account details:
- باز کن تنظیمات.
- انتخاب کنید حساب ها.
- انتخاب کنید اطلاعات شما.
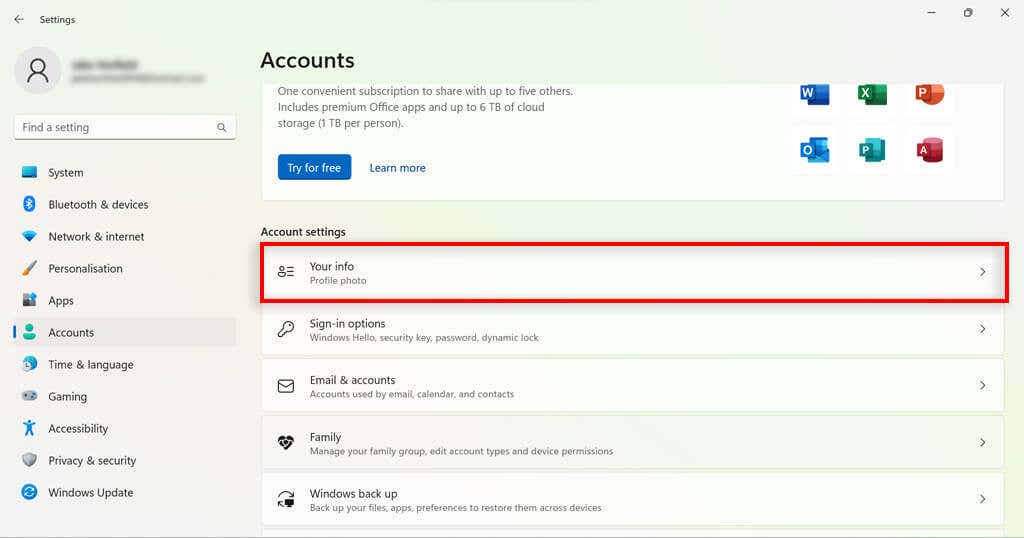
- Confirm your account details.
How to Change User Account Type on Windows 11
Windows 11 allows you to change standard user accounts to administrator accounts and vice versa.
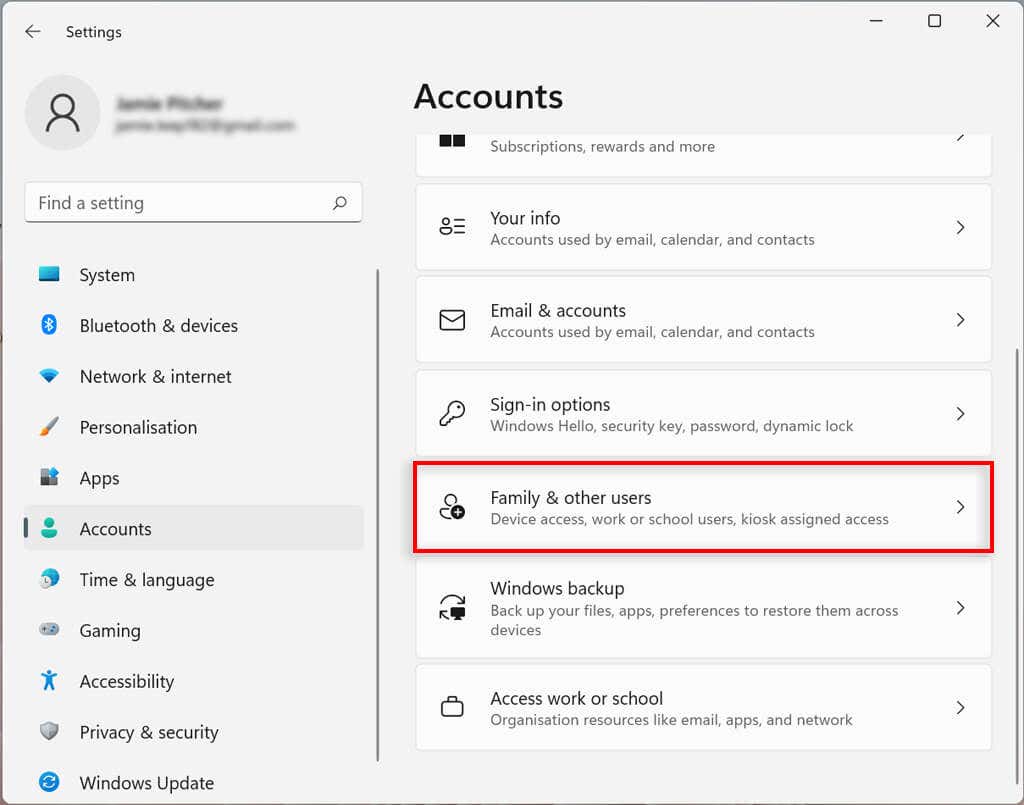
- باز کن تنظیمات.
- انتخاب کنید حساب ها.
- را انتخاب کنید خانواده و سایر کاربران.
- تحت سایر کاربران, select the account you would like to change and select نوع حساب را تغییر دهید.
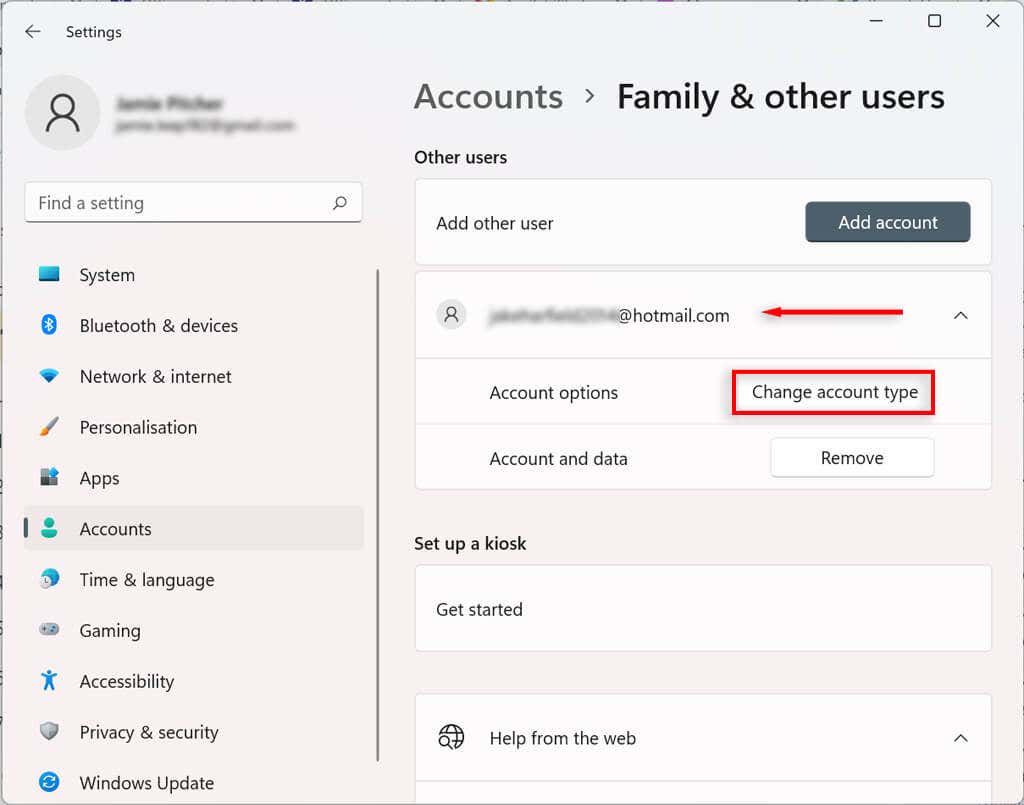
- Select the account type you’d like.
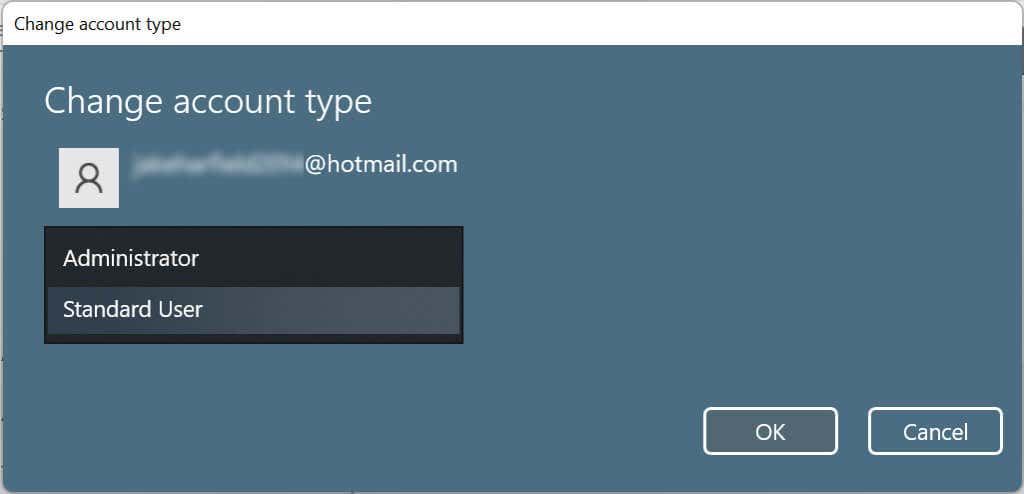
- رسانه ها و مطبوعات OK.
Once you complete the steps, the new account type will dictate the user’s access permissions.
How To Delete an Account On Windows 11
If you no longer need an account, you can easily delete it and all related data.
How to Delete a Family Account
- باز کن تنظیمات.
- انتخاب کنید حساب ها.
- را انتخاب کنید خانواده و سایر کاربران.
- تحت سایر کاربران, select the user you want to delete and select برداشتن. You may need to sign in to confirm your decision.
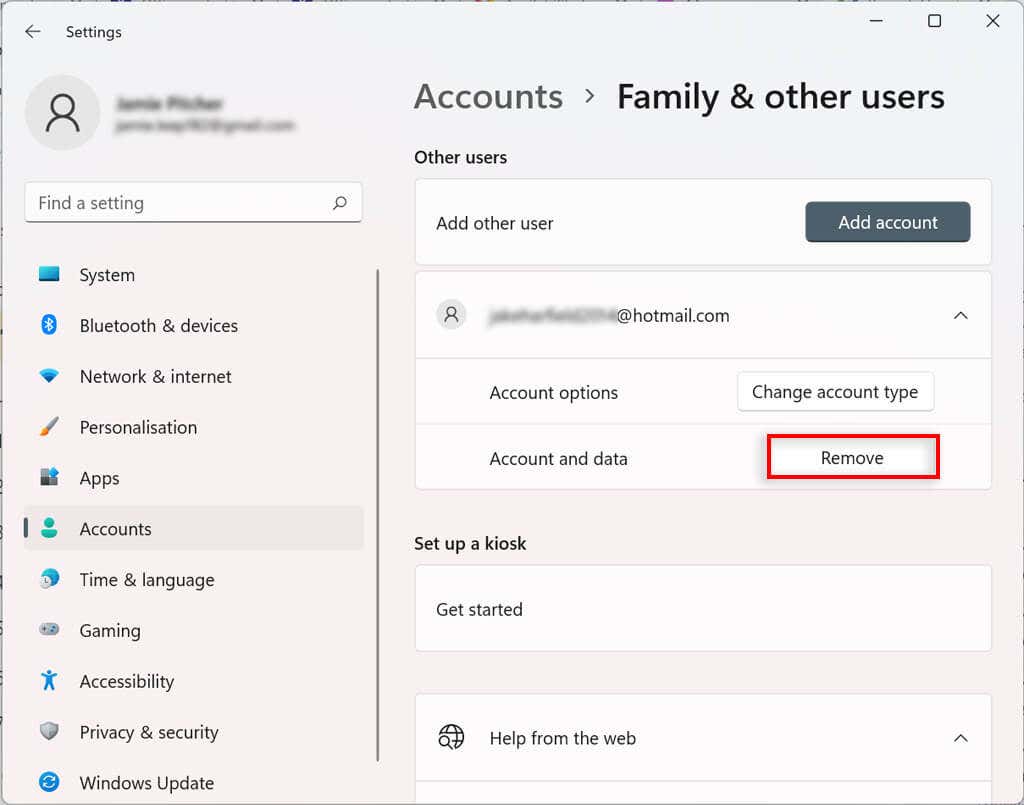
- انتخاب کنید برداشتن.
How to Link Additional Emails to Mail, Calendar, and Contacts Apps to a Windows 11 User Account
You can add other email accounts to your Windows 11 user account. This way, you can automatically link the information on other apps, such as Mail, Calendar, and contacts, without having to add your details separately.
- باز کن تنظیمات.
- انتخاب کنید حساب ها.

- را انتخاب کنید حسابهای ایمیل.
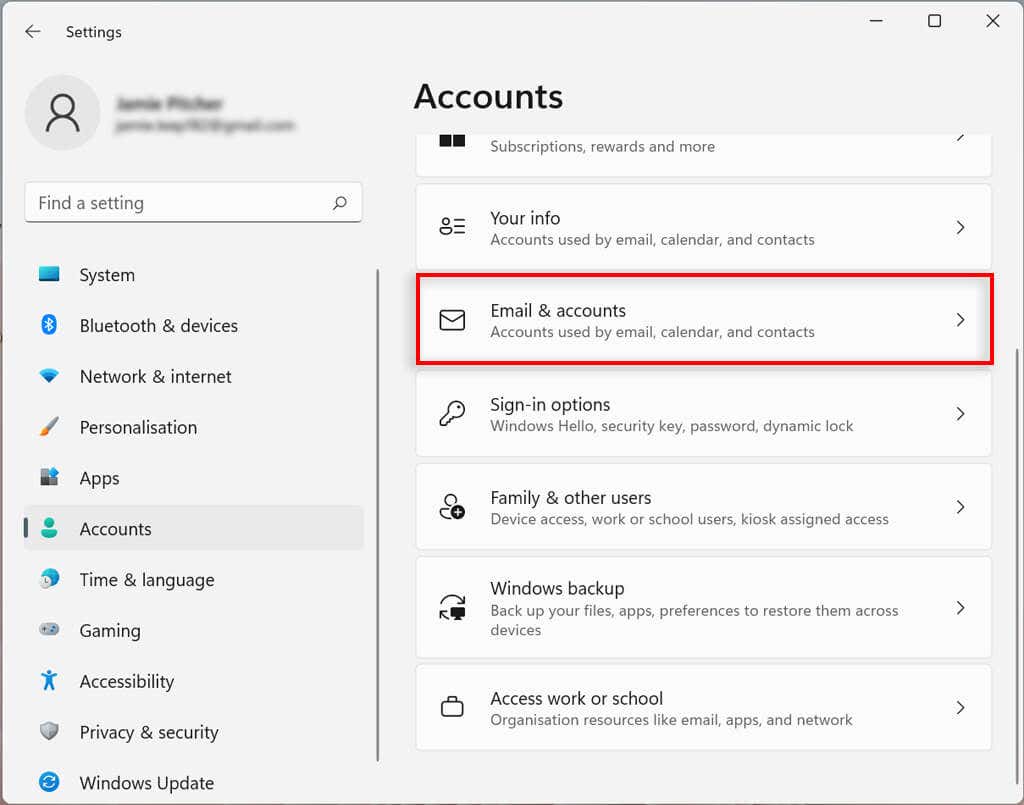
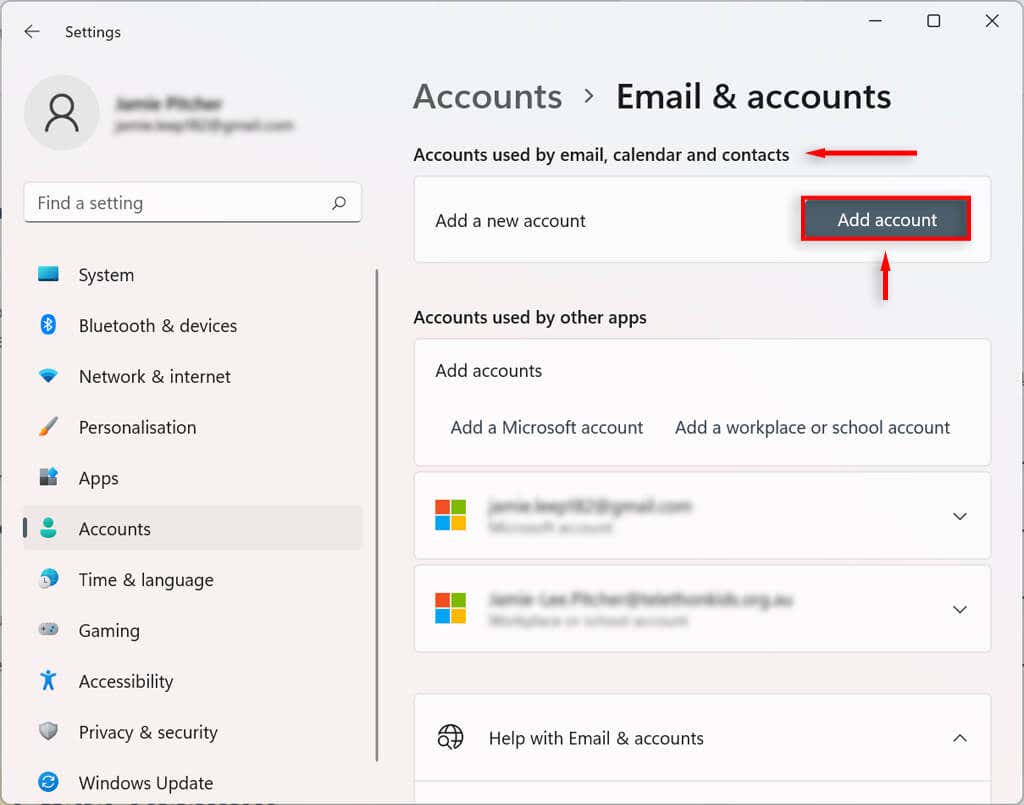
- تحت Accounts used by email, calendar, and contacts، انتخاب کنید یک حساب کاربری اضافه کنید.
- Select the email service provider (such as Outlook, Google, or iCloud).
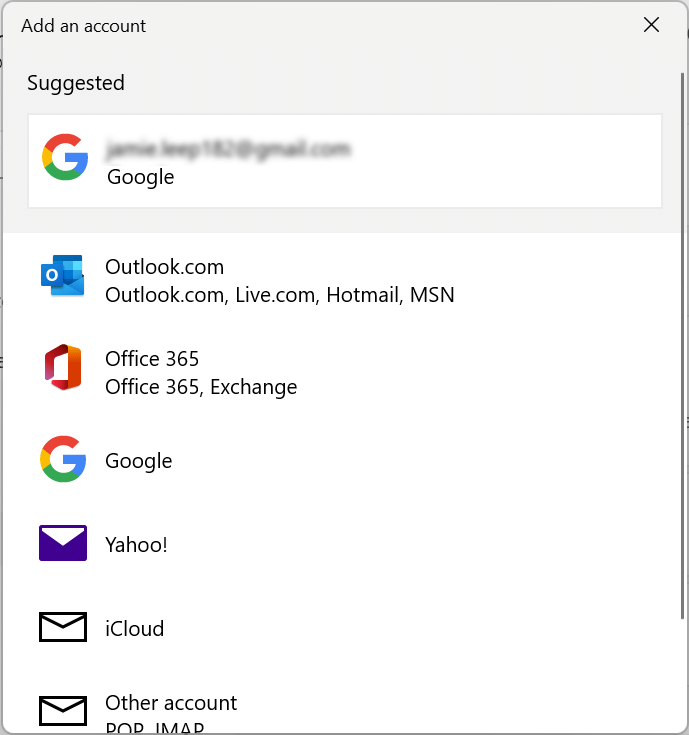
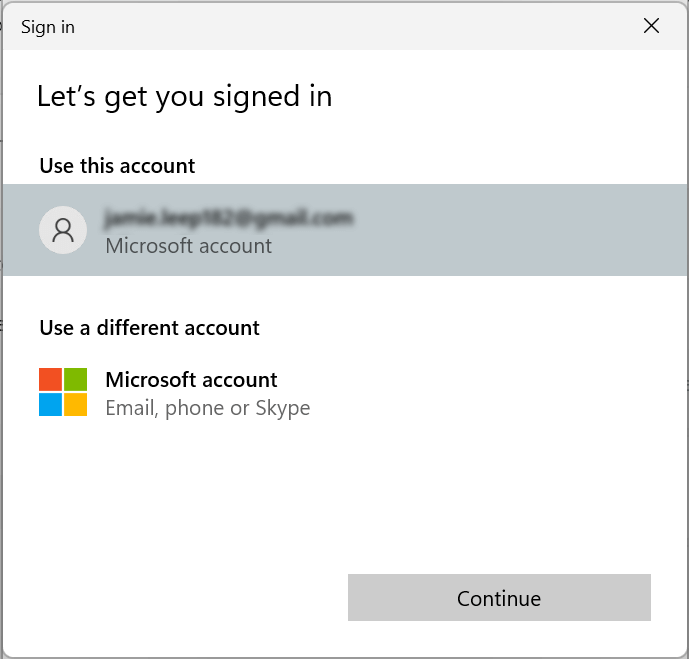
- Select the account you would like to add the email to and click ادامه.
How to Link a Workplace or School Account to a Windows 11 User Account
You can also add workplace and school accounts to your Windows 11 user account. This will allow you to use apps such as OneDrive.
- باز کن تنظیمات.
- انتخاب کنید حساب ها.
- را انتخاب کنید حسابهای ایمیل.

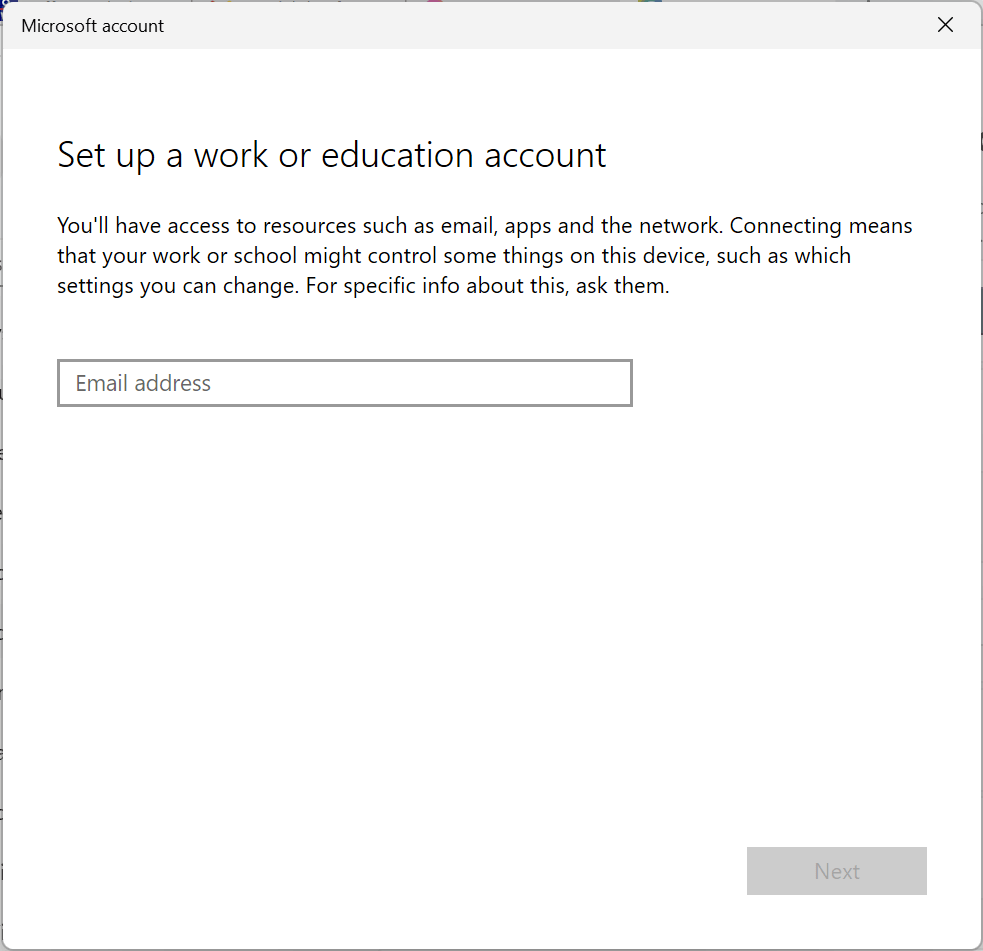
- تحت Accounts used by other برنامه های، انتخاب کنید Add a workplace or school account.
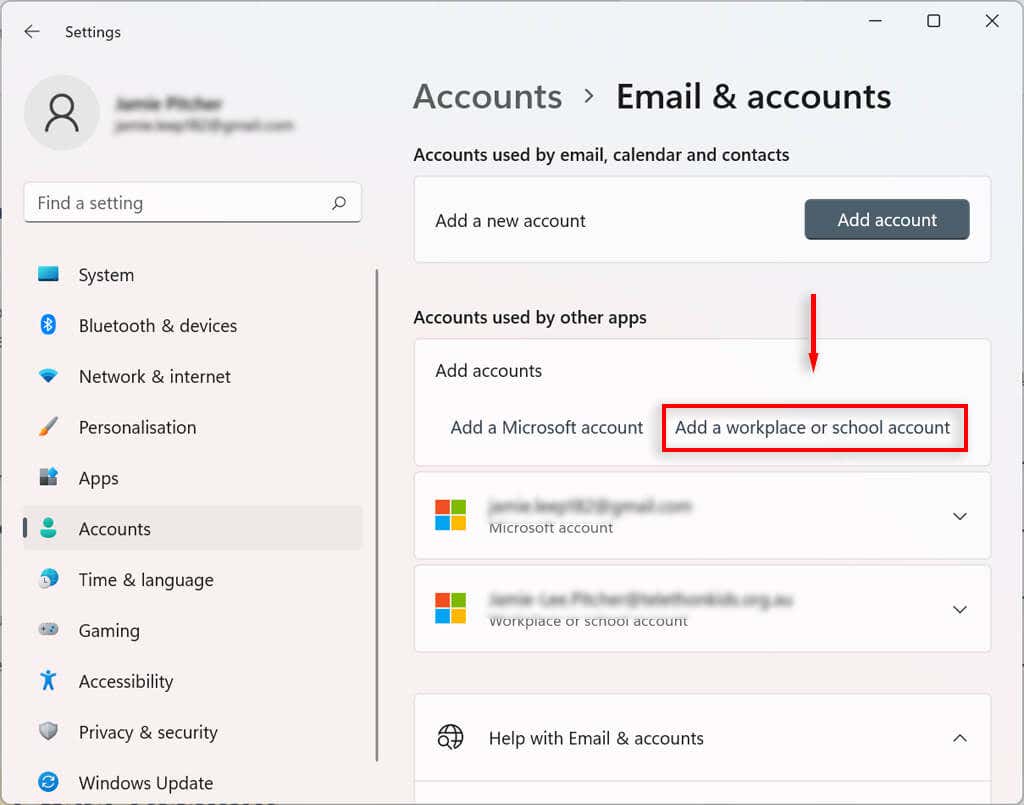
- Enter the email address for the relevant account and sign in.
How to Change Sign-In Options on Windows 11
Windows 11 allows you to customize your sign-in preferences making use of Windows Hello. Windows Hello is a more personal way to access your devices via a PIN, fingerprint, or facial recognition. You can also enable sign-in with a physical key.
Configure or Change Windows Hello Authentication Sign-In Method
- باز کن تنظیمات.
- انتخاب کنید حساب ها.
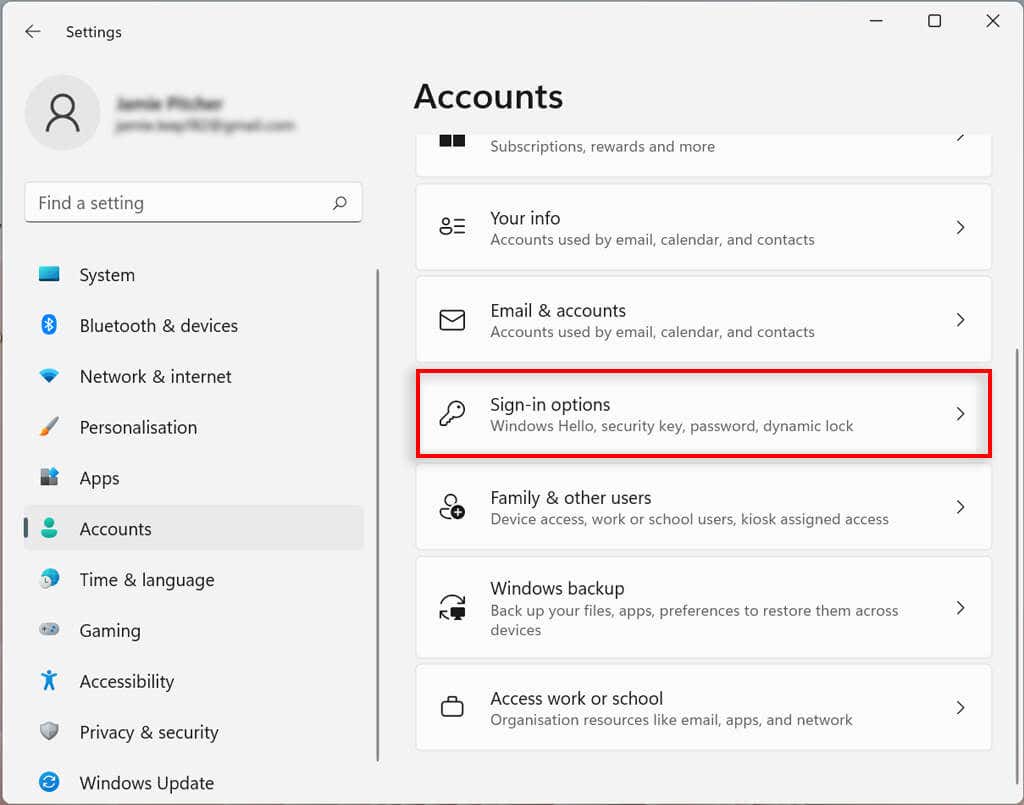
- را انتخاب کنید گزینه های ورود به سیستم.
- تحت راه های ورود به سیستم, select your desired way to sign in.
- رسانه ها و مطبوعات راه اندازی or تغییر دادن.
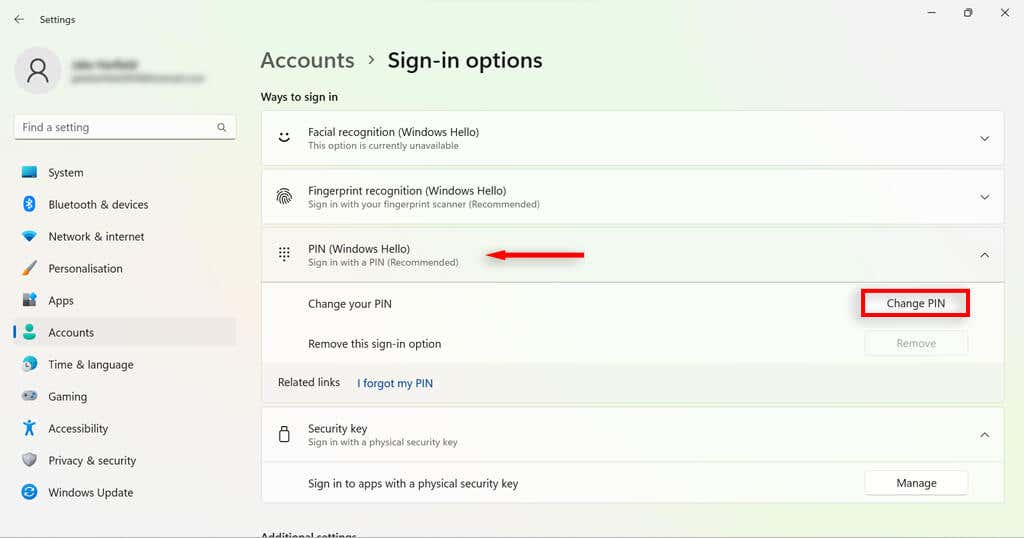
- Confirm your account password (whether it’s a PIN or biometrics).
- را انتخاب کنید OK.
- Proceed through the on-screen instructions to set up your new sign-in options.
Enable Sign-In Upon Waking Up in Windows 11
Using this setting, you can decide whether your PC will prompt you for a password upon waking up or after a set amount of time.
- ویندوز را باز کنید تنظیمات.
- انتخاب کنید حساب ها.
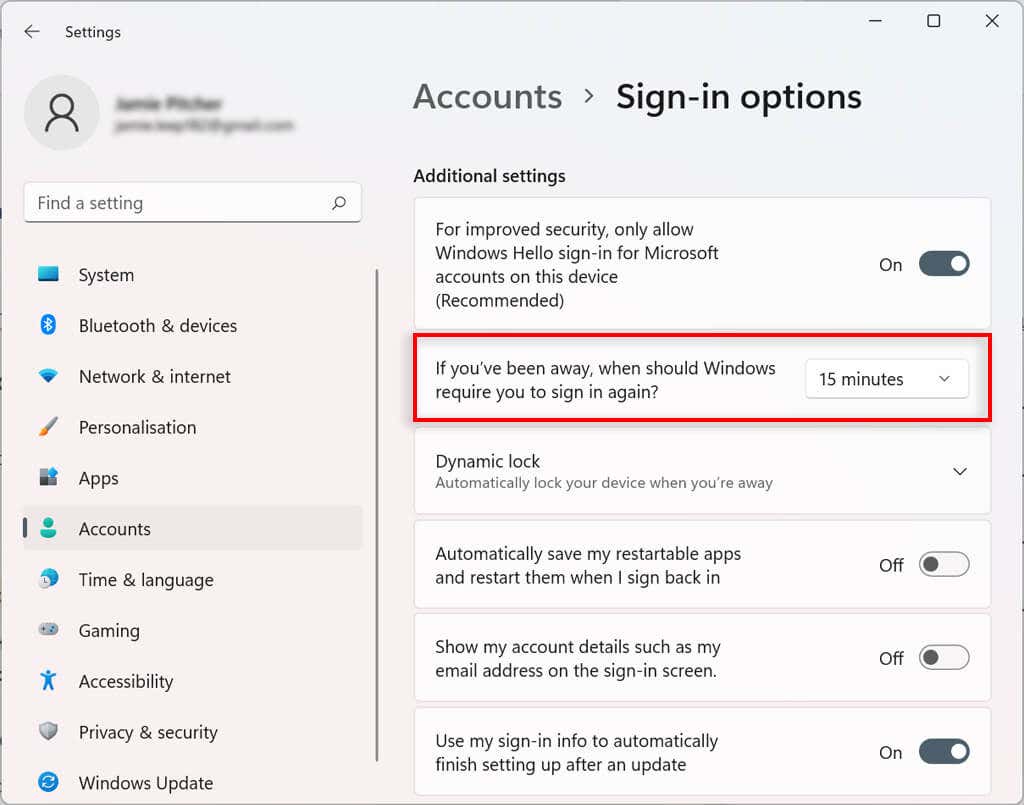
- را انتخاب کنید ثبت نام گزینه های.
- تحت تنظیمات اضافی, select the drop-down box next to If you’ve been away, when should Windows require you to sign in again?
- Select the time you would like.
Enable Dynamic Lock in Windows 11
The dynamic lock feature automatically secures your device when you step away from the room. It uses Bluetooth proximity technology, so you will need to link a Bluetooth device like a phone or smart watch before you can configure it.
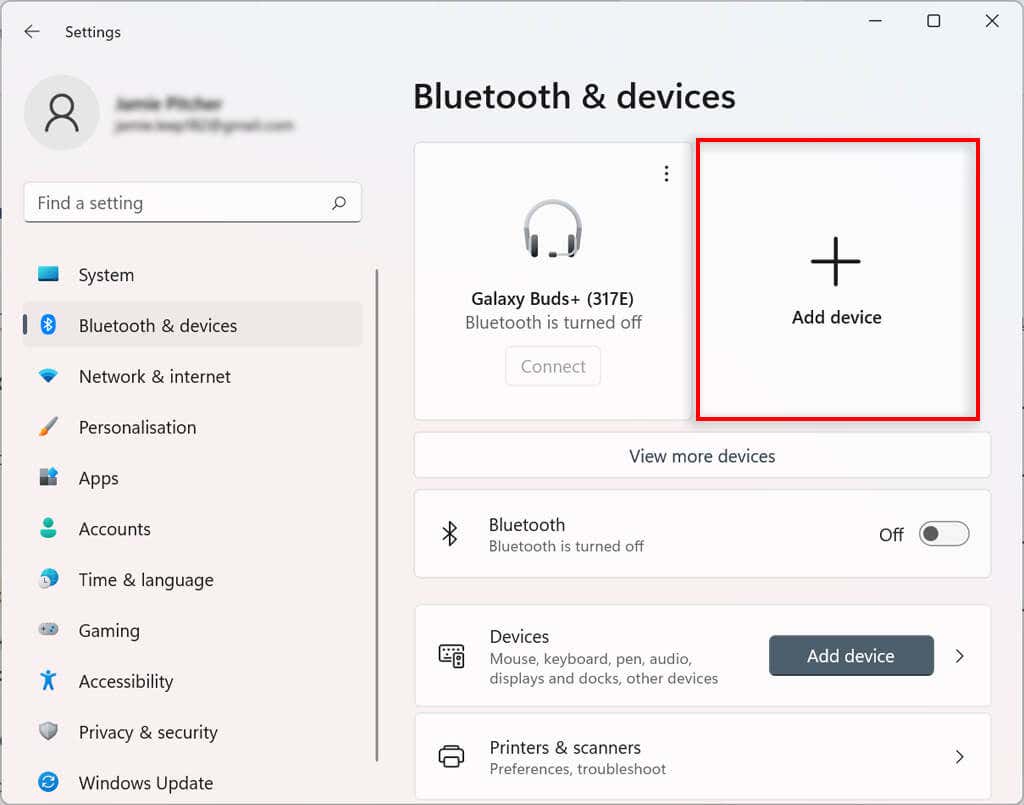
- باز کن تنظیمات.
- انتخاب کنید بلوتوث و دستگاه ها.
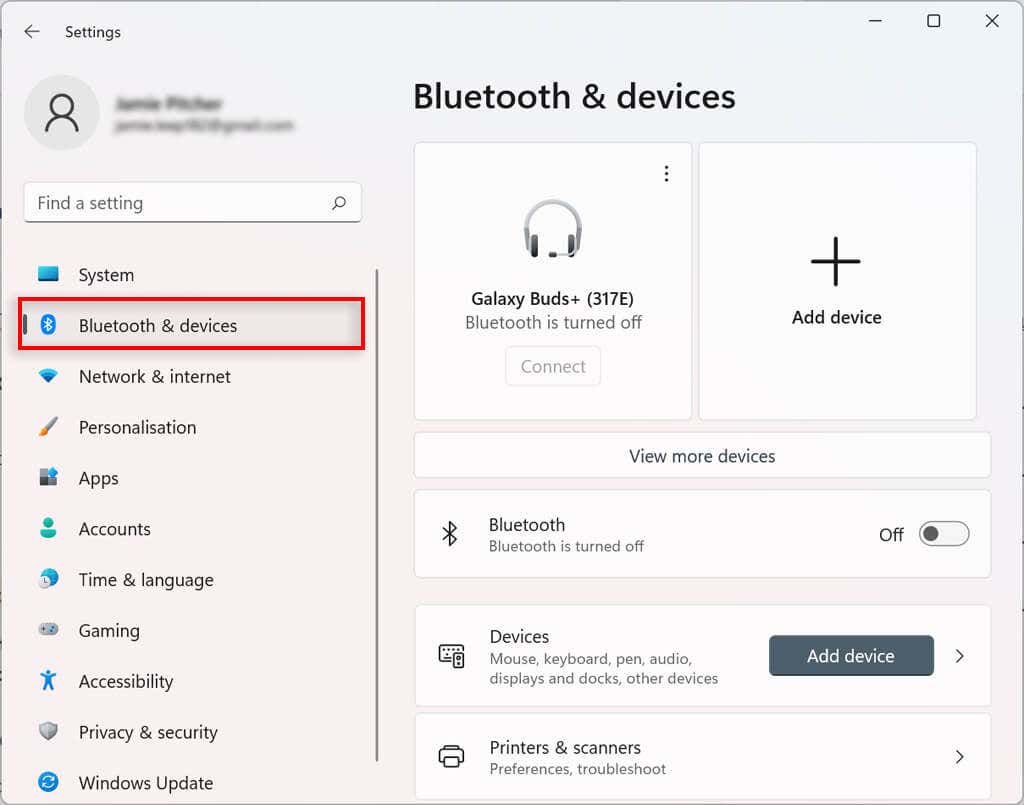
- را فشار دهید افزودن دستگاه را فشار دهید.
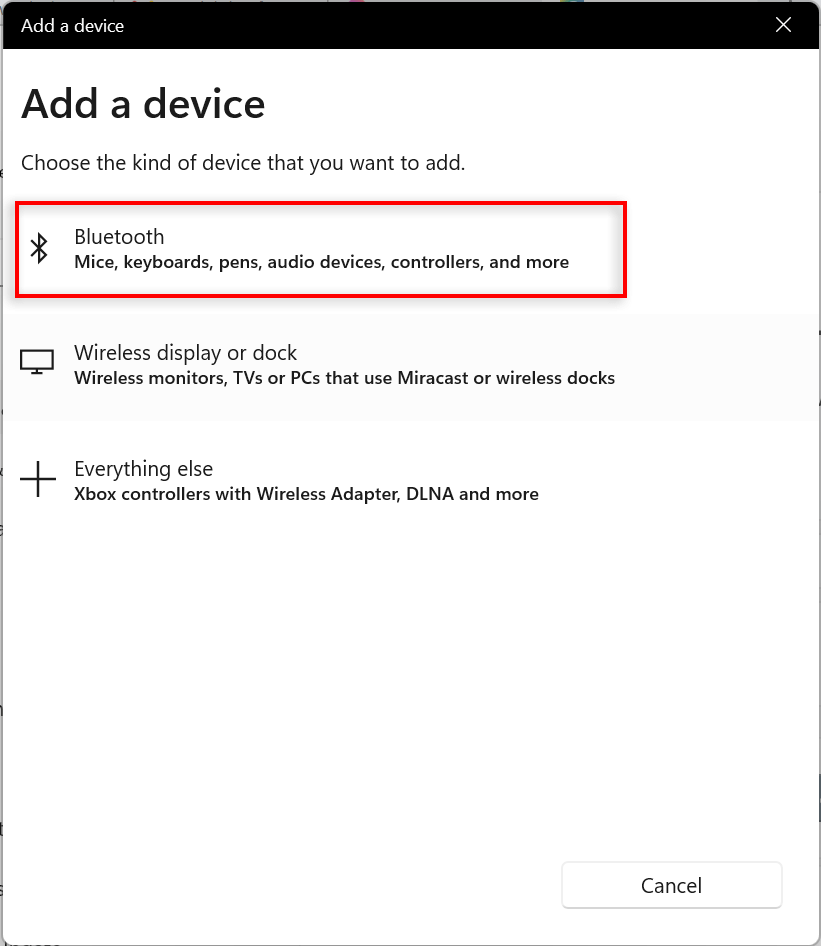
- انتخاب کنید بلوتوث. Turn on Bluetooth on the device you want to pair and select the device from the list and pair it to your computer.
- Head back to the Settings app and choose حساب ها.

- انتخاب کنید گزینه های ورود به سیستم.

- بر اساس تنظیمات اضافی، انتخاب کنید قفل پویا و بررسی جعبه کنار Allow Windows to automatically lock the device when you’re away.
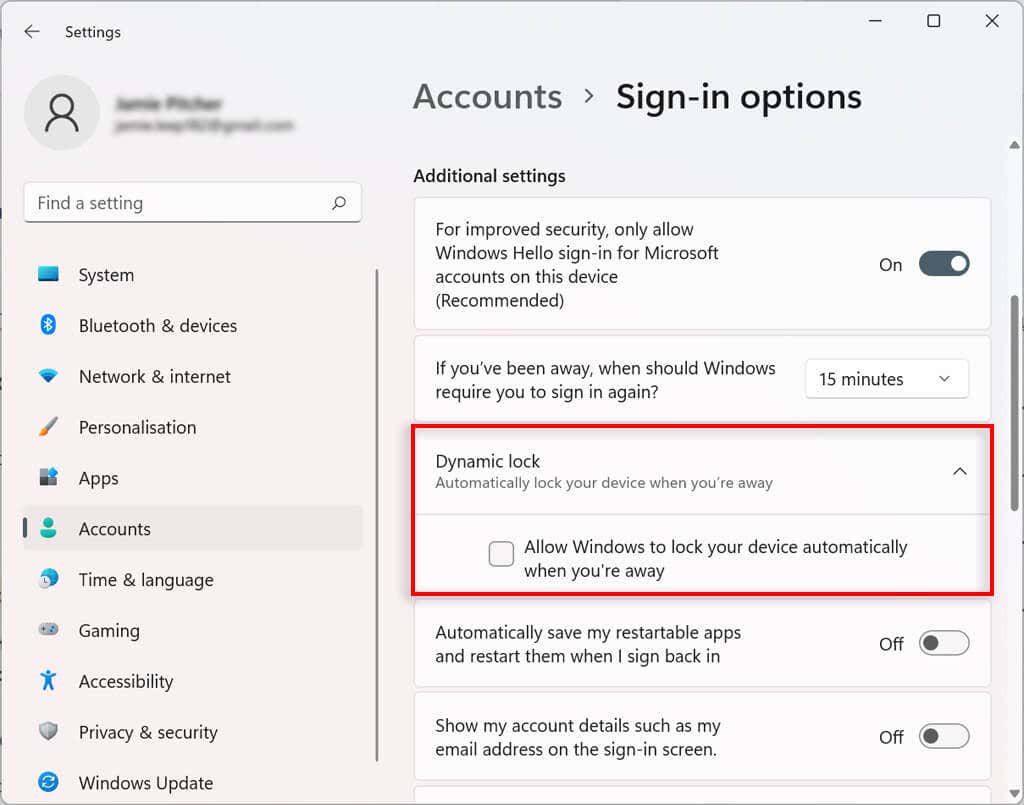
Now when you step away from the computer with the linked Bluetooth device for more than 30 seconds, your computer will lock.
Stop Restarting Apps on Startup
Some apps open automatically at startup if they weren’t closed before shutdown. You can disable this feature by following these steps:
- باز کن تنظیمات.
- انتخاب کنید حساب ها.
- با کلیک بر روی گزینه های ورود به سیستم صفحه سمت راست
- تحت تنظیمات اضافی turn off the toggle next to Automatically save my restartable برنامه های and restart when I sign back in.
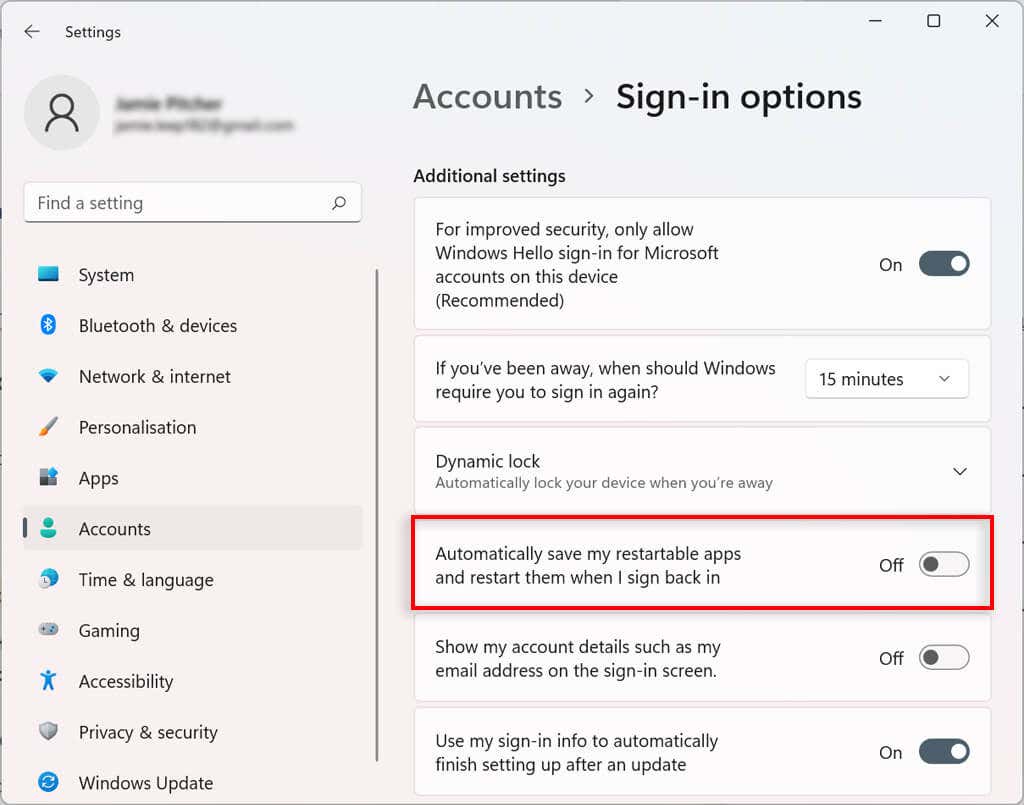
Now apps will no longer restart automatically on startup.
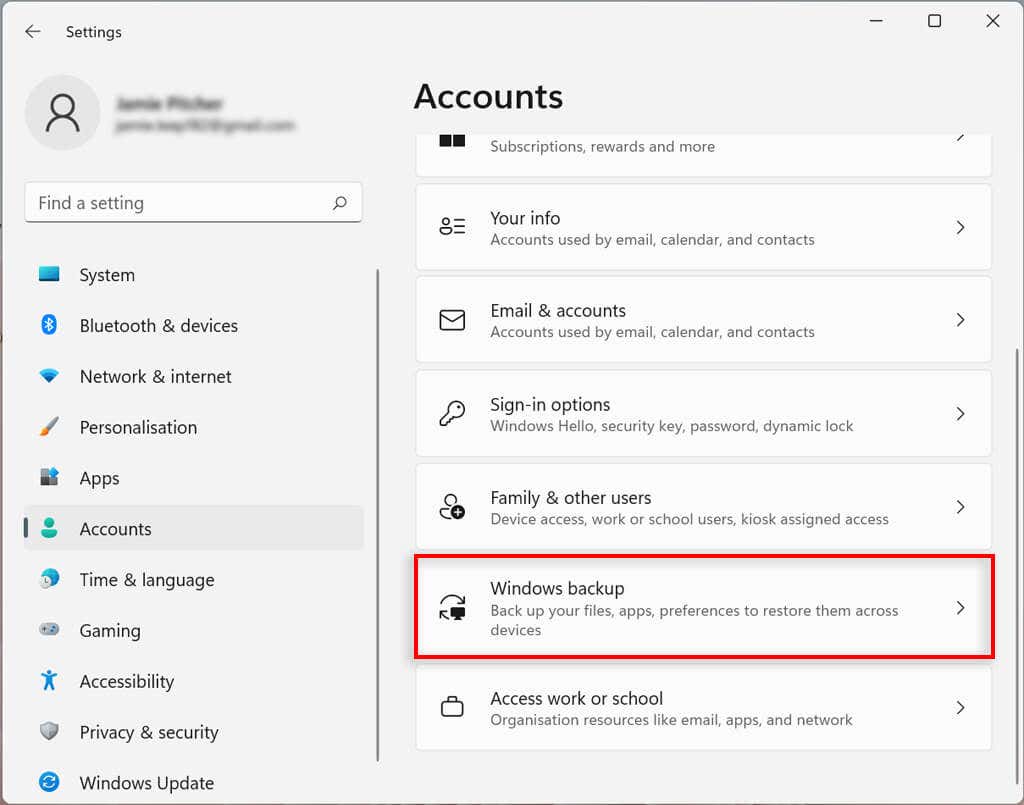
How to Control Account Sync Settings on Windows 11
You can determine how your account settings sync in Windows 11. This configures which folders are backed up in OneDrive. You can also decide whether the system will remember your apps and settings across devices with the same Microsoft account.
- باز کن تنظیمات.
- انتخاب کنید حساب ها.
- را انتخاب کنید پشتیبان گیری از ویندوز.
- بعد به OneDrive folder syncing, را انتخاب کنید راه اندازی همگام سازی. This might appear as “Manage sync settings”.
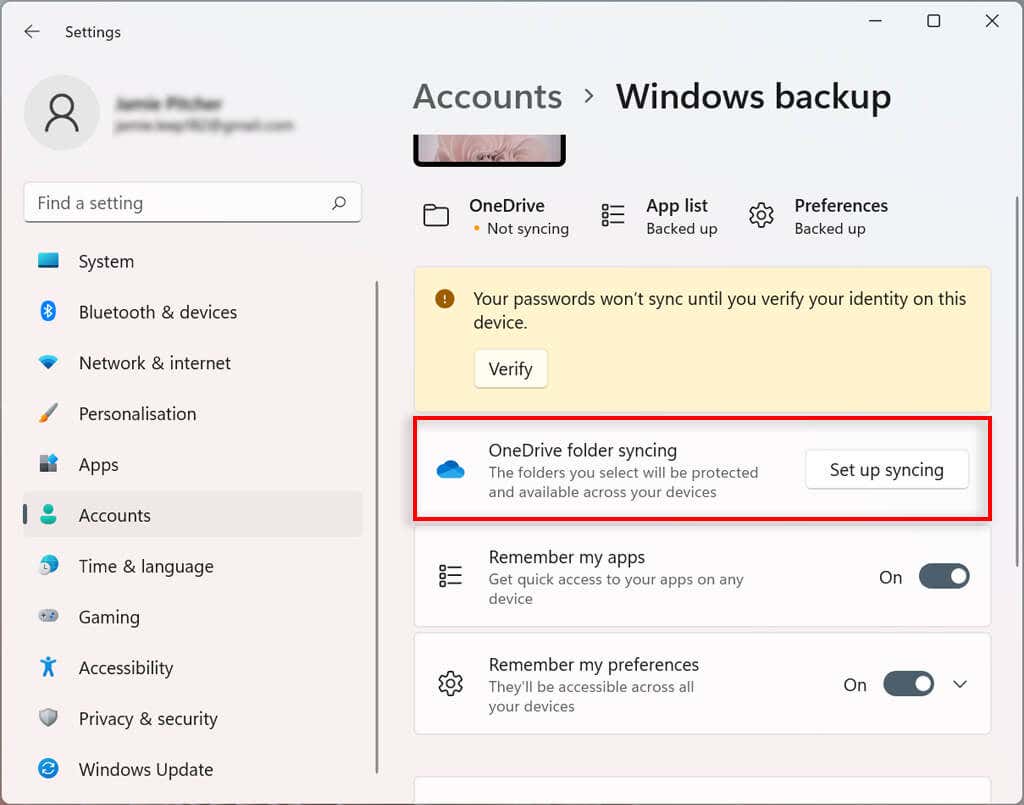
- Select the folders to upload and back up on the cloud.
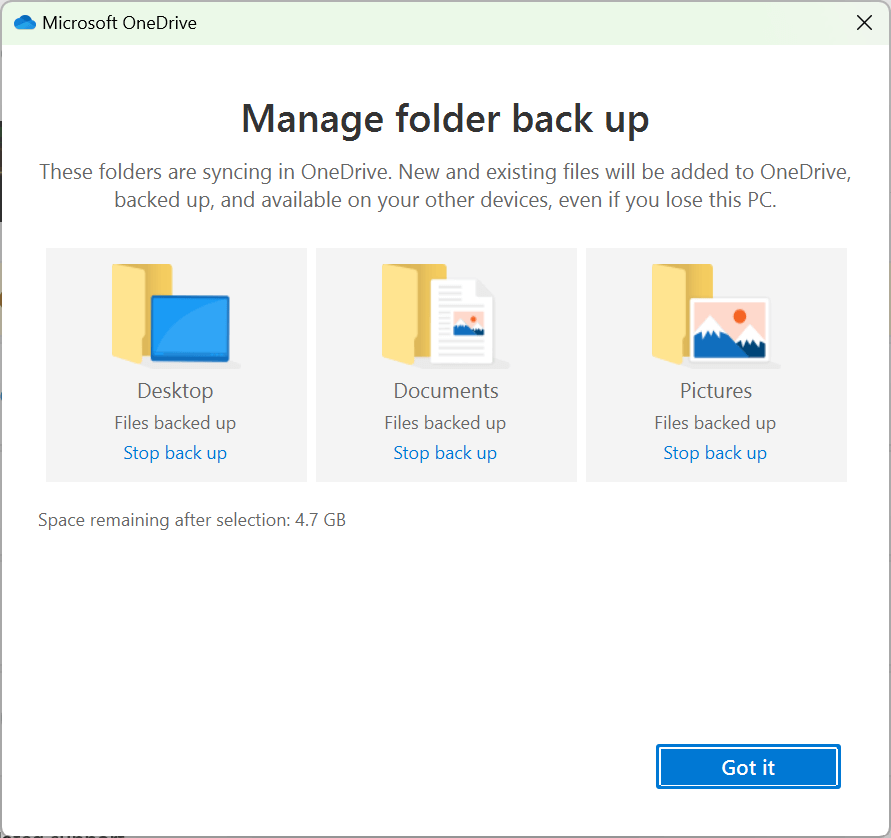
- The backup will start automatically. If not, select پشتیبانگیری را شروع کنید.
- (Optional) You can toggle on به یاد داشته باشید برنامه های, Remember my preferencesو Remember my preferences to sync your Microsoft apps, preferences, and settings between devices.
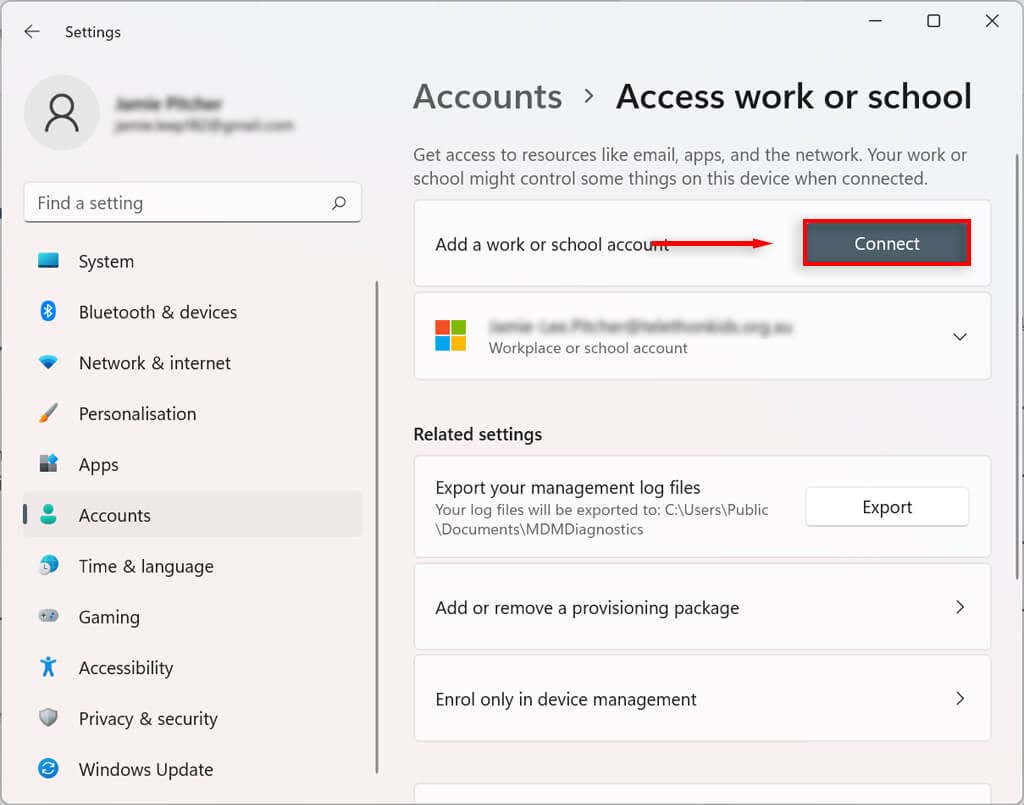
How to Connect an Organization to Your Windows 11 Account
You can connect an organization to your account to access shared resources, such as network resources, apps, and emails.
- راست کلیک کنید منوی شروع را انتخاب کنید و تنظیمات.
- انتخاب کنید حساب ها.
- را انتخاب کنید دسترسی به کار یا مدرسه.
- رسانه ها و مطبوعات اتصال.
- Confirm your work or school account.
- انتخاب کنید بعدی.
شخصی سازی بی پایان
Although Windows 10 had some customization features, the newest version of Windows has taken local user account control to the next level. Hopefully, with this tutorial, you’ve been able to make your Windows 11 account exactly the way you’d like it.

