Windows collects and uses a lot of your private information to provide you with some of its cool default features. While these features have proven to be of great utility, concerns about data privacy and security have also been rising recently. If you are someone who hates being watched over and would rather trade-off those features for your data privacy, this article will take you through a series of steps and methods that you can follow to prevent Windows from accessing your personal data by disabling some or all features that you can survive without.

Désactivez la collecte de données dans Windows 10 (protégez votre vie privée)
Assurez-vous de créer un point de restauration au cas où quelque chose se passerait mal.
Method – 1: Turn Off Location Tracking
So most of us know about this piece of private information which is out in the open. Windows gathers your location-related information to provide you with information that can be useful to you like your nearby places, weather forecasts, etc. But all of this at the cost of Windows knowing everywhere you go might not be very favourable. To Disable Data Collection in Windows 10, you need to turn off location tracking,
1. Cliquez sur le bouton Démarrer sur votre barre des tâches.
2. Cliquez sur le icône engrenage above it to open Paramètres.
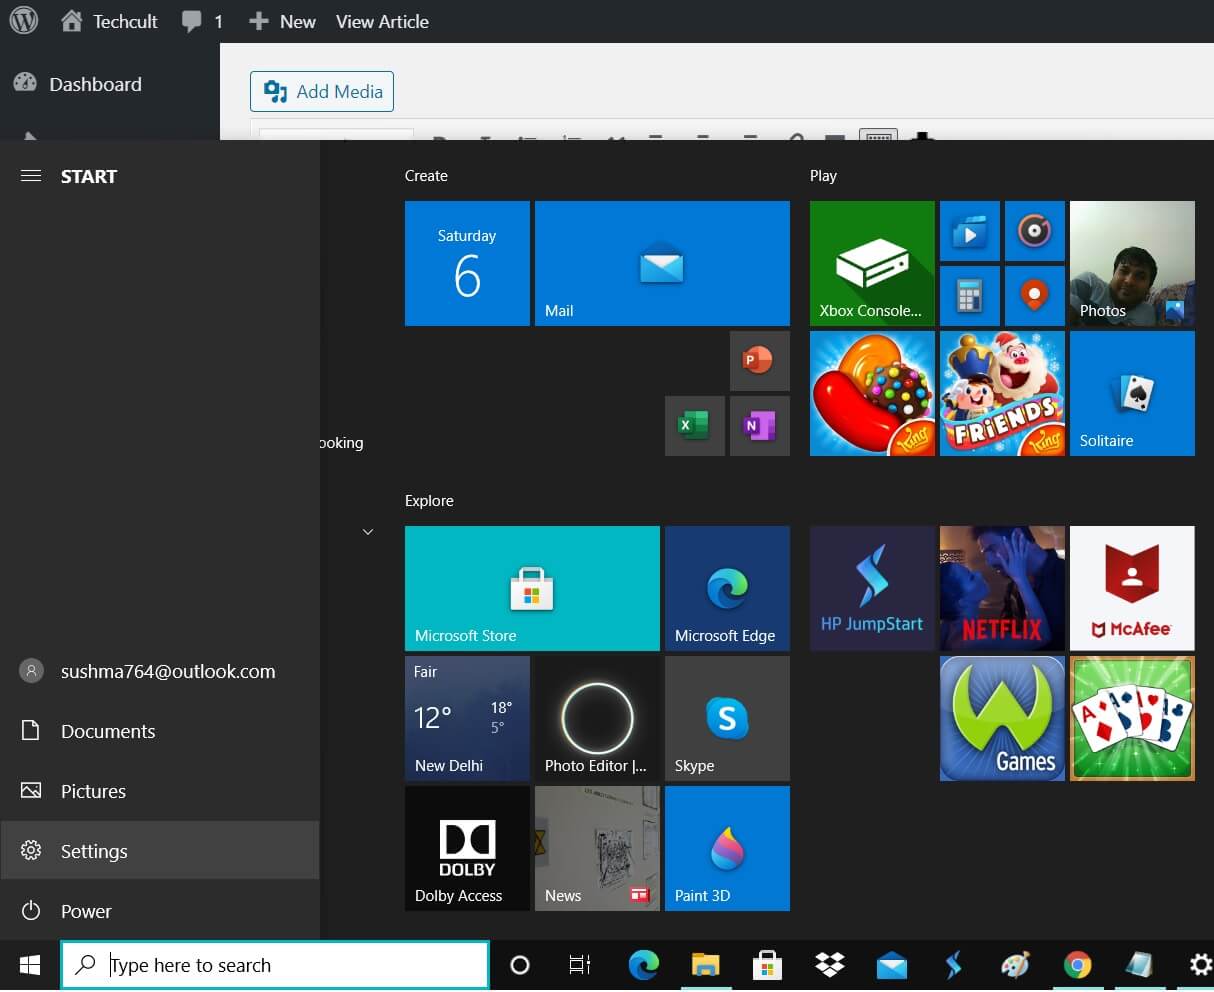
3. Maintenant, cliquez sur 'Confidentialité'et sélectionnez'Localisation' dans le volet de gauche.
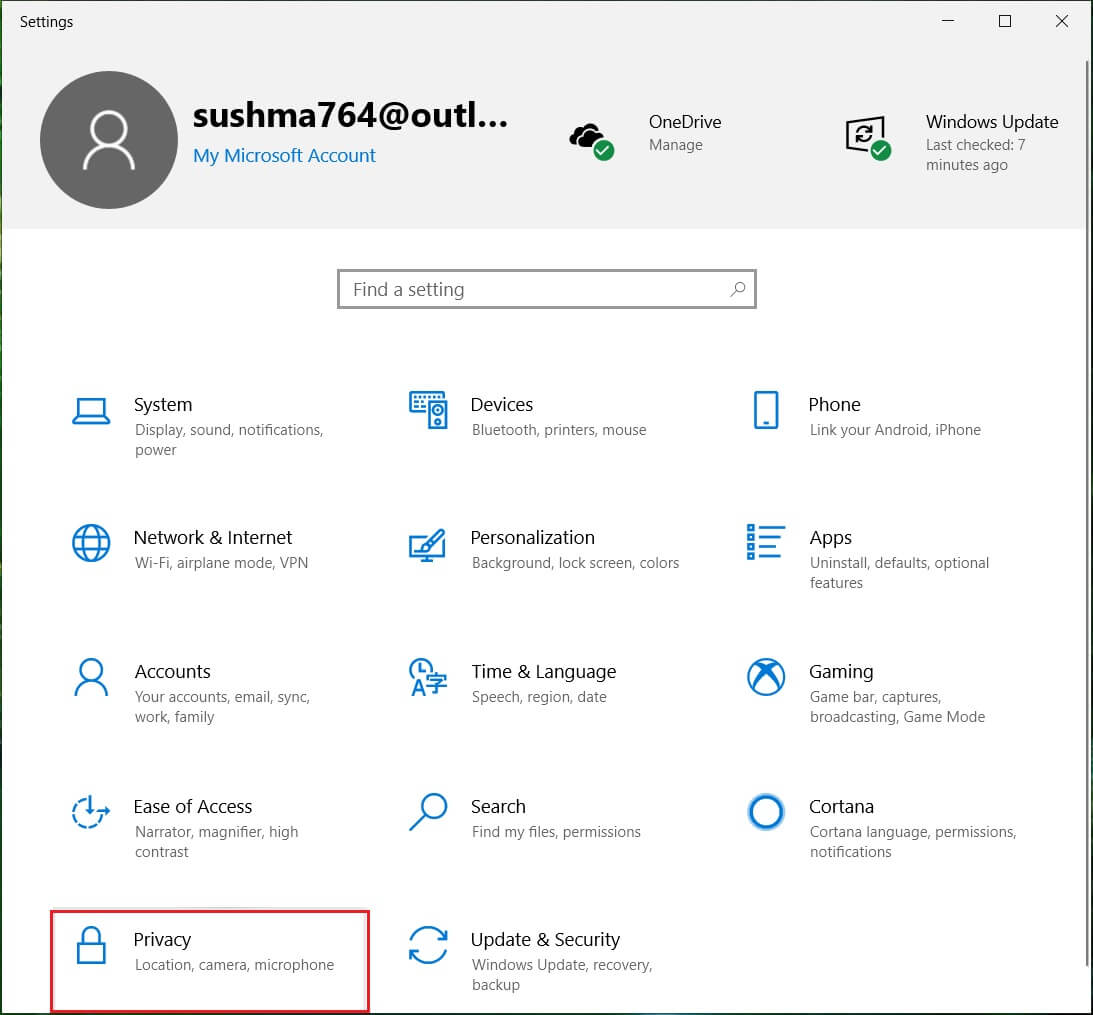
4. À désactiver le suivi de la position for your account, désactiver la 'apps access to your location.»
5. Si you have multiple accounts on the same device, you can turn off location tracking for all of them by clicking on ‘Modifier".
![]()
While doing this will désactiver le suivi de la position in the future, your past location records can still be accessed by Windows. To clear your location records, click on ‘Tansparent' sous 'Historique de localisation’ section on the same page.
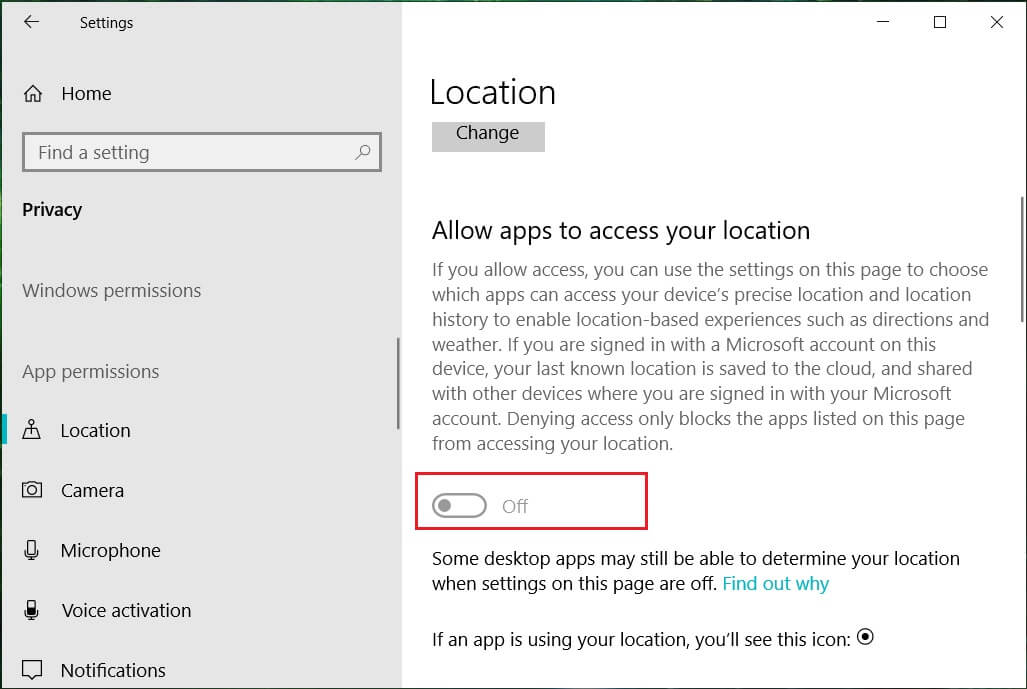
In case you want some particular apps to be able to access your location,
1. Keep your ‘Service de localisation» SUR LA.
2. Scroll down to ‘Choisissez des applications qui peuvent utiliser votre position précise' et turn on/off the switch for apps as you require.
3. Hence, you will able to allow location access to only the apps of your choice.
Méthode - 2: Turn Off Personalized Advertisements
Have you ever noticed that the ads you see are related to that one particular item you were searching on the web for? Of course! Windows provides you with tailored advertisements by spying on your cookies and gathering your web browsing information. To prevent this sensitive information from being accessed by Windows,
1. Appuyez sur la touche Windows + I pour ouvrir les paramètres puis cliquez sur Confidentialité icône.
2. Now make sure to select ‘Général’ from the left window pane.
3. Here, it would help if you switched de rabais »Let apps use my advertising ID for experience across apps (turning this off will reset your ID)".
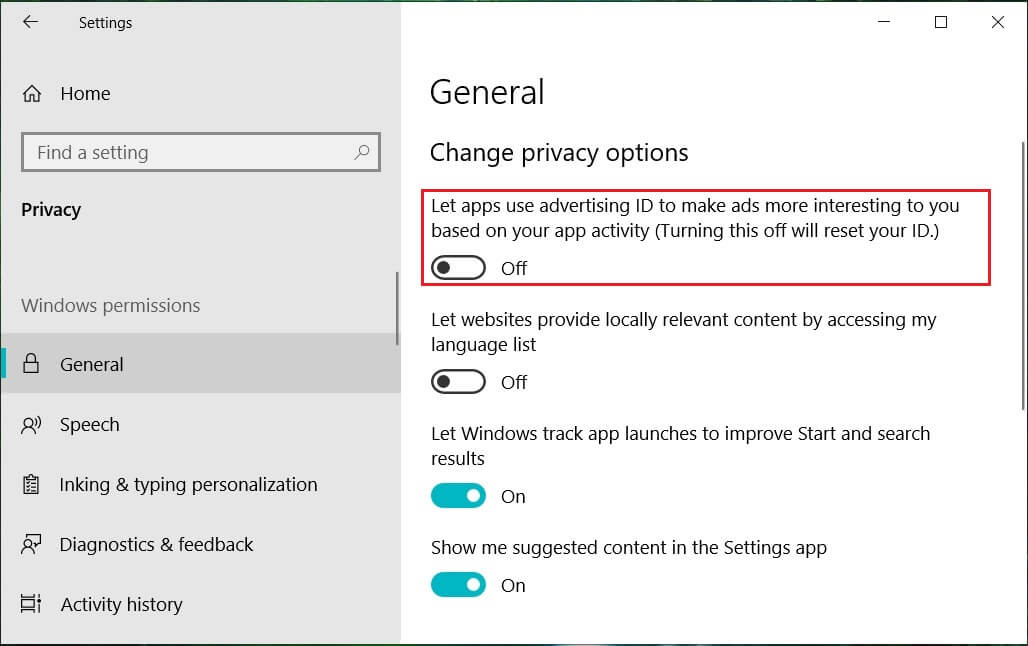
4. Note that this doesn’t stop ads from appearing. You will still see ads, but they will only be general and not personalized.
Further, to prevent Microsoft from being able to access or use this information in any way,
- Sur votre navigateur Web, accédez à microsoft.com/en-us/opt-out.
- Connectez-vous à votre compte Microsoft Si tu as besoin de.
- Maintenant, éteindre “Personalized ads wherever I use my Microsoft account” and “Personalized ads in this browser.”
Méthode - 3: Prevent Cortana From Using Information or Disable Cortana Completely
Cortana is Microsoft’s virtual assistant created for Windows 10. Cortana is designed to provide answers to the users, using the Bing search engine and can perform basic tasks like recognizing natural voice to set reminders, manage calendars, fetch weather or news updates, search for files and documents, etc. For this, Cortana uses your personal information like your voice, writing, location, contacts, calendars, etc. that you may not want to share with it. Now to Disable Data Collection in Windows 10,, you need to prevent Cortana from using your personal information,
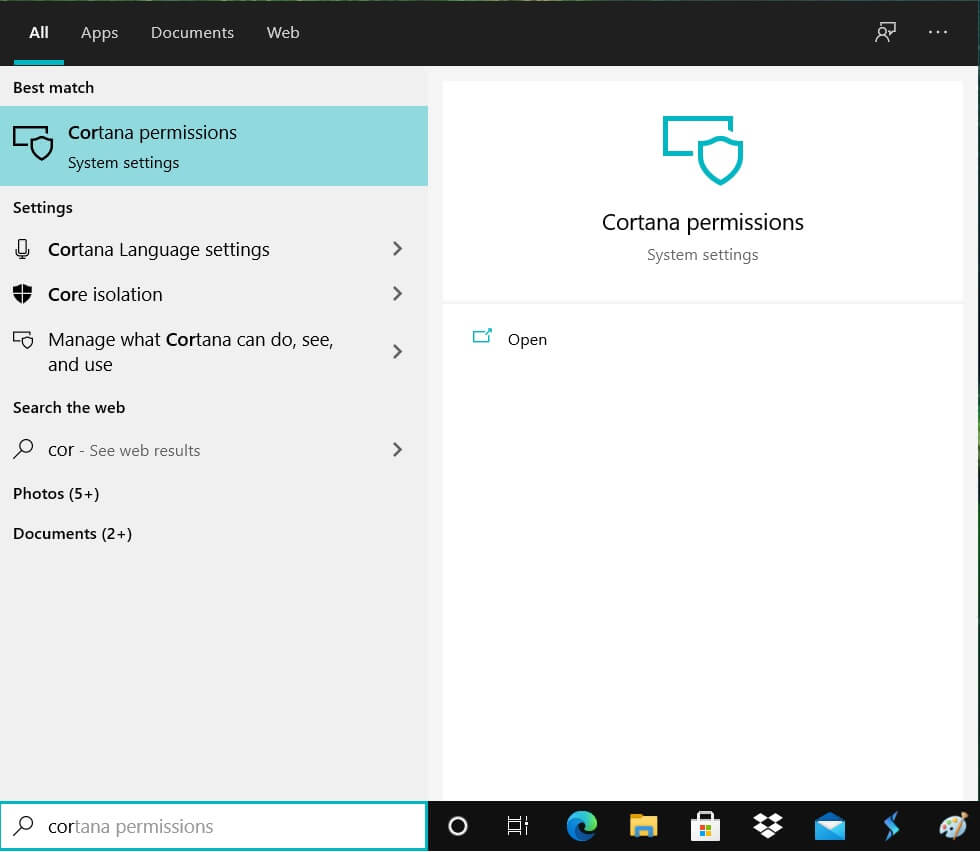
1. In the search field located on your taskbar, search for ‘Cortana Permission’ and open it.
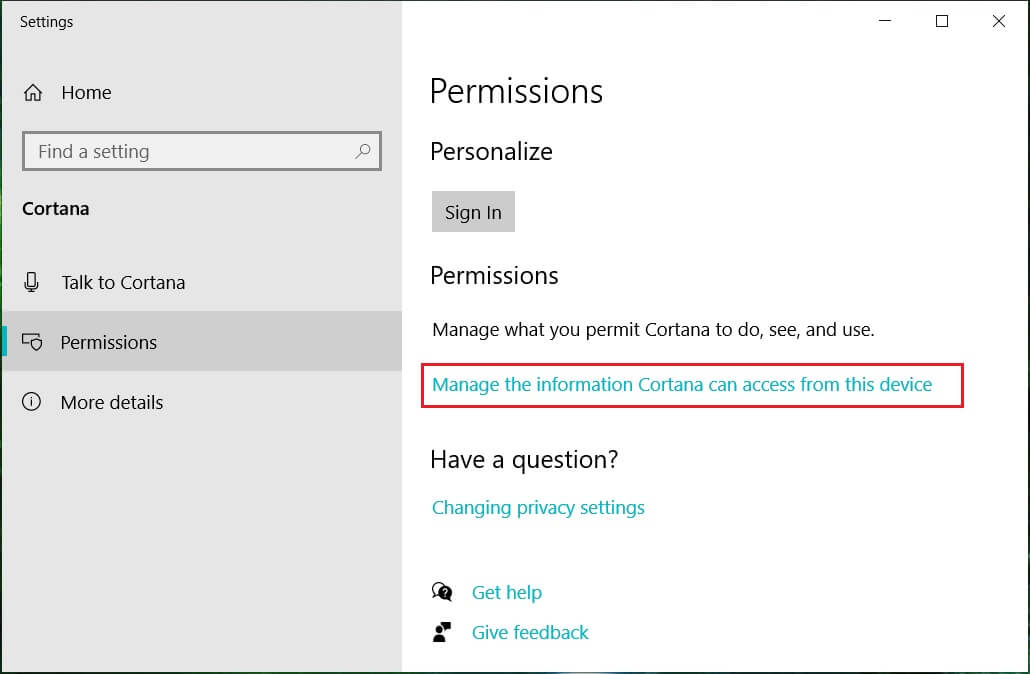
2. Basculez vers le 'Permissions’ settings from the left pane.
3. Cliquer sur "Gérer les informations auxquelles Cortana peut accéder à partir de cet appareil ».
4. À présent éteindre »Localisation','Contacts, email, calendar & communication history' et 'Historique de navigation’. Note that by disabling the permissions, Cortana will not be able to do things that require it to have these permissions.
To further stop Cortana from collecting your personal information,
1. Allez à 'Paramètres’ on your computer and click on ‘Confidentialité".
2. Cliquer sur 'Speech, inking & typing' dans le volet de gauche.
3. Maintenant, cliquez sur 'Désactiver les services vocaux et les suggestions de saisie’ to stop Cortana from getting to know you.
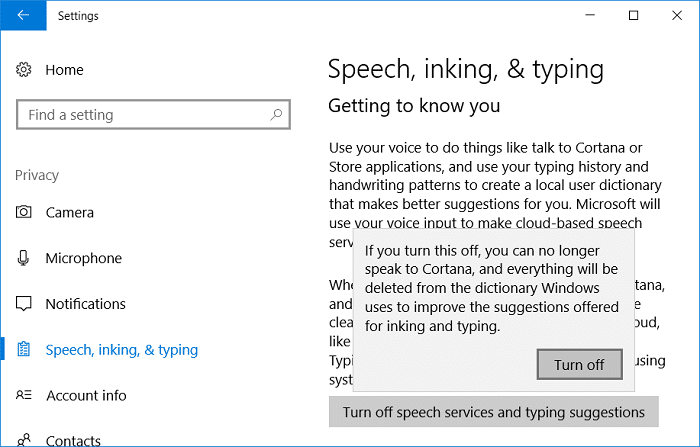
4. Cela delete collected data stored on your PC, and it also turns off dictation functionality.
To further erase any data that Cortana may have gathered about you,
1. Press Windows Key + I to open Settings then click on ‘Cortana".
![]()
2. Ouvrez 'Autorisations et historique' dans le volet de gauche.
3. Scroll down to ‘History’ and cliquez au 'Effacer l'historique de mon appareil".

Further, login to your Microsoft account on your web browser and move on to Cortana’s notebook section on the privacy dashboard. Disable the content that you want to from the list provided.
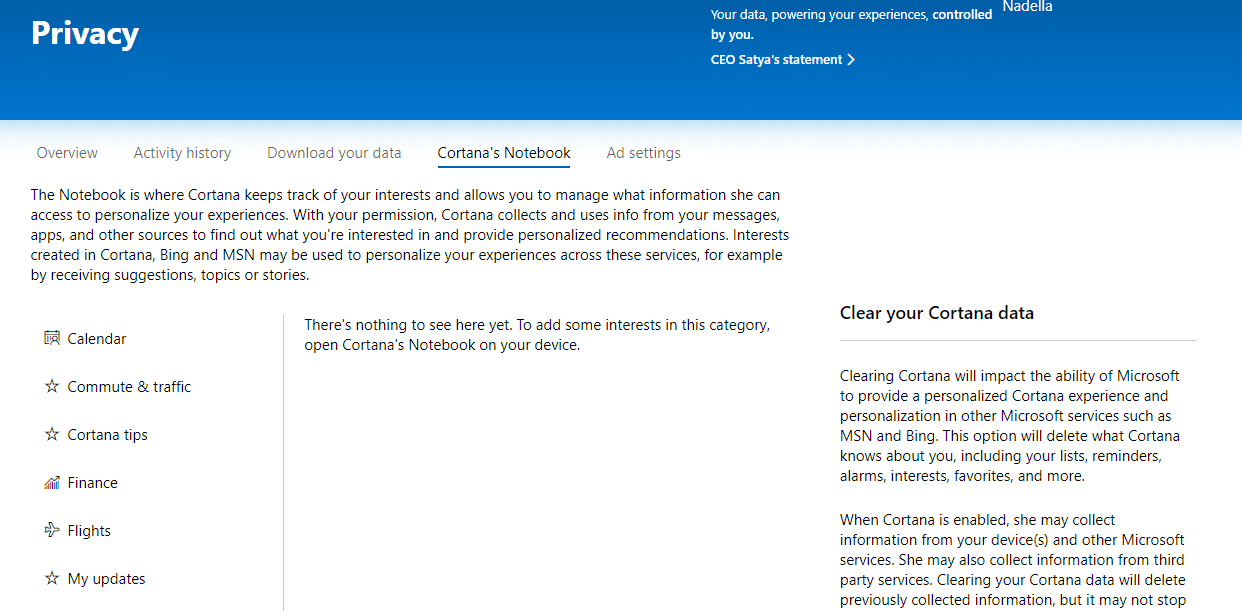
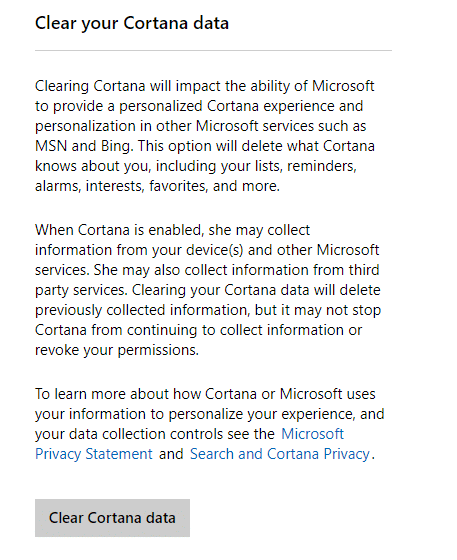
Cliquer sur 'Clear Cortana data’ on the right side of the page to delete all information that Cortana has about you.
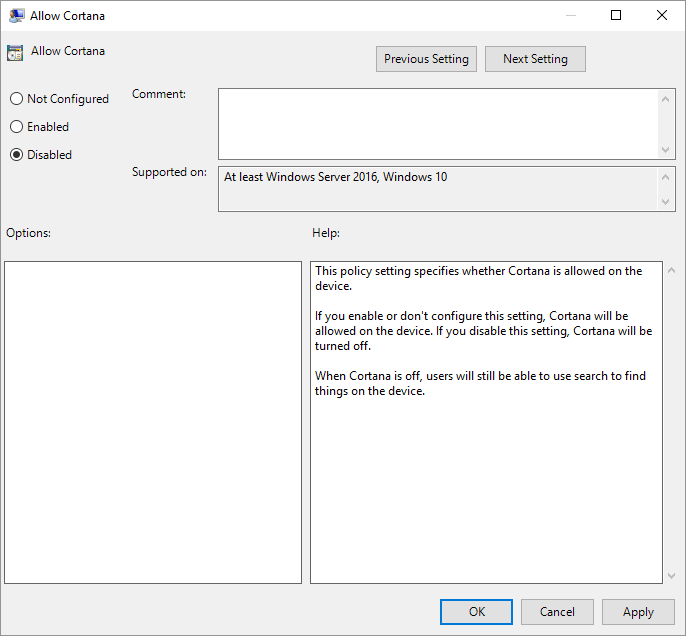
If you don’t like Cortana or don’t want to use it because of privacy reasons, you can permanently disable Cortana on Windows 10.
Méthode - 4: Désactiver WiFi Sense
With Wi-Fi Sense, users can optionally have their device automatically connect to suggested open hotspots, and share their home network’s password with contacts (on Skype, Facebook, etc.) so they may automatically connect to the network on a Windows 10 device without needing to enter its password manually. To turn off Wi-Fi Sense,
1. Appuyez sur la touche Windows + I pour ouvrir les paramètres puis cliquez sur Réseau et Internet.

2. Maintenant, cliquez sur Wi-Fi dans le volet de gauche de la fenêtre et assurez-vous de Désactivez tout sous Wi-Fi Sense.
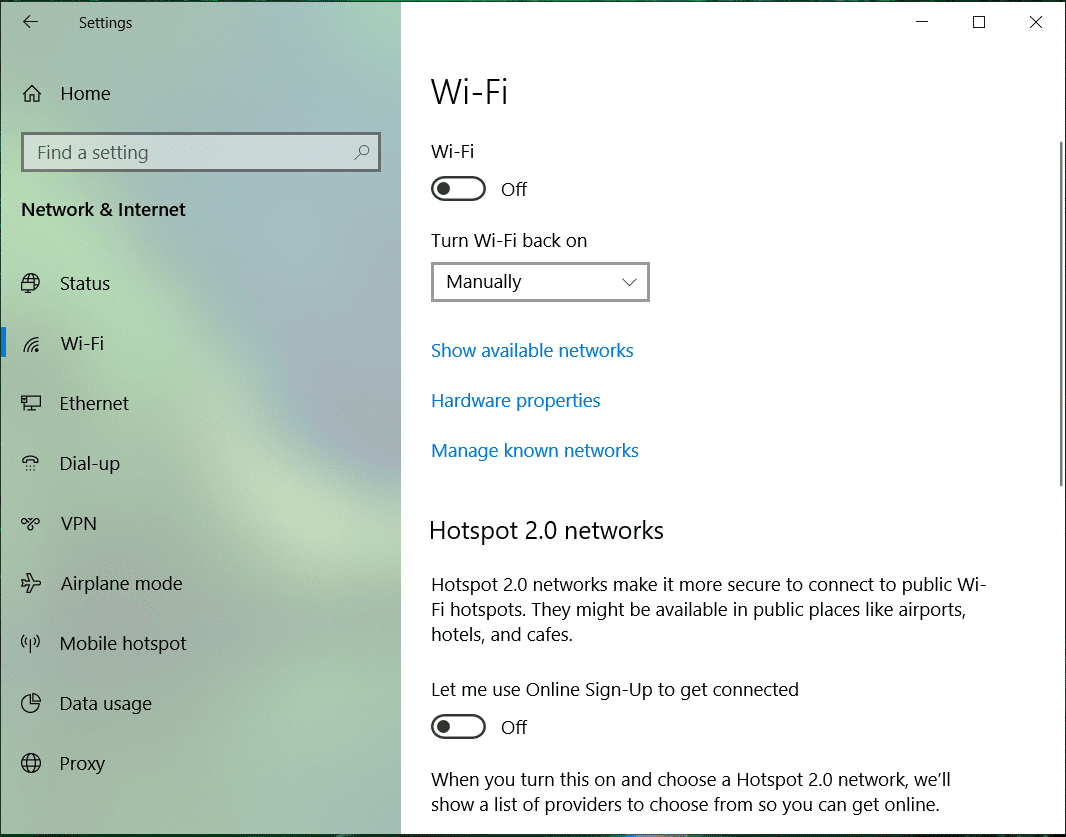
3. Also, make sure to disable Réseaux Hotspot 2.0 et services Wi-Fi payants.
Method – 5: Stop Sharing System Files
Windows 10 shares your system files and updates with other users and from other users to you. So it would help if you stopped sharing system files to Disable Data Collection in Windows 10 to protect your privacy:
1. Aller à Paramètres et cliquez sur 'Mise à jour et sécurité".
![]()
2. Sélectionnez 'Windows Update’ from the left pane and click on ‘Options avancées".
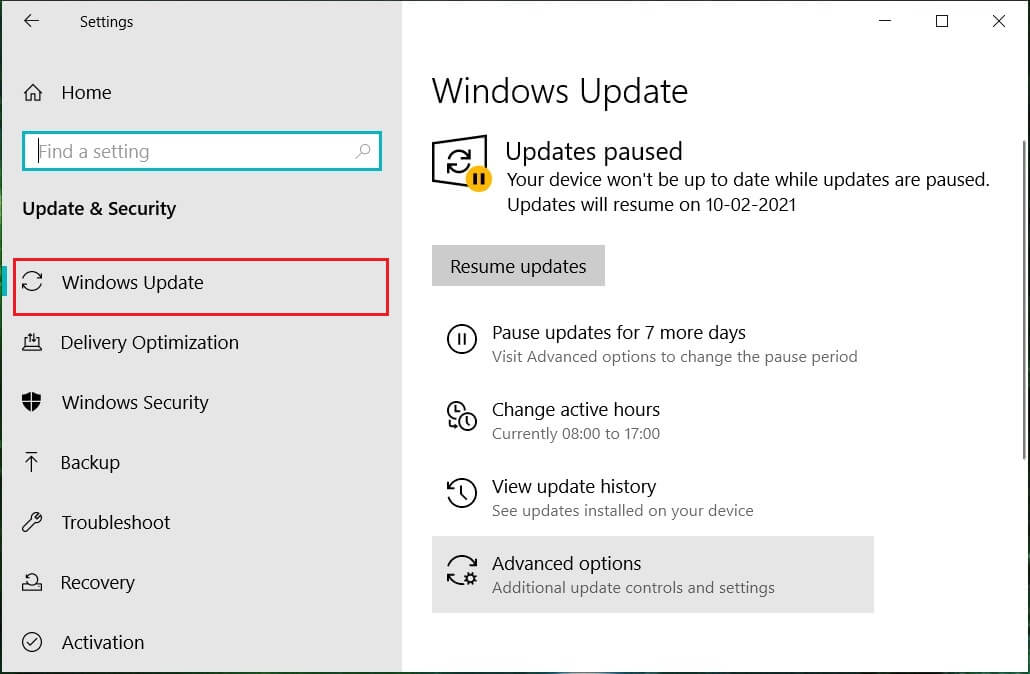
3. Cliquer sur 'Optimisation de la livraison".
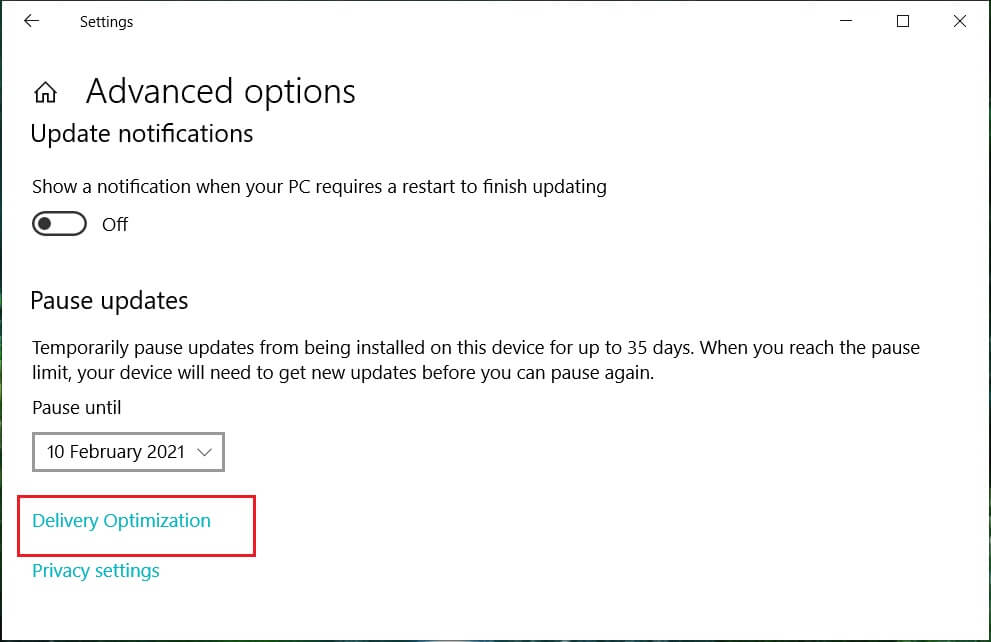
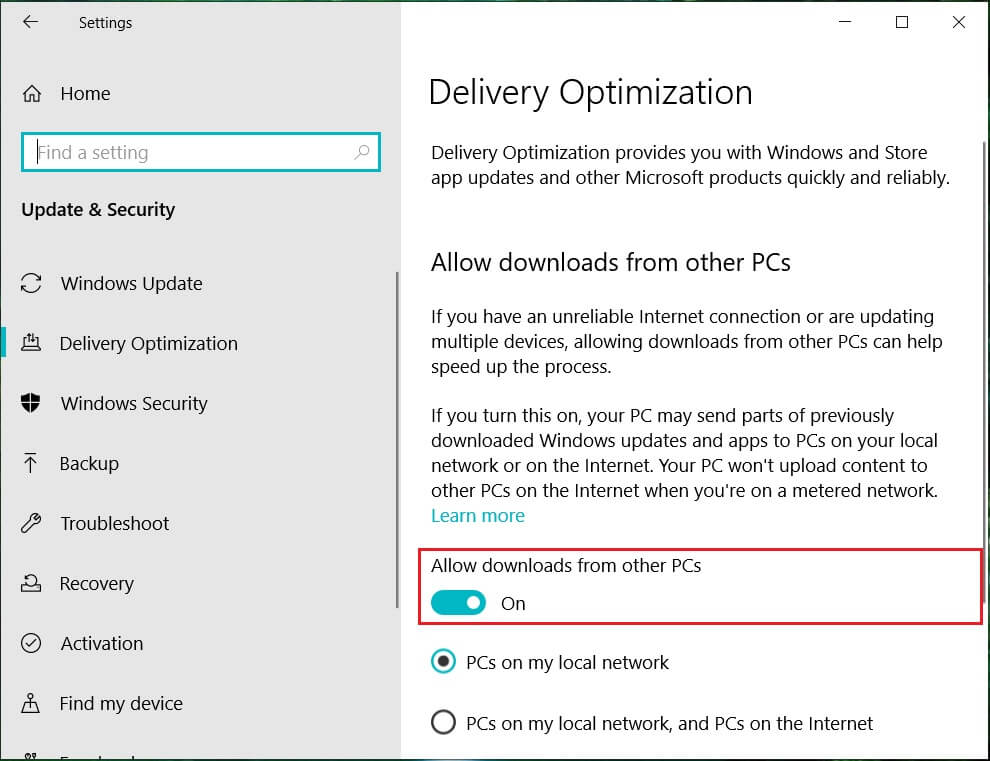
By default, ‘Allow download from other PCs’ is ON. You can turn it off entirely, or decide to choose between ‘PC sur mon réseau local' ou 'PCs on my local network and PCs on the Internet".
Method – 6: Disable OneDrive
To stop Windows from storing any of your data on Microsoft’s OneDrive,
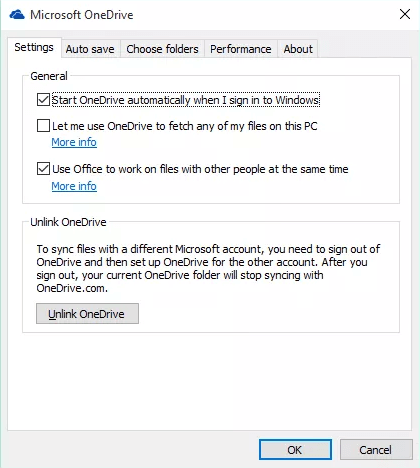
1. In the notification area of your taskbar, cliquez-droit sur on onedrive icon and select ‘Paramétres".
2. Deselect all three of the following options: ‘Démarrer OneDrive automatiquement lorsque je me connecte à Windows','Permettez-moi d'utiliser OneDrive pour récupérer l'un de mes fichiers sur ce PC' et 'Use Office work on files with other people at the same time'.
Method – 7: Turn Off Microsoft Edge
Microsoft’s web browser, Edge, might also be sending your data to Microsoft for its features and predictions. To prevent it from sharing your data,
1. Open Edge then clicks on the menu à trois points on the top right corner of the window and select ‘Paramètres".
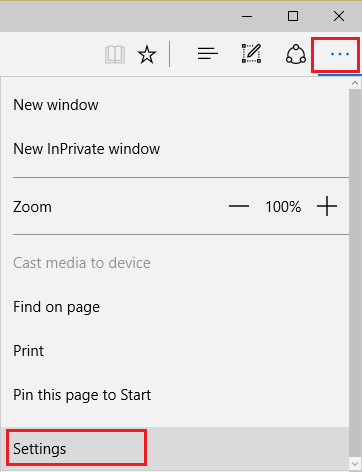
2. Cliquer sur 'Afficher les paramètres avancés".

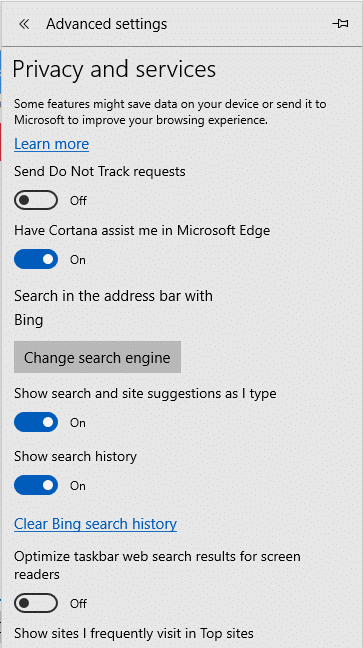
3. Dans le 'Confidentialité et services’ section, turn off everything you want to like save passwords, Cortana assist, search suggestions, search history, etc.
You can also completely Uninstall Microsoft Edge in Windows 10 if you use Google Chrome or some other browser.
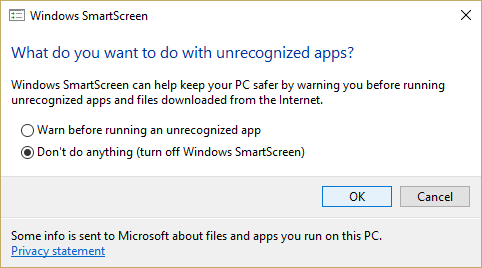
Method – 8: Turn Off Windows SmartScreen
SmartScreen is a infonuagique anti-phishing ainsi que le anti-malware component that helps protect users against attacks. To provide this feature, Microsoft collects information about your downloaded and installed programs. While this is a recommended feature, but to disable data collection in Windows 10 you need to turn off Windows SmartScreen filter:
1. In the search field located on your taskbar, type ‘Panneau de configuration’ and open it with the given shortcut.

2. Cliquer sur 'Système et sécurité' puis cliquez sur 'Sécurité et maintenance".
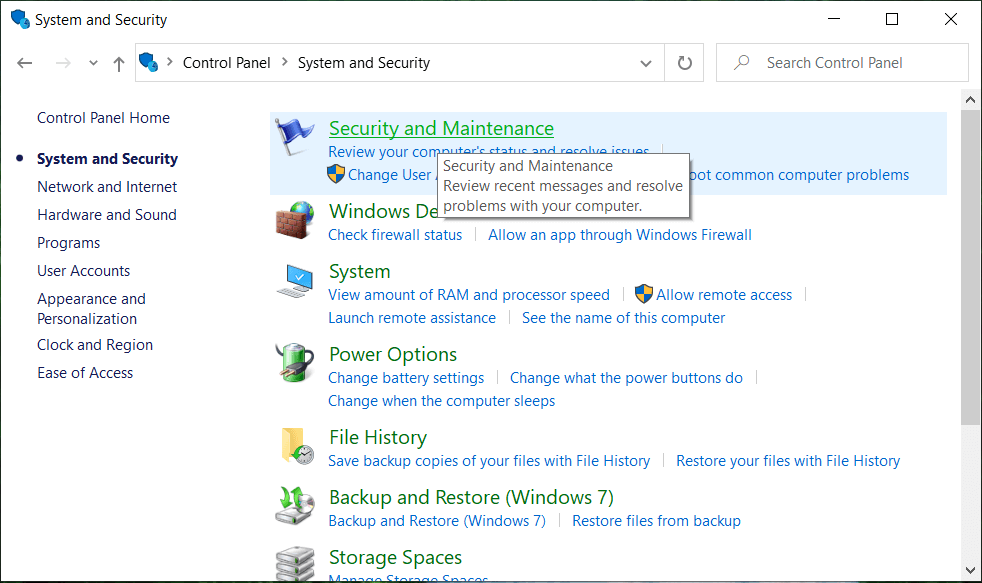
3. Sélectionnez 'Change Windows SmartScreen settings’ from the left pane.
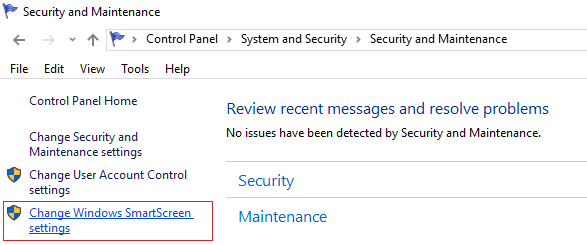
4. Sélectionnez 'Ne fais rien’ option and click on OK to confirm.
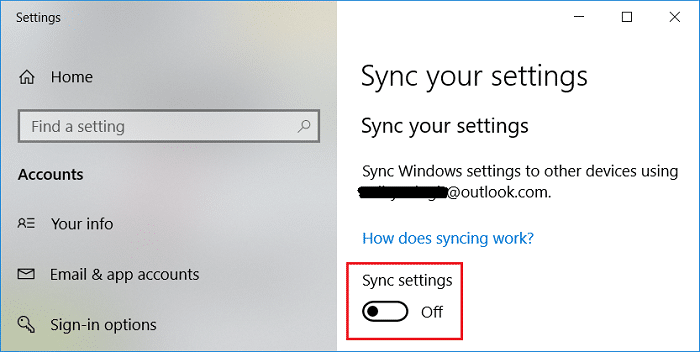
Method – 9: Disable Sync From Settings
To prevent sharing your data to Microsoft for syncing purposes,
1. Ouvert Paramètres En cliquant sur le équipement icône dans le Le menu Démarrer.
2. Cliquer sur 'hybrides’ from the Settings window.
3. Sélectionnez 'Synchronisez vos paramètres' dans le volet de gauche.
4. Turn ‘Les paramètres de synchronisation» curseur désactivé.
There is another SmartScreen filter for Windows Store apps. To turn it off,
- Press Windows Key + I to open Paramètress then click on ‘Confidentialité".
- Sélectionnez 'Général' Du panneau de gauche.
- Maintenant éteindre la 'Turn on SmartScreen Filter to check web content (URLs) that Windows Store apps use‘ switch.
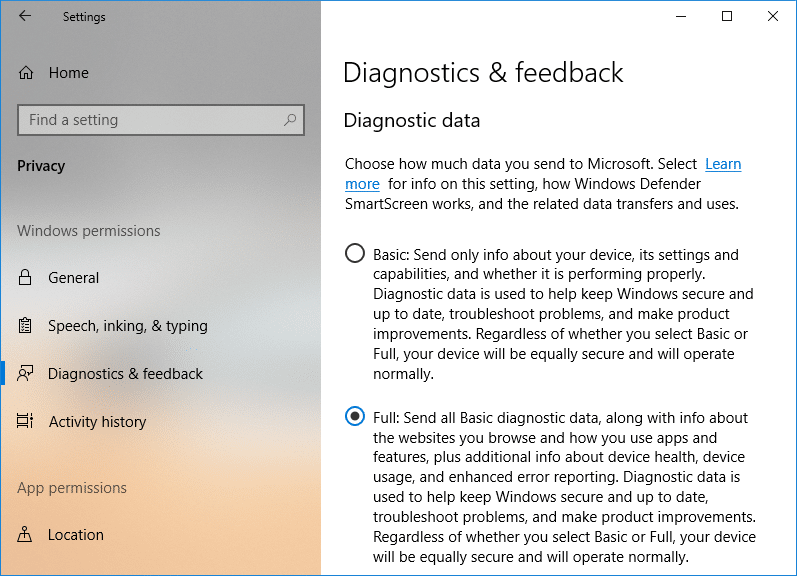
Method – 10: Manage Diagnostic Data
Microsoft uses diagnostic data to keep Windows secure and up to date, troubleshoot problems, and make product improvements. This data is transmitted to Microsoft and stored with unique identifiers that help them recognize an individual user on an individual device and understand its service issues and use patterns. While you can’t entirely stop it from gathering diagnostic data, these are the two options that Microsoft provides:
- DE BASE: This is information about your device, its settings and capabilities, and whether it performs properly.
- PLEIN: This includes all data collected with Basic, along with information about the websites you browse, how you use apps and features, plus additional information about device health, device activity (sometimes referred to as usage), and enhanced error reporting, including others.
To set these settings,
1. Appuyez sur la touche Windows + I pour ouvrir les paramètres puis cliquez sur »Confidentialité".
2. Sélectionnez 'Diagnostic et feedback’ from the left pane and select your desired option.
If you need to know more about these settings then you can read one of our previous posts: Change Diagnostic and Usage Data Settings in Windows 10
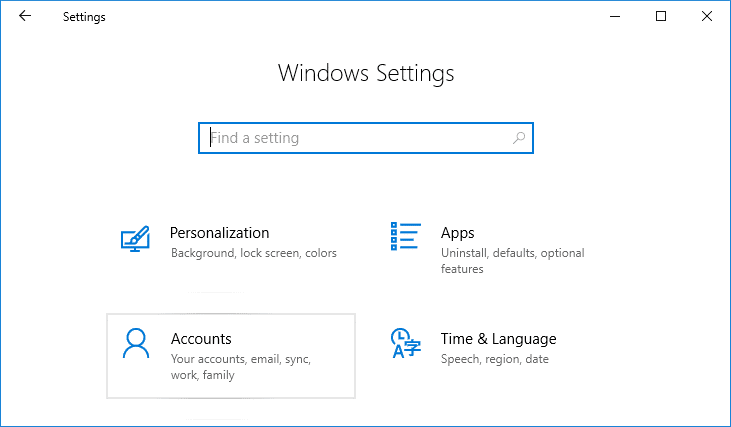
Method – 11: Use a Local Account Instead of Microsoft Account
Not just Windows, your personal information is used by Microsoft too. Microsoft uses your account settings and some other information to sync your data and settings over all of your devices. If you do not want Microsoft to use your information, you can stop using your Microsoft account and use a local account instead and this way you can completely disable data collection in Windows 10. For this,
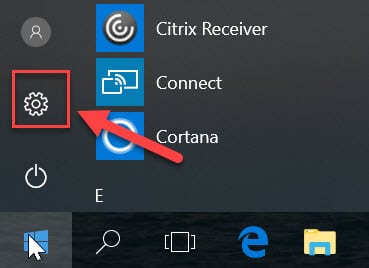
1. Cliquez sur le bouton Démarrer sur votre barre des tâches.
2. Ensuite, cliquez sur le icône engrenage above it to open paramètres.
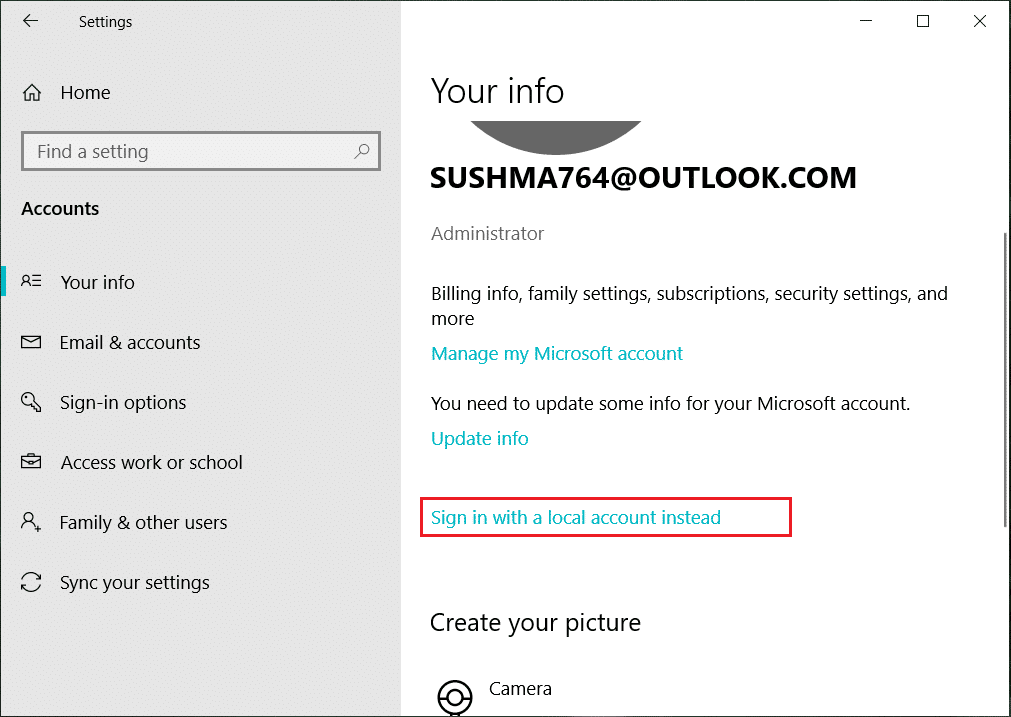
3. Cliquer sur 'hybrides'et sélectionnez'Votre info' dans le volet de gauche.
4. Sélectionnez 'Connectez-vous avec un compte local à la place’ and follow the instructions.
These were the steps you can take to prevent Windows from invading your privacy and gathering your personal data.
Recommandée:
I hope this article was helpful. Now you can easily Disable Data Collection in Windows 10 to Protect Your Privacy, mais si vous avez encore des questions concernant ce tutoriel, n'hésitez pas à les poser dans la section commentaires.


)