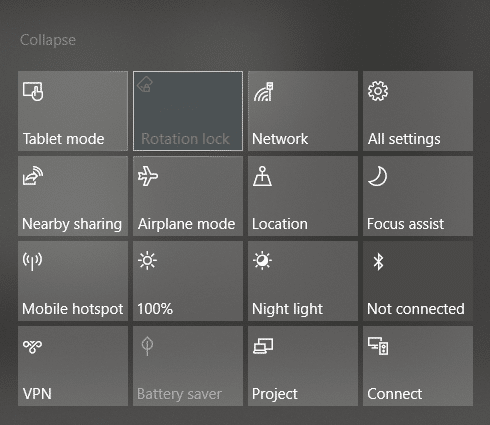
If you have 2 in 1 Windows device such as Tablets, you would be familiar with the importance of the screen rotation feature. Users report that the screen rotation feature has stopped working & the Screen Rotation Lock option is greyed out. If you’re facing this issue, then don’t worry as this is just a setting issue which means it can be easily fixed. This guide will walk you through the steps to fix rotation lock greyed out in Windows 10.
Here are issues which can be resolved using this guide:
- Rotation lock missing
- Auto Rotate not working
- Rotation lock greyed out.
- Screen rotation not working
Fix Rotation Lock greyed out in Windows 10
Assurez-vous de créer un point de restauration au cas où quelque chose se passerait mal.
Method – 1: Enable Portrait Mode
One of the methods to fix this problem is to rotate your screen in portrait mode. Once you rotate it to portrait mode, most probably your rotation lock would start working, i.e. clickable again. In case your device is not rotating into portrait mode automatically, try to do it manually.
1. presse Clé Windows + I to open Settings then click on the Système icône.

2. Assurez-vous de sélectionner Commande dans le menu de gauche.
3. Localisez le Orientation section where you need to choose Portrait Dans le menu déroulant.
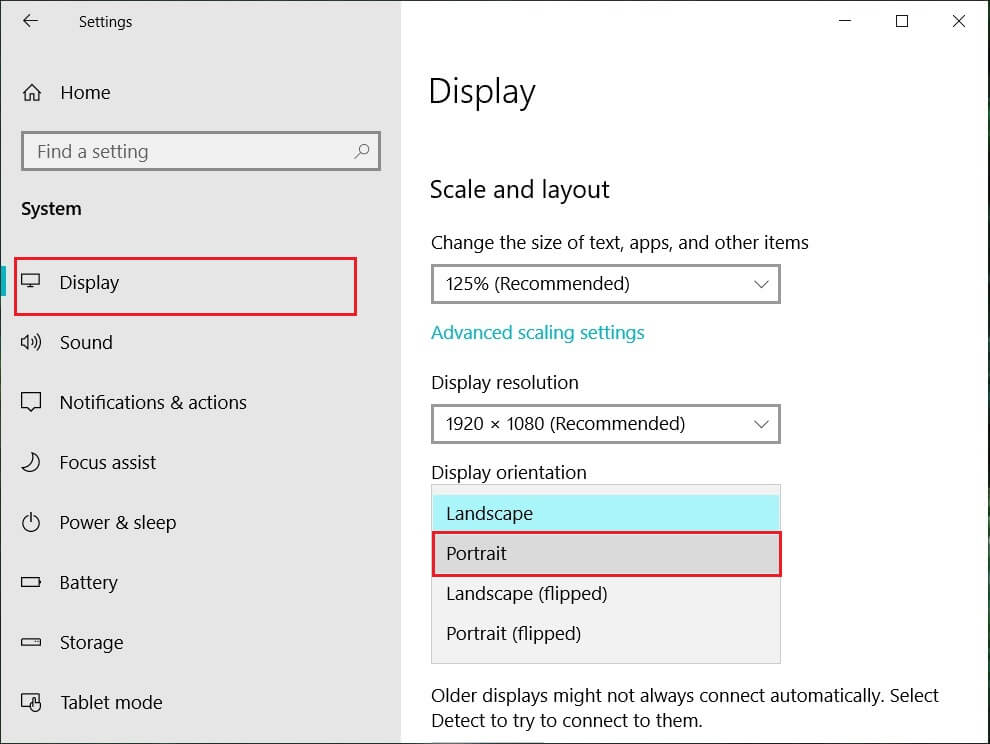
4. Your device will automatically turn into portrait mode.
Method – 2: Use your device in tent mode
Some users, particularly Dell Inspiron, experienced that when their rotation lock is greyed out, the only way to solve this problem is to put your device in Tent Mode.
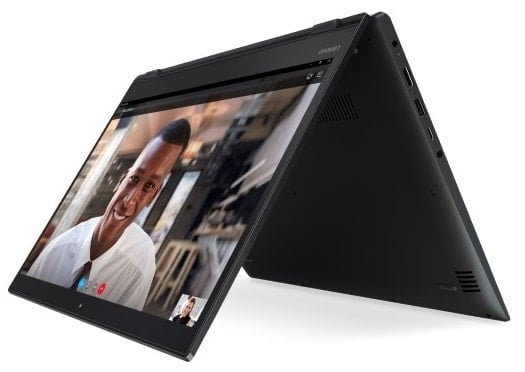
Crédit image: Microsoft
1. You need to put your device in Tent Mode. If your display is upside down, you need not worry.
2. Cliquez maintenant sur le Centre d'action Windows, Serrure de rotation will be working. Here you need to turn it off if you want so that your device rotate properly.
Method – 3: Disconnect your keyboard
If rotation lock is greyed in your Dell XPS and Surface Pro 3 (2-in-1 device), you need to disconnect your keyboard, and many users reported that disconnecting the keyboard solves the rotation lock problem. If you own different devices, you can still use this method to fix rotation lock greyed out in Windows 10 issue.
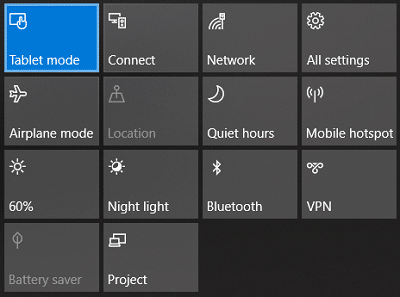
Method – 4: Switch to Tablet Mode
Many users experienced that this rotation greyed out the problem by switching their device into Tablet Mode. If it is switched automatically, it is good; otherwise, you can do it manually.
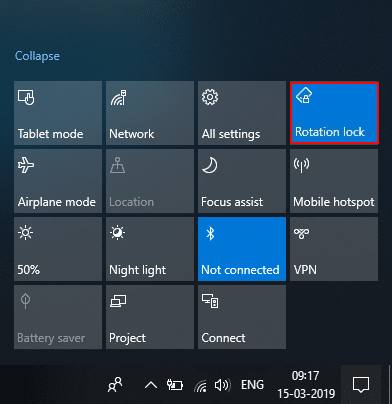
1. Cliquez sur le Centre d'action Windows.
2. Ici, vous trouverez Mode Tablet option, Click on It.
OR
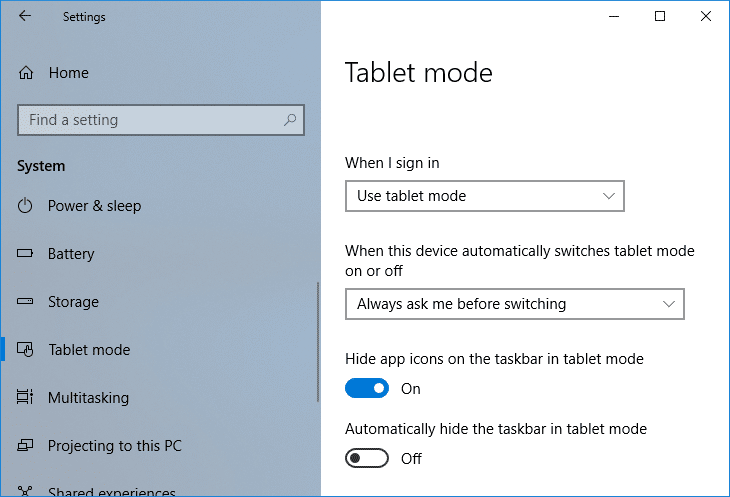
1. Appuyez sur la touche Windows + I pour ouvrir Paramètres puis cliquez sur le Système icône.
2. Here it would help if you located Mode Tablet option under the left window pane.
3. Maintenant, à partir du "When I sign in” drop-down, select “Utiliser le mode tablette" .
Method – 5: Change LastOrientation Registry Value
If you still experience a problem, you can solve it by changing some registry values.
1. Press Windows +R and enter regedit puis appuyez sur Entrée.

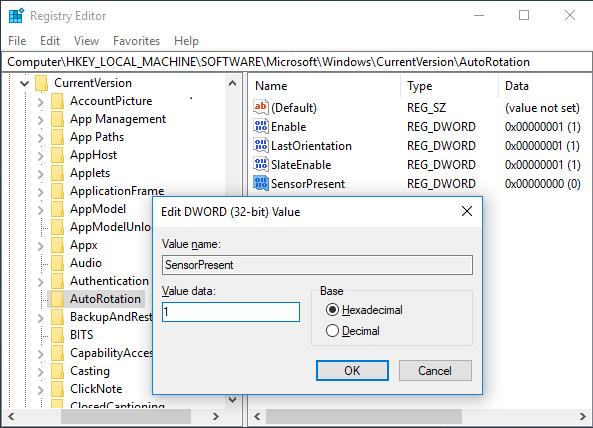
2. Once registry editor opens, you need to navigate to the below path:
HKEY_LOCAL_MACHINESOFTWAREMicrosoftWindowsCurrentVersionAutoRotation
Remarque: Follow the above folders one by one to locate Auto Rotation.
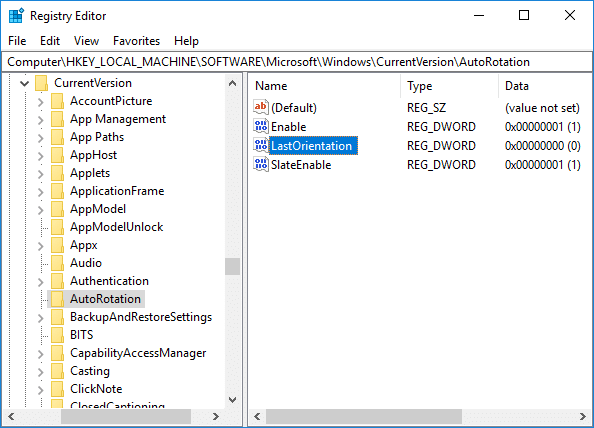
3. Assurez-vous de select AutoRotation puis dans le volet de droite de la fenêtre double-cliquez sur Last Orientation DWORD.
4. Now enter 0 under Value data field et cliquez sur OK.
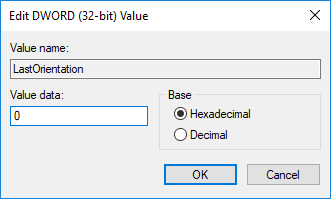
5. S'il y a SensorPresent DWORD, double-click on it and set its valeur à 1.
Method – 6: Check Sensor Monitoring Service
Sometimes services of your device can cause a rotation lock problem. Therefore, we can get it sorted with Windows Monitoring services feature.
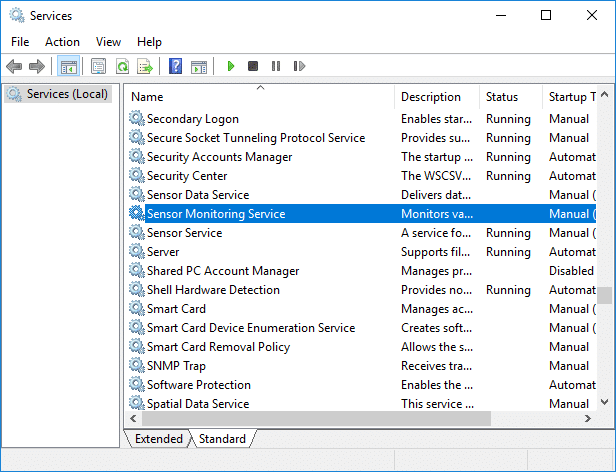
1. Appuyez sur Windows + R et tapez services.msc et appuyez sur Entrée.

2. Once the services window opens, find the Sensor Monitoring services option et double-cliquez dessus.
3. Now, from the Startup type drop-down select Automatique puis cliquez sur le bouton Démarrer pour démarrer le service.
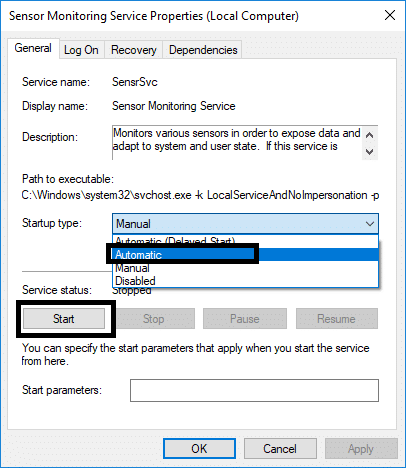
4. Finally, click Apply followed by OK to save the settings, and you can reboot the system to apply the changes.
Method – 7: Disable YMC service
If you are using a Lenovo Yoga device and experiencing this problem, you can fix rotation lock grayed out in the Windows 10 issue by disabling YMC service.
1. Windows + R type services.msc et appuyez sur Entrée.
2. Localisez YMC services et double-cliquez dessus.
3. Définissez le type de démarrage sur Hors Ligne and click Apply, followed by OK.
Method – 8: Update Display Drivers
One reason for this problem could be the driver update. If your respective driver for the monitor is not updated, it can cause the Rotation Lock greyed out in Windows 10 Issue.
Mettre à jour manuellement les pilotes graphiques à l'aide du Gestionnaire de périphériques
1. Appuyez sur la touche Windows + R puis tapez devmgmt.msc et appuyez sur Entrée pour ouvrir Gestionnaire de périphériques.

2. Ensuite, développez Prises d'écran et faites un clic droit sur votre carte graphique et sélectionnez Activer.

3. Une fois que vous avez refait cette opération, faites un clic droit sur votre carte graphique et sélectionnez « »Mise à jour du pilote" .

4. Sélectionnez "Rechercher automatiquement un logiciel de pilote mis à jour» et laissez-le terminer le processus.

5. Si les étapes ci-dessus ont permis de résoudre le problème, alors très bien, sinon continuez.
6. Faites à nouveau un clic droit sur votre carte graphique et sélectionnez «Mise à jour du pilote" mais cette fois sur l'écran suivant sélectionnez "Parcourir mon ordinateur pour le logiciel pilote. »

7. Sélectionnez maintenant «Me laisser choisir parmi une liste de pilotes disponibles sur mon ordinateur. »

8. Finalement, sélectionnez le dernier pilote de la liste et cliquez Suivant.
9. Laissez le processus ci-dessus se terminer et redémarrez votre PC pour enregistrer les modifications.
Suivez les mêmes étapes pour la carte graphique intégrée (Intel dans ce cas) pour mettre à jour ses pilotes. Voyez si vous êtes capable de Fix Rotation Lock greyed out Issue, sinon, passez à l'étape suivante.
Mettre à jour automatiquement les pilotes graphiques à partir du site Web du fabricant
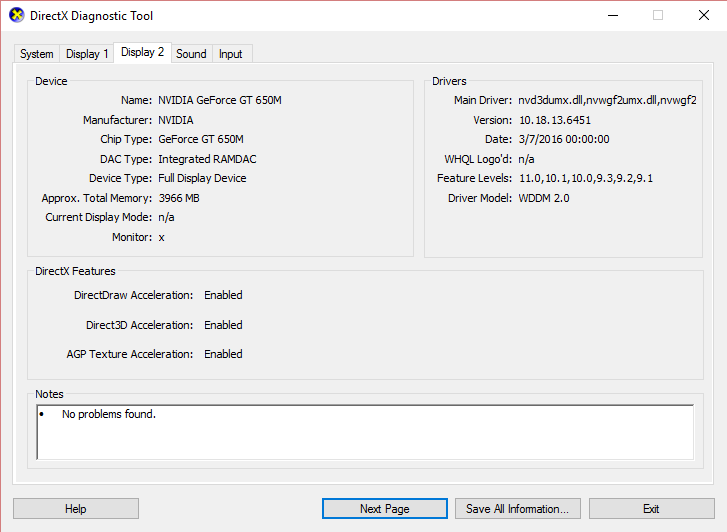
1. Appuyez sur la touche Windows + R et dans la boîte de dialogue, tapez «dXDIAG" et appuyez sur Entrée.

2. Après cela, recherchez l'onglet d'affichage (il y aura deux onglets d'affichage, un pour la carte graphique intégrée et un autre pour celui de Nvidia), cliquez sur l'onglet Affichage et recherchez votre carte graphique.
3. Accédez maintenant au pilote Nvidia site de téléchargement et entrez les détails du produit que nous découvrons.
4. Recherchez vos pilotes après avoir saisi les informations, cliquez sur Accepter et téléchargez les pilotes.

5. Une fois le téléchargement réussi, installez le pilote et vous avez mis à jour avec succès vos pilotes Nvidia manuellement.
Method – 9: Remove Intel Virtual Buttons Driver
Some users reported that Intel Virtual button drivers cause rotation lock problem on your device. To solve this problem, you can uninstall the driver.
1. Open Device manager on your device by pressing Windows + R and type devmgmt.msc and hit Enter or press Windows X and choose Gestionnaire de périphériques dans la liste des options.
2. Once Device manager box is opened locate Intel virtual buttons driver.
3. Faites un clic droit dessus et choisissez Désinstaller.
Recommandée:
J'espère que cet article vous a été utile et que vous pouvez maintenant facilement Fix Rotation Lock greyed out in Windows 10, mais si vous avez encore des questions concernant ce tutoriel, n'hésitez pas à les poser dans la section commentaires.
")
