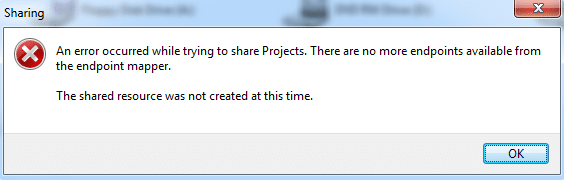
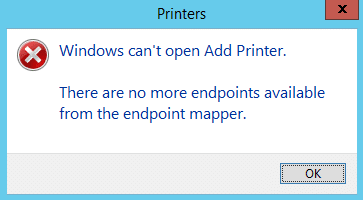
Fix There are no more endpoints available from the endpoint mapper: If you’re facing this error then this means either you are trying to install a printer or you’re sharing your drive within your network. Generally ‘No More Endpoints Available’ error occur when you try to join a domain but the Windows services are corrupted and therefore, conflicting with other services which won’t let you join that particular domain and ultimately causing the error. Anyway, this error is very annoying and that’s why troubleshooter is here to fix this error via the following troubleshooting steps.
When attempting to join a client to an Active Directory domain, you may receive the following error:
The following error occurred attempting to join the domain <domain>:
There are no more endpoints available from the endpoint mapper.
Error 1753: There are no more endpoints available from the endpoint mapper.
Il n'y a plus de points de terminaison disponibles à partir du mappeur de points de terminaison [RESOLU]
Assurez-vous de créer un point de restauration au cas où quelque chose se passerait mal.
Method 1: Delete the Internet key to remove RPC restriction
1.Appuyez sur la touche Windows + R puis tapez regedit et appuyez sur Entrée pour ouvrir l'Éditeur du Registre.

2. Accédez à la clé de registre suivante :
ComputerHKEY_LOCAL_MACHINESoftwareMicrosoftRpcInternet
3.Cliquez avec le bouton droit sur Internet key et sélectionnez Supprimer.
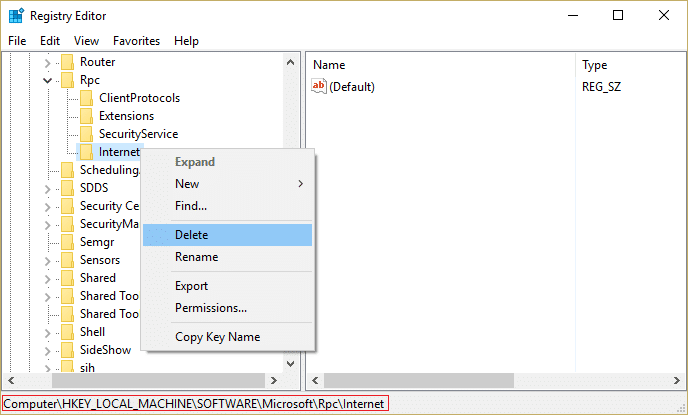
4.Redémarrez votre PC pour enregistrer les modifications.
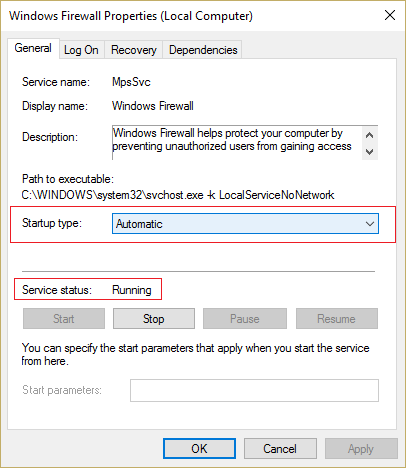
Method 2: Verify that Remote Procedure Call (RPC) Services are Started
1.Appuyez sur la touche Windows + R puis tapez services.msc et appuyez sur Entrée.

2.Locate the following services:
Appel de procédure à distance
Remote Procedure Call Locator
ParProcessManager
If you are trouble adding a printer then make sure following services are also running:
Spouleur d'impression
Lanceur de processus du serveur DCOM
Mappeur de point final RPC
3.Right-click and select Propriétés for above services.
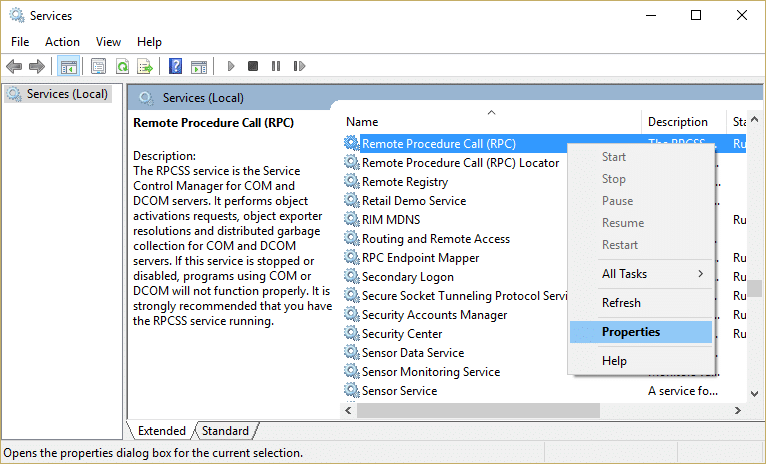
4.Next, make sure the Startup type is Automatic et par les services fonctionnent.
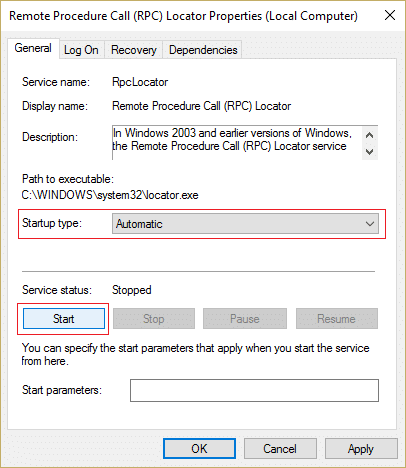
5.If the above services are stopped make sure to Courir them from properties window.
6.Reboot your PC to save changes and the error “There are no more endpoints available from the endpoint mapper” may be resolved.
Method 3: Temporary Disable antivirus ainsi que Pare-feu
Sometimes the Antivirus program can cause “There are no more endpoints available from the endpoint mapper” and in order to verify this is not the case here, you need to disable your antivirus for a limited time so that you can check if the error still appears when the antivirus is off.
1.Cliquez avec le bouton droit sur Icône du programme antivirus dans la barre d'état système et sélectionnez Désactiver

2. Ensuite, sélectionnez la période pour laquelle le L'antivirus restera désactivé.

Remarque : Choisissez la durée la plus courte possible, par exemple 15 minutes ou 30 minutes.
3.Once done, again try to connect to the WiFi network and check if the error resolves or not.
4.Appuyez sur la touche Windows + I puis sélectionnez Panneau de configuration.

5. Ensuite, cliquez sur Système et sécurité.
6. Cliquez ensuite sur Fenêtre pare-feu.

7.Maintenant, dans le volet de gauche de la fenêtre, cliquez sur Activer ou désactiver le pare-feu Windows.

8.Sélectionnez Désactiver le pare-feu Windows et redémarrez votre PC. Again try to connect to the WiFi network and see if the issue is resolved or not.
Si la méthode ci-dessus ne fonctionne pas, assurez-vous de suivre exactement les mêmes étapes pour réactiver votre pare-feu.
Method 4: Run Print Troubleshooter
1.Tapez « dépannage » dans la barre de recherche Windows et cliquez sur Dépannage.

2. Ensuite, dans le volet de gauche de la fenêtre, sélectionnez Voir tout.
3. Ensuite, dans la liste Résoudre les problèmes informatiques, sélectionnez Imprimante.

4.Suivez les instructions à l'écran et laissez l'utilitaire de résolution des problèmes d'imprimante s'exécuter.
5.Restart your PC and the error “There are no more endpoints available from the endpoint mapper” may be resolved.
Method 5: Change advanced sharing settings
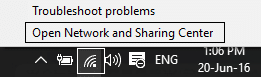
1.Right-click on Wireless icon on system tray and click on Ouvrir Centre Réseau et partage.
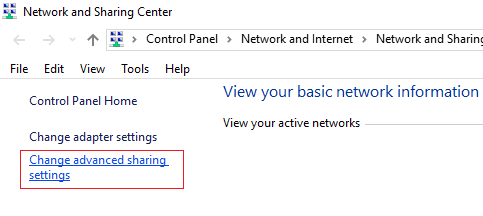
2.Cliquez sur Modifier les paramètres de partage avancés in the left-hand window.
3.Enable the Network discovery, File and printer sharing and Public folder.
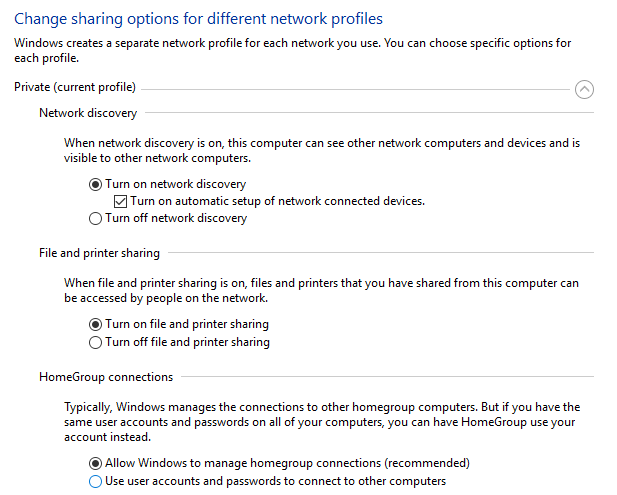
4.Click Save changes and close everything. Reboot your PC to save changes.
Method 6: Registry fix for Sharing error
1. téléchargement MpsSvc.reg ainsi que BFE.reg files. Double-click on them to run and to add these files to the registry.
2.Redémarrez votre PC pour enregistrer les modifications.
3.Appuyez sur la touche Windows + R puis tapez regedit et appuyez sur Entrée pour ouvrir l'Éditeur du Registre.
4. Ensuite, accédez à la clé de registre suivante :
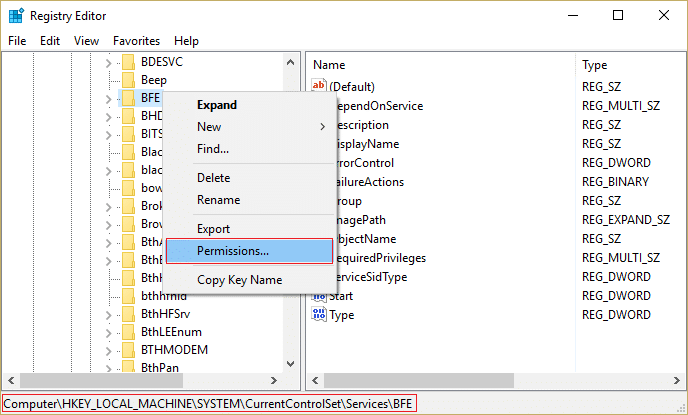
ComputerHKEY_LOCAL_MACHINESYSTEMCurrentControlSetServicesBFE
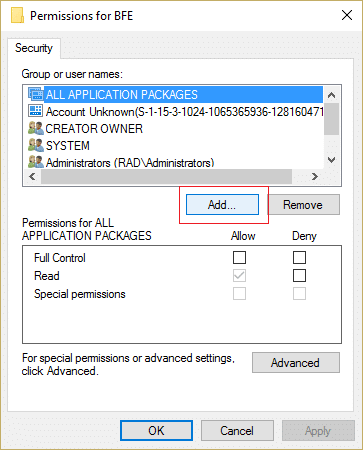
5.Right-click the BFE key and select Permissions.
6.In the next window that opens, click the Ajouter un bouton.
7.Tapez «Tous” (without quotes) under the field Enter the object names to select and then click on Vérifiez les noms.
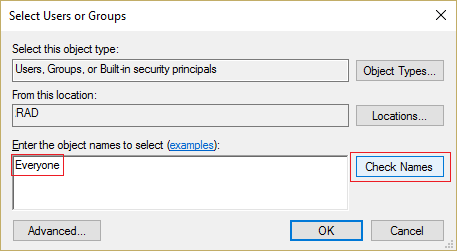
8.Now once the name is verified click D'ACCORD.
9.Everyone should be now added to the Group or user names section.
10.Assurez-vous de sélectionner Tous from the list and check mark contrôle total option in Allow column.
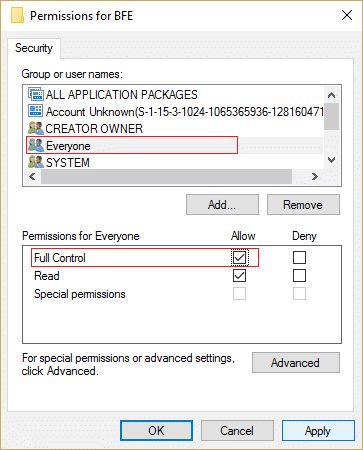
11.Cliquez sur Appliquer puis sur OK.
12.Appuyez sur la touche Windows + R puis tapez services.msc et appuyez sur Entrée.
13.Find the below services and right-click on them then select Propriétés :
Filtering Engine
Pare-feu windows
14.Enable them both in the Properties window (click on Start) and make sure their Type de démarrage est fixé à Automatique.
15.That’s it you may have Fix There are no more endpoints available from the endpoint mapper but if not then run SFC and CHKDSK in the next step.
Méthode 7 : Exécuter le vérificateur de fichiers système (SFC) et vérifier le disque (CHKDSK)
1.Appuyez sur la touche Windows + X puis cliquez sur Invite de commandes (administrateur).

2. Tapez maintenant ce qui suit dans le cmd et appuyez sur Entrée :
Sfc /scannow sfc /scannow /offbootdir=c: /offwindir=c:windows

3. Attendez la fin du processus ci-dessus et une fois terminé, redémarrez votre PC.
4. Ensuite, exécutez CHKDSK à partir d'ici Corrigez les erreurs du système de fichiers avec l'utilitaire de vérification du disque (CHKDSK).
5. Laissez le processus ci-dessus se terminer et redémarrez à nouveau votre PC pour enregistrer les modifications.
Méthode 8 : exécuter DISM (service et gestion des images de déploiement)
1.Appuyez sur la touche Windows + X puis sélectionnez Invite de commandes (administrateur).

2.Entrez la commande suivante dans cmd et appuyez sur Entrée :
Important: Lorsque vous utilisez DISM, vous devez disposer du support d'installation Windows prêt.
DISM.exe / Online / Cleanup-Image / RestoreHealth / Source: C: RepairSourceWindows / LimitAccess
Remarque: Remplacez C:RepairSourceWindows par l'emplacement de votre source de réparation

2.Appuyez sur Entrée pour exécuter la commande ci-dessus et attendez la fin du processus. Cela prend généralement 15 à 20 minutes.
REMARQUE: Si la commande ci-dessus ne fonctionne pas, essayez ce qui suit : Dism /Image:C:offline /Cleanup-Image /RestoreHealth /Source:c:testmountwindows Dism /Online /Cleanup-Image /RestoreHealth /Source:c:testmountwindows /LimitAccess
3.Une fois le processus DISM terminé, tapez ce qui suit dans le cmd et appuyez sur Entrée : sfc / scannow
4.Let System File Checker run and once it’s complete, restart your PC. Check if the Windows 10 Slow Shutdown le problème est résolu ou non.
Recommandé pour vous:
Voilà, vous avez réussi Fix There are no more endpoints available from the endpoint mapper mais si vous avez encore des questions concernant cet article, n'hésitez pas à les poser dans la section commentaires.

