OneDrive is one of the best cloud storage service which comes bundled as part of Windows 10. One Drive is available on most major platforms such as desktop, mobile, Xbox etc. and that’s why Windows users prefer it over any other service. But for most of the Windows users, OneDrive is merely a distraction, and it just bugs users with an unnecessary prompt for Sign in and whatnot. The most notable issue is the OneDrive icon in the File Explorer which the users want to somehow hide or remove completely from their system.
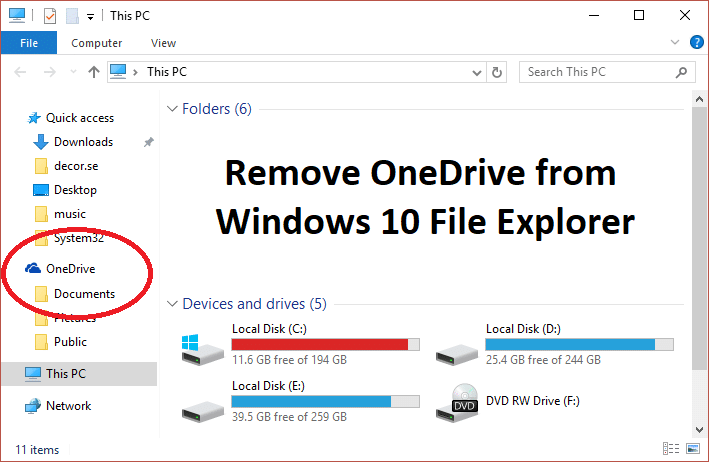
Now the problem is Windows 10 doesn’t include an option to hide or remove OneDrive from your system, and that’s why we have put together this article which will show you how to remove, hide or uninstall OneDrive completely from your PC. So without wasting any time let’s see How to Remove OneDrive from Windows 10 File Explorer with the help of below-listed steps.
How to Remove OneDrive from Windows 10 File Explorer
Make sure to create a restore point and backup registry, just in case something goes wrong.
Method 1: Hide OneDrive From Windows 10 File Explorer
1. Brúigh Windows Key + R ansin clóscríobh regedit agus brúigh Iontráil chun Eagarthóir Clárlainne a oscailt.

2. Déan nascleanúint go dtí an eochair chláraithe seo a leanas:
HKEY_CLASSES_ROOTCLSID{018D5C66-4533-4307-9B53-224DE2ED1FE6}
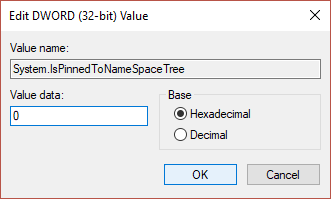
3. Anois roghnaigh an {018D5C66-4533-4307-9B53-224DE2ED1FE6} key and then from the right window pane double click on System.IsPinnedToNameSpaceTree DWORD.

4. Athraigh an DWORD value data from 1 to 0 agus cliceáil OK.
5. Close the Registry Editor and Reboot your PC to save changes.
Nóta: In future, if you want to access the OneDrive and need to revert the changes, then follow the above steps and change the value System.IsPinnedToNameSpaceTree DWORD from 0 to 1 again.
Method 2: Uninstall or Remove OneDrive from Windows 10 File Explorer
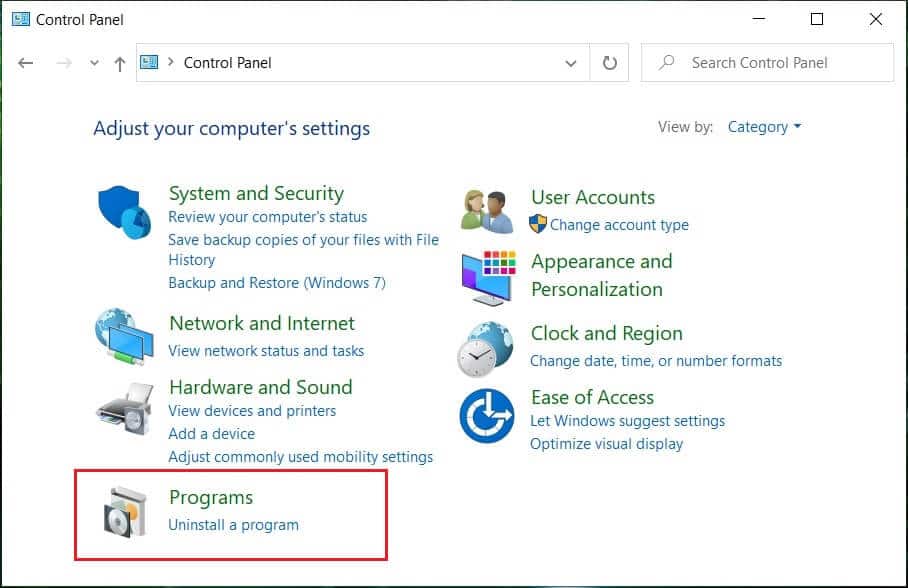
1. cineál painéal rialú in Windows Search and then click on it to open Control Panel.

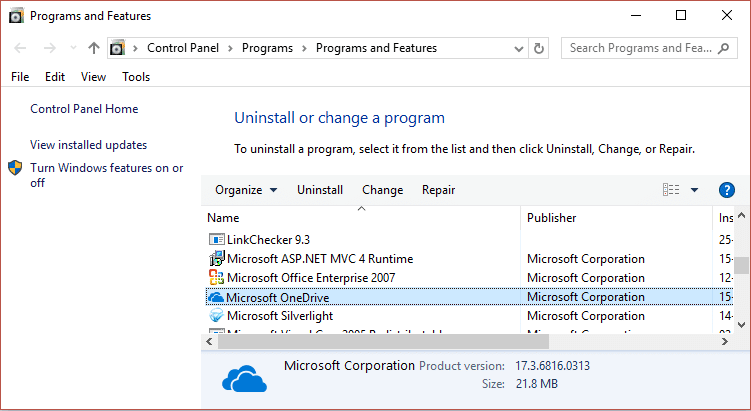
2. Ansin cliceáil Díshuiteáil le Clár agus faigh Microsoft OneDrive ar an liosta.
3. Right-click on Microsoft OneDrive and select Dhíshuiteáil.
4. Follow the on-screen instruction to uninstall OneDrive from your system completely
5. Reboot your PC to save changes, and this would Remove OneDrive from Windows 10 File Explorer completely.
Nóta: If you want to reinstall OneDrive in future navigate to the following folder according to the architecture of your PC:
For 64-bit PC: C:WindowsSysWOW64
For 32-bit PC: C:WindowsSystem32
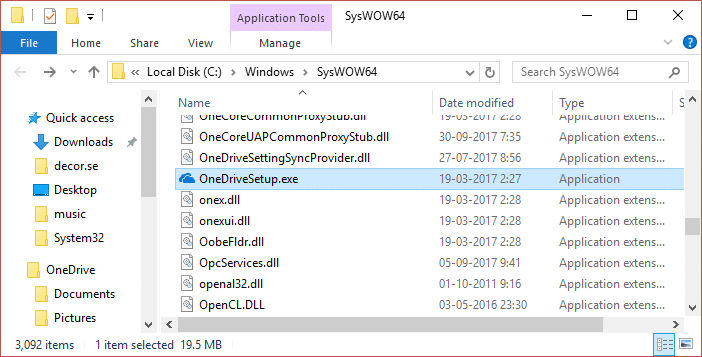
Anois lorg OneDriveSetup.exe, then double-click on it to run the setup. Follow the on-screen instruction to re-install OneDrive.
Method 3: Hide OneDrive from File Explorer using Group Policy Editor
Nóta: This method won’t work in Windows Home Edition version.
1. Brúigh Windows Key + R ansin clóscríobh gpedit.msc agus brúigh Iontráil chun Eagarthóir Polasaí Grúpa a oscailt.

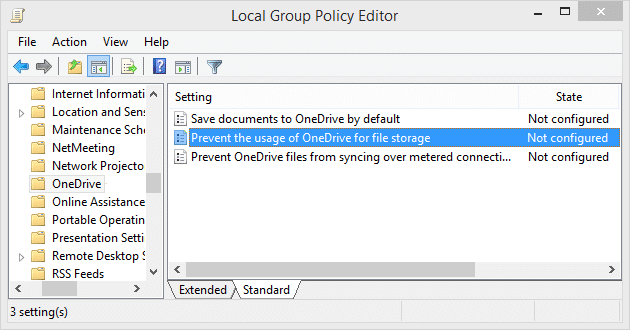
2. Now navigate to the following path in the gpedit window:
Computer Configuration > Administrative Templates > Windows Components > OneDrive
3. Make sure to select OneDrive from the left window pane and then in the right window pane double click on “Cosc a chur ar úsáid OneDrive chun comhaid a stóráil” polasaí.
4. Now from the policy setting window select Cumasaithe checkbox and click OK.
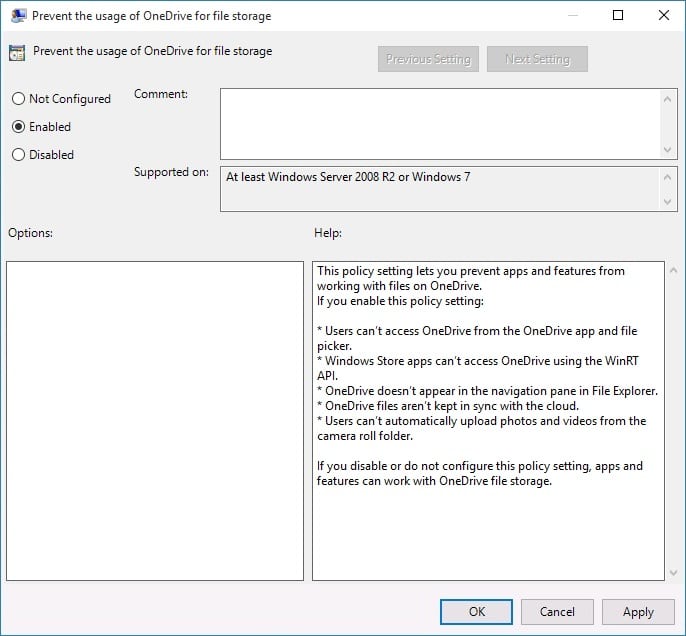
5. This will completely hide OneDrive from File Explorer and users won’t be able to access it anymore.
6. Atosaigh do ríomhaire chun athruithe a shábháil.
Molta:
Sin é atá foghlamtha agat go rathúil How to Remove OneDrive from Windows 10 File Explorer ach má tá aon cheist agat fós maidir leis an bpost seo ansin bíodh leisce ort iad a chur sa chuid tuairimí.

