Most Windows users are familiar with the gray x on desktop icons. Desktop icons are quite helpful in accessing files, folders, or important applications with a single click on the desktop screen. Many of these desktop icons are pre-built, like, This PC, Recycle Bin, etc. It is very common to see grey x on updated Windows 10. Many users have found some ways to fix the issue, a few of which include uninstalling the applications or re-booting the system, which eventually is of no help for the users because the icons end up with gray x again. If you are also dealing with the same problem, you are at the right place. We bring to you a perfect guide that will help you fix gray x on desktop icons. So, continue reading to fix grey x on Desktop icons.
![]()
8 Ways to Fix Gray X on Desktop Icons in Windows 10
You might find yourself wondering about the question of why grey x on desktop icons Windows 10 appear. The answer to your doubt lies in the reasons stated below:
- Error in cloud applications can result in grey x on files appearing repeatedly.
- Insufficient cloud storage is another reason why gray x appears. Try removing cloud data to get rid of it.
- Shortcut app errors can also sometimes lead to gray x on desktop icons.
Even though there are many reasons why you are seeing a gray x on desktop icons, there are also many ways to fix gray x on desktop icons.
Method 1: Refresh PC
The simplest and fondly approached way to resolve the gray x on the desktop problem is by refreshing the system. To do so:
1. Rach gu do sgrion deasg and right-click anywhere.
2. Cliog air a 'phutan Ath-nuadhaich roghainn.
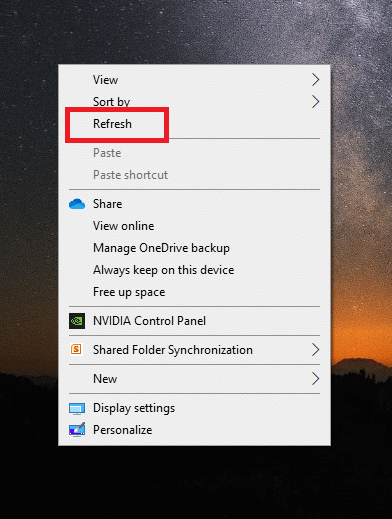
Using the refresh option helps to recreate the screen and thus, helps in refreshing the apps too, which helps to fix grey x on desktop icons.
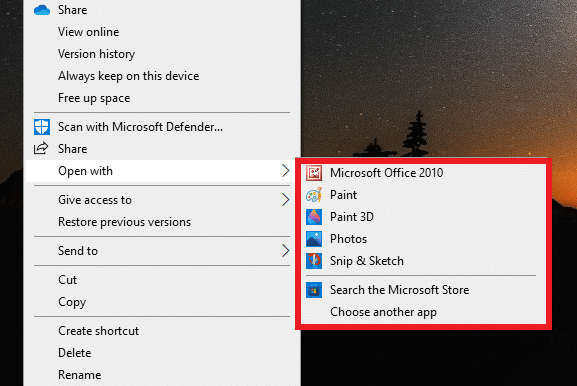
Method 2: Open with Another App
Problematic files or folders can be fixed by opening them using different applications. If you are facing the issue of grey x popping up on your desktop icons, then try using the following mentioned method:
1. Go to the problematic faidhl agus cliog deas air.
2. Cliog air fosgailte le.

3. Open the file using a iarrtais eadar-dhealaichte gus a ’chùis a chàradh.
Cuideachd Leugh: Mar a shocraicheas tu ìomhaighean air an deasg
Method 3: Remove Icon Cache
One of the reasons behind the appearance of gray x can be a corrupt icon cache. Therefore, to get rid of the gray x issue, you need to remove the icon cache. But once done, it is also important to rebuild the icon cache so that it does not affect your system’s performance.
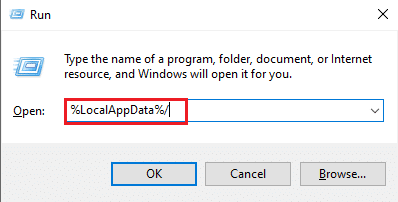
1. Brùth air an Iuchraichean Windows + R gus am fosgladh Run bogsa còmhraidh.
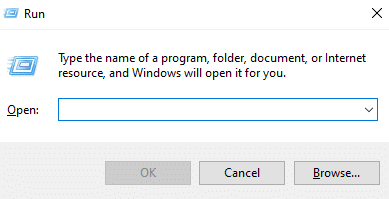
2. Seòrsa % LocalAppData% agus bhuail a ' Cuir a-steach iuchair.
3. Dèan briogadh deas air an pasgan tasgadan agus Sguab às e.
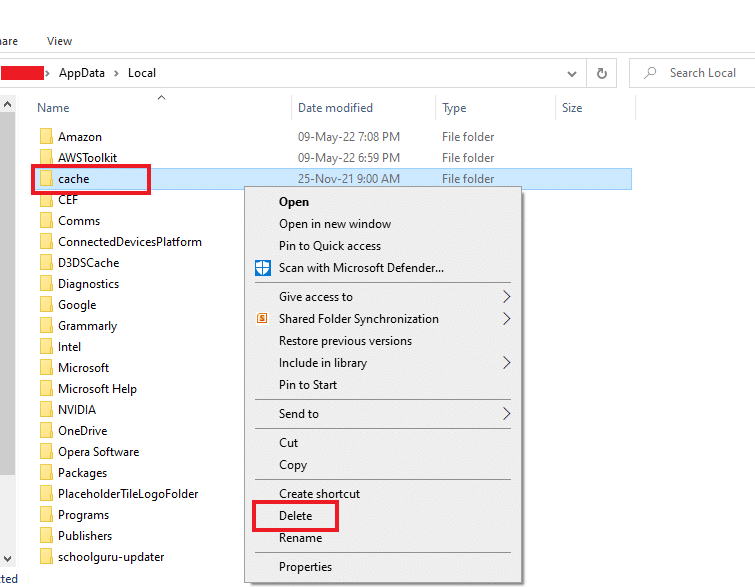
4. Mu dheireadh, ath-thòisich am PC.

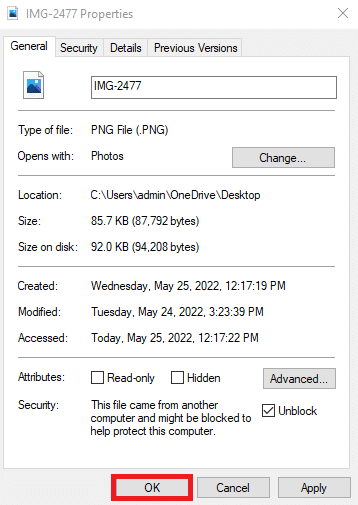
Method 4: Unblock File
Gray x can also appear due to unwanted permissions given to the respected file or blocked permissions. You can undo this and fix gray x on desktop icons by unblocking the troubled file.
1. Dèan briogadh deas air an faidhl/An ìomhaigheag with grey x on it and click on Properties.
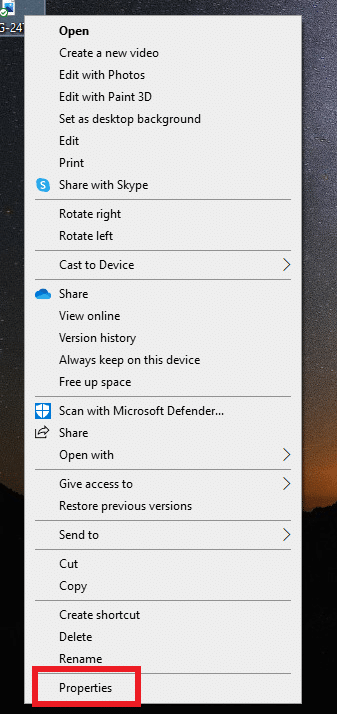
2. Rach gun Coitcheann tab.
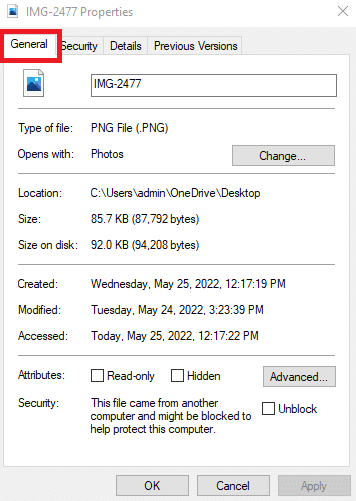
3. Anns a tèarainteachd section, mark the box titled Neo-dhùmhlachadh.
4. Cliog air Cuir a-steach> OK gus atharrachaidhean a shàbhaladh.
Cuideachd Leugh: Ceartaich Windows 10 Icons Taskbar a dhìth
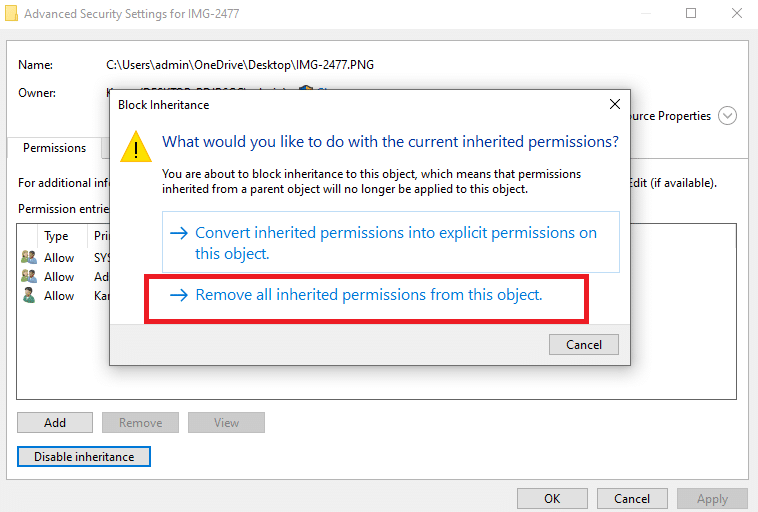
Method 5: Disable Inheritance
In case the above-stated method does not work for you and you are still seeing a gray x on files then the next step is to disable the inheritance of your files. Sometimes, invalid permissions can be a roadblock which results in grey x.
These invalid permissions can therefore be edited by following the steps below:
1. Right-click on the troubling faidhl agus fosgailte Properties.

2. Atharraich chun an tèarainteachd tab.
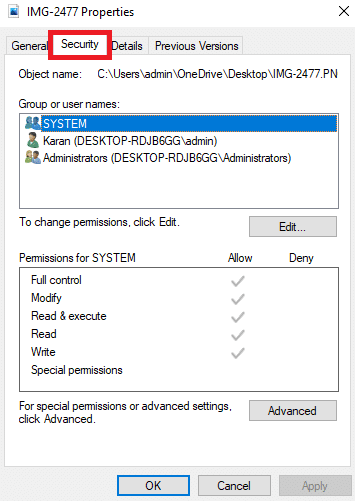
3. Cliog air a 'phutan adhartach putan mar a chithear.
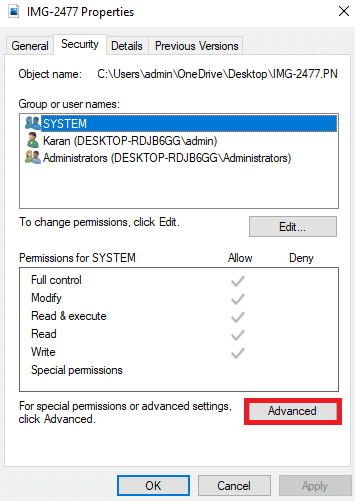
4. Cliog air Thoir seachad dìleab.
5. Tagh Thoir air falbh a h-uile cead a fhuair thu bhon nì seo.
Cuideachd Leugh: How to Use OneDrive: Getting Started with Microsoft OneDrive
Method 6: Quit OneDrive
If any of the above-given methods don’t work for you to fix grey x on desktop icons, another simple technique to opt for is to quit OneDrive. By doing this you can easily fix the issue.
1. Dèan briogadh deas air an Ìomhaigh OneDrive Air an Taskbar.
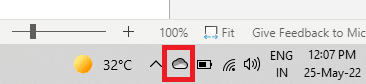
2. Cliog air a 'phutan Ìomhaigh nan roghainnean agus tagh Cuir stad air sioncronachadh.
3. If the grey x icon persists, click on Quit OneDrive.
![]()
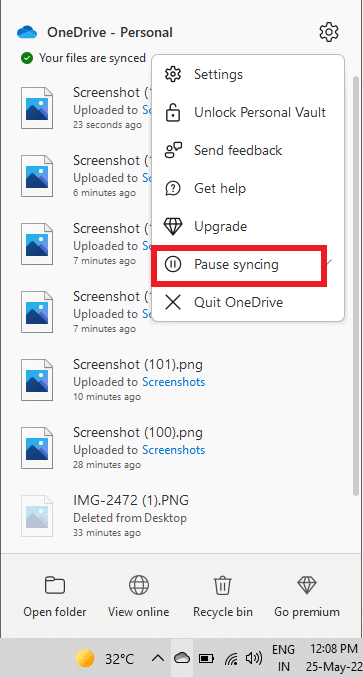
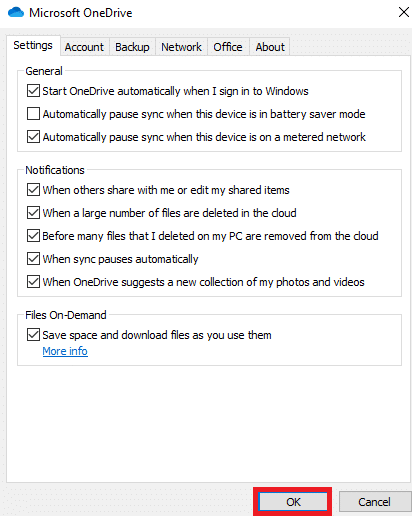
Method 7: Disable Files On-Demand
Disabling files on-demand also helps in fixing the issue of gray x on desktop icons. If you are facing the issue again and over then you can save space on your OneDrive and disable files on-demand.
1. Dèan briogadh deas air an Ìomhaigh OneDrive air an t-siostam agad.
![]()
2. Cliog air roghainnean.
3. Fosgail an Tab roghainnean ann.
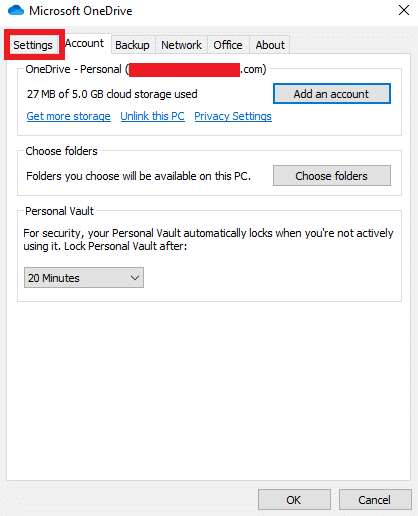
4. Mark the box titled Sàbhail àite agus luchdaich sìos faidhlichean mar a bhios tu gan cleachdadh agus briog air OK.
Check to see if the grey x icon issue is resolved.
1. If not, then right-click on the troubled file.
2. Lorg agus tagh an Cùm air an inneal seo an-còmhnaidh roghainn.
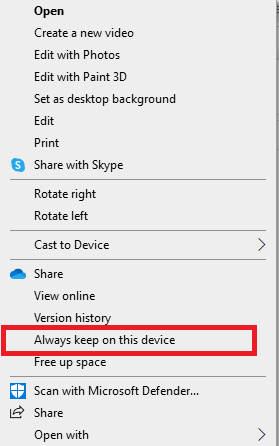
This will certainly help you to get rid of the gray x on desktop icons.
Cuideachd Leugh: Fix OneDrive Sync Problems on Windows 10
Method 8: Reinstall One Drive
If you happen to have tried out each or almost every method provided above, then the last resort for you is to reinstall the cloud application (OneDrive) on your desktop. Reinstalling will help to take out corrupt files or eliminate any error leading to grey x on the files.
To reinstall OneDrive on your desktop, follow the steps below:
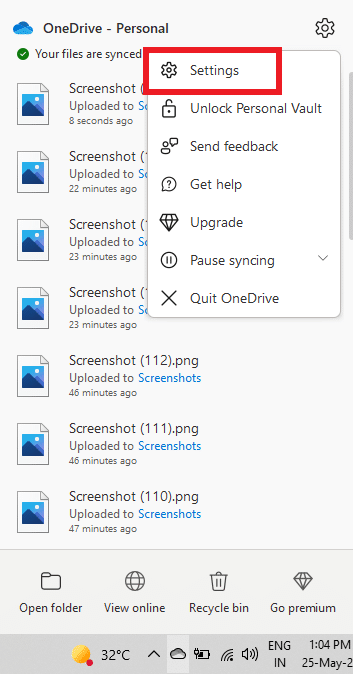
1. Dèan briogadh deas air an Ìomhaigh OneDrive.
![]()
2. Cliog air roghainnean ann.

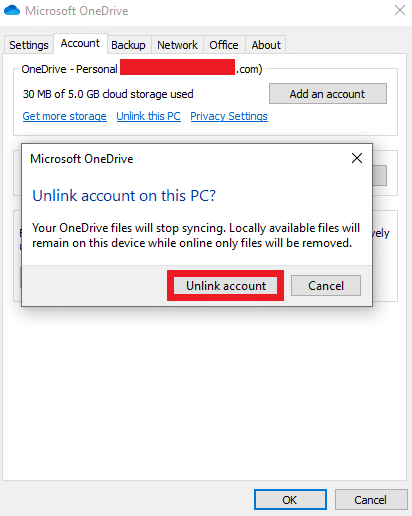
3. Fosgail an cunntas tab.
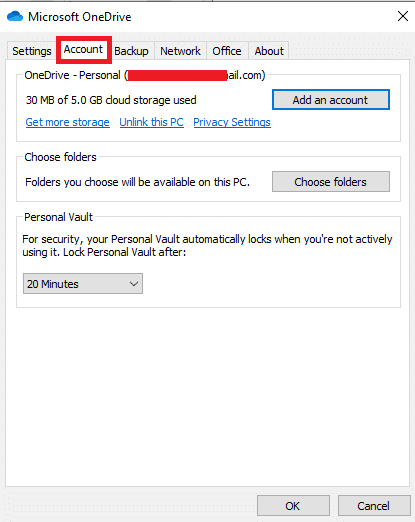
4. Cliog air Unlink am PC seo.
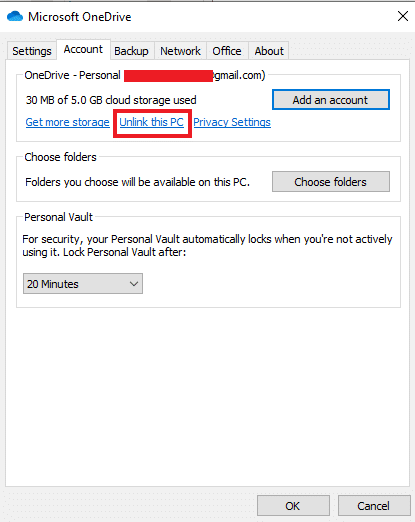
5. Tagh Cunntas neo-cheangailte.
6. An ath rud, ath-thòisich am PC.

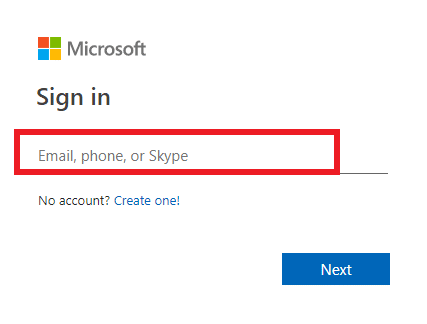
7. Clàraich a-steach do Cunntas OneDrive.
The above-stated steps will help you to fix the gray x issue on your desktop. If the problem still persists, then try to uninstall your cloud storage and install it again.
Ceistean Bitheanta
Q1. How can I fix the gray x on all of the desktop icons?
Ans. If you are seeing a gray x on all of your Desktop icons, then try to fix the issue by clearing out your corrupt icon cache.
Q2. Why am I seeing gray x when I create new folders or files?
Ans. Gray x on new folders or files can be a result of issues with OneDrive. If you are repeatedly facing the same problem, then pause the syncing on your OneDrive. Stopping the syncing process will help you to create new folders without gray x on them.
Q3. How to fix grey x on desktop icons?
Ans. You can fix grey x on desktop icons by simply refreshing your Desktop screen. If this does not help then disable the desktop icons to remove the grey x.
Q4. Does gray x on my desktop icons mean that my files are corrupt?
Ans. Chan eil, the gray x on your desktop icons does not indicate that your files are corrupt. The gray x shows up due to an error with icon cache on your system or OneDrive errors like 0x8004de40 .
Q5. Why does a grey x appear on desktop icons?
Ans. If a grey x appears on your desktop icons or files then it indicates that your file is unable to sync with Dropbox and you will get downloading uploading errors. This could be due to an error which can be with icon cache or your OneDrive application.
Q6. Is it necessary to have OneDrive?
Ans. It is not necessary to have OneDrive on your system. Depending upon your need, you can use the application. The main purpose of the application is to provide storage and to save files, data, and other important stuff on your system. If you do not wish to use OneDrive, then you can go for other storage apps that can help you to achieve the same.
Q7. What if I stop using OneDrive?
Freagairt. If you wish to discontinue the use of OneDrive, you can still access all your data or files on your system. Deleting or not using OneDrive does not affect your important data in any form. You can use another storage app for the same.
Air a mholadh:
Tha sinn an dòchas gun robh an stiùireadh seo cuideachail agus gun robh e comasach dhut a chàradh Gray x on Desktop icons in Windows 10. Let us know which method worked the best for you. If you have any queries or suggestions then feel free to drop them in the comments section below.

