Fix ERR_NETWORK_ACCESS_DENIED in Chrome: The error ERR_NETWORK_ACCESS_DENIED indicates that the websites you are trying to access are being denied by the network and hence you can’t access them. This error is specific to Google Chrome, so you can verify if you are able to visit the same website in another browser, which means there is some problem with Chrome. The issue can be caused because of 3rd party apps or extensions which might be interfering and hence the error.
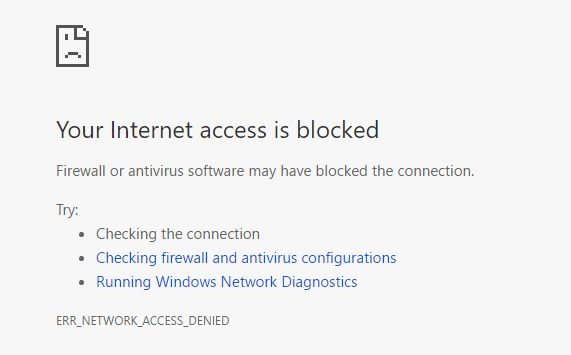
Sometimes this error can also occur when antivirus or firewall might be blocking the access to the specific web page. In any case, you need to Fix ERR_NETWORK_ACCESS_DENIED in Chrome in order to continue browsing without any problem. So without wasting any time let’s see how to actually resolve this error with the help of below-listed troubleshooting guide.
Fix ERR_NETWORK_ACCESS_DENIED in Chrome
Dèan cinnteach gun cruthaich thu puing ath-nuadhachaidh dìreach air eagal ‘s gun tèid rudeigin ceàrr.
Method 1: Clear Browsing History
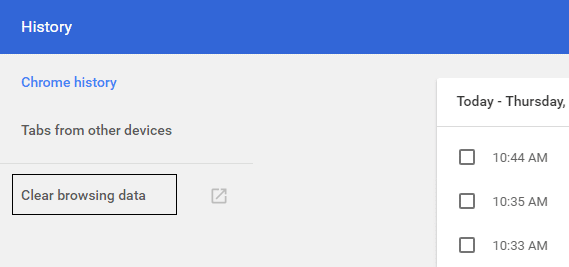
1.Open Google Chrome and press Ctrl + H gus eachdraidh fhosgladh.
2.Next, cliog Brabhsadh soilleir dàta bhon phannal chlì.
3.Make sure the “toiseach ùine” air a thaghadh fo Cuir às do na nithean a leanas bho.
4.Also, check mark the following:
- Eachdraidh brabhsaidh
- Luchdaich sìos eachdraidh
- Briosgaidean agus dàta athar is plugan eile
- Ìomhaighean glèidhte agus faidhlichean
- Lìon am foirm gu fèin-obrachail an dàta
- Faclan-faire
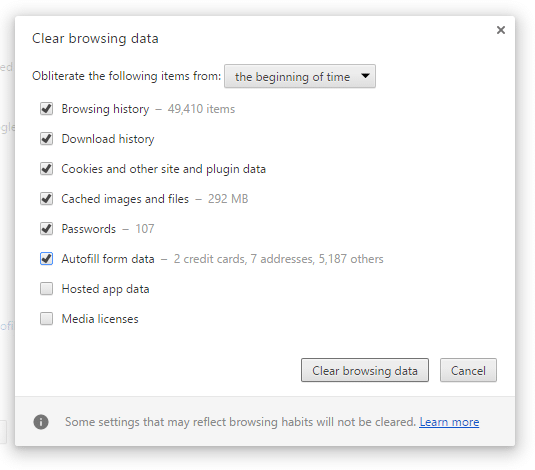
5.Now cliog Fuasgladh dàta brabhsaidh agus feitheamh gus an criochnaich e.
6.Close your browser and restart your PC. Now again open Chrome and see if you’re able to Fix ERR_NETWORK_ACCESS_DENIED in Chrome if not then continue to next method.
Method 2: Reset Google Chrome
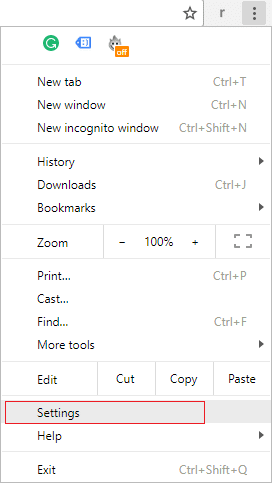
1.Open Google Chrome then click the three dots on the upper right corner and click on Roghainnean.
2.Now in the settings window scroll down and click on Advanced at the bottom.
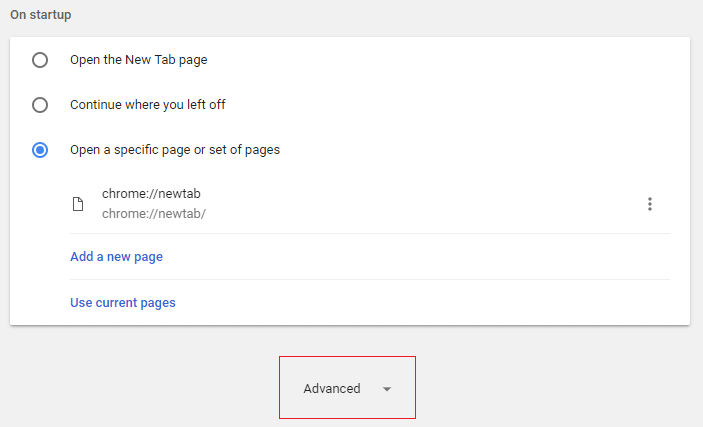
3.Again scroll down to bottom and click on Reset column.
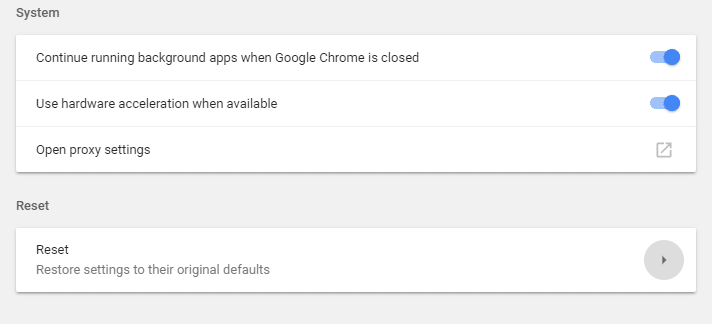
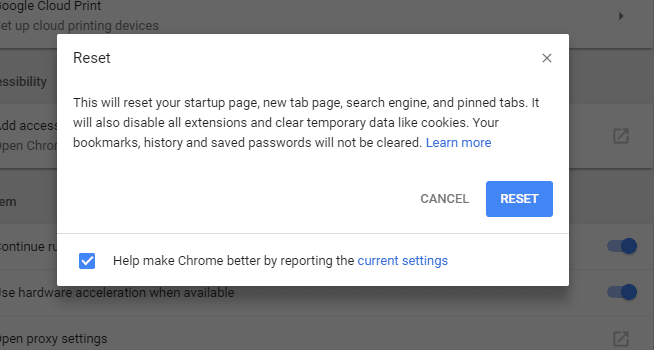
4.This would open a pop window again asking if you want to Reset, so click on Reset to continue.
Dòigh 3: Cuir à comas Antivirus agus Balla-teine gu sealach
Uaireannan faodaidh am prògram Antivirus adhbhrachadh ERR_NETWORK_ACCESS_DENIED in Chrome and in order to verify this is not the case here you need to disable your antivirus for a limited time so that you can check if the error still appears when the antivirus is off.
1.Right-briog air an An ìomhaigheag airson prògram antivirus. bho treidhe an t-siostaim agus tagh Cuir an comas.

2.Next, tagh am frèam-ama airson a bheil an Bidh Antivirus fhathast ciorramach.

Nota: Tagh an ùine as lugha as urrainn dhut, mar eisimpleir 15 mionaidean no 30 mionaid.
3.Once dhèanamh, a-rithist a 'feuchainn ri ceangal ris an lìonra WiFi agus dèanamh cinnteach ma tha a' mhearachd a 'fuasgladh no nach eil.
4.Press Windows Key + Bidh mi an uairsin a 'taghadh Pannal Smachd.

5.Next, cliog air Siostam agus tèarainteachd.
6.Then cliog air Balla-teine Windows.

7.Now bhon phana uinneig chlì cliog air Tionndaidh Windows Firewall air no dheth.

8.Tagh Cuir dheth Windows Firewall agus ath-thòisich am PC agad. Again try to open Google Chrome and see if you’re able to Fix ERR_NETWORK_ACCESS_DENIED in Chrome.
Mura obraich an dòigh gu h-àrd dèan cinnteach gun lean thu na h-aon cheumannan gus am Balla-teine agad a thionndadh a-rithist.
Method 4: Uncheck Proxy
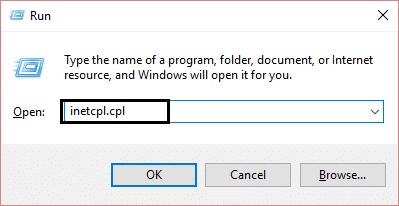
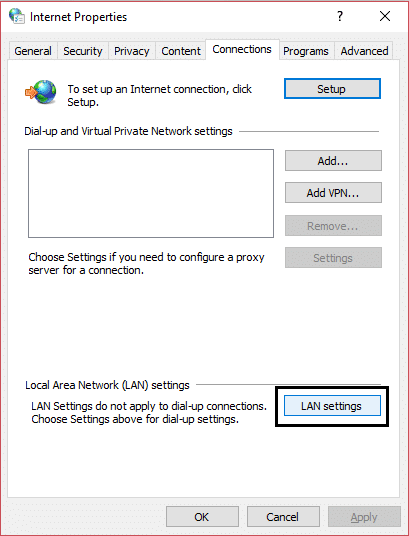
1.Press Windows Key + R an uairsin dèan seòrsa “inetcpl.cpl” and hit enter to open Internet Properties.
2.Next, Go to Tab ceanglaichean and select LAN settings.
3.Uncheck Use a Proxy Server for your LAN and make sure “Lorg suidhichidhean gu fèin-ghluasadach” air a sgrùdadh.
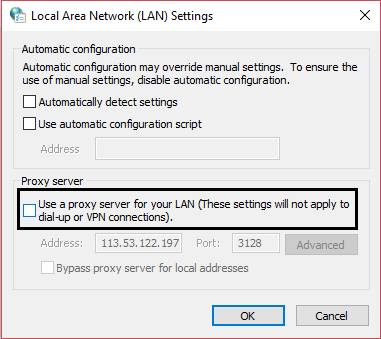
4.Click Ok then Apply and reboot your PC.
Method 5: Disable 3rd party Extensions
1.Open Google Chrome then click the trì dotagan anns an oisean gu h-àrd air an làimh dheis.

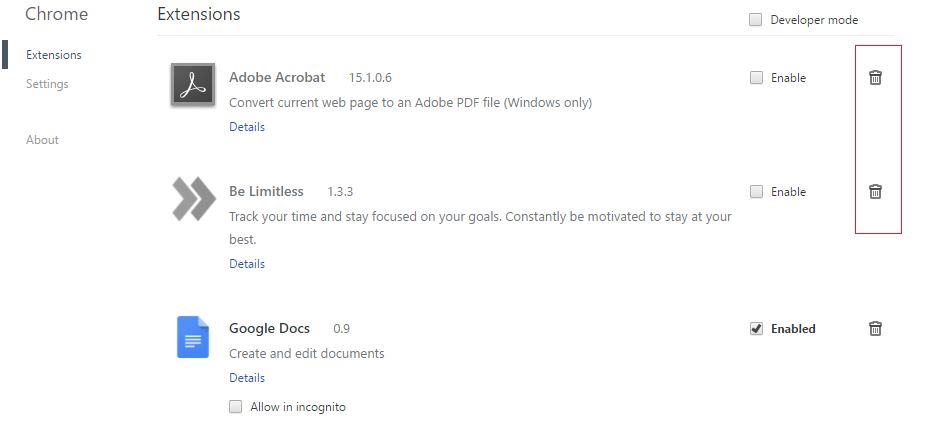
2.Now from the menu select Barrachd Innealan an uairsin briog Leudachain.
3.Disable unnecessary Extensions and if the issue is not resolved then disable all the extensions. Then one by one enable them and see which one was causing the ERR_NETWORK_ACCESS_DENIED in Chrome. Delete that extension permanently and restart the Chrome browser.
Method 6: Delete Chrome Profile
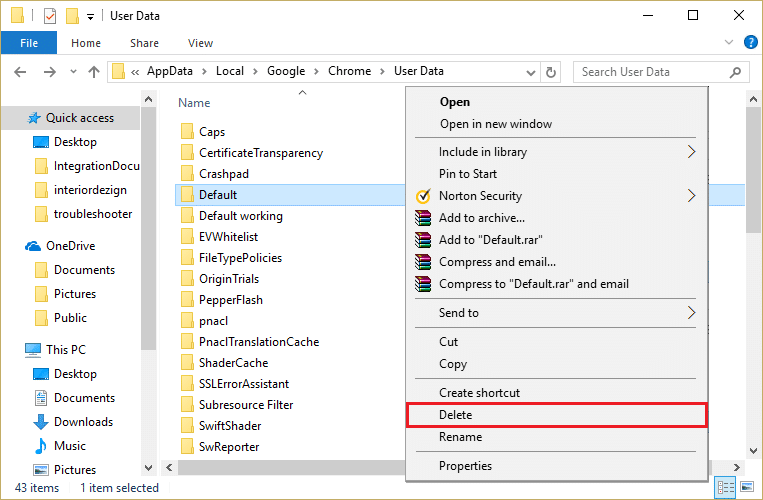
1.Press Windows Key + R an uairsin dèan na leanas agus buail Enter:
% LOCALAPPDATA% Dàta GoogleChromeUser
2.Right-click on the default folder and select Rename or you can delete if you are comfortable losing all your preferences in Chrome.
3.Rename the folder to default.old agus bhuail Enter.
Note: If you are not able to rename the folder make sure you close all instances of chrome.exe from Task Manager.
4.Reboot do PC agus faic an urrainn dhut Fix ERR_NETWORK_ACCESS_DENIED in Chrome.
Dòigh 7: Ruith CCleaner agus Malwarebytes
1.Download agus a stàladh CCleaner & Malwarebytes.
2.Ruith Malwarebytes agus leig leis an siostam agad a sganadh airson faidhlichean cronail.
3.If lorgar malware bheir e air falbh iad gu fèin-obrachail.
4.Now ruith CCleaner agus anns an roinn “Glanaiche”, fo tab Windows, tha sinn a ’moladh sgrùdadh a dhèanamh air na taghaidhean a leanas airson an glanadh:

5. Nuair a tha thu air dèanamh cinnteach gu bheil na puingean ceart air an sgrùdadh, dìreach cliog Ruith Glanadair, agus leig le CCleaner a chùrsa a ruith.
6. Gus an siostam agad a ghlanadh tuilleadh tagh taba a’ Chlàraidh agus dèan cinnteach gu bheil na leanas air an sgrùdadh:

7.Select Scan for Issue agus leig le CCleaner sganadh, an uairsin cliog Ceartaich cùisean taghte.
8.Nuair a dh’ iarras CCleaner “A bheil thu ag iarraidh atharraichean cùl-taic air a' chlàr?” tagh Tha.
9.Once do chùl-taic air a chrìochnachadh, tagh Fix All Selected Issues.
10.Restart do PC gus atharrachaidhean a shàbhaladh.
Air a mholadh dhut:
Sin agad e gu soirbheachail Fix ERR_NETWORK_ACCESS_DENIED in Chrome ach ma tha ceist sam bith agad fhathast a thaobh na dreuchd seo faodaidh tu faighneachd dhaibh anns an earrann bheachdan.

