Enable Remote Desktop On Windows 10: Sometimes the situation occurs when you have to manage some other device or server remotely, or you need to assist some other person without actually being physically present at the location, in cases like this you either move to the location of the person or call that person to assist them. But with the advancement of technology, you can now easily assist any other person on their PC with the help of a feature introduced by Microsoft called Escritorio remoto.
Escritorio remoto: Remote Desktop is a feature which enables you to access a computer remotely using the Remote Desktop Protocol (RDP) to manage PC or servers remotely without actually being present at the location. Remote Desktop was first introduced in Windows XP Pro but has evolved a lot ever since. This feature has made it fairly simple to connect to other PC’s or servers to retrieve files and to provide any kind of support. If Remote Desktop is used efficiently it can also lead to increase efficiency and productivity. But make sure you follow the correct procedure to enable Remote Desktop feature so that it will be safe & secure to use.
Remote Desktop uses a service called Remote Desktop Server which allows connection to the PC from the network and a Remote Desktop Client service which makes that connection to the remote PC. The Client is included in all the editions of Windows like Home, Professional, etc. But the Server part is only available on the Enterprise & Professional editions. In other words, you can initiate a Remote Desktop connection from any PC running any Windows editions, but you can only connect to the PC’s running a Windows Pro or Enterprise edition.
Remote Desktop is disabled by default, so you need to first enable it in order to use this feature. But don’t worry it is very easy to enable Remote Desktop on Windows 10 with the help of the below-listed guide.
How to Enable Remote Desktop On Windows 10
Asegúrate de crear un punto de restauración por se algo falla.
There are two ways via which you can enable Remote Desktop on Windows 10, the first one is using the Windows 10 Settings and another is using Control Panel. Both methods are discussed below:
Method 1: Enable Remote Desktop using Settings
To use settings to enable remote desktop on Windows 10, follow the below steps:
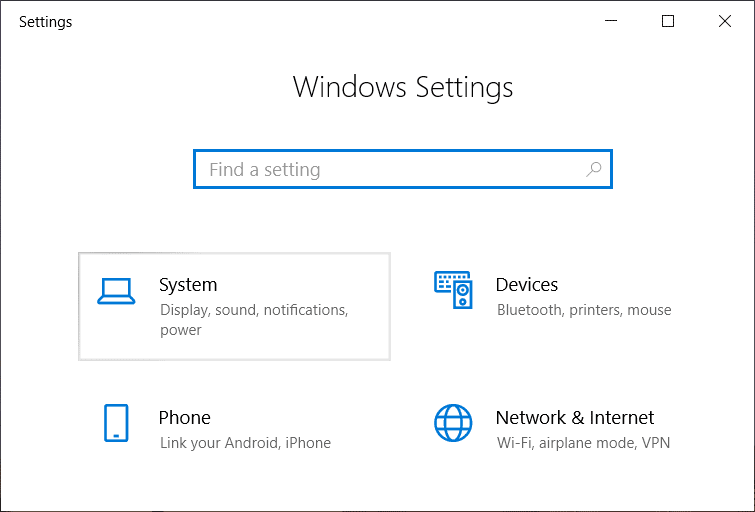
1. Preme Tecla de Windows + I to open Settings then click on Sistema.
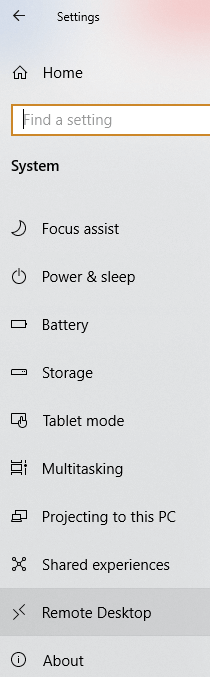
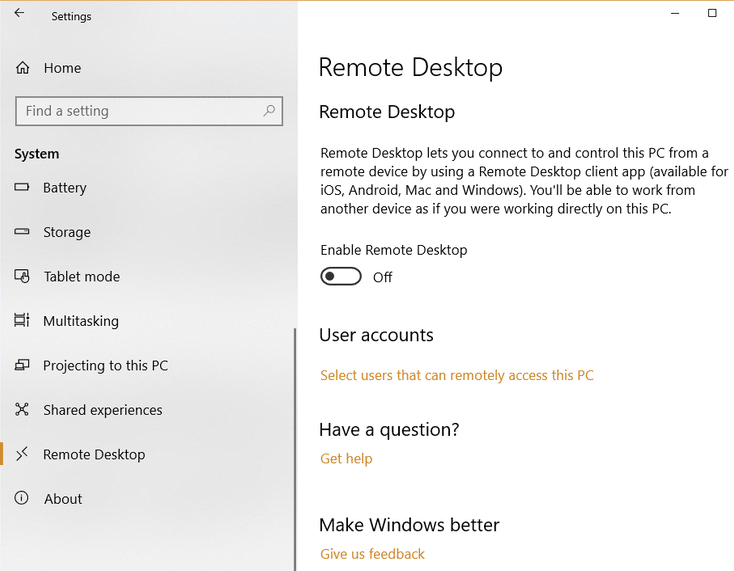
2.Now from the left-hand window pane click on Escritorio remoto opción.
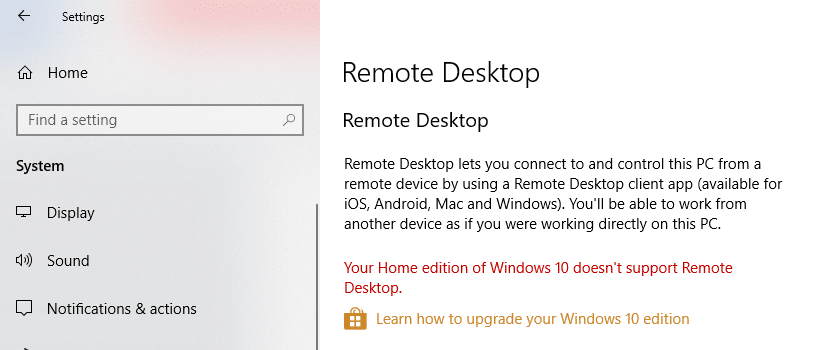
3.If you do not have a professional or enterprise edition of Windows then you will see the following message:
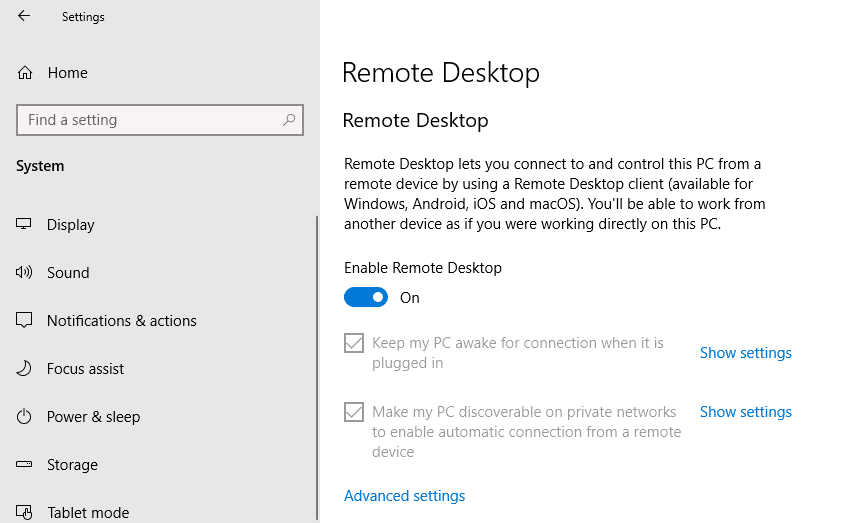
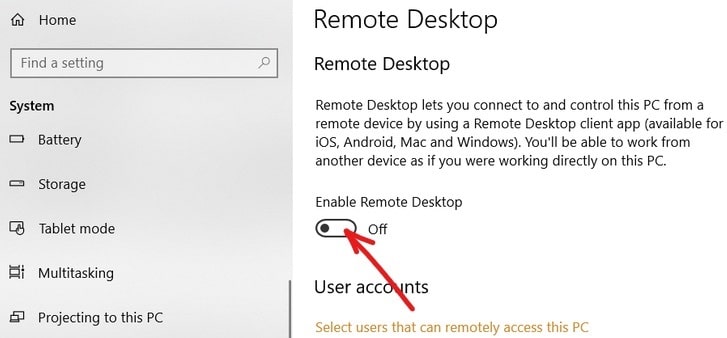
4.But if you have enterprise or professional edition of Windows, then you will see the below screen:
5.Turn ON the toggle under Activar o escritorio remoto Título.
6.You will be asked to confirm your configuration change. Click on the Confirmar button to enable Remote desktop.
7.This will successfully enable Remote Desktop on Windows 10 and you will see more options to configure Remote Desktop connections.
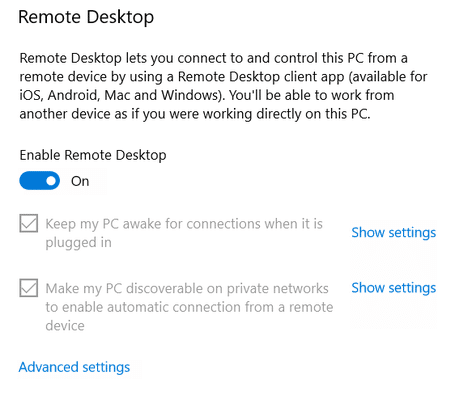
8.As you can see from the above screen you will get the following options:
- Mantén o meu PC esperto para as conexións cando estea conectado
- Fai que o meu PC se poida detectar en redes privadas para activar a conexión automática desde un dispositivo remoto
9.You can configure these settings according to your preferences.
Once you complete the above steps, you will be able to connect to your computer from anywhere & anytime using the Remote Control App or using the Remote Desktop Connection which is in-built in Windows 10.
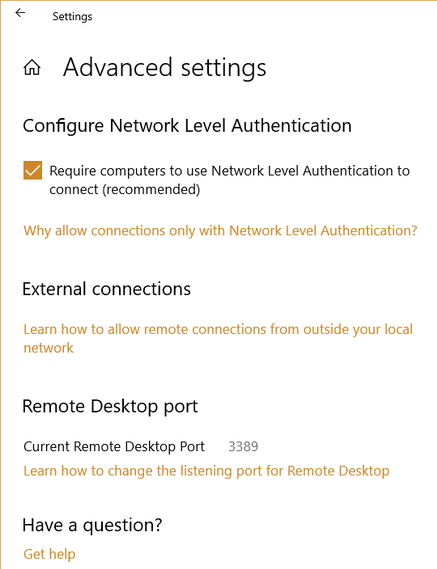
You can also configure advanced settings for Remote Desktop, by clicking on the Advanced settings link. Below screen will appear with the following options:
- Require computers to use Network Level Authentication to connect. This makes the connection more secure by requiring users to authenticate with the network before they connect to the device. If you do not know exactly what you are doing, configure Network Level Authentication should never be turned off.
- External connections to allow external access. External connections should never be active. This can be activated only if you are establishing a Virtual Private Network connection.
- Remote desktop port to configure a router to allow remote connections outside of the network. It has a default value of 3389. The default port is adequate for this purpose unless you have very strong reason to change the port number.
Método 2: Enable Remote Desktop using Control Panel
This is another method which can be used to enable Remote Desktop using Control Panel.
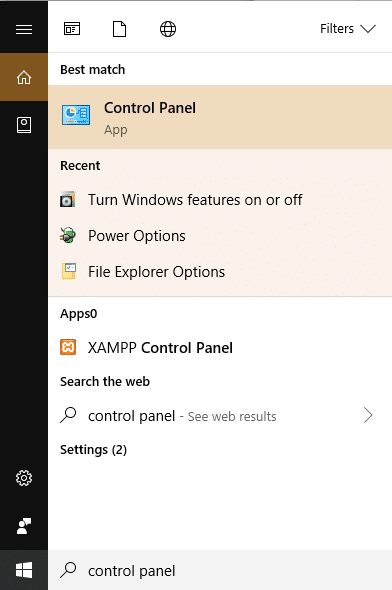
1.Tipo controlar in Windows Search bar then click on Panel de control a partir do resultado da busca.
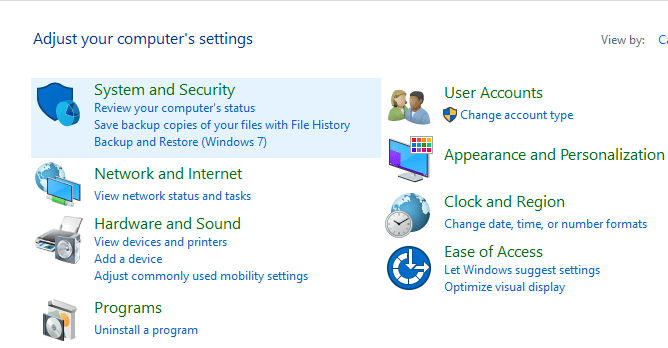
2.Agora fai clic en System and Security baixo Panel de control.
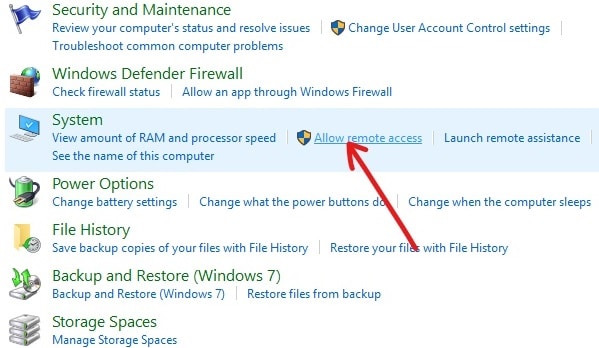
3.From the System and Security screen, click on “Permitir acceso remoto” link under System heading.
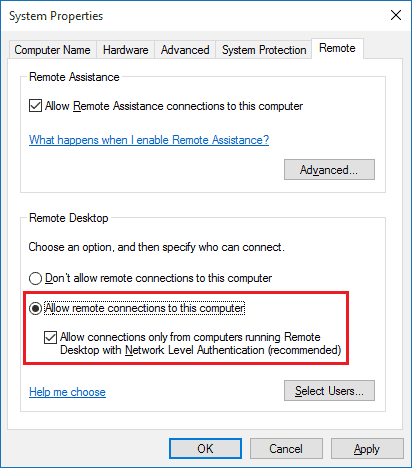
4.Next, under Remote Desktop section, marca de verificación "Permite conexións remotas a este ordenador"E"Allow connections from running Remote Desktop with Network Level Authentication".
5.If you want to only allow specific users to make network connections then click on Select Users button. Select the users and if you want to connect to other PC’s on the same local network then you don’t need anything else and you can proceed further.
6.Click on the Apply followed by OK to save changes.
After completing the above steps, you can use the Remote Desktop app or the Remote Desktop Connection client from another computer to connect to your device remotely.
Recomendado:
I hope this article was helpful and now you can easily Enable Remote Desktop On Windows 10, but if you still have any questions regarding this tutorial then feel free to ask them in the comment’s section.

