If you don’t see Wireless Adapter under Network Connections neither there is a Network adapter tab under device manager then it seems like your Network Adapter is missing or not detected on your Windows 10 which is a serious issue because you won’t be able to access the Internet until the issue is resolved. In short, when you click on the Wireless icon on the system tray there won’t be any device listed in order to connect to the Internet and if you open Device Manager then you won’t see the Network Adapter tab.
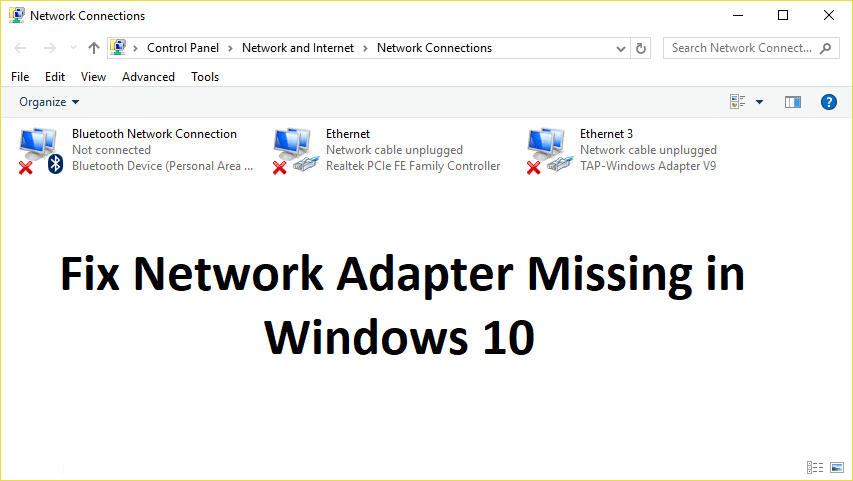
These are the reasons behind the Network Adapter missing issue:
- Network adapter missing in Device manager
- No Network Adapters showing in Device Manager
- Network Adapter Not Detected
- Network Adapter Not Found Windows 10
- No Network Adapter In Device Manager
The main cause of this issue seems to be outdated, incompatible or corrupted Network Adapter drivers. If you have recently upgraded from previous versions of Windows then it’s possible that the old drivers will not work with the new Windows and hence the issue. So without wasting any time let’s see how to actually Fix Network Adapter Missing in Windows 10 issue with the below-listed troubleshooting steps.
Note: Just make sure to uninstall any VPN software on your PC before continuing.
Windows 10 માં ગુમ થયેલ નેટવર્ક એડેપ્ટરને ઠીક કરો
જો કંઈક ખોટું થાય તો પુનઃસ્થાપિત બિંદુ બનાવવાની ખાતરી કરો.
Method 1: Reboot your Computer
આપણામાંથી મોટાભાગના લોકો આ ખૂબ જ મૂળભૂત યુક્તિ વિશે જાણે છે. તમારા કમ્પ્યુટરને રીબૂટ કરવાથી કેટલીકવાર તેને નવી શરૂઆત આપીને કોઈપણ સોફ્ટવેર સંઘર્ષને ઠીક કરી શકાય છે. તેથી જો તમે એવા વ્યક્તિ છો કે જેઓ તેમના કમ્પ્યુટરને સ્લીપ પર રાખવાનું પસંદ કરે છે, તો તમારા કમ્પ્યુટરને પુનઃપ્રારંભ કરવું એ એક સારો વિચાર છે.
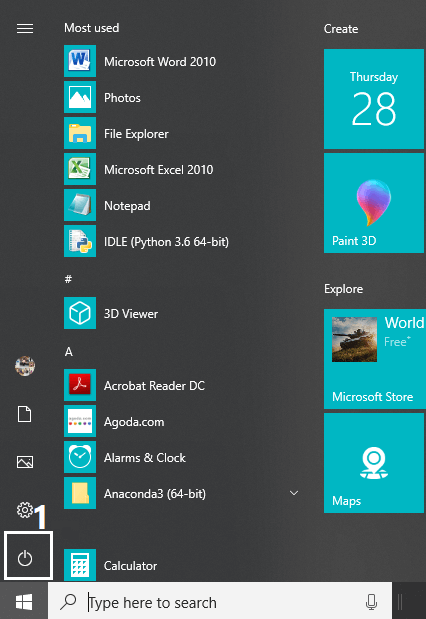
1. પર ક્લિક કરો પ્રારંભ મેનૂ અને પછી ઉપર ક્લિક કરો પાવર બટન તળિયે ડાબા ખૂણે ઉપલબ્ધ.
2. આગળ, પર ક્લિક કરો પુનઃપ્રારંભ વિકલ્પ અને તમારું કમ્પ્યુટર પોતે જ પુનઃપ્રારંભ થશે.
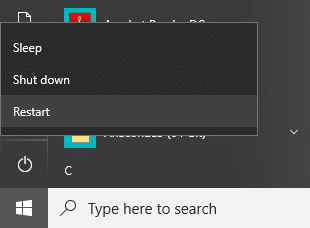
કમ્પ્યુટર પુનઃપ્રારંભ થયા પછી, તમારી સમસ્યા હલ થઈ છે કે નહીં તે તપાસો.
Method 2: Flush DNS and Reset Winsock Components
1. Open elevated Command Prompt.
2. હવે નીચેનો આદેશ ટાઈપ કરો અને દરેક એક પછી Enter દબાવો:
ipconfig / પ્રકાશન
ipconfig / flushdns
ipconfig / નવીકરણ

3. ફરીથી કમાન્ડ પ્રોમ્પ્ટ ખોલો અને નીચેના આદેશને એક પછી એક ટાઈપ કરો અને દરેક પછી એન્ટર દબાવો:
ipconfig /flushdns nbtstat –r netsh int ip રીસેટ netsh winsock રીસેટ
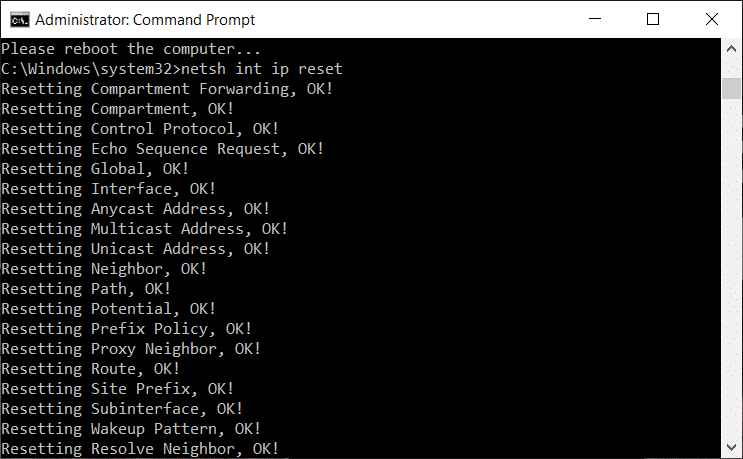
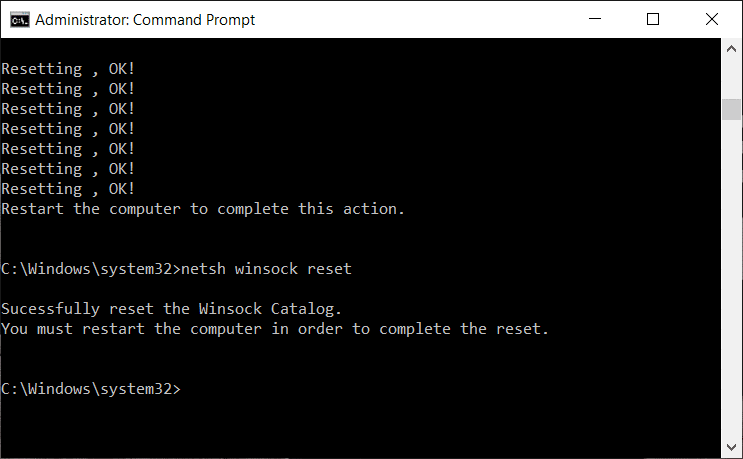
4. ફેરફારો લાગુ કરવા માટે રીબૂટ કરો. ફ્લશિંગ DNS લાગે છે Fix Network Adapter Driver Issues on Windows 10.
Method 3: Run WWAN AutoConfig Service
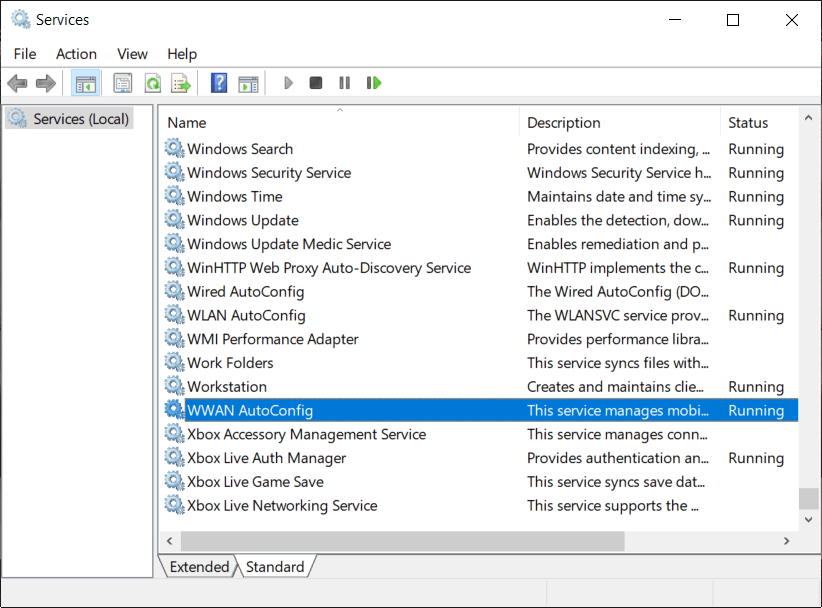
1. Windows Key + R દબાવો પછી ટાઇપ કરો services.msc અને Enter દબાવો.

2. શોધો WWAN AutoConfig Service in the list (press W to reach to the end of the list quickly).
3. પર ડબલ-ક્લિક કરો WWAN AutoConfig Service.
4. If the service is already running then click on Stop, then from the Startup type drop-down select સ્વચાલિત.
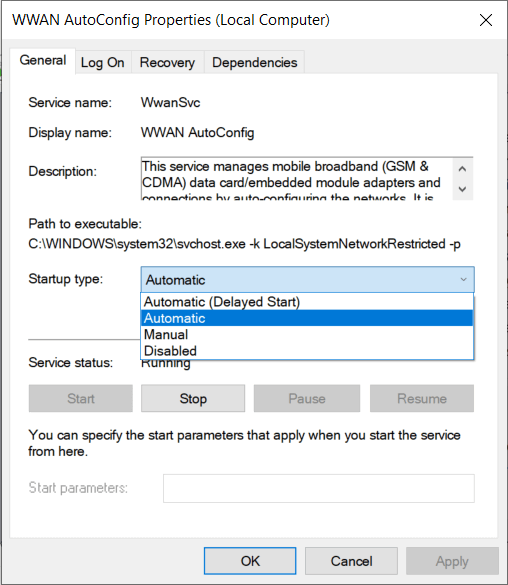
5. Click Apply followed by OK.
6. પર જમણું-ક્લિક કરો WWAN AutoConfig Service અને પસંદ કરો પ્રારંભ કરો.
પદ્ધતિ 4: નેટવર્ક એડેપ્ટર ડ્રાઇવરોને અપડેટ કરો
1. વિન્ડોઝ કી + R દબાવો અને "ટાઈપ કરો.devmgmt.msc” ખોલવા માટે રન ડાયલોગ બોક્સમાં ઉપકરણ સંચાલક.

2. વિસ્તૃત કરો નેટવર્ક ઍડપ્ટર, પછી તમારા પર જમણું-ક્લિક કરો Wi-Fi નિયંત્રક (ઉદાહરણ તરીકે બ્રોડકોમ અથવા ઇન્ટેલ) અને પસંદ કરો ડ્રાઇવર સ Softwareફ્ટવેરને અપડેટ કરો.

3. હવે પસંદ કરોઅપડેટ થયેલ ડ્રાઈવર સોફ્ટવેર માટે આપોઆપ શોધો"
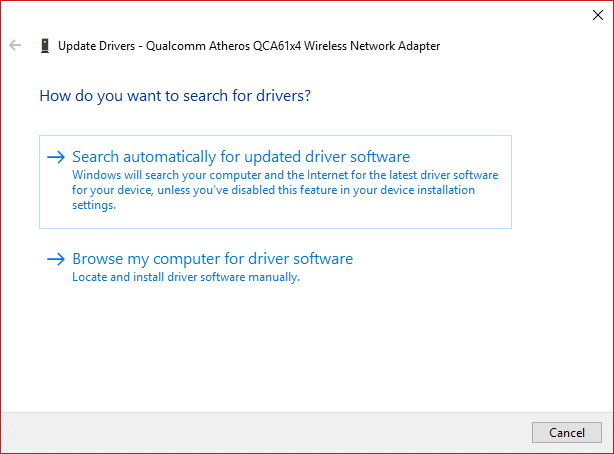
4. હવે Windows will automatically search for the Network driver update and if new update is found, it will automatically download and install it.
5. એકવાર સમાપ્ત થઈ જાય, બધું બંધ કરો અને તમારા PCને રીબૂટ કરો.
6. જો તમે હજુ પણ સામનો કરી રહ્યાં છો Network Adapter Missing in Windows 10 issue, then again right-click on your WiFi controller and select સુધારા ડ્રાઇવર ઉપકરણ સંચાલકમાં.
7. હવે, અપડેટ ડ્રાઈવર સોફ્ટવેર વિન્ડોઝમાં, “પસંદ કરો.ડ્રાઇવર સૉફ્ટવેર માટે મારા કમ્પ્યુટરને બ્રાઉઝ કરો."

8. હવે પસંદ કરોમને મારા કમ્પ્યુટર પર ઉપલબ્ધ ડ્રાઇવરોની સૂચિમાંથી પસંદ કરવા દો."

9. પ્રયાસ કરો સૂચિબદ્ધ સંસ્કરણોમાંથી ડ્રાઇવરોને અપડેટ કરો (સુસંગત હાર્ડવેરને ચેકમાર્ક કરવાનું સુનિશ્ચિત કરો).
10. જો ઉપરોક્ત કામ ન કરે તો પર જાઓ ઉત્પાદકની વેબસાઇટ ડ્રાઇવરોને અપડેટ કરવા.

11. ઉત્પાદકની વેબસાઈટ પરથી નવીનતમ ડ્રાઈવર ડાઉનલોડ અને ઈન્સ્ટોલ કરો પછી તમારા પીસીને રીસ્ટાર્ટ કરો.
Method 5: Uninstall Network Adapter Drivers
1. વિન્ડોઝ કી + R દબાવો અને પછી "devmgmt.msc” અને ડિવાઇસ મેનેજર ખોલવા માટે એન્ટર દબાવો.
2. નેટવર્ક એડેપ્ટરોને વિસ્તૃત કરો અને શોધો તમારા નેટવર્ક એડેપ્ટરનું નામ.
3. ખાતરી કરો કે તમે એડેપ્ટરનું નામ નોંધો કંઈક ખોટું થાય તો જ.
4. Right-click on your network adapter and uninstall it.

5. It will ask for confirmation હા પસંદ કરો.
6. Restart your PC and Windows will automatically install the network adapter drivers again.
7. If the drivers are not installed automatically then again open the Device Manager.
8. From the Device Manager menu, click on ક્રિયા પછી "પર ક્લિક કરોહાર્ડવેર ફેરફારો માટે સ્કેન"

પદ્ધતિ 6: ખાતરી કરો કે Windows અપ ટુ ડેટ છે
1. પ્રેસ વિન્ડોઝ કી + I to open Settings then click on અપડેટ અને સુરક્ષા.
![]()
2. From the left-hand side, menu click on વિન્ડોઝ સુધારા.
3. Now click on the “અપડેટ માટે ચકાસોકોઈપણ ઉપલબ્ધ અપડેટ્સ તપાસવા માટે ” બટન.

4. If any updates are pending then click on અપડેટ્સ ડાઉનલોડ કરો અને ઇન્સ્ટોલ કરો.

5. Once the updates are downloaded, install them and your Windows will become up-to-date.
6. After the updates are installed reboot your PC to save changes.
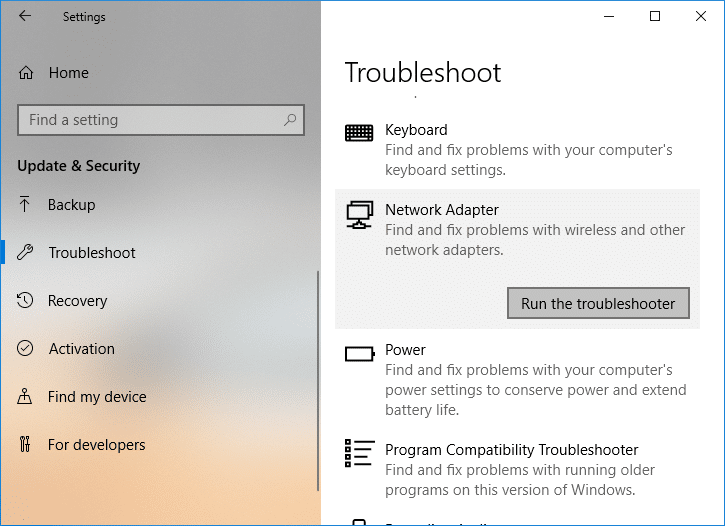
Method 7: Run Network Adapter Troubleshooter
1. સેટિંગ્સ ખોલવા માટે Windows Key + I દબાવો અને પછી ક્લિક કરો અપડેટ અને સુરક્ષા.
![]()
2. ડાબી બાજુના મેનુમાંથી પસંદ કરો મુશ્કેલીનિવારણ.
3. મુશ્કેલીનિવારણ હેઠળ પર ક્લિક કરો ઇન્ટરનેટ જોડાણો અને પછી ક્લિક કરો મુશ્કેલીનિવારણ ચલાવો.

4. સમસ્યાનિવારકને ચલાવવા માટે વધુ ઑન-સ્ક્રીન સૂચનાઓને અનુસરો.
5. જો ઉપરોક્ત સમસ્યાનું નિરાકરણ ન કરે તો મુશ્કેલીનિવારણ વિન્ડોમાંથી, પર ક્લિક કરો નેટવર્ક એડેપ્ટર અને પછી ક્લિક કરો મુશ્કેલીનિવારણ ચલાવો.
5. ફેરફારો સાચવવા માટે તમારા PCને રીબૂટ કરો અને જુઓ કે તમે સક્ષમ છો કે નહીં fix the Network Adapter Missing issue.
પદ્ધતિ 8: ઇન્ટેલ પ્રોસેટ/વાયરલેસ સોફ્ટવેર ઇન્સ્ટોલ કરો
કેટલીકવાર સમસ્યા જૂના Intel PROSet સોફ્ટવેરને કારણે થાય છે, તેથી તેને અપડેટ કરવાનું લાગે છે fix Network Adapter Missing in Windows 10 issue. તેથી, અહીં જાઓ અને PROSet/Wireless Software નું નવીનતમ સંસ્કરણ ડાઉનલોડ કરો અને તેને ઇન્સ્ટોલ કરો. આ એક તૃતીય પક્ષ સોફ્ટવેર છે જે Windows ને બદલે તમારા WiFi કનેક્શનનું સંચાલન કરે છે અને જો PROset/Wireless Software આઉટડેટેડ હોય તો તે ડ્રાઇવરોને સમસ્યાનું કારણ બની શકે છે. વાયરલેસ નેટવર્ક એડેપ્ટર. Hence, read How to Update Network Adapter Drivers on Windows 10.
પદ્ધતિ 9: નેટવર્ક કનેક્શન રીસેટ કરો
1. સેટિંગ્સ ખોલવા માટે Windows Key + I દબાવો અને પછી ક્લિક કરો નેટવર્ક અને ઇન્ટરનેટ.

2. ડાબી બાજુના મેનુમાંથી પસંદ કરો સ્થિતિ.
3. હવે નીચે સ્ક્રોલ કરો અને તેના પર ક્લિક કરો નેટવર્ક રીસેટ તળિયે.

4. ફરીથી “પર ક્લિક કરોહવે ફરીથી સેટ કરોનેટવર્ક રીસેટ વિભાગ હેઠળ.

5. This will successfully reset your network adapter and once it is complete the system will be restarted.
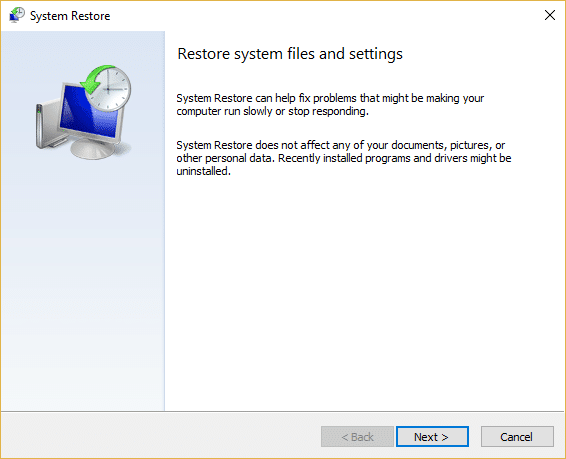
Method 10: Perform a System Restore
System Restore always works in resolving the error, therefore System Restore can definitely help you in fixing this error. So without wasting any time run system restore in order to resolve Network Adapter Missing issue.
Method 11: Using elevated Command Prompt
1. Windows Key + X દબાવો પછી પસંદ કરો કમાન્ડ પ્રોમ્પ્ટ (એડમિન).

2. નીચેનો આદેશ cmd માં ટાઈપ કરો અને Enter દબાવો:
netcfg –s n
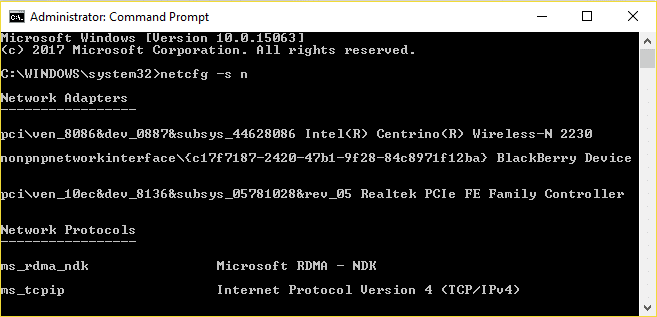
3. This will display a list of networking protocols and in that list find DNI_DNE.
4. If DNI_DNE is listed then type the following command into cmd:
reg કાઢી નાખો HKCRCLSID {988248f3-a1ad-49bf-9170-676cbbc36ba3} / va / f
netcfg -v -u day_day
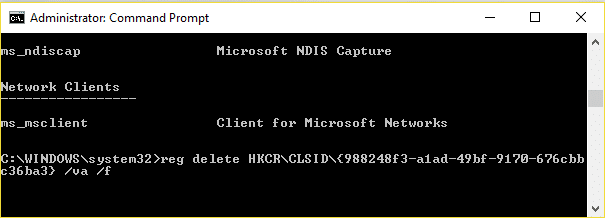
5. If you don’t see DNI_DNE listed then only run the command netcfg -v -u dni_dne.
6. Now if you receive the error 0x80004002 after trying to run the above command then you need to delete the above key manually.
7. Windows Key + R દબાવો પછી ટાઇપ કરો regedit અને Enter દબાવો.

8. Navigate to the following Registry Key:
HKEY_CLASSES_ROOTCLSID{988248f3-a1ad-49bf-9170-676cbbc36ba3}
9. Delete this key and then again type netcfg -v -u day_day command in cmd.
10. ફેરફારો સાચવવા માટે તમારા PCને રીબૂટ કરો.
તમારા માટે ભલામણ કરેલ છે:
તે તમે સફળતાપૂર્વક કર્યું છે Windows 10 માં ગુમ થયેલ નેટવર્ક એડેપ્ટરને ઠીક કરો પરંતુ જો તમને હજુ પણ આ પોસ્ટ સંબંધિત કોઈ પ્રશ્નો હોય તો ટિપ્પણી વિભાગમાં તેમને પૂછવા માટે નિઃસંકોચ.

