Factory resetting Windows means installing or loading a fresh copy of the operating system on your device. Performing a factory reset will fix complex software-related issues, remove stubborn malware, and other problems. It’s also recommended to factory reset a computer you intend to sell or gift to someone.
This tutorial will walk you through different ways to factory reset Windows 11 devices, even if they won’t boot correctly. The process isn’t too different from factory resetting Windows 10 devices. So, if you’ve ever reset a Windows 10 PC, you should have no problem performing a factory reset in Windows 11.
Reset Windows 11 from the Settings App
This is the easiest way to factory reset a Windows 11 device if you can access or sign in to the Windows interface.
- प्रेस विंडोज कुंजी or मेनू आइकन प्रारंभ करें का चयन करें और सेटिंग.
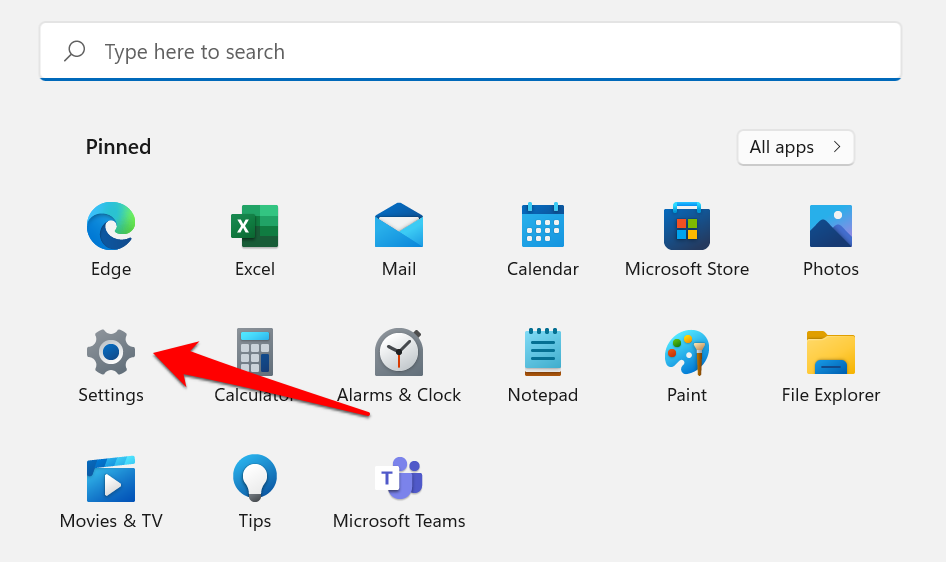
वैकल्पिक रूप से, उपयोग करें विंडोज कुंजी + I shortcut to access the Settings menu.
- के लिए सिर Windows अद्यतन tab on the left sidebar and select उन्नत विकल्प.

- अगला, चयन करें वसूली.

- Scroll to the “Recovery options” section and select रीसेट पीसी.

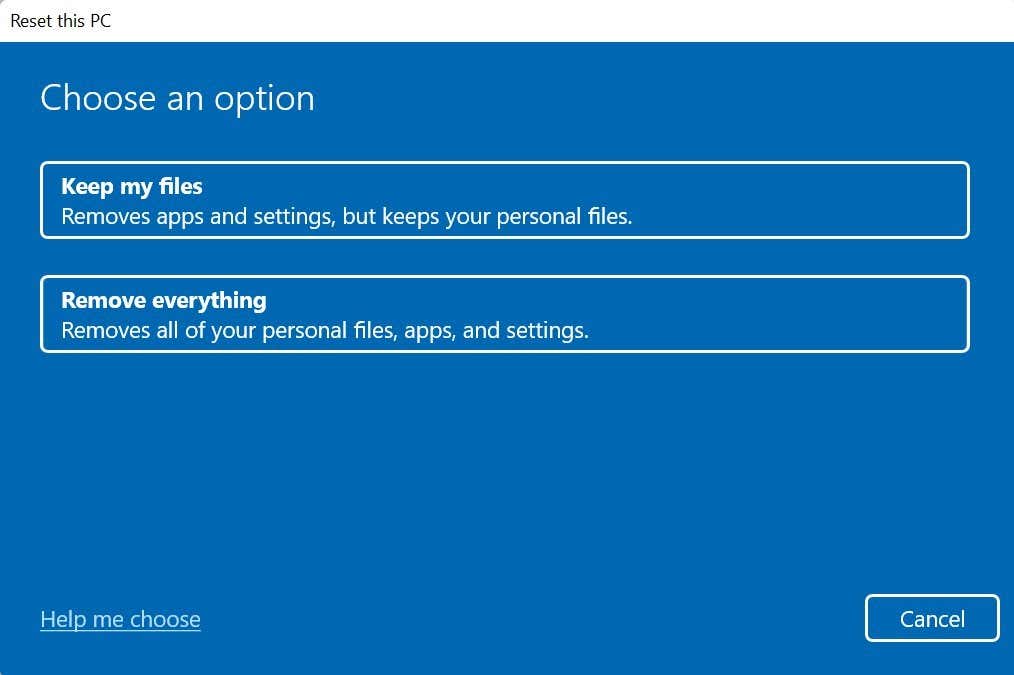
- चुनते हैं सब हटा दो if you want your personal files, settings, and third-party apps removed during the factory reset process. The मेरी फाइल रख option will retain your personal files and remove third-party apps and settings.
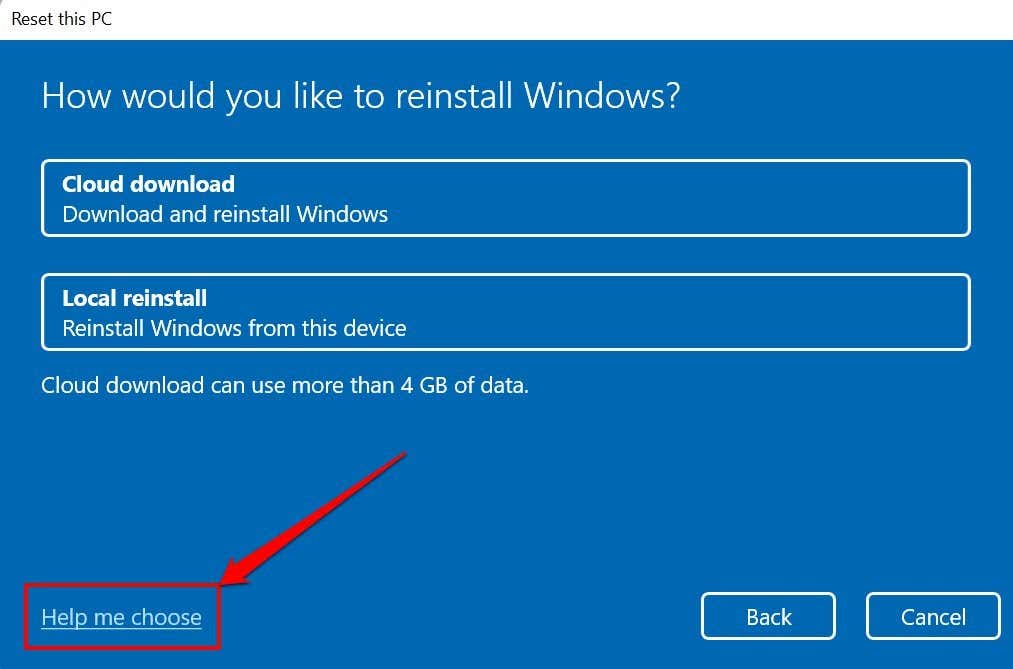
- बाद में, चुनें स्थानीय पुनर्स्थापना if you want to reinstall Windows from your device or choose क्लाउड डाउनलोड to download and reinstall Windows 11 from Microsoft’s servers. Note that the “Cloud download” option requires an internet connection and could use over 4GB of data.
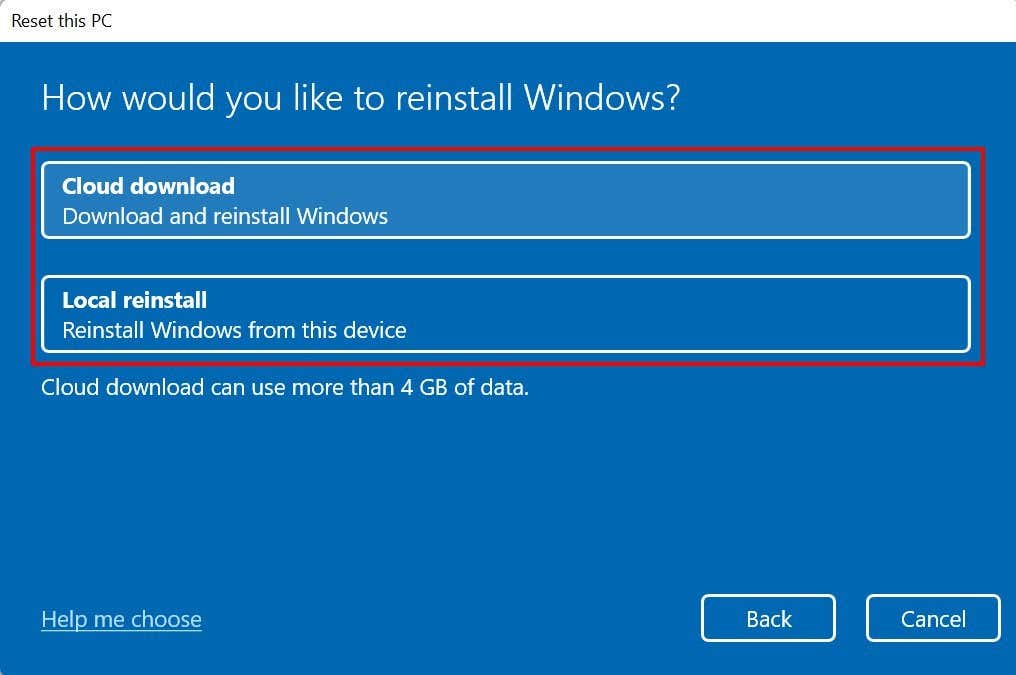
आपको चुनना चाहिए क्लाउड डाउनलोड यदि आपका PC has some corrupt or missing system files. That’ll download a fresh copy of the affected files from Microsoft’s server and fix the malfunction.
Microsoft has a support document that can help you decide the best reset option to select if you’re unsure. Select मुझे चुनने में मदद करें to access the document in your browser.
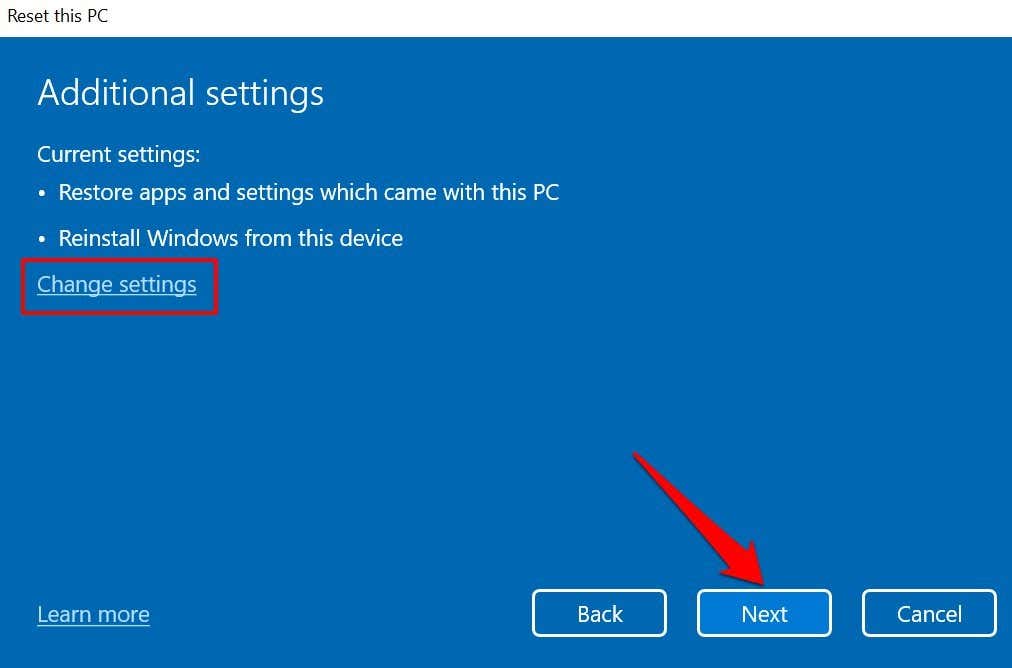
- Preview the factory reset settings and select अगला आगे बढ़ने के लिए। चुनना परिवर्तन स्थान if you want to make any modifications to the factory reset options.
- You’ll land on a confirmation page if you recently updated your PC to Windows11. Select अगला आगे बढ़ने के लिए।

नोट: You cannot factory reset Windows 11 while your PC is running on battery power. Otherwise, you’ll get a “Plug in your PC” error message.
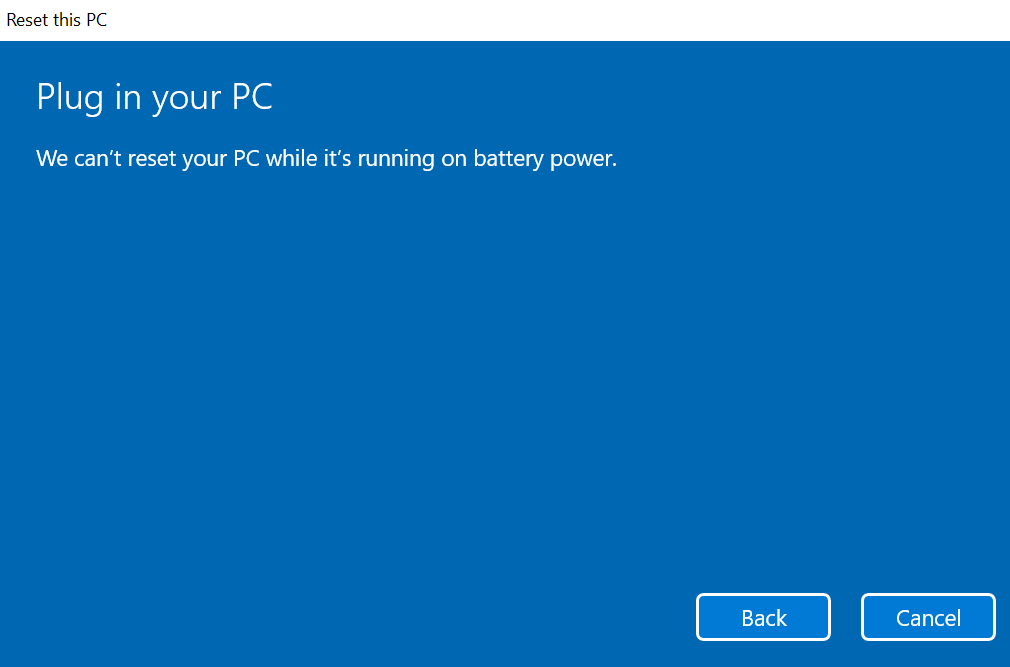
The factory restoration process will resume when you connect your computer to a power outlet.
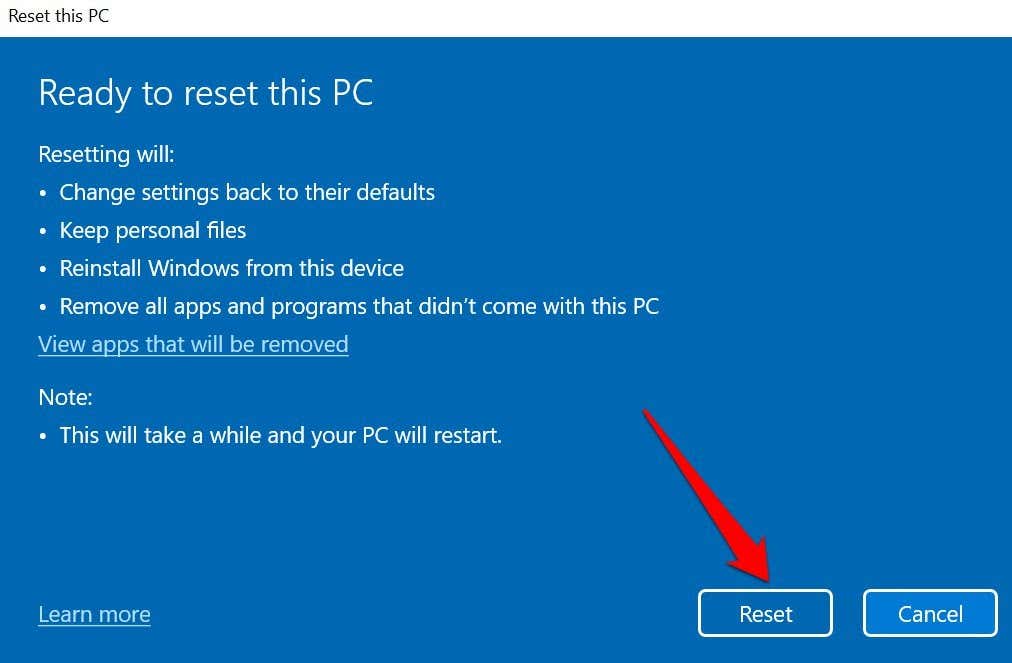
- Preview the reset options again and select रीसेट to start the factory reset. Before you proceed, we recommend selecting View apps that will be removed to have a cursory look at programs that will no longer be on your PC after the factory reset.
Your PC should boot into Windows 11 when it’s done resetting your settings or files. Again, note that the क्लाउड डाउनलोड option takes longer minutes or hours than स्थानीय पुनर्स्थापना. Keep your PC plugged into a power outlet and ensure you have a fast internet connection.
Reset Windows 11 Using a Bootable USB Drive
Use this method if your PC isn’t booting into Windows. First, you have to download the Windows 11 disk image (ISO) file to an external storage device from another computer. Before you proceed, make sure you have a high-speed internet connection.
Additionally, ensure there’s sufficient storage space on your PC or external drive–you’ll need at least 8GB of storage space to download the Windows 11 ISO file. Finally, and most importantly, confirm that the PC you want to factory reset meets the विंडोज 11 आवश्यकताएं.
Installing Windows 11 on a device that doesn’t meet the requirement may result in performance issues and hardware damage. Mind you, compatibility-related damages aren’t always covered under the manufacturer’s warranty. So, confirm that your PC can handle Windows 11 before creating the bootable USB drive.
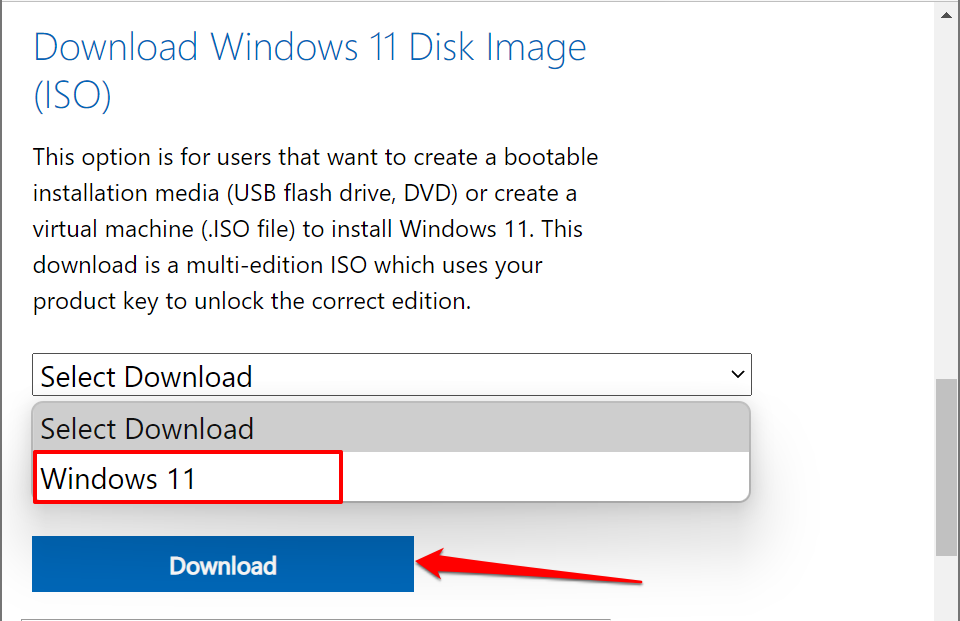
- के लिए सिर software download page on the Microsoft website and scroll to the “Download Windows 11 Disk Image (ISO)” section. Hit the डाउनलोड का चयन करें ड्रॉप-डाउन, चुनें Windows 11, और चुनें डाउनलोड बटन.
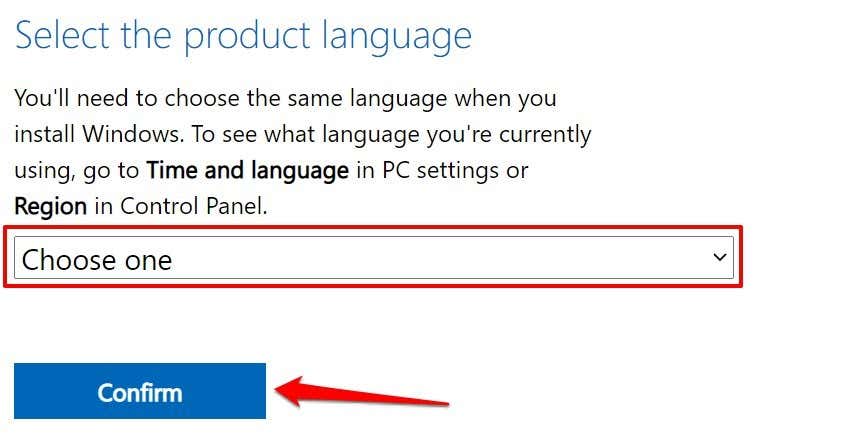
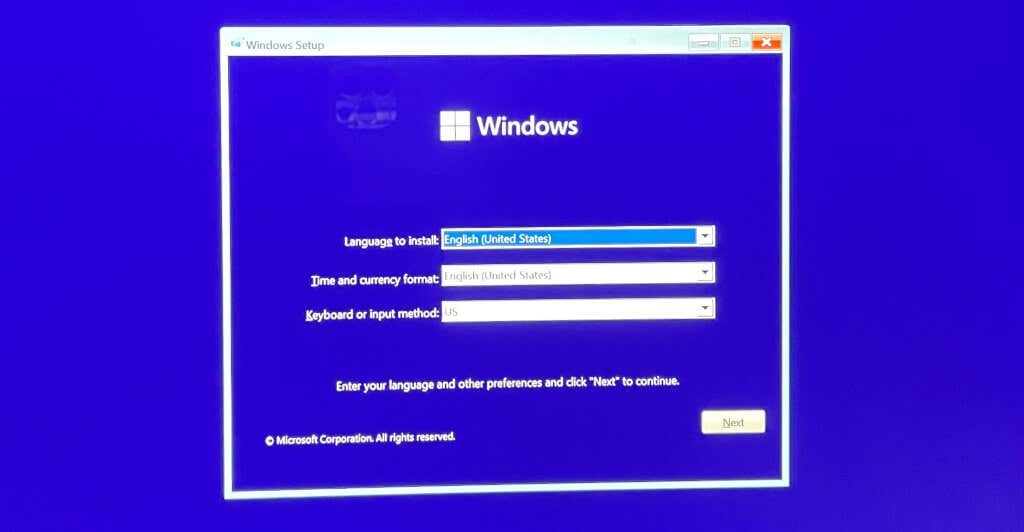
That’ll redirect you to the “Select the product language” section where you’ll need to select your preferred Windows language.
- चयन एक का चयन drop-down menu, select a language, and select पुष्टि करें डाउनलोड शुरू करने के लिए।
That’ll finally generate a Windows 11 download link for the selected language. Try again in 24 hours or use another computer if you’re getting an error message. Or, if the downloader fails to generate a link.
- चयन 64- बिट डाउनलोड करें डाउनलोड शुरू करने के लिए बटन।

नोट: Windows 11 is only available for PCs with 64-bit processors, although 32-bit apps will work correctly on the operating system. So you might be unable to factory reset a 32-bit PC using a bootable USB drive.
Plug the USB drive into your PC when the download is complete. Afterward, proceed to step #4 to flash the ISO file to the USB drive using Rufus, a reliable third-party solution for creating USB installation drives.
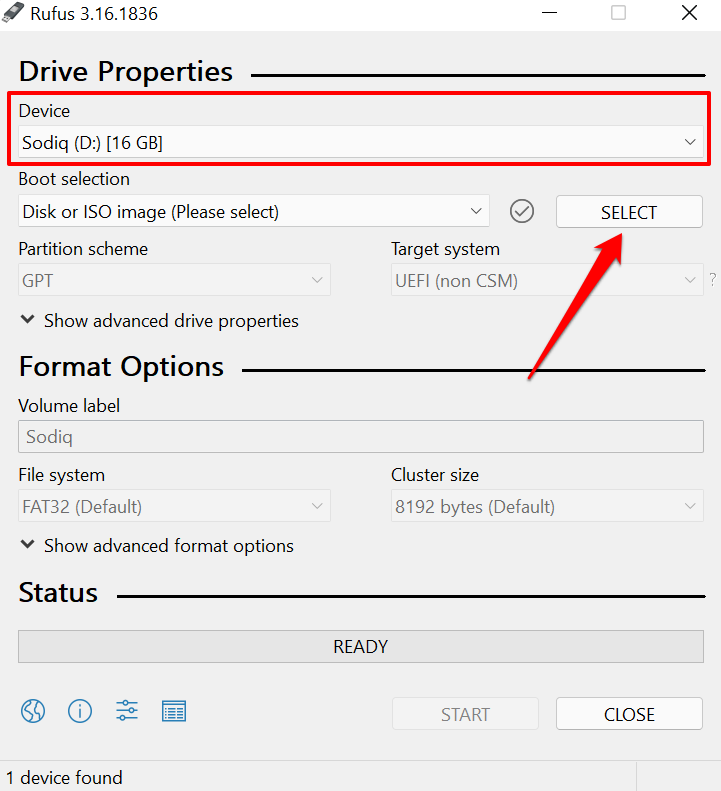
- Download Rufus’ setup file from the developer website and run it on your PC. The tool should automatically detect your USB drive in the “Device” section. Select the चुनते हैं आगे बढ़ने के लिए बटन
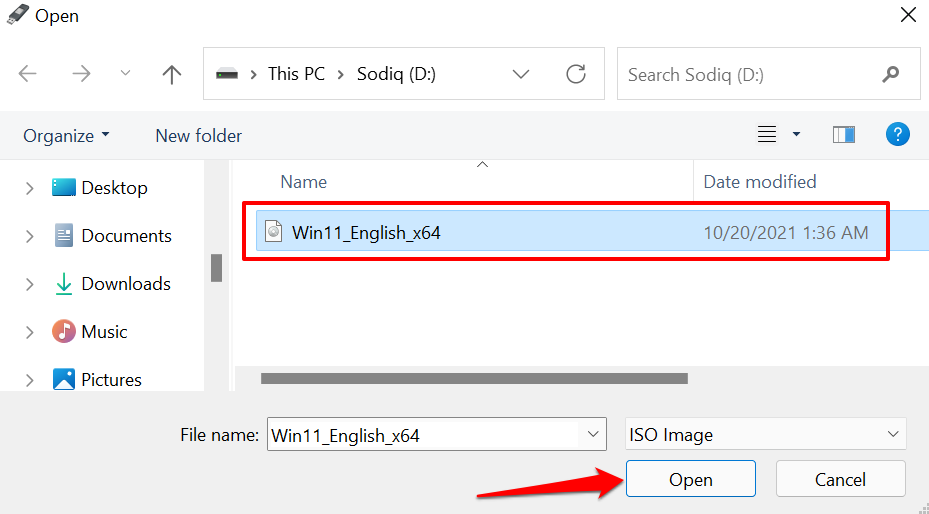
- Head to the Windows 11 ISO location on your PC, select the file and select प्रारंभिक.
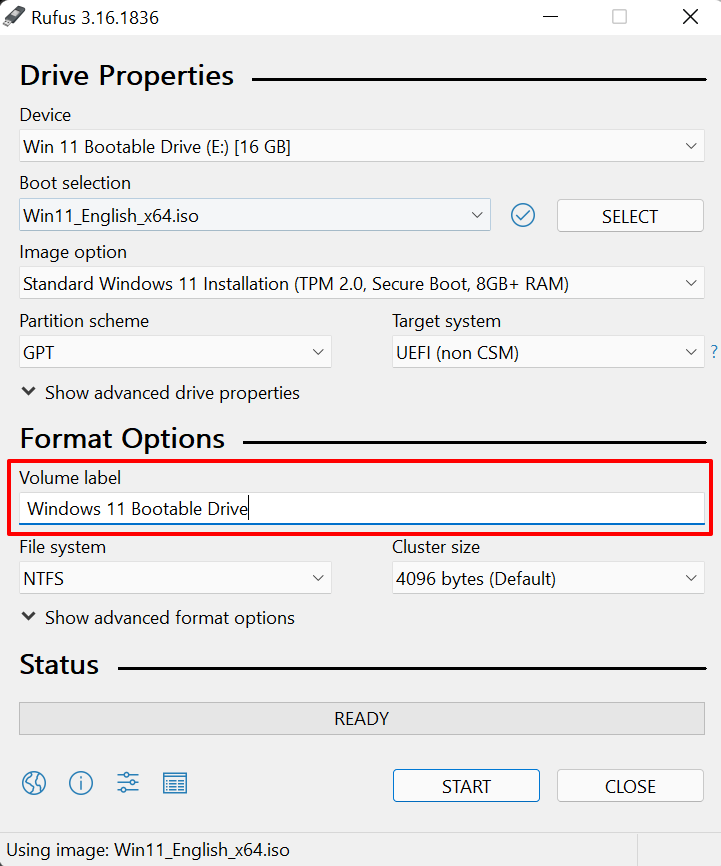
- In the “Format Options” section, enter a preferred name for the bootable drive in the वॉल्यूम लेबल संवाद बॉक्स।
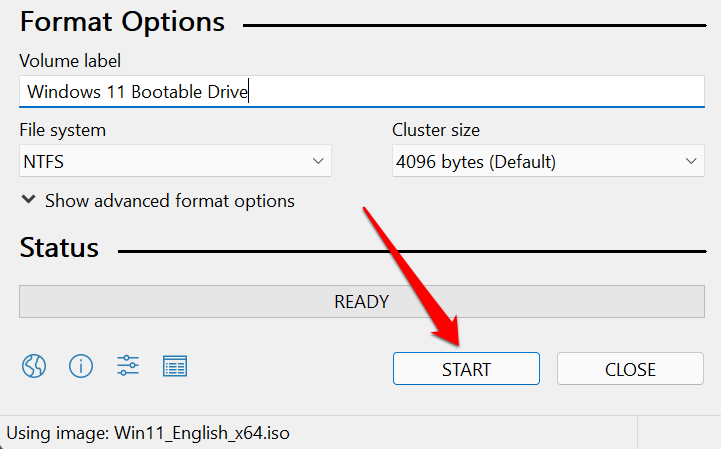
- चुनते हैं प्रारंभ to create the bootable drive.
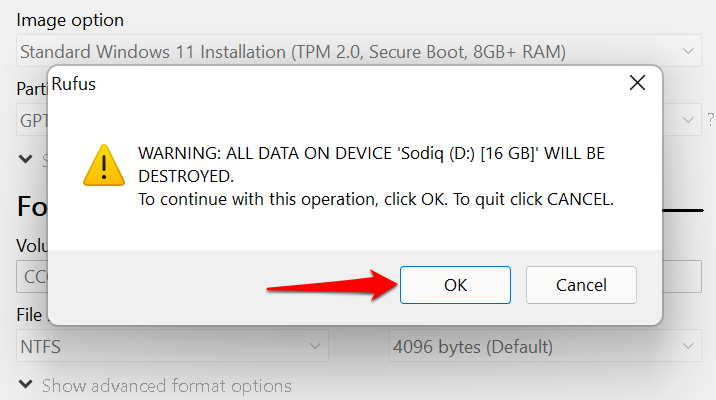
- Note that the operation will erase all data on the USB drive. Select OK to continue. Otherwise, select रद्द करना, back up all important data on the drive, and restart the process.
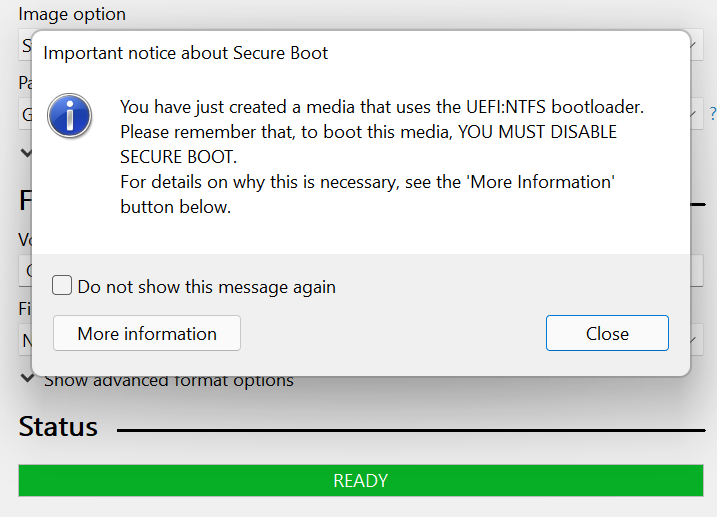
You’ll get a success message when the bootable drive is created. Rufus will also recommend disabling “Secure Boot” in your BIOS settings before using the bootable drive. Continue to the next step to learn how it’s done.
- Turn on the PC you want to reset and keep pressing F2 सेवा मेरे BIOS तक पहुँचें. Note that the preset function key for accessing the BIOS on some PC is F10, F12, or F1. Contact your PC manufacturer or check the instruction manual if these function keys don’t get you into the BIOS.
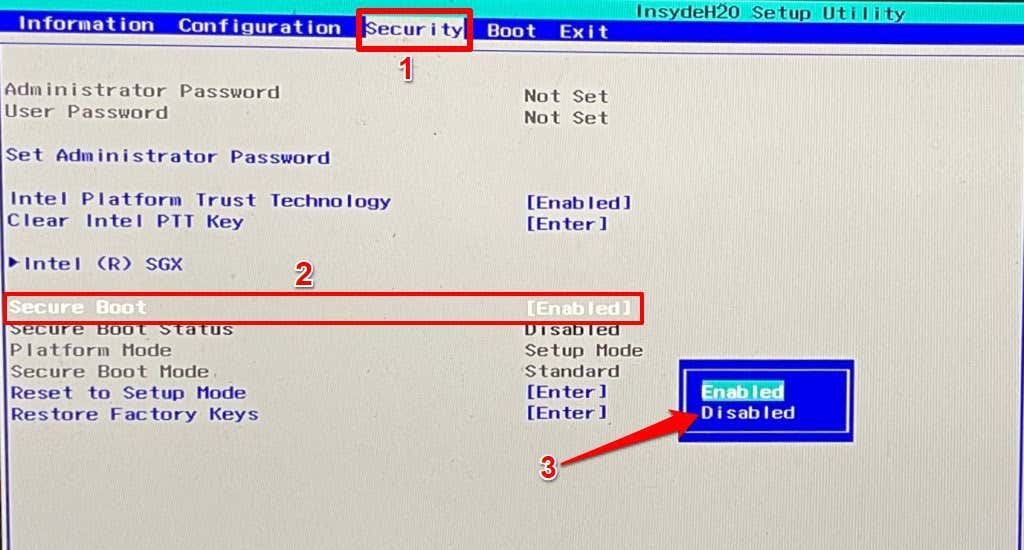
- While in the BIOS, head to the सुरक्षा टैब, पर नेविगेट करें सुरक्षित बूट row and set it to विकलांग.
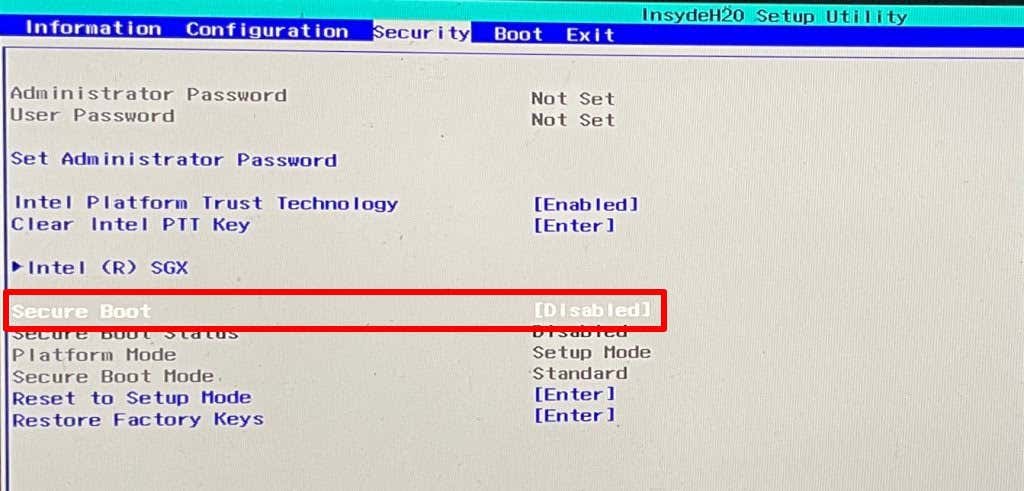
- Confirm that “Secure Boot” is set to विकलांग। दबाएँ F10 परिवर्तन को सहेजने और BIOS से बाहर निकलने के लिए।
Now you can factory reset the PC via the Windows Boot Manager via the bootable drive.
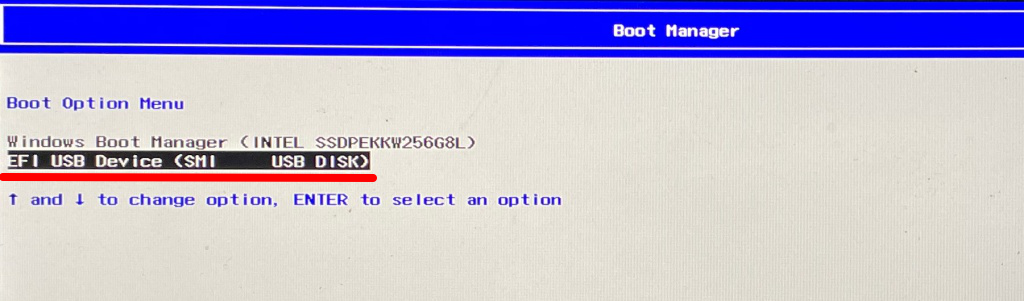
- Power off the PC, turn it back on, and keep pressing F12 until the Boot Manager window pops up on the screen.
- In the “Boot Option Menu,” select the USB drive as the boot device and press दर्ज.
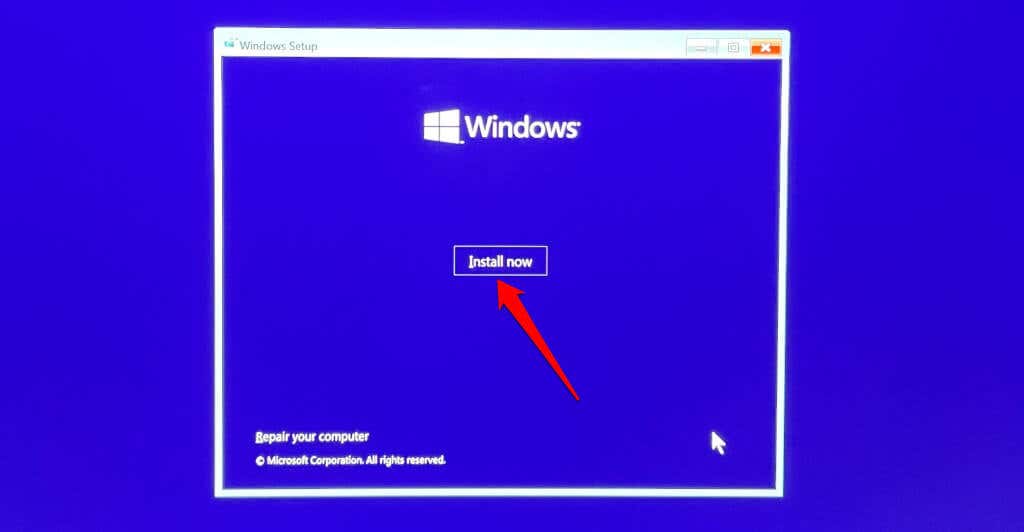
That’ll load the Windows 11 setup file on the drive. Follow the prompt and continue with the installation.
- अंत में, चयन करें अब स्थापित and follow the prompt to start the factory reset process.
We recommend having your PC plugged into a power source during the process. After resetting your PC, make sure you have the latest security patches, updates, and device drivers. Connect your PC to the internet, head to सेटिंग > विंडोज सुधार, and install any available cumulative updates on the page.

