Fix High Ping on Windows 10: It becomes really irritating for online gamers who use the internet for playing games to have a high ping on your system. And having a high ping is definitely not good for your system and while playing online having high ping doesn’t help at all. Sometimes, you will get such pings when you have high configuration system. Ping can be defined as the computational speed of your connection or, more particularly, the latency of its connection. If you facing problems while playing the game due to the interruption of such above-mentioned issue, here is an article for you that will show some methods through which you can reduce ping latency on your Windows 10 system.
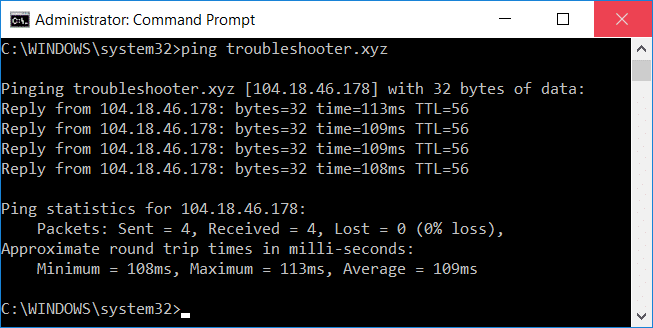
5 Ways to Fix High Ping on Windows 10
Nco ntsoov tsim qhov taw tes rov qab tsuas yog thaum muaj qee yam yuam kev.
Method 1: Disable Network Throttling using Registry
1.Press Windows Key + R to open Run then type regedit thiab ntaus Enter los qhib Cov Npe Sau Npe.

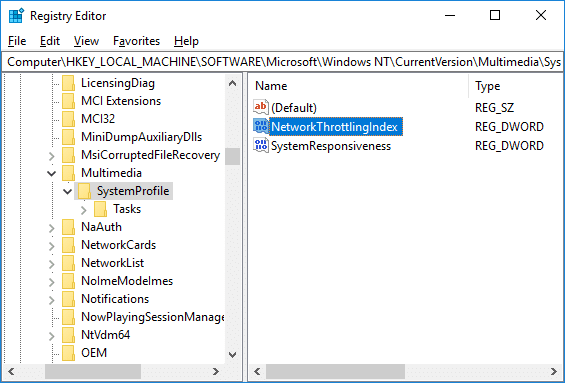
2.Nav mus rau tus yuam sij npe hauv qab no:
HKEY_LOCAL_MACHINESOFTWAREMicrosoftWindows NTCurrentVersionMultimediaSystemProfile
3.Select SystemProfile then in the right window pane double-click on “NetworkThrottlingIndex".
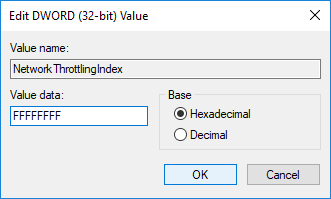
4.First, make sure the Base is selected as “hexadecimal” then in the value data field type “FFFFFFFF”Thiab nyem OK.
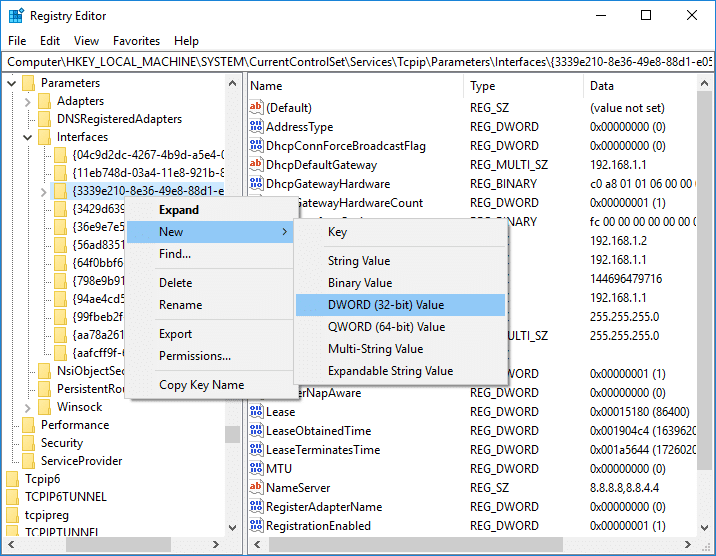
5.Tam sim no taug qab mus rau tus yuam sij npe hauv qab no:
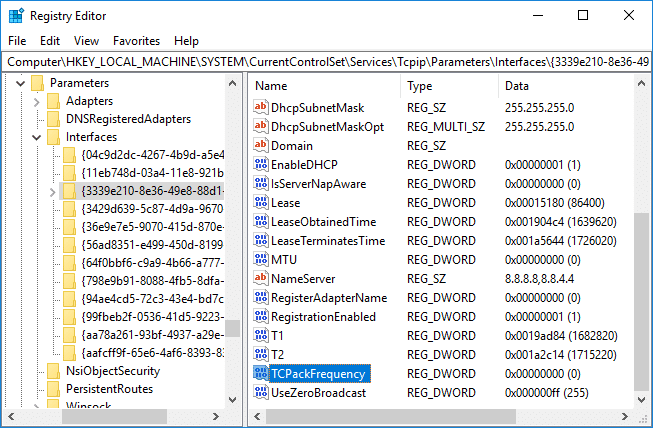
HKEY_LOCAL_MACHINESYSTEMCurrentControlSetServicesTcpipParametersInterfaces
6.Here you need to select a subkey (folder) which represents your network txuas. To identify the correct folder you need to check the subkey for your IP address, gateway, etc information.

7.Now right-click on the above subkey then select Tshiab> DWORD (32-ntsis) Tus Nqi.
8.Name this newly created DWORD as “TCPackFrequency” and hit Enter.
9.Similarly, again create a new DWORD and name it as “TCPNoDelay".
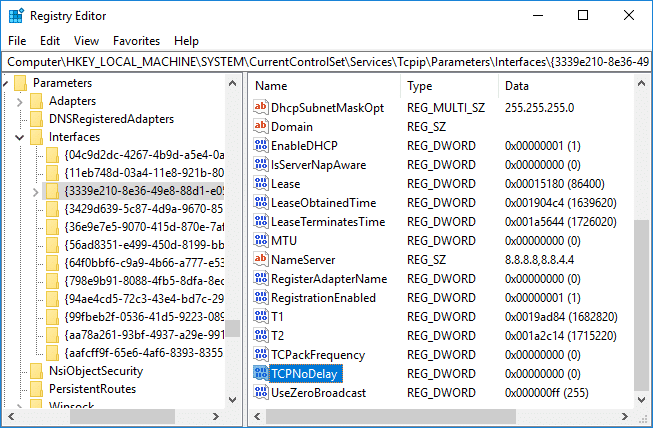
10.Set the Value of both “TCPackFrequency” & “TCPNoDelay” DWORD to 1 & click OK to save changes.

11.Tom ntej no, mus rau qhov tseem ceeb hauv qab no:
HKEY_LOCAL_MACHINESOFTWAREMicrosoftMSMQ
12.Right-click on MSMQ then select Tshiab> DWORD (32-ntsis) Tus Nqi.
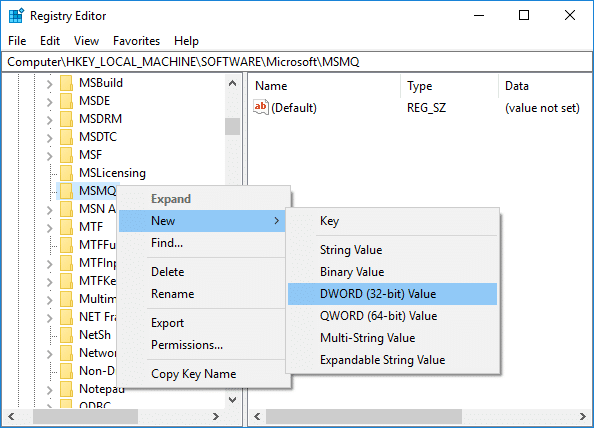
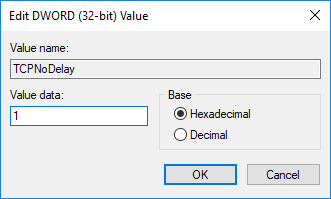
13.Name this DWORD as “TCPNoDelay” and hit Enter.
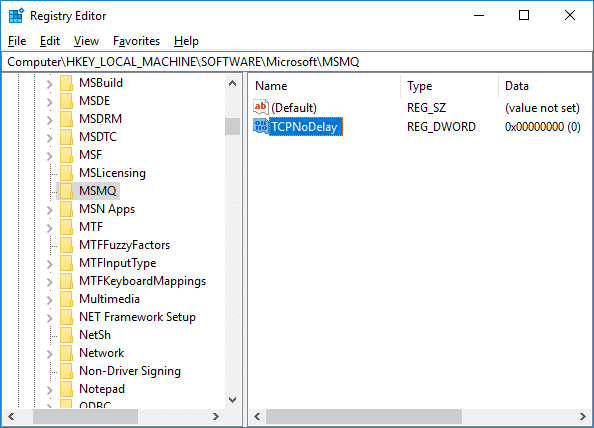
14.Double-click on “TCPNoDelay” then set the value as 1 nyob rau hauv cov nqi ntaub ntawv field and click OK.
15. nthuav dav MSMQ key and make sure it has tsis subkey.
16.If you can’t find tsis folder then right-click on MSMQ & xaiv New > Key.
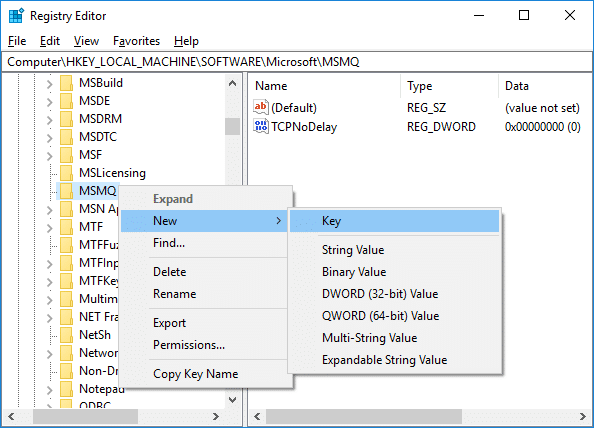
17.Name this key as tsis & hit Enter.
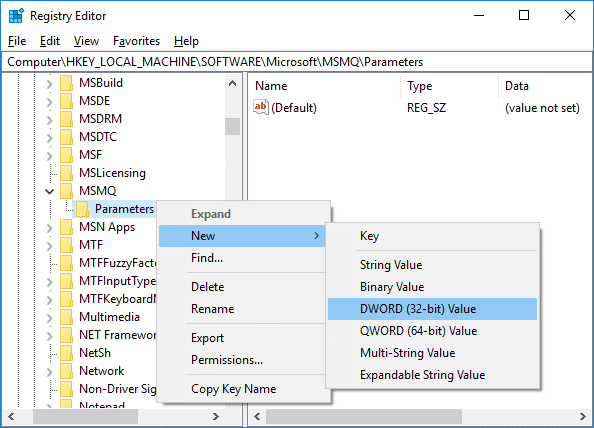
18. Right-click rau tsis & xaiv Tshiab> DWORD (32-ntsis) Tus Nqi.
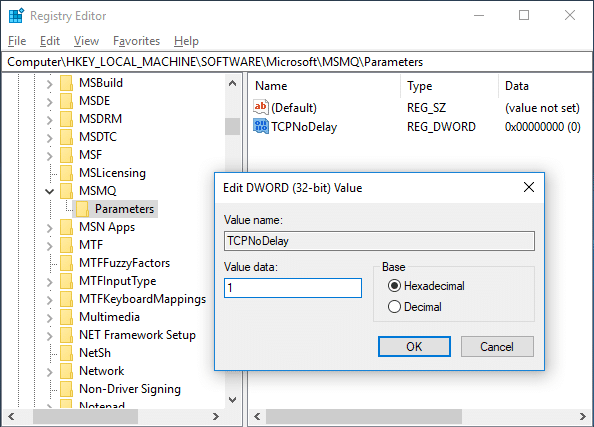
19.Name this DWORD as “TCPNoDelay” and set it’s value to 1.
20.Click OK to save changes and reboot your PC.
Method 2: Disable Apps with High Network Usage using Task Manager
Usually, Windows 10 permits its users to observe which applications are employing or eating up the most network bandwidth in the background.
1.Neej Ctrl + Ua haujlwm + Esc yuam sij ua ke qhib Tus Tswj Xyuas Haujlwm.

2. Nyem rau “ntau Paub meej” to expand Task Manager.
3.You can sort the “network” column of Task Manager in descending order which will allow you to see those applications which are taking the most bandwidth.
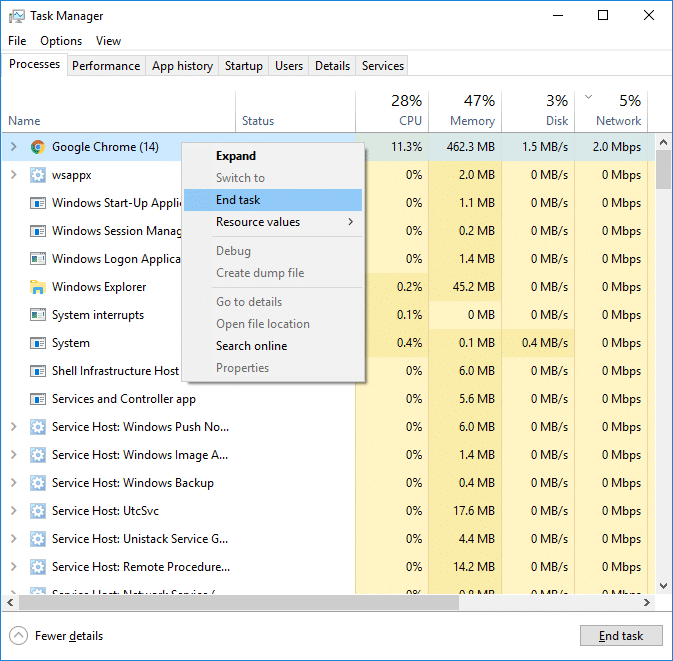
4.Close those applications uas yog eating a high amount of bandwidth,
Nco ntsoov: Don’t close the processes which are a system process.
Method 3: Disable Windows Auto-Updates
Windows usually download system updates with no notification or permission. Hence it may eat up your internet with high ping & slow your game. That time you cannot hiatus an update which has already started; & may ruin your online game experience. So you can stop your Windows update so that it doesn’t eat up your internet bandwidth.
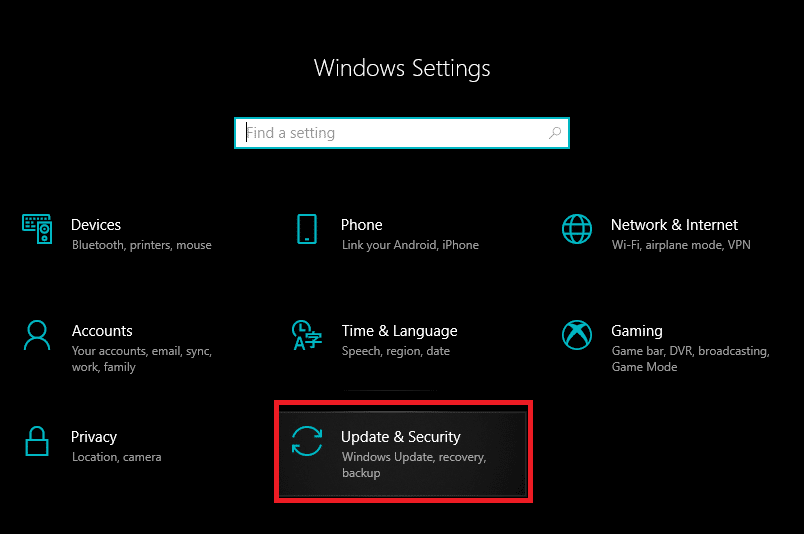
1.Press Windows Key + I to open Settings then click on “Hloov Kho & Ruaj Ntseg”Icon.
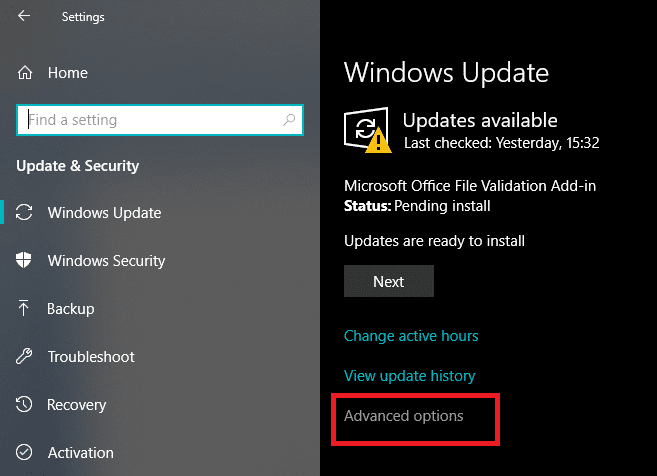
2.From the left-hand window select “Qhov Hloov Piav Qhia qhov rais".
3.Now under Windows Update click on “Advanced”Kev xaiv.
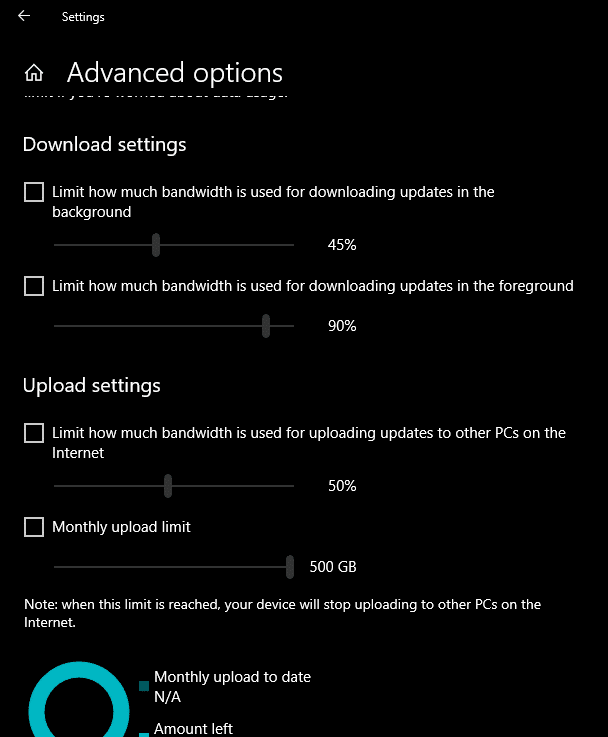
4.Now look for “Kev Xaiv Tsa” option & click on it.

5.Again click on “Advanced xaiv".

6. Tam sim no adjust your Download & Upload Bandwidth feem pua.
If you don’t want to mess System updates then another way to Fix High Ping on Windows 10 issue is to set your network connection as Metered. This will let system think that you’re on a metered connection and hence it will not download the Windows updates automatically.
1.Click rau ntawm Pib khawm mam li mus Chaw.
2.From Settings window click on “Network & Is Taws Nem”Icon.
![]()
3.Now make sure you select Ethernet option from the left window pane.
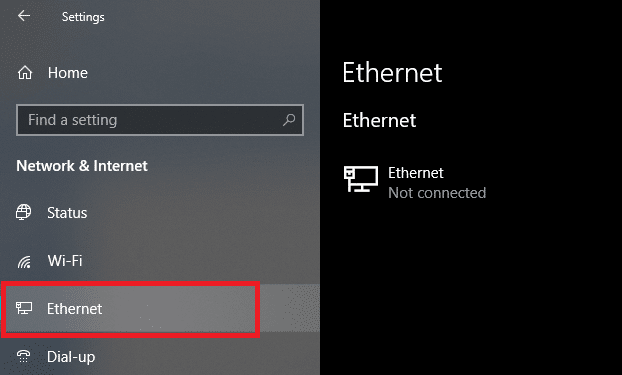
4.Choose the Network which you currently connected to.
5.Turn ON the toggle for “Teem raws li kev sib txuas lus".

Txoj Kev 4: Pib dua Network Txuas
1.Nias Windows Key + I kom qhib Chaw ces nyem rau Network & Internet.

2.Los ntawm sab laug lub qhov rais pane nyem rau Cov xwm txheej.
3.Scroll cia rau hauv qab thiab nyem rau ntawm Network pib dua.

4.Nyob rau lub qhov rais tom ntej no nyem rau Rov pib dua tam sim no.

5.Yog nug kom paub meej xaiv Yog.
6.Reboot koj lub PC kom txuag tau cov kev hloov pauv thiab saib seb koj puas tuaj yeem ua tau Fix High Ping on Windows 10 Issue.
Method 5: Disable WiFi Sense
1.Nias Windows Key + I kom qhib Chaw ces nyem rau Network & Internet.
2.Tam sim no nyem rau Wi-Fi from the left window pane and make sure to Disable everything under Wi-Fi Sense.
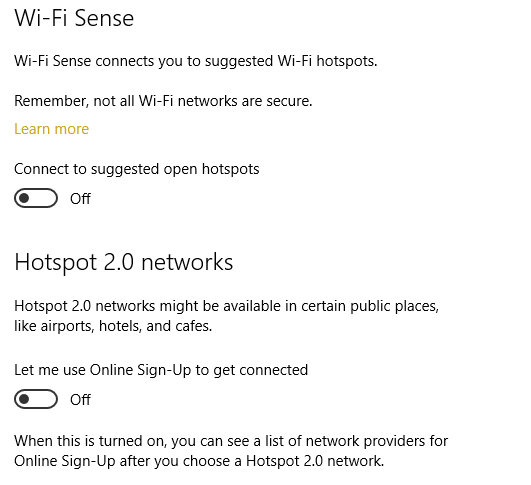
3.Also, make sure to disable Hotspot 2.0 networks and Paid Wi-Fi services.
pom zoo:
Kuv vam tias tsab xov xwm no yuav pab tau thiab tam sim no koj tuaj yeem yooj yim Fix High Ping on Windows 10, but if you still have any questions regarding this guide then feel free to ask them in the comment’s section.
")
