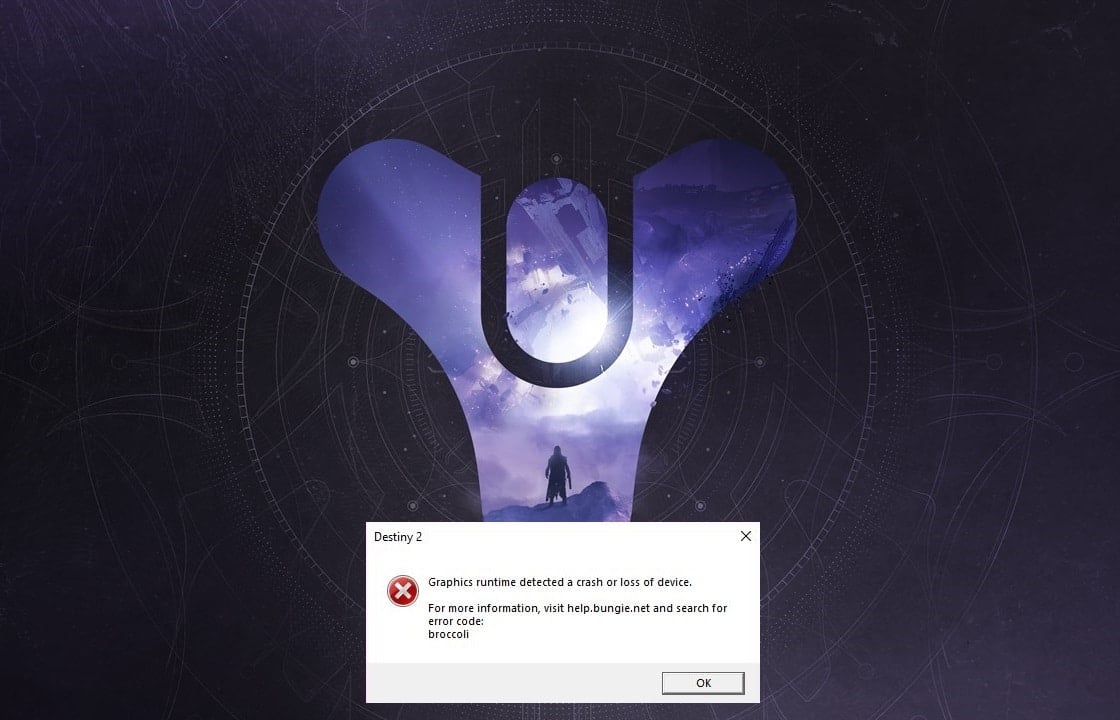
Destiny 2 is a multiplayer shooting game that is hugely popular amongst gamers today. Bungie Inc developed this game and released it in 2017. It is now available on Windows computers along with PlayStation 4/5 and Xbox models – One/X/S. Since it is an online-only game, you would require a stable and high-speed internet connection on your device to play it. Many users reported some issues while playing this game on their Windows systems, majorly: error code Zaub cob pob and error code Marionberry. Keep reading to learn more about Destiny 2 Error Code Broccoli and the methods to fix it.
Yuav kho li cas destiny 2 Error Code Broccoli on Windows 10
Here are the general reasons why this error occurs while playing Destiny 2:
- Overclocked GPU: All Graphics Processing Units are set to run at a particular speed called the paus ceev which is set by the device manufacturer. On some GPUs, users can boost their performance by increasing the GPU speed to a level higher than the base speed. However, overclocking the GPU may cause the Broccoli error.
- Full-screen glitch: You are more likely to face Destiny 2 error code Broccoli if you are using NVIDIA GeForce GPU.
- Outdated Windows version: If the Windows operating system is working on an outdated version, then the system will not update the GPU drivers on the PC. You need to ensure that you have the latest version of Windows installed.
- Corrupted/Outdated Graphics card drivers: The Destiny 2 error code Broccoli can occur if the graphic drivers on your PC are outdated or corrupt. Destiny 2 requires compatible graphics card and updated graphics card drivers so that your gaming experience is smooth and error-free.
To fix Destiny 2 error code Broccoli, try the methods written below, one-by-one, to find a possible solution for your Windows 10 system.
Method 1: Run Game in Windowed Mode (NVIDIA)
This method is applicable only if you use NVIDIA Kev Ua Si Geforce to play Destiny 2. Since GeForce Experience might force the game into Full-screen mode, leading to error code Broccoli learn How to Manually Add Game to GeForce Experience learn How to Manually Add Game to GeForce Experience. Follow the steps below to force the game to run in Windowed Mode instead:
1. Tshaj tawm rau NVIDIA GeForce Kev Paub daim ntawv thov.
2. Mus rau Tsev Tab thiab xaiv destiny 2 from the list of games displayed on the screen.
3. Scroll cia thiab nyem rau ntawm qhov Cov cuab yeej icon to launch settings.
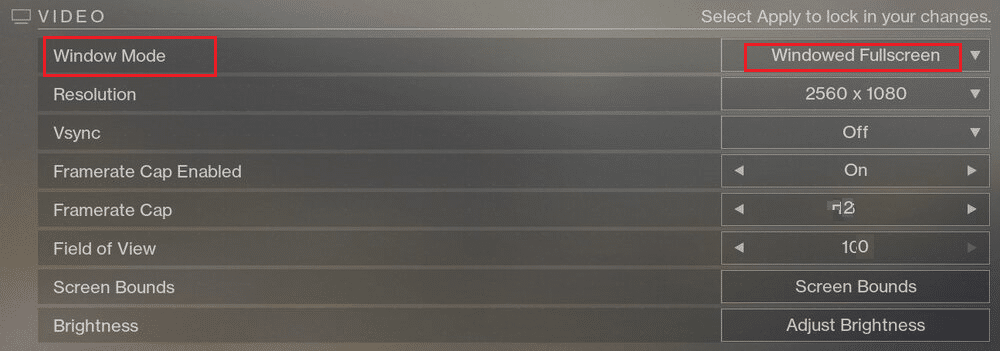
4. Nias rau Hom Saib nyob rau hauv Cov Chaw Kev Cai thiab xaiv Cua los ntawm daim ntawv qhia zaub mov nco.
5. Kawg no, nyem rau thov kom txuag tau qhov kev hloov.
6. Tua tawm destiny 2 thiab pab tau Puv npo hom from here instead. Refer highlighted section in the pic below.
Txoj Kev 2: Hloov Windows
The developers named the error code Broccoli to indicate the inconsistencies with the Graphics card drivers and Windows OS. If the graphics card driver updates are handled by the Windows Update service on your PC, it is necessary to ensure that no Windows updates are pending. Follow the given steps to update Windows:
1. Hom tshiab in Windows nrhiav box. Launch the Windows Update nqis from the search result, as shown.
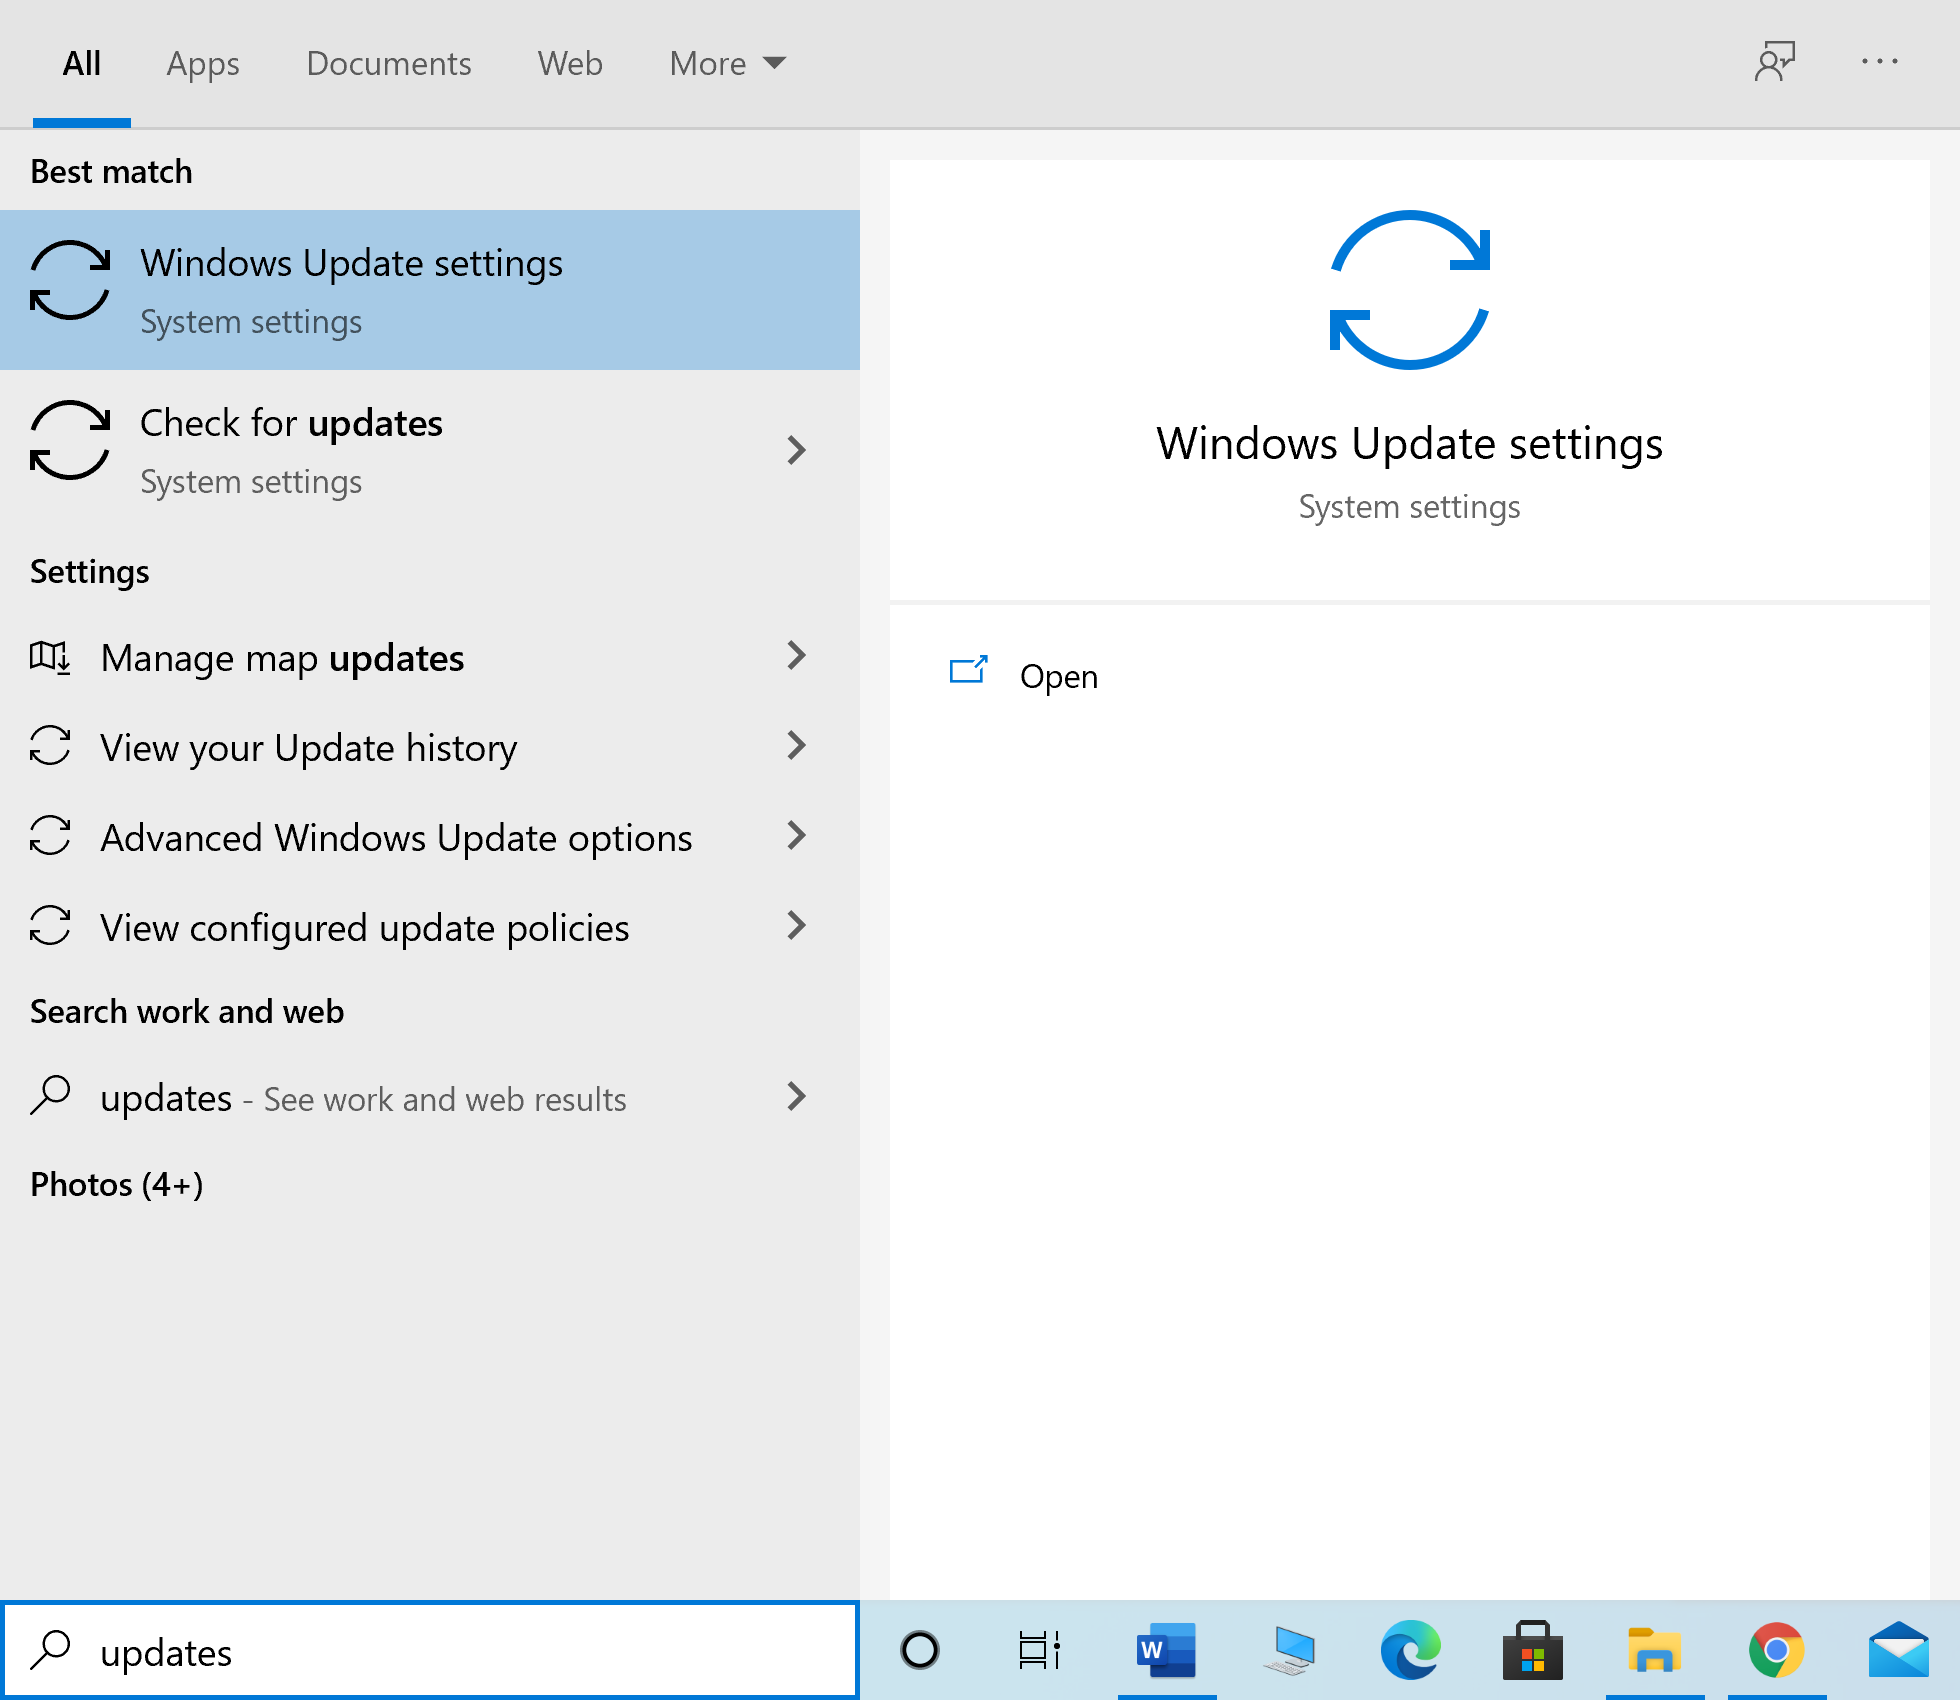
2. Nias rau Kos rau cov tshiab from the right pane, as depicted.
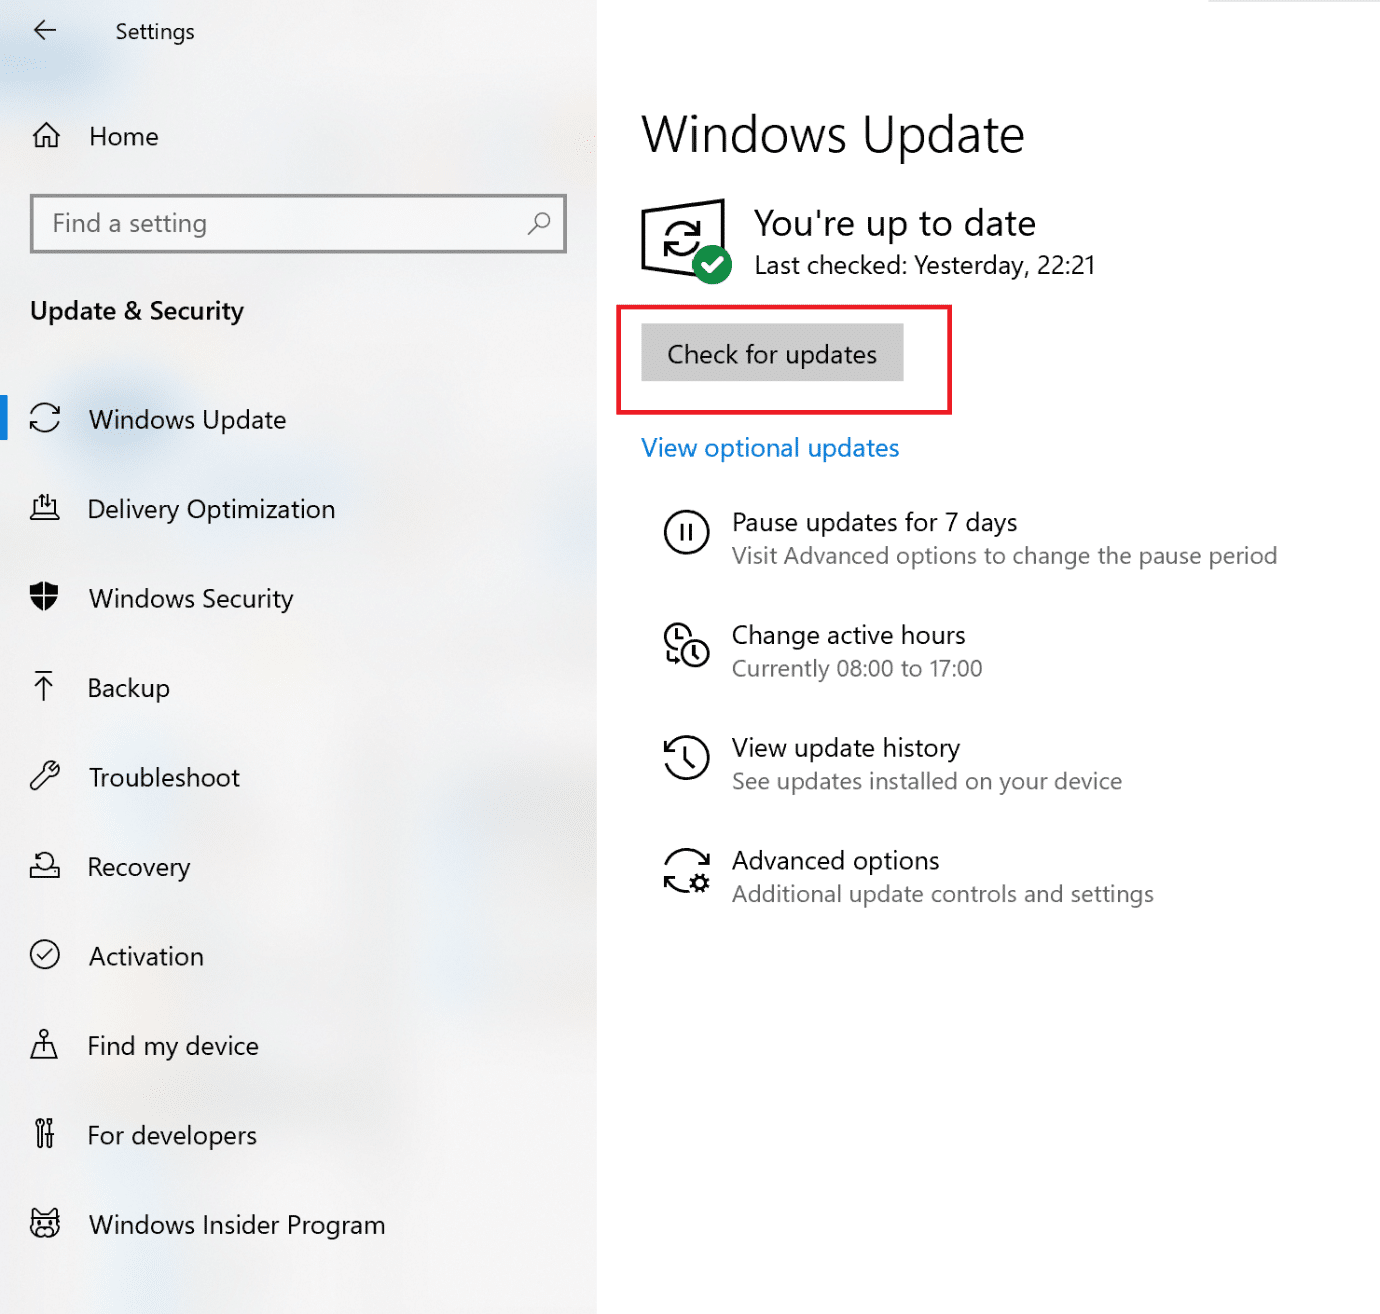
3 tos for Windows to search for and install any pending updates.
Nco ntsoov: Your PC may need to restart several times during the update process. Return to Windows Update settings to install all available updates, after every restart.
After the process is complete, launch Destiny 2 and see if the game launches without Broccoli error. If not, there may be issues with Graphics card drivers which will be dealt with in succeeding methods.
Kuj nyeem: Windows Updates Stuck? Nov yog ob peb yam uas koj tuaj yeem sim!
Method 3: Reinstall Graphics Card Drivers
If the above methods did not work for you, you need to update Graphics card drivers on your PC to eliminate the issue of corrupt and/or outdated drivers. This can possibly resolve Destiny 2 error code Broccoli.
Given below are two options:
- update graphics card drivers using Device Manager.
- update the drivers by reinstalling them manually.
Option 1: Automatically Update Graphics Card Drivers
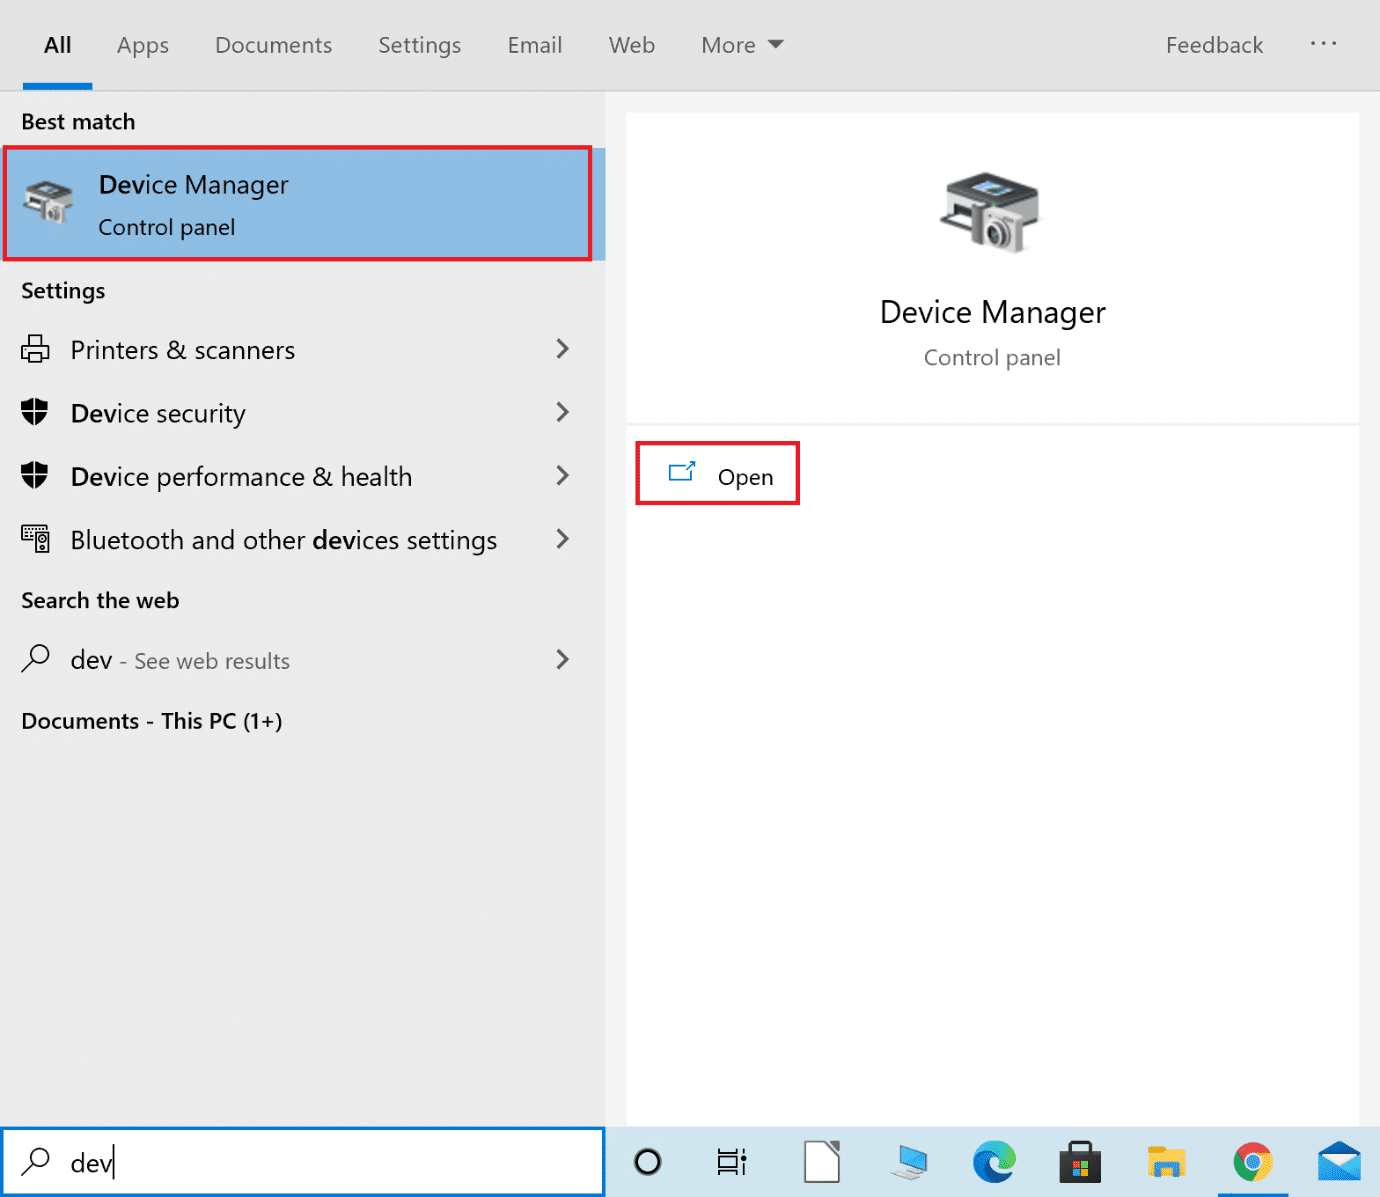
1. Hom Tus thawj tswj xyuas ntaus ntawv nyob rau hauv lub Windows nrhiav box and launch the app from there.
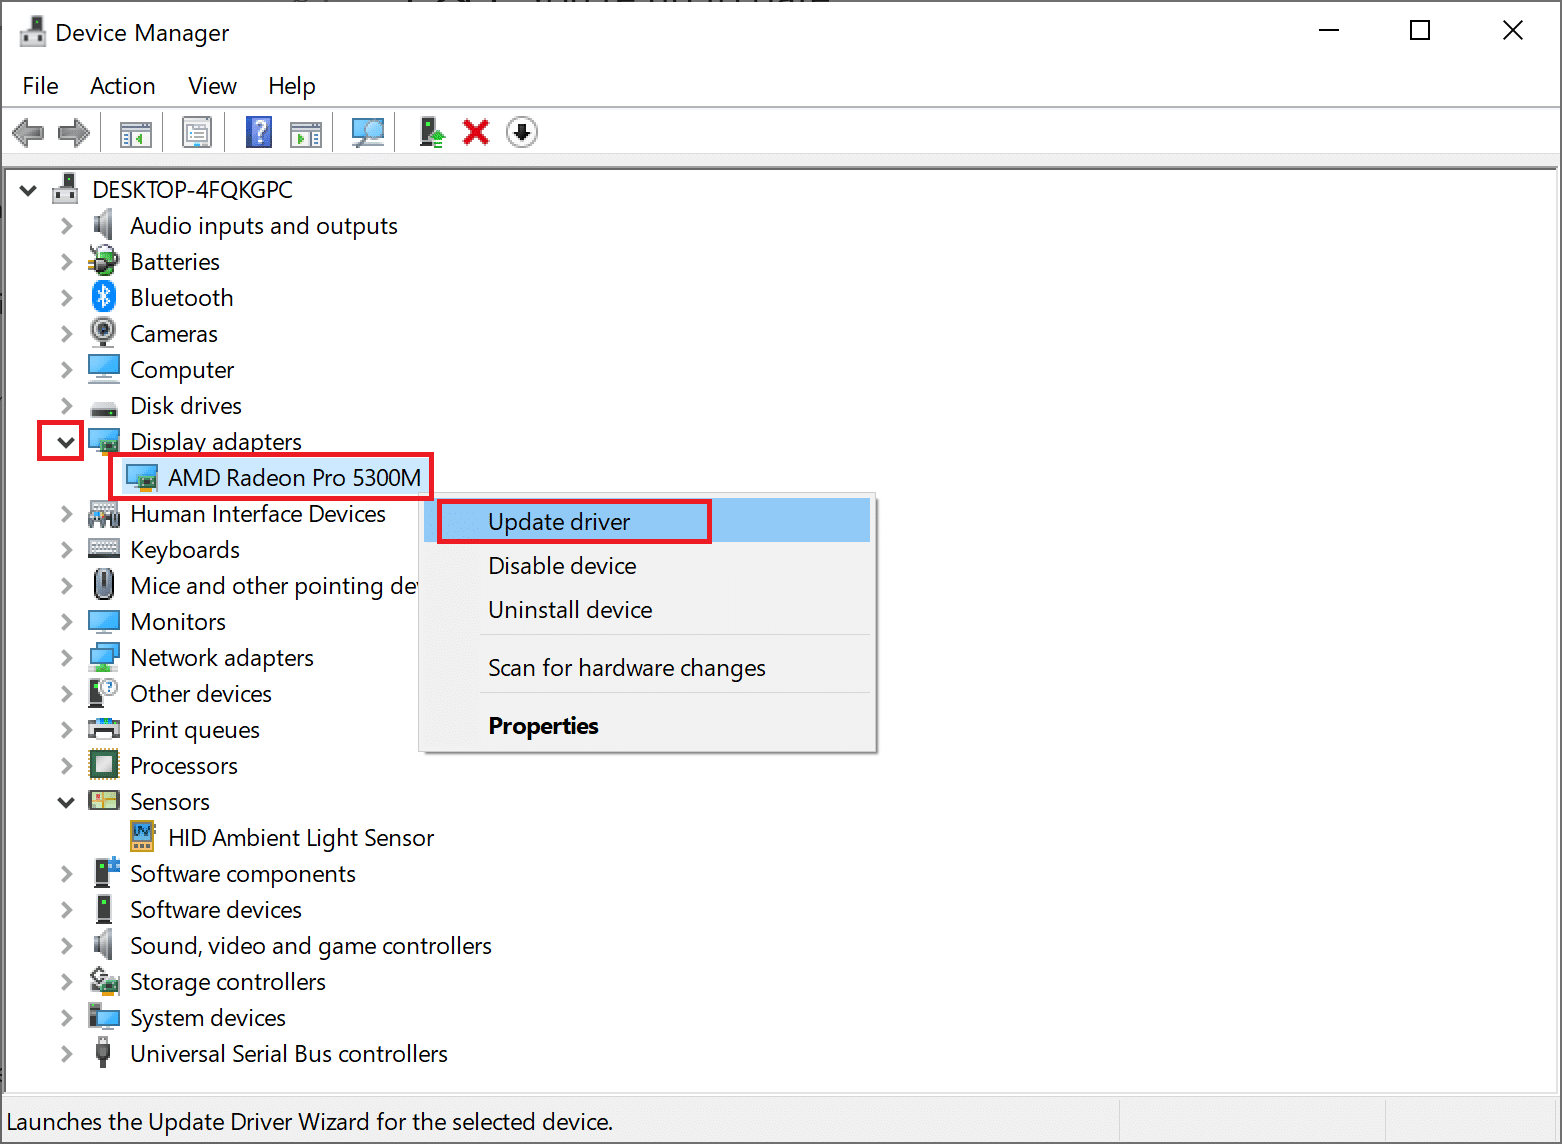
2. Nyem ntawm qhov hauv qab xub tom ntej Zaub adapters kom nthuav nws.
3. Right-click on your Graphics card driver and select Tus neeg tsav tsheb hloov tshiab los ntawm cov ntawv qhia zaub mov nco-down, raws li tau piav qhia hauv qab no.
4. In the pop-up box that follows, click on the option titled Nrhiav rau tus tsav tsheb nkaus xwb, raws li qhia hauv qab no.
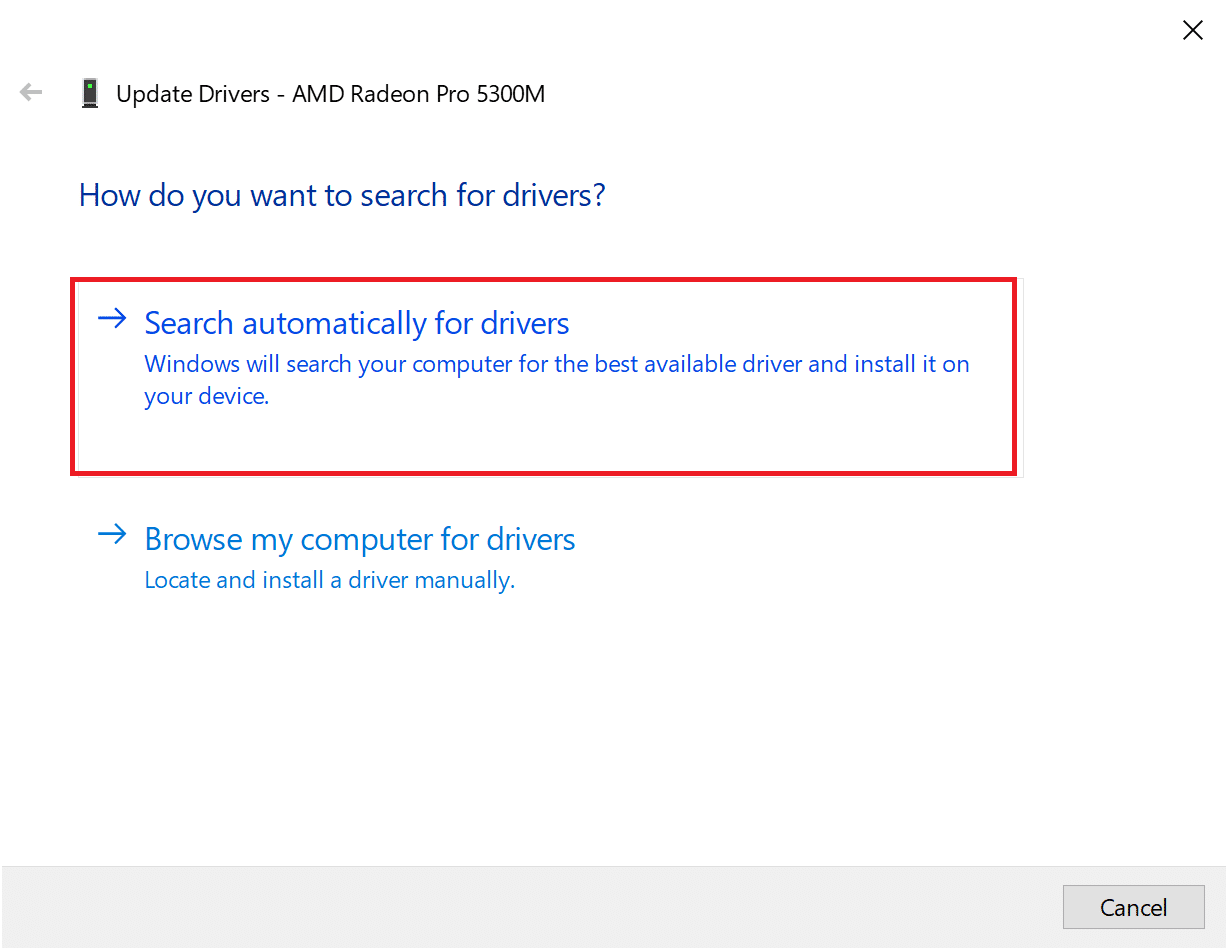
5. tos for your PC to install updated drivers if any are found.
6. Restart the computer and launch the game.
If the above option did not work, you need to manually update the graphics card drivers by reinstalling them on your computer. Read below to do so.
Option 2: Manually Update Drivers by Reinstallation
This process has been explained for users of AMD graphic cards and NVIDIA graphics cards. If you use any other graphics card, ensure to follow the correct steps to reinstall those.
Reinstall AMD Graphic Drivers
1. Download AMD Cleanup Utility ntawm no.
2. Once the file is downloaded, right-click on it and select Khiav li tus neeg khiav dej num.
3. Nias rau Yog nyob rau hauv cov AMD Cleanup Utility pop-up box to enter Qhov Cuab Yim Cuab Yeej Cuab Yeej.
4. Once in Muaj kev nyab xeeb hom, follow the instructions on the screen to complete the uninstallation process.
5. The AMD Cleanup Utility will completely remove AMD drivers without leaving leftover files on your system. Of course, if there are any corrupt AMD files, those will be removed too. After the process is complete, your machine will pib dua yeej. Nyem no nyeem ntxiv.
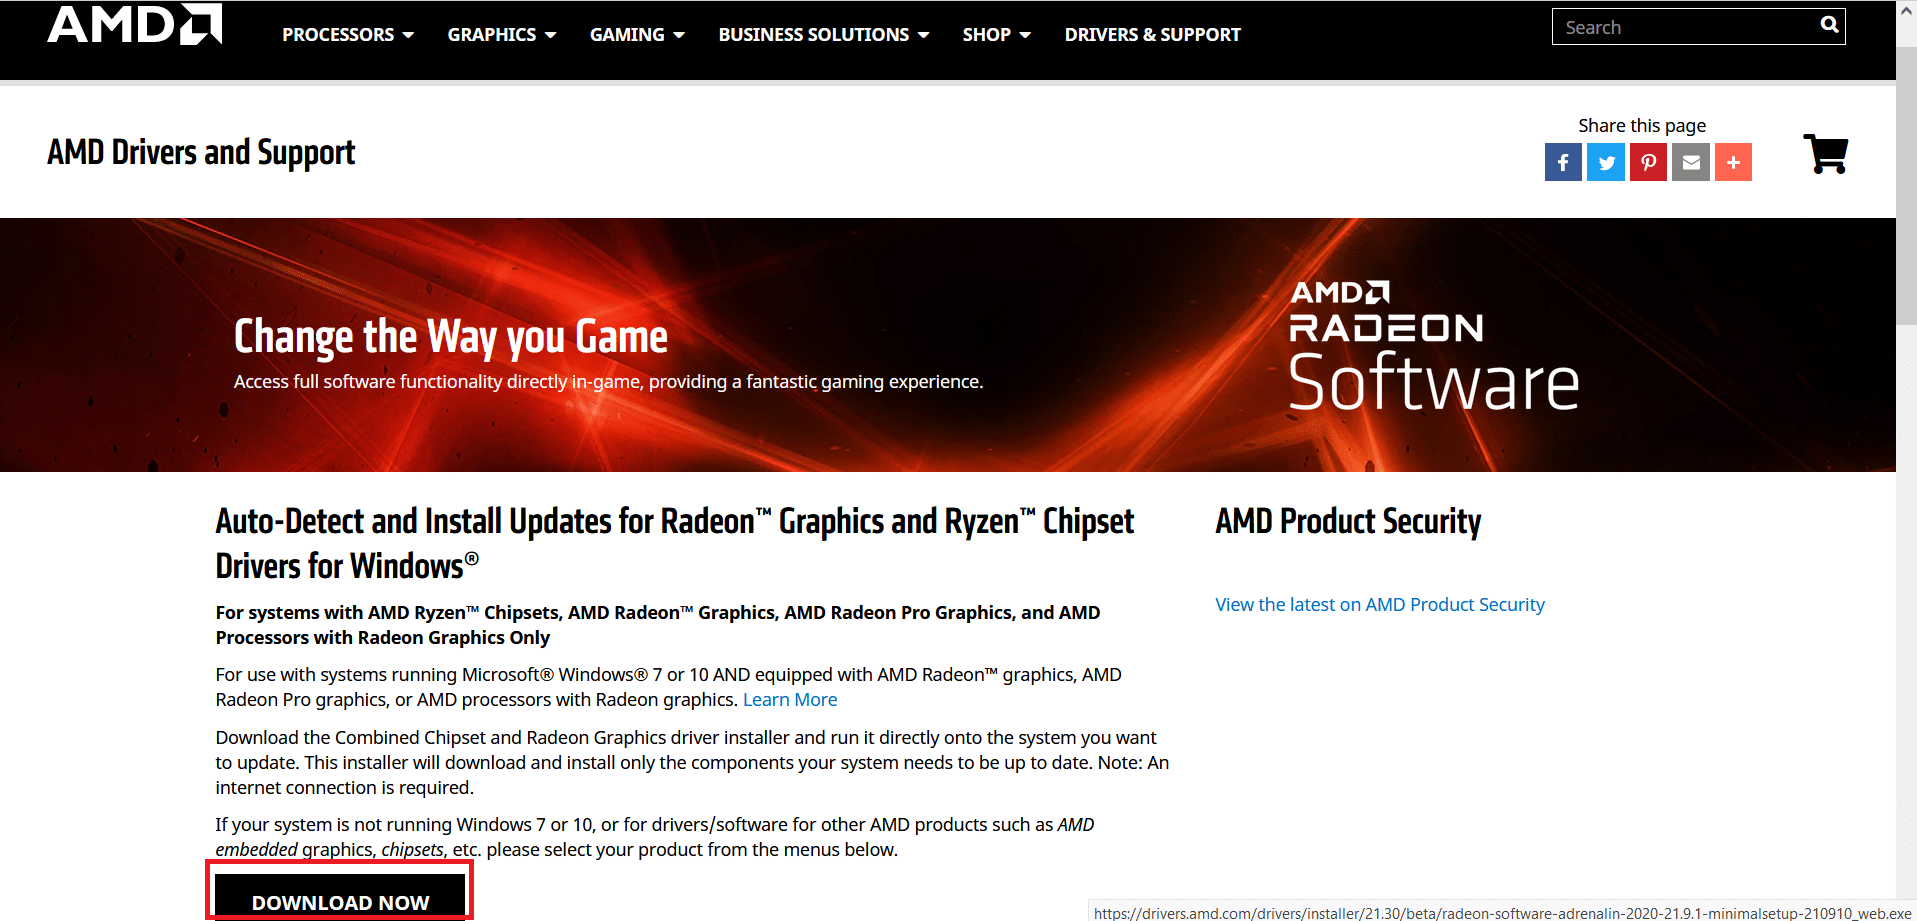
6. Xyuas cov official AMD website thiab nyem rau ntawm Download tau tam sim option displayed at the bottom of the screen, to download the latest drivers for your PC.
7. On the AMD Radeon Software Installer, click on Pom zoo Version to determine the most suitable drivers for the AMD hardware on your PC. Nruab lawv.
8. Follow the instruction on-screen to finish the installation. Once done, restart the computer and enjoy playing Destiny 2.
Reinstall NVIDIA Graphics Cards
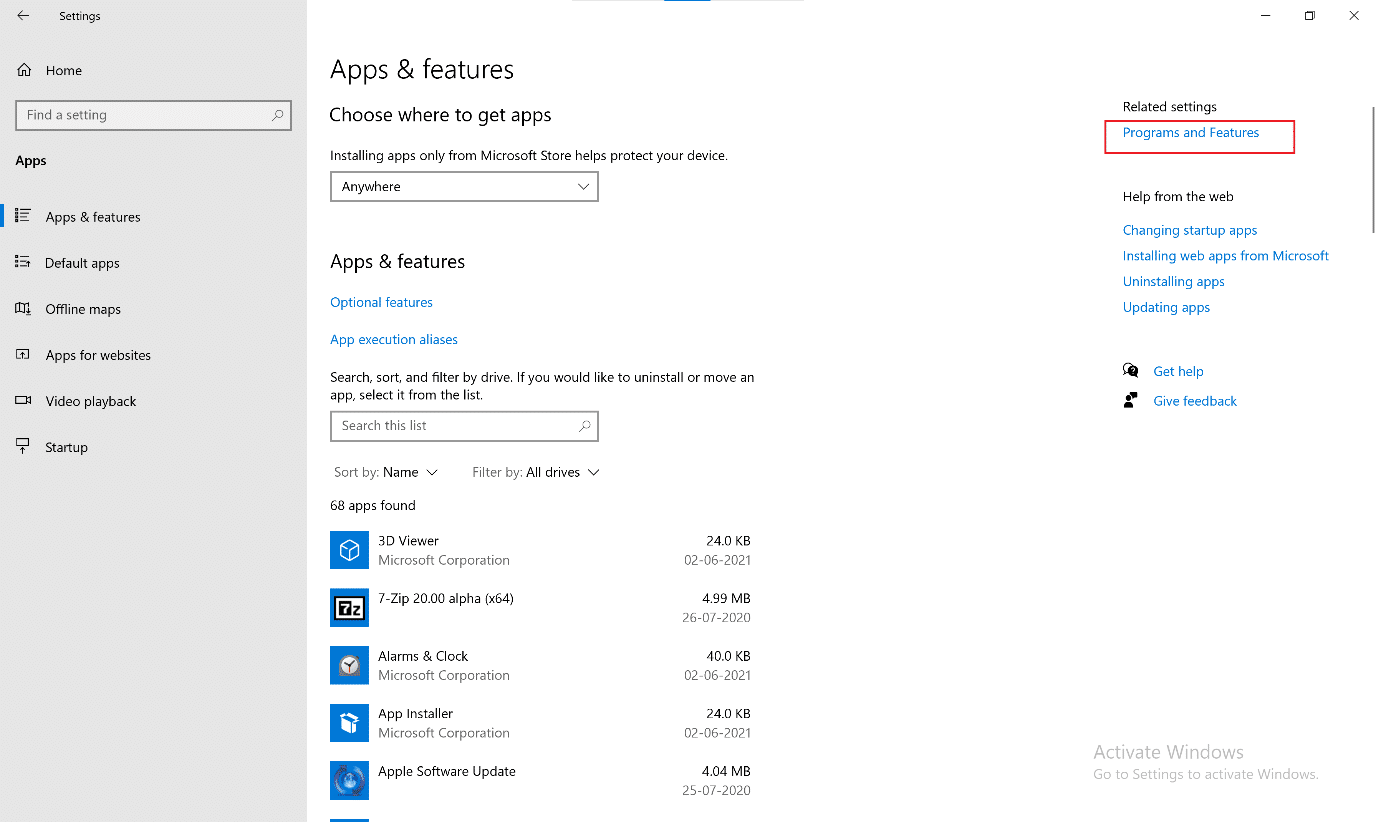
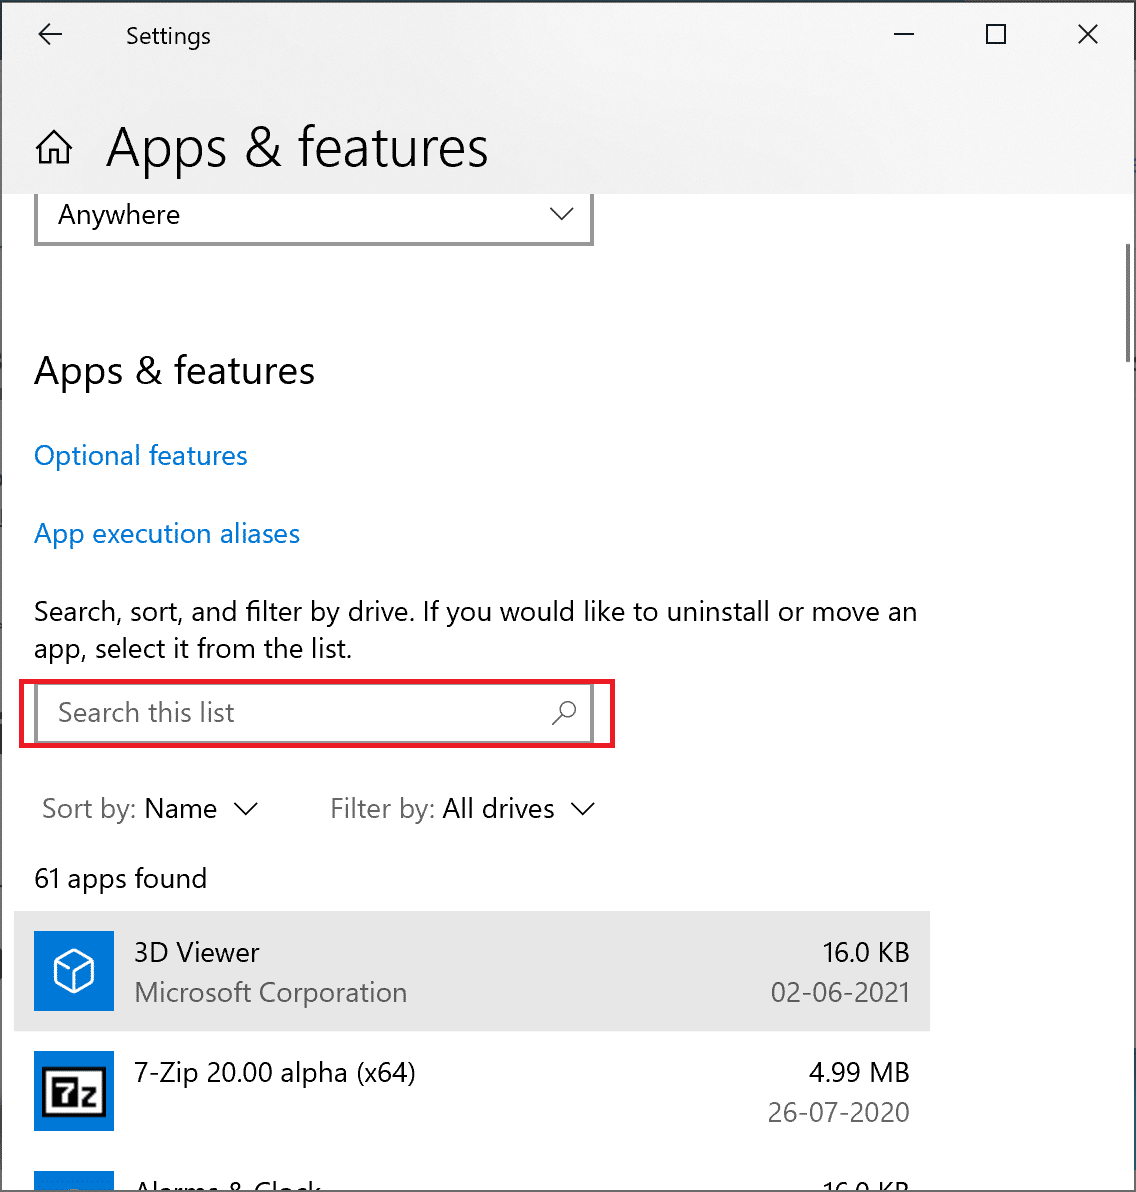
1. Hom Ntxiv lossis tshem tawm cov haujlwm nyob rau hauv lub Windows nrhiav box and launch it from the search result, as shown.
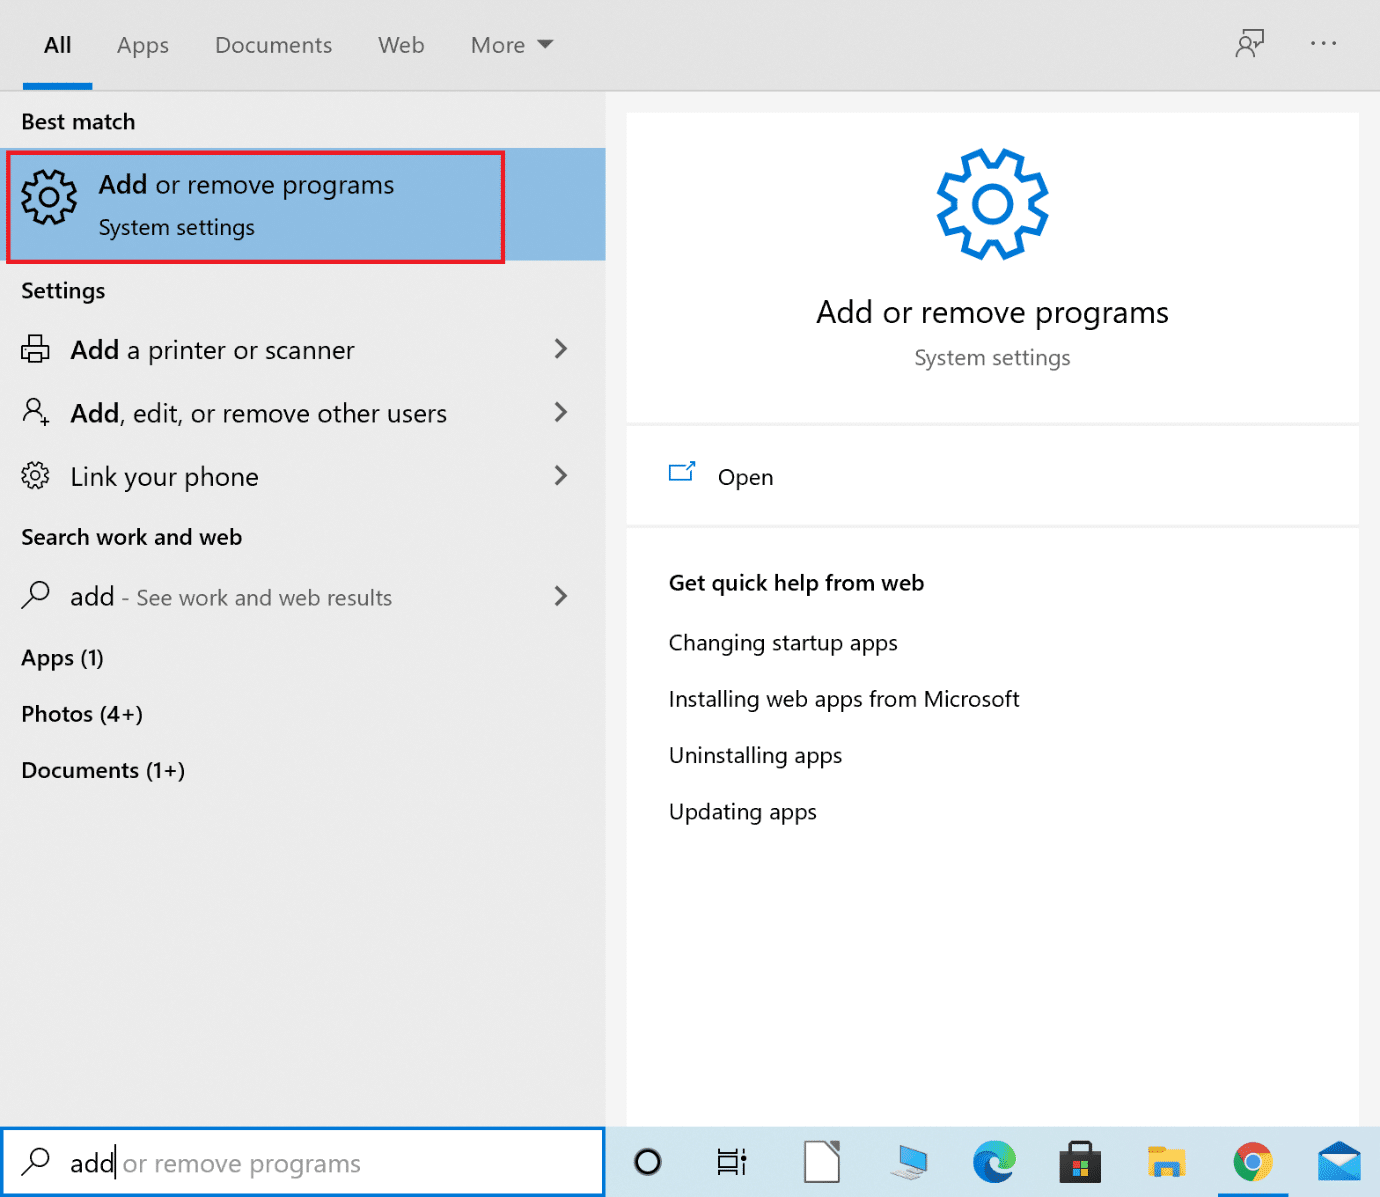
2. Nias rau Kev pab cuam thiab nta nyob rau hauv Lwm qhov chaw from the right side of the screen.
3. Nyem ntawm qhov hauv qab xub tom ntej Change your view icon raws li qhia.
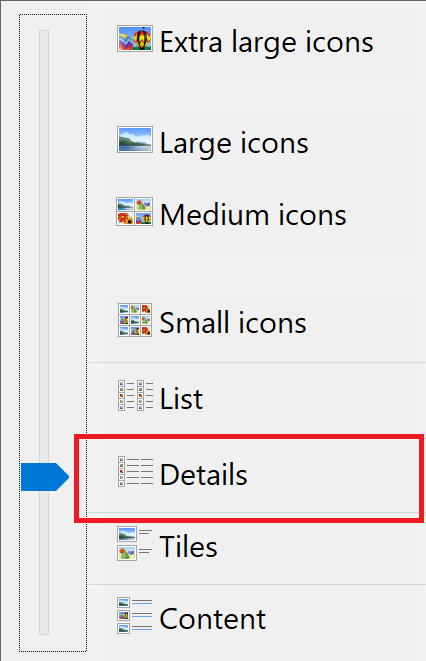
4. Xaiv Paub meej from the list to view apps along with the name of the publisher, date of installation, and the version installed.
![]()
5. Select all instances of apps and programs published by NVIDIA. Right-click on each and select uninstall.
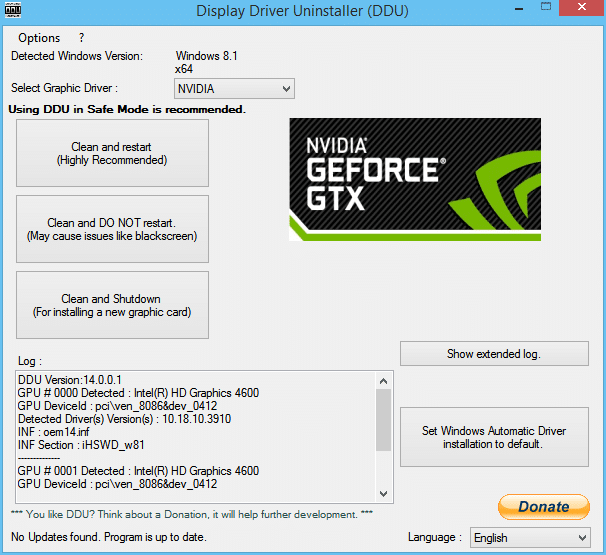
Nco ntsoov: Hloov pauv, koj tuaj yeem siv Cov Neeg Tsav Tsheb Uninstaller to uninstall NVIDIA GeForce as well.
6. Pib dua khoos phis tawj ib zaug ua tiav.
7. Ces, mus saib lub Nvidia official website thiab nias rau download to download the latest GeForce Experience.

8. Click on the downloaded file to khiav the set-up utility.
9. Ntxiv mus, teev nyob rau hauv to your Nvidia account and click on the Cov neeg tsav tsheb tab. Install all the recommended drivers.
Kuj nyeem: Txhim kho Graphics Card Tsis pom ntawm Windows 10
Method 4: Toggle off Game Mode
The Windows 10 feature of Game Mode can boost the gaming experience and performance of your PC. Nevertheless, many users have reported that disabling this feature is a potential Destiny 2 error code Broccoli fix. Here’s how you can turn off Game Mode in Windows 10 systems:
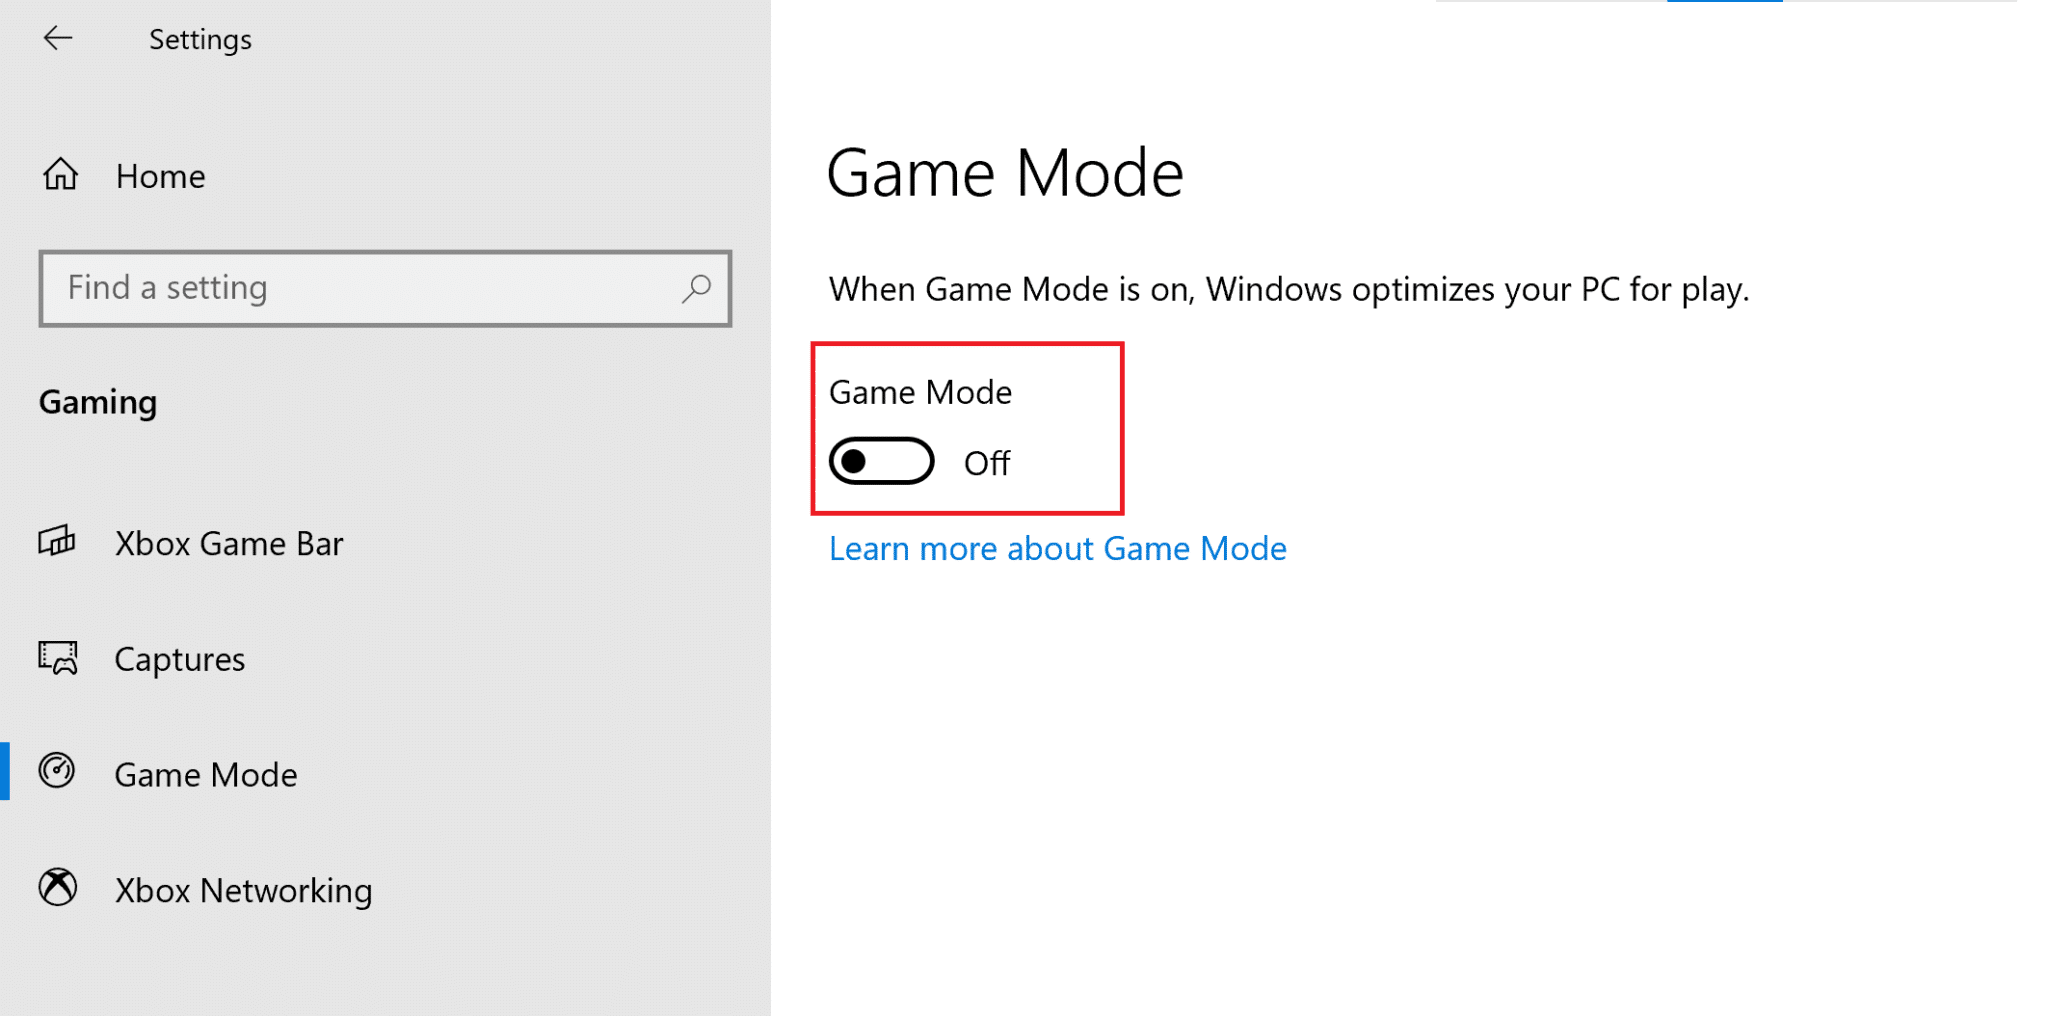
1. Hom Game mode settings nyob rau hauv lub Windows nrhiav box. Click on Open from the right window.
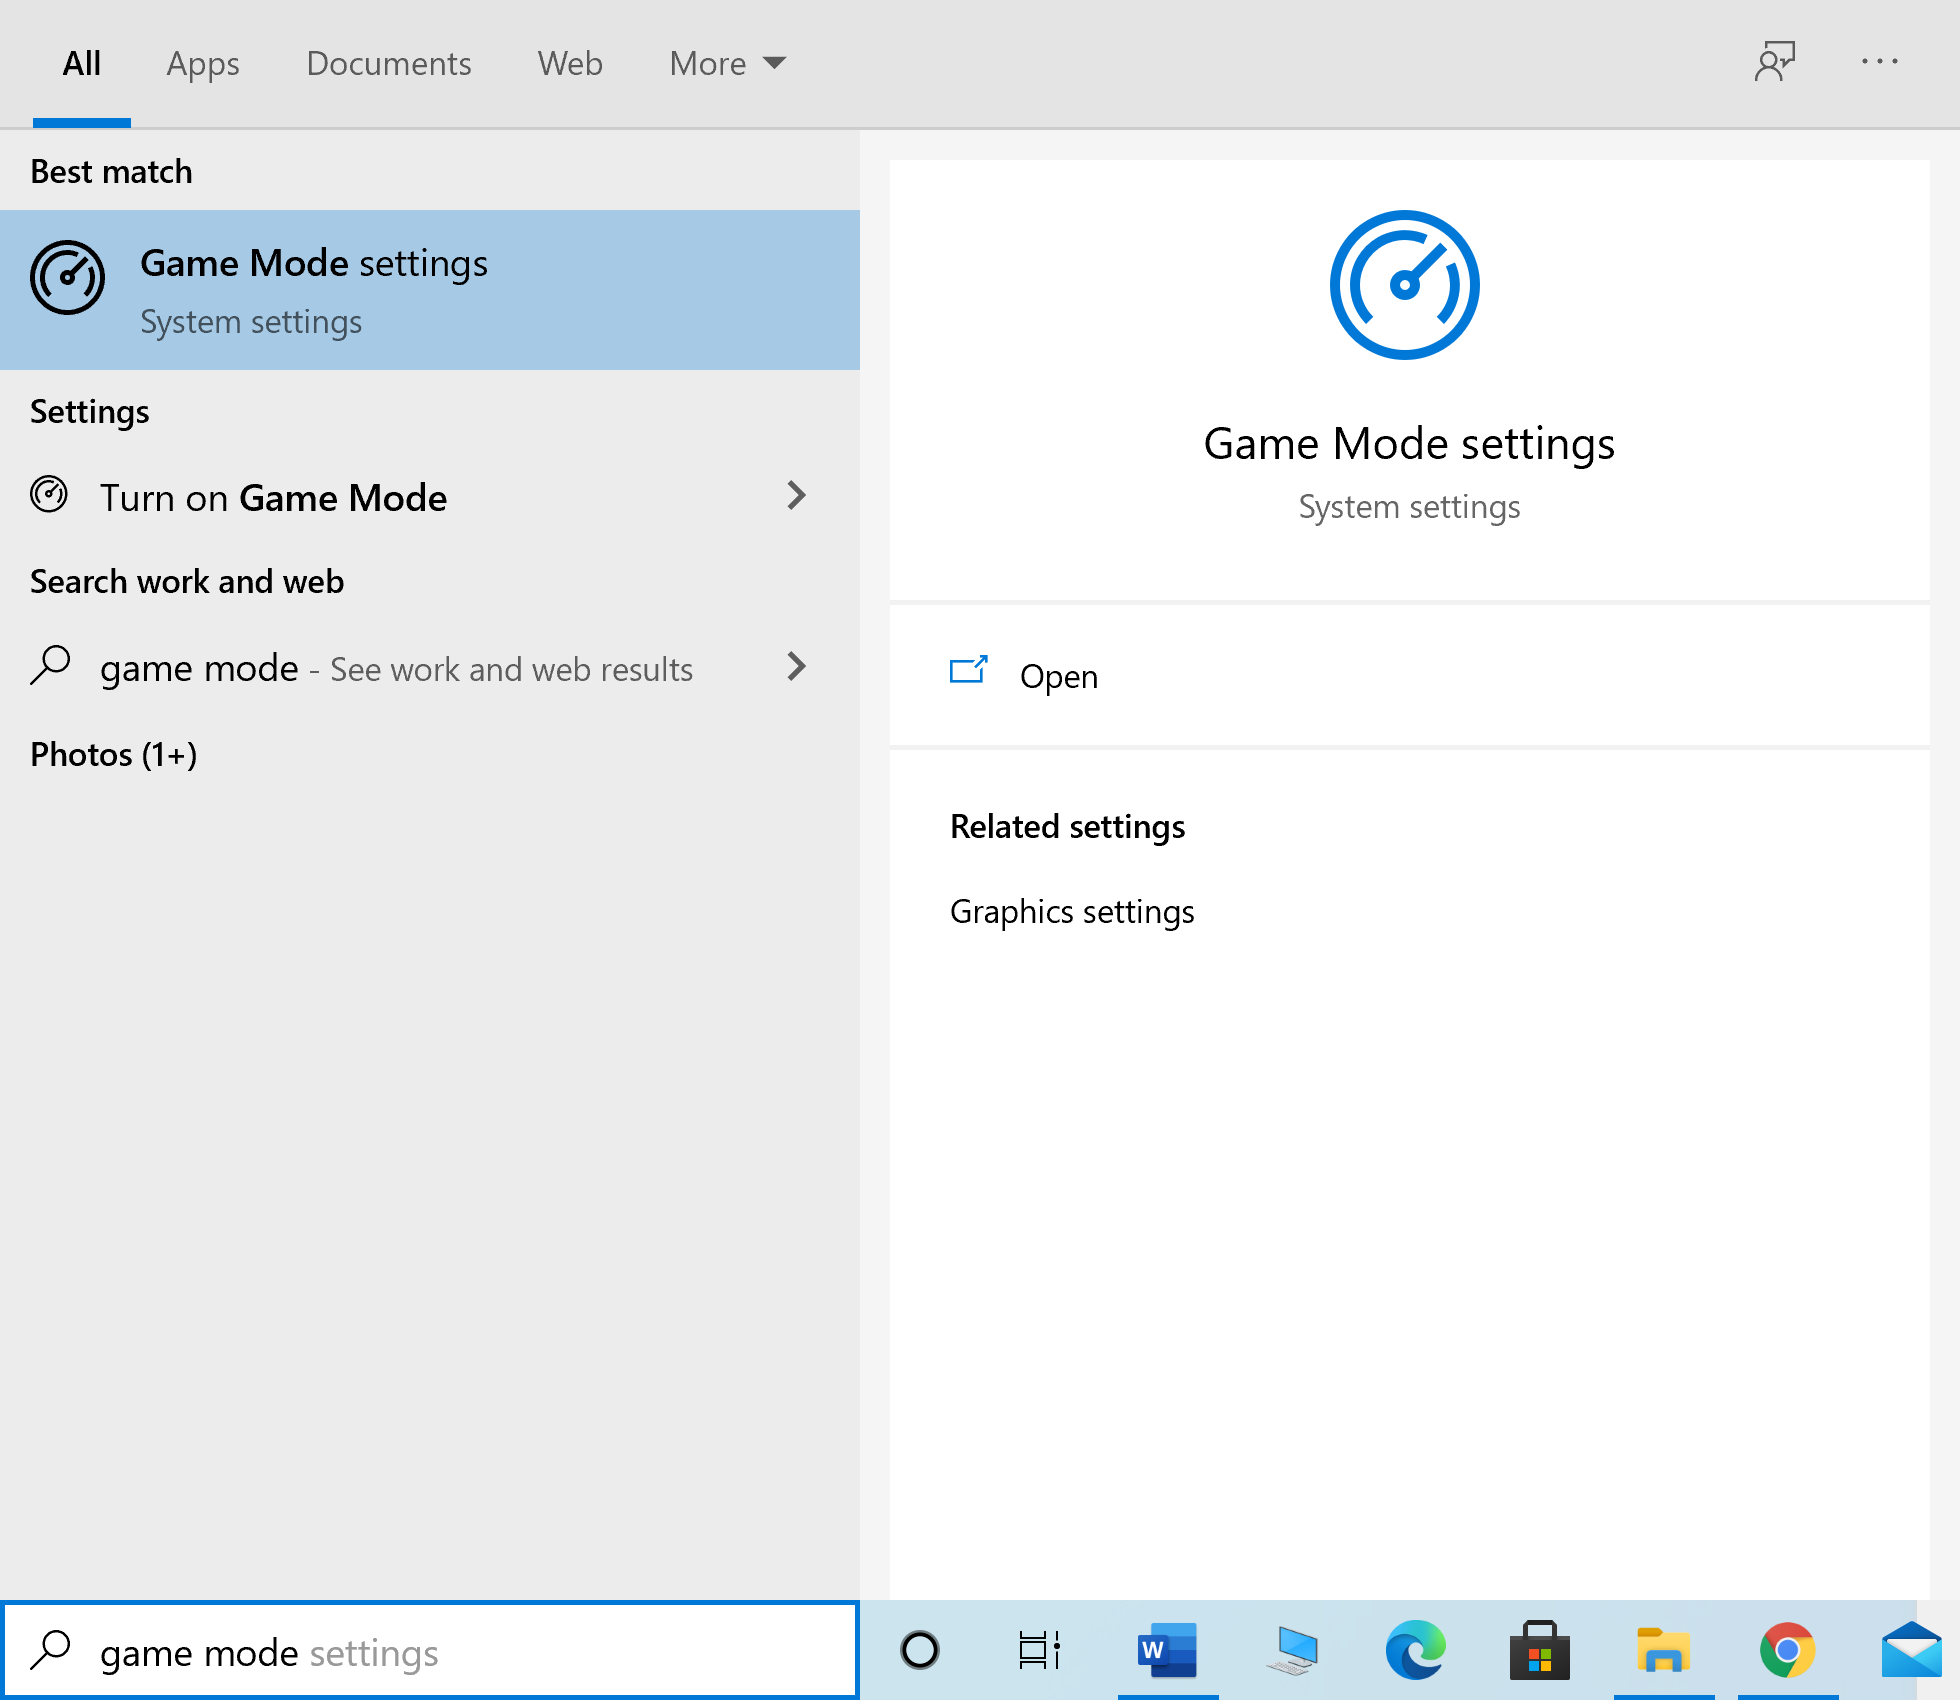
2. Toggle cov Game Mode off raws li qhia hauv qab no.
Method 5: Check Integrity of Destiny 2 Files (For Steam)
If you use Steam to play Destiny 2, you need to verify the integrity of game files so that the installed version of the game matches the latest version available on Steam servers. Read our guide on How to Verify the Integrity of Game Files on Steam here.
Method 6: Enable Multi-GPU settings (If applicable)
This method is applicable if you use two graphic cards and are facing the Destiny 2 Broccoli error. These settings allow the PC to combine multiple graphic cards and use combined graphics processing power. Follow the listed steps to enable the said settings for NVIDIA and AMD, as the case may be.
Rau NVIDIA
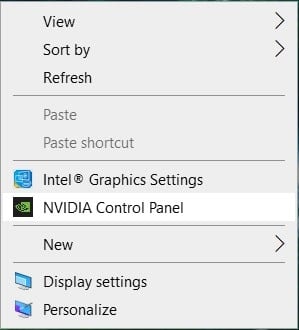
1. Txoj cai-nias rau ntawm duab thiab xaiv NVIDIA Tswj Vaj Huam Sib Luag.
2. Nias rau Configure SLI, Surround, PhysX, from the left pane of the NVIDIA Control Panel.
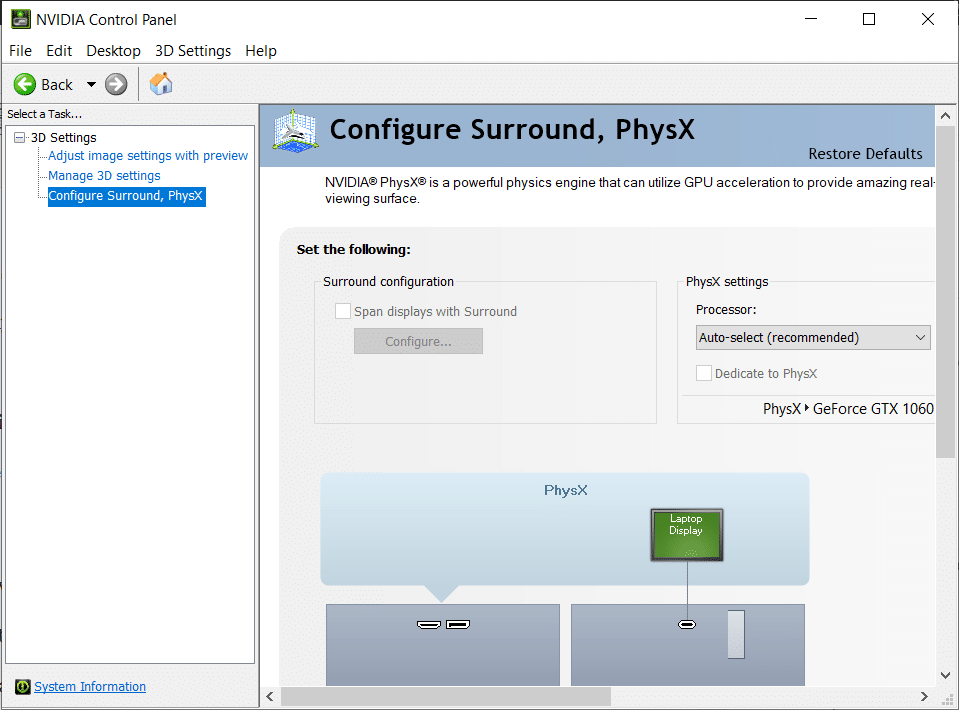
3. Nias rau Maximize 3D performance nyob rau hauv SLI configuration. Txuag cov kev hloov pauv.
Nco ntsoov: The Scalable Link Interface (SLI) is the brand name for the NVIDIA multi-GPU setting.
4. Pib dua koj lub system and launch the game to check if the issue is resolved.
Txog AMD
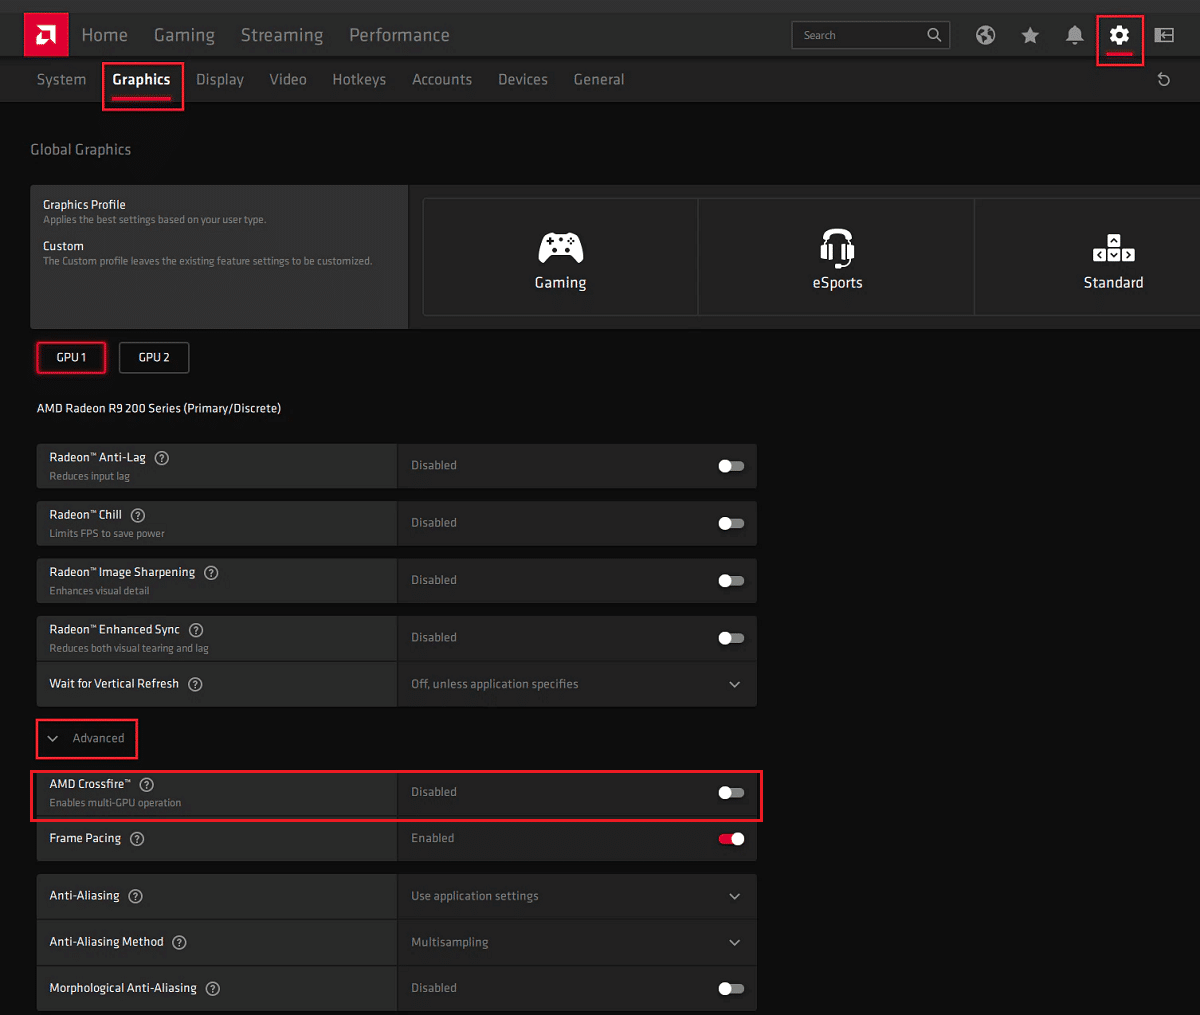
1. Right-click rau koj duab thiab nias rau AMD Radeon Software.
2. Nyem ntawm qhov Qhov chaw icon from the top right corner of the AMD Software window.
3. Tom ntej no, mus rau lub graphics tab.
4. Taw rau hauv Advanced seem thiab toggle rau AMD Crossfire to enable multi-GPU settings.
Nco ntsoov: CrossFire is the brand name for the AMD multi-GPU setting.
5. Pib dua the PC, and launch Destiny 2. Check if you’re able to fix Destiny 2 Error Code Broccoli.
Method 7: Change Graphic Settings on Destiny 2
In addition to modifying graphics settings associated with GPU, you can do similar modifications in the game itself. This will help avoid issues arising out of graphics inconsistency like Destiny 2 error code Broccoli. Here’s how to alter graphics settings in Destiny 2:
1. Tua tawm destiny 2 ntawm koj lub PC.
2. Nias rau qhib chaw to view the available settings.
3. Tom ntej no, nyem rau ntawm qhov Video tab los ntawm sab laug pane.
4. Tom ntej no, xaiv v-sync from Off to Rau.
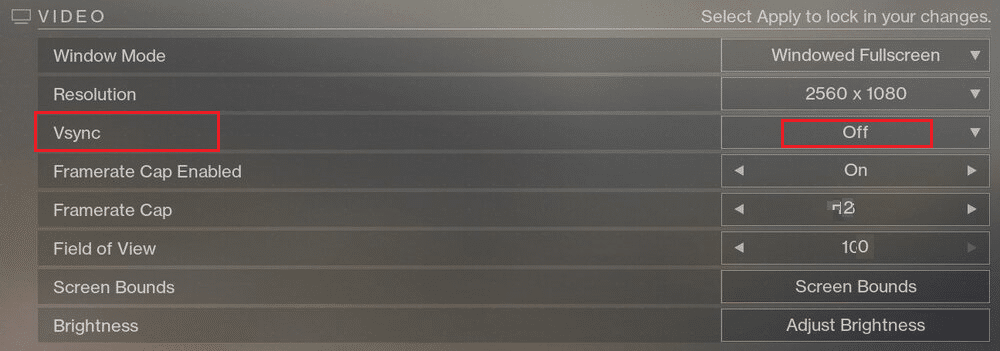
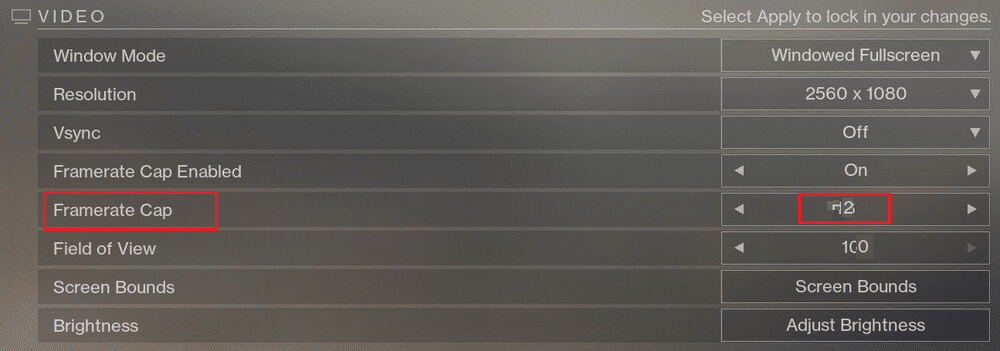
5. Tom qab ntawd, Enable Framerate Cap thiab teem nws mus 72 from the drop-down, as illustrated below.
6. Txuag the settings and launch the game.
Kuj nyeem: Fix Unreal Engine Exiting Due To D3D Device Being Lost
Method 8: Change Game Properties
You can change settings for the executable file of the game to potentially fix the Broccoli error code. Follow the given steps to do the same.
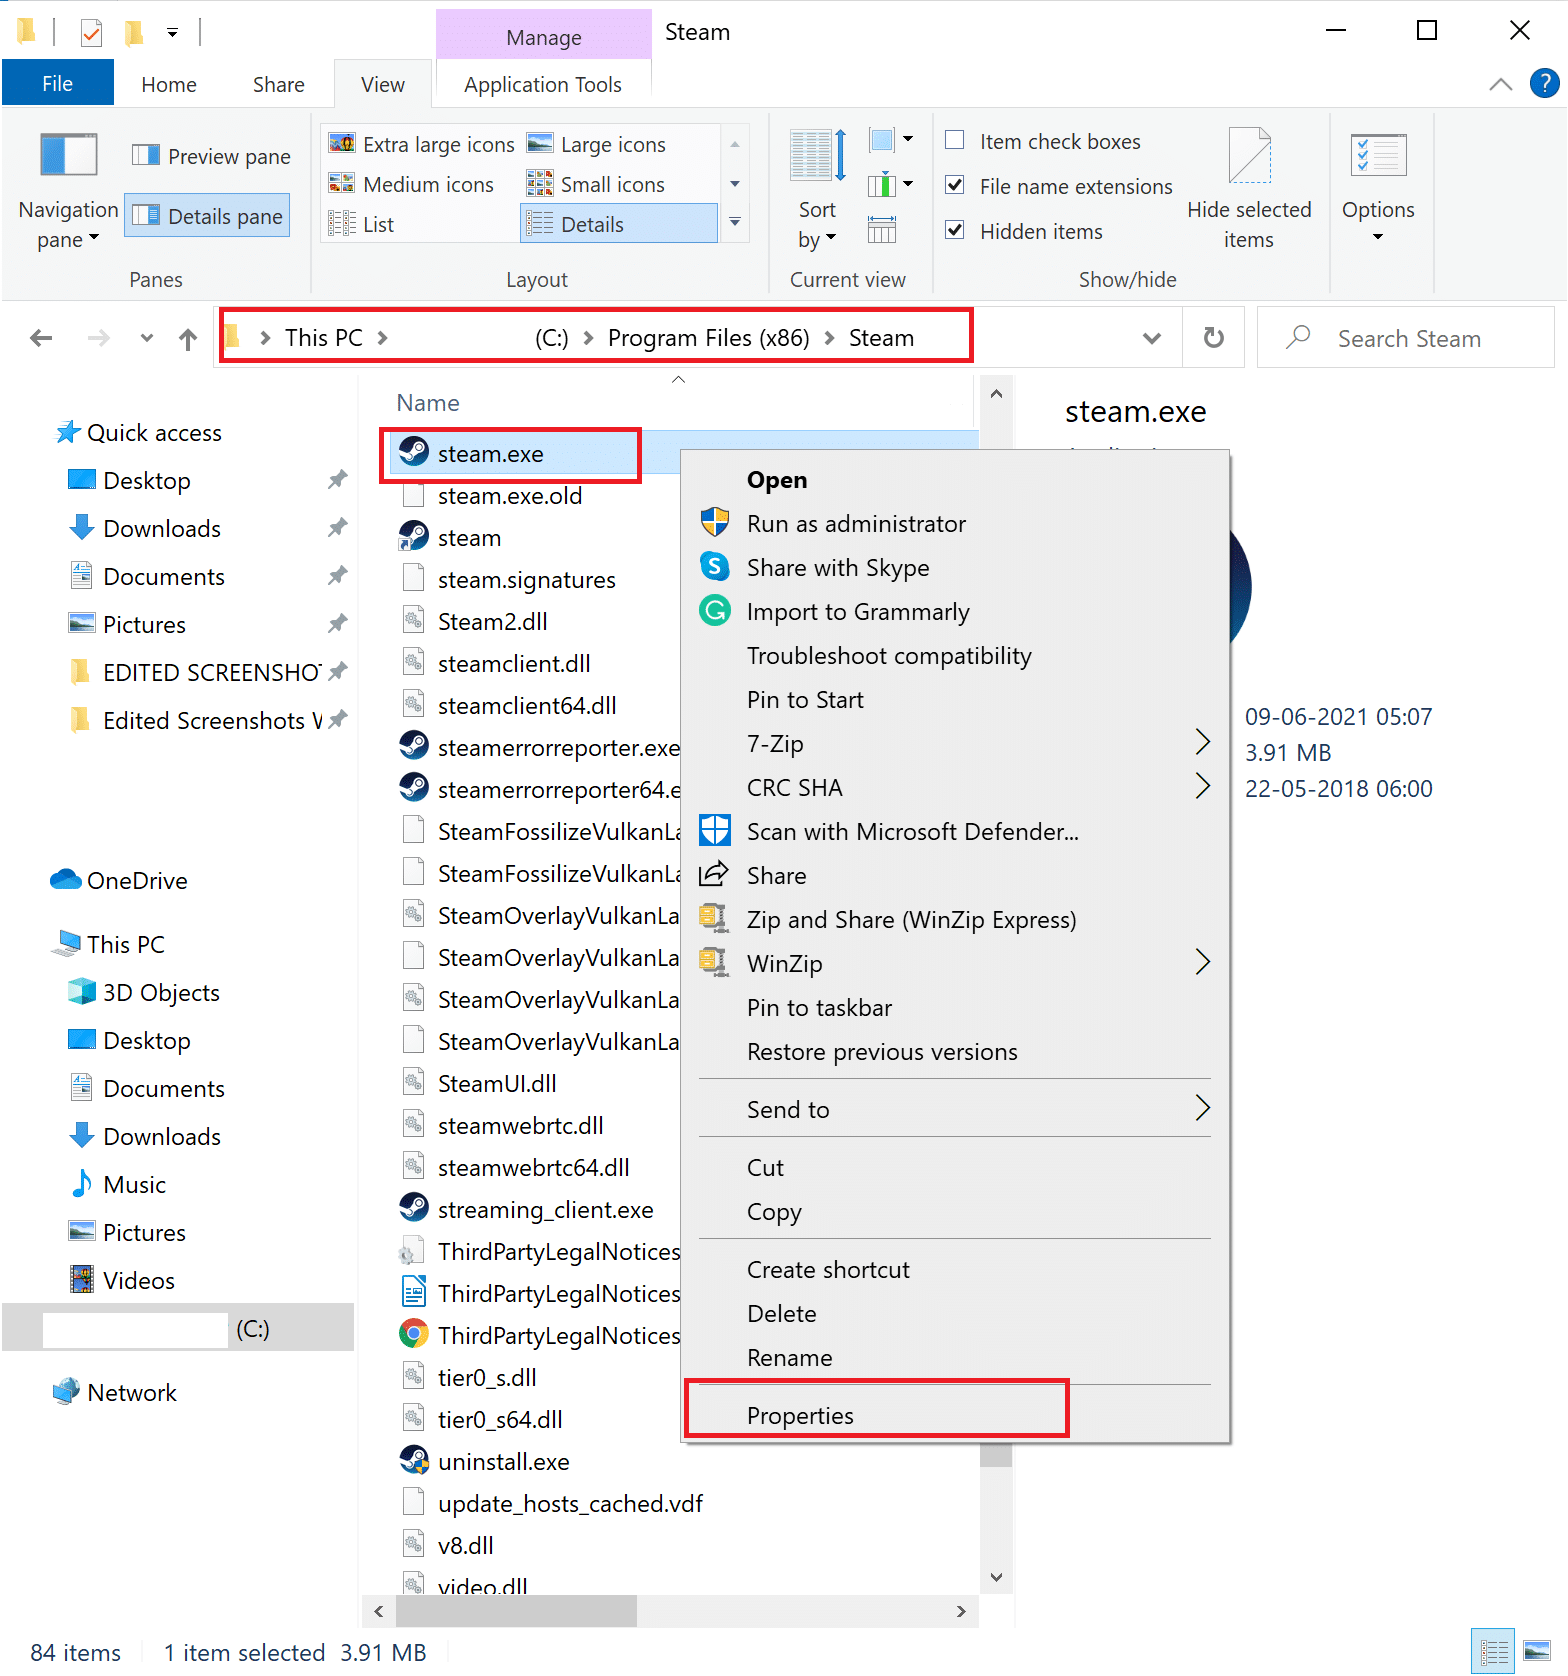
1. Launch File Explorer and go to C: > Program files (x86).
Nco ntsoov: If you have installed the game elsewhere, navigate to the appropriate directory.
2. qhib lub Destiny 2 folderCov. Txoj cai-nias rau ntawm .exe ntawv of the game and select Properties.
Nco ntsoov: Below is an example shown using Chav.
3. Tom ntej no, mus rau lub Security tab nyob hauv Properties window. Click on the option titled Kho kom raug neeg.
4. Ua kom paub tseeb tias Tag nrho kev tswj is enabled for all users, as depicted below.
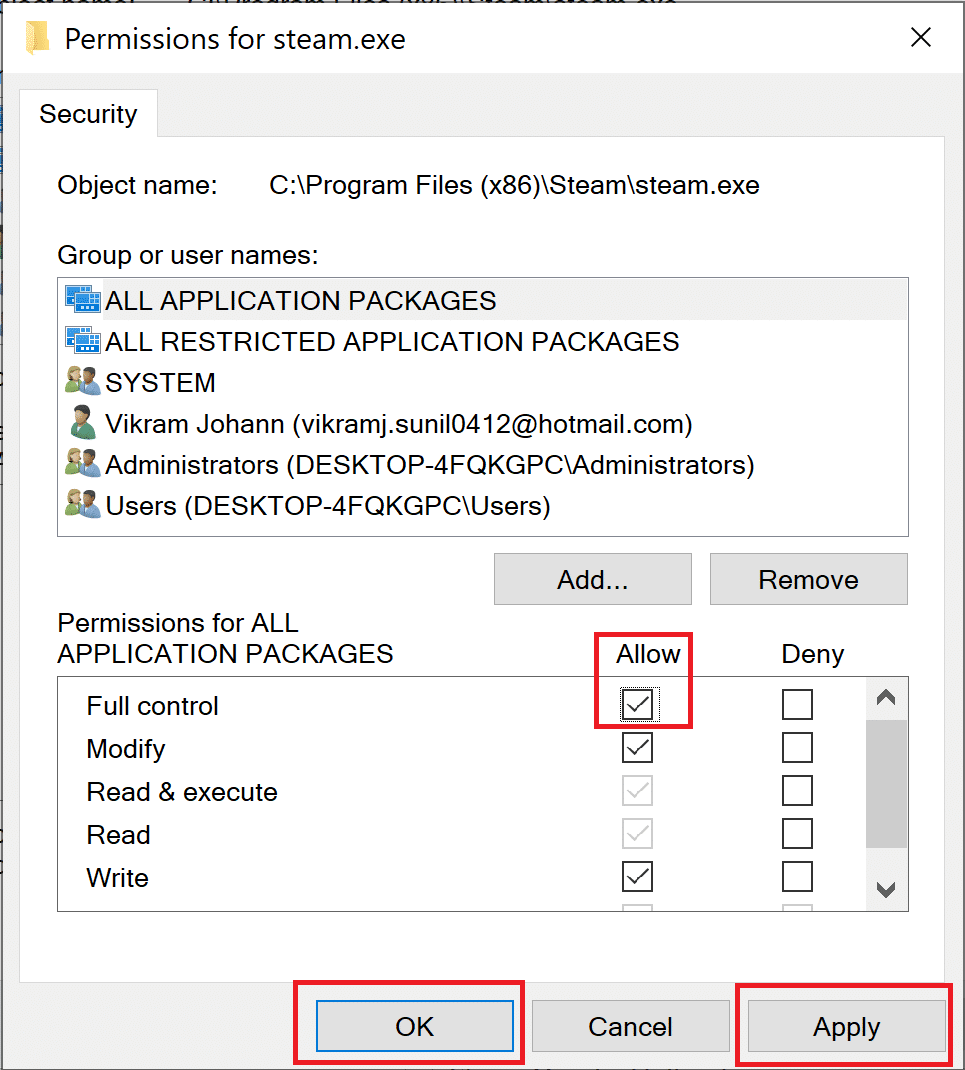
5. Nias rau Thov> OK to save changes as highlighted above.
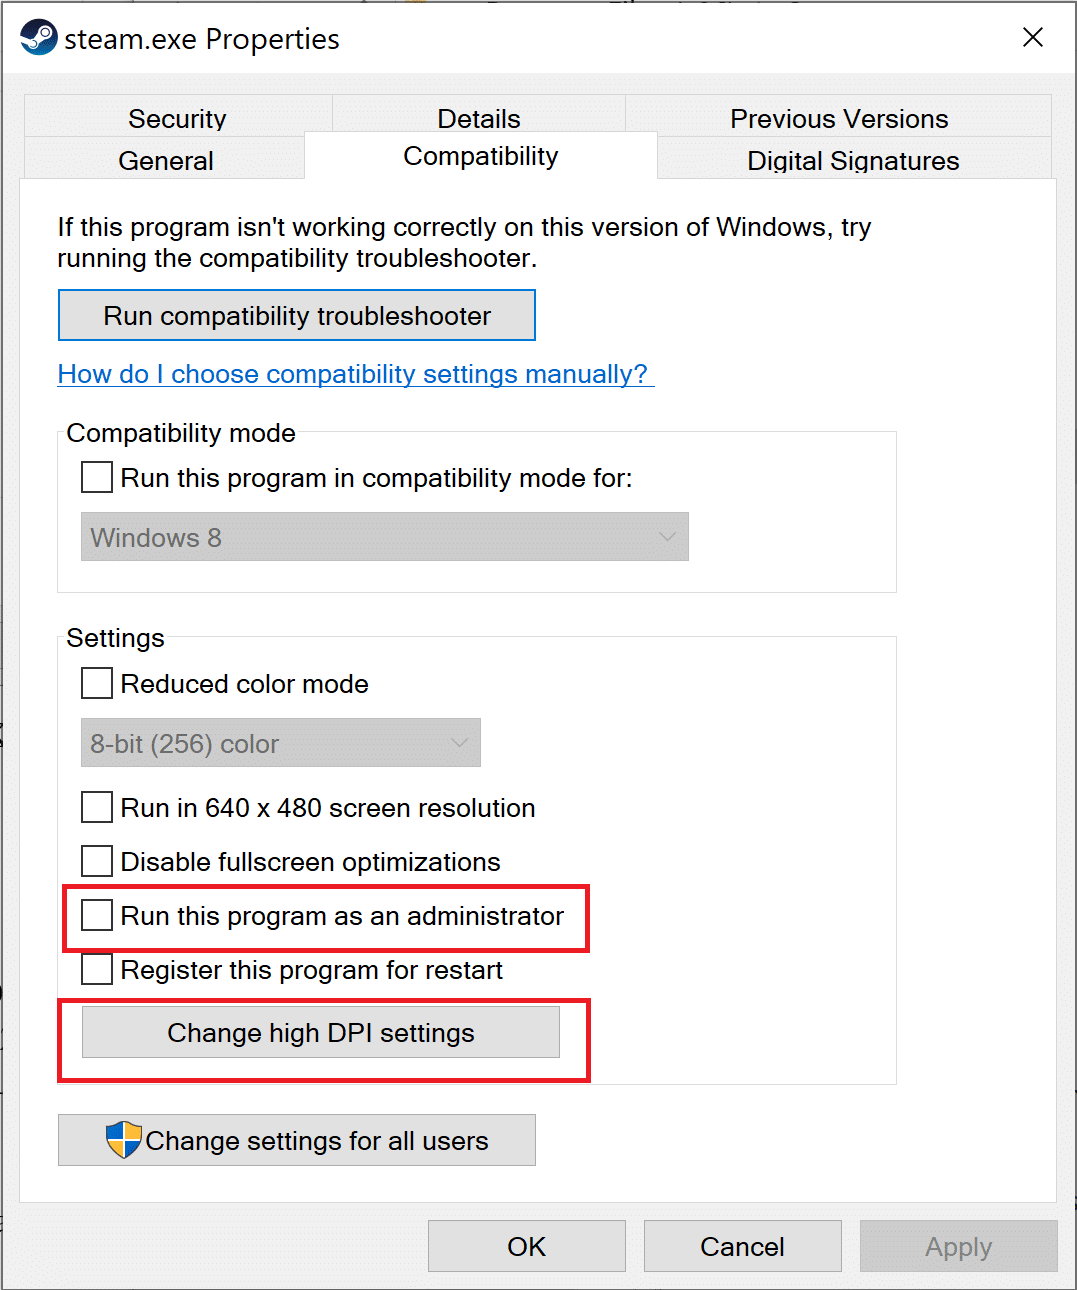
6. Tom ntej no, hloov mus rau lub compatibility tab and check the box next to the option titled Khiav txoj haujlwm no ua tus tswj hwm.
7. Ces, nyem rau Hloov siab DPI nqis raws li qhia highlighted.
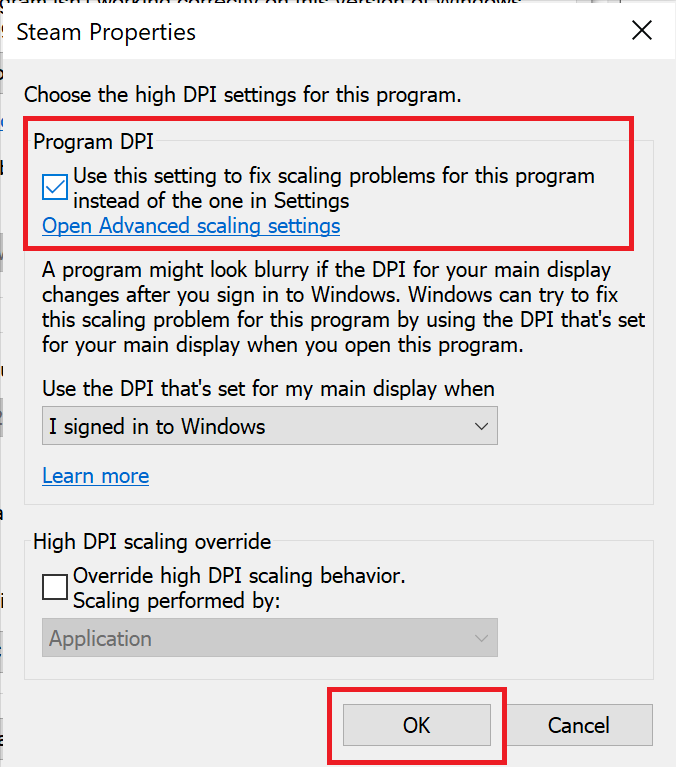
8. Here check the box under Program DPI. Nias rau OK kom txuag tau qhov chaw.
Method 9: Set Destiny 2 as High Priority
To ensure that the CPU resources are reserved for Destiny 2 gameplay, you need to set it as a high-priority task in Task Manager. When your PC prefers to utilize the CPU for Destiny 2, there are lesser chances that the game will crash. Follow these steps to prioritize Destiny 2 and in turn, fix Destiny 2 Error Code Broccoli on Windows 10:
1. Hom Task Manager in Windows nrhiav box. Launch it from the search result by clicking Qhib.

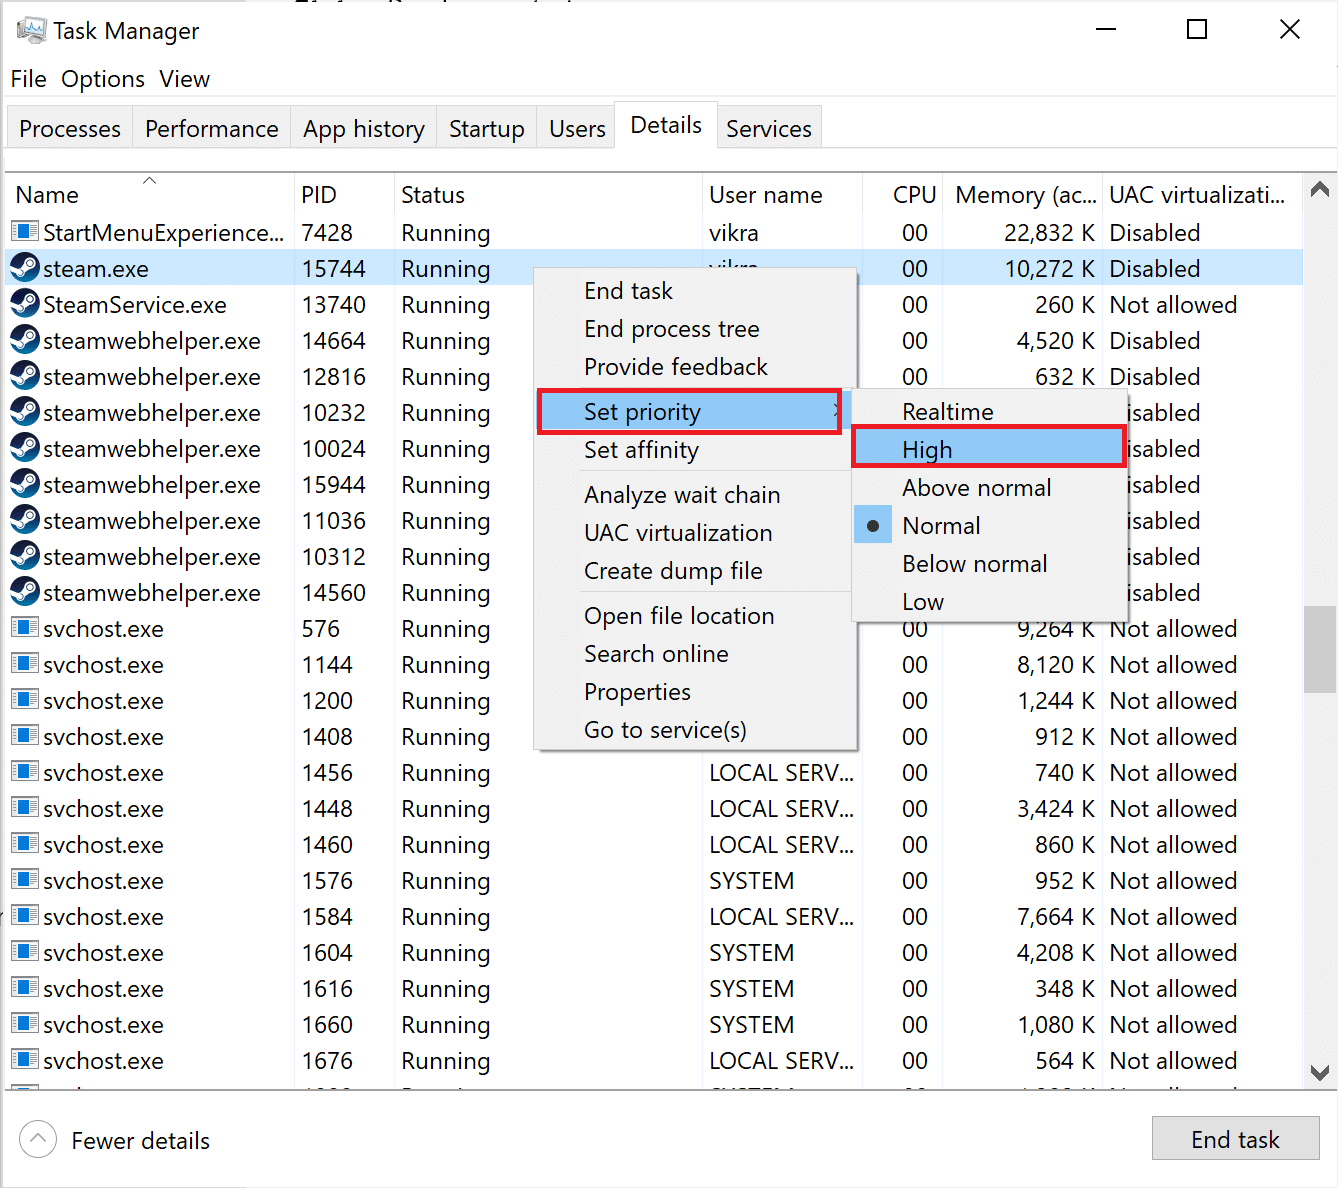
2. Mus rau Paub meej tab nyob hauv Task Manager qhov rais.
3. Txoj cai-nyem rau destiny 2 thiab nias rau Set priority > High, as explained in the given pic.
4. Repeat the same process for Battle.net, Chav, or any application that you use to launch Destiny 2.
Kuj nyeem: Yuav Ua Li Cas Hloov CPU Txheej Txheem Ua Ntej Hauv Windows 10
Method 10: Reinstall Destiny 2
There might be corrupt installation files or game files. To clean your system of corrupt game files, you need to reinstall the game, as follows:
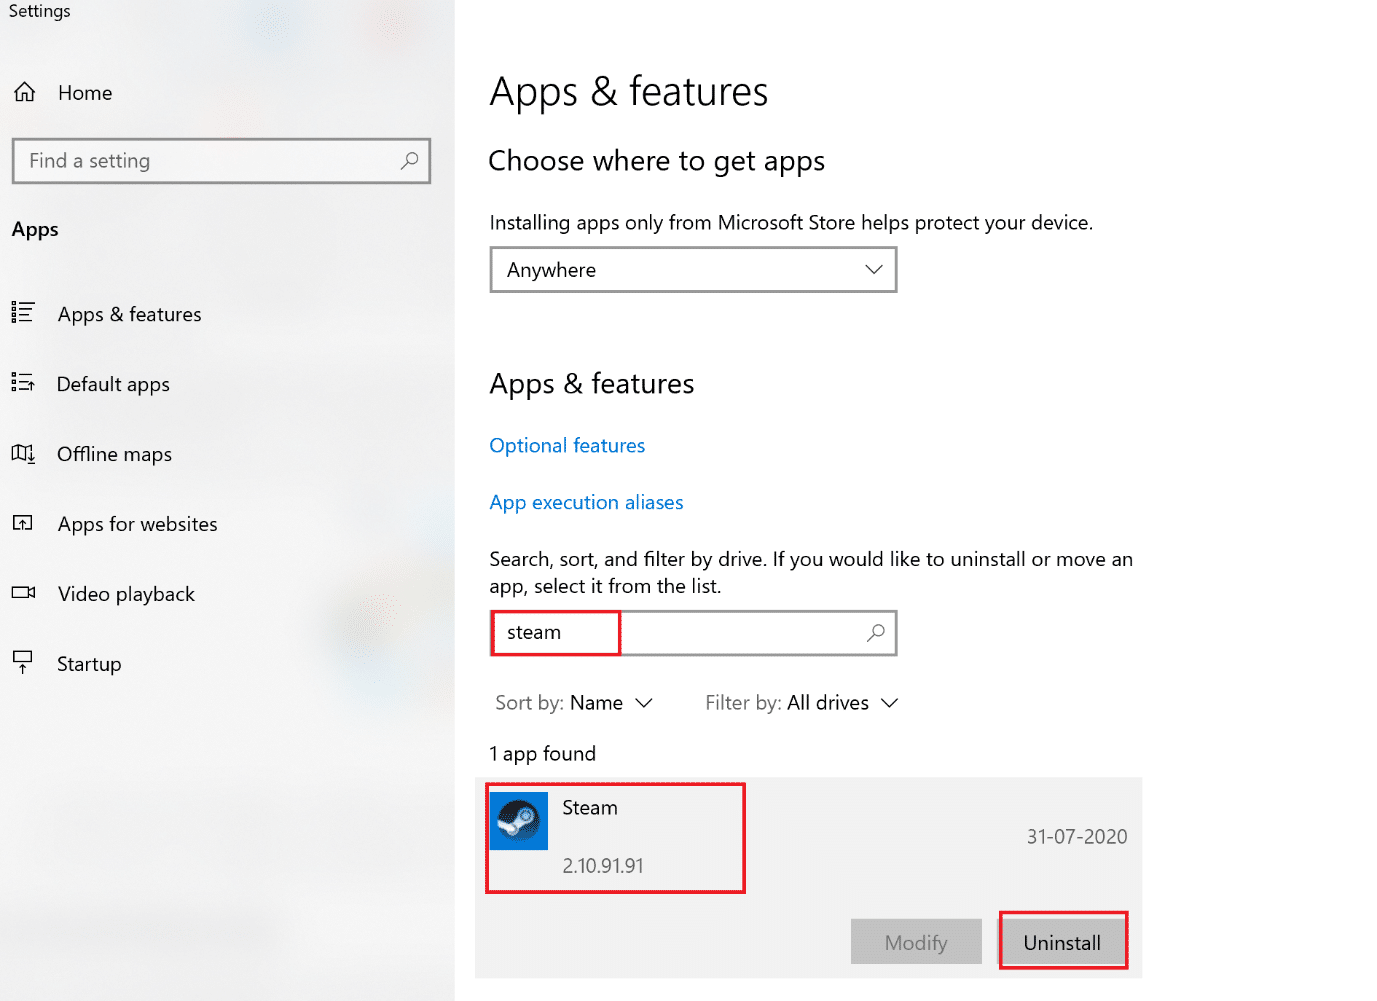
1. Tua tawm Ntxiv lossis tshem tawm cov haujlwm window as explained in Txoj kev 3 during Reinstallation of Graphics drivers.
2. Hom destiny 2 nyob rau hauv lub Nrhiav daim ntawv no text box, as shown.
3. Nias rau destiny 2 in the search result and select uninstall.
Nco ntsoov: Below is an example is given using Chav.
4. tos for the game to be uninstalled.
5. Tua tawm Chav or the application that you use to play games and reinstall Destiny 2.
Corrupt game files on your PC, if any, are now deleted and the Destiny 2 Broccoli error code rectified.
Txoj Kev 11: Khiav Qhov rai Diagnostic
In case, the said error still persists, there is a probability of hardware problems with your computer. To diagnose these problems, implement this method. The Windows Memory Diagnostic app will scan the hardware components of your computer to search for problems. For example, if the RAM on your PC is malfunctioning, the diagnostic app will give information about it so that you can get the RAM checked or replaced. Similarly, we shall run this tool to have problems diagnosed with system hardware that is affecting gameplay.
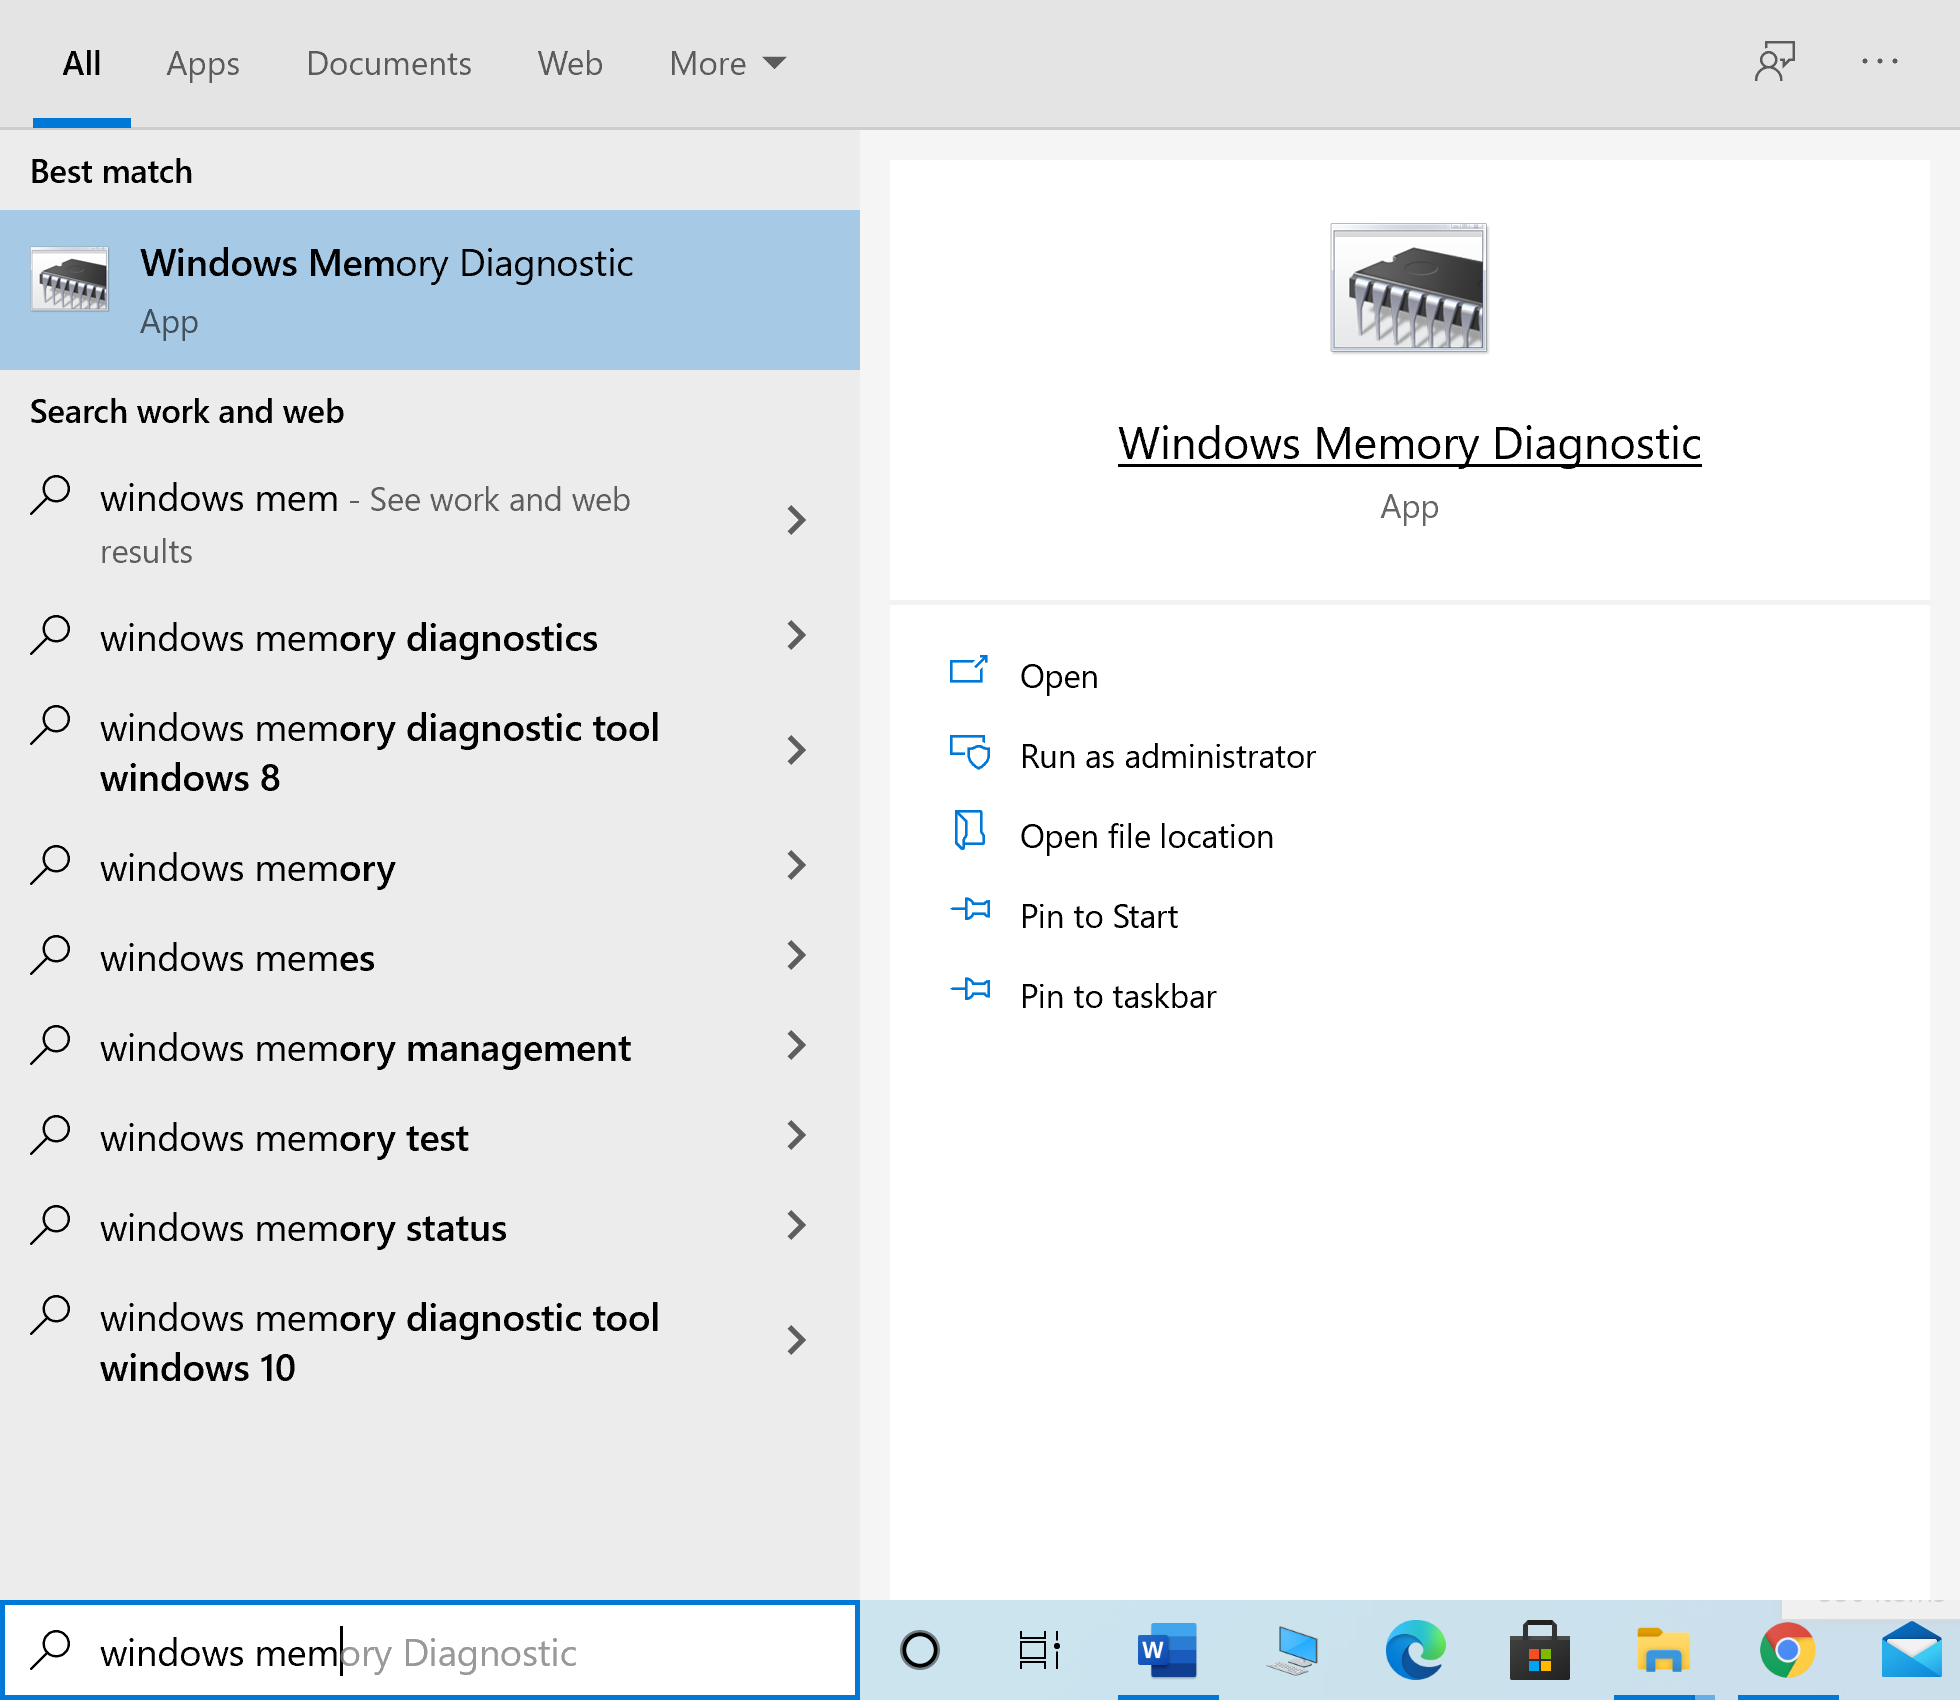
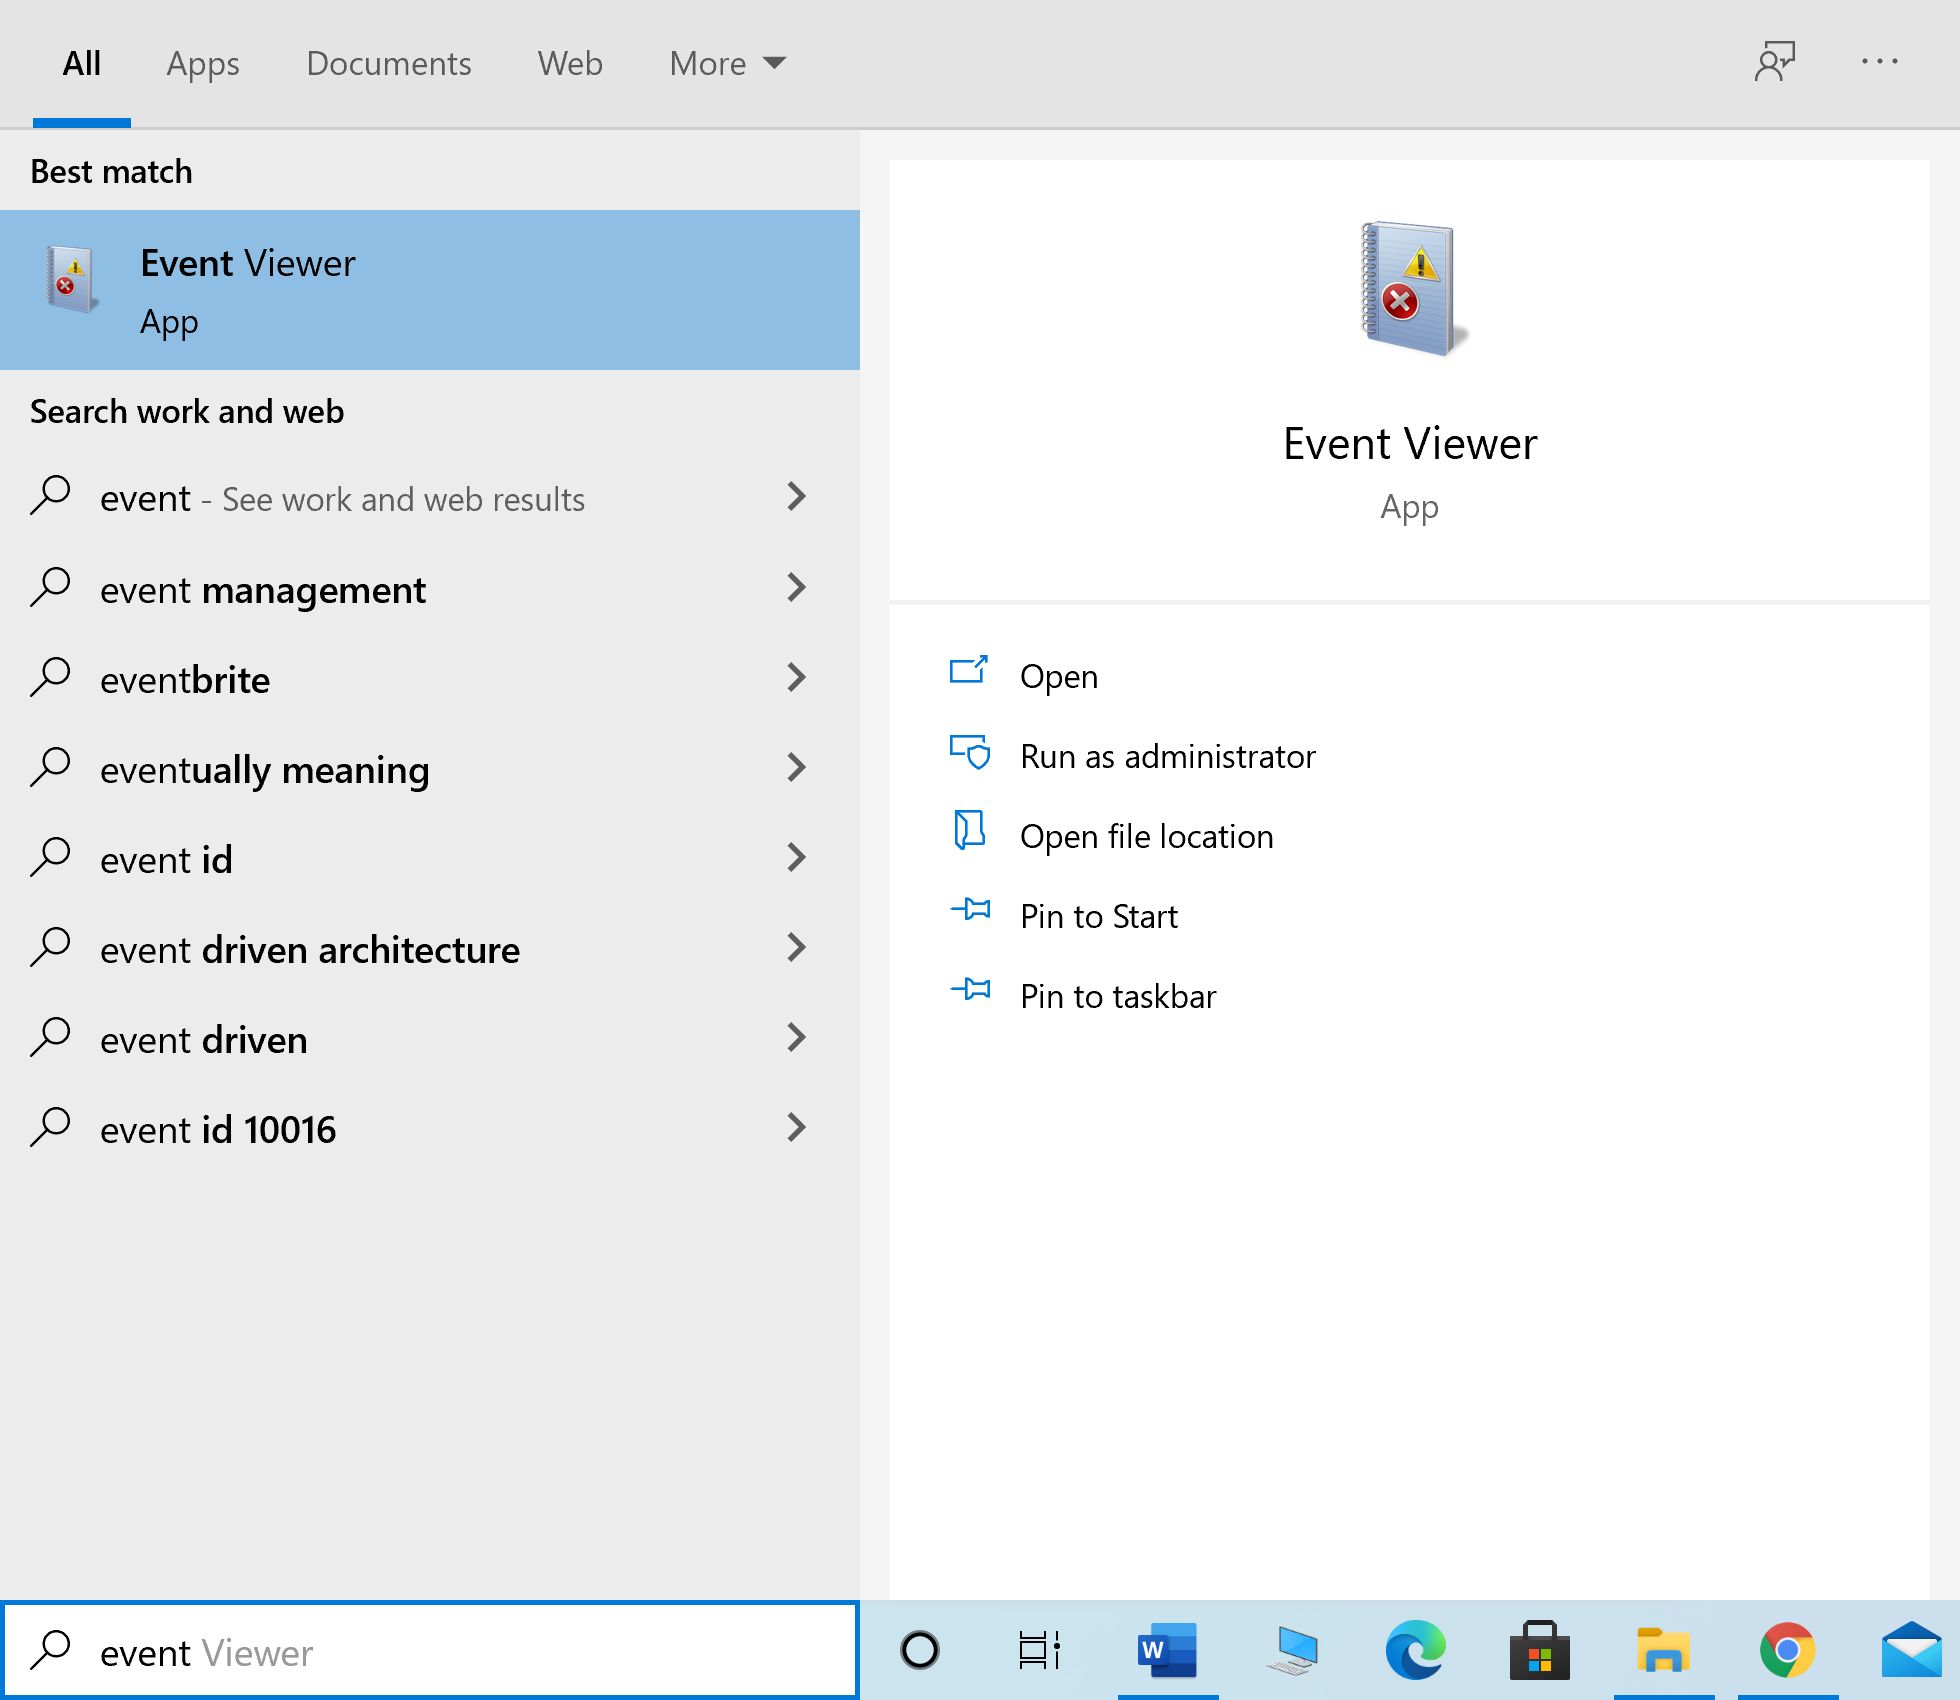
1. Hom Qhov rai Diagnostic nco nyob rau hauv lub Windows nrhiav box. Open it from here.
2. Nias rau Rov pib dua tam sim no thiab kuaj xyuas cov teeb meem (pom zoo) nyob rau hauv lub qhov rais qhib pop-up.
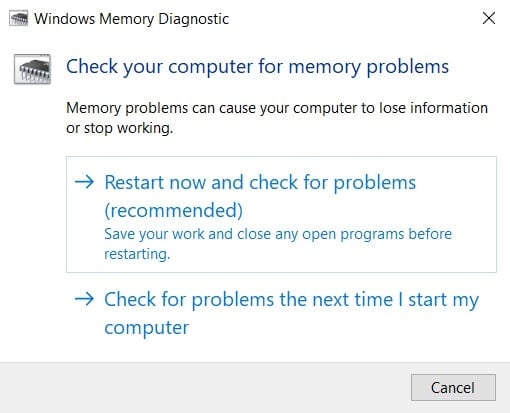
3. The computer will pib dua and begin the diagnostics.
Nco ntsoov: The process may take a while. Do not switch off the machine during the process.
4. The computer will Reboot thaum txoj kev ua tiav.
5. To view the diagnostic information, go to Tawm Ntoo, raws li qhia.
6. Nkag mus rau Qhov rai cav> Qhov System from the left pane of the Event Viewer window.
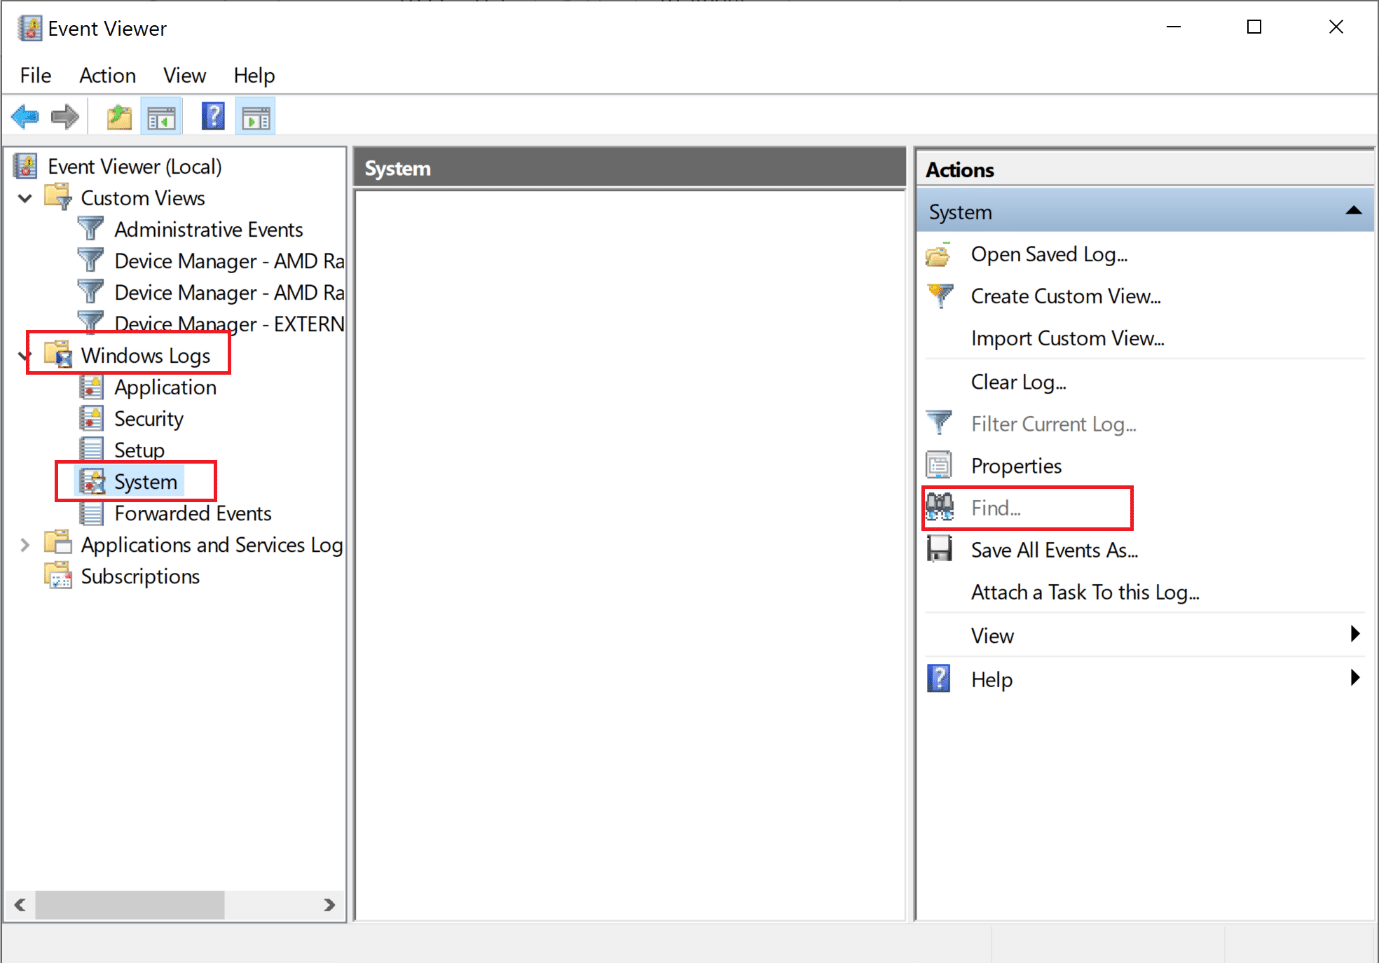
7. Nias rau nrhiav los ntawm lub kev nqis tes ua pane on the right-hand side.
8. Hom MemoryDiagnostic thiab xaiv Nrhiav Txuas Mus.
9. Check the Event Viewer window for information displayed about faulty kho vajtse, yog tias muaj.
10. If the hardware is found to be defective, get it checked or replaced by a technician.
pom zoo:
Peb cia siab tias phau ntawv qhia no yuav pab tau thiab koj tuaj yeem ua tau fix Destiny 2 error code Broccoli on your Windows 10 laptop/desktop. Do let us know which method worked the best for you. Also, if you have any questions or suggestions regarding this article, feel free to drop them in the comments section below.

