With an earlier version of Windows, users could only track their Wireless (Wi-Fi) or Ethernet Adapter data usage. Still, with the Windows 10 April 2018 Update version 1803, you can now set a data limit for Ethernet, Wi-Fi, and mobile networks. Although you could set Ethernet or Wi-Fi connections as metered, you couldn’t restrict the data usage by any of these networks.
This feature works best for those who use a limited data broadband plan; in such cases keeping track of your data usage becomes difficult, and this is where the new feature of Windows 10 comes into action. Once you reach your data limit, Windows will notify you regarding the same. You can also restrict the network’s background data usage, and once you reach within the 10% of the data limit, background data usage will be restricted. Anyway, without wasting any time, let’s see How to set Data Limit for WiFi and Ethernet in Windows 10 with the help of the below-listed tutorial.
How to set Data Limit for WiFi and Ethernet in Windows 10
Nco ntsoov tsim qhov taw tes rov qab tsuas yog thaum muaj qee yam yuam kev.
Method 1: Set Data Limit for WiFi and Ethernet in Windows 10 Settings
1. Nias Windows Key + I qhib chaw ces nias rau ntawm Network & Internet icon.

2. Now, from the left-hand menu, select Kev siv cov ntaub ntawv.
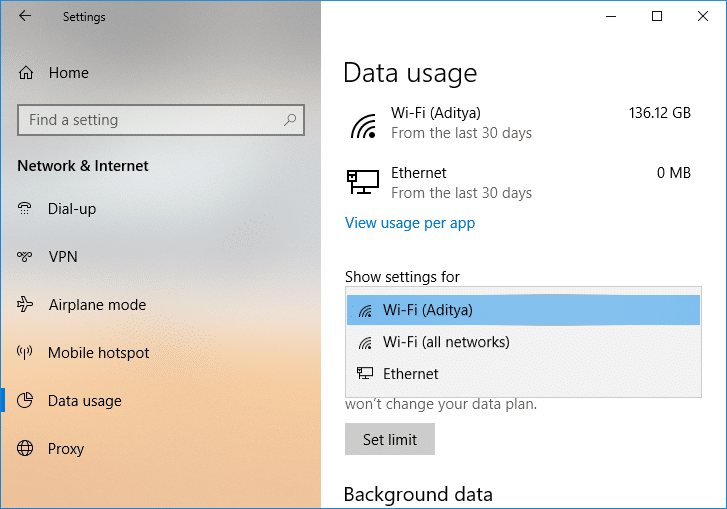
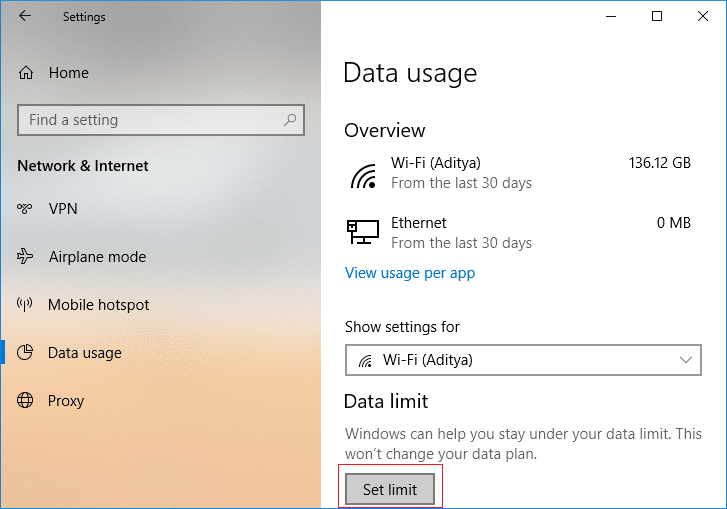
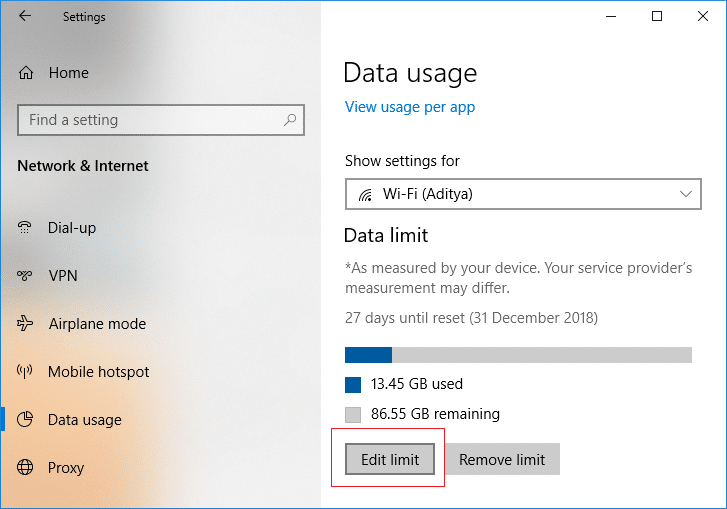
3. In the right-hand side window, from the “Show settings for” dropdown select the network connection you want to set a data limit for and then click on “Teem txwv"Khawm.
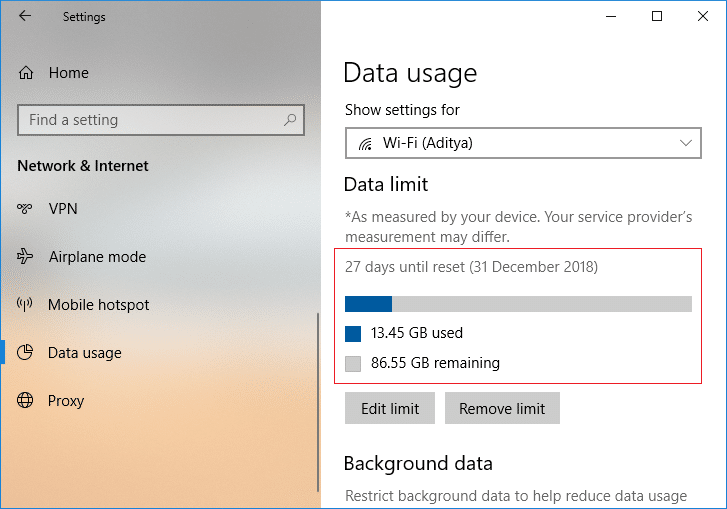
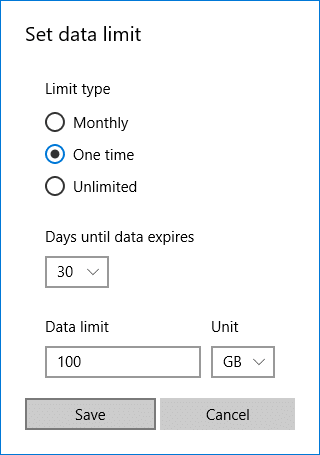
4. Ntxiv mus, specify the limit type, monthly reset date, data limit, etc. ces nias Tseg.

Nco ntsoov: Once you click Save, it will detail how much your data has been consumed till now as the data has already been tracked.
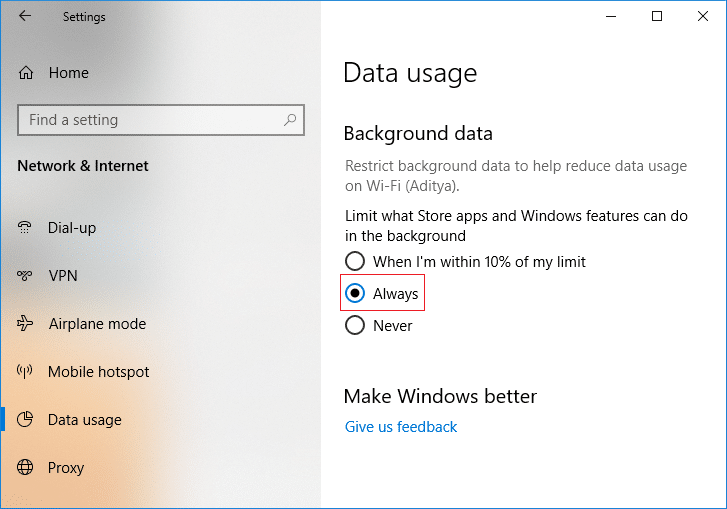
Method 2: Set Background Data Limit for WiFi and Ethernet in Windows 10 Settings
1. Nias Windows Key + I qhib chaw ces nias rau ntawm Network & Internet icon.
2. Now, from the left-hand menu, select Kev siv cov ntaub ntawv.
3. Ntxiv mus, select the network connection for which you want to set the data limit from the “Show settings for” drop-down then under Cov ntaub ntawv keeb kwm yav dhau either select “Yuav"Lossis"tsis txhob".
Method 3: Edit Data Limit for WiFi and Ethernet in Windows 10 Settings
1. Nias Windows Key + I qhib chaws then click on the Network & Internet icon.
2. Now, from the left-hand menu, select Kev siv cov ntaub ntawv.
3. In the right-hand side window, from the “Show settings for” dropdown select the network connection you want to edit the data limit for and then to click on “Kho kom raug txwv"Khawm.
4. Ib Zaug Ntxiv specify the data limit you want to set for this network connection and then click Save.
Method 4: Remove Data Limit for WiFi and Ethernet in Windows 10 Settings
1. Nias Windows Key + I qhib chaw ces nias rau ntawm Network & Internet icon.
2. Now, from the left-hand menu, select Kev siv cov ntaub ntawv.
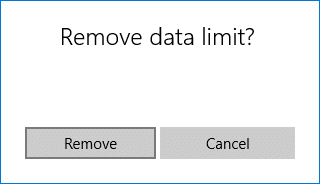
3. Ntxiv mus, select the network connection for which you want to remove the data limit from the “Show settings for” drop-down then click on “Tshem tawm cov kev txwv"Khawm.
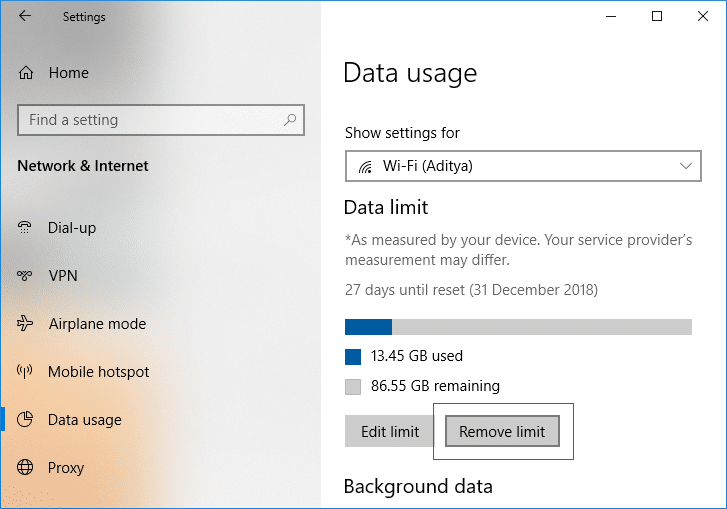
4. Again click on tshem tawm kom paub meej tias koj ua.
5. Once finished, you can close the Settings window.
pom zoo:
Qhov ntawd yog nws koj tau kawm tiav How to set Data Limit for WiFi and Ethernet in Windows 10 tab sis yog tias koj tseem muaj lus nug txog qhov kev tshaj tawm no ces xav nug lawv hauv cov lus ntu.
")
