If you’ve built up a large amount of data on your computer, you may not always have enough space to store everything. Sometimes you’ll need additional storage to hold the larger files or huab cia, but even those fill up fast.
With Windows 10 Storage Spaces, you can organize and consolidate all your files using a software-configured, RAID-like technology.
We’ll walk you through how to use the Storage Spaces feature on Windows 10 to create data backups.
What is Storage Spaces on Windows 10?
The Windows 10 Storage Spaces feature helps increase the amount of storage on your PC while protecting your data and storage from drive read errors or driver failures.
The feature is implemented in software similar to RAID, and can be used to group hard drives together into one virtual drive. It can also mirror data over several drives for redundancy.

From this pool, you can create Storage Spaces, which store extra copies of your data. This way, if one drive fails, you don’t lose all your data but still have intact copies available.
Plus, you can add more drives to the storage pool in case you run low on capacity in the pool of drives.
How Storage Spaces on Windows 10 Works
The Storage Spaces feature helps you combine multiple hard drives with duplicate mirrors of files into a single storage pool instead of spreading all your files across multiple drives. This way, you have one unified volume and add redundancy. If one drive fails, you can add another one and rebuild the storage without any cov ntaub ntawv tsis.
Storage Spaces works like RAID, except you don’t need another hardware RAID card because it’s performed entirely via software. It won’t perform as fast as a RAID card, but it’s easier and cheaper to implement if you’re using it for the first time.
Plus, Windows sees your Storage Spaces as any other hard drive – a unified volume with one drive letter and folders that work similar to any other folders. This means you can add your folders to libraries or share them with others on your network.
How to Create a Storage Space in Windows 10
To create a Storage Space in Windows 10, start by connecting the storage drives to your computer.
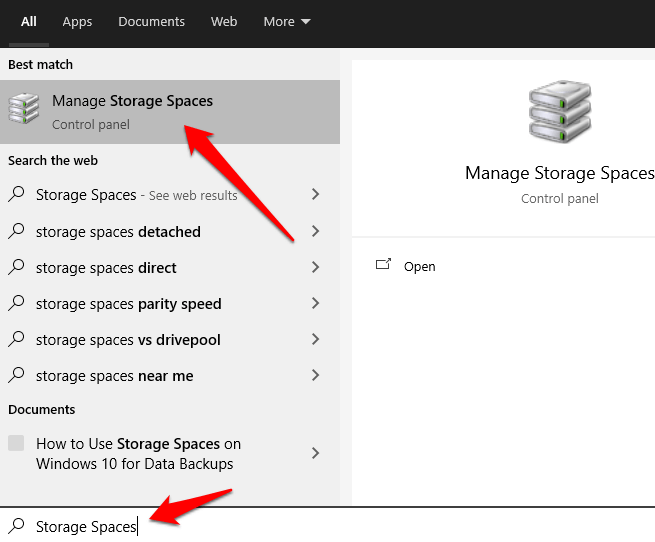
- Tom ntej, ntaus Cia Chaw Hauv kem tshawb nrhiav, thiab xaiv Tswj qhov chaw cia los ntawm kev tshawb nrhiav.
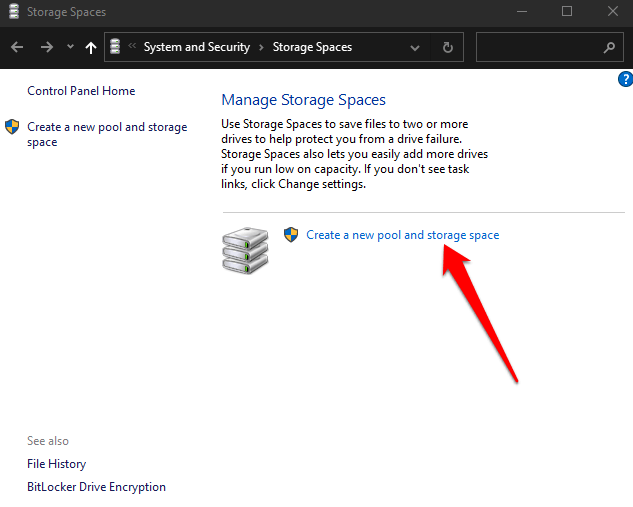
- xaiv Tsim ib lub pas dej tshiab thiab chaw cia khoom.
Ceeb toom: You can use an internal or lwm nyuab tsav los yog ib tug cov khoom hauv lub xeev (SSD) to create Storage Spaces in addition to the drive where Windows 10 is installed. Other drive formats you can use include USB, ATA, SATA, and SAS drives. However, you can’t use a daim credit card microSD to create Storage Spaces.
- Ntxiv mus, xaiv qhov drives you want to add, and then select Tsim lub pas dej.

- lub npe the drive(s) and assign a Daim ntawv.
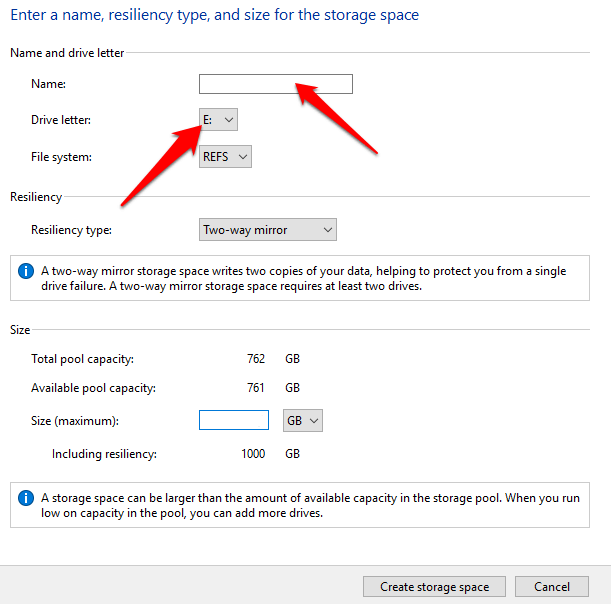
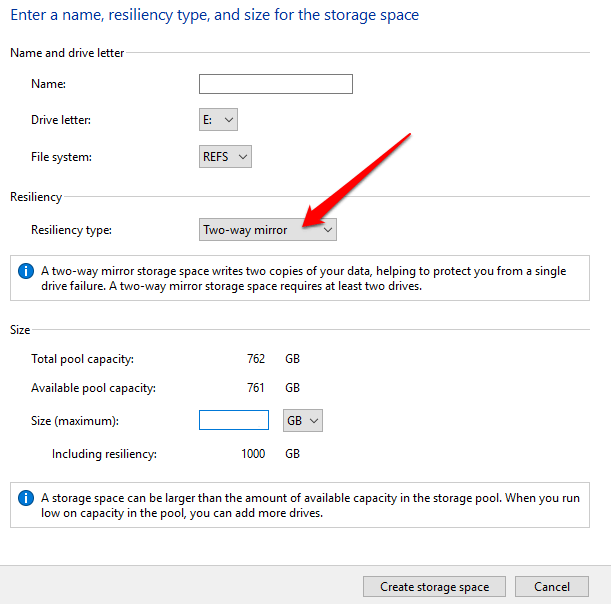
- Xaiv ib resiliency type. You can pick from three different layouts: Simple, Mirror, or Parity.
- cov Simple spaces layout requires at least two drives and are designed for increased performance. Simple spaces are ideal for temporary data so they’re not recommended for protecting your data los ntawm driver error or failure.
- Mirror spaces layout is also designed for storing a wide range of data and for increased performance. Unlike Simple spaces, you can use Mirror spaces to protect your data from drive failure. This layout holds multiple copies of your data and is classified into ob txoj kev or peb-txoj kev mirror spaces.
Thooj ob makes two copies of your data, requires at least two drives to function, and can handle a single drive failure, while three-way makes three copies of your data, requires at least five drives to function, and can handle two drive failures.
- Unlike simple and mirror spaces, which are designed for increased performance, the Parity spaces are designed for storage efficiency. Not only that, but parity spaces keep multiple copies of your data and protect the data from driver failure. Plus, it works best for media files and archival data, and needs three or more drives to protect you from single drive failure and seven or more to protect from two drive failures.
Ceeb toom: Once you set the resiliency or file system, you can’t change it. You can rename a pool or space, add more drives and upgrade the storage space on-demand. Plus, for your drive to be available in Storage Spaces, it has to be around 5GB of size.
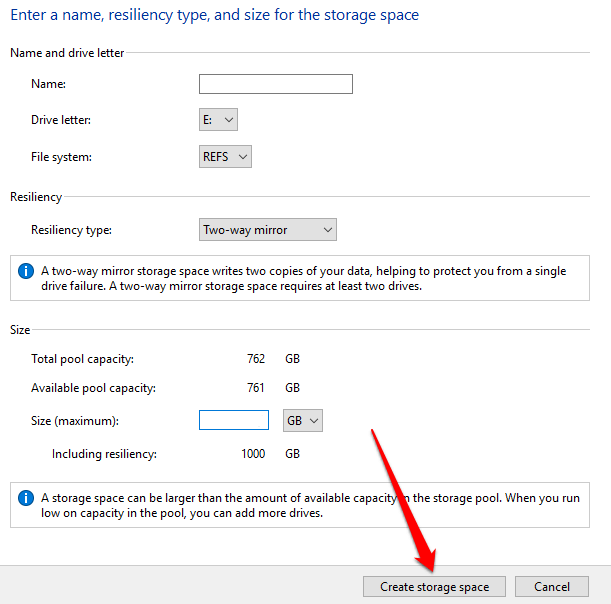
- xaiv Tsim Chaw Cia.
Ceeb toom: Whenever you add new drives to a Storage Spaces pool, optimize the drive usage to move some of the data to the new drive. This way, you’ll make optimum use of the pool’s overall storage capacity. If you add a drive before upgrading a pool, you’ll need to optimize your drive usage manually.
How to Add a Drive to Storage Spaces
Now that you have your Storage Spaces, you can use your PC normally. However, if you run low on space again, you can easily add more storage to the storage pool.
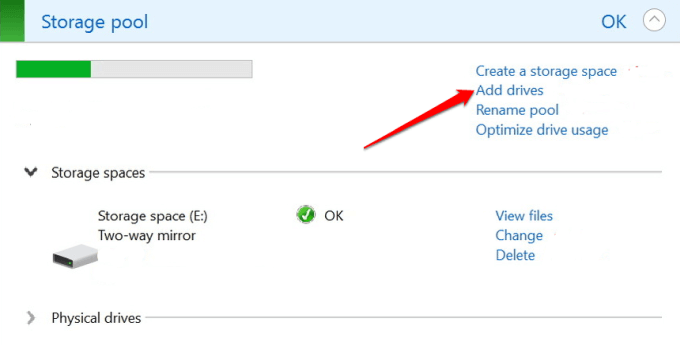
- Txhawm rau ua qhov no, mus rau lub vev xaib Tswj qhov chaw cia nplooj thiab xaiv Pauv Cov Chaw.
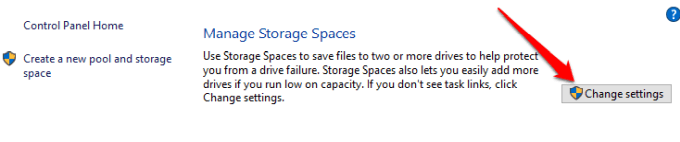
- xaiv lub Ntxiv Drives button next to your current storage pool.
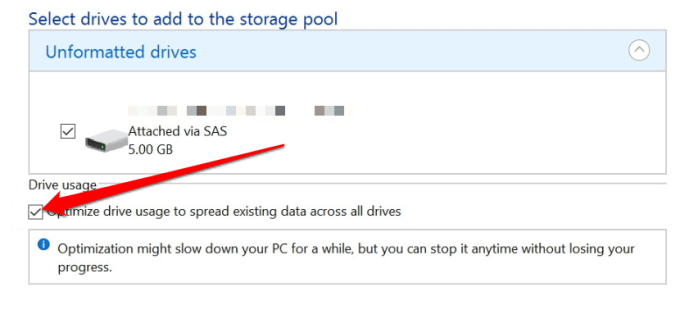
- Backup your drive and then select it, otherwise it’ll be erased and you’d lose data. Check the Optimize Drive Usage box so that some data moves to the new drive.
- xaiv Ntxiv Drives.
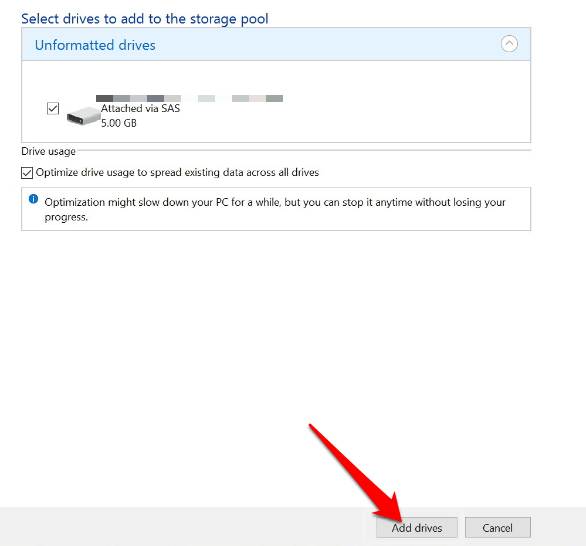
Windows will finish moving your data and you’ll have a much larger pool of drives.
How to Disconnect a Drive From a Storage Space
Once you configure a Storage Space, you can remove a drive that’s in use from a pool. If you just yank the drive out, you could lose your data and cause other issues, but there are steps to do this by moving the data on the drive to other drives in the storage pool and then removing the drive from your PC.
- To disconnect a drive from a pool, open Cia Chaw thiab xaiv Physical drives to expand the section. Select Prepare for removal.
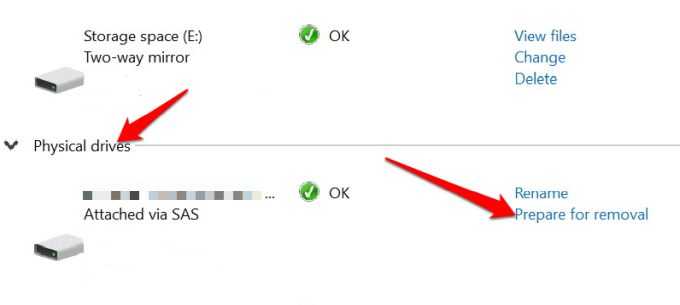
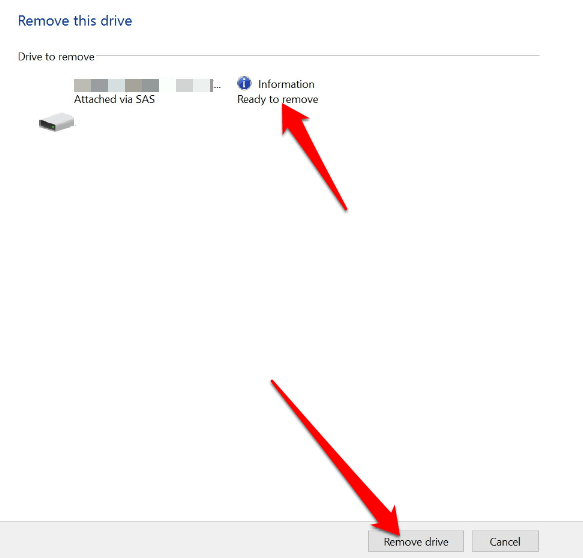
- Find the drive you want to remove and select tshem tawm.

- Tom ntej, xaiv Remove drive to complete the removal process.
Ceeb toom: Once you disconnect the drive, you won’t be able to access it in File Explorer. To do so, you’ll need to right-click Start > Disk Management and find the drive labelled Unallocated. Right-click the drive, select Phau Ntawv Tshiab Tshiab and follow the steps to reformat the drive in the Disk Management utility.
How to Delete a Windows 10 Storage Space or Storage Pool
If you don’t need the storage space anymore, you can delete it using these steps.
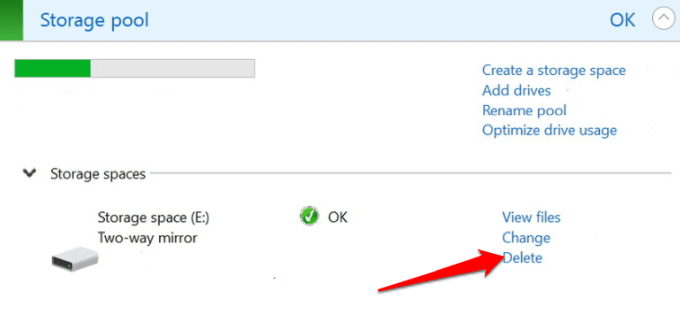
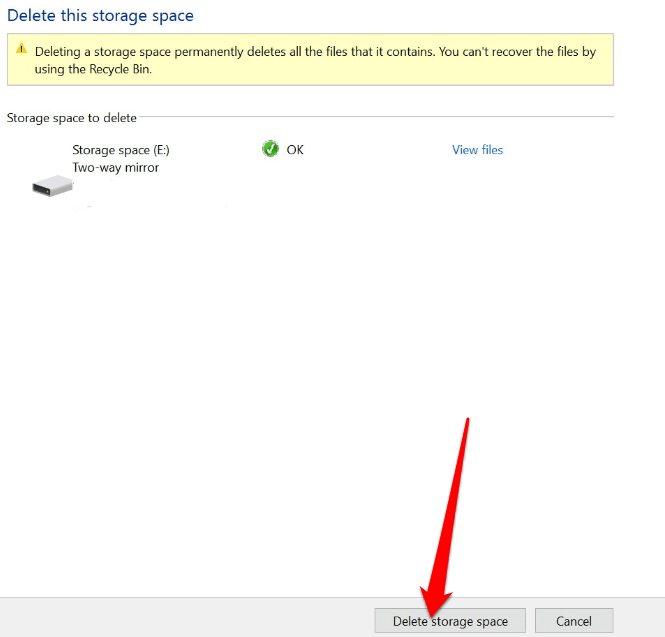
- Qhib Cia Chaw, find the space you don’t need and select Rho tawm. If you hadn’t made a backup of the data in that space, you’ll lose it all since deleting a space permanently deletes all the data it contains.
- Tom ntej, xaiv Delete storage space.
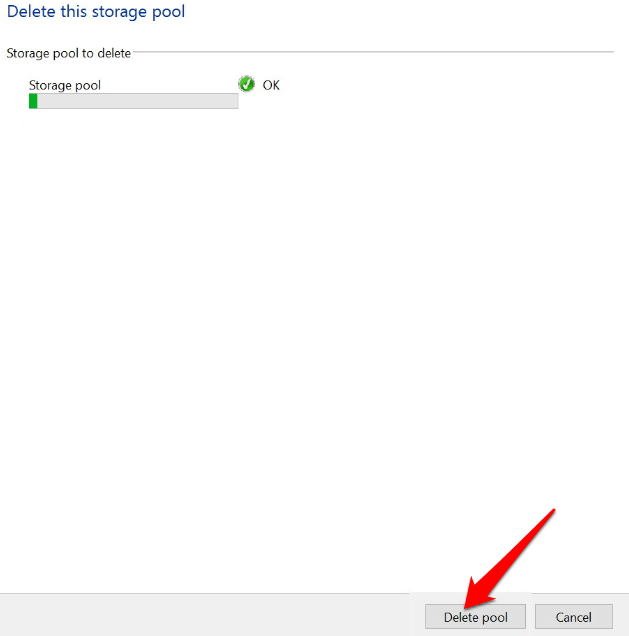
- To delete a storage pool, open Cia Chaw, find the pool you want to remove and select Delete pool.
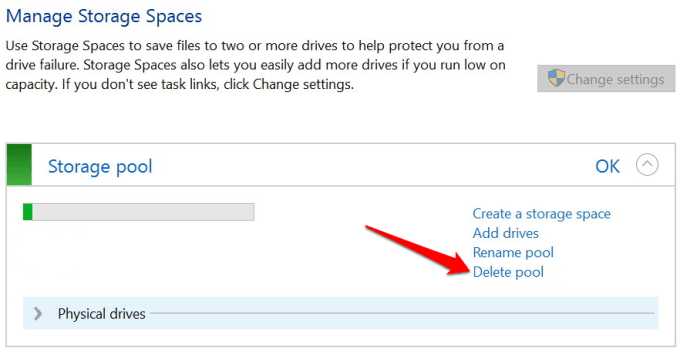
- xaiv Delete pool to complete the deletion process.
Ceeb toom: You can’t delete a pool that contains a storage space. To do this, remove all the storage spaces within the pool first, and then delete the pool. Once you delete a storage pool, the drive in use will be restored to your PC, and you can reformat it via Disk Management.
Add More Storage to Your PC
Creating and using Storage Spaces in Windows 10 may seem a bit confusing, but with the steps above, you should be able to do it by yourself.
Share with us your experience creating and using Windows 10 Storage Spaces by leaving a comment below.
")
