Deployment Image Servicing and Management (DISM) is a command-line tool which can be used to service and repair Windows Image. DISM can be used to service a Windows image (.wim) or a virtual hard disk (.vhd or .vhdx). The following DISM command is most commonly used:
DISM / Online / Cleanup-Image / RestoreHealth
A few users are reporting that they are facing the DISM error 0x800f081f after running the above command and the error message is:
Error 0x800f081f, The source files could be found. Use the “Source” option to specify the location of the files that are required to restore the feature.
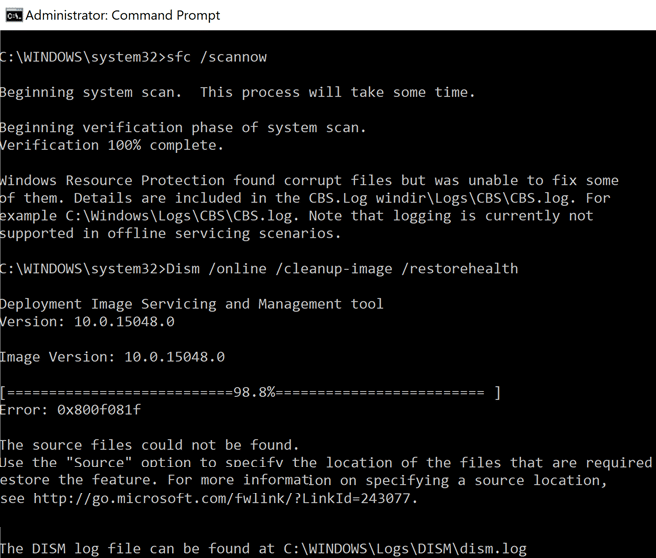
The above error message clearly states that the DISM could not repair your computer because the file required to fix the Windows Image is missing from the source. So without wasting any time let’s see how to Fix DISM Error 0x800f081f in Windows 10 with the help of the below-listed guide.
Javítsa ki a 0x800f081f DISM hibát a Windows 10 rendszerben
Method 1: Run DISM Cleanup Command
1. Nyissa meg a Parancssort. A felhasználó ezt a lépést a következő kereséssel hajthatja végre „cmd” Majd nyomja meg az Enter billentyűt.

2. Írja be a következő parancsot a cmd-be, és nyomja meg az Enter billentyűt:
dism.exe / online / Cleanup-Image / StartComponentCleanup
sfc / scannow

3.Once the above commands are finished processing, type DISM command into cmd and hit Enter:
Dism /Online /Cleanup-Image /restoreHealth

4. See if you’re able to Javítsa ki a 0x800f081f DISM hibát a Windows 10 rendszerben, ha nem, folytassa a következő módszerrel.
Method 2: Specify the Correct DISM Source
1. Download Windows 10 Image using Windows Media Creation Tool.
2. Kattintson duplán a MediaCreationTool.exe file to launch the application.
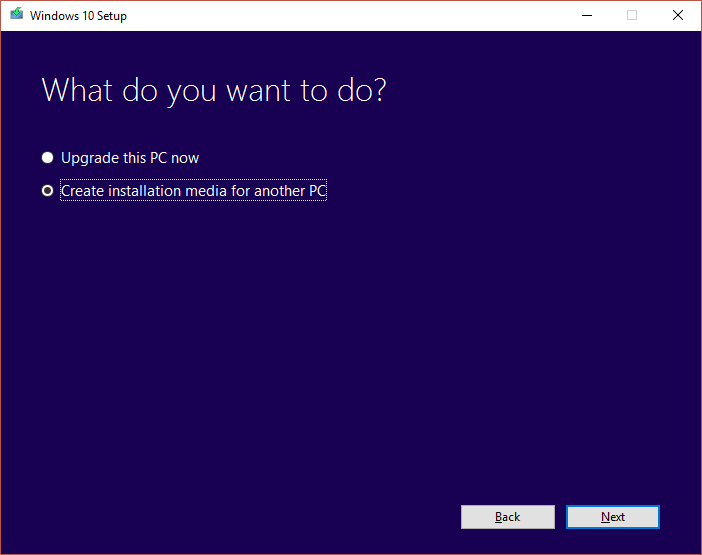
3. Accept License terms then select “Hozzon létre telepítési adathordozót egy másik számítógéphez”És kattintson a Tovább gombra.
4. Now the language, edition, and architecture will automatically be selected according to your PC configuration but if you still want to set them yourself uncheck the option at the bottom saying “Használja a számítógéphez javasolt lehetőségeket. "

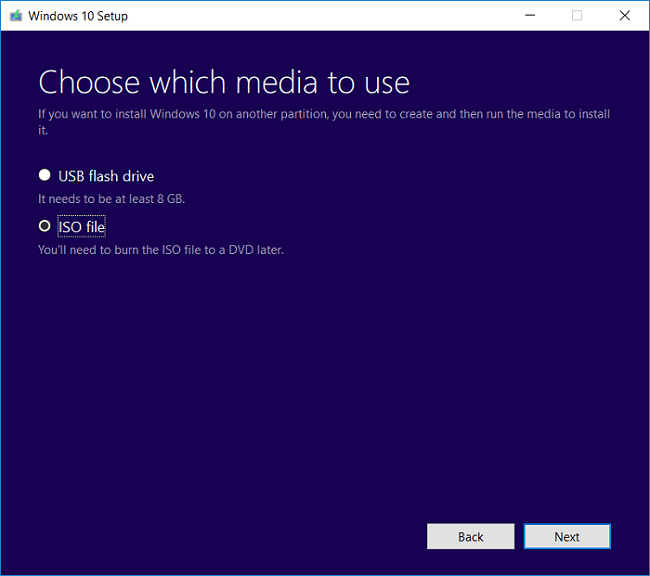
5. On "Válassza ki a használni kívánt médiát”Képernyő kiválasztása ISO fájlt és kattintson a Tovább gombra.
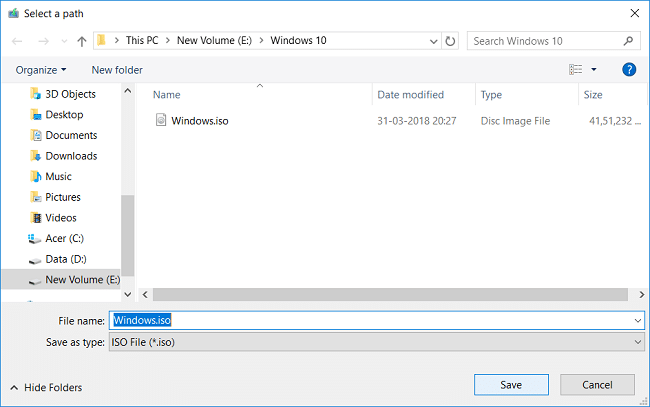
6. Specify the download location és kattintson Mentése.
7. Once the ISO file is download, right-click on it and select Hegy.
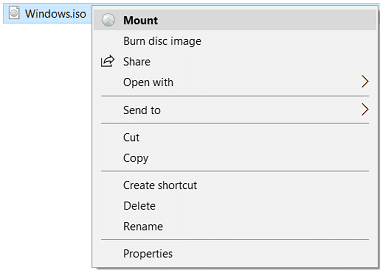
Jegyzet: Meg kell download Virtual Clone Drive or Daemon tools to mount ISO files.
8. Open the mounted Windows ISO file from File Explorer and then navigate to sources folder.
9. Kattintson a jobb gombbal a gombra install.esd file under sources folder then select copy and paste it to C: drive.

10. Nyomja meg a Windows Key + X billentyűkombinációt, majd válassza a lehetőséget Parancssor (Admin).
11. típus cd and hit Enter to go to the root folder of C: drive.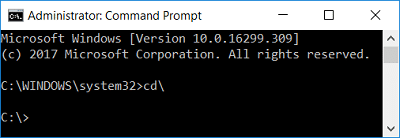
12. Now type the following command into cmd hit Enter:
dism /Get-WimInfo /WimFile:install.esd
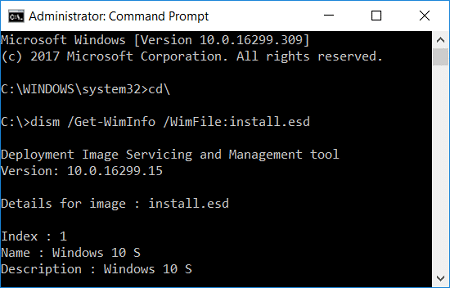
13. A list of Indexes will be displayed, according to your version of Windows note down the index number. For example, if you have Windows 10 Education edition, then the index number will be 6.
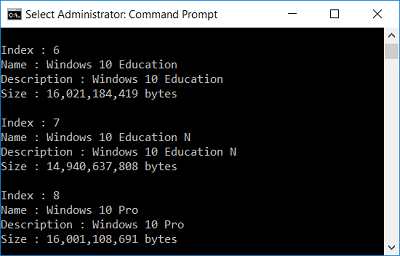
14. Again type the following command into cmd and hit Enter:
dism /export-image /SourceImageFile:install.esd /SourceIndex:IndexNumber /DestinationImageFile:install.wim /Compress:max /CheckIntegrity
Fontos: Cseréljük ki a IndexNumber according to your Windows 10 installed version.
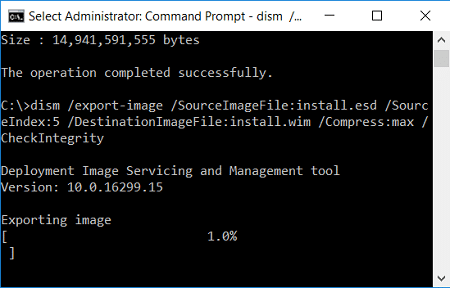
15. In the example which we took on step 13, the command will be:
dism /export-image /SourceImageFile:install.esd /SourceIndex:5 /DestinationImageFile:install.wim /Compress:max /CheckIntegrity
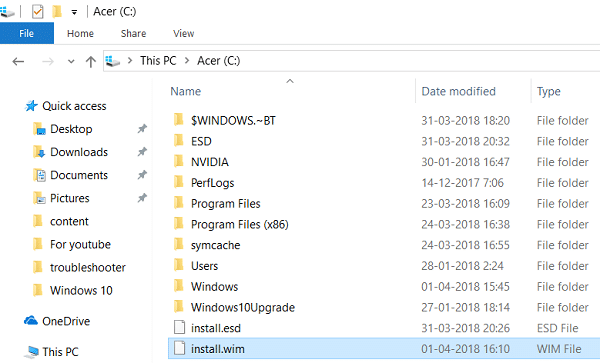
16. Once the above command finished execution, you will find the install.wim file created on the C: drive.
17. Again open the Command Prompt with admin rights then type the following command one by one and hit Enter after:
DISM / Online / Tisztítás kép / StartComponentCleanup
DISM /Online /Cleanup-Image /AnalyzeComponentStore

18. Now type the DISM /RestoreHealth command with the Source Windows file:
DISM /Online /Cleanup-Image /RestoreHealth /Source:WIM:c:install.wim:1 /LimitAccess

19. After that run System File Checker to complete the repair process:
Sfc / Scannow
Ajánlott:
Ez az, ami sikeresen megvan Javítsa ki a 0x800f081f DISM hibát a Windows 10 rendszerben de ha még mindig van kérdésed ezzel a bejegyzéssel kapcsolatban, akkor nyugodtan tedd fel őket a megjegyzés rovatban.

