Change Default OS in Dual-Boot Setup: The boot menu comes whenever you start your computer. If you have multiple operating systems on your computer then you need to choose an operating system when the computer starts. Anyways if you do not choose an OS, the system will start with the default operating system. But, you can easily change the default OS in dual-boot setup for your system.
Basically, you need to change the default OS when you have installed or update your Windows. Because whenever you update the OS, that operating system will become the default operating system. In this article, we will learn how to change the boot order of the operating system through different methods.
Ինչպես փոխել կանխադրված OS-ը Dual-Boot Setup-ում
Նշում: Համոզվեք, որ ստեղծեք վերականգնման կետ, եթե ինչ-որ բան սխալ լինի:
Method 1: Change Default OS in System Configuration
The most basic way to change the Boot order through the system configuration. There are very few steps you need to follow to do the changes.
1.First, open the run window through the shortcut key “Windows + R- ը”. Now, type the command “msconfig” & hit Enter to open the system configuration window.

2.This will open the System configuration window from where you need to switch to the Boot ներդիր:
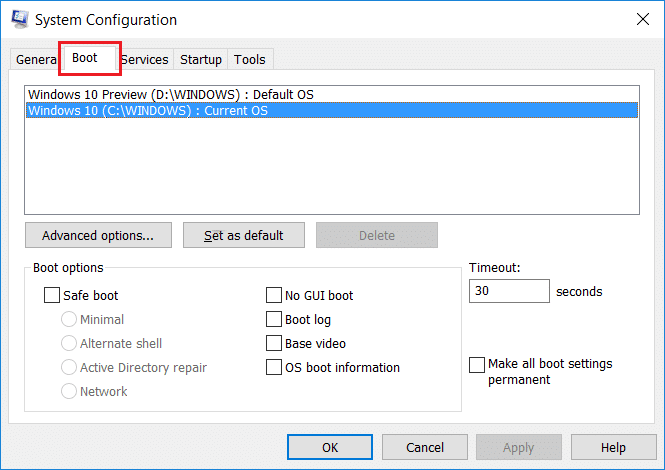
3.Now select the Operating System which you want to set as default then click on the “Սահմանել որպես լռելյայն» կոճակը:
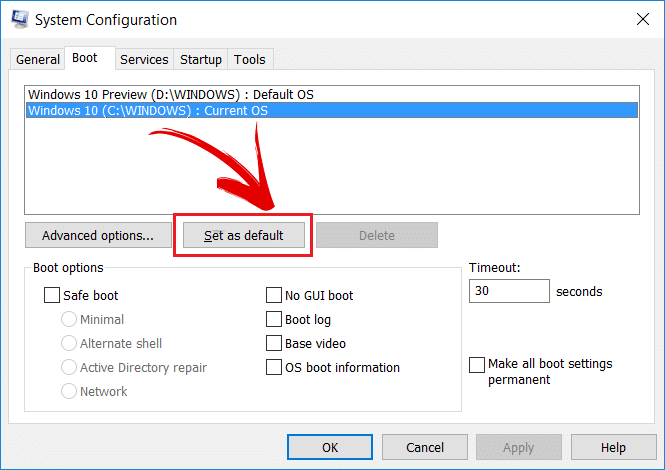
This way you can change the Operating System which will boot when your system restarts. You can also change the default time out setting in the system configuration. You can change it to your desired waiting time to choose an Operating System.
Method 2: Change Default OS in Dual-Boot Setup using Advanced Options
You can set a boot order when the system starts. Follow the steps below to change the default OS in dual-boot setup:
1.First, restart your system.
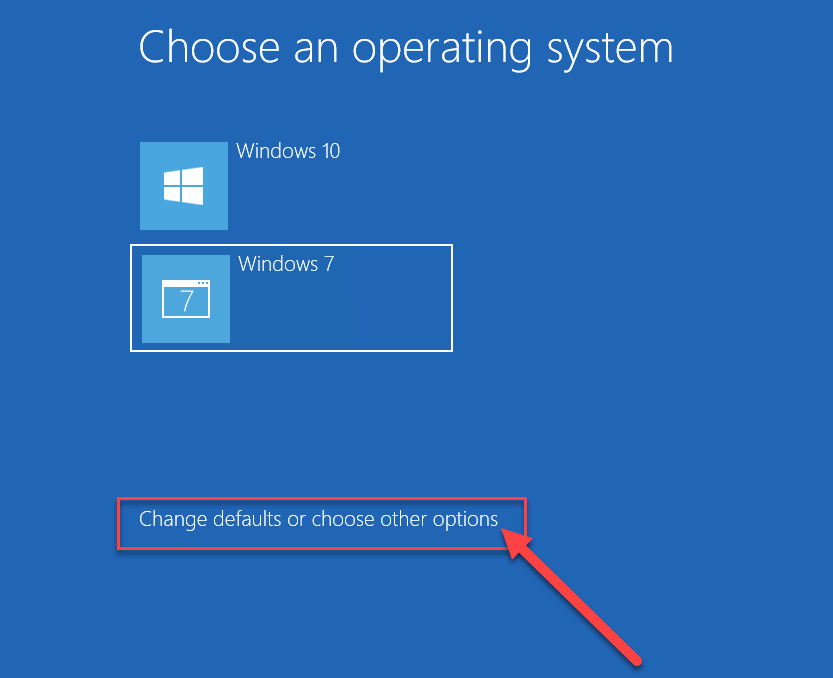
2.When the screen appears for choosing an operating system, select the “Փոխեք լռելյայն կամ ընտրեք այլ տարբերակներ” from the bottom of the screen instead of the operating system.
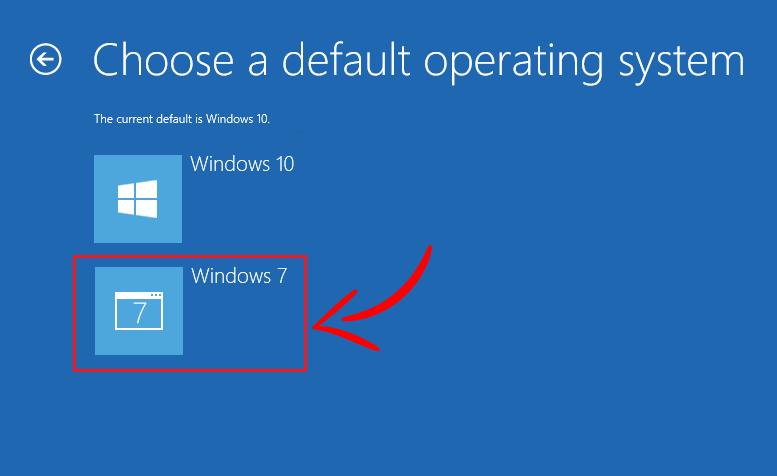
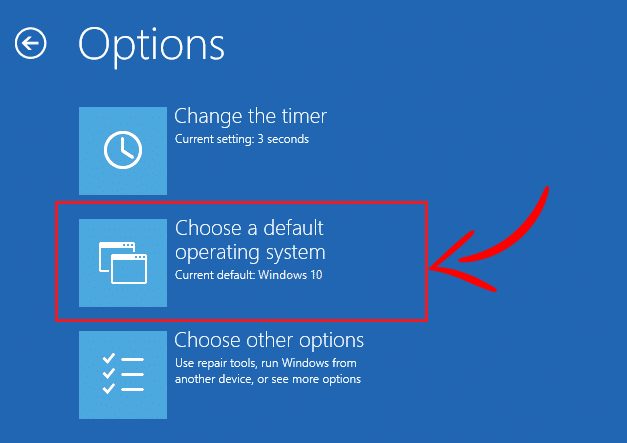
3.Now from the Options window select “Choose a default operating system".
4. Ընտրեք preferred default operating system.
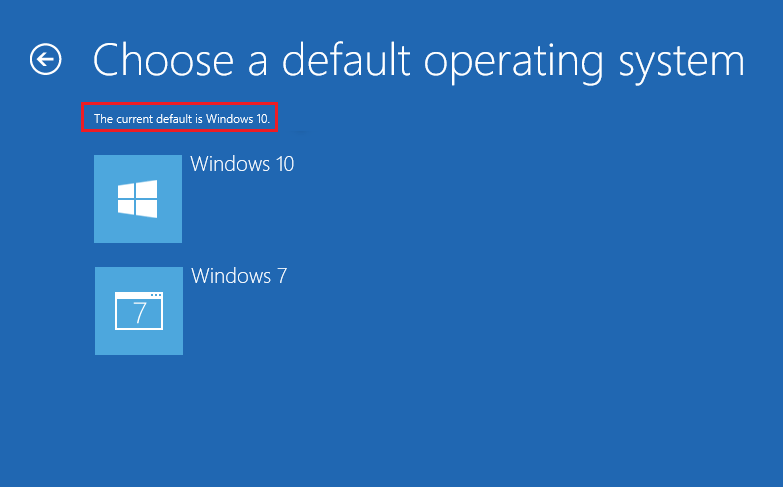
Նշում: Here the operating system which is at the top is ներկայումս որ Default Օպերացիոն համակարգ.
5.In the above image Windows 10 is the currently the default operating system, Եթե ընտրես Windows 7 then it will become your default operating system. Just keep in mind that you will not get any confirmation message.
6.From the Options window, you could also change the default waiting period after which Windows automatically start with the default operating system.
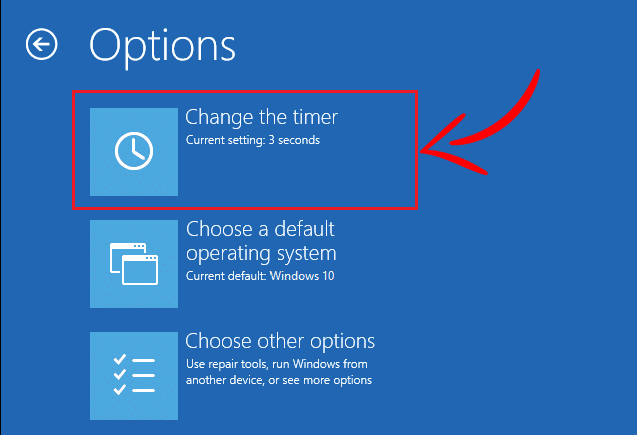
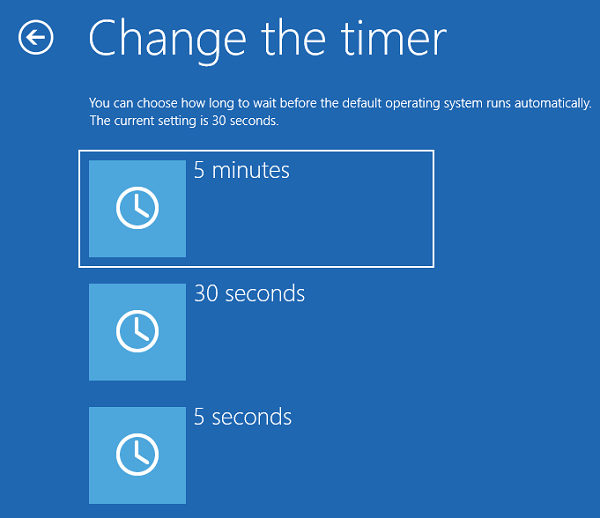
7. Սեղմեք «Փոխեք ժմչփը” under Options window and then change it to 5, 10 or 15 secs according to your choice.
Սեղմեք «Վերադառնալ” button to see the Options screen. Now, you will see the operating system you have chosen as the “Default Operating System".
Method 3: Change Default OS in Dual-Boot Setup using Settings
There is another way to change boot order which is using Windows 10 Settings. Using the below method will again lead to the same screen as above but it is helpful to learn another method.
1. Սեղմեք Windows Key + I՝ Settings բացելու համար, այնուհետև սեղմեք «Թարմացում և անվտանգություն»Պատկերակը:
![]()
2.From the left-hand side menu make sure to select “Recovery"Տարբերակը:
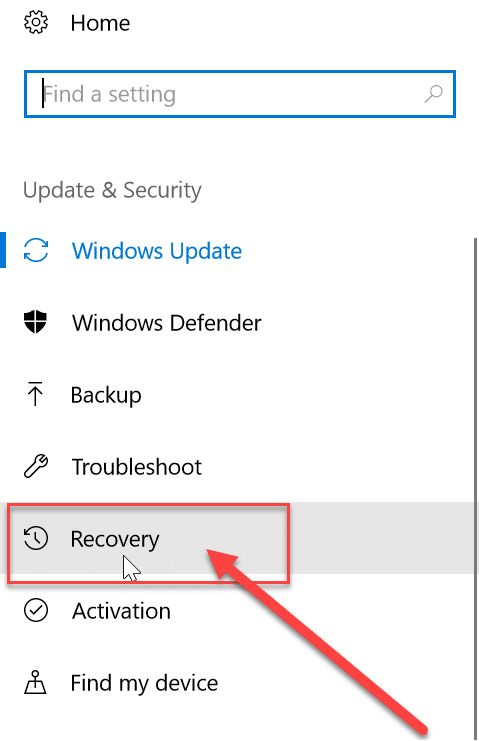
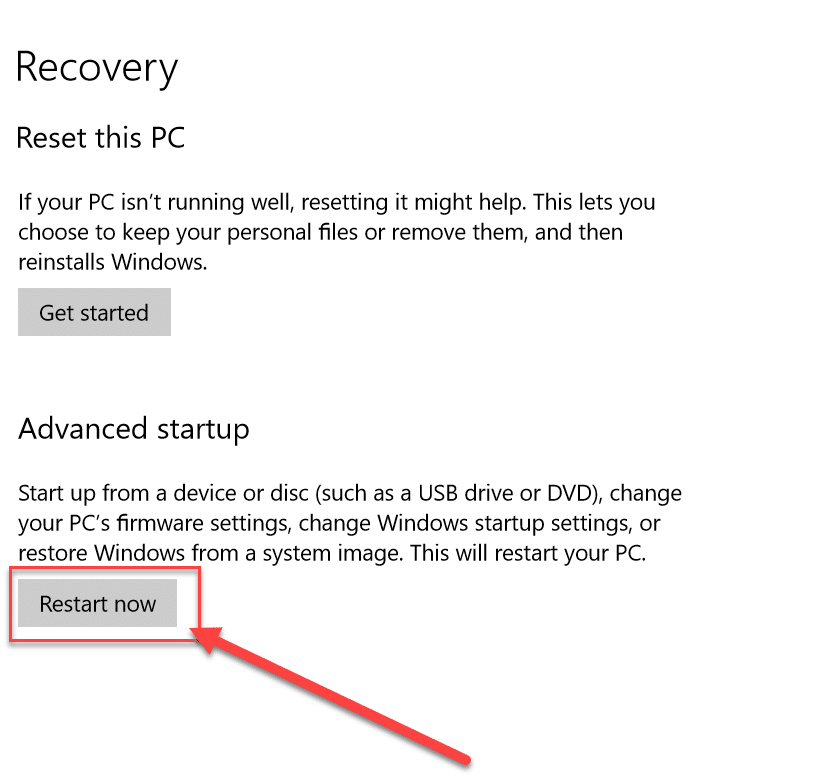
4.Now from the Recovery screen, click on “Վերագործարկեք այժմկոճակը տակ Advanced Startup section.
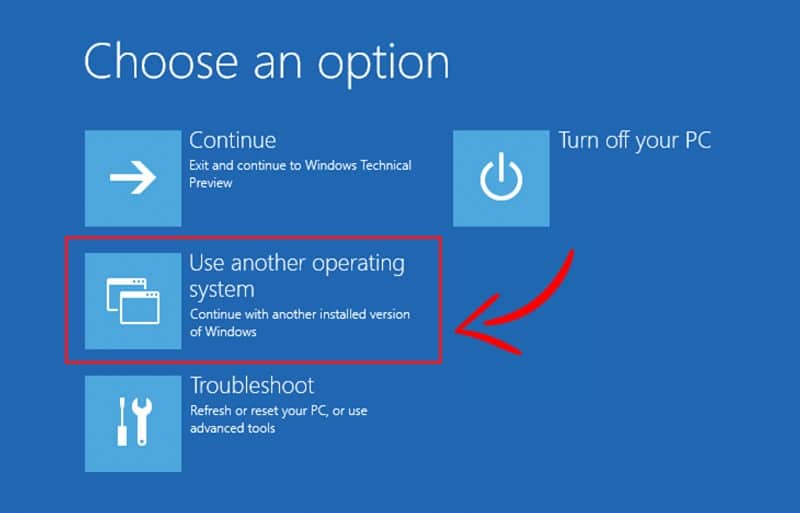
5.Now your system will restart and you will get “Ընտրեք մի տարբերակ” screen. Select the “Use another operating system” option from this screen.
6.On the next screen, you will get a list of operating system. The first one will be the current default operating system. To change it, click on “Փոխեք լռելյայն կամ ընտրեք այլ տարբերակներ".
7.After this click on the option “Choose a default operating system” from the Options screen.
8.Now you can select the default operating system as you have done in the last method.
That’s it, you have successfully change Default OS in Dual-Boot setup for your system. Now, this chosen operating system will be your default operating system. Every time when the system starts this operating system will be automatically chosen to boot from if you do not choose any OS initially.
Method 4: EasyBCD Software
EasyBCD software is the software which can be very useful to change the BOOT order of the operating system. EasyBCD is compatible with Windows, Linux, and macOS. EasyBCD has a very user-friendly interface and you can use EasyBCD software through these steps.
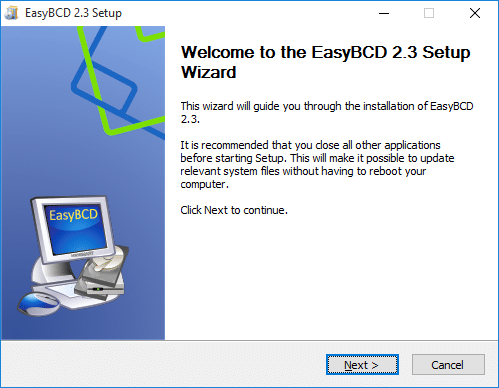
1.First, download EasyBCD software and install it on your desktop.
2.Now run the software EasyBCD and click “Խմբագրել բեռնման ընտրացանկը” from the left side of the screen.
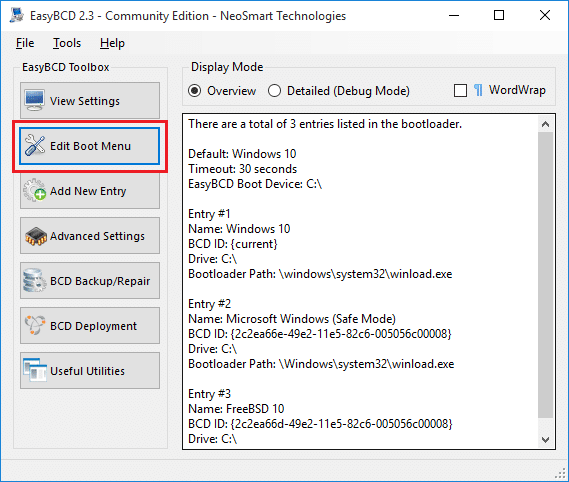
3.You can now see the list of the Operating System. Use up and down arrow to change the sequence of the operating system on the computer.
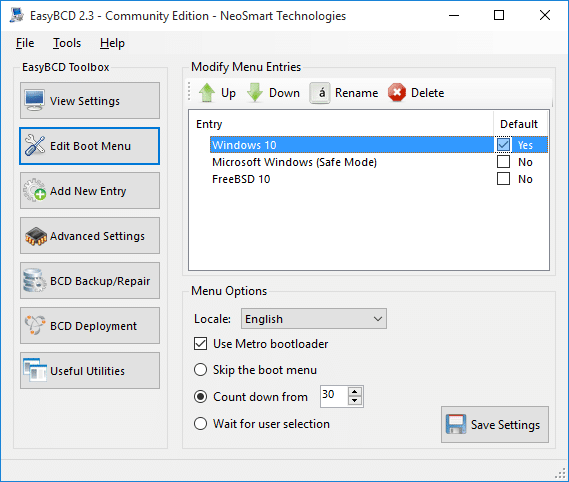
4.After this just save the changes by clicking the “Պահել Կառավարում"Կոճակը:
These are the methods which can be used for changing the Boot order if you are using multiple operating systems.
Խորհուրդ է տրվում:
Հուսով եմ, որ վերը նշված քայլերը օգտակար էին, և այժմ դուք կարող եք հեշտությամբ Change Default OS in Dual-Boot Setup, բայց եթե դեռ հարցեր ունեք այս ձեռնարկի վերաբերյալ, ապա ազատ զգալ հարցրեք դրանք մեկնաբանությունների բաժնում:

