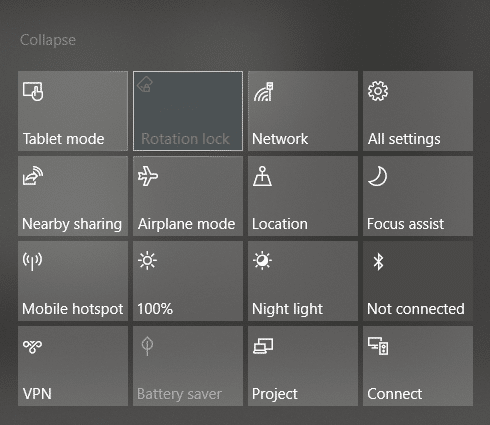
If you have 2 in 1 Windows device such as Tablets, you would be familiar with the importance of the screen rotation feature. Users report that the screen rotation feature has stopped working & the Screen Rotation Lock option is greyed out. If you’re facing this issue, then don’t worry as this is just a setting issue which means it can be easily fixed. This guide will walk you through the steps to fix rotation lock greyed out in Windows 10.
Here are issues which can be resolved using this guide:
- Rotation lock missing
- Auto Rotate not working
- Rotation lock greyed out.
- Screen rotation not working
Fix Rotation Lock greyed out in Windows 10
Pastikan untuk membuat titik pemulihan untuk berjaga-jaga jika terjadi kesalahan.
Method – 1: Enable Portrait Mode
One of the methods to fix this problem is to rotate your screen in portrait mode. Once you rotate it to portrait mode, most probably your rotation lock would start working, i.e. clickable again. In case your device is not rotating into portrait mode automatically, try to do it manually.
1. tekan Tombol Windows + I untuk membuka Pengaturan lalu klik System icon.

2. Make sure to select Display dari menu sebelah kiri.
3. Temukan file Orientation section where you need to choose potret dari menu drop-down.
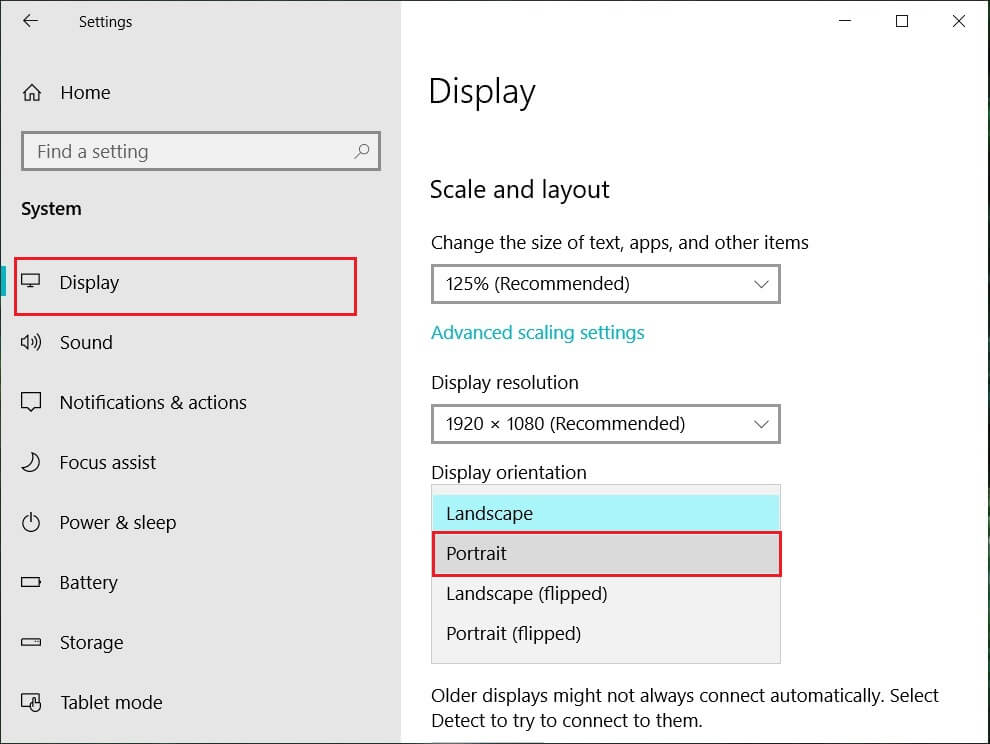
4. Your device will automatically turn into portrait mode.
Method – 2: Use your device in tent mode
Some users, particularly Dell Inspiron, experienced that when their rotation lock is greyed out, the only way to solve this problem is to put your device in Tent Mode.
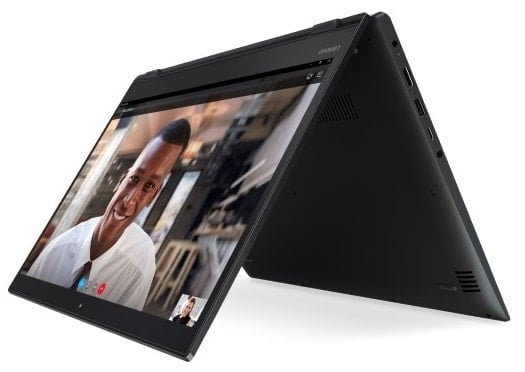
Gambar Kredit: Microsoft
1. You need to put your device in Tent Mode. If your display is upside down, you need not worry.
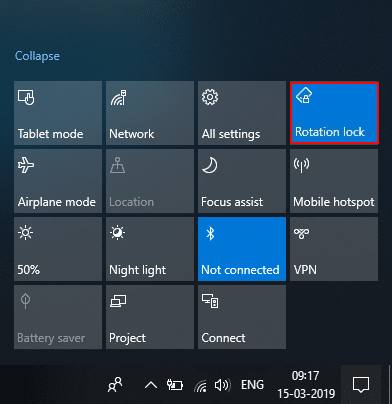
2. Sekarang klik pada Pusat Aksi Windows, Kunci rotasi will be working. Here you need to turn it off if you want so that your device rotate properly.
Method – 3: Disconnect your keyboard
If rotation lock is greyed in your Dell XPS and Surface Pro 3 (2-in-1 device), you need to disconnect your keyboard, and many users reported that disconnecting the keyboard solves the rotation lock problem. If you own different devices, you can still use this method to fix rotation lock greyed out in Windows 10 issue.
Method – 4: Switch to Tablet Mode
Many users experienced that this rotation greyed out the problem by switching their device into Tablet Mode. If it is switched automatically, it is good; otherwise, you can do it manually.
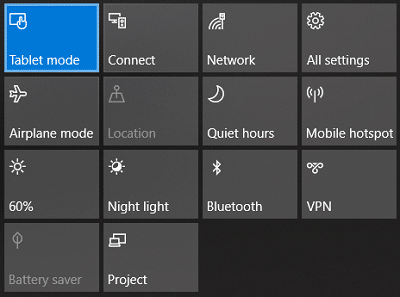
1. Klik pada Pusat Aksi Windows.
2. Di sini, Anda akan menemukannya Mode Tablet option, Click on It.
OR
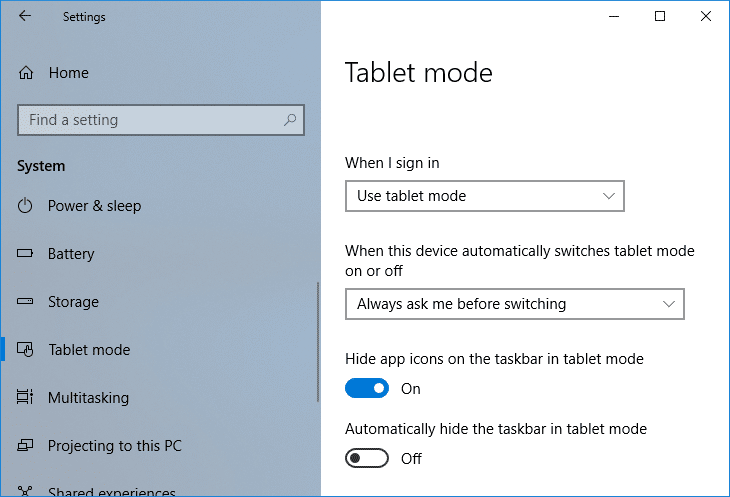
1. Tekan Tombol Windows + I untuk membuka Settings lalu klik pada System icon.
2. Here it would help if you located Mode Tablet option under the left window pane.
3. Now from the “When I sign in” drop-down, select “Gunakan mode tablet".
Method – 5: Change LastOrientation Registry Value
If you still experience a problem, you can solve it by changing some registry values.
1. Press Windows +R and enter regedit lalu tekan Enter.

2. Once registry editor opens, you need to navigate to the below path:
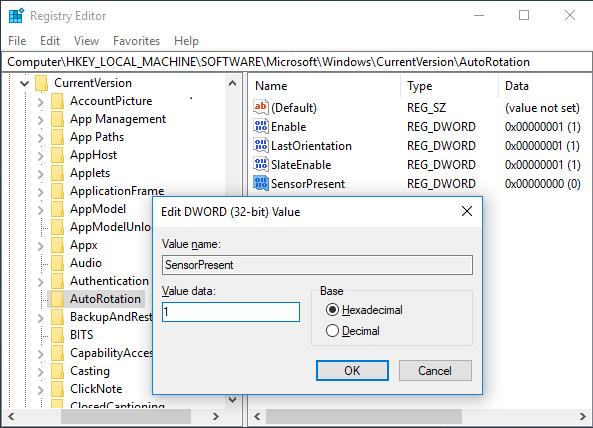
HKEY_LOCAL_MACHINESOFTWAREMicrosoftWindowsCurrentVersionAutoRotation
Catatan: Follow the above folders one by one to locate Auto Rotation.
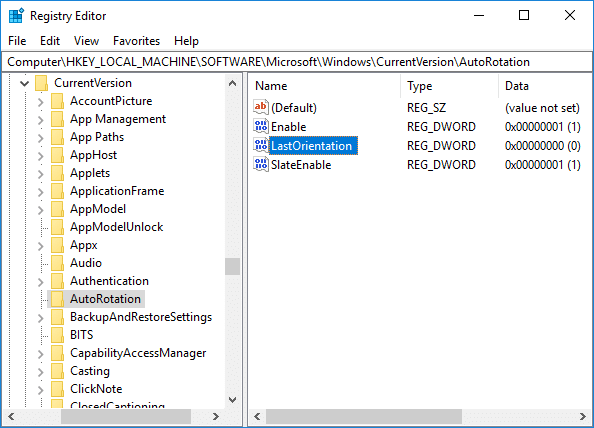
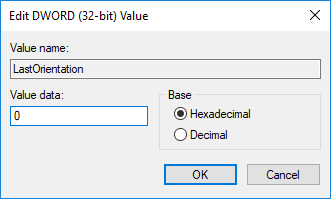
3. Pastikan untuk melakukannya select AutoRotation lalu di panel jendela kanan klik dua kali Last Orientation DWORD.
4. Now enter 0 under Value data field dan klik OK.
5. Jika ada Sensor Hadir DWORD, double-click on it and set its bernilai 1.
Method – 6: Check Sensor Monitoring Service
Sometimes services of your device can cause a rotation lock problem. Therefore, we can get it sorted with Windows Monitoring services feature.
1. Press Windows + R and type services.msc dan tekan Enter.

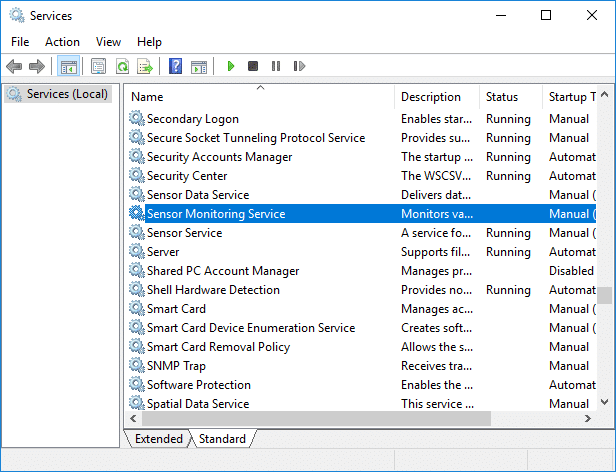
2. Once the services window opens, find the Sensor Monitoring services option dan klik dua kali di atasnya.
3. Now, from the Startup type drop-down select secara otomatis dan kemudian klik pada Tombol Mulai to start the service.
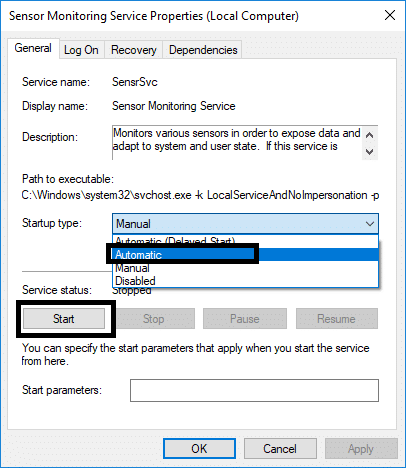
4. Finally, click Apply followed by OK to save the settings, and you can reboot the system to apply the changes.
Method – 7: Disable YMC service
If you are using a Lenovo Yoga device and experiencing this problem, you can fix rotation lock grayed out in the Windows 10 issue by disabling YMC service.
1. Windows + R type services.msc dan tekan Enter.
2. Temukan YMC services dan klik dua kali.
3. Atur jenis Startup ke Disabled and click Apply, followed by OK.
Method – 8: Update Display Drivers
One reason for this problem could be the driver update. If your respective driver for the monitor is not updated, it can cause the Rotation Lock greyed out in Windows 10 Issue.
Perbarui Driver Grafis secara Manual menggunakan Pengelola Perangkat
1. Tekan Tombol Windows + R lalu ketik devmgmt.msc dan tekan enter untuk membuka Pengaturan perangkat.

2. Selanjutnya, perluas Display adapter dan klik kanan pada Kartu Grafis Anda dan pilih Memungkinkan.

3. Once you have done this again right-click on your graphics card and select “Update driver".

4. Pilih "Cari secara otomatis untuk perangkat lunak driver yang diperbarui” dan biarkan prosesnya selesai.

5. If the above steps helped fix the issue then very good, if not then continue.
6. Again right-click on your graphics card and select “Update driver” tapi kali ini di layar berikutnya pilih “Jelajahi komputer saya untuk perangkat lunak driver."

7. Sekarang pilih “Let me pick from a list of available drivers on my computer. "

8. Akhirnya, pilih driver terbaru dari daftar dan klik Next.
9. Let the above process finish and restart your PC to save changes.
Follow the same steps for the integrated graphics card (Intel in this case) to update its drivers. See if you’re able to Fix Rotation Lock greyed out Issue, jika belum maka lanjutkan ke langkah berikutnya.
Perbarui Driver Grafis Secara Otomatis dari Situs Web Produsen
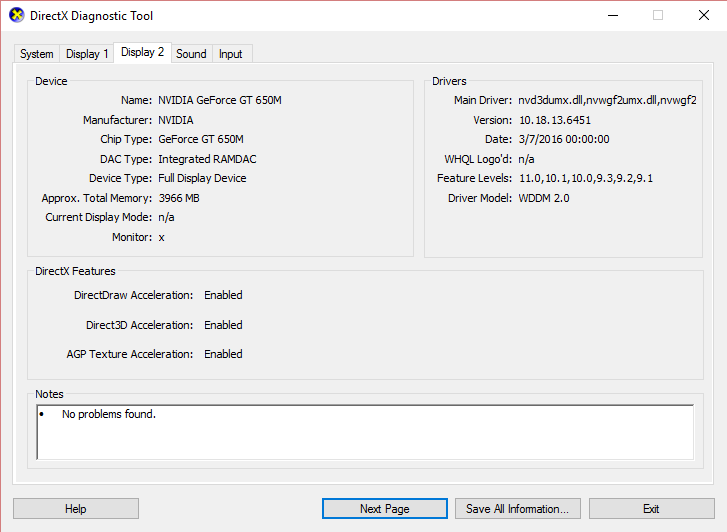
1. Press Windows Key + R and in the dialog box type “dxdiag” dan tekan enter.

2. After that search for the display tab (there will be two display tabs one for the integrated graphics card and another one will be of Nvidia’s) click on the Display tab and find out your graphics card.
3. Now go to the Nvidia driver unduh situs web and enter the product details which we find out.
4. Search your drivers after inputting the information, click Agree and download the drivers.

5. After successful download, install the driver, and you have successfully updated your Nvidia drivers manually.
Method – 9: Remove Intel Virtual Buttons Driver
Some users reported that Intel Virtual button drivers cause rotation lock problem on your device. To solve this problem, you can uninstall the driver.
1. Open Device manager on your device by pressing Windows + R and type devmgmt.msc and hit Enter or press Windows X and choose device Manager from the options list.
2. Once Device manager box is opened locate Intel virtual buttons driver.
3. Right-click on it and choose Uninstall.
Rekomendasi:
Saya harap artikel ini bermanfaat dan sekarang Anda bisa dengan mudah Fix Rotation Lock greyed out in Windows 10, but if you still have any questions regarding this tutorial then feel free to ask them in the comment’s section.
")
