Microsoft bụ forcing Windows 11 on every Windows 10 user. The persistent notifications to nweta nkwalite na Windows 11 are distracting and annoying—especially if you don’t want Windows 11 yet.
We’ll show two ways to stop Windows 11 update notifications on your Windows 10 PC. In Windows 11, you can also use the methods below to stop notifications for feature or quality updates.
Disable Update Notifications via Group Policy Editor
The Nchịkọta Ndị Nchịkọta Otu allows you to configure system, users, and administrative settings in Windows. Follow the steps below to stop Windows 11 update notifications through the Group Policy Editor.
Cheta na: Group Policy Editor is available in the Professional and Enterprise editions of Windows. You can’t stop Windows update notifications using this method if you have Windows Home edition. Use the Registry Editor instead (see the next section for instructions).
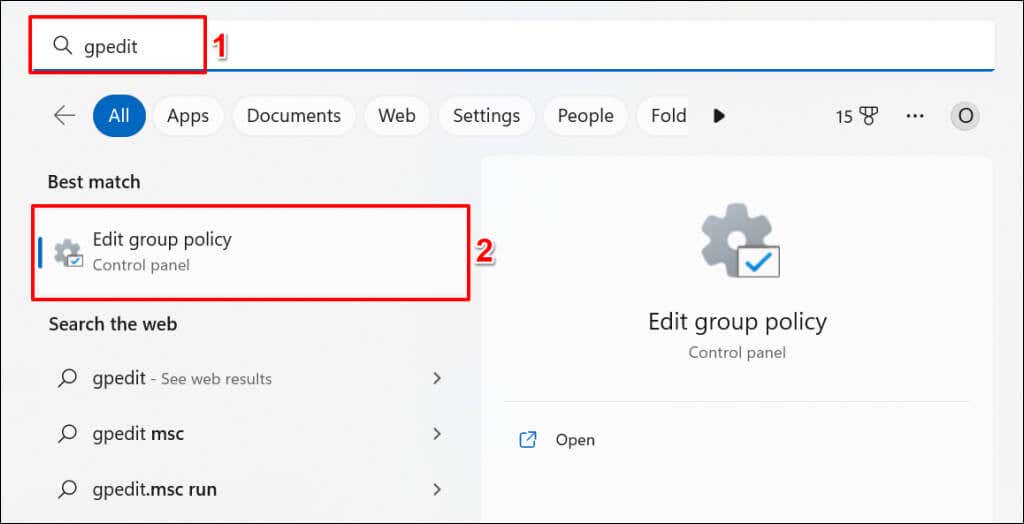
- Meghee Windows Start menu, ụdị gpedit n'ime mmanya ọchụchọ, wee họrọ Dezie iwu otu na nsonaazụ.
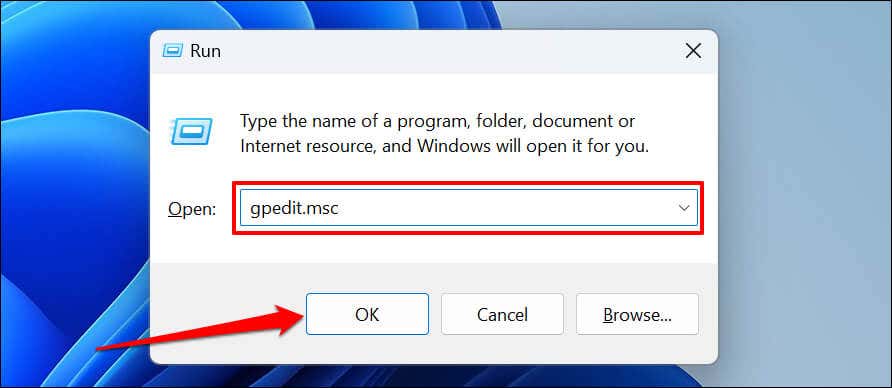
Nhọrọ, pịa Igodo Windows + R, ụdị gpedit.msc in the Run box, and select OK.
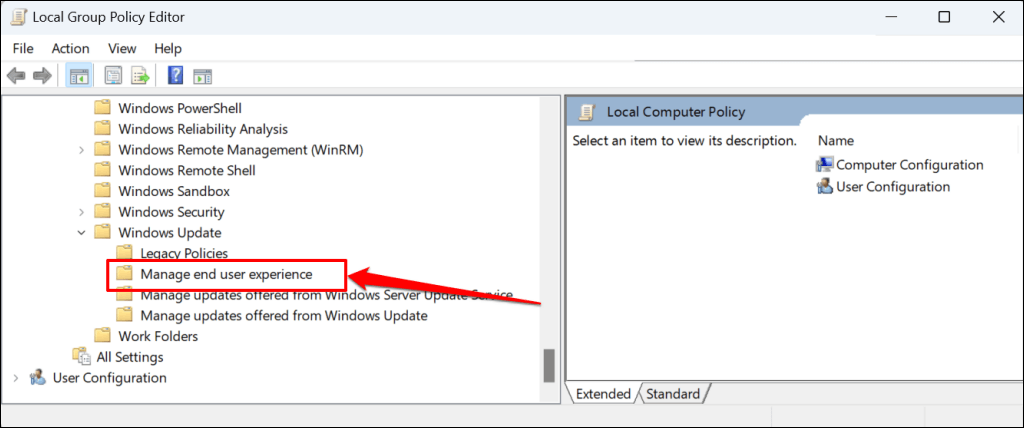
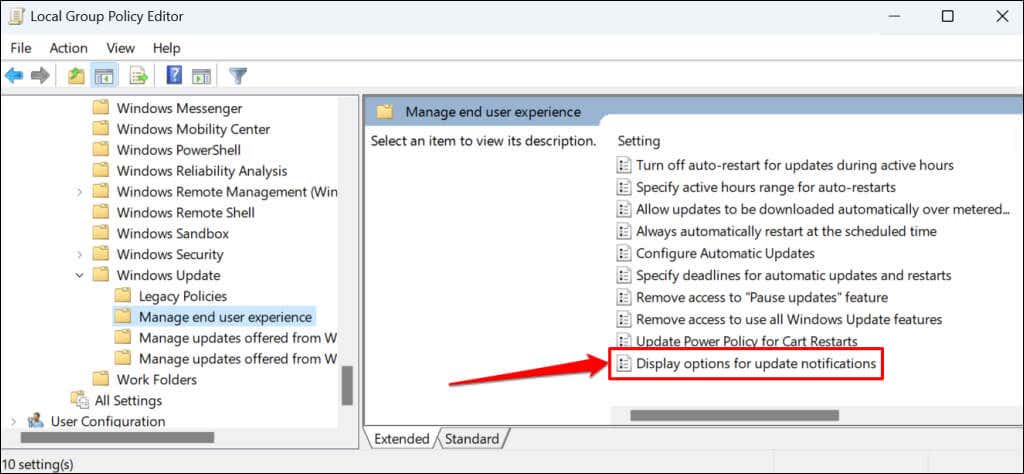
- Na-agagharị na Nhazi kọmputa > Ụkpụrụ Nlekọta > Ihe Windows > Mmelite Windows > Manage end user experience on the sidebar.
- Pịa ugboro abụọ Gosipụta nhọrọ maka ọkwa mmelite.
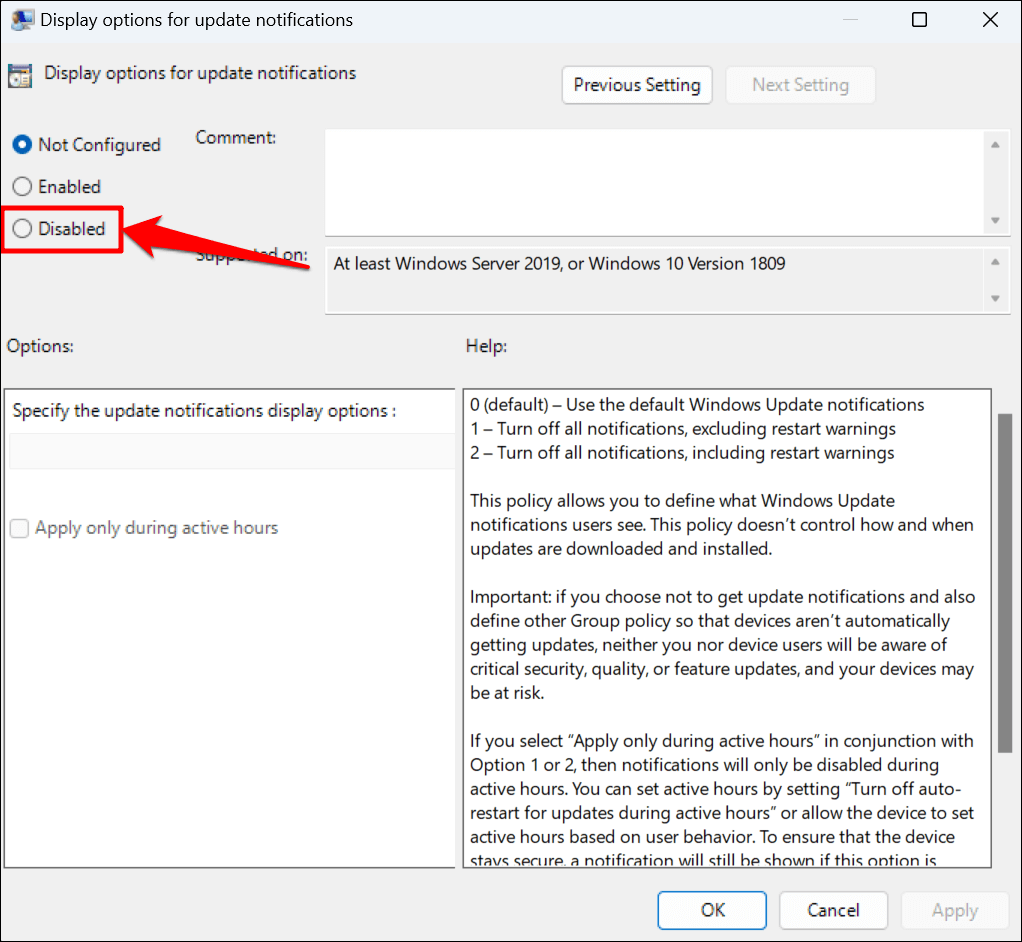
- Họrọ nke nwere nkwarụ nhọrọ.
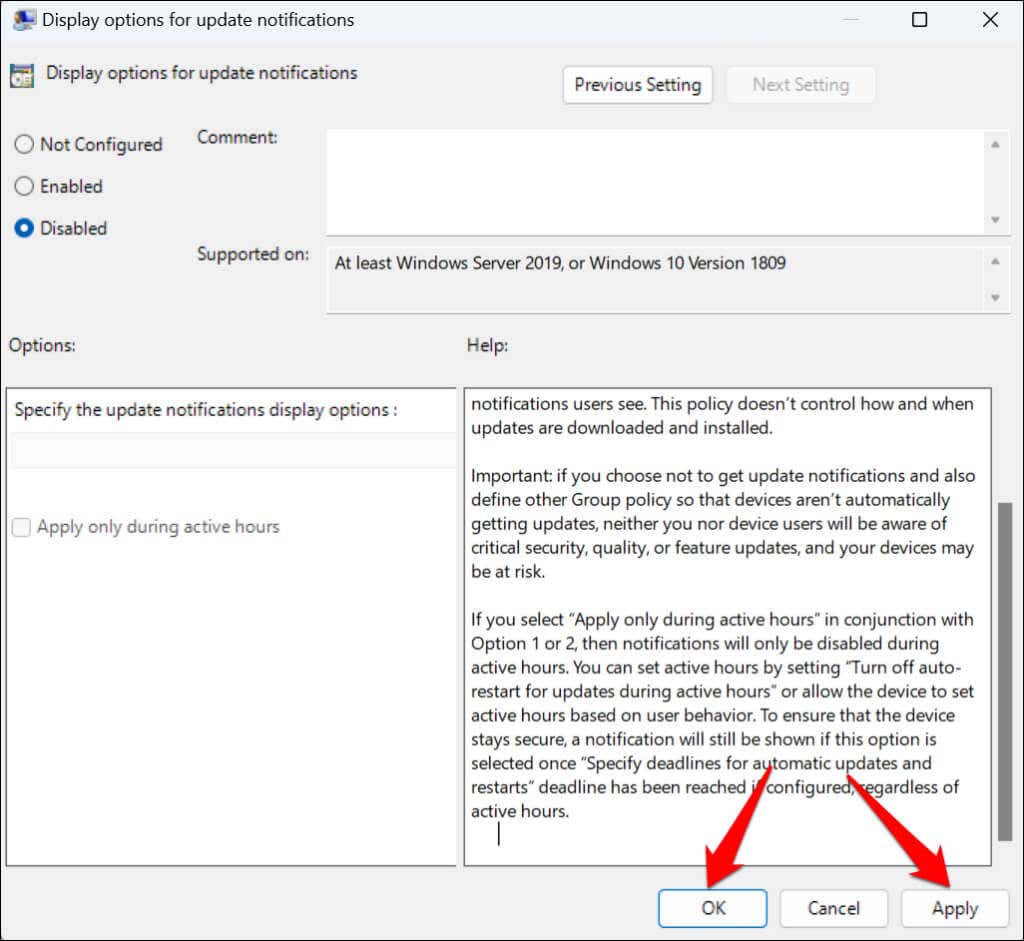
- họrọ Tee > OK and close the Local Group Policy Editor.
If you want to receive Window update notifications in the future, set the policy to “Not Configured” (see step #4).
Disable Windows Update Notifications via Windows Registry
The Ndebanye Windows is a database of settings for your computer’s operating system. Follow the steps below to create an entry in the Registry that prevents Windows from displaying update notifications.
Cheta na: You can break your PC if you accidentally modify or delete a registry item. Hence, we recommend backing up the Windows Registry na creating a System Restore point before you proceed. If things go south, you can easily fix the problem by restoring your computer from the registry or System Restore backup.
- Mepee menu mmalite, pịnye regedit n'ime mmanya ọchụchọ, wee họrọ Na-agba ọsọ dị ka onye nlekọta below the “Registry” app.

- Tapawa HKEY_LOCAL_MACHINESOFTWAREIwuMicrosoftWindows in the Registry Editor navigation bar and press Tinye.
- Right-click a blank space in the “Windows” folder and select New > Key.
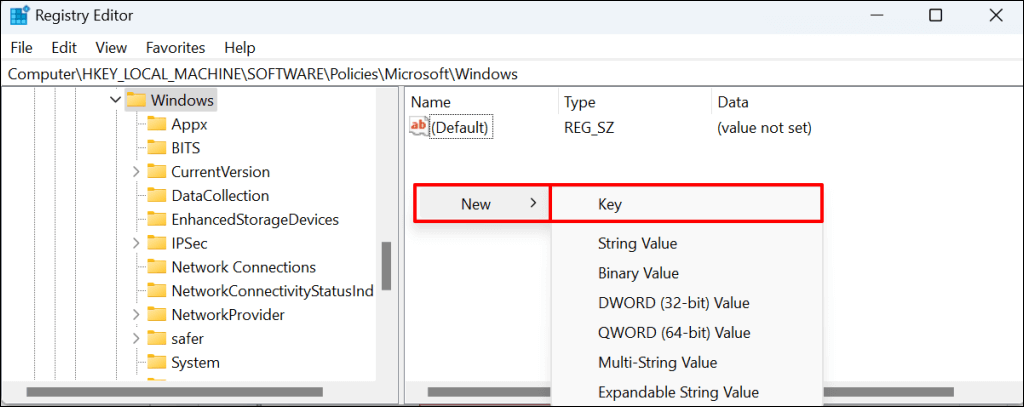
- Kpọọ isi ihe Windows nwelite na pịa Tinye.
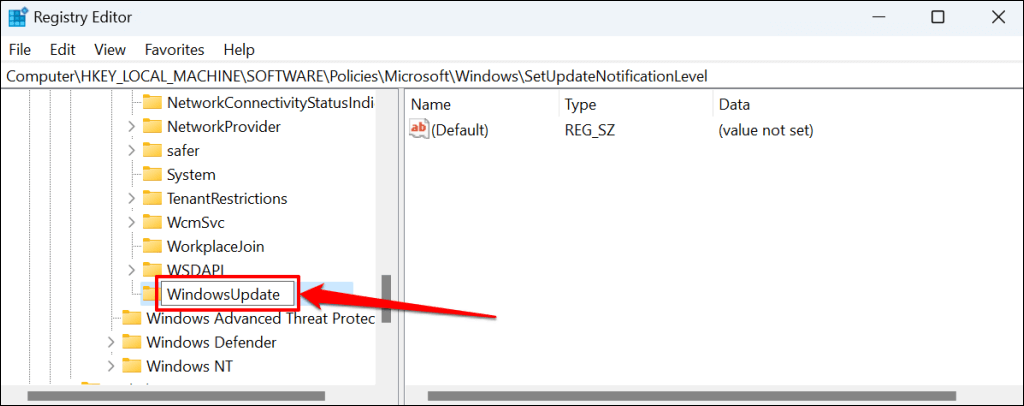
- Right-click the new Windows nwelite igodo, họrọ New on the context menu, and select DWORD (32-bit) Bara uru.

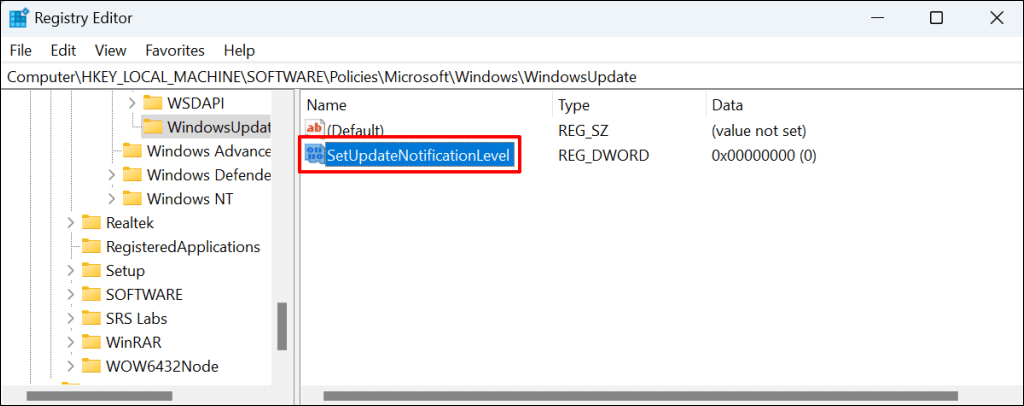
- Kpọọ uru ahụ SetUpfateNotificationLevel na pịa Tinye.

- Pịa ugboro abụọ SetUpdateNotification uru.
- Nyochaa na Data bara uru is 0 and select OK.
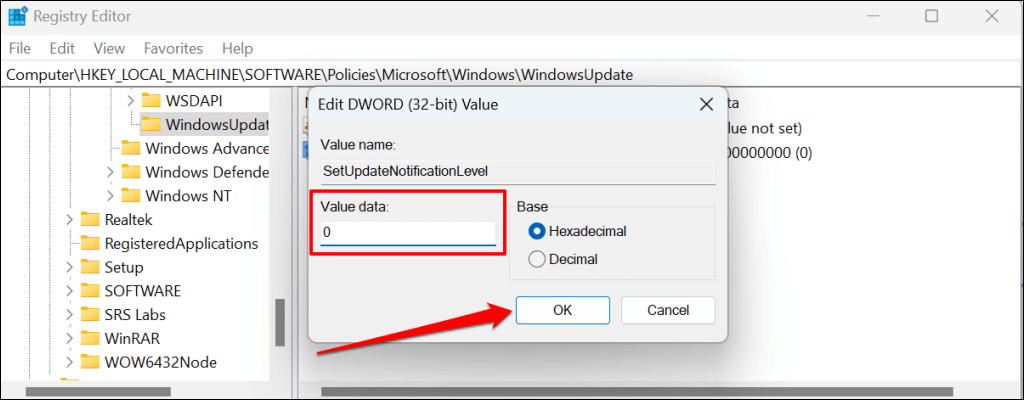
Close the Registry Editor and reboot your computer. Your computer should stop showing Windows update notifications after the reboot. Delete the “SetUpdateNotifiationLevel” value to re-enable Windows update notifications on your computer.
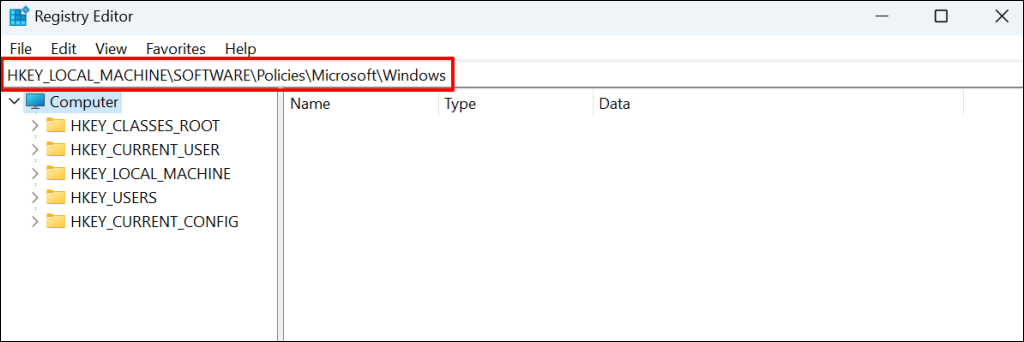
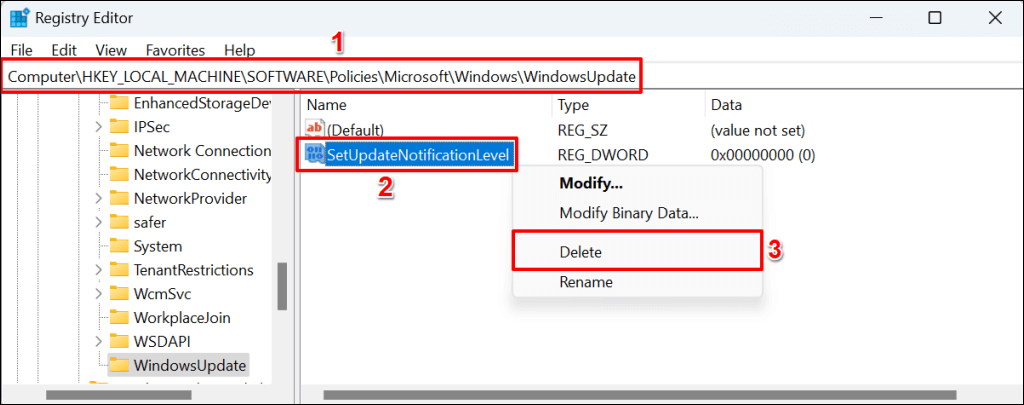
Open the Registry Editor and paste ComputerHKEY_LOCAL_MACHINESOFTWAREPoliciesMicrosoftWindowsWindowsUpdate in the navigation bar. Afterward, right-click SetUpdateNotificationLevel, ma họrọ Hichapụ.
Update Notifications Begone
Note that these methods only stop Windows from displaying update notifications. It doesn’t prevent Windows from automatically downloading or installing quality or feature updates in the background.
You cannot stop Windows updates forever, but you can delay them for a while. Refer to our tutorial on stopping Windows updates to learn how to pause updates on your PC temporarily.

