Are you facing issues with Realtek High Definition Audio Driver? Is Realtek HD Audio Manager missing from your Windows 10 Taskbar? Or there is no sound coming from your speakers in Windows 10? If you are finding the answer to the above questions, then you’re in the right place as today we will see How to Fix Realtek High Definition Audio Driver Issue.
Realtek HD Audio Manager is one of the best tools available for managing all your audio/sound needs in Windows 10. But what happens when you can’t find the Realtek HD Audio Manager icon on the Taskbar? Most of the users facing this issue complain that they are only having this issue after the Windows 10 upgrade or update.
There can be numerous underlying causes for this issue, but the main problem seems to be corrupt or outdated Realtek audio drivers. And if that’s the case, this issue can be fixed by re-installing Realtek audio drivers. Anyway, without wasting any time, let’s see How to Fix Realtek High Definition Audio Driver Issue.
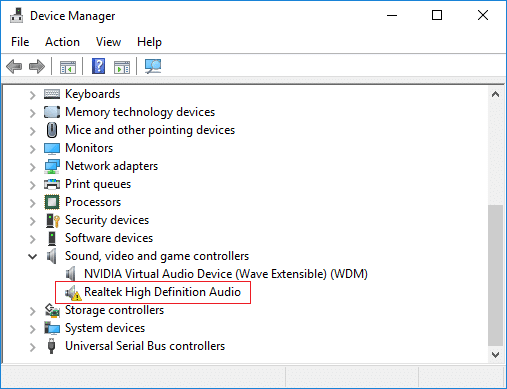
Athugaðu: Open Device Manager by pressing Windows Key + R then type devmgmt.msc and hit Enter. Next, expand Sound, video and game controllers and then check if you can see a gult upphrópunarmerki á “Realtek High Definition Audio“. If you can see the yellow exclamation mark then its confirm that this is a driver issue.
Fix Realtek High Definition Audio Driver Issue
Gakktu úr skugga um að búa til endurheimtarstað ef eitthvað fer úrskeiðis.
Method 1: Reinstall Realtek HD Audio Drivers
1. Open your favourite web browser, then navigate to this website.
https://www.realtek.com/en/component/zoo/category/pc-audio-codecs-high-definition-audio-codecs-software
2. Make sure to download the proper driver according to your system architecture.
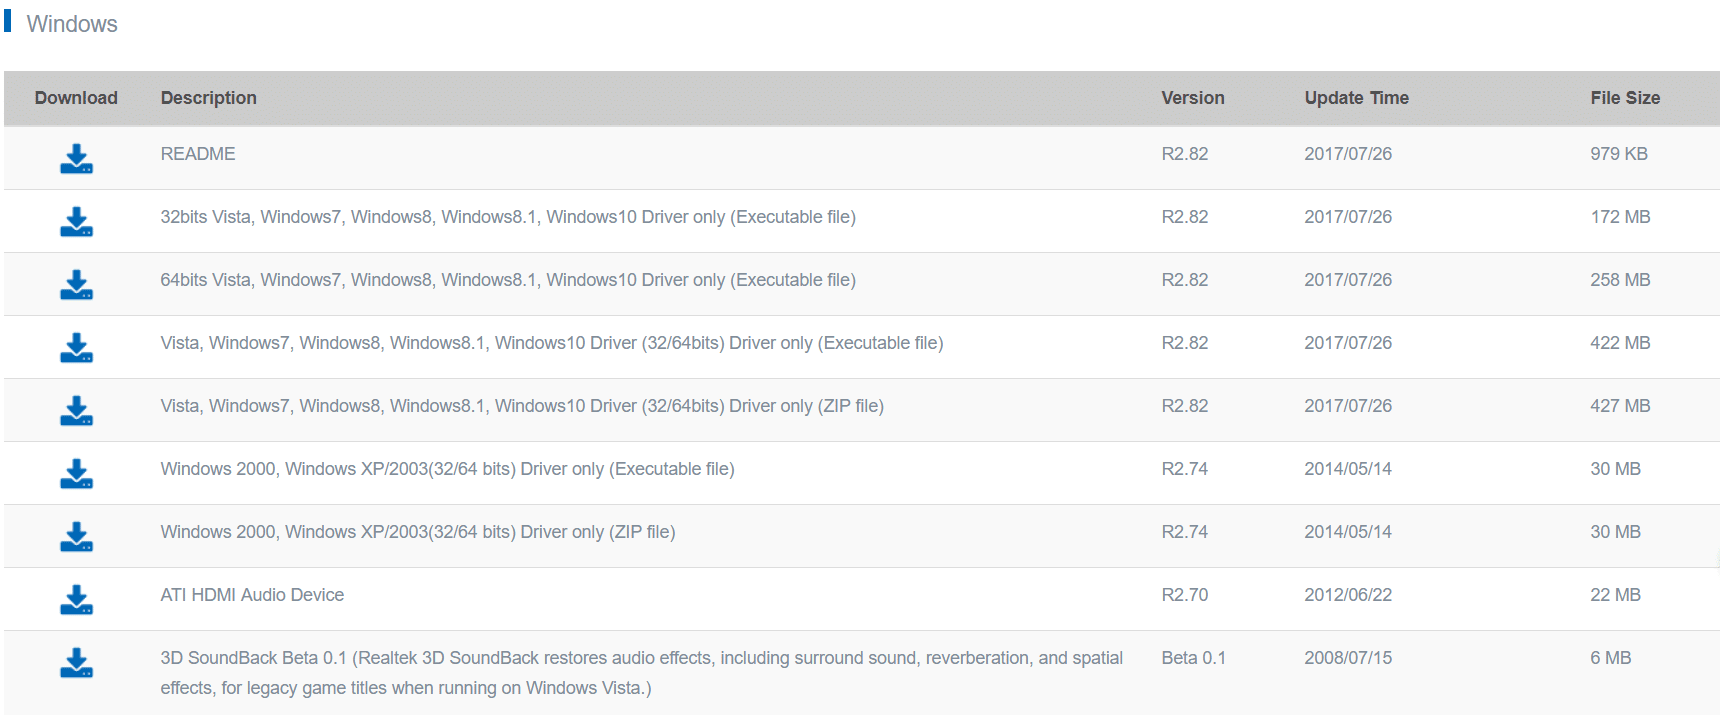
3. Once the file is downloaded, double-click on the setup file and follow the on-screen instructions to install the latest Realtek High Definition Audio drivers.
Method 2: Manually Update Realtek Audio Drivers
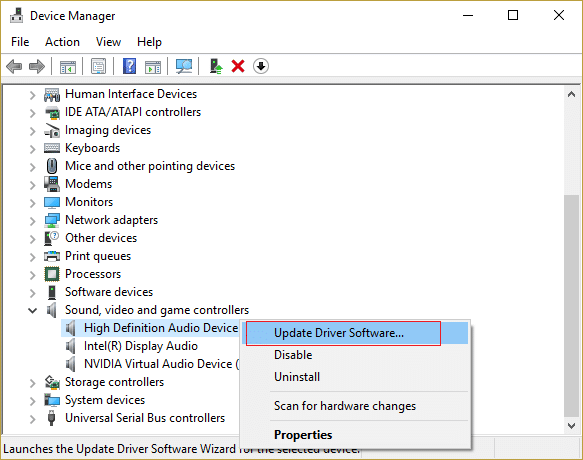
1. Ýttu á Windows Key + R og sláðu síðan inn devmgmt.msc og ýttu á Enter til að opna Tækjastjórnun.

2. Expand “Hljóð-, mynd- og leikstýringar” and then right-click on “Realtek High Definition Audio” & select Uppfærðu bílstjóri.
3. On the next window, click on “Leitaðu sjálfkrafa fyrir uppfærða bílstjóri hugbúnað".

4. In case you already have the updated driver, then the following window will appear. If not then Windows will automatically update Realtek Audio drivers to the latest update available.
5. Once finished, reboot your PC to save changes.
If you’re still facing the Realtek High Definition Audio Driver Issue then you need to manually update the drivers, follow this:
6. If it wasn’t able to update your drivers then again right-click on “Realtek High Definition Audio” & select Uppfærðu bílstjóri.
7. This time, select "Skoðaðu tölvuna mína fyrir hugbúnað ökumanns."

8. Next, select “Leyfðu mér að velja úr lista yfir tæki rekla í tölvunni minni."

9. Veldu viðeigandi bílstjóri af listanum og smelltu á Next.
10. Let the process complete and then restart your PC.
11. Alternatively, go to your manufacturer’s website and download the latest drivers.
Aðferð 3: Notaðu Add arfleifð til að setja upp rekla til að styðja eldri hljóðkort
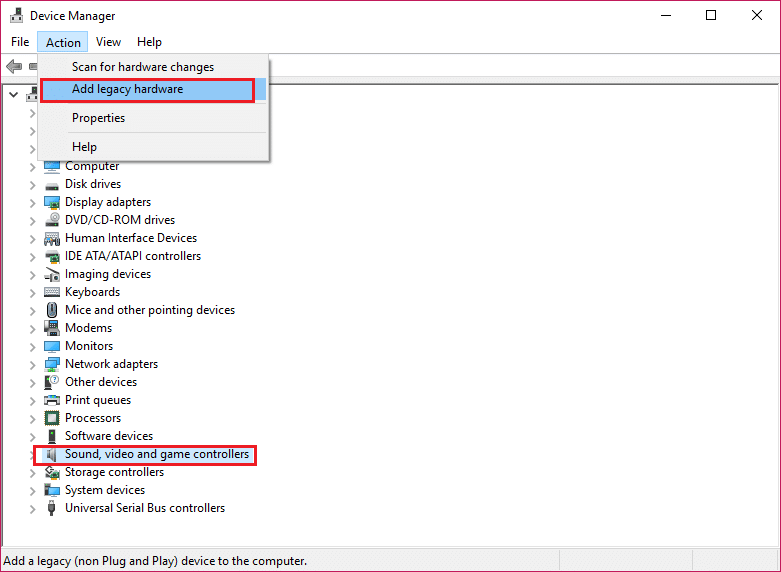
1. Ýttu á Windows takkann + R og sláðu síðan inn “devmgmt.msc” (án gæsalappa) og ýttu á enter til að opna Device Manager.
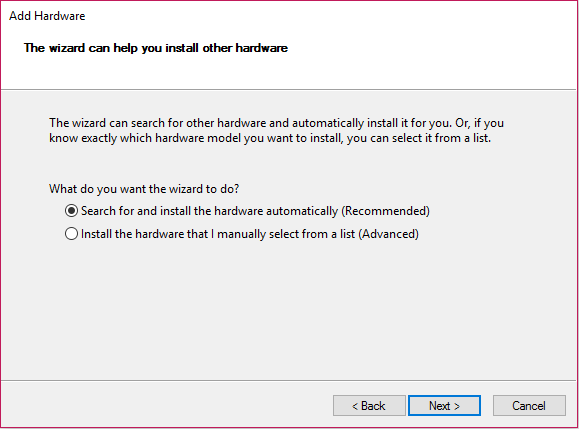
2. In Device Manager, select Hljóð-, mynd- og leikstýringar og smelltu síðan á Aðgerð > Bæta við eldri vélbúnaði.
3. smellur Næstu, veldu 'Leitaðu að og settu upp vélbúnaðinn sjálfkrafa (ráðlagt).
4. Reboot your system to save changes and see if you’re able to Fix Realtek High Definition Audio Driver Issue.
Method 4: Uninstall Realtek High Definition Audio Driver
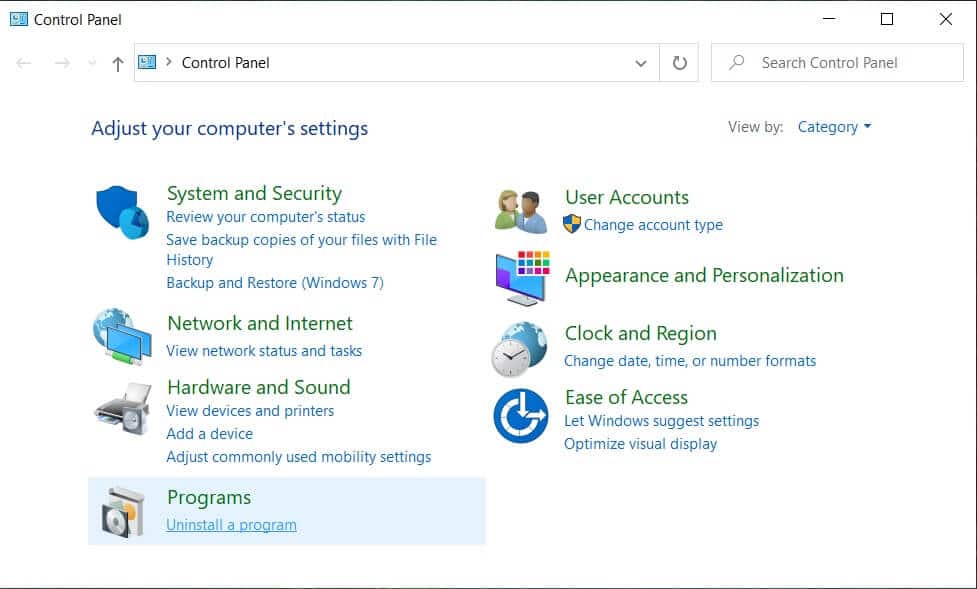
1. Leitaðu að stjórnborðið from the Start Menu search bar and click on it to open the Stjórnborð.

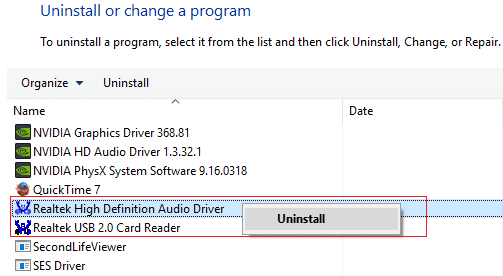
2. Smelltu á Uninstall forrit og leitaðu síðan að Realtek High Definition Audio Driver entry.
3. Hægrismelltu á það og veldu Uninstall.
4. Restart your PC and open Tækjastjórnun.
5. Click on Action then “Leitaðu að breytingum á vélbúnaði."

6. Your system will automatically install the Realtek High Definition Audio Driver.
Method 5: Disable Microsoft UAA Bus Driver for High Definition Audio
1. Ýttu á Windows Key + R og sláðu síðan inn devmgmt.msc og ýttu á enter til að opna Tækjastjórnun.
2. Stækkaðu Kerfi Tæki og hægrismelltu á Microsoft UAA strætóstjóri fyrir háskerpu hljóð veldu þá Slökkva.
3. Now visit Fasteignasali to download the latest driver, and it should now install without any problem.
Mælt með:
Það er það sem þú hefur lært með góðum árangri How to Fix Realtek High Definition Audio Driver Issue en ef þú hefur enn einhverjar spurningar varðandi þessa kennslu skaltu ekki hika við að spyrja þær í athugasemdahlutanum.

