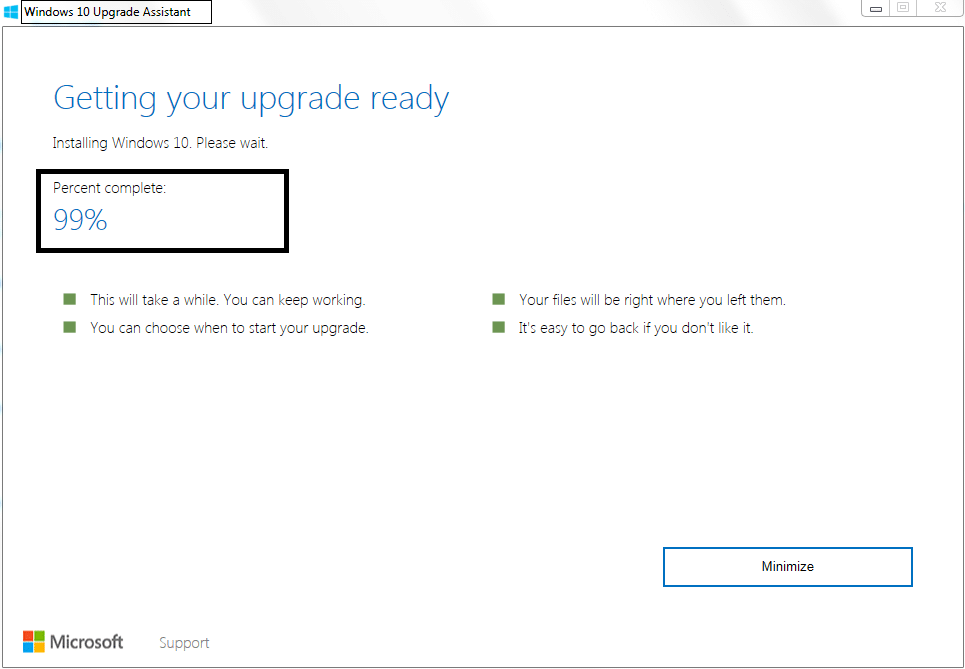
Fix Windows 10 upgrade assistant stuck at 99%: The Windows 10 Anniversary Update is finally ready for download and millions of people simultaneously downloading this update is obviously going to create some problems. One such problem is Windows 10 Upgrade Assistant stuck at 99% while downloading the update, without wasting time let’s see how to fix this issue.
Laga Windows 10 uppfærsluaðstoðarmaður fastur við 99%
Method 1: Disable Windows 10 update manually
Athugaðu: Make sure the upgrade assistant is running
1. Gerð services.msc in the Windows search bar, then right click and select run as administrator.

2.Now locate Windows update services in the list and right-click on it, then select stop.
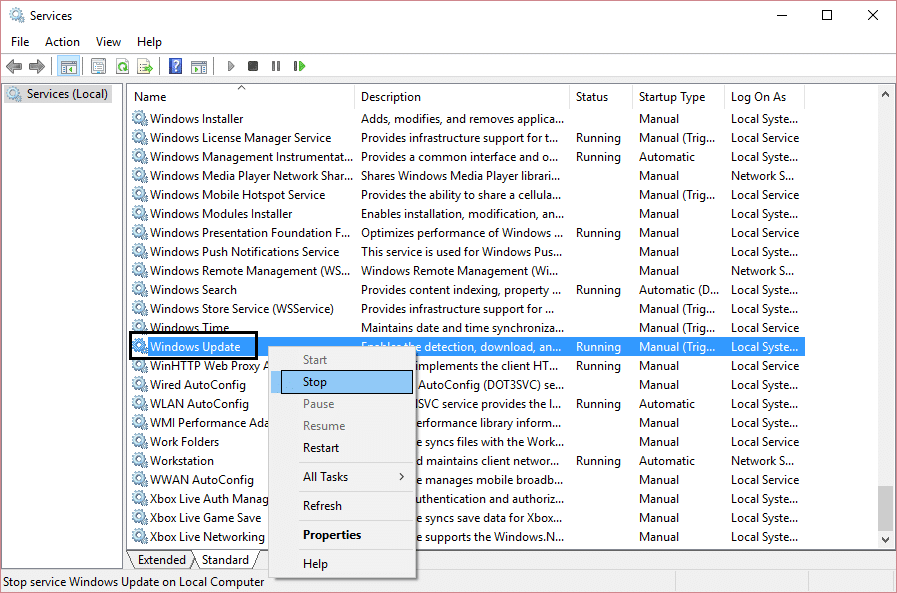
3.Again right click and select Properties.
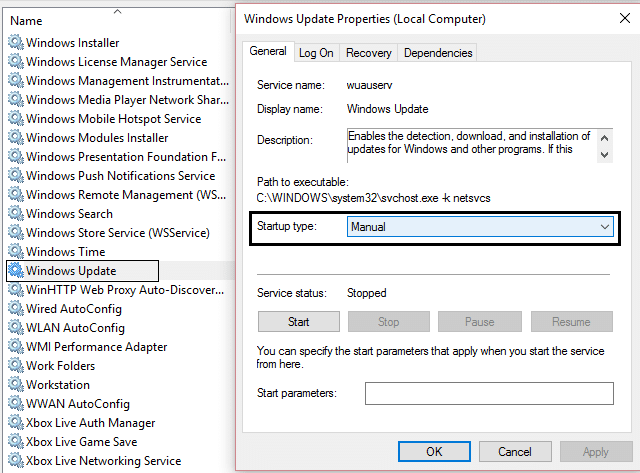
4.Now set the startup type til Manual.
5.Close services.msc after verifying that the update services has stopped.
6.Again try to run Windows 10 upgrade assistant and this time it will work.
Method 2: Delete Windows Update Cache
1.Restart Windows 10 if you are stuck at the Windows 10 anniversary update.
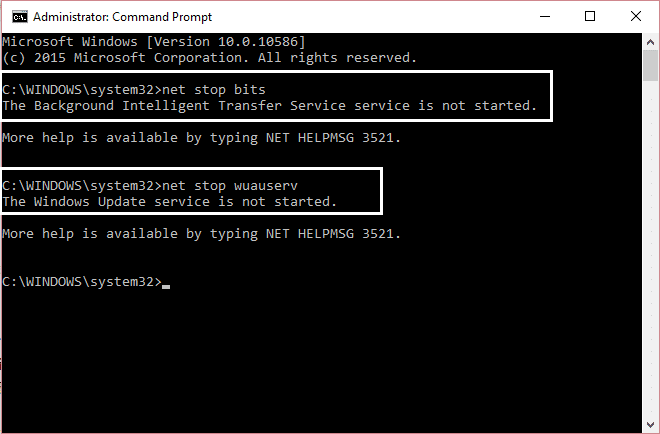
2.Right Click on Windows button and select Command Promot (Admin).

3.Now type the following in the cmd and press enter after each one:
net stopp bitar
net stop wuauserv
4.Exit Command Prompt and go the following folder: C: Windows
5.Search for the folder SoftwareDistribution, then copy it and paste it on your desktop for backup purpose.
6. Sigla til C: WindowsSoftwareDistribution and delete everything inside that folder.
Note: Don’t delete the folder itself.

7. Að lokum, endurræstu tölvuna þína og athugaðu hvort þú getir það Fix Windows 10 upgrade assistant stuck at 99% issue.
Method 3: Updating using the Media Creation Tool
1.Download the Media Creation Tool from here.
2.Double-click on the setup file to launch the tool.
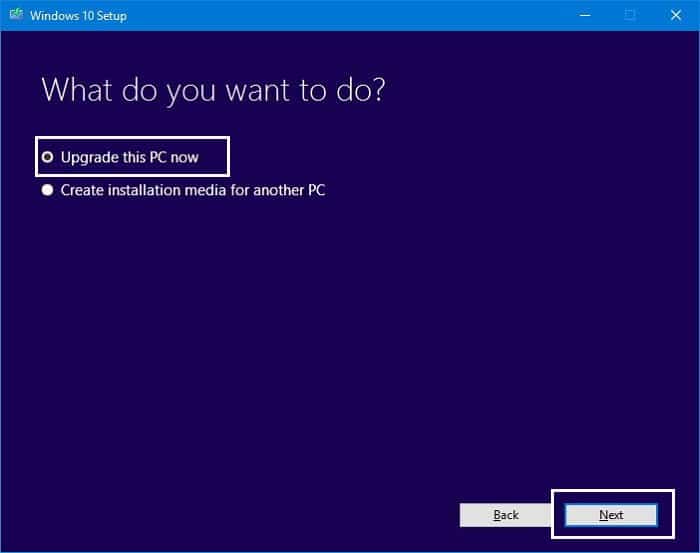
3.Follow on screen instruction until you get to Windows 10 Setup.
4.Select Upgrade this PC now and click Next.
5.When the download is finished, click Accept to agree to terms and conditions.
6.Make sure you have selected Keep personal files and apps in the installer which is selected by default.
7.If not then click on “Breyttu því sem á að halda” link in the setup to change the settings.
8.Click Install to begin the Windows 10 anniversary update.
Method 4: Fix Windows 10 Upgrade Assistant is stuck at 99% [New Method]
1.Press Windows Key + E to open File Explorer then type C:$GetCurrent in the address bar of File Explorer and hit Enter.
2.Next, click on View then click on Options from File Explorer. Switch to View tab and checkmark “Show hidden files, folders, or drivers".
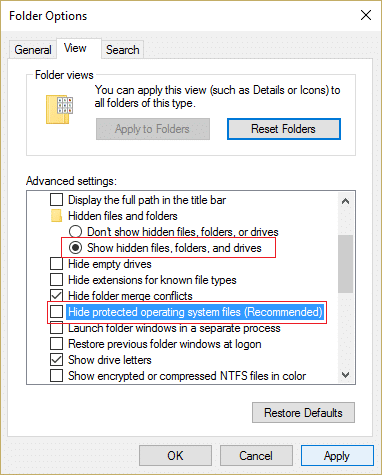
3.Click Apply followed by Ok.
4.Now Copy and paste the Media folder from C:$GetCurrent to desktop.
5.Reboot your PC, then open File Explorer and navigate to C:$GetCurrent.
6.Next, copy and paste the fjölmiðla möppu frá desktop to C:$GetCurrent.
7.Open the Media folder and double-click on setup file.
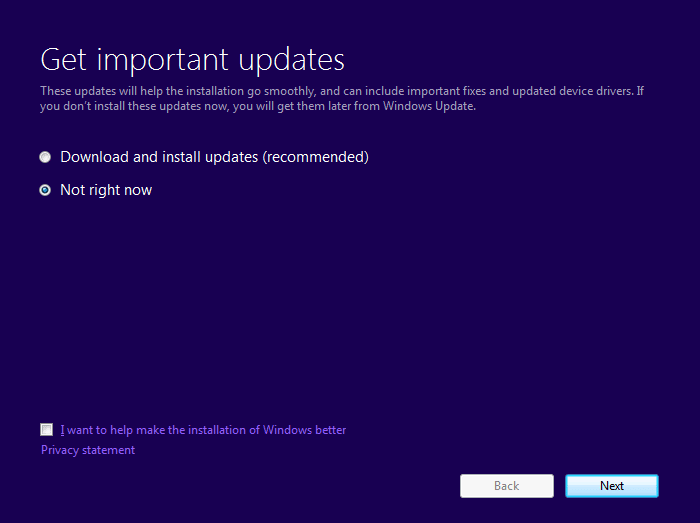
8.On “Get important updates” skjár, veldu Ekki núna og smelltu svo á Next.
9.Follow the on-screen instructions to complete the setup. Once finished, press Windows Key + I to open Stillingar flettu síðan til Update & security > Windows Update > Check for updates.

Mælt með fyrir þig:
If above doesn’t work for you then again go to services.msc and right click on it to disable it. Restart your PC and make sure Windows update is disable then again try to run the Windows 10 upgrade assistant or better use Media Creation Tool.
Það er það sem þú hefur með góðum árangri Laga Windows 10 uppfærsluaðstoðarmaður fastur við 99% issue but if you still have any question regarding this post feel free to ask them in comments. Share this post to help your family and friends if they are still facing this issue.

