A user profile is a place where Windows 10 stores a collection of settings and preferences, making a user account the way it looks for that particular account. All these settings and preferences are stored in a folder called User Profile folder located in C:UsersUser_name. It contains all the settings for screensavers, desktop background, sound settings, display settings and other features. The User Profile also contains users personal files & folders such as Desktop, Documents, Download, Favorites, Links, Music, Pictures etc.
Whenever you add a new user account in Windows 10, a new user profile for that account is automatically created. Since the user profile is automatically created, you don’t get to specify the User Profile folder’s name, so this tutorial will show you How to Rename User Profile Folder in Windows 10.
Rename User Profile Folder in Windows 10
Gakktu úr skugga um að búa til endurheimtarstað ef eitthvað fer úrskeiðis.
1. Sign out of the user account for which you want to change the name of the user profile folder.
2. Now you need to sign in to any stjórnandi reikningur (you don’t want to change this administrator account).
Athugaðu: If you don’t have access to an administrator account, you can enable the built-in Administrator to sign in to Windows and do these steps.
3. Opnaðu Command Prompt. Notandinn getur framkvæmt þetta skref með því að leita að 'cmd' Og ýttu síðan á Enter.

4. Sláðu inn eftirfarandi skipun í cmd og ýttu á Enter:
wmic useraccount get name,SID
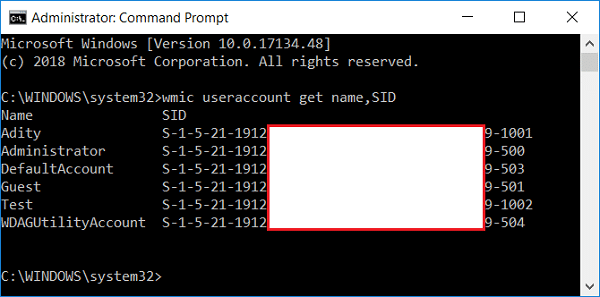
5. Note down the SID of the account you want to change the name of the user profile folder.
6. Ýttu á Windows Key + R og sláðu síðan inn ríkisstjóratíð og ýttu á Enter til að opna Registry Editor.

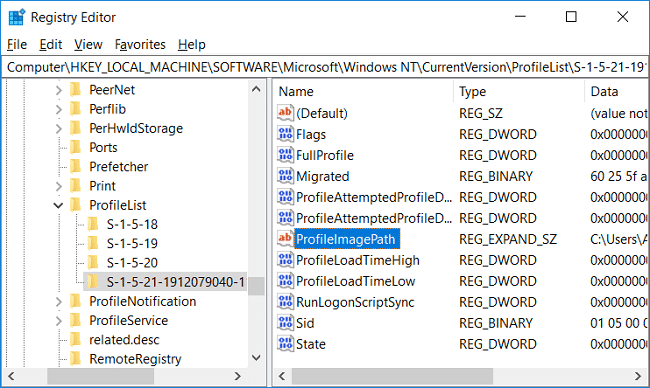
7. Farðu í eftirfarandi skrásetningarlykil:
HKEY_LOCAL_MACHINESOFTWAREMicrosoft Windows Windows NTCurrentVersionProfileList
8. From the left pane, select the SID which you noted in step 5 then in the right window, pane double-click on ProfileImagePath.
9. Now, under Value data field, change the name of the user profile folder í samræmi við óskir þínar.
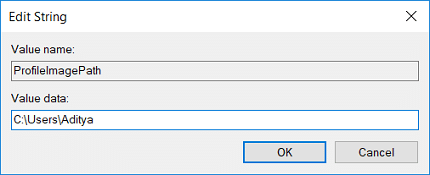
Til dæmis: Ef það er C:UsersMicrosoft_Windows10 then you could change it to C:UsersWindows10
10. Close Registry Editor then press Windows lykill + E til að opna File Explorer.
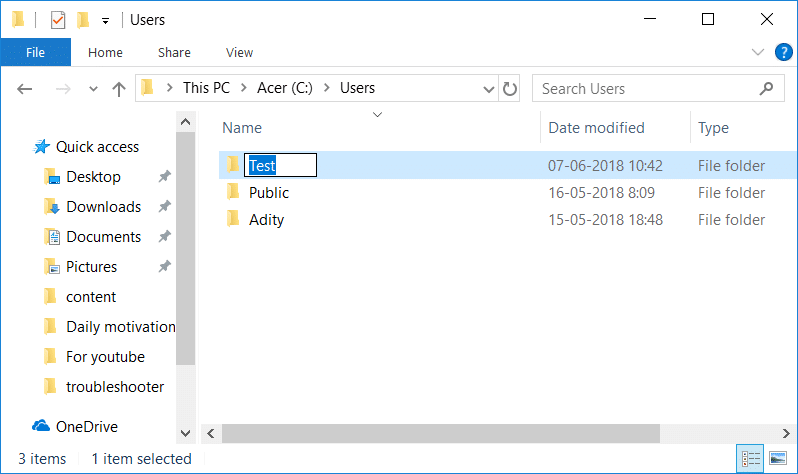
11. Flettu að C: Notendur in the Windows File Explorer.
12. Hægri smelltu á user profile folder og rename according to the new path to the profile you have renamed in step 9.
13. Close everything and reboot your PC to save changes.
Mælt með:
Það er það sem þú hefur lært með góðum árangri How to Rename User Profile Folder in Windows 10 en ef þú hefur enn einhverjar spurningar varðandi þessa kennslu skaltu ekki hika við að spyrja þær í athugasemdahlutanum.

