How to Fix Automatic Repair couldn’t repair your PC: Windows 10 is the latest operating system offered by Microsoft and with each Windows upgrade Microsoft is trying their best to overcome the limitation and shortcomings of various issues found in earlier versions of Windows. But there are some errors that are common to all versions of Windows including boot failure being the major one. Boot failure can happen with any version of Windows including Windows 10.
Automatic repair is generally able to fix the boot failure error, this is a built-in option that comes along with Windows itself. When Windows 10 running system fails to boot, the Automatic Repair option tries to repair Windows automatically. In most cases, automatic repair fixes various issues related to errori di avvio but like any other program, it also has its limitations, and sometimes Automatic Repair fails to work.
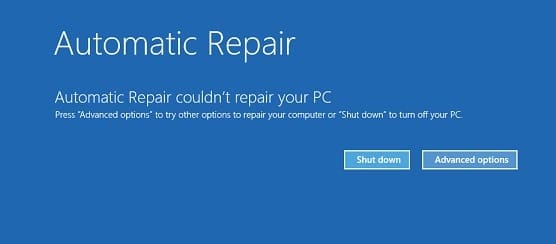
Automatic Repair fails because there are some errors or corrupted or missing files in your operating system installation that prevent Windows from starting correctly and if Automatic Repair fails then you won’t be able to get into Safe Mode. Often a failed automatic repair option will show you some kind of error message like this one:
Automatic Repair couldn't repair your PC.
Press "Advanced options" to try other options to repair your PC or "Shut down" to turn off your PC.
Log file: C:WINDOWSSystem32LogfilesSrtSrtTrail.txt
In a situation when Automatic Repair couldn’t repair your PC, Bootable installation media or Recovery Drive/System Repair Disc are helpful in such cases. Let’s get started and see step by step how you can fix Automatic Repair couldn’t repair your PC error.
Nota: For each and every step below you need to have Bootable installation media or Recovery Drive/System Repair Disc and if you don’t have one then create one. If you don’t want to download the entire OS from the website then you use your friend’s PC to create the disc using this link or you need to download official Windows 10 ISO but for that, you need to have a working internet connection and PC.
IMPORTANT: Never convert a Basic disk that contains your operating system to a Dynamic disk, as it could make your system unbootable.
How to open Command Prompt at Boot in Windows 10
NOTA: You need to open Command Prompt at Boot a lot in order to fix various issues.
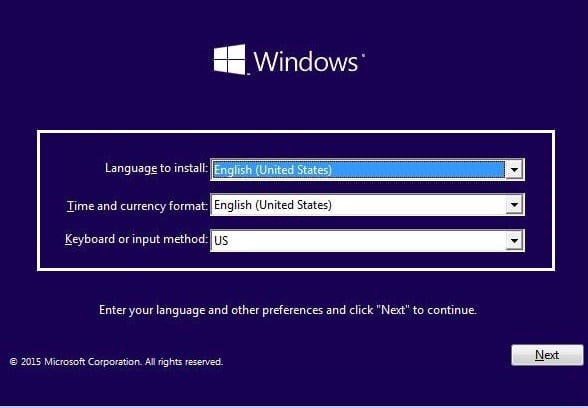
a) Put in the Windows installation media or Recovery Drive/System Repair Disc and select your preferenze linguistiche, e fare clic su Avanti.
b) Fare clic su Riparazione il tuo computer in basso.

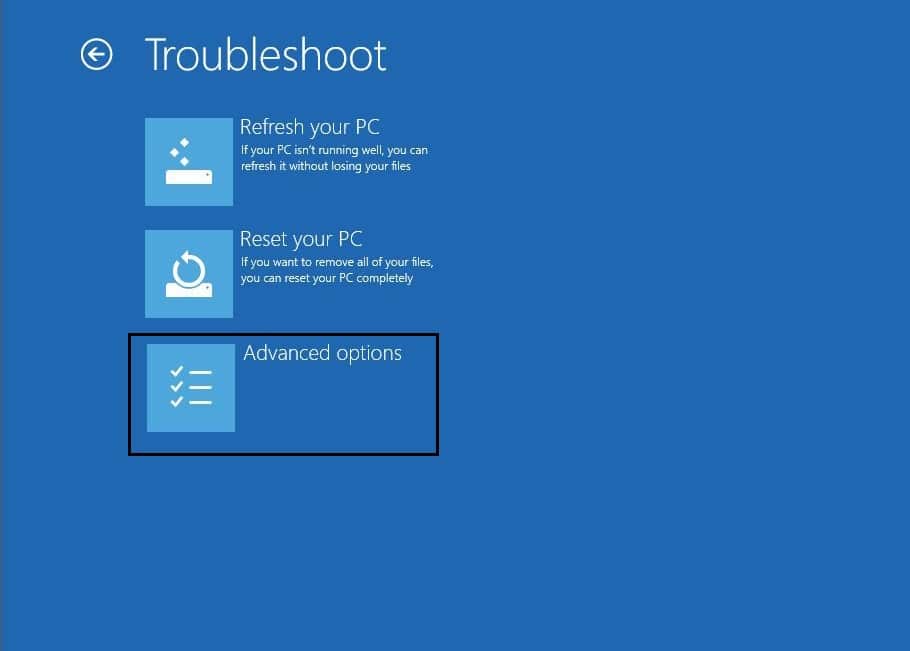
c) Now choose Risoluzione dei problemi e poi Opzioni avanzate.
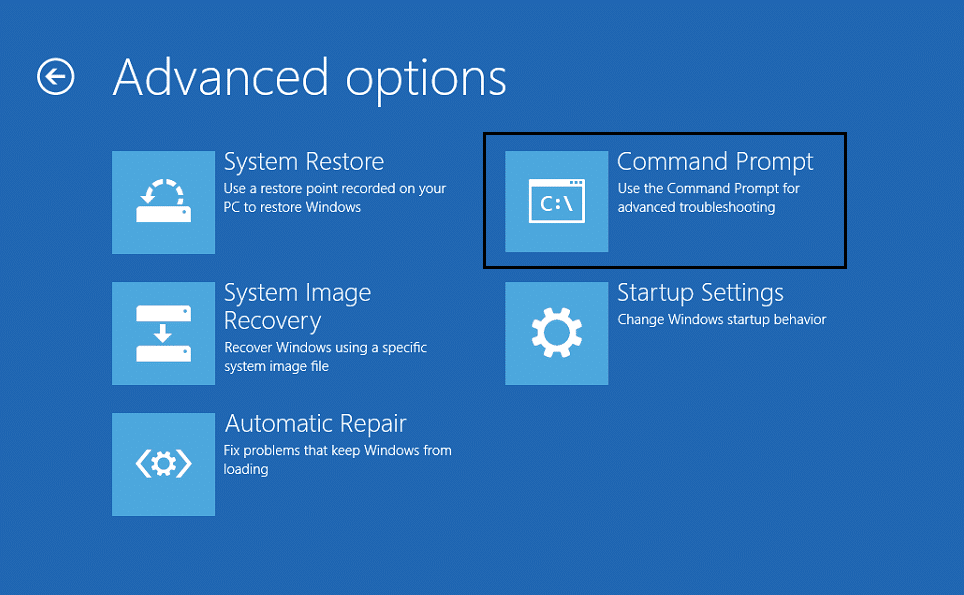
d) Selezionare Prompt dei comandi (Con rete) dall'elenco delle opzioni.
Fix Automatic Repair couldn’t repair your PC
Importante dichiarazione di non responsabilità:
These are very advanced tutorial, if you don’t know what you’re doing then you may accidentally harm your PC or perform some steps incorrectly that will ultimately make your PC unable to boot to Windows. So if you don’t know what you’re doing, please take help from any technician or expert supervision is recommended.
Method 1: Fix boot and rebuild BCD
1. Open the Command prompt and type the following commands one by one & hit enter:
bootrec.exe / rebuildbcd
bootrec.exe / fixmbr
bootrec.exe / fixboot
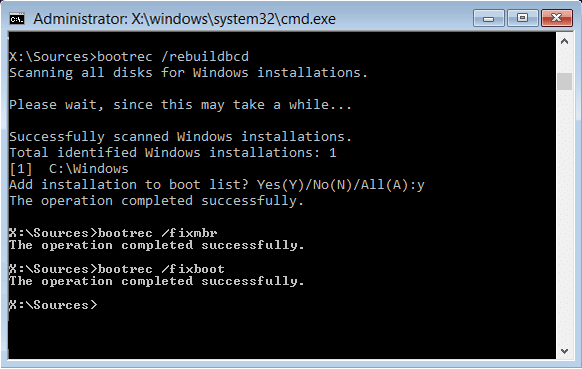
2. After completing each command successfully type Uscita.
3. Restart your PC to see if you boot to windows.
4. If you get an error in the above method then try this:
bootsect /ntfs60 C: (sostituisci la lettera di unità con la lettera di unità di avvio)
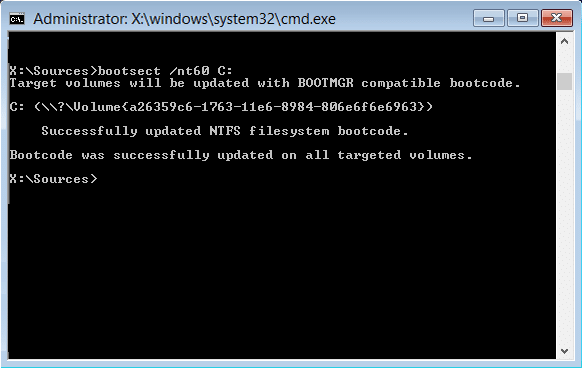
5. And again try the above commands which failed earlier.
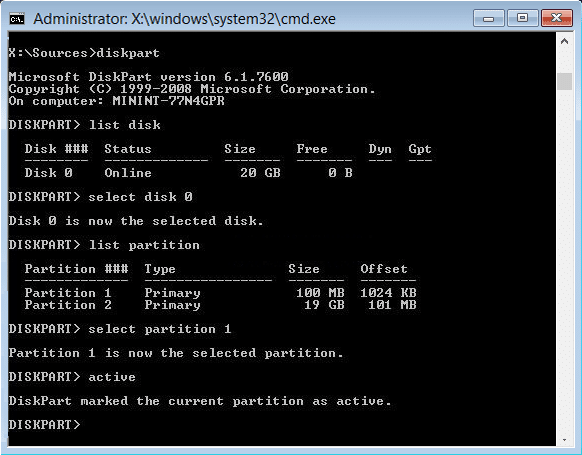
Method 2: Use Diskpart to fix corrupted file system
1. Ancora una volta vai a Prompt dei comandi e scrivi: diskpart
2. Now type these commands in Diskpart: (don’t type DISKPART)
DISKPART> seleziona disco 1
DISKPART> seleziona la partizione 1
DISKPART> attivo
DISKPART> estendi il filesystem
DISKPART> esci
3. Now type the following command:
 bootrec.exe / rebuildbcd
 bootrec.exe / fixmbr
 bootrec.exe / fixboot
4. Restart to apply changes and see if you’re able to fix Automatic Repair couldn’t repair your PC error.
Method 3: Use Check Disk Utility
1. Go to command prompt and type the following: chkdsk /f /r C:
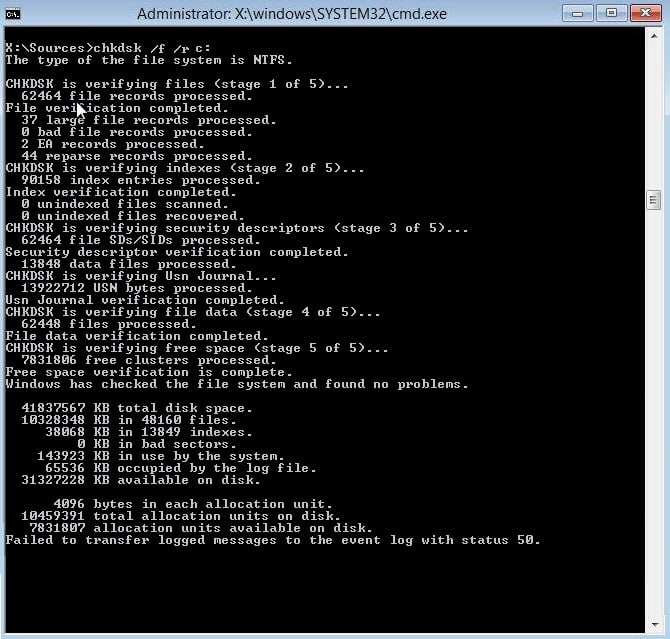
2. Adesso riavvia il tuo PC to see if the problem is fixed or not.
Method 4: Recover Windows registry
1. Inserire il supporto di installazione o ripristino e avvialo da esso.
2. Seleziona il tuo preferenze di lingua e fare clic su Avanti.
3. After selecting language press Maiusc + F10 al prompt dei comandi.
4. Type the following command in the Command Prompt:
cd C:windowssystem32logfilesrt (cambia la lettera dell'unità di conseguenza)

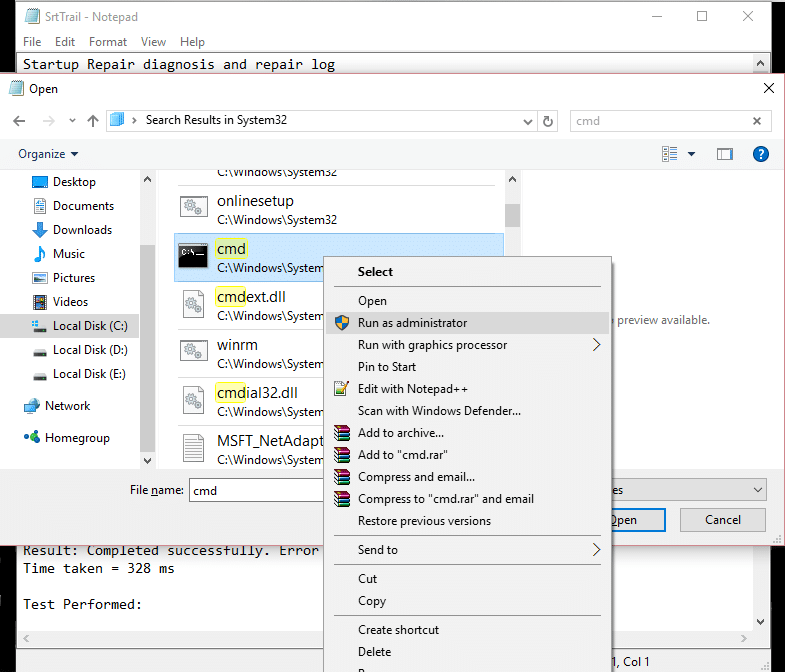
5. Now type this to open the file in notepad: SrtTrail.txt
6. Stampa CTRL + O quindi dal tipo di file seleziona "Tutti i file" e vai a C: sistema windows32 then right-click CMD e seleziona Esegui come amministratore.
7. Type the following command in cmd: cd C:windowssystem32config
8. Rename Default, Software, SAM, System, and Security files to .bak to back up those files.
9. To do so type the following command:
rename DEFAULT DEFAULT.bak
rename SAM SAM.bak
rename SECURITY SECURITY.bak
rename SOFTWARE SOFTWARE.bak
rename SYSTEM SYSTEM.bak
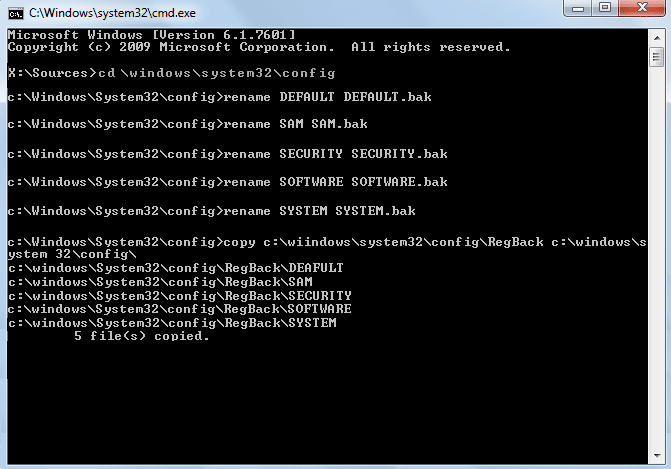
10. Now type the following command in cmd:
copiare c:windowssystem32configRegBack c:windowssystem32config
11. Restart your PC to see if you can boot to Windows.
Method 5: Repair Windows Image
1. Open Command Prompt and enter the following command:
DISM / Online / Cleanup-Image / RestoreHealth

2. Press enter to run the above command and wait for the process to complete, usually, it takes 15-20 minutes.
NOTA: If the above command doesn’t work then try this: Dism /Image:C:offline /Cleanup-Image /RestoreHealth /Source:c:testmountwindows or Dism /Online /Cleanup-Image /RestoreHealth /Source:c:testmountwindows /LimitAccess
3. After the process is completed restart your PC.
4. Reinstall all the windows drivers and fix Automatic Repair couldn’t repair your PC error.
Metodo 6: eliminare il file problematico
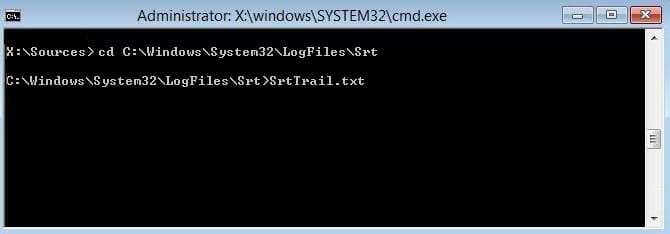
1. Access Command Prompt again and enter the following command:
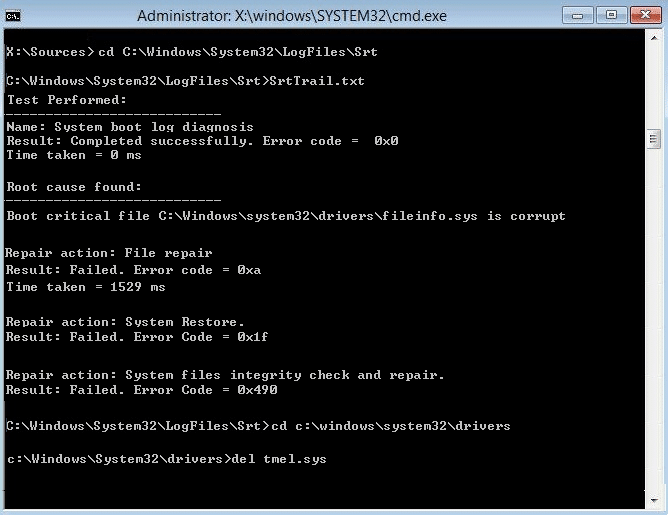
cd C:WindowsSystem32LogFilesSrt
SrtTrail.txt
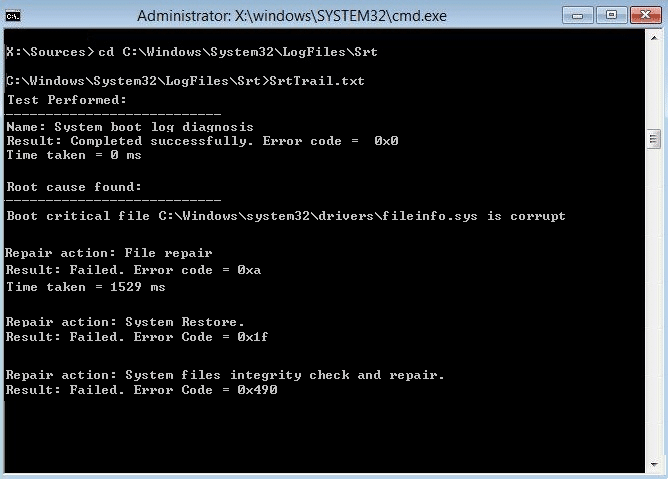
2. When the file opens you should see something like this:
Il file critico di avvio c:windowssystem32driverstmel.sys è danneggiato.
3. Delete the problematic file by entering the following command in cmd:
cdc:windowssystem32drivers
del tmel.sys
NOTA: Non eliminare i driver essenziali affinché Windows possa caricare il sistema operativo
4. Restart to see if the issue is fixed if not continue to the next method.
Method 7: Disable Automatic Startup Repair Loop
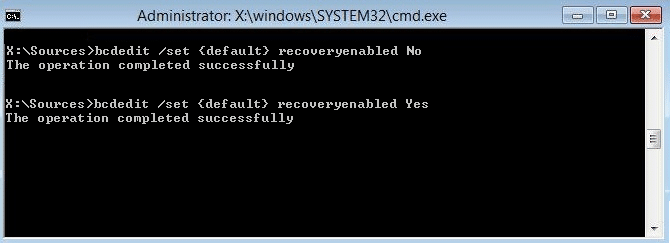
1. Open Command Prompt and enter the following command:
NOTA: Only disable if you are in Automatic Startup Repair Loop
bcdedit / set {default} recoveryenabled No
2. Restart and Automatic Startup Repair should be disabled.
3. If you need to again enable it, enter the following command in cmd:
bcdedit /set {default} recoveryenabled Sì
4. Reboot to apply changes.
Metodo 8: impostare i valori corretti della partizione del dispositivo e della partizione del dispositivo os
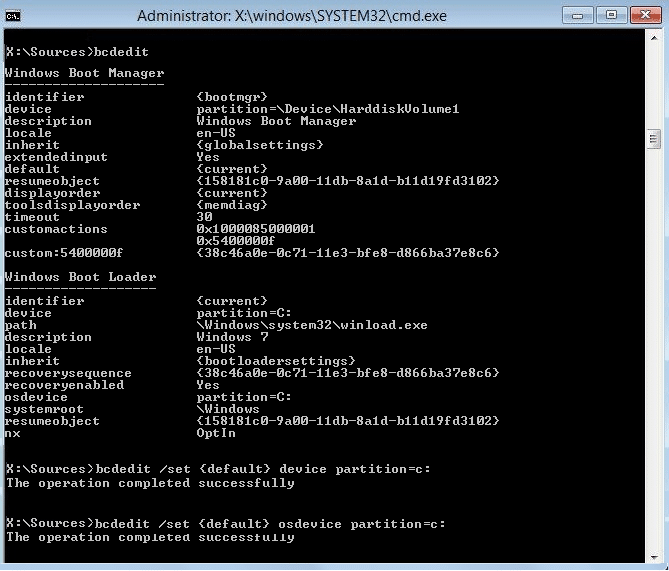
1. In Command Prompt type the following and press enter: bcdedit
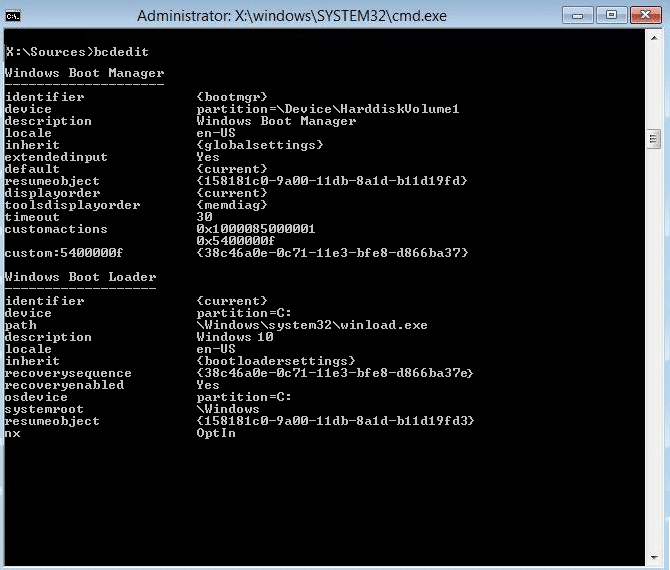
2. Now find the values of partizione del dispositivo e partizione del dispositivo os e assicurati che i loro valori siano corretti o impostati sulla partizione corretta.
3. By default value is C: because Windows comes pre-installed on this partition only.
4. If by any reason it is changed to any other drive then enter the following commands and press Enter after each one:
bcdedit /set partizione del dispositivo {predefinita}=c:
bcdedit /set {default} partizione osdevice=c:
Nota: Se hai installato Windows su qualsiasi altra unità assicurati di utilizzare quella invece di C:
5. Reboot your PC to save changes and fix Automatic Repair couldn’t repair your PC error.
Method 9: Disable driver signature enforcement
1. Put in the Windows installation media or Recovery Drive/System Repair Disc and select your preferenze linguistiche, e fare clic su Avanti.
2. Clic Riparazione il tuo computer in basso.
3. Now choose Risoluzione dei problemi e poi Opzioni avanzate.
4. Scegliere Impostazioni di avvio.
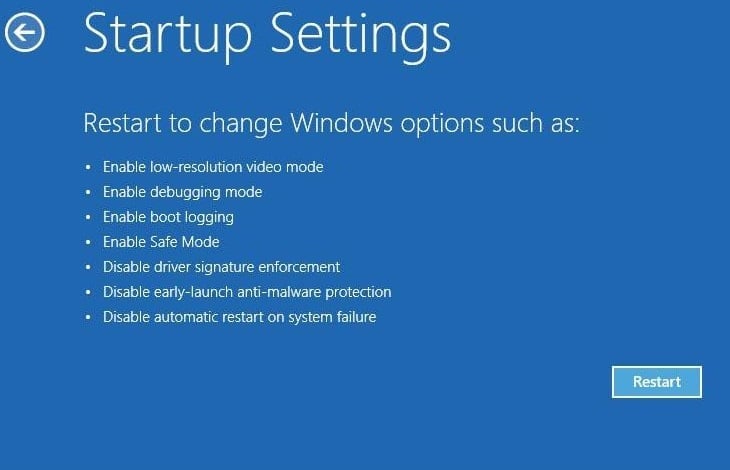
5. Riavvia il PC e premere il numero 7 (If 7 isn’t working then relaunch the process and try different numbers).

Method 10: Last option is to perform Refresh or Reset
Again insert Windows 10 ISO then select your language preferences and click Ripristina il computer in basso.
1. Scegliere Troubleshooting quando l' Menu di avvio appare.

2. Now choose between the option Refresh or Reset.
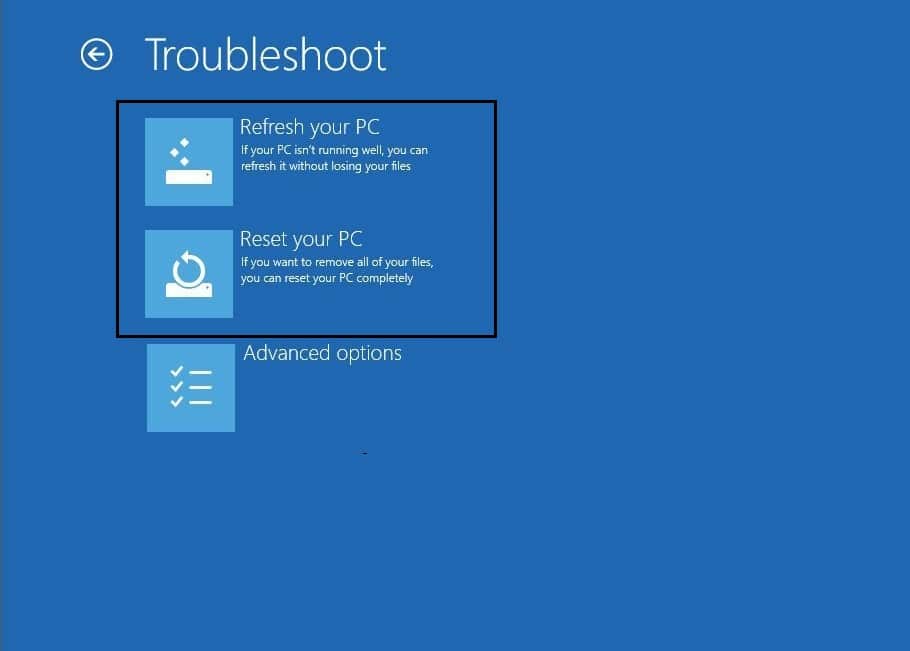
3. Follow the on-screen instructions to complete the Reset or Refresh.
4. Make sure you have the latest OS disc (Preferibilmente Windows 10) in order to complete this process.
Raccomandato per te:
By now you must have successfully fisso La riparazione automatica non è riuscita a riparare il tuo PC but if you still have any questions regarding this guide please feel free to ask them in the comment section.

