4 Ways to Run Disk Error Checking in Windows 10: Once in a while running Disk Error checking ensures that your drive doesn’t have performance issues or drive errors which are caused by bad sectors, improper shutdowns, corrupt or damaged hard disk etc. Disk error checking is nothing but Check Disk (Chkdsk) which checks for any errors in the hard drive. Now there are different ways for running Disk Check in Windows 10 and today in this tutorial we are going to see what are the 4 Ways to Run Disk Error Checking in Windows 10.
4 דרכים להפעיל בדיקת שגיאות דיסק ב-Windows 10
הקפד ליצור נקודת שחזור למקרה שמשהו ישתבש.
Method 1: Run Disk Error Checking in Windows 10 using Drive Tools
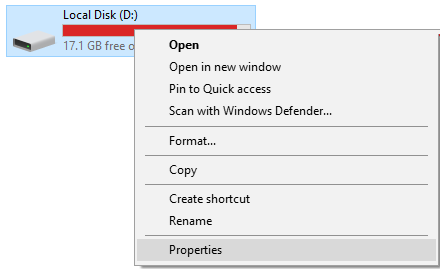
1.Press Windows Key + E to open File Explorer then navigate to “במחשב זה
2.Right-click on the drive which you want to run the error checking ובחר נכסים.
3. עבור אל הכרטיסייה כלים לאחר מכן לחץ על "לבדוק” button under Error checking.
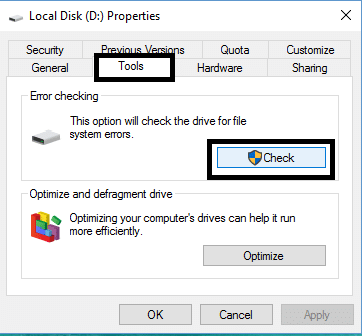
4.Now you can Scan drive or Repair drive (if errors are found).
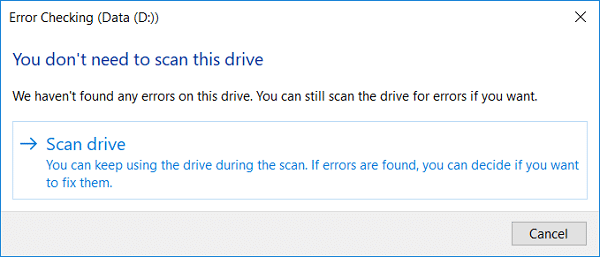
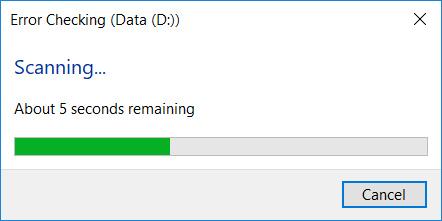
5.After you click כונן סריקה, it will take some time to scan the drive for errors.

הערה: While the Disk Error Checking is running, it best to leave the PC idle.
5.Once the scan is finished you can click on “הראה פרטים” link to see the Chkdsk scan results in Event Viewer.
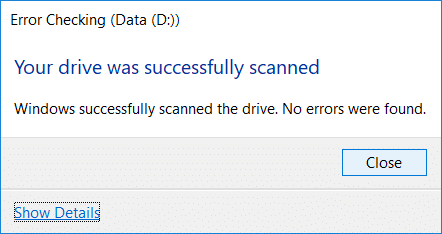
6.Click Close once you’re finished and close Event Viewer.
Method 2: Run Disk Error Checking in Windows 10 using Command Prompt
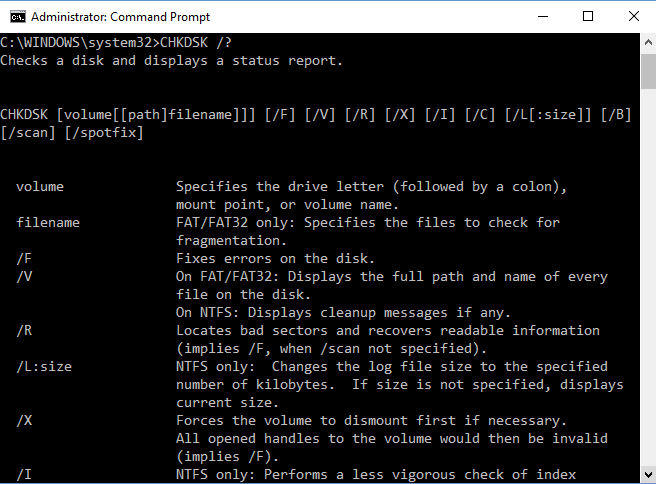
1. הקש על מקש Windows + X ואז בחר שורת הפקודה (מנהל).

2. הקלד את הפקודה הבאה לתוך cmd והקש Enter:
chkdsk C: / f / r / x

הערה: Replace C: with the drive letter on which you want to run Check Disk. Also, in the above command C: is the drive on which we want to run check disk, /f stands for a flag which chkdsk the permission to fix any errors associated with the drive, /r let chkdsk search for bad sectors and perform recovery and /x instructs the check disk to dismount the drive before beginning the process.
3. You can also substitute the Switches which are /f or /r etc. To know more about switches type the following command into cmd and hit Enter:
CHKDSK /?
4.Wait for the command to finish checking the disk for errors then restart your PC.
Method 3: Run Disk Error Checking in Windows 10 using Security and Maintenance
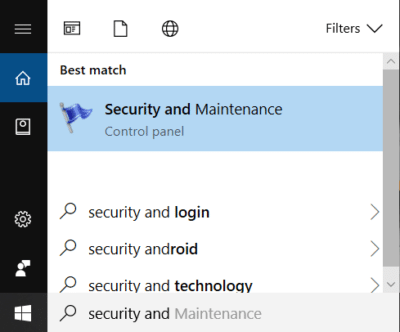
1. סוג אבטחה in Windows Search then click on אבטחה ותחזוקה from the Search result.
2.Expand Maintenance then under Drive status see the current health of your drives.
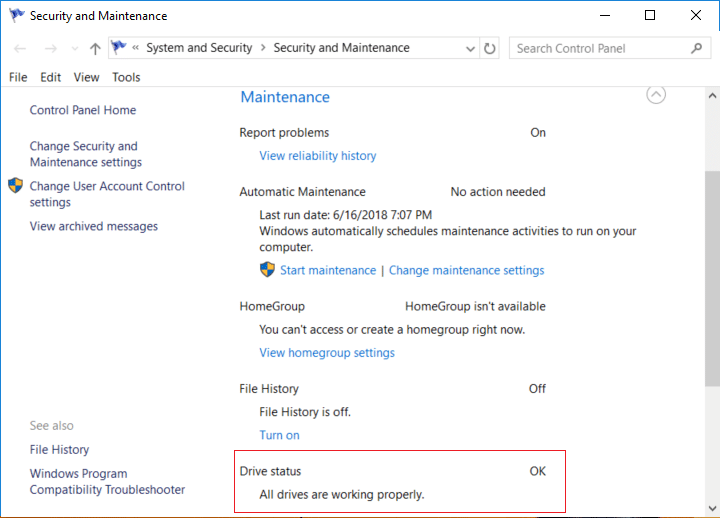
3.If any issues are found with your hard disk drives then you will see an option to scan the drive.
4.Just click on Scan to run disk error checking and let it run until the scan is complete.
5. הפעל מחדש את המחשב כדי לשמור שינויים.
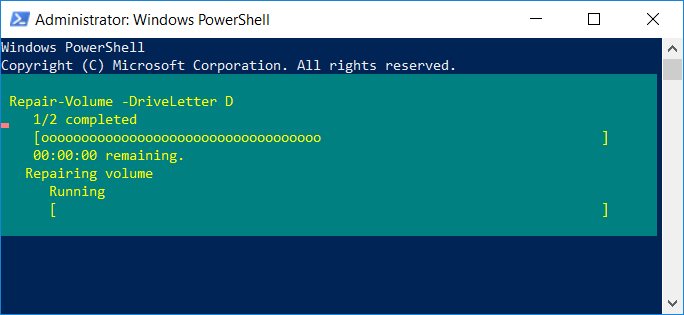
Method 4: Run Disk Error Checking in Windows 10 using PowerShell
1. סוג PowerShell בחיפוש Windows ולאחר מכן לחץ לחיצה ימנית על PowerShell מתוצאת החיפוש ובחר הפעל כמנהל.
2.Now type one of the following command into PowerShell and hit Enter:
To scan and repair the drive (equivalent to chkdsk): Repair-Volume -DriveLetter drive_letter
To scan the volume offline and fix any errors found (equivalent to chkdsk /f): Repair-Volume -DriveLetter drive_letter -OfflineScanAndFix
To scan the volume without attempting to repair it (equivalent to chkdsk /scan): Repair-Volume -DriveLetter drive_letter -Scan
To take the volume briefly offline and then fixes only issues that are logged in the $corrupt file (equivalent to chkdsk /spotfix): Repair-Volume -DriveLetter drive_letter -SpotFix
הערה: Substitute “drive_letter” in the above command with the actual drive letter you want.
3.Close PowerShell restart your PC to save changes.
מומלץ:
זהו זה שלמדת בהצלחה How to Run Disk Error Checking in Windows 10 אבל אם עדיין יש לך שאלות כלשהן בנוגע לפוסט הזה, אל תהסס לשאול אותם בקטע של התגובה.

