Fix The Service Couldn’t Be Started Windows Defender Error 0x80070422: Windows Defender is a malware protection software which is inbuilt into Windows 10. Now it is used widely by Windows users because it’s reliable, but in some cases, users also installed 3rd party Antivirus software such as Norton, Quick Heal etc which is not recommend because they corrupt the files of Windows Defender. Once you completely uninstall 3rd party antivirus you won’t be able to use Windows Defender properly because files required by it have already been corrupted and can no longer be used.
“The service couldn’t be started.
The service cannot be started, either because it is disabled or because it has no enabled devices associated with it.”
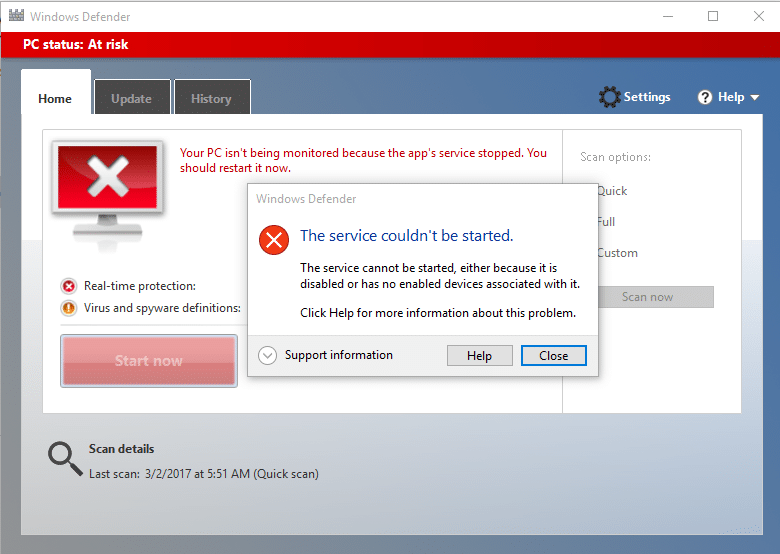
Windows Defender is turned off when you use a 3rd party Antivirus and once you uninstall the Antivirus software you won’t be able to turn ON Windows Defender. If you try to enable Windows Defender you will face the error “The Service Couldn’t Be Started” with error code 0x80070422. So without wasting any time let’s see how to actually Fix The Service Couldn’t Be Started Windows Defender Error 0x80070422 with the help of below-listed troubleshooting guide.
Fix The Service Couldn’t Be Started Windows Defender Error 0x80070422
הקפד ליצור נקודת שחזור למקרה שמשהו ישתבש.
שיטה 1: הפעל את SFC ו-CHKDSK
1. הקש על מקש Windows + X ואז לחץ על שורת הפקודה (מנהל).

2. כעת הקלד את הדברים הבאים ב-cmd ולחץ על Enter:
Sfc /scannow sfc /scannow /offbootdir=c: /offwindir=c:windows (אם למעלה נכשל אז נסה את זה)

3. המתן לסיום התהליך שלמעלה ולאחר שתסיים הפעל מחדש את המחשב.
4. הבא, הפעל את CHKDSK מכאן תקן שגיאות במערכת הקבצים באמצעות בדיקת כלי השירות (CHKDSK).
5. תן לתהליך לעיל להשלים ושוב אתחל את המחשב כדי לשמור שינויים.
Method 2: Temporarily Disable 3rd party Antivirus
1. לחץ באמצעות לחצן העכבר הימני על סמל תוכנית אנטי וירוס ממגש המערכת ובחר השבת.

2. לאחר מכן, בחר את מסגרת הזמן עבורה האנטי וירוס יישאר מושבת.

הערה: בחר את פרק הזמן הקטן ביותר האפשרי, למשל 15 דקות או 30 דקות.
3.Once done, again try to run Windows Defender and check if the error resolves or not.
4. הקש על מקש Windows + X ואז בחר לוח בקרה.

5.הבא, לחץ על מערכת ואבטחה.
6. לאחר מכן לחץ על חומת האש של Windows.

7. כעת, מחלונית החלון השמאלית, לחץ על הפעל או כבה את חומת האש של Windows.

8.בחר כבה את חומת האש של Windows והפעל מחדש את המחשב. Again try to open Windows Defender and see if you’re able to Fix The Service Couldn’t Be Started Windows Defender Error 0x80070422.
אם השיטה שלעיל לא עובדת, הקפד לבצע את אותם השלבים בדיוק כדי להפעיל שוב את חומת האש שלך.
שיטה 3: ודא ש-Windows מעודכן
1. הקש על מקש Windows + I ואז בחר עדכון ואבטחה.

2.הבא, לחץ שוב בדקו אם יש עדכונים ודאג להתקין עדכונים ממתינים.

3. לאחר התקנת העדכונים הפעל מחדש את המחשב ובדוק אם אתה מסוגל Fix The Service Couldn’t Be Started Windows Defender Error 0x80070422.
Method 4: Make sure Windows Defender service is set to Automatic
הערה: If Windows Defender service is grayed out in Services Manager then follow this post.
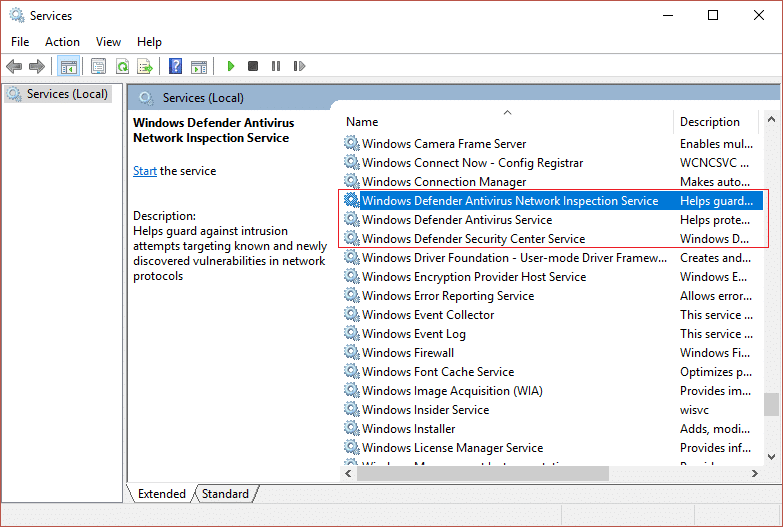
1. הקש על מקש Windows + R ואז הקלד services.msc ולחץ על Enter.

2.Find the following services in the Services window:
Windows Defender Antivirus Network Inspection Service
Windows Defender Antivirus Service
Windows Defender Security Center Service
3.Double-click on each of them and make sure their Startup type is set to מכני עם סלילה אוטומטית and click Start if the services are not already running.
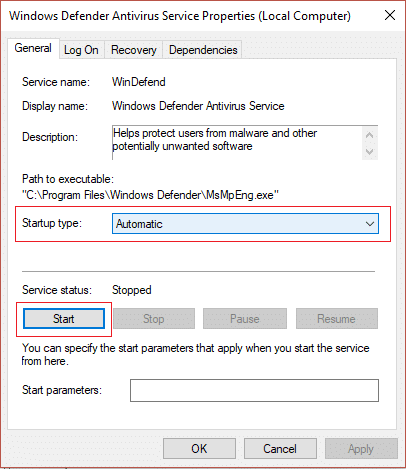
4. לחץ על החל ולאחר מכן על OK.
5. הפעל מחדש את המחשב כדי לשמור שינויים ולראות אם אתה מסוגל Fix The Service Couldn’t Be Started Windows Defender Error 0x80070422.
Method 5: Enable Windows Defender through Registry Editor
1. הקש על מקש Windows + R ואז הקלד regedit ולחץ על Enter.

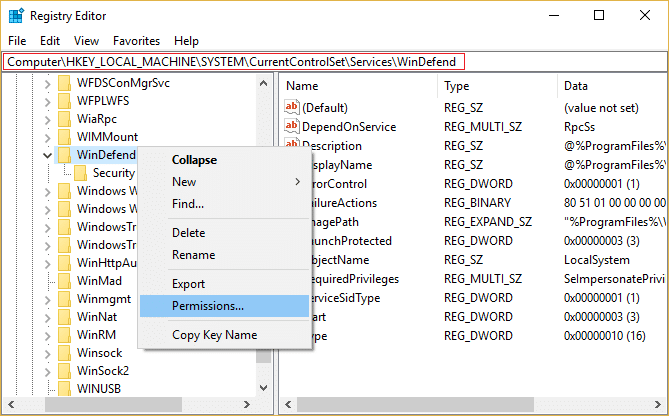
2. נווט אל מפתח הרישום הבא:
HKEY_LOCAL_MACHINESYSTEM CurrentControlSetServicesWinDefend
3.Now right-click on WinDefend ובחר אישורים.
4.Follow this guide in order to take full control or ownership of the above registry key.
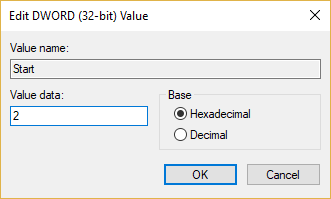
5.After that make sure you have selected WinDefend then in the right window double-click on Start DWORD.
6.Change the value to 2 in the value data field and click OK.
7. סגור את עורך הרישום והפעל מחדש את המחשב.
8.Again try to enable Windows Defender and this time it should work.
שיטה 6: הפעל את CCleaner ו-Malwarebytes
1. הורד והתקן CCleaner & Malwarebytes.
2.הפעל את Malwarebytes ותן לו לסרוק את המערכת שלך לאיתור קבצים מזיקים.
3. אם נמצא תוכנה זדונית זה יסיר אותם אוטומטית.
4. כעת רוץ CCleaner ובקטע "מנקה", תחת לשונית Windows, אנו מציעים לבדוק את הבחירות הבאות שיש לנקות:

5. לאחר שווידאת שהנקודות המתאימות נבדקות, פשוט לחץ מנקה ריצה, ולתת ל-CCleaner לפעול.
6. כדי לנקות את המערכת שלך עוד יותר, בחר בכרטיסייה רישום וודא שהדברים הבאים מסומנים:

7. בחר סרוק לבעיה ואפשר ל-CCleaner לסרוק, ולאחר מכן לחץ תקן בעיות נבחרות.
8. כאשר CCleaner שואל "האם אתה רוצה שינויי גיבוי ברישום?" בחר כן.
9. לאחר השלמת הגיבוי, בחר תקן את כל הבעיות שנבחרו.
10. הפעל מחדש את המחשב כדי לשמור שינויים ולראות אם אתה מסוגל Fix The Service Couldn’t Be Started Windows Defender Error 0x80070422.
Method 7: Refresh or Reset your PC
1.Press Windows Key + I to open Settings then select עדכון ואבטחה.
2.From left-hand menu select התאוששות ולחץ על “התחל כאן” under Reset this PC.

3. בחר באפשרות ל שמור על הקבצים שלי.

4.Follow the instructions on the screen to complete the process.
5.This will take some time and your computer will restart.
שיטה 8: תיקון התקנת Windows 10
שיטה זו היא המוצא האחרון כי אם שום דבר לא יסתדר אז שיטה זו בוודאי תתקן את כל הבעיות במחשב שלך. תיקון התקן רק באמצעות שדרוג במקום כדי לתקן בעיות במערכת מבלי למחוק את נתוני המשתמש הקיימים במערכת. אז עקוב אחר מאמר זה כדי לראות כיצד לתקן התקן את Windows 10 בקלות.
מומלץ עבורך:
זהו, יש לך בהצלחה Fix The Service Couldn’t Be Started Windows Defender Error 0x80070422 אבל אם עדיין יש לך שאלות כלשהן בנוגע למדריך הזה, אל תהסס לשאול אותם בקטע של ההערה.

