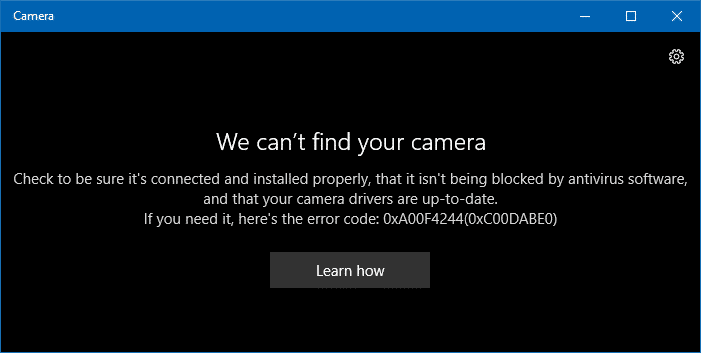
Fix Windows can’t find or start the camera: If you are facing the error “We can’t find your camera” with error code 0xA00F4244 (0xC00D36D5) then the cause might be antivirus blocking the webcam/camera or outdated drivers of the webcam. It’s possible that your webcam or camera app won’t open and you will get an error message saying we can’t find or start your camera including the above error code. So without wasting any time let’s see how to actually Fix Windows can’t find or start the camera with the help of below-listed troubleshooting guide.
Fix Windows can’t find or start the camera
何か問題が発生した場合に備えて、必ず復元ポイントを作成してください。
Method 1: Temporarily Disable Antivirus and Firewall
1. を右クリックします。 ウイルス対策プログラムのアイコン システムトレイから選択し、 無効にする。

2.次に、期間を選択します。 ウイルス対策は無効のままになります。

注: 15 分や 30 分など、可能な限り短い時間を選択してください。
3.Once done, again try to open webcam and check if the error resolves or not.
4.Windows キー + X を押して選択します。 コントロールパネル。

5.Next, click on システムとセキュリティ。
6.次に、をクリックします Windowsファイアウォール。

7.Now from the left window pane click on Turn Windows Firewall on or off.

8.Select Turn off Windows Firewall and restart your PC. Again try to open Update Windows and see if you’re able to Fix Windows can’t find or start the camera error.
If the above method doesn’t work make sure to follow the exact same steps to turn on your Firewall again.
Method 2: Make sure Camera is turned ON
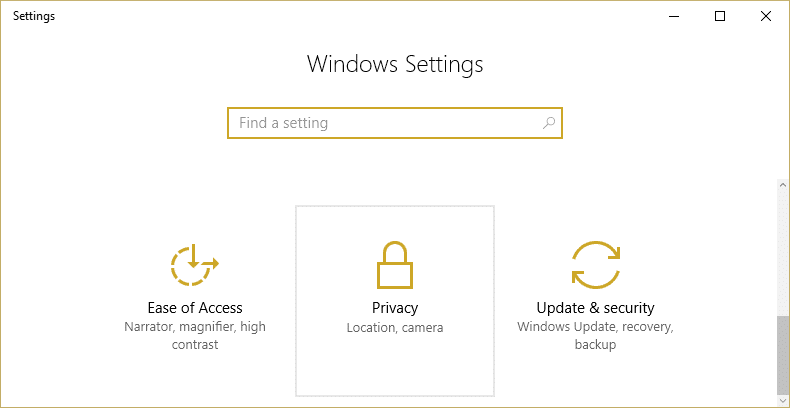
1.Press Windows Key + I to open Windows Settings then click on プライバシー。
2.左側のメニューから カメラ。
3.Make sure the toggle below Camera which says “Let apps use my camera hardware” is turned ON.
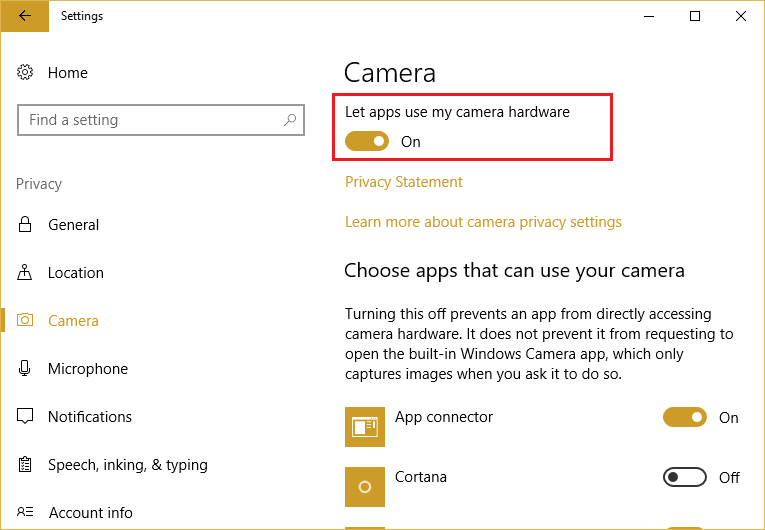
4.Close Settings and reboot your PC to save changes.
方法3:システムの復元を試す
1.Windowsキー+Rを押して「」と入力します。sysdm.cplと」と入力して Enter キーを押します。

2.Select システム保護 タブを選択して システムの復元。
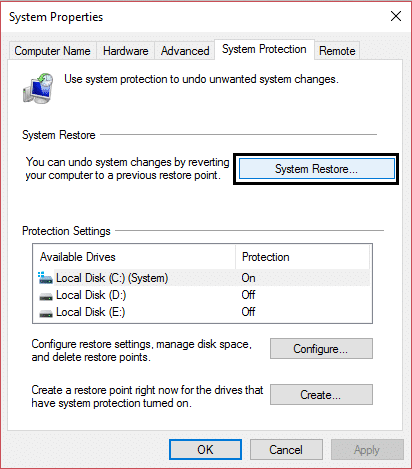
3.「次へ」をクリックし、必要な項目を選択します。 システムの復元ポイント.
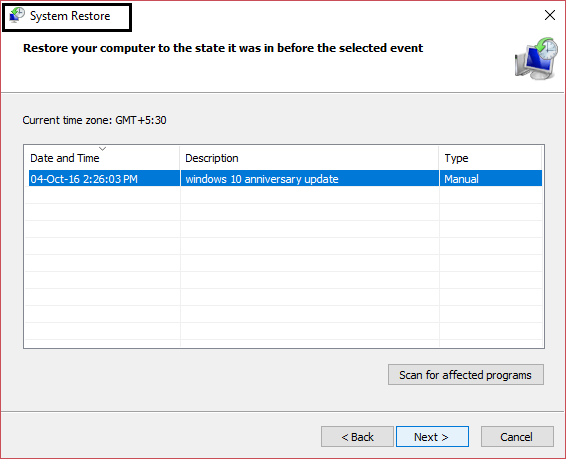
4.Follow the on-screen instructions to complete system restore.
5.After reboot, you may be able to Fix Windows can’t find or start the camera or All Cameras are Reserved Error 0xA00f4288 in Windows 10.
Method 4: Rollback Webcam Driver
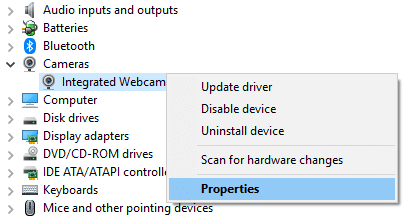
1.Windows キー + R を押してから、次のように入力します。 devmgmt.msc Enter キーを押して、デバイス マネージャーを開きます。

2.展開する Imaging devices or Sound, video and game controllers or Cameras and find your webcam listed under it.
3.Right-click on your webcam and select プロパティ。
4.切り替え ドライバ]タブ そして ドライバのロールバック option is available click on it.
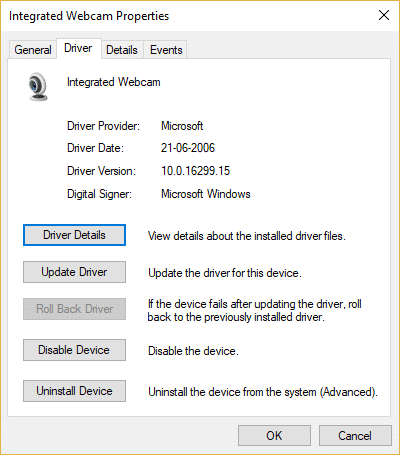
5.Select 有り to continue with the rollback and reboot your PC once the process is complete.
6.Again check if you’re able to fix Windows can’t find or start the camera or no cameras are attached エラー。
Method 5: Uninstall Webcam Driver
1.Press Windows Key + R then devmgmt.msc Enterキーを押します。
2.展開する カメラ then right-click on your webcam and select デバイスをアンインストールします。
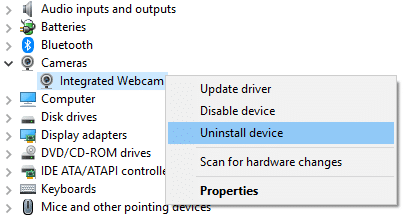
3.Now from Action select “ハードウェアの変更をスキャンします。「

4. PC を再起動して変更を保存します。
Method 6: Reset Webcam
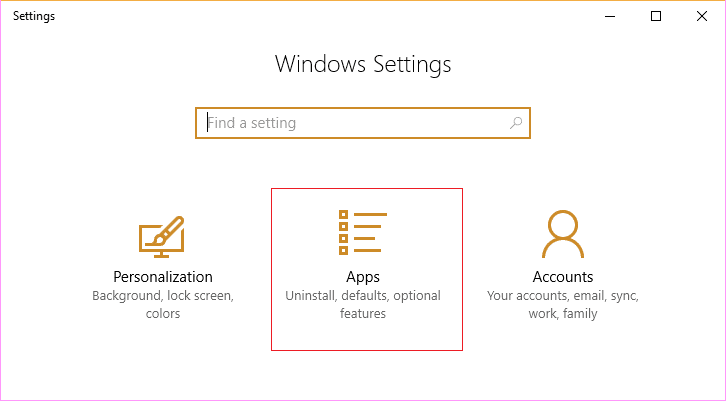
1.Windows キー + I を押して開きます Windowsの設定。
2.Click アプリ and then from the left-hand menu select アプリと機能。
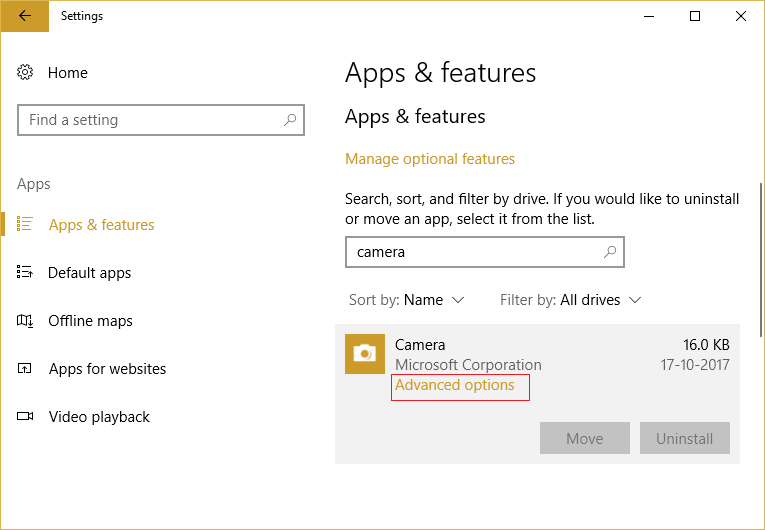
3.検索 カメラアプリ in the list then click on it and select 高度なオプション。
4.ここでクリックします リセット in order to reset camera app.
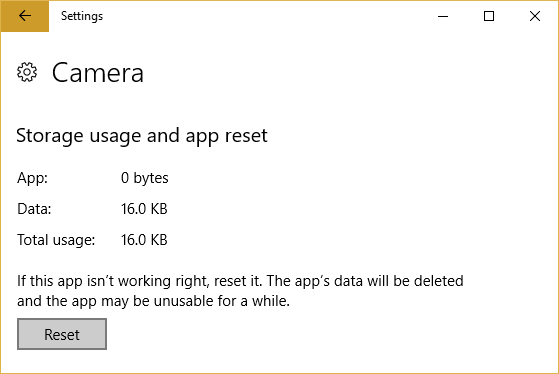
5. PC を再起動して変更を保存し、保存できるかどうかを確認します。 Fix Windows can’t find or start the camera error.
方法 7: レジストリを修正する
1.Windows キー + R を押してから、次のように入力します。 regeditを Enter キーを押してレジストリ エディターを開きます。

2.次のレジストリ キーに移動します。
HKEY_LOCAL_MACHINESOFTWAREMicrosoftWindows Media FoundationPlatform
3.右クリック プラットフォーム 次に選択する 新規 > DWORD (32 ビット) 値。
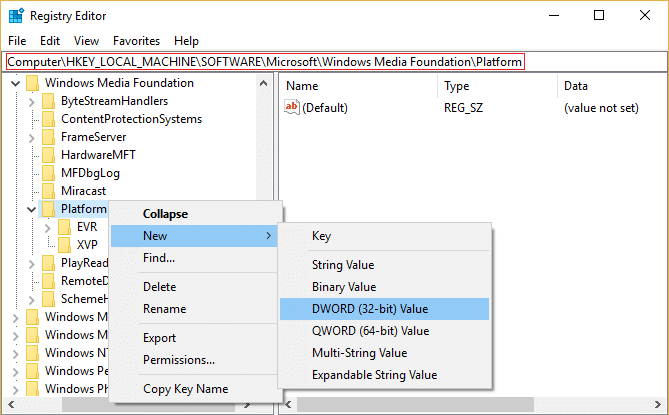
4.Name this new DWORD as EnableFrameServerMode。
5.Double click on EnableFrameServerMode and その値を 0 に変更します。
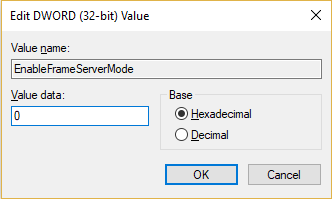
6.Click OK and close the registry editor.
あなたにおすすめ:
これで成功です Fix Windows can’t find or start the camera error ただし、このガイドに関してまだご質問がある場合は、コメントセクションでお気軽にお問い合わせください。
