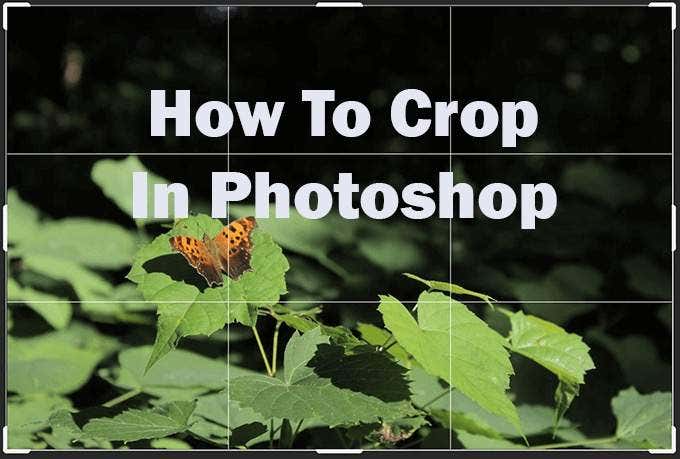
Changing the composition of a photograph has been made easy with programs like Photoshop. You can use the crop tool within the program to fix your photo and have it look the way you want.
If you’re a beginner to using フォトショップ, though, you may be overwhelmed with the amount of capabilities and tools this program has. So doing something simple as cropping can seem complicated.
There are also many different ways you can use the crop tool that you may not have known before. In this article you can learn how to use the crop tool, as well as straightening your image, using grids, and undoing a crop.
How To Crop An Image in Photoshop
- 動画内で 作物 tool. You can find this in the ツールバー. It’s the icon with two right-angled lines making a square, shown here:

- を選択したら 作物 tool, you’ll get a border around your image that you can adjust from the corners or sides. Or, you can click inside your image and drag out to make a border yourself. You’ll want to put the border around the section of your 画像 you wish to crop to. The inside of the border will be kept, and the outside deleted.
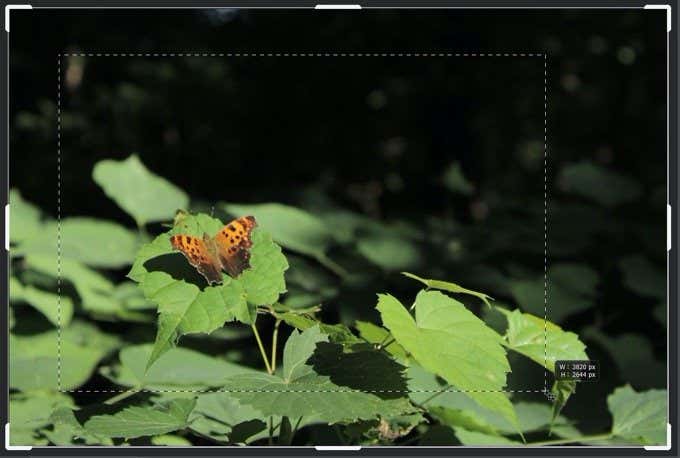
- If you want to move the image inside the area that will be kept, you can click and drag inside the border to do so after you’ve initially moved the crop border. Once you’re happy with the crop, you can either select the check mark in the オプション bar or hit 入力します キーボードの。
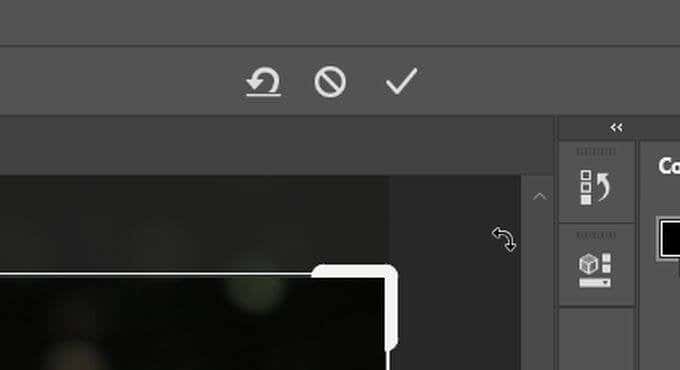
You’ll also have the option to reset or cancel your crop. You can do either of these actions from the オプション bar. To reset your crop, click the backwards arrow icon. To cancel it, select the middle icon of a slashed circle.
If you want to crop an 画像 without the outer parts getting deleted, you can do so by changing the Delete Cropped Pixels オプションを選択します。
To do this, look in the オプション bar and you can uncheck this. Then, when you crop an image and you want to change its orientation or aspect ratio, the rest of the image will come back. With this method, you’ll have to re-crop photos if you change them in that way, so do whatever suits your workflow best.
Using Aspect Ratio
If you want to get a more precise result when you crop in Photoshop, you can change the aspect ratio of your image so it’s exact. In the オプション bar, you can click on the 比 dropdown to look at the aspect ratio presets. Once you select one, Photoshop will automatically set your crop border to this ratio. You can click on the arrow icons between the width and height boxes to swap them.
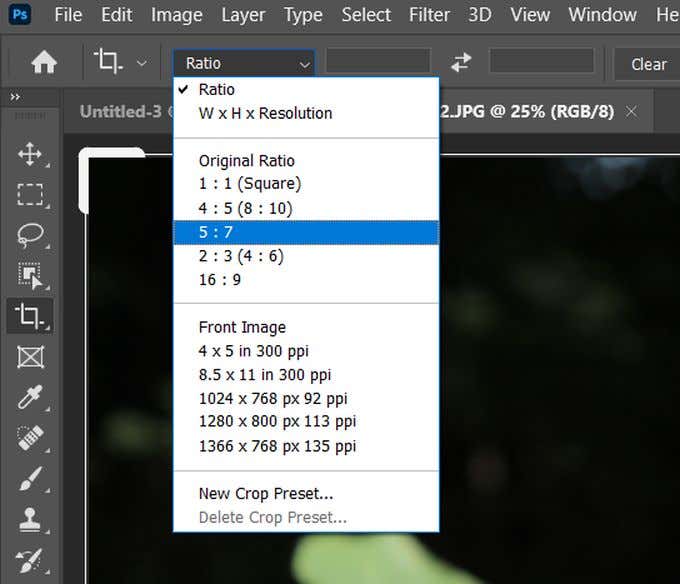
If you want to manually enter your aspect ratio, if the one you need doesn’t appear in the presets, you can do this as well by entering the numbers into the width and height boxes. Again, Photoshop will automatically adjust the crop to the ratio you entered.
If you want to save the aspect ratio you entered for future use, you can create your own Crop Presets. This can be done by clicking the 比 dropdown and selecting New Crop Preset. Then you can name the preset, and the next time you open the 比 dropdown it should appear in the list.
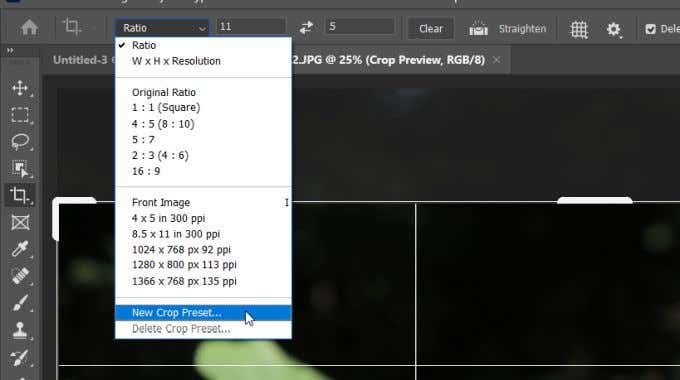
If you have an aspect ratio entered, Photoshop will lock the crop selection square to this ratio. So you can move the square around the image, but you can’t freely change the size. If you want to be able to resize the square on your own, you can clear the aspect ratio by clicking on the クリア button next to the width and height boxes.
How To Straighten An Image
The crop tool can also be used to straighten out pictures. Once you’ve selected 作物、あなたは 正す ツール オプション bar. Select this to use it on your image.

You’ll want to find a line in your photo that can act as an anchor point for Photoshop to straighten the image to. This could be a horizontal or vertical edge that should appear straight, such as a horizon line.
Make a point at the beginning of this line by clicking, then hold and drag to the other end. Once you release, Photoshop will straighten the image to make this line straight. It will also change the crop border so you get a square image.
Using The Crop Tool Overlay
You probably have noticed the grid that overlays your image when you’re cropping it. You can actually change this grid to multiple others if you want some guidelines for how to set your photo’s composition.
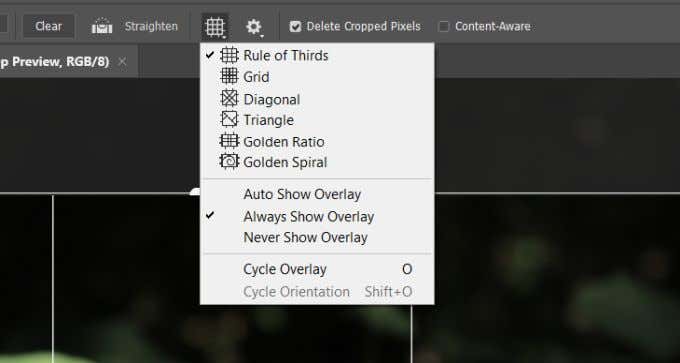
The default overlay is the 3分の1のルール. This is a grid designed to make your photo pleasing to the eye when the focus of the image is located at one of the intersecting points. However, you can change the grid by going to the オプション bar and selecting the オーバーレイ icon, which looks like a grid.
あなたはから選ぶことができます グリッド, 対角, 三角形, 黄金比または ゴールデンスパイラル overlays. These can help you when cropping to get the composition of your image to be eye-pleasing. The idea behind most of these is that the eye tends to naturally move along a photo in a certain way, and if you put the focus of your image at one of these natural points, the composition flows much smoother.

