There are many software optimizations that you can make use of on your Windows 10 desktop/laptop to optimize your gaming experience. These range from increasing Frames per Second, using Gaming Mode to hardware changes like replacing HDD with SDD. If you are an avid gamer, follow the methods in this guide to optimize Windows 10 for Gaming and maximize the performance of your machine.
How to Optimize Windows 10 for Gaming and Performance
After optimization, playing games like Fortnite, Red Dead Redemption, Call of Duty, GTA V, Minecraft, Fallout 3, and many more, would be even more engrossing for you and your friends. So, let us begin!
Method 1: Enable Game Mode
The most accessible optimization that you can carry out on Windows 10 is to turn Windows game mode on or off. Once Game Mode is enabled on Windows 10, background processes like Windows updates, notifications, etc., are halted. Disabling Game Mode will boost the Frames Per Second needed to play highly graphical games. Follow these steps to turn on Game Mode.
1. ტიპი თამაშის რეჟიმი იმ ვინდოუსის ძებნა ბარი.
2. შემდეგი, დააწკაპუნეთ თამაშის რეჟიმის პარამეტრები that appear in the search results to launch it.
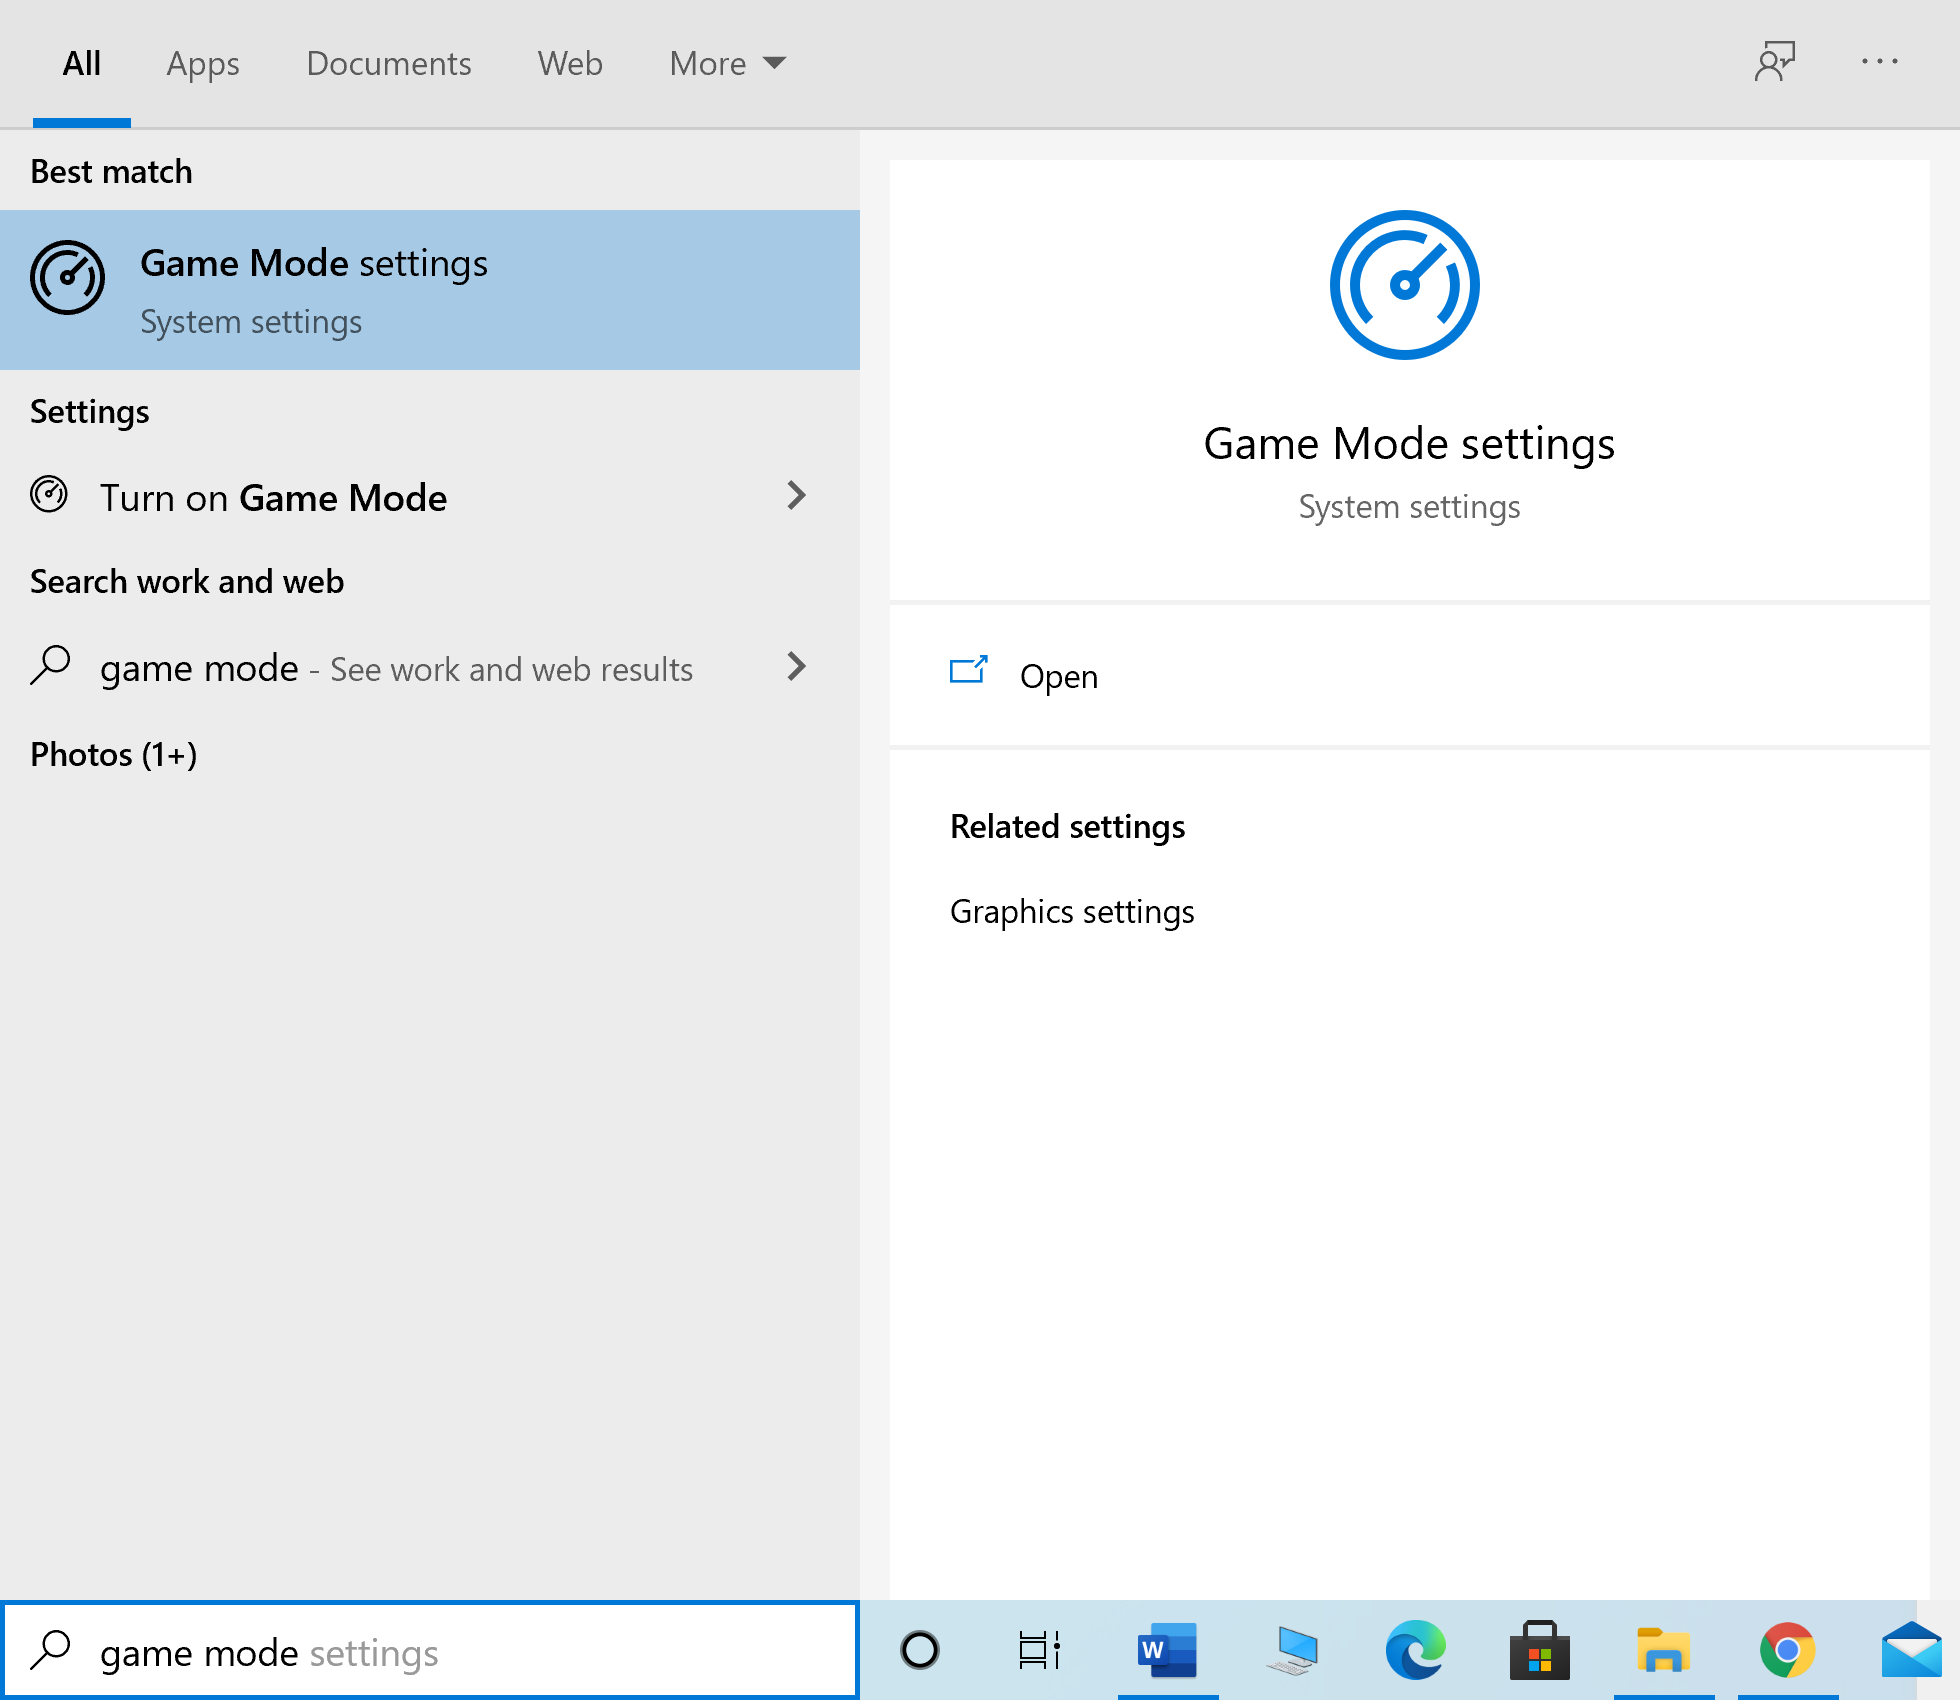
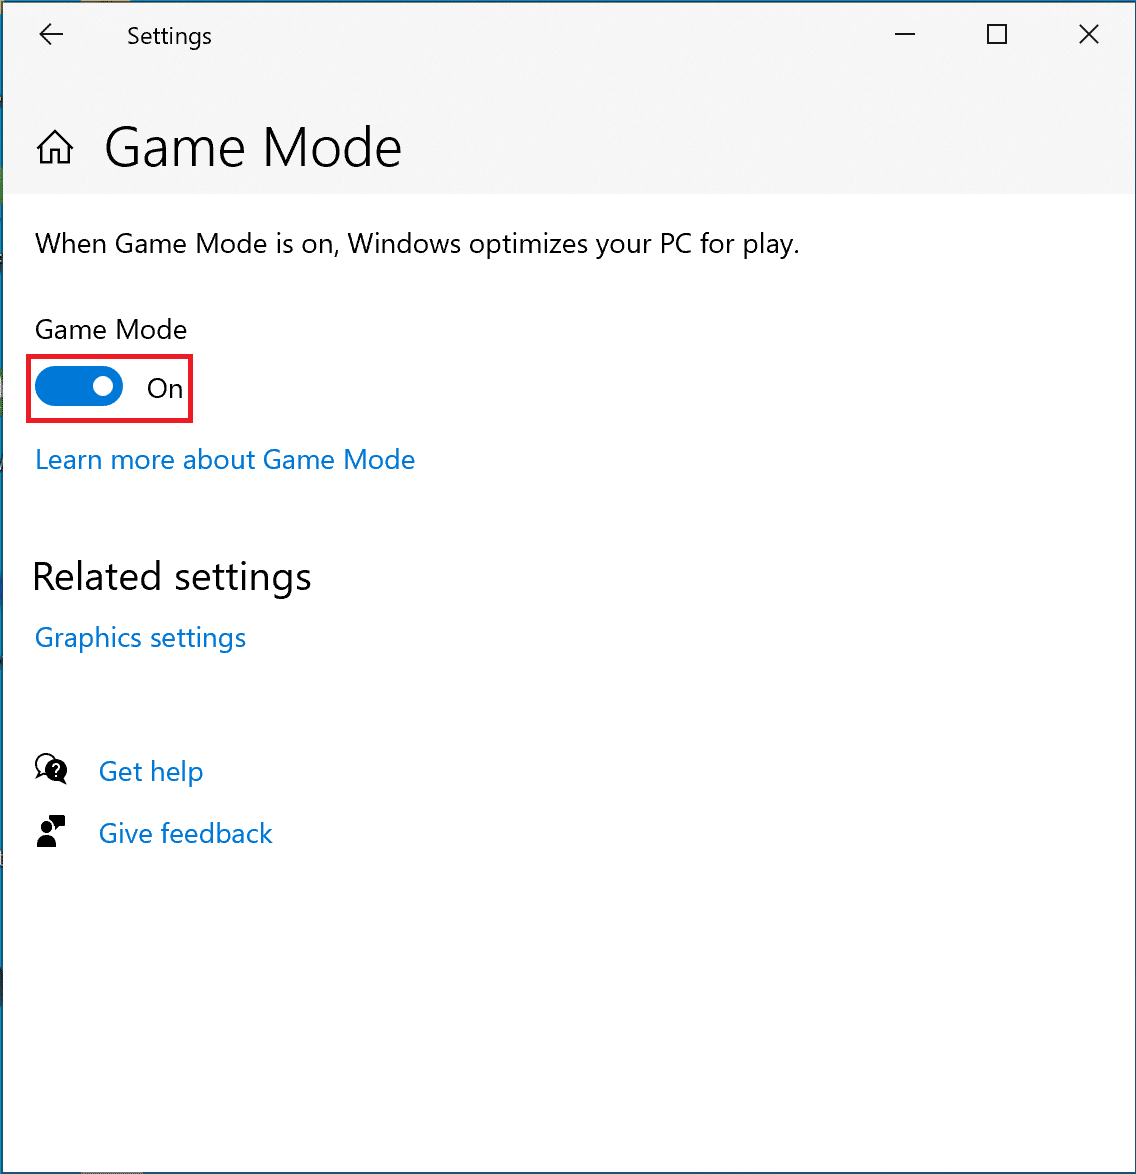
3. In the new window, turn the გადართვა to enable Game Mode, as shown below.
Method 2: Remove Nagle’s Algorithm
When Nagle’s algorithm is enabled, your computer internet connection sends lesser packets over the network. Thus, the algorithm helps increase the efficiency of TCP/IP networks, even though it comes at the cost of a smooth internet connection. Follow these steps to disable Nagle’s algorithm to optimize Windows 10 for gaming:
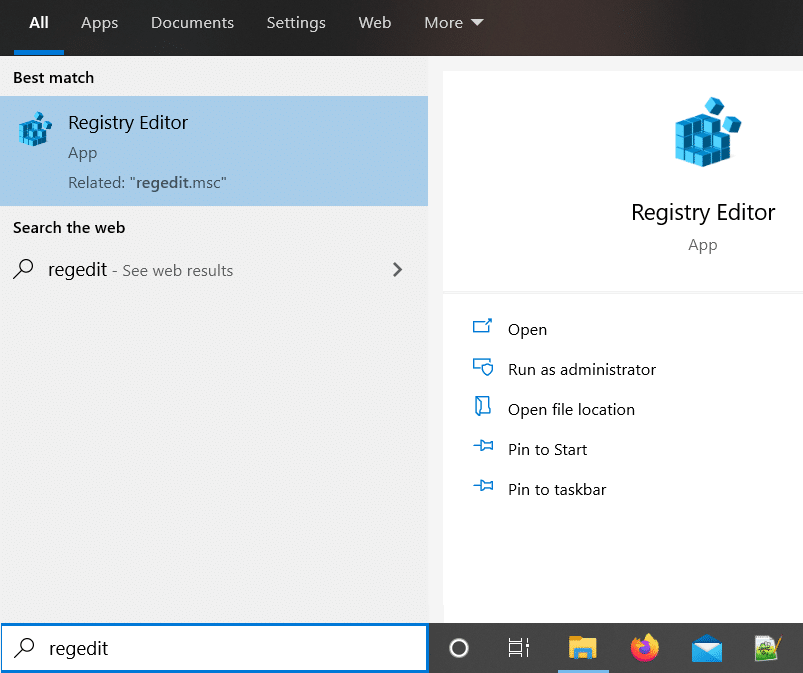
1. In ვინდოუსის ძებნა bar, search for რეესტრის რედაქტორი. Then, click on it to launch it.
2. In the Registry Editor window, navigate the following file path:
HKEY_LOCAL_MACHINESYSTEMCurrentControlSetServicesTcpipParametersInterfaces
3. You will now see numbered folders within the ინტერფეისები folder. Click on the first folder from the left panel, as illustrated below.
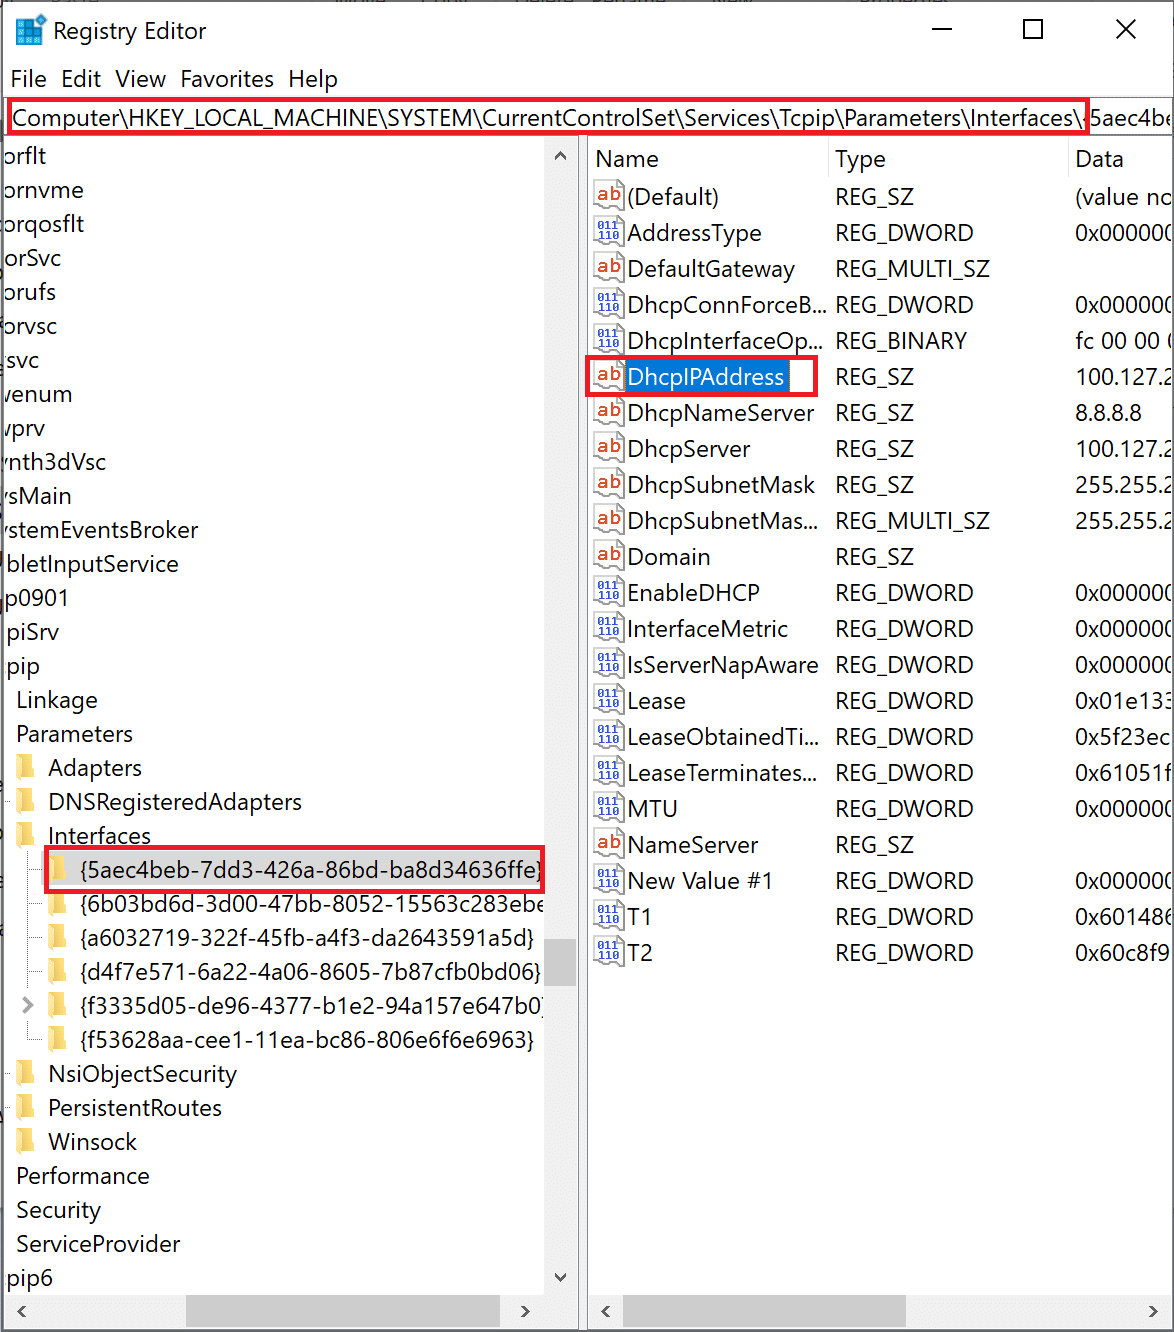
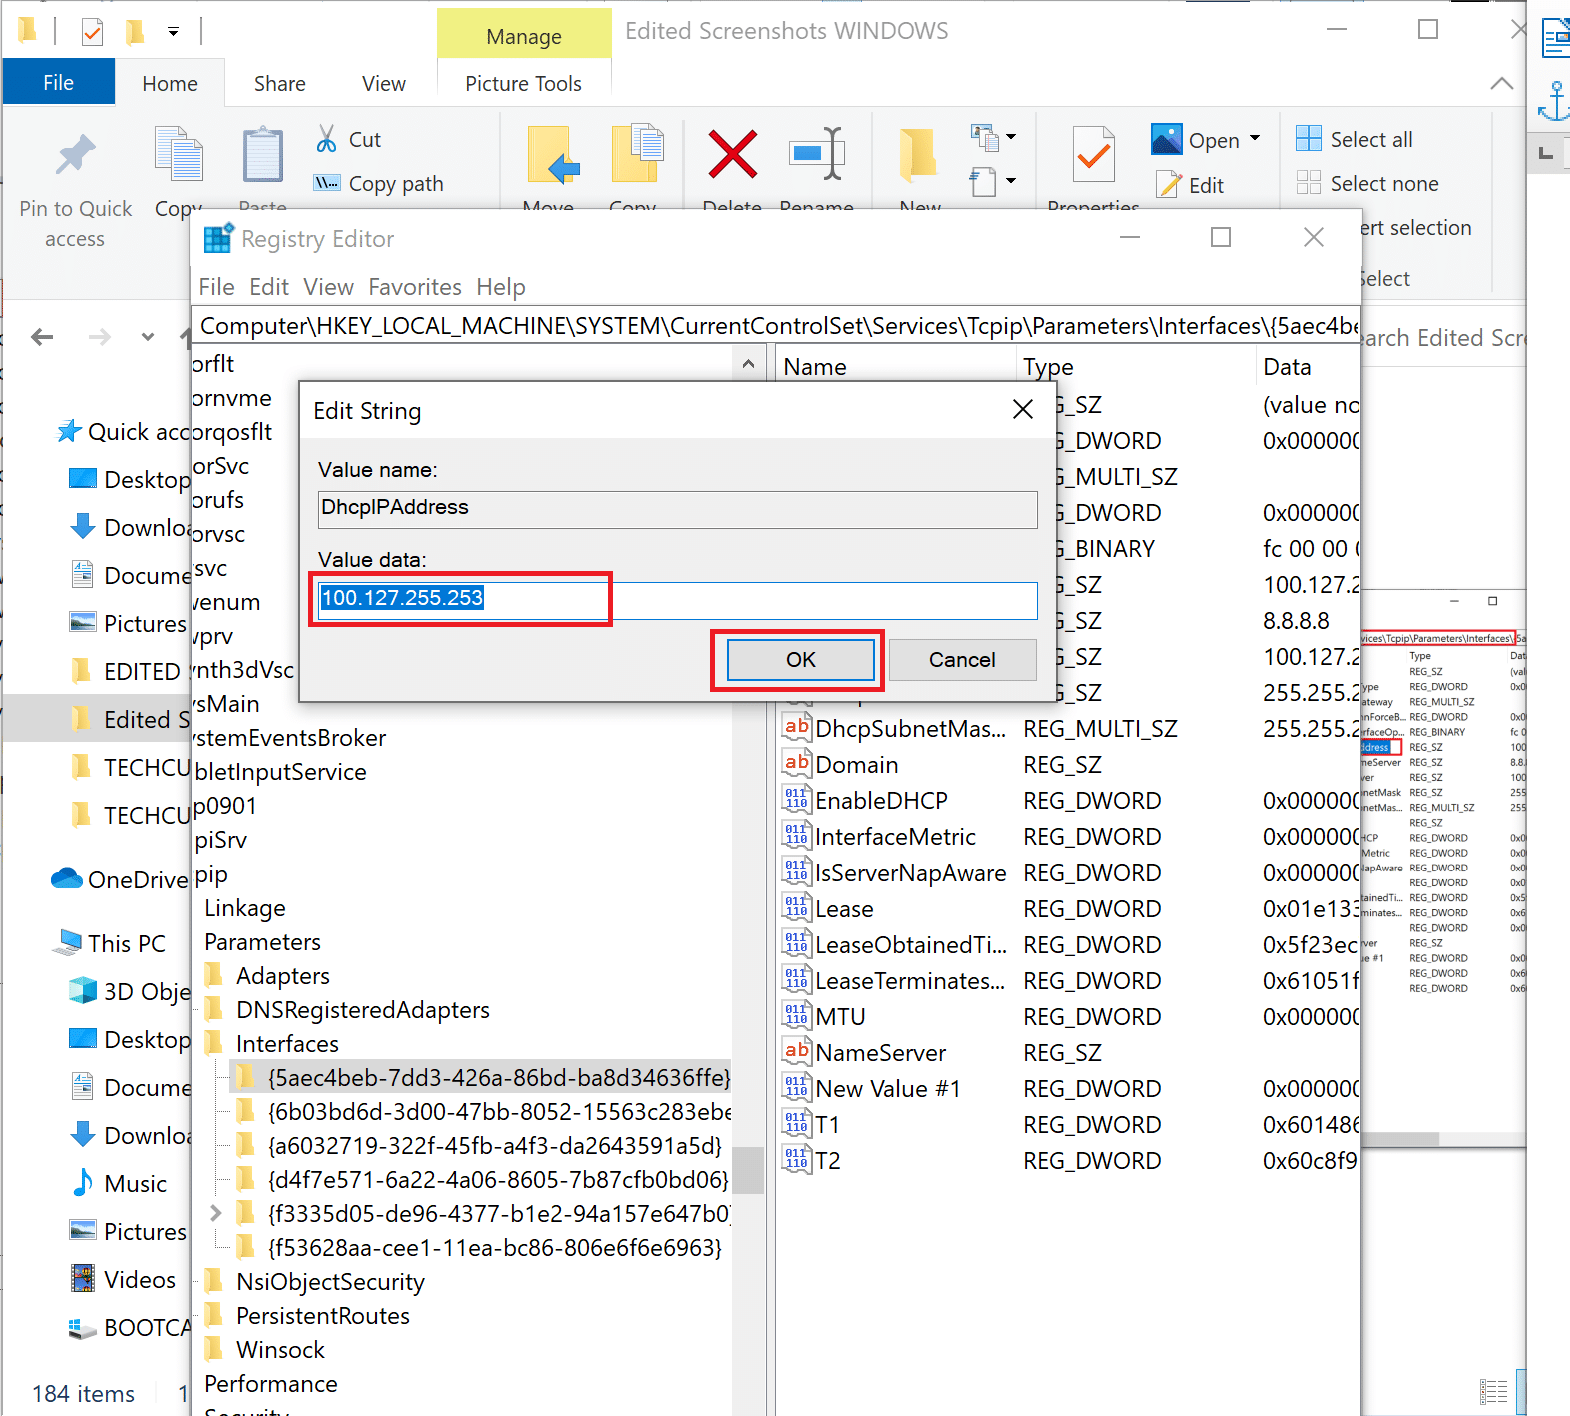
4. შემდეგი, ორჯერ დააწკაპუნეთ DhcpIPAddress, როგორც ნაჩვენებია ზემოთ.
5. Replace the value written in ღირებულების მონაცემები ერთად თქვენი IP მისამართი. შემდეგ, დააჭირეთ ღილაკს OK, როგორც გამოსახულია.
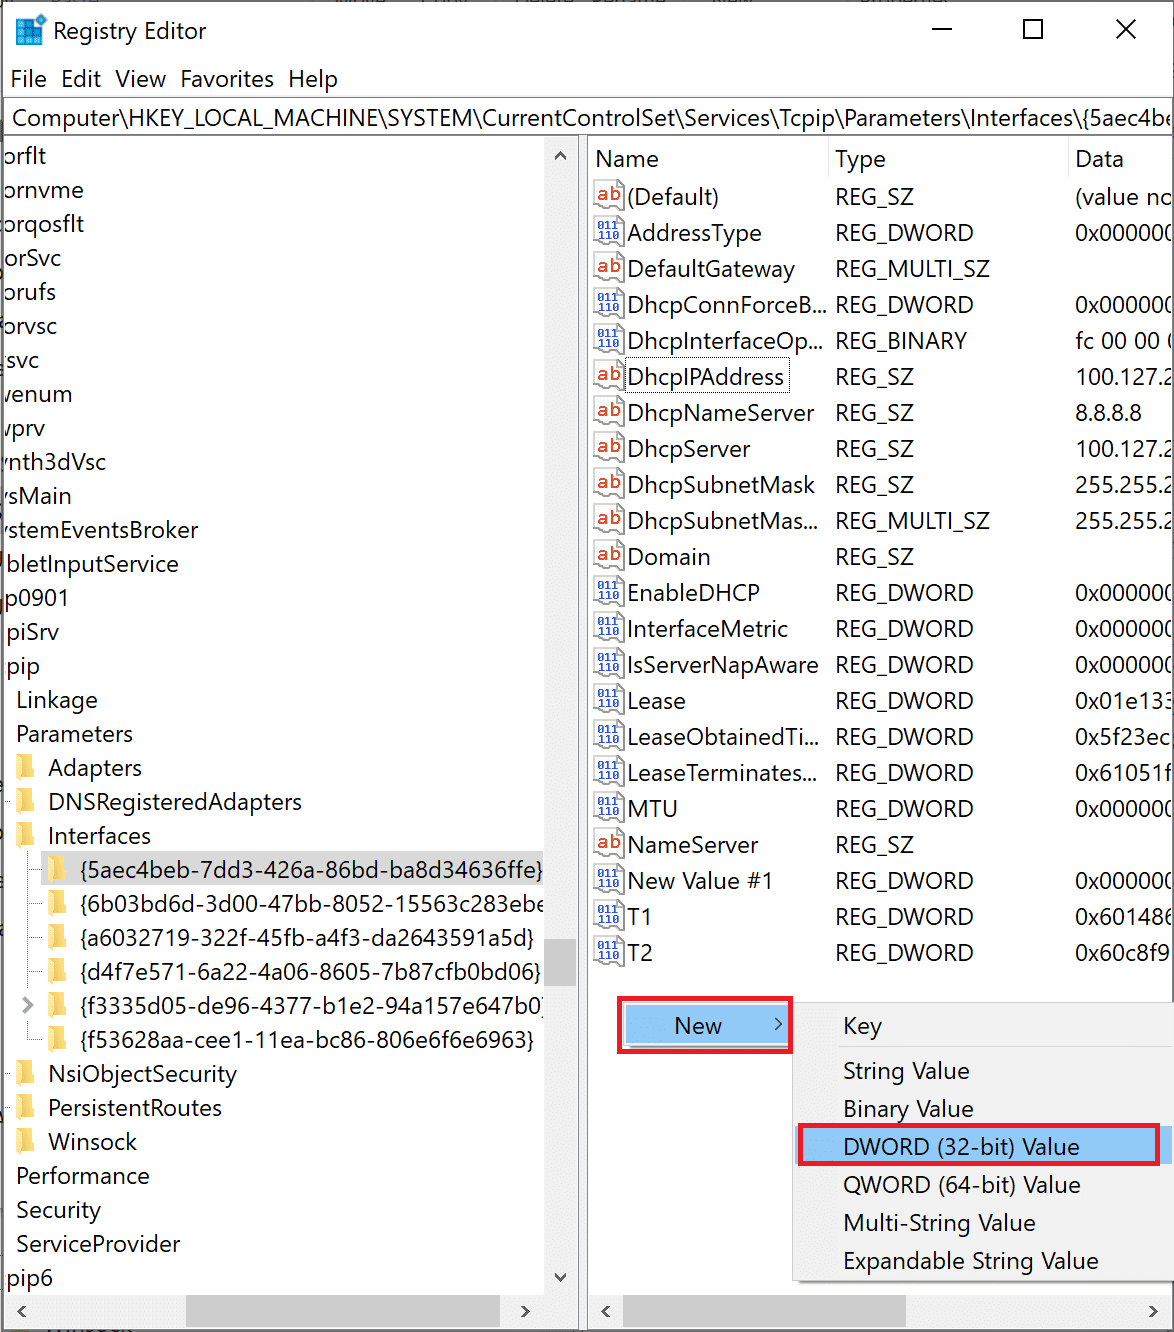
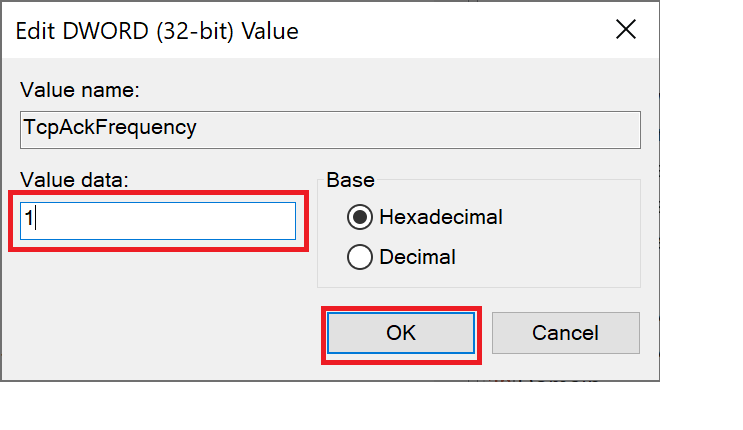
6. Then, right-click on any empty space in the right pane and select New > DWORD(32-bit) Value.
7. დაასახელეთ ახალი გასაღები TcpAck სიხშირე ნაჩვენებია ქვემოთ.
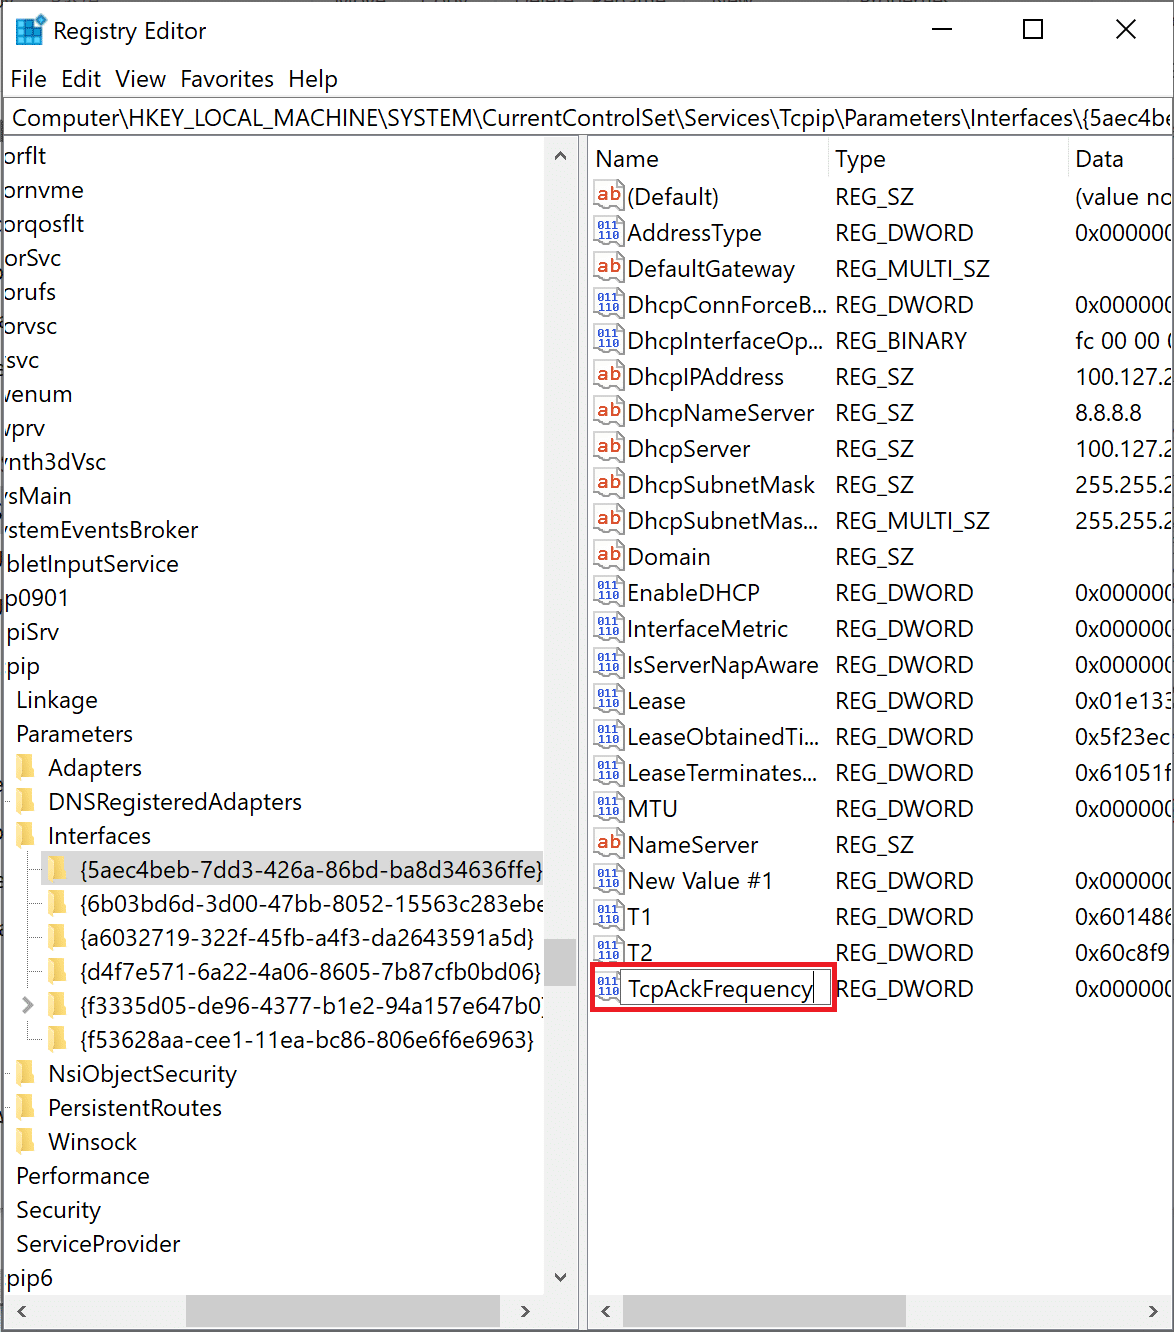
8. Double-click on the new key and edit the ღირებულების მონაცემები to 1.
9. Create another key by repeating ნაბიჯები 6-8 და დაარქვით მას TCPNoDelay ერთად ღირებულების მონაცემები to 1.
You have now successfully disabled the algorithm. Resultantly, gameplay will be better optimized on your computer.
ასევე წაიკითხე: What is the Windows Registry & How it Works?
Method 3: Disable SysMain
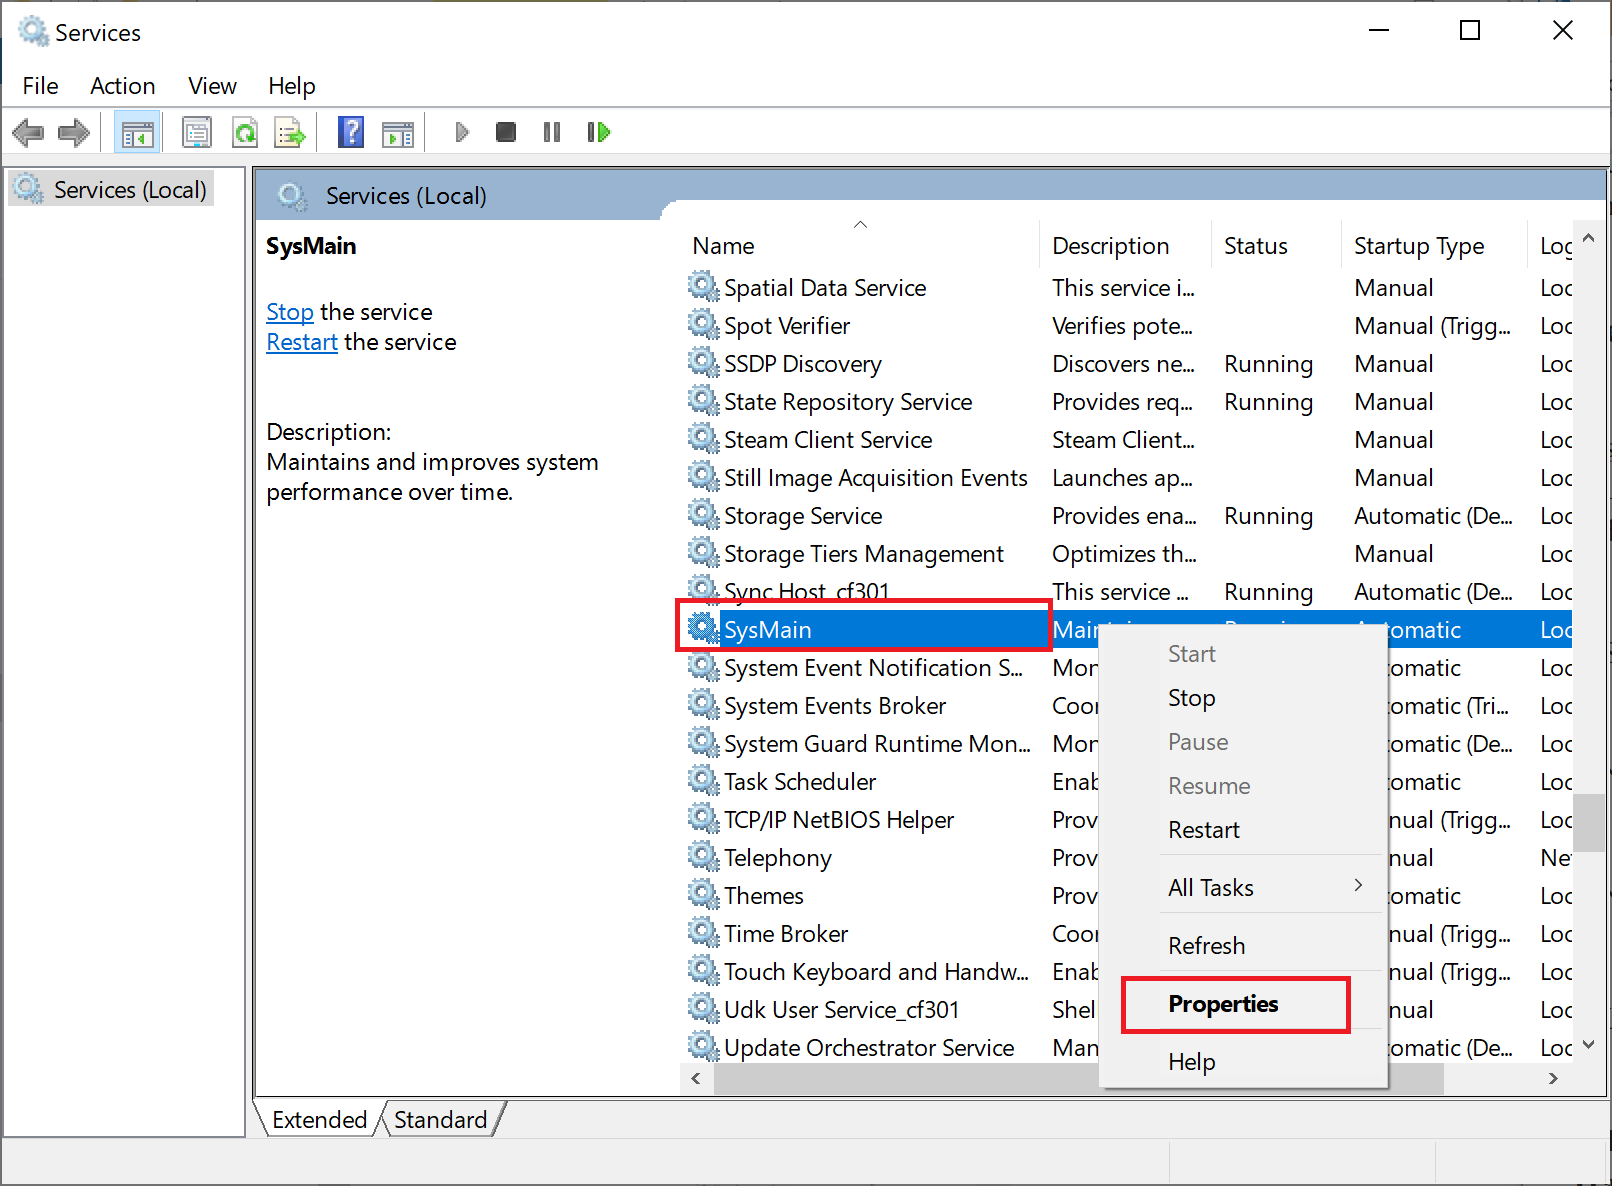
SysMain, which was once called სუპერფეჩი, is a Windows feature that decreases the start-up times for Windows applications and Windows operating systems. Turning off this feature will reduce CPU usage and optimize Windows 10 for gaming.
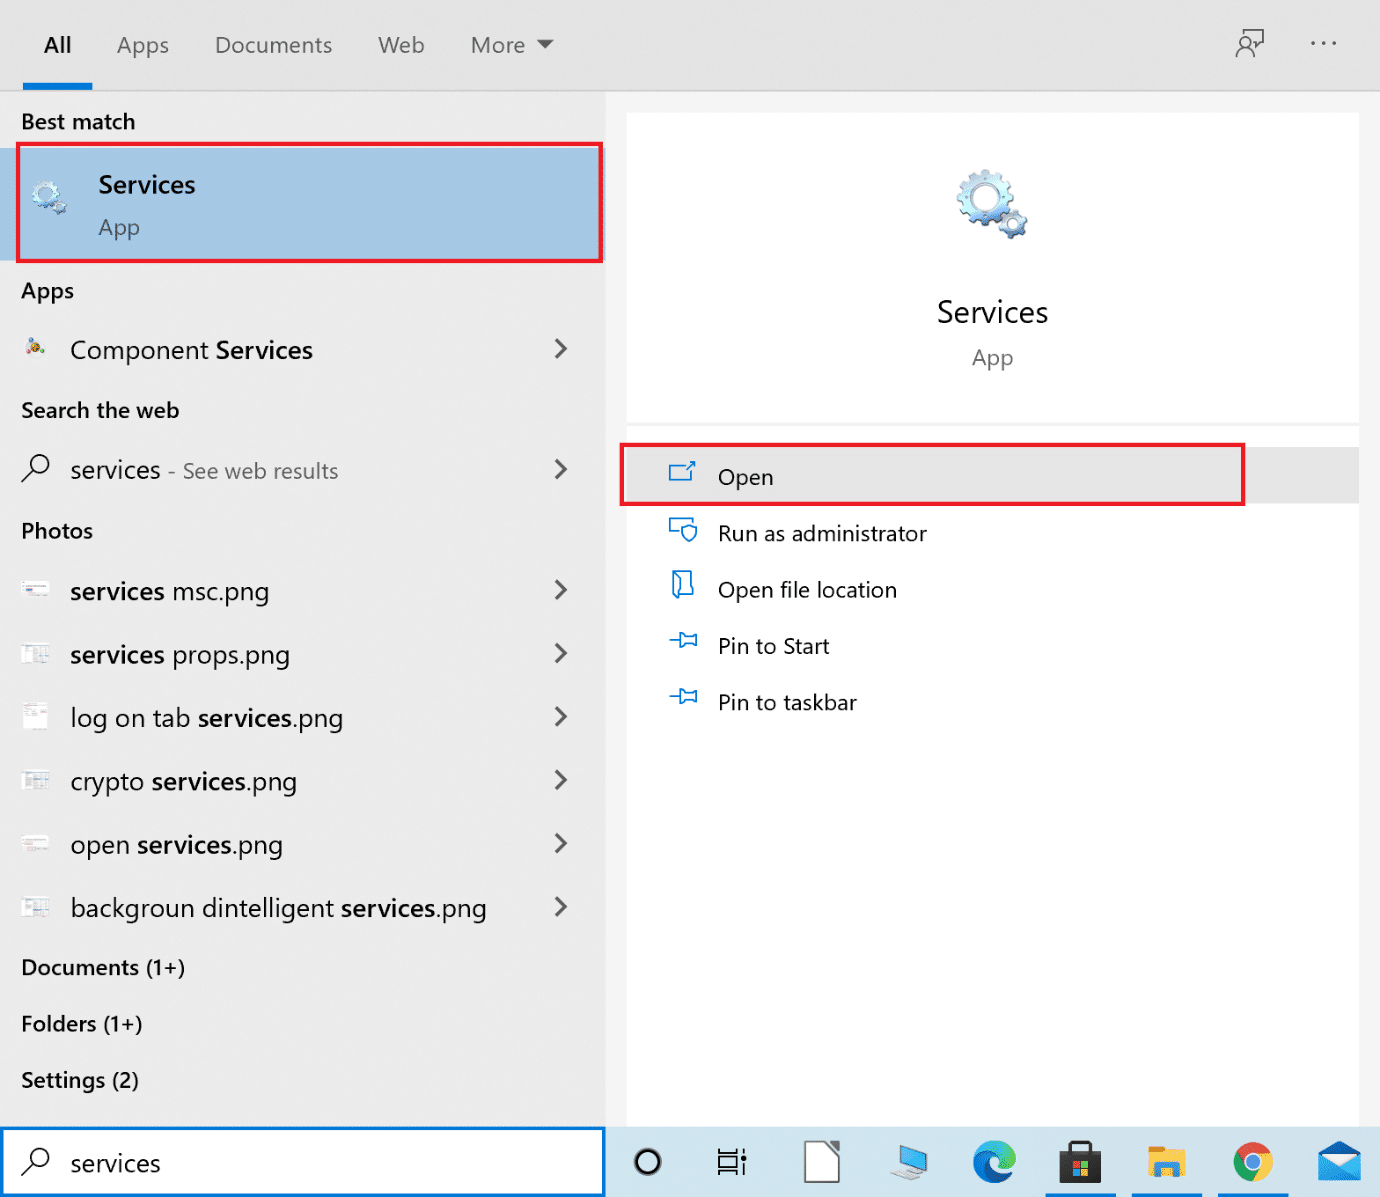
1. ძიება მომსახურება იმ ვინდოუსის ძებნა bar and then, click on ღიაა დაიწყოს იგი.
2. შემდეგ გადადით ქვემოთ sysmain. დააწკაპუნეთ მასზე მარჯვენა ღილაკით და აირჩიეთ Თვისებები, როგორც გამოსახულია.
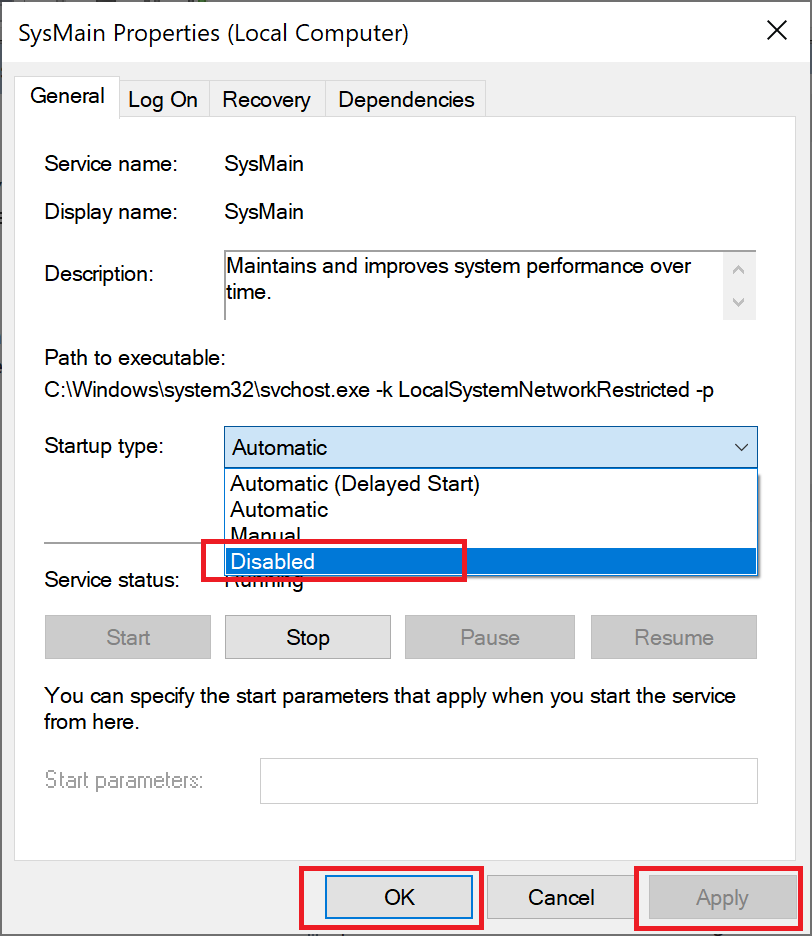
3. In the Properties window, change the გაშვების ტიპი to შეზღუდული შესაძლებლობების მქონე საწყისი ჩამოსაშლელი მენიუდან.
4. დაბოლოს, დააჭირეთ ღილაკს მიმართვა და შემდეგ, OK.
შენიშვნა: To further decrease CPU usage, you can implement the same method for Windows ძიება მდე Background Intelligent Transfer processes similarly.
Method 4: Change Active Hours
Your gaming performance will be affected when Windows 10 installs updates or reboots the computer without prior permission. To ensure that Windows does not update or reboot during this time, you can change the Active hours, as instructed below.
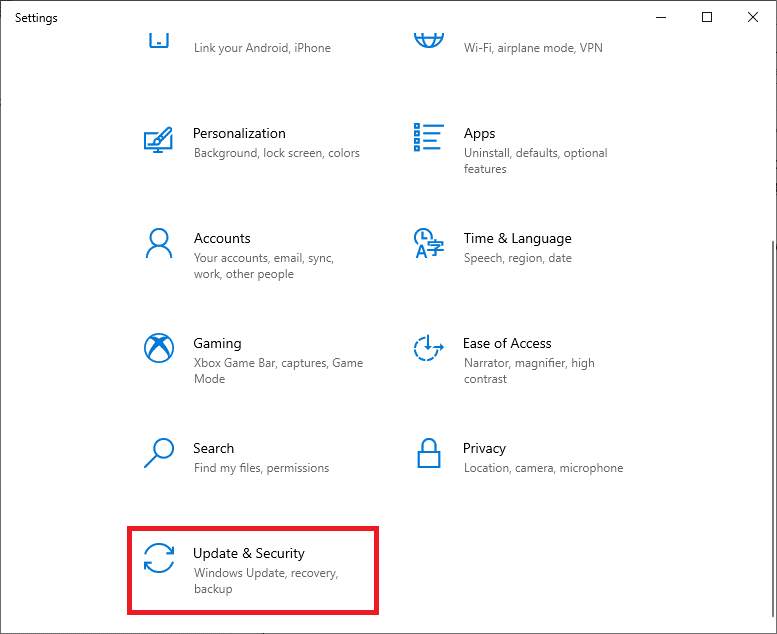
1. დაიწყე პარამეტრები და დააჭირეთ განახლება და უსაფრთხოება.
2. შემდეგ, დააჭირეთ ღილაკს აქტიური საათების შეცვლა from the right panel, as shown below.
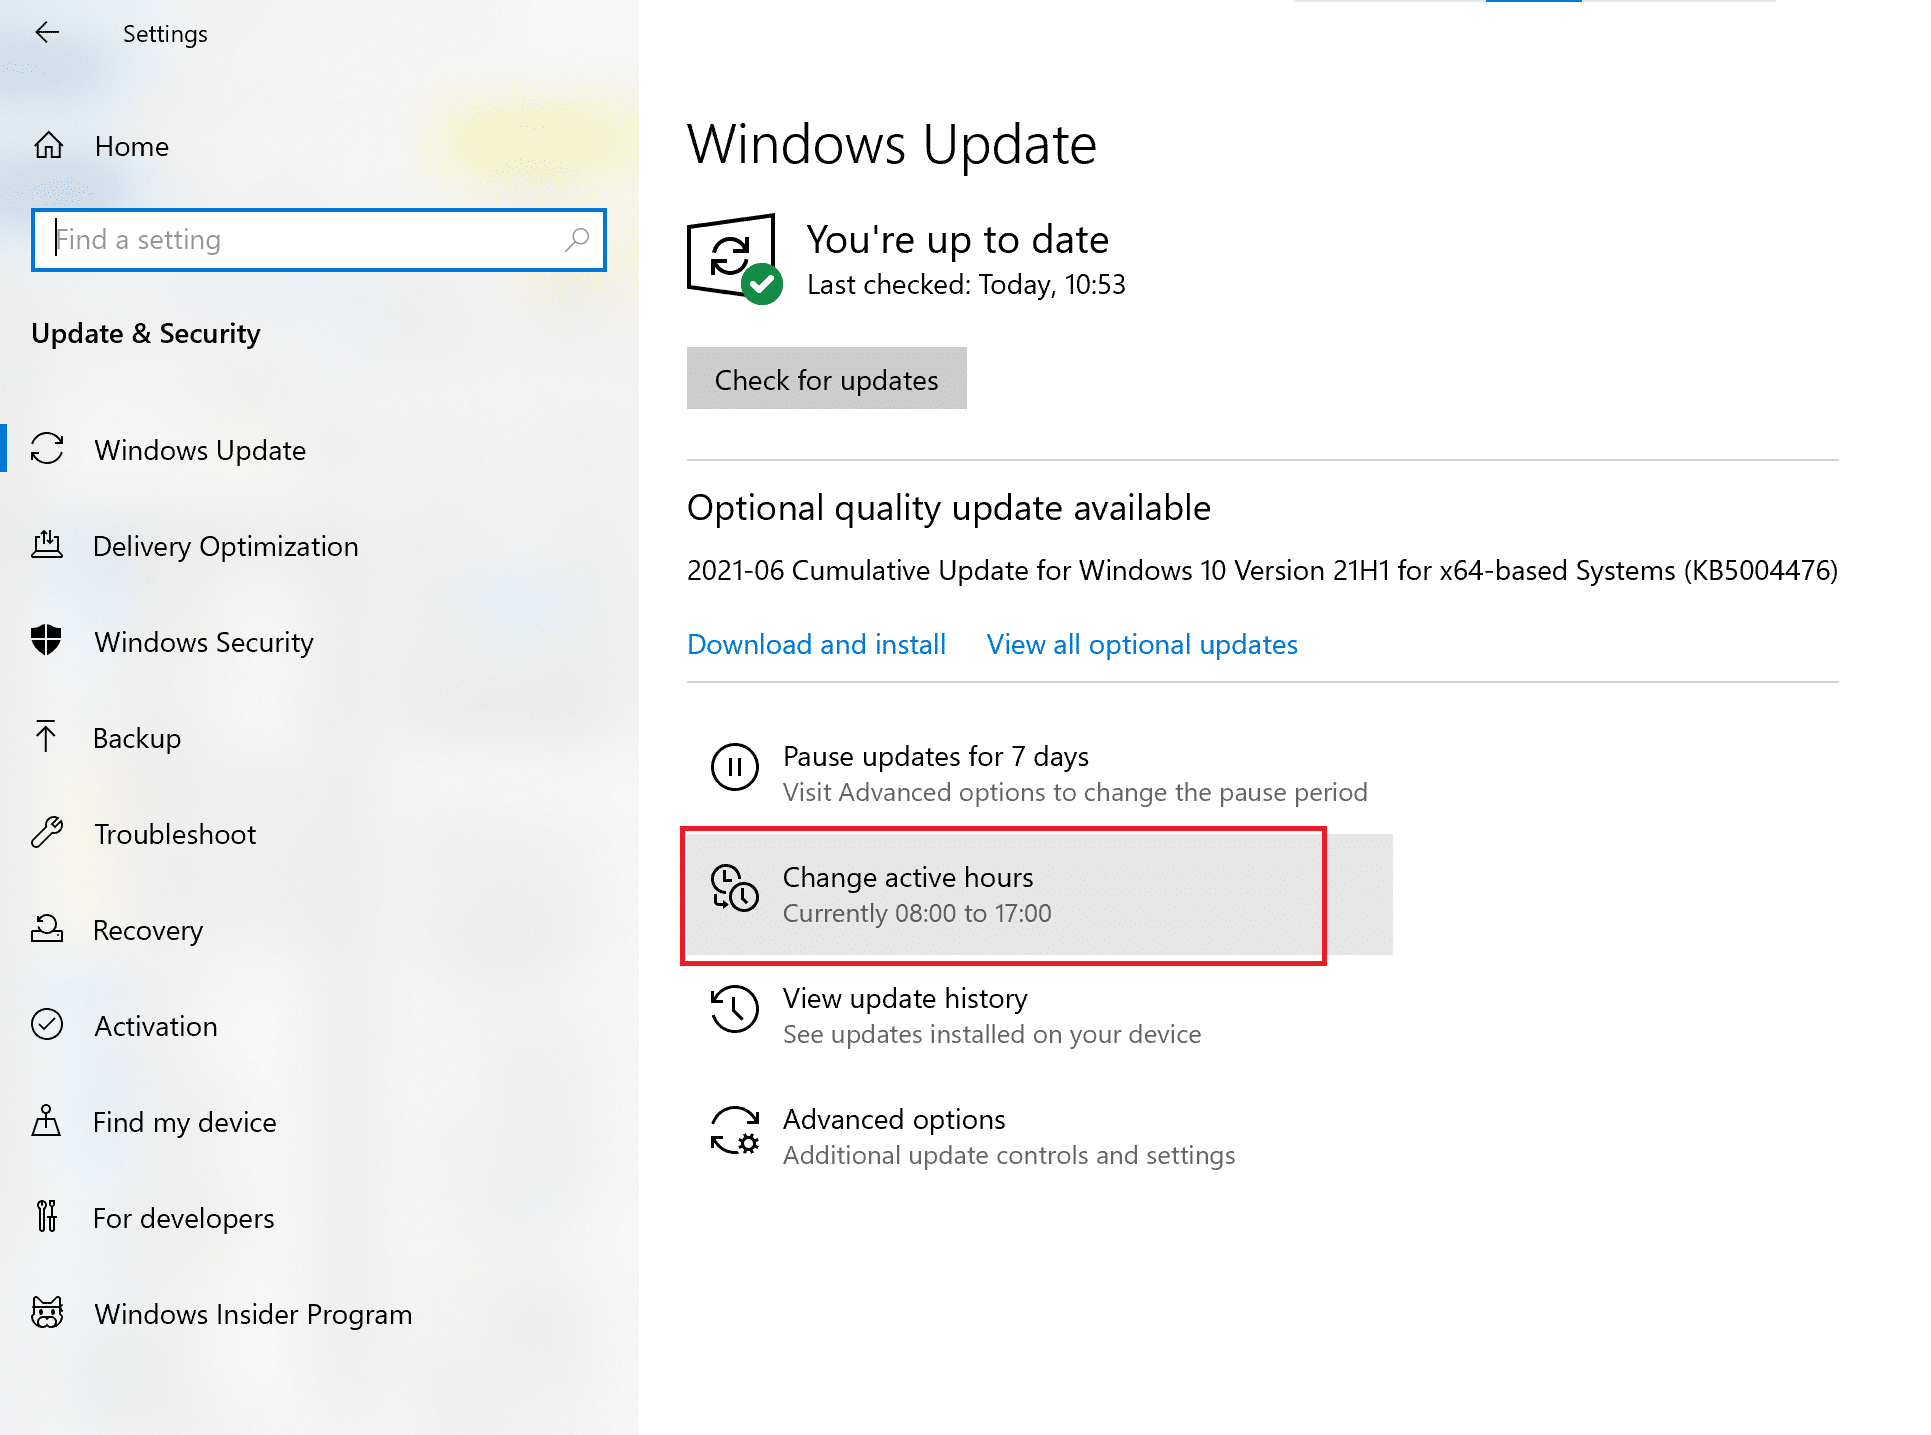
3. მითითებული დაწყების დრო მდე დროის დასასრული in accordance with when you are likely to be gaming. Choose when you wouldn’t want automatic Windows updates and reboots to take place and optimize Windows 10 for performance.
Method 5: Edit Prefetch Parameters
Prefetch is a technique used by the Windows operating system to speed up the fetching of data. Disabling this will decrease CPU usage and optimize Windows 10 for gaming.
1. დაიწყე რეესტრის რედაქტორი როგორც ახსნილია მეთოდი 2.
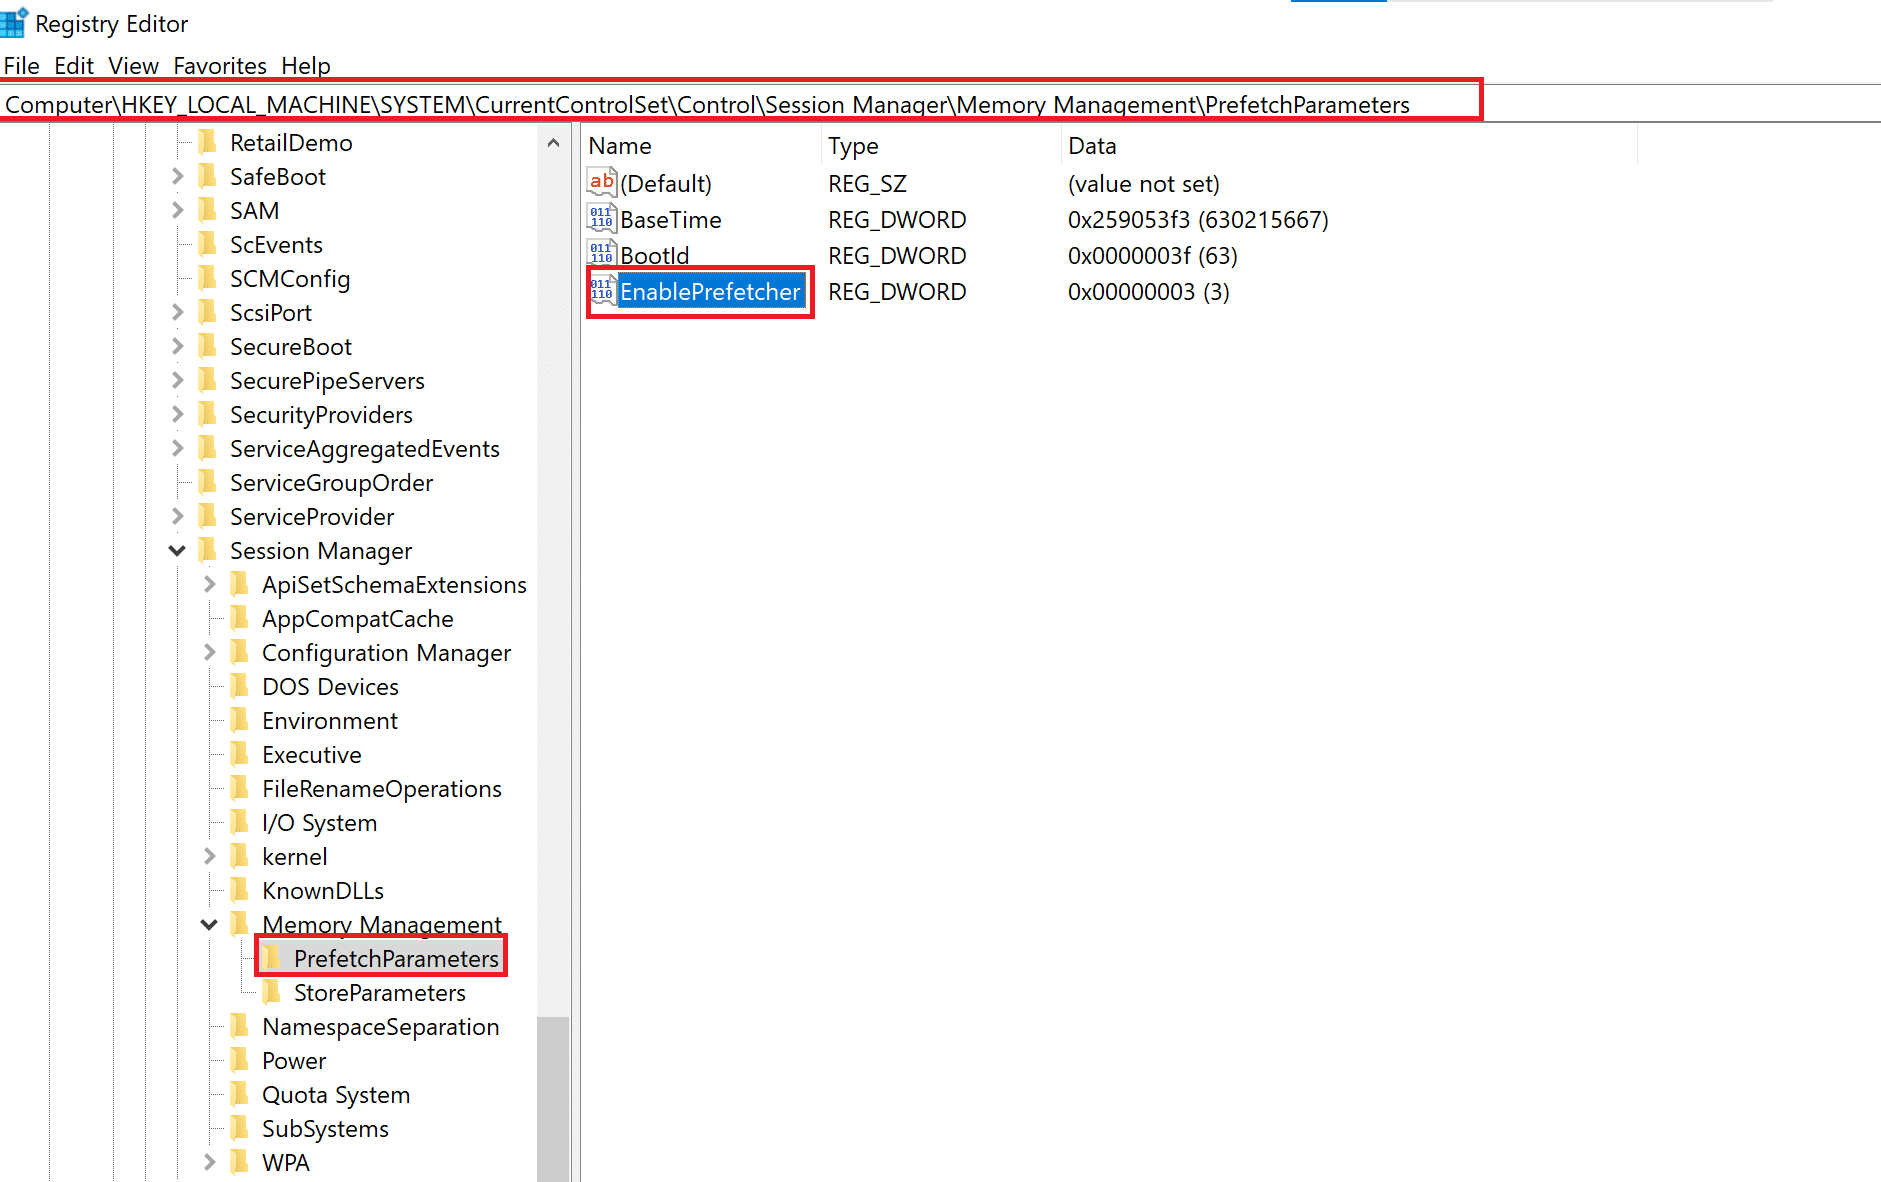
2. This time, navigate the following path:
HKEY_LOCAL_MACHINESYSTEMCurrentControlSetControlSessionManagerMemory ManagementPrefetchParameters
3. From the right pane, double click on EnablePrefetcher, როგორც ნაჩვენებია.
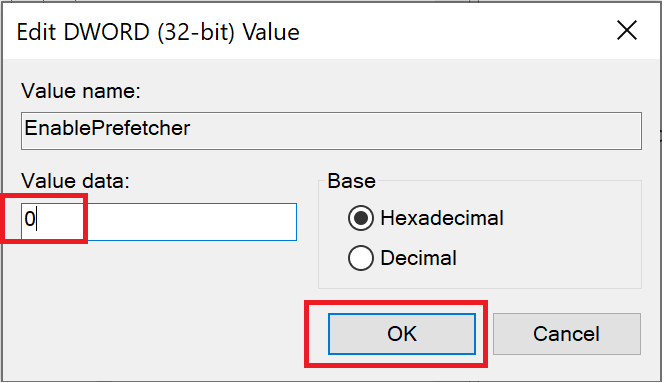
4. Then, change the ღირებულების მონაცემები to 0, და დააჭირეთ OK, როგორც ხაზგასმულია.
Method 6: Turn off Background Services
System applications and Windows 10 services running in the background can increase CPU usage and slow down gaming performance. Follow the given steps to turn off background services which in turn, will optimize Windows 10 for gaming:
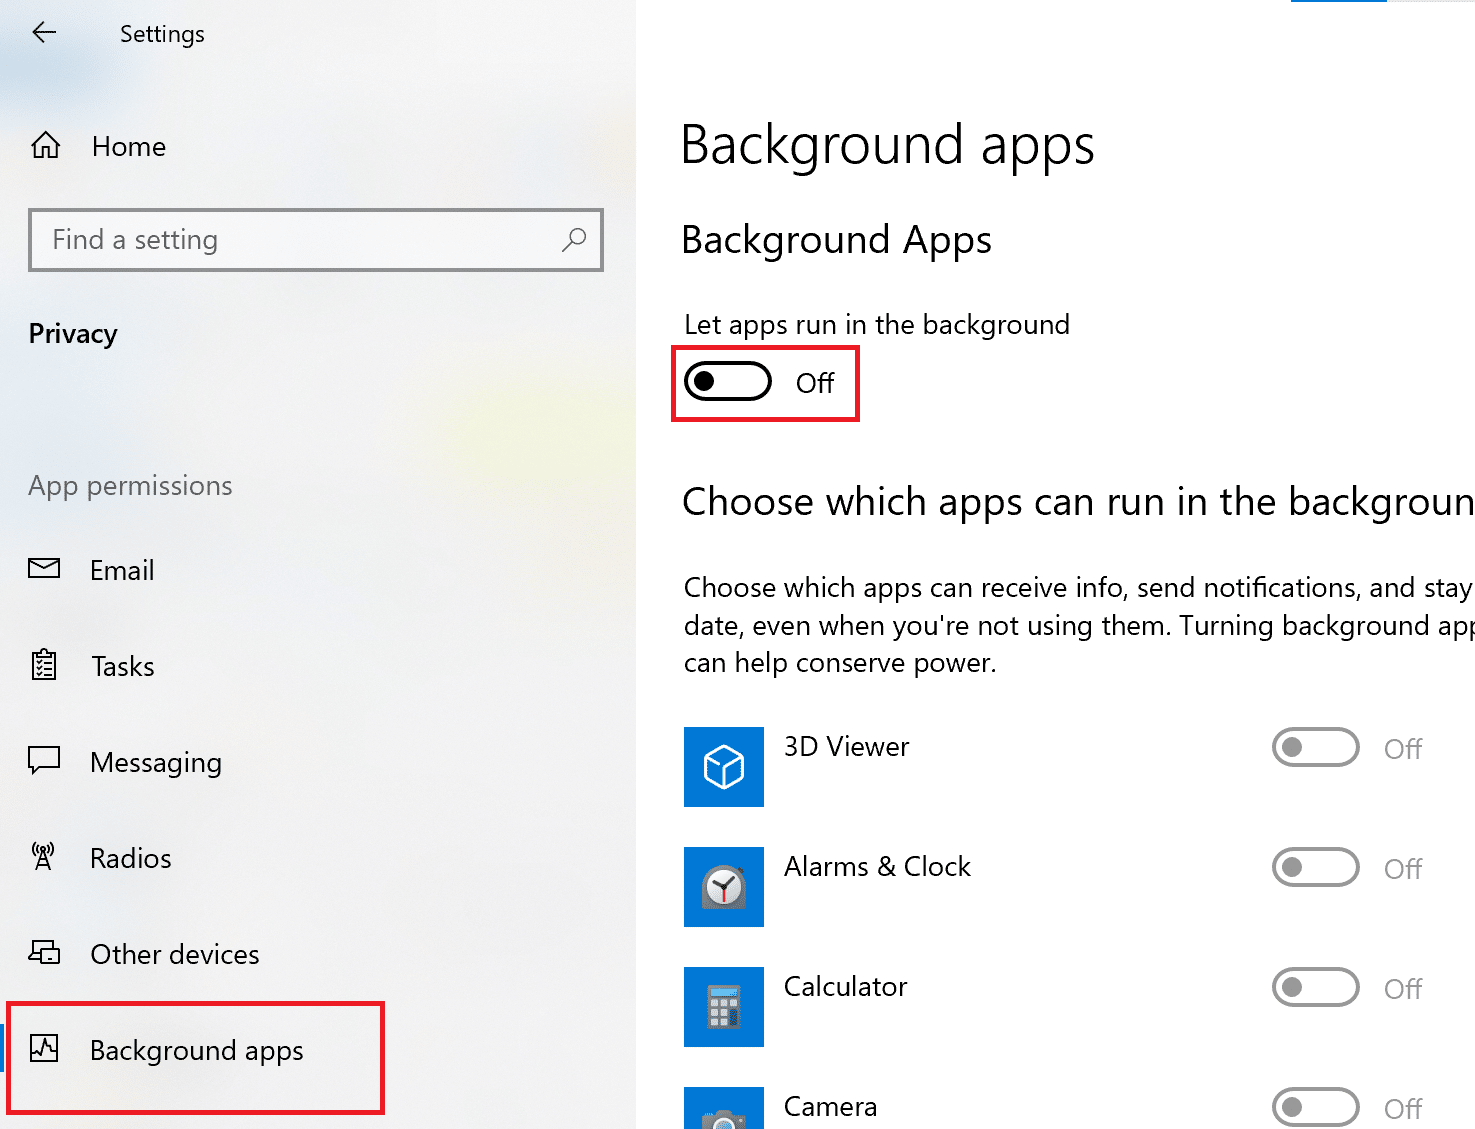
1. დაწყება პარამეტრები და დააჭირეთ Privacy, როგორც ნაჩვენებია.
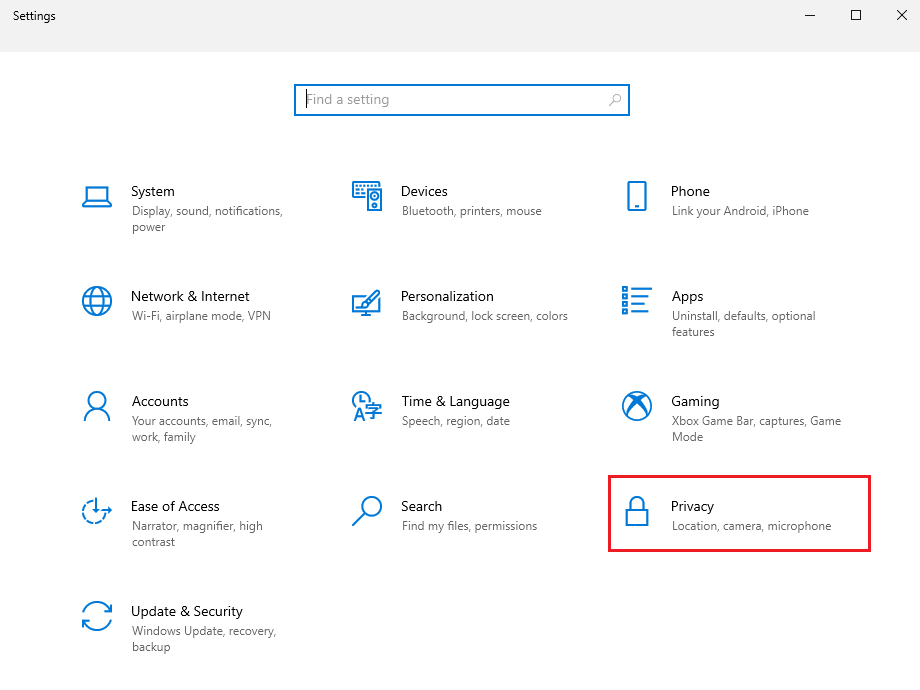
2. შემდეგ, დააჭირეთ ღილაკს ფონის აპლიკაციები.
3. Finally, turn the გამორთვა for the option titled Let apps run in the background, როგორც ილუსტრირებულია ქვემოთ.
ასევე წაიკითხე: Windows 10 Tip: Disable SuperFetch
Method 7: Turn on Focus Assist
Not being distracted by notification pop-ups and sounds is an integral part of optimizing your system for gaming. Turning on Focus Assist will prevent notifications from popping up when you are gaming and thus, enhance your chances of winning the game.
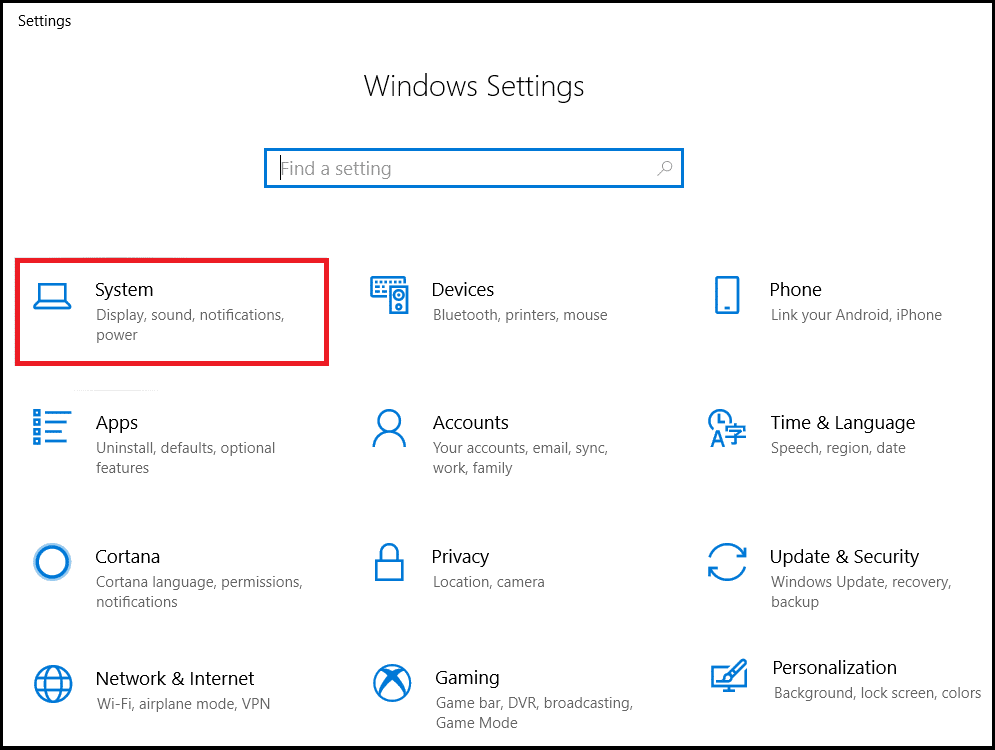
1. დაიწყე პარამეტრები და დააჭირეთ სისტემის, როგორც ნაჩვენებია.
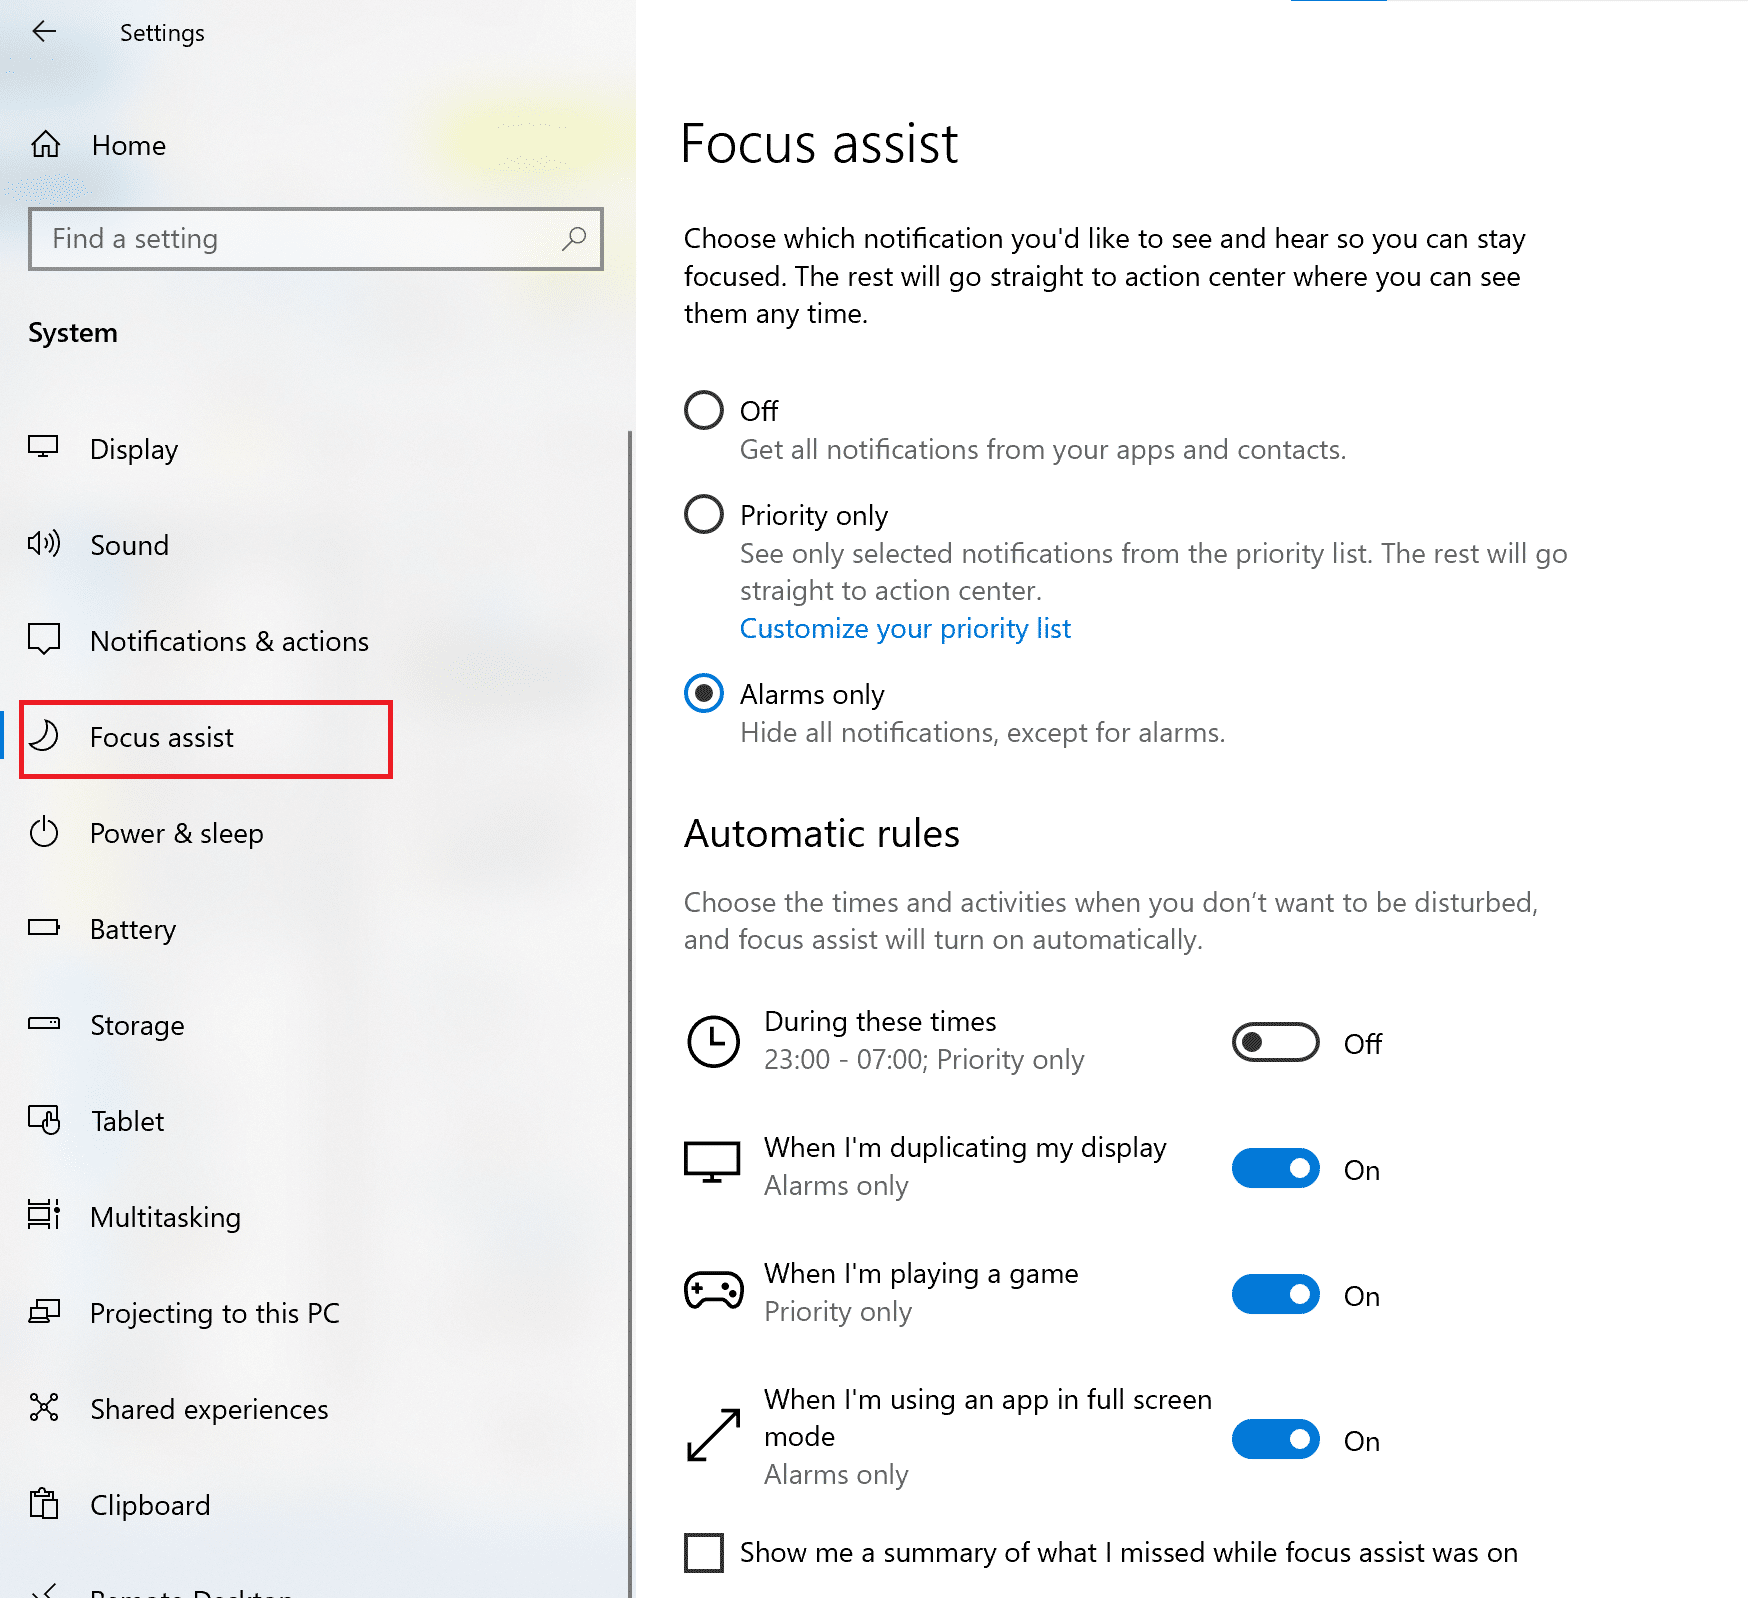
2. არჩევა ფოკუსის დახმარება მარცხენა პანელიდან.
3. From the options displayed in the right pane, choose მხოლოდ პრიორიტეტული.
4A. Open the link to Customize your priority list to select apps that will be allowed to send notifications.
4B. Choose მხოლოდ სიგნალიზაცია if you want to block all notifications except for set alarms.
Method 8: Modify Visual Effects Settings
Graphics that are turned on and run in the background can affect the performance of your computer. Here’s how to optimize Windows 10 for gaming by changing Visual Effects settings using Control Panel:
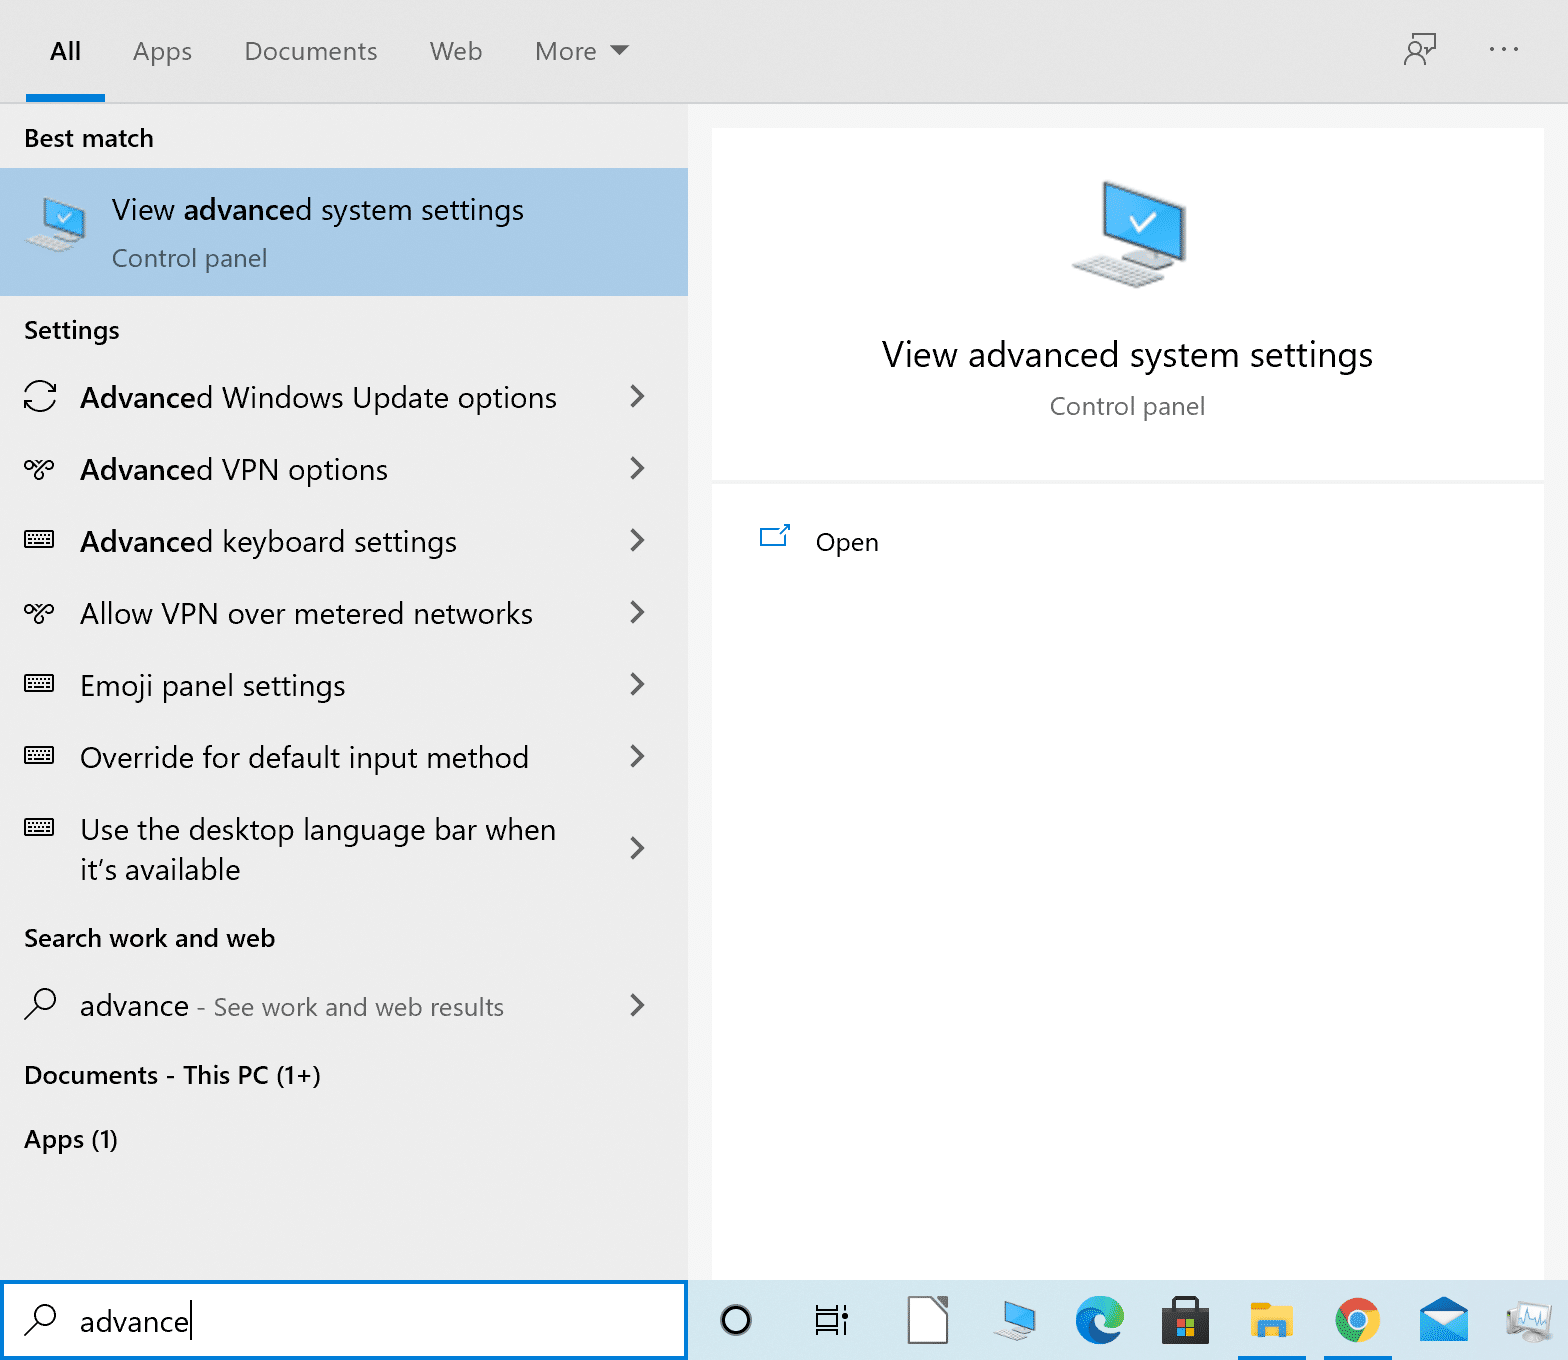
1. ტიპი მოწინავე in the Windows search bar. Click on იხილეთ სისტემის მოწინავე პარამეტრები to open it from the search results, as shown.
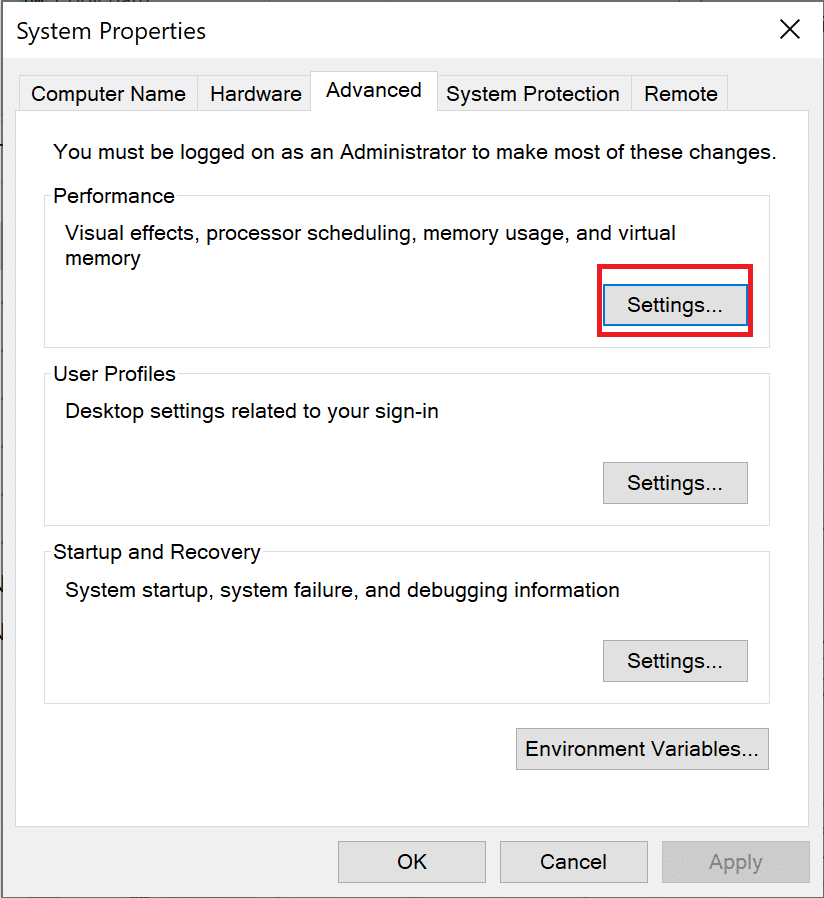
2. In სისტემის თვისებები ფანჯარა, დააჭირეთ პარამეტრები ქვეშ Performance სექცია.
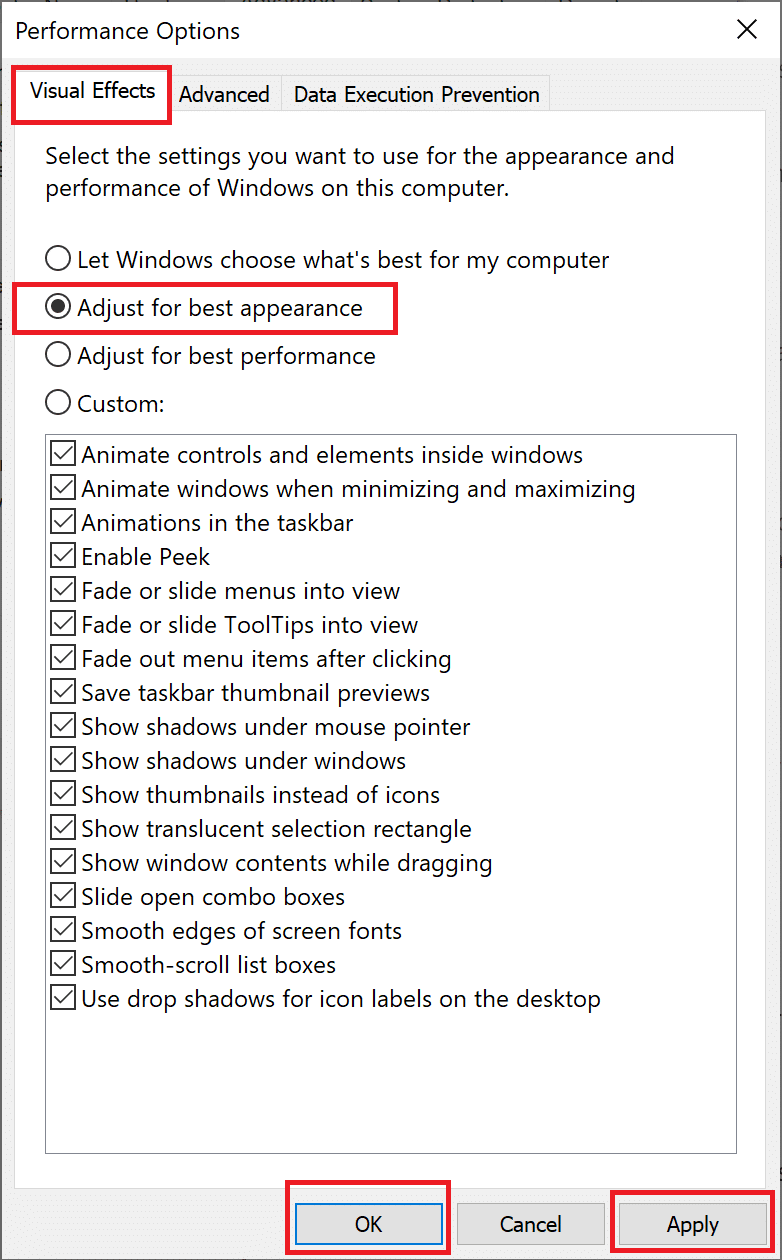
3. In ვიზუალური ეფექტები tab, choose the third option titled მორგება საუკეთესო შესრულებისთვის.
4. დაბოლოს, დააჭირეთ ღილაკს მიმართვა > OK, როგორც ქვემოთ არის გამოსახული.
Method 9: Change Battery Power Plan
Changing the battery power plan to High Performance will optimize the battery life and in turn, optimize Windows 10 for gaming.
1. დაიწყე პარამეტრები და დააჭირეთ სისტემის, როგორც ადრე.
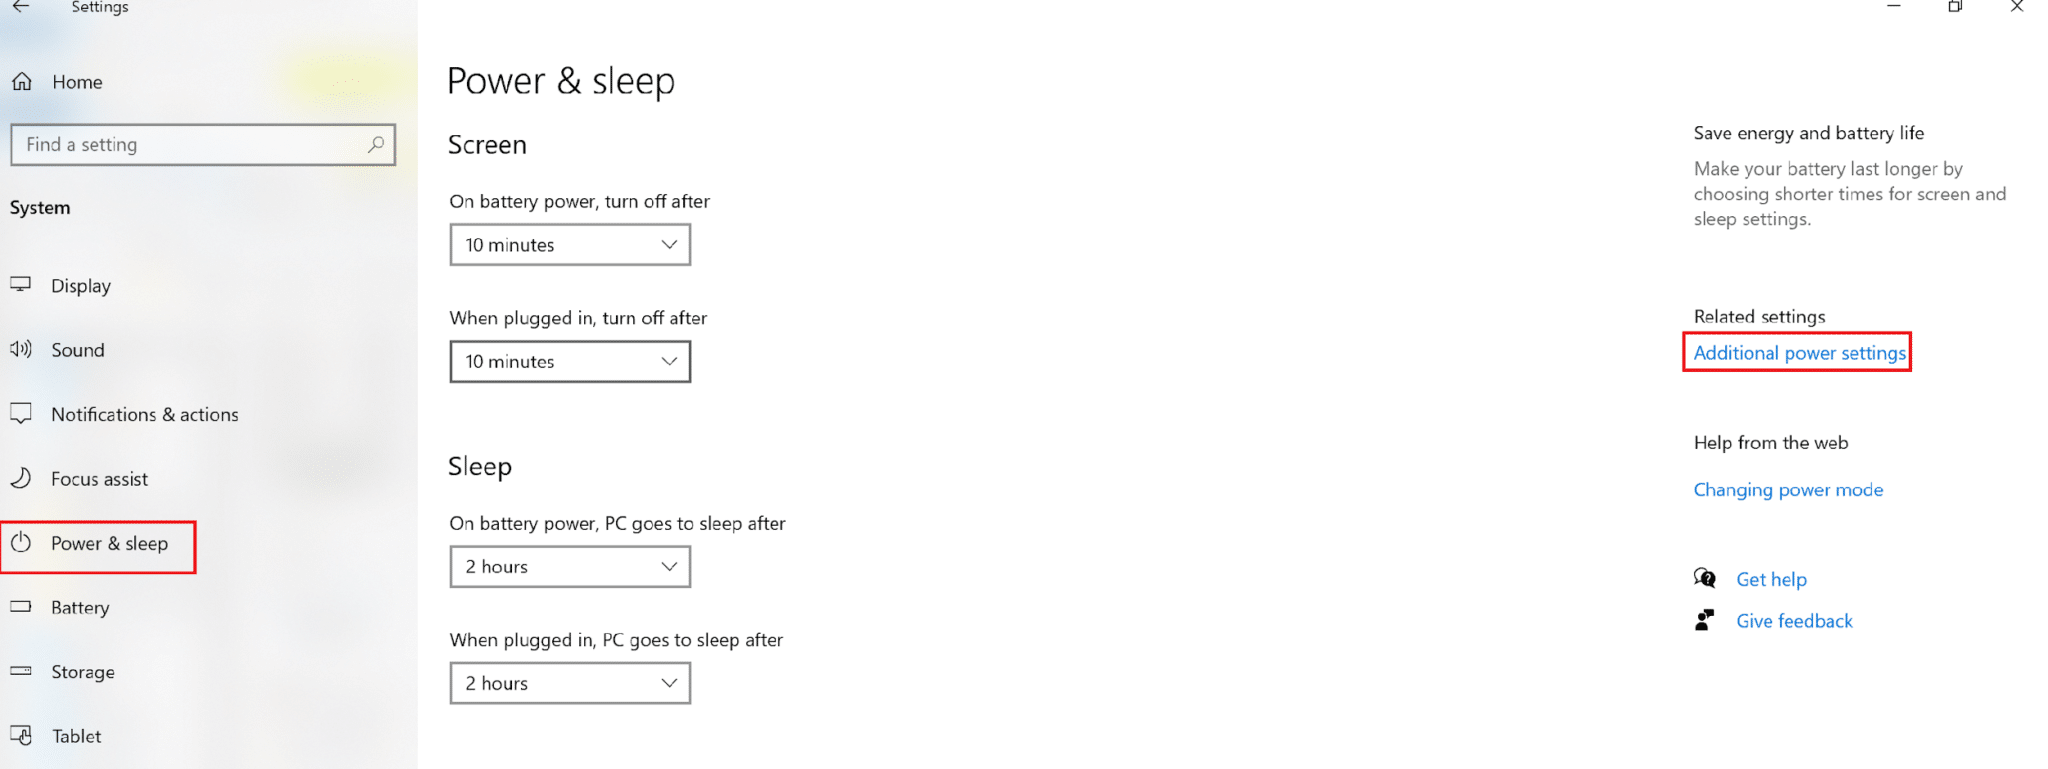
2. click ძალა და ძილი მარცხენა პანელიდან.
3. ახლა, დააჭირეთ ღილაკს დამატებითი დენის პარამეტრები from the right-most pane, as shown.
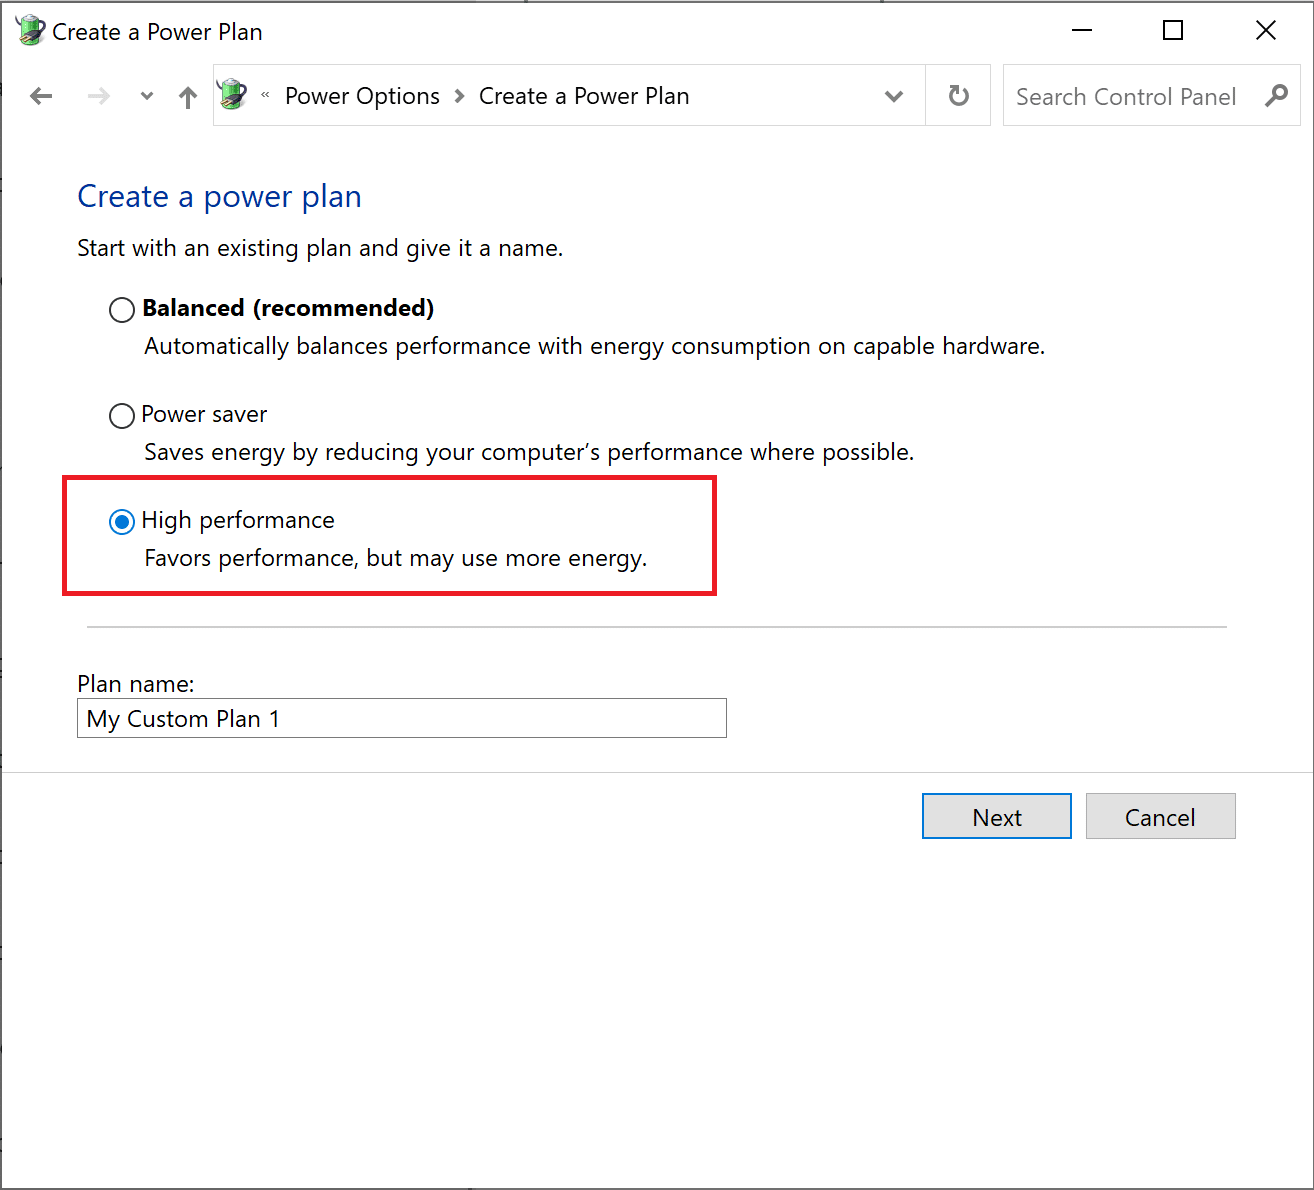
4. In დენის პარამეტრები window that now appears, click on შექმენით ელექტროენერგიის გეგმა, როგორც გამოსახულია.
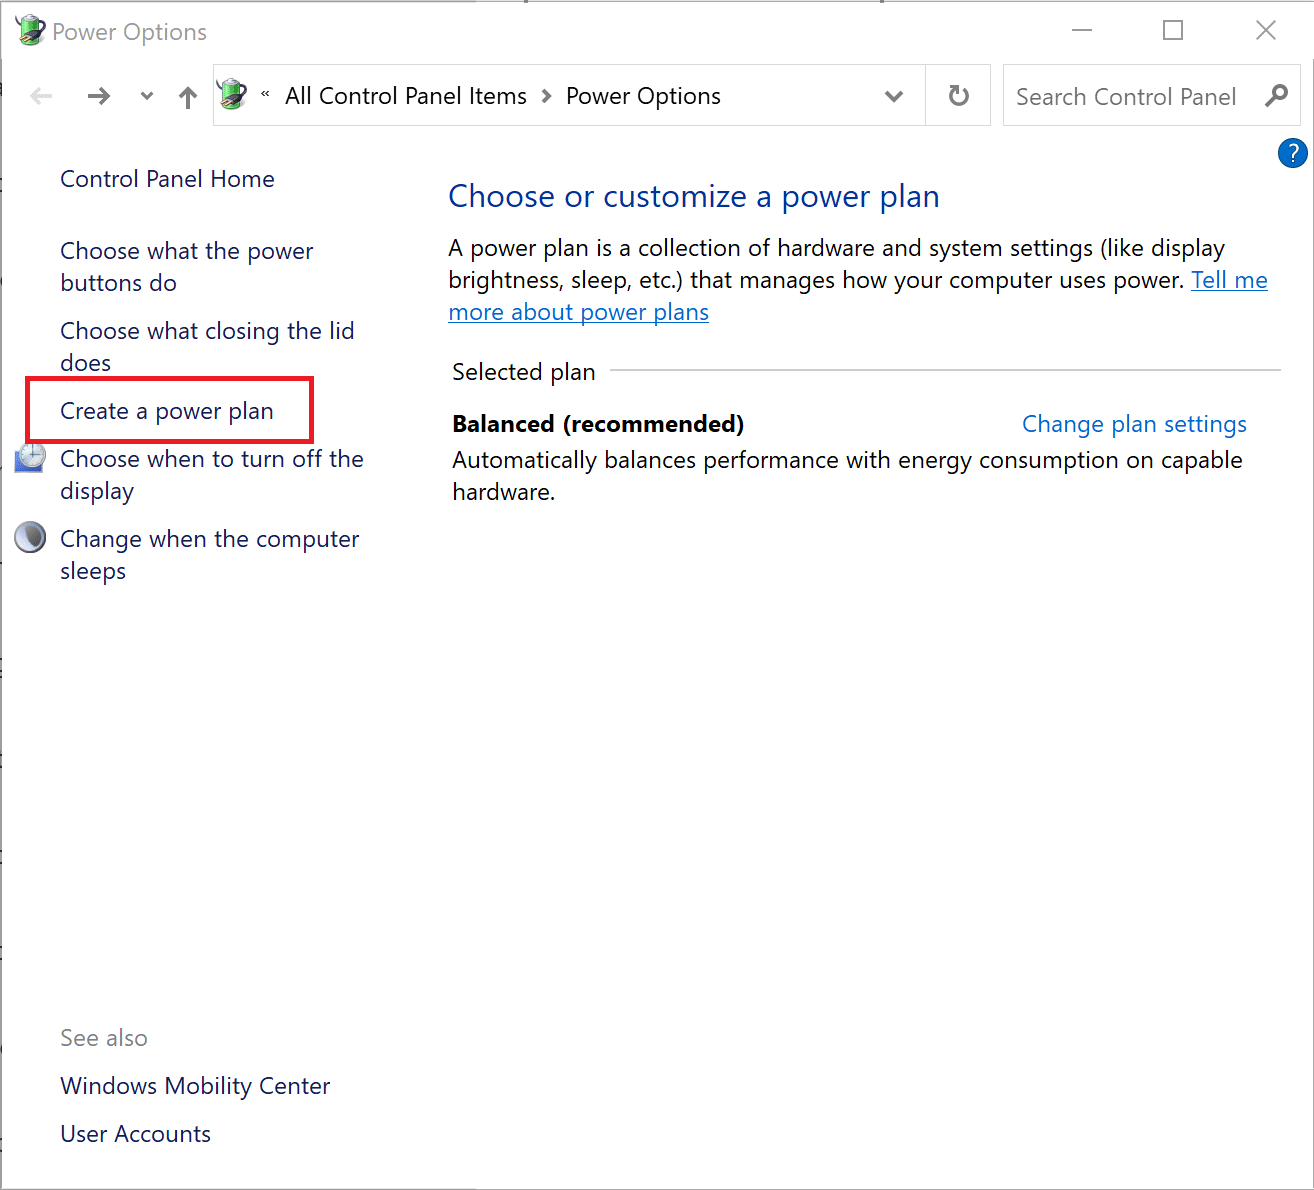
5. აი, აირჩიე მაღალი ხარისხის და დაწკაპეთ შემდეგი ცვლილებების შენახვა.
ასევე წაიკითხე: How to Enable or Disable Battery Saver In Windows 10
Method 10: Disable Auto-update of Steam Games (If applicable)
If you play games using Steam, you would have noticed that Steam games automatically update in the background. Background updates use up storage space & processing power of your computer. In order to optimize Windows 10 for gaming, block Steam from updating games in the background as follows:
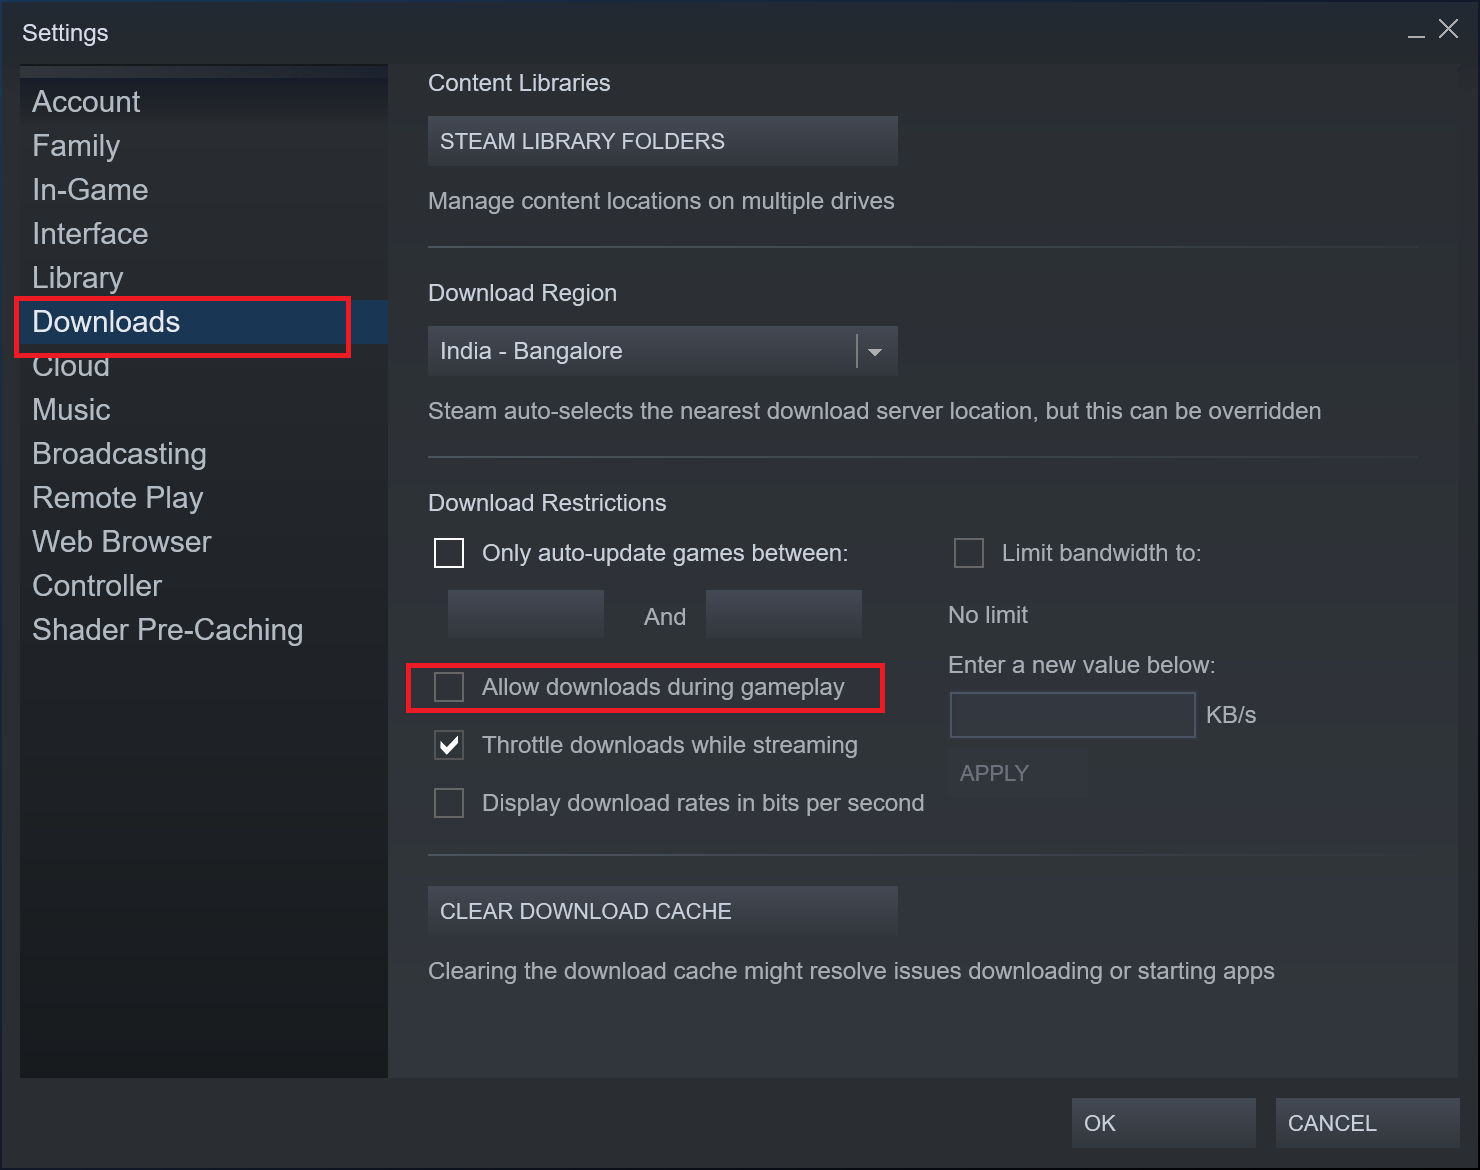
1. დაიწყე ორთქლის. შემდეგ, დააჭირეთ ღილაკს ორთქლის ზედა მარცხენა კუთხეში და აირჩიეთ პარამეტრები.

2. შემდეგი, დააწკაპუნეთ ჩამოტვირთვა Tab.
3. და ბოლოს, მოხსნა the box next to Allow downloads during gameplay, როგორც ხაზგასმულია.
Method 11: Update GPU drivers
It is essential to keep the Graphics Processing Unit updated so that your gaming experience is smooth and uninterrupted. An outdated GPU may lead to glitches and crashes. To avoid this, do as instructed:
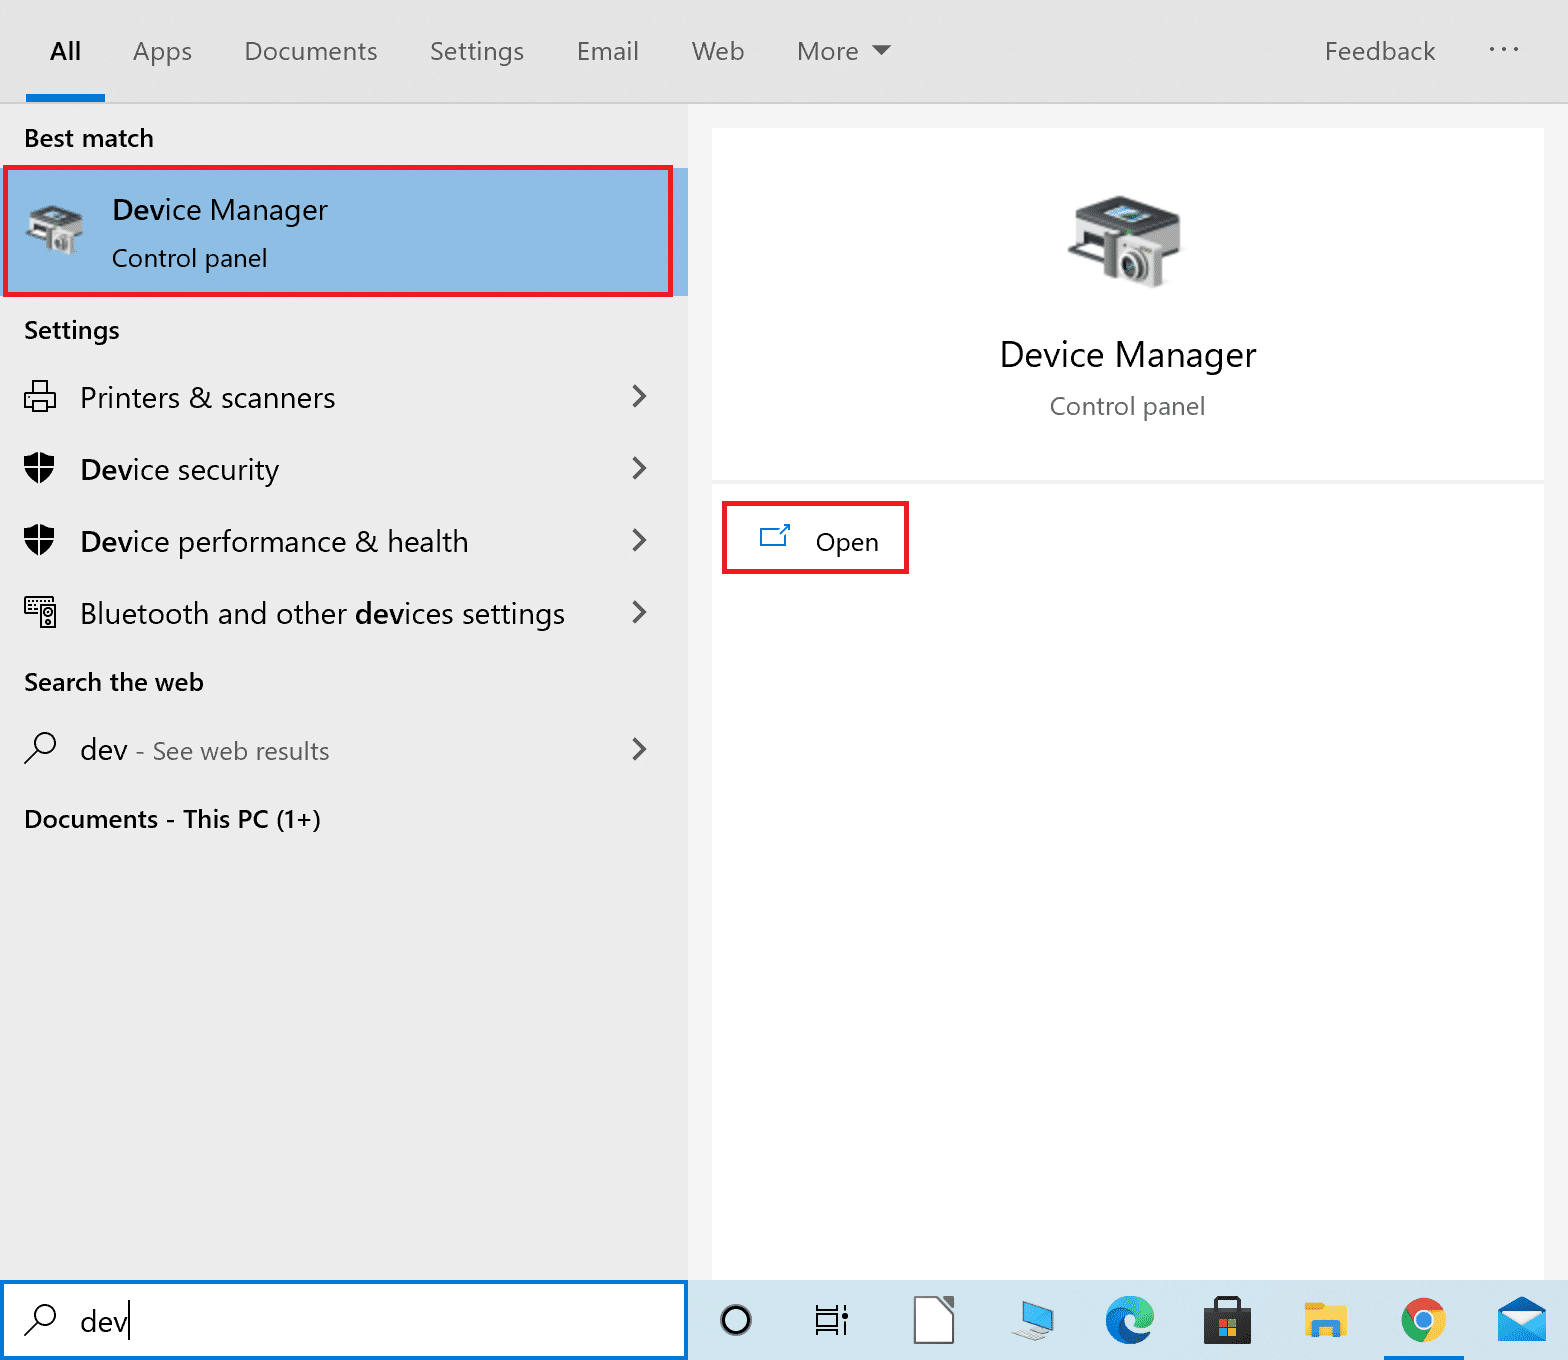
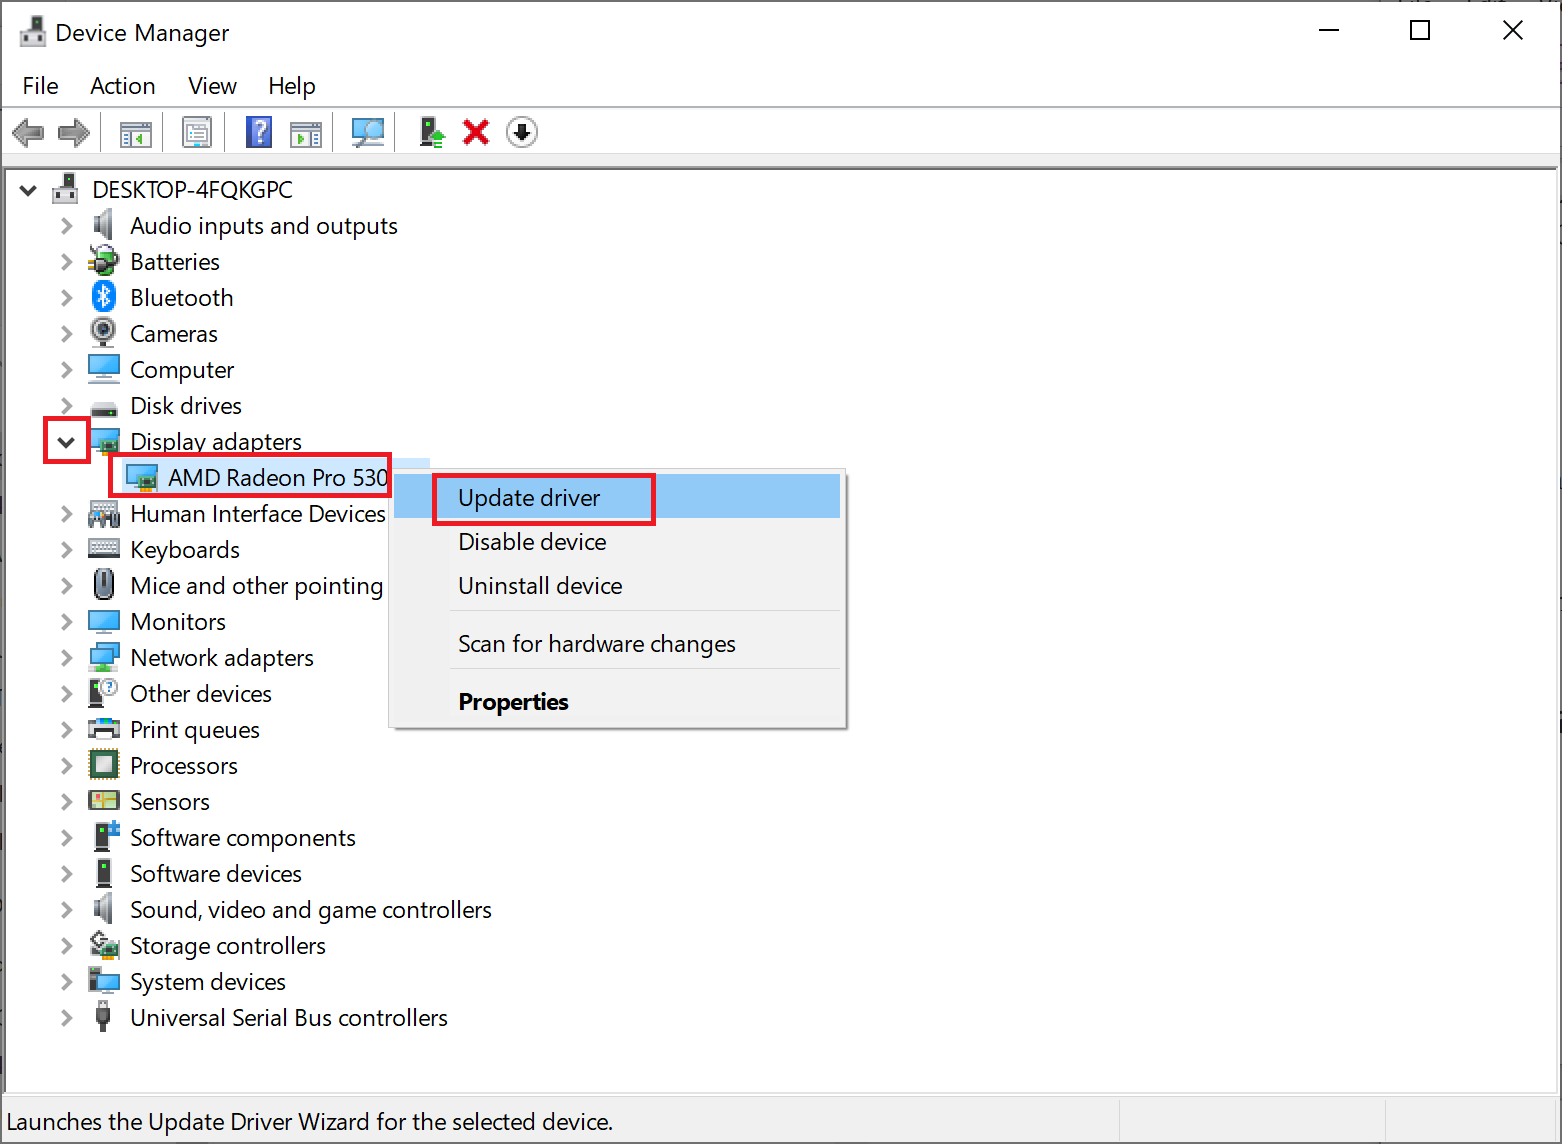
1. Search for Device Manager in the ვინდოუსის ძებნა bar. Launch Device Manager by clicking on it in the search result.
2. In the new window, click on the ქვევით ისარი შემდეგი ეკრანის გადამყვანები მისი გაფართოება.
3. შემდეგი, დააწკაპუნეთ მარჯვენა ღილაკით თქვენს გრაფიკული დრაივერი. შემდეგ, აირჩიეთ დრაივერის განახლება, ნაჩვენებია ქვემოთ.
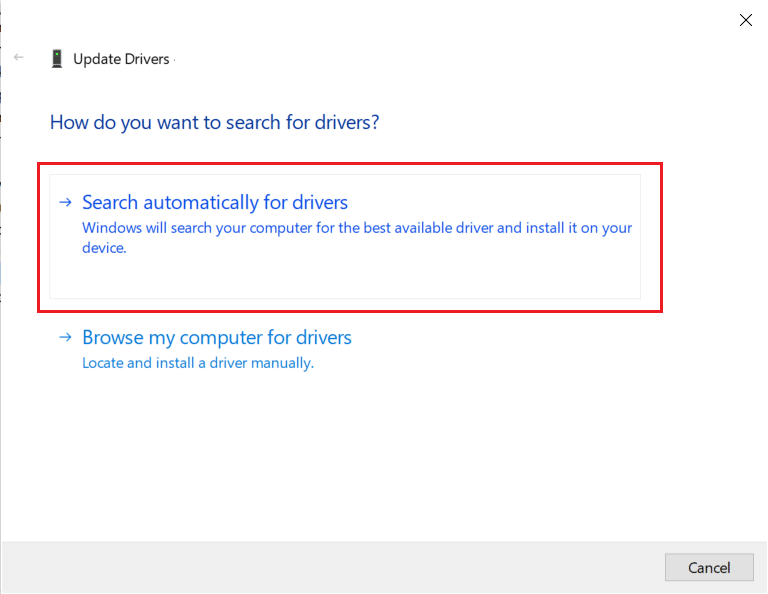
4. Finally, click on the option titled ავტომატურად მოძებნეთ მძღოლები to download and install the latest graphics drivers.
Method 12: Disable Pointer Precision
Pointer precision can help when working with any Windows programs or third-party software. But, it can affect your Windows 10 performance while gaming. Follow the given steps to disable pointer precision and to optimize Windows 10 for gaming and performance:
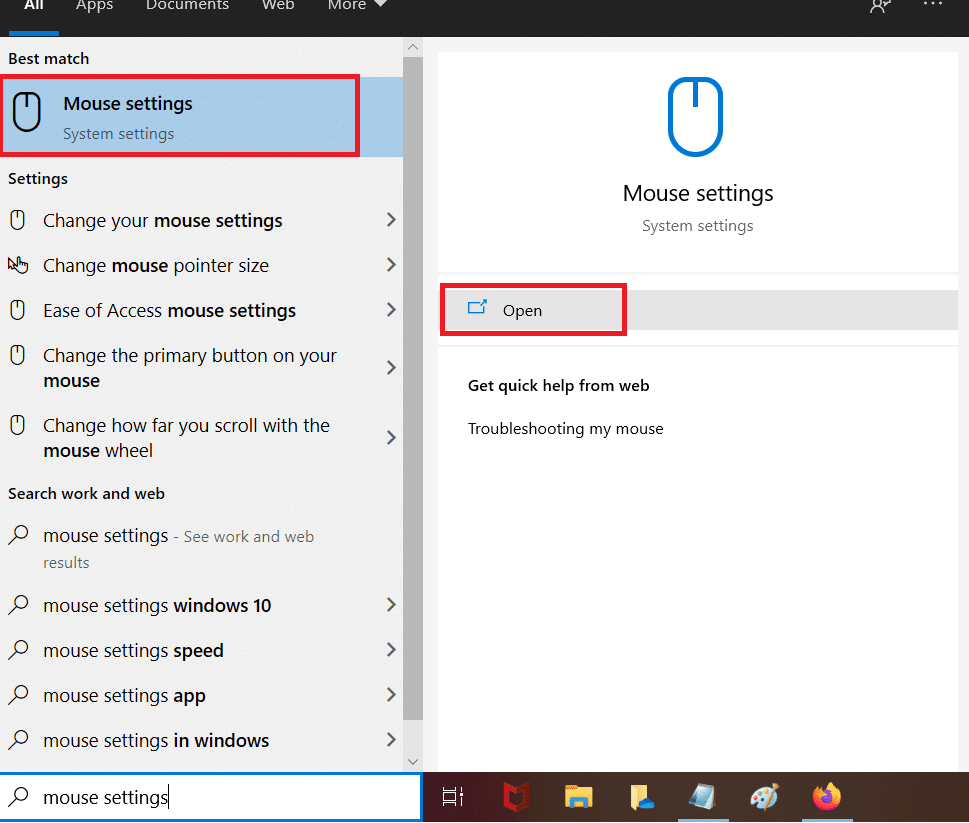
1. ძიება მაუსის პარამეტრები იმ ვინდოუსის ძებნა bar. Then, click on it from the search results.
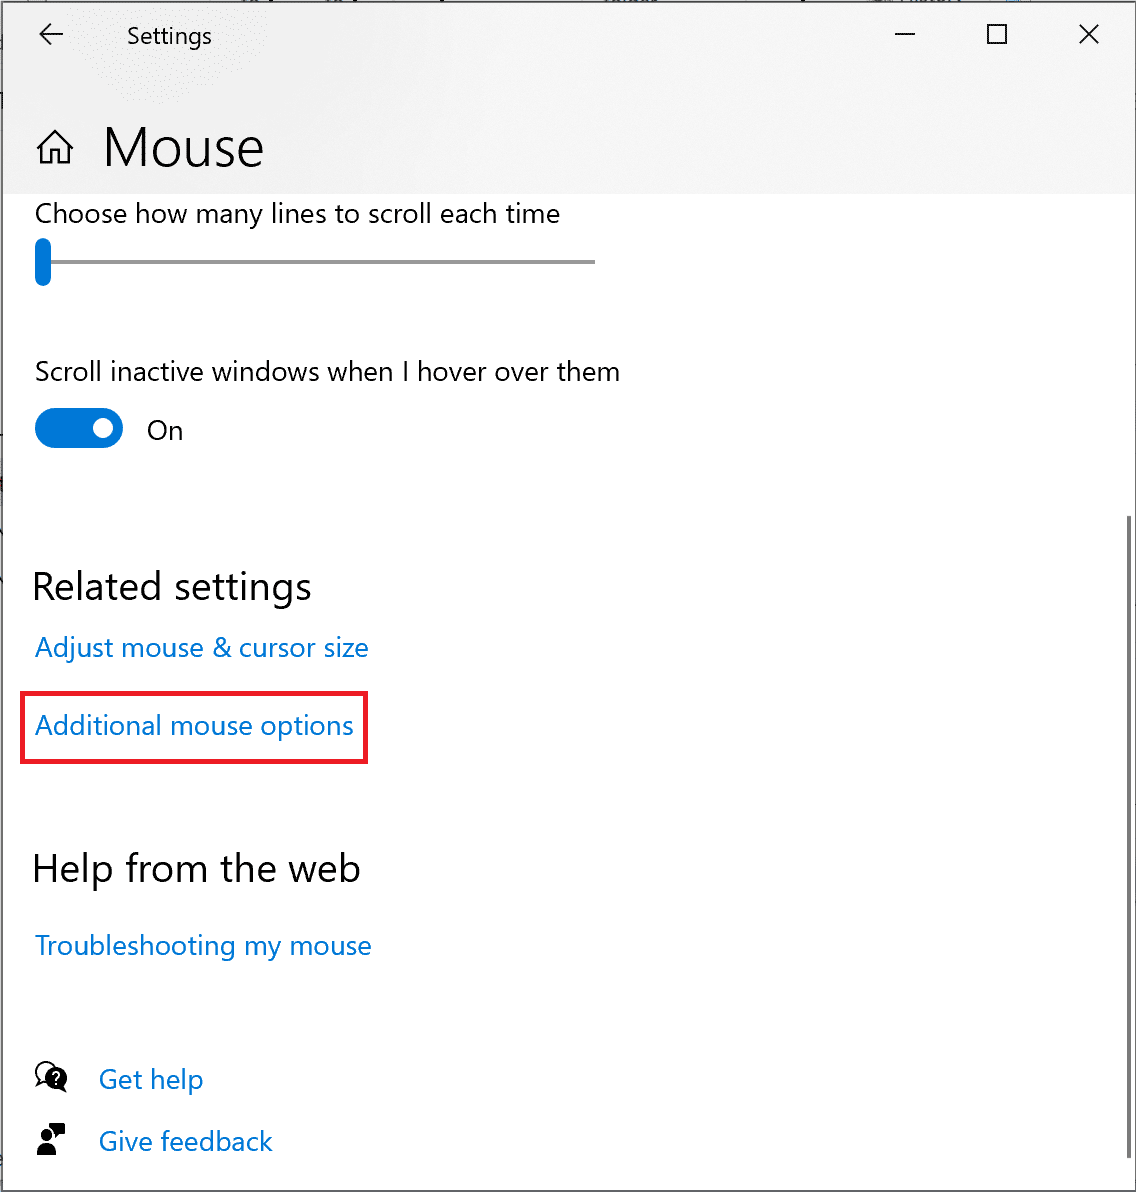
2. ახლა, აირჩიეთ Additional mouse პარამეტრები, as marked below.
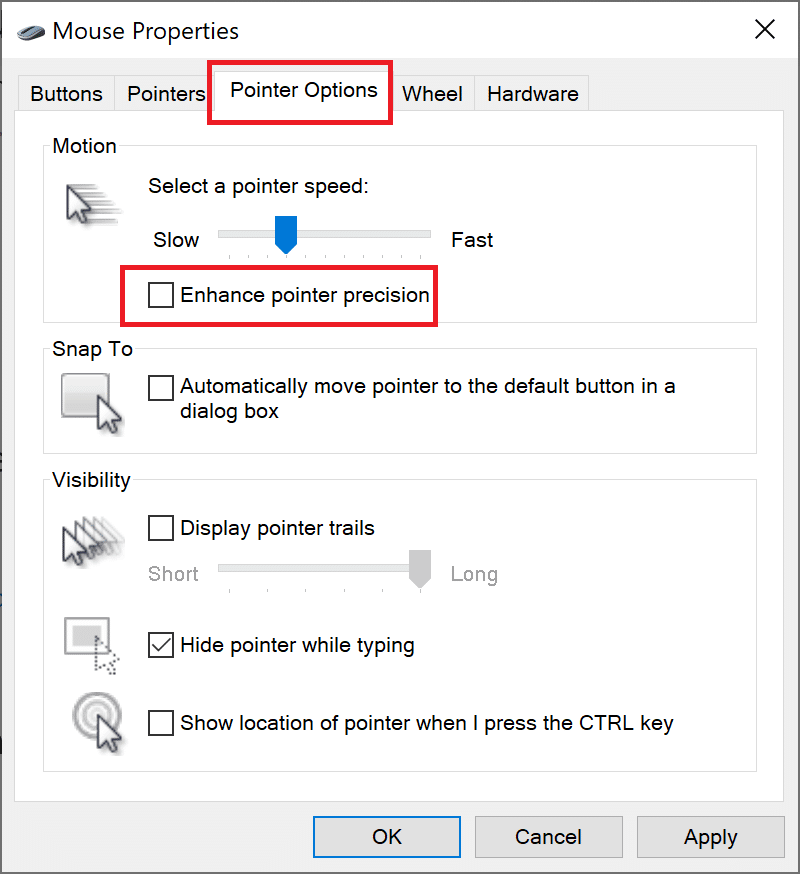
3. In the Mouse Properties window, switch to the მანიშნებლის პარამეტრები Tab.
4. ბოლოს და ბოლოს, მოხსნა ყუთი მონიშნულია Enhance pointer precision. შემდეგ, დააჭირეთ მიმართვა > OK.
Method 13: Disable Keyboard Accessibility Options
It can be pretty annoying when you get a message saying that წებოვანი გასაღებები have been enabled while working on your computer, even more so when you are playing a game. Here’s how to optimize Windows 10 for gaming performance by disabling them:
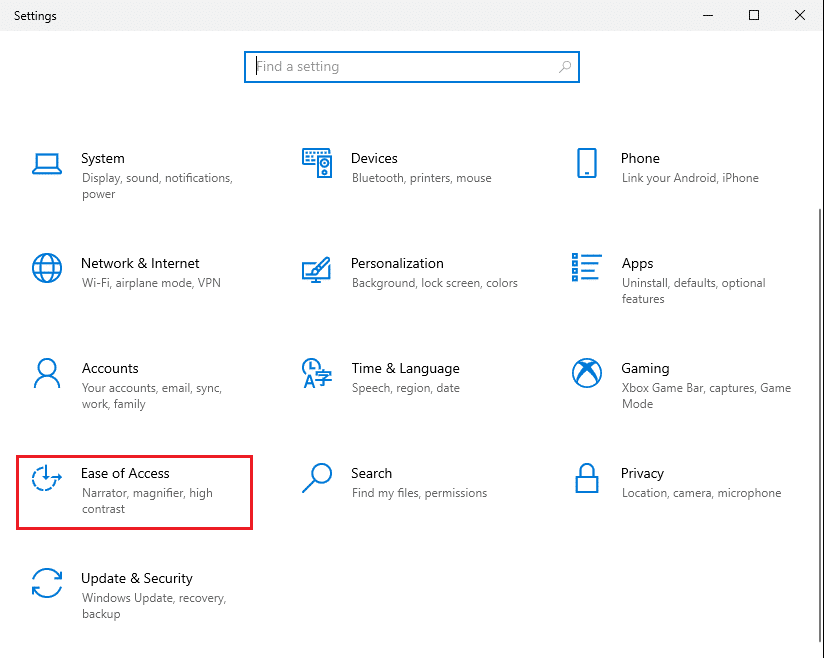
1. დაიწყე პარამეტრები და აირჩიეთ გამარტივებული ძებნა, როგორც ნაჩვენებია.
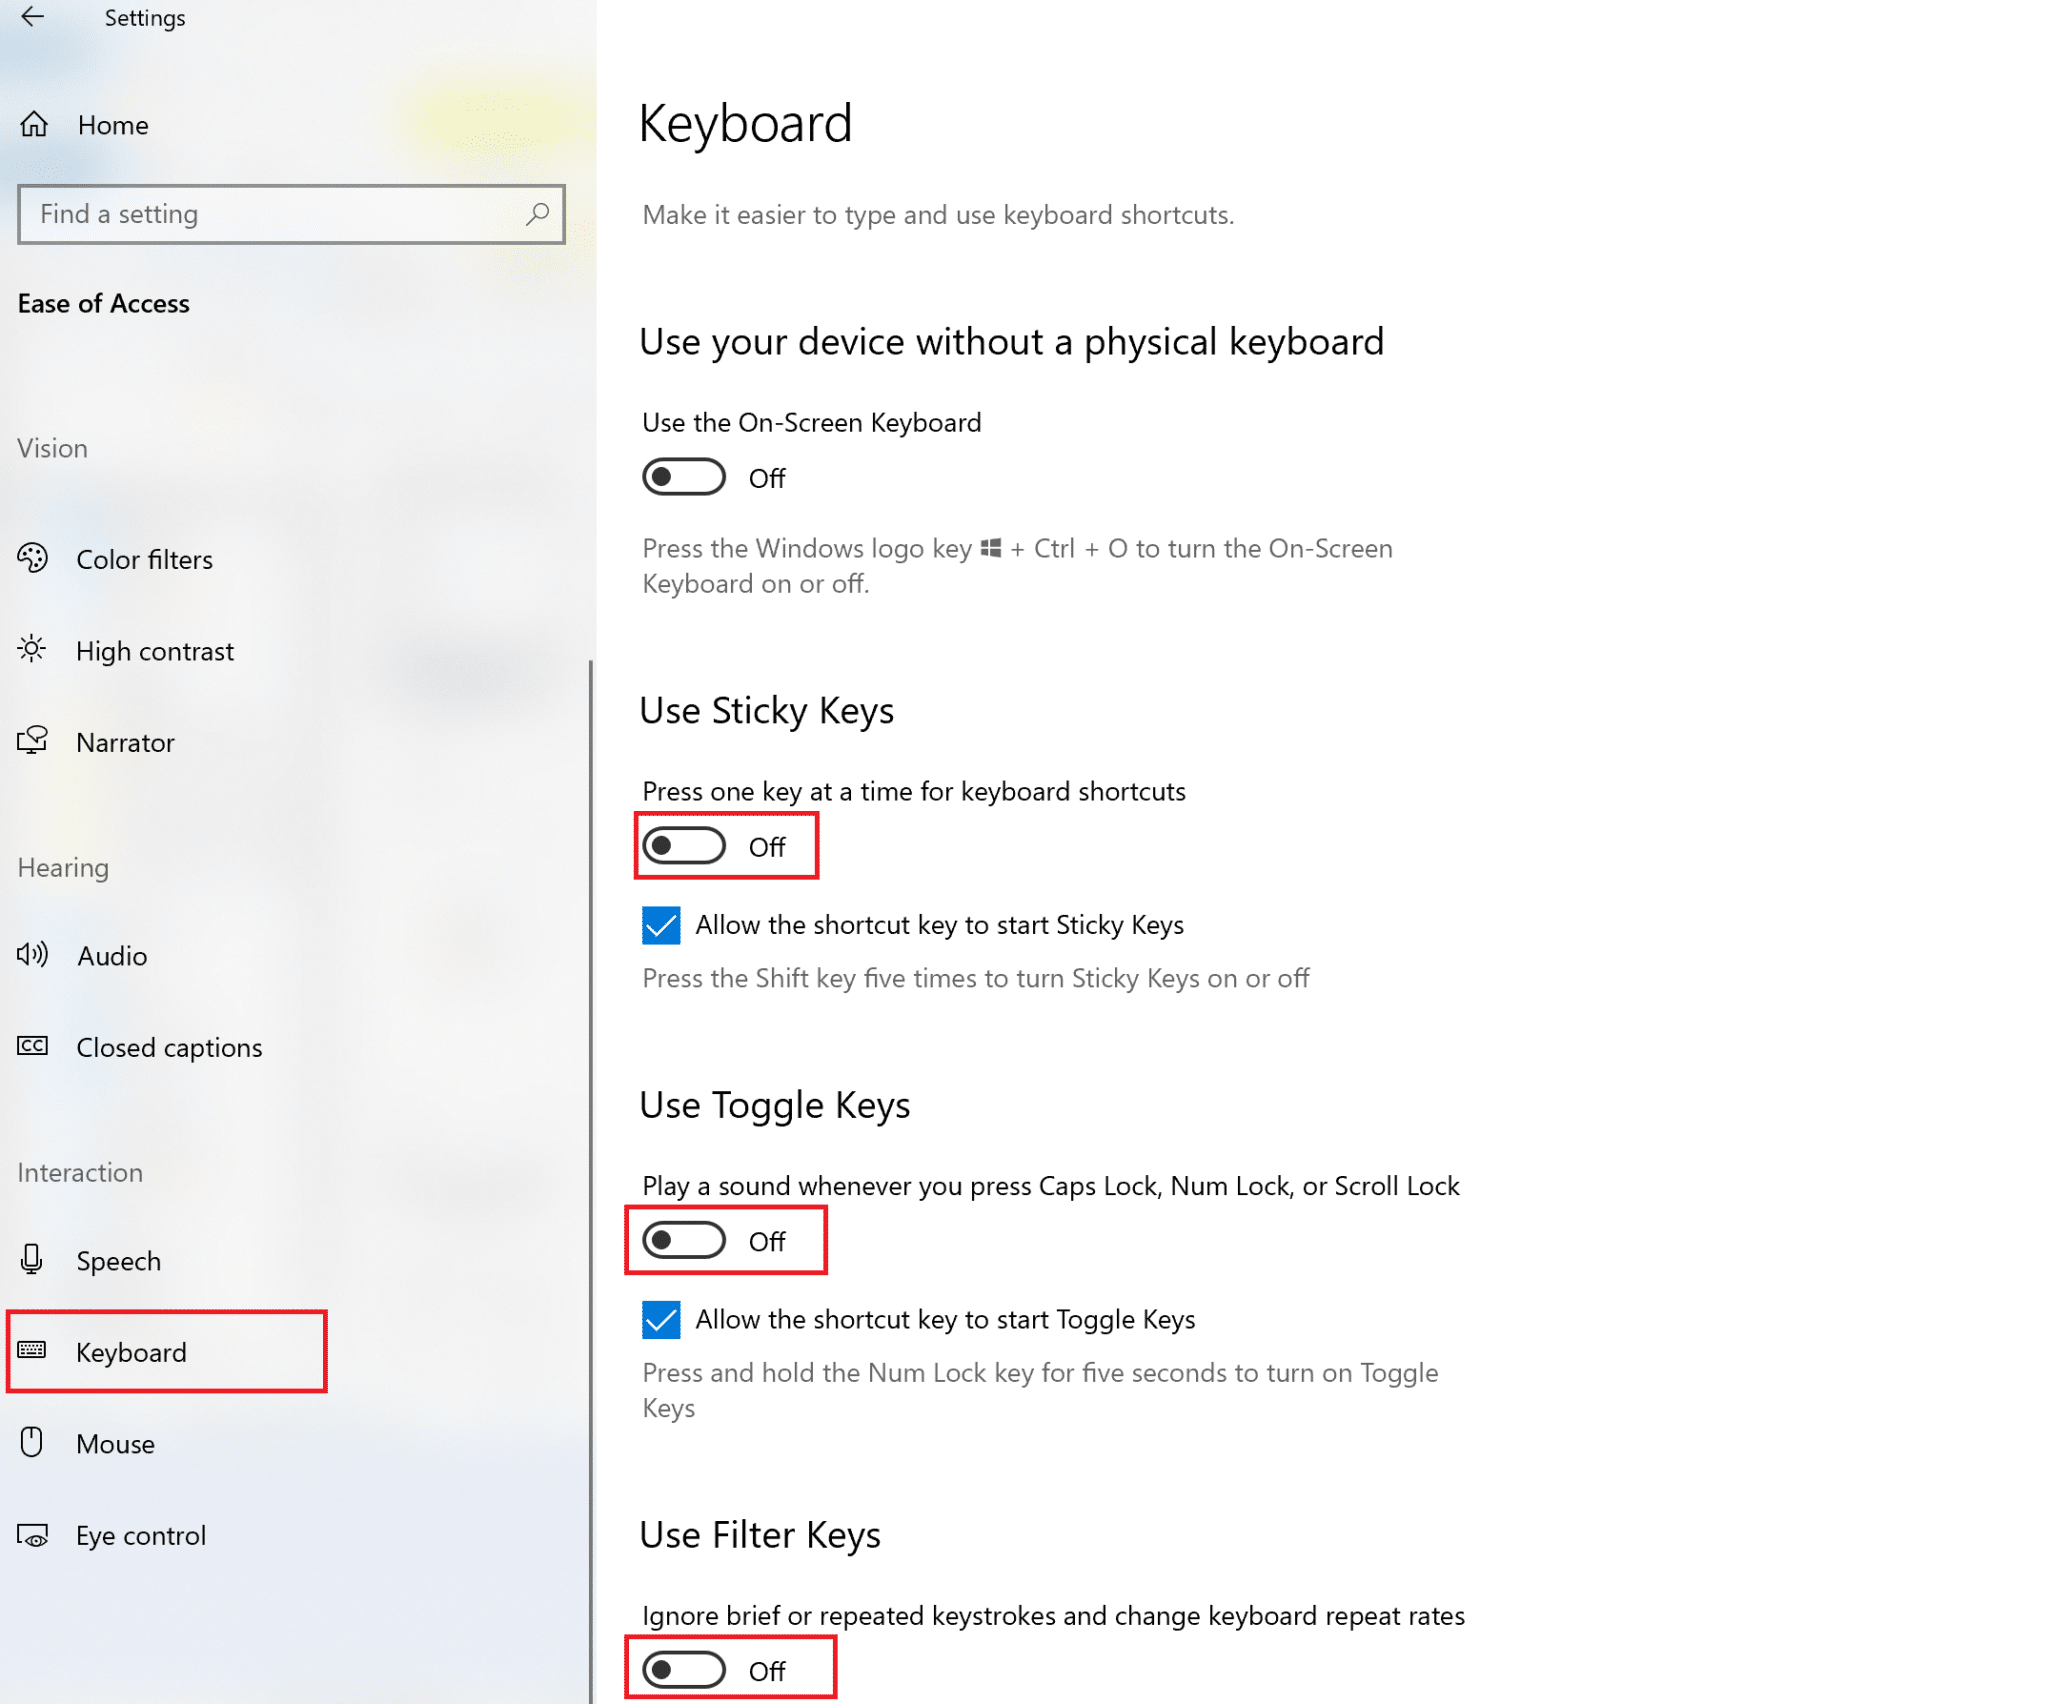
2. შემდეგ, დააჭირეთ ღილაკს კლავიატურა in the left pane.
3. Turn the toggle off for გამოიყენეთ Sticky Keys, Use Toggle Keys, მდე Use Filter keys to disable them all.
ასევე წაიკითხე: How to Turn off Narrator Voice in Windows 10
Method 14: Use Discrete GPU for Gaming (If applicable)
In case you own a multi-GPU computer, the integrated GPU offers better power efficiency, while the discrete GPU enhances the performance of graphics-heavy, intensive games. You can choose to play graphics-heavy games by setting discrete GPU as the default GPU to run them, as follows:
1. დაიწყე სისტემის პარამეტრები, როგორც ადრე.
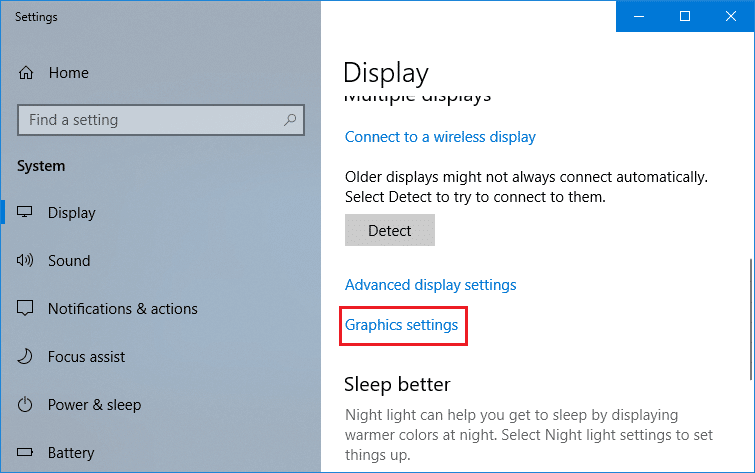
2. შემდეგ, დააჭირეთ ღილაკს ჩვენება > გრაფიკული პარამეტრები, როგორც ნაჩვენებია.
3. From the drop-down menu given for Choose an app to set preference, აირჩიეთ Desktop ოთახი როგორც ნაჩვენებია.
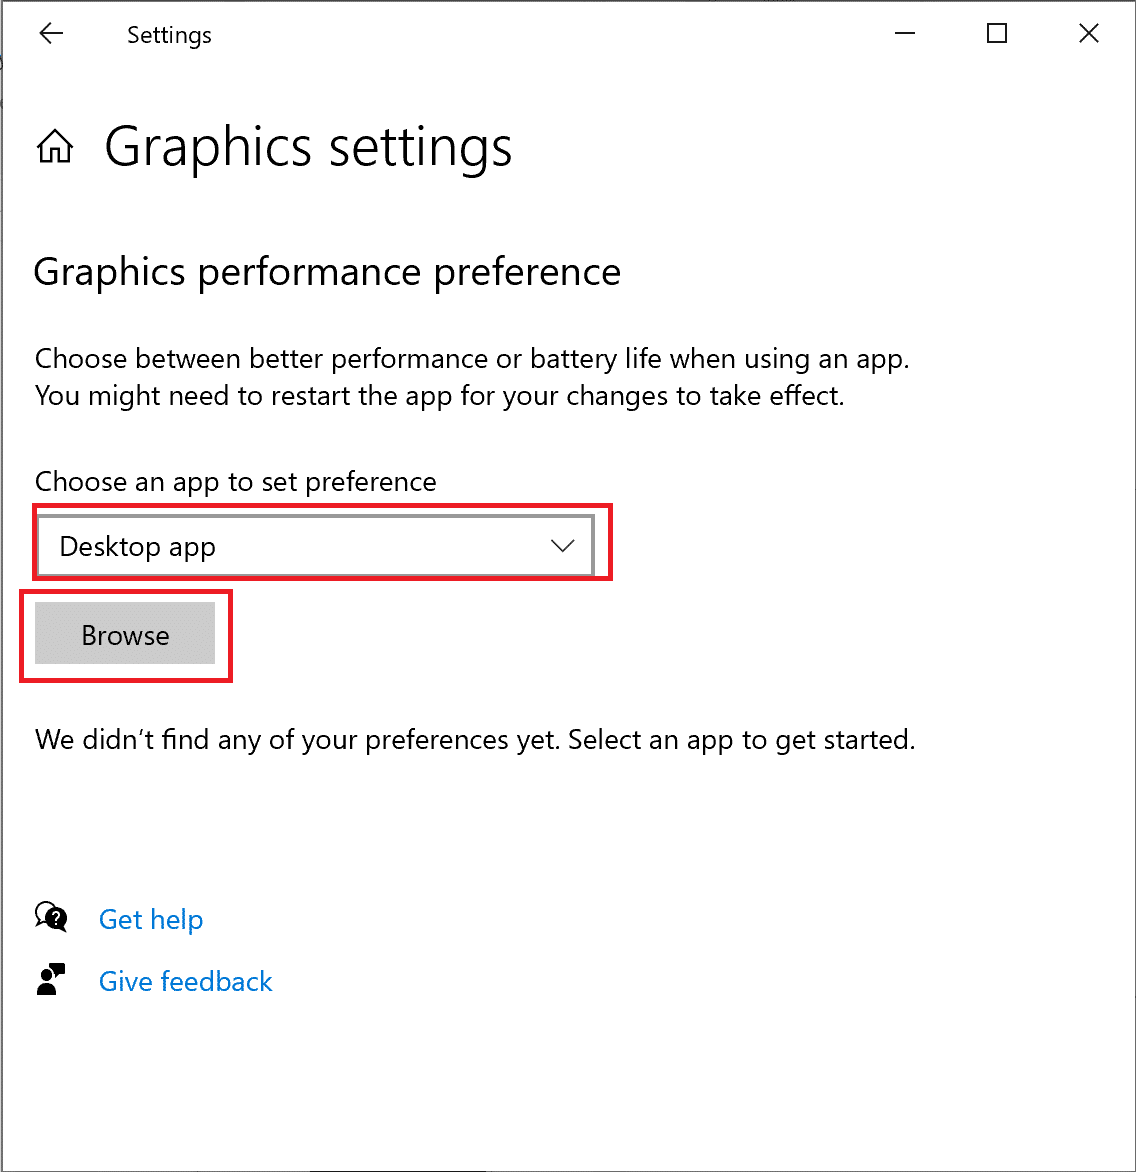
4. შემდეგი, დააწკაპუნეთ იხილე option. Navigate to your თამაშის საქაღალდე.
5. Select the .exe ფაილი of the game and click on დამატება.
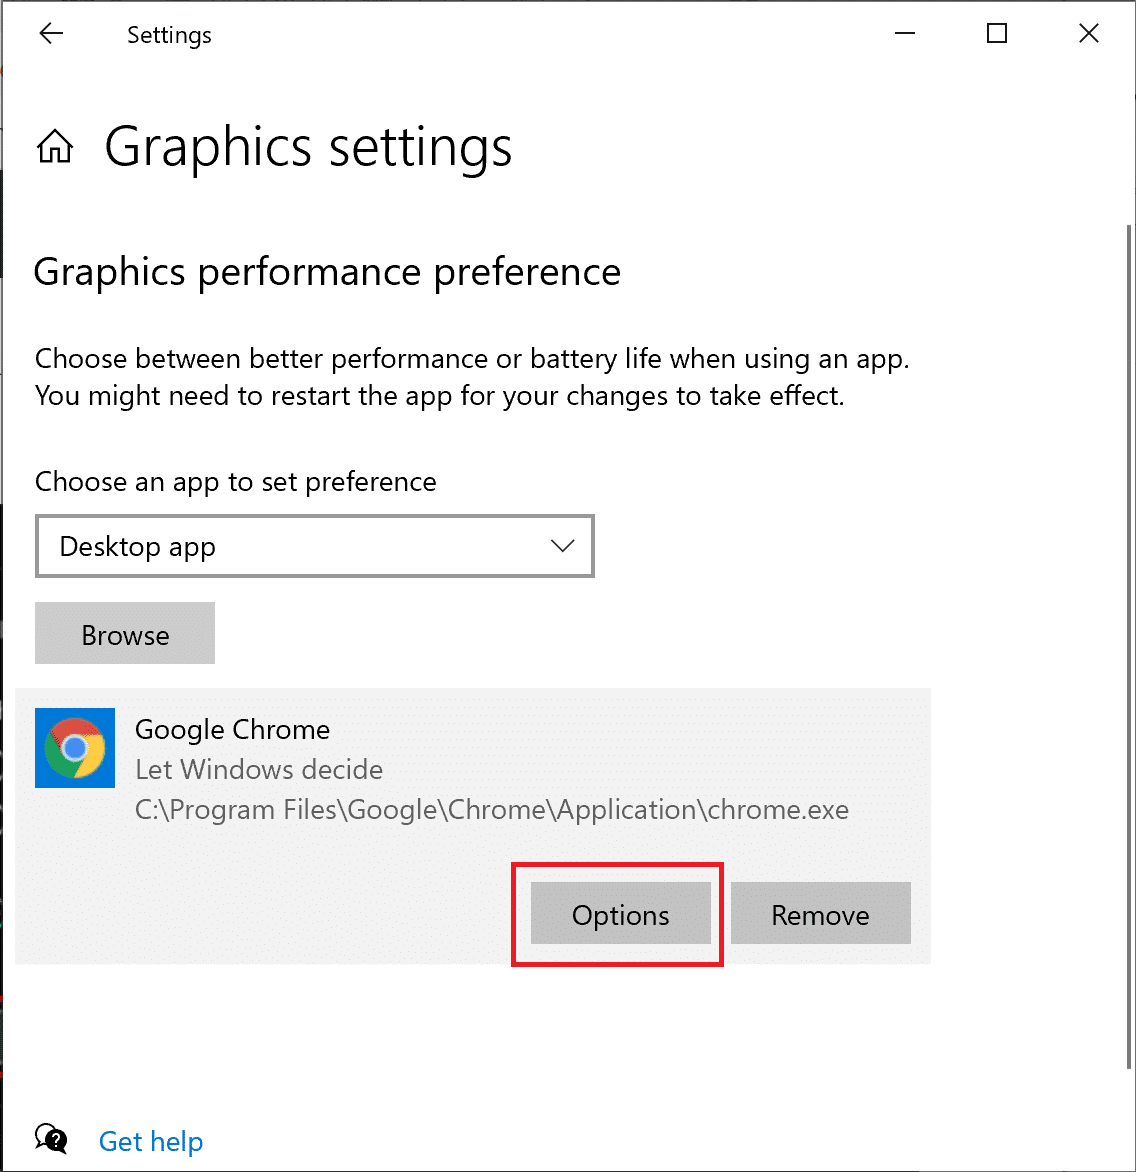
6. ახლა დააწკაპუნეთ added game in the Settings window, then click on პარამეტრები.
შენიშვნა: We have explained the step for Google Chrome as an example.
7. აირჩიეთ მაღალი ხარისხის from the listed options. Then, click on Გადარჩენა, როგორც ხაზგასმულია.
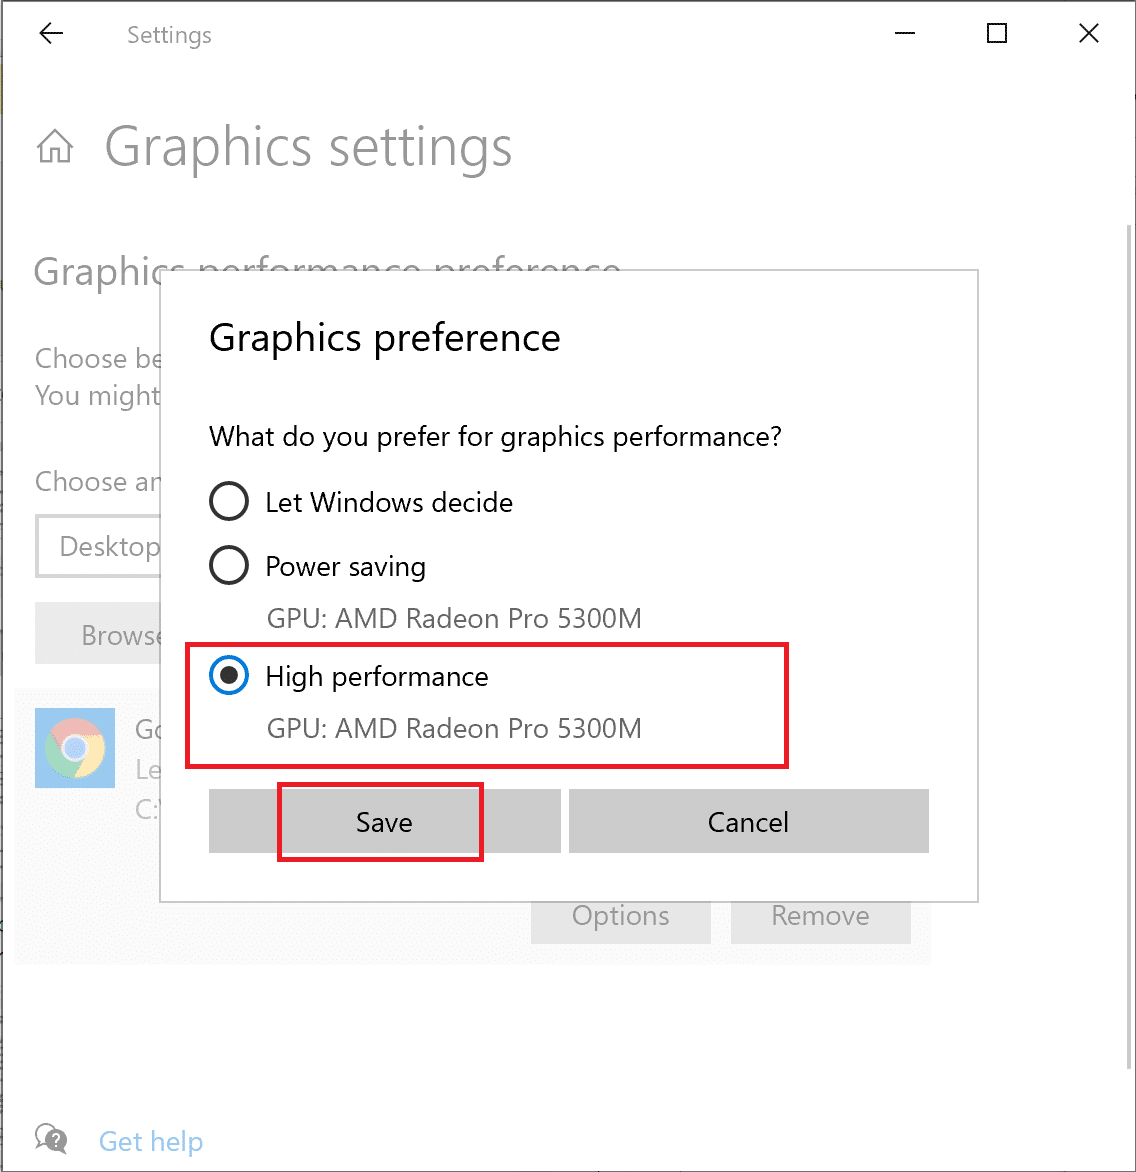
8. გადატვირთეთ კომპიუტერი for the changes that you made to take effect. This is how to optimize Windows 10 for performance.
Method 15: Tweak Settings in Graphics Card Control Panel (If applicable)
NVIDIA or AMD graphic cards installed on your system have their respective control panels to change settings. You can alter these settings to optimize Windows 10 for gaming.
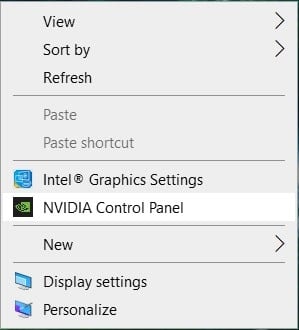
1. დააწკაპუნეთ მარჯვენა ღილაკით თქვენს desktop and then click on your graphic driver control panel. For example, NVIDIA Control Panel.
2. In the settings menu, change the following settings (if applicable):
- შემცირება Maximum Pre-rendered frames to 1.
- ჩართე თემატური ოპტიმიზაცია.
- გამორთვა Ვერტიკალური Sync.
- უცნობია ენერგიის მართვის რეჟიმი to Maximum, as depicted.
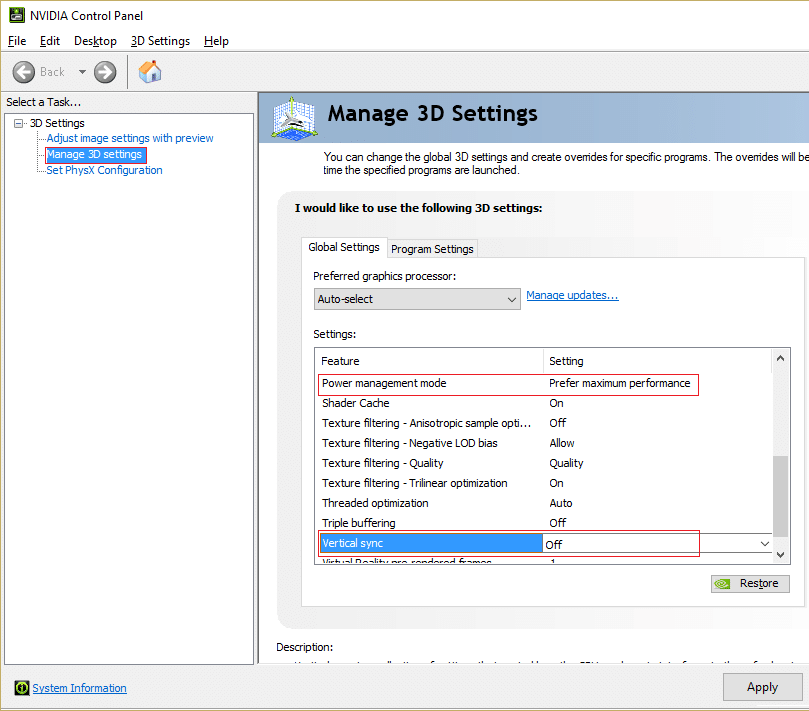
This will not only help optimize Windows 10 for gaming but also solve how to optimize Windows 10 for performance issues.
Method 16: Install DirectX 12
DirectX is an application that can significantly enhance your gaming experience. It does so by offering efficient power consumption, enhanced graphics, multi-CPU, and multi-GPU cores, along with smoother frame rates. Direct X 10 & Direct X 12 versions are greatly favored by gamers worldwide. Follow the steps given below to upgrade the DirectX version installed on your computer to to optimize Windows 10 for performance:
1. დაჭერა Windows + R გასაღებები დაიწყოს გასაშვებად დიალოგური ფანჯარა.
2. შემდეგი, აკრიფეთ dxdiag in the dialogue box and then, click on OK. The DirectX diagnostic tool will open now.
3. შეამოწმეთ the version of DirectX as shown below.
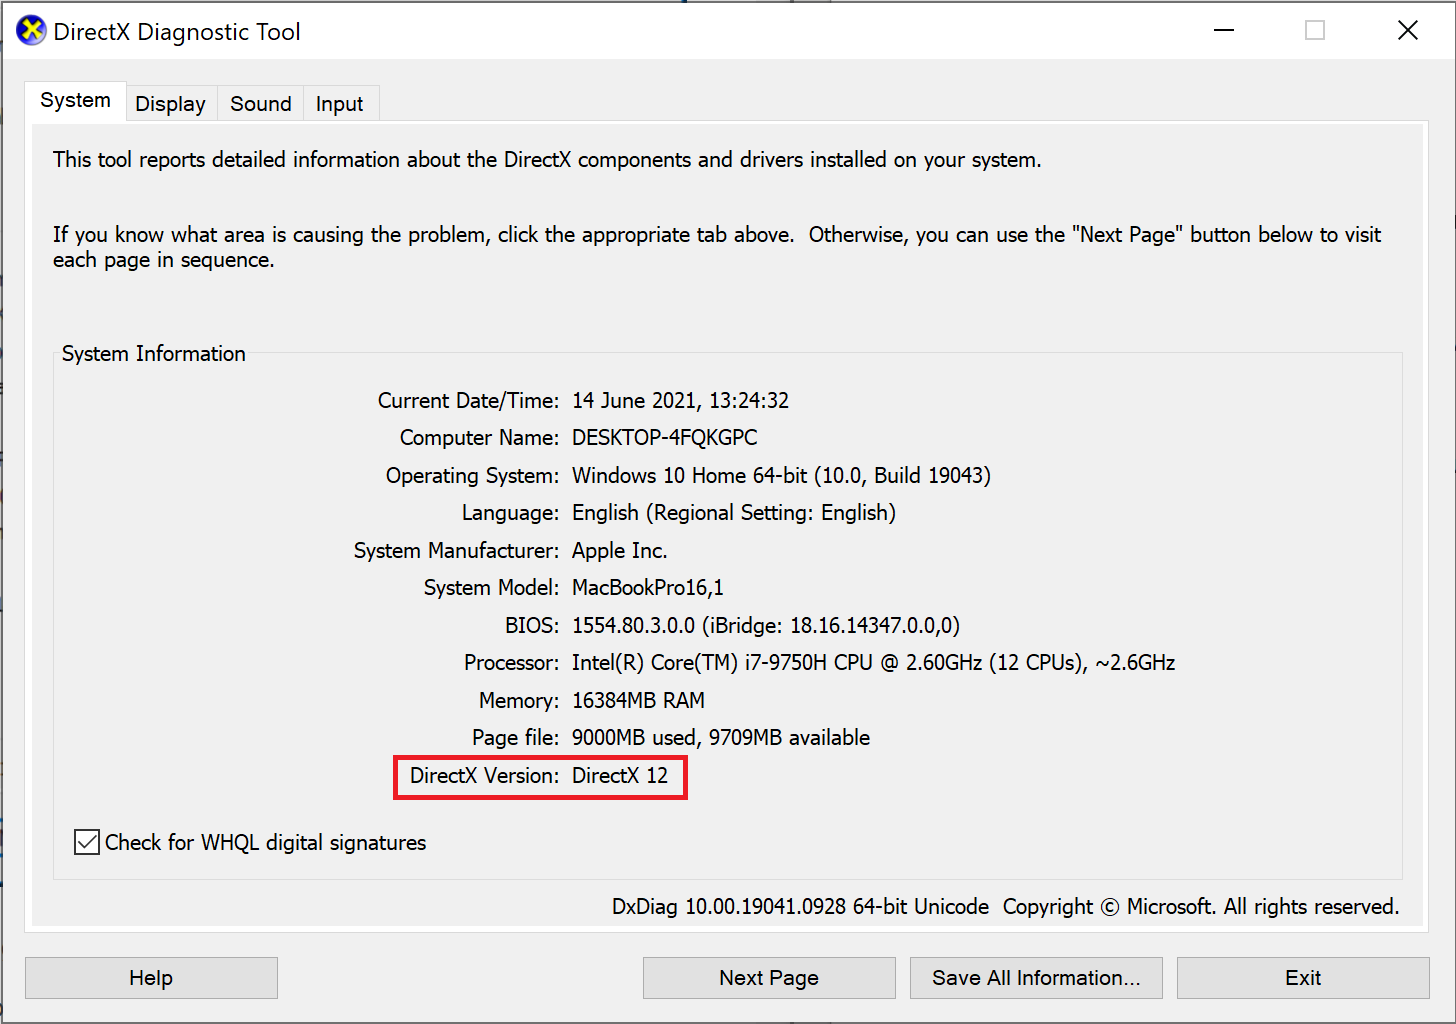
4. If you do not have DirectX 12 installed on your computer, ჩამოტვირთეთ და დააინსტალირეთ აქედან.
5. Next, go to პარამეტრები> განახლება და უსაფრთხოება, როგორც ნაჩვენებია.
6. დაწკაპეთ შეამოწმოთ განახლებები and update Windows OS to optimize Windows 10 for gaming.
ასევე წაიკითხე: Fix Graphics Card Not Detected on Windows 10
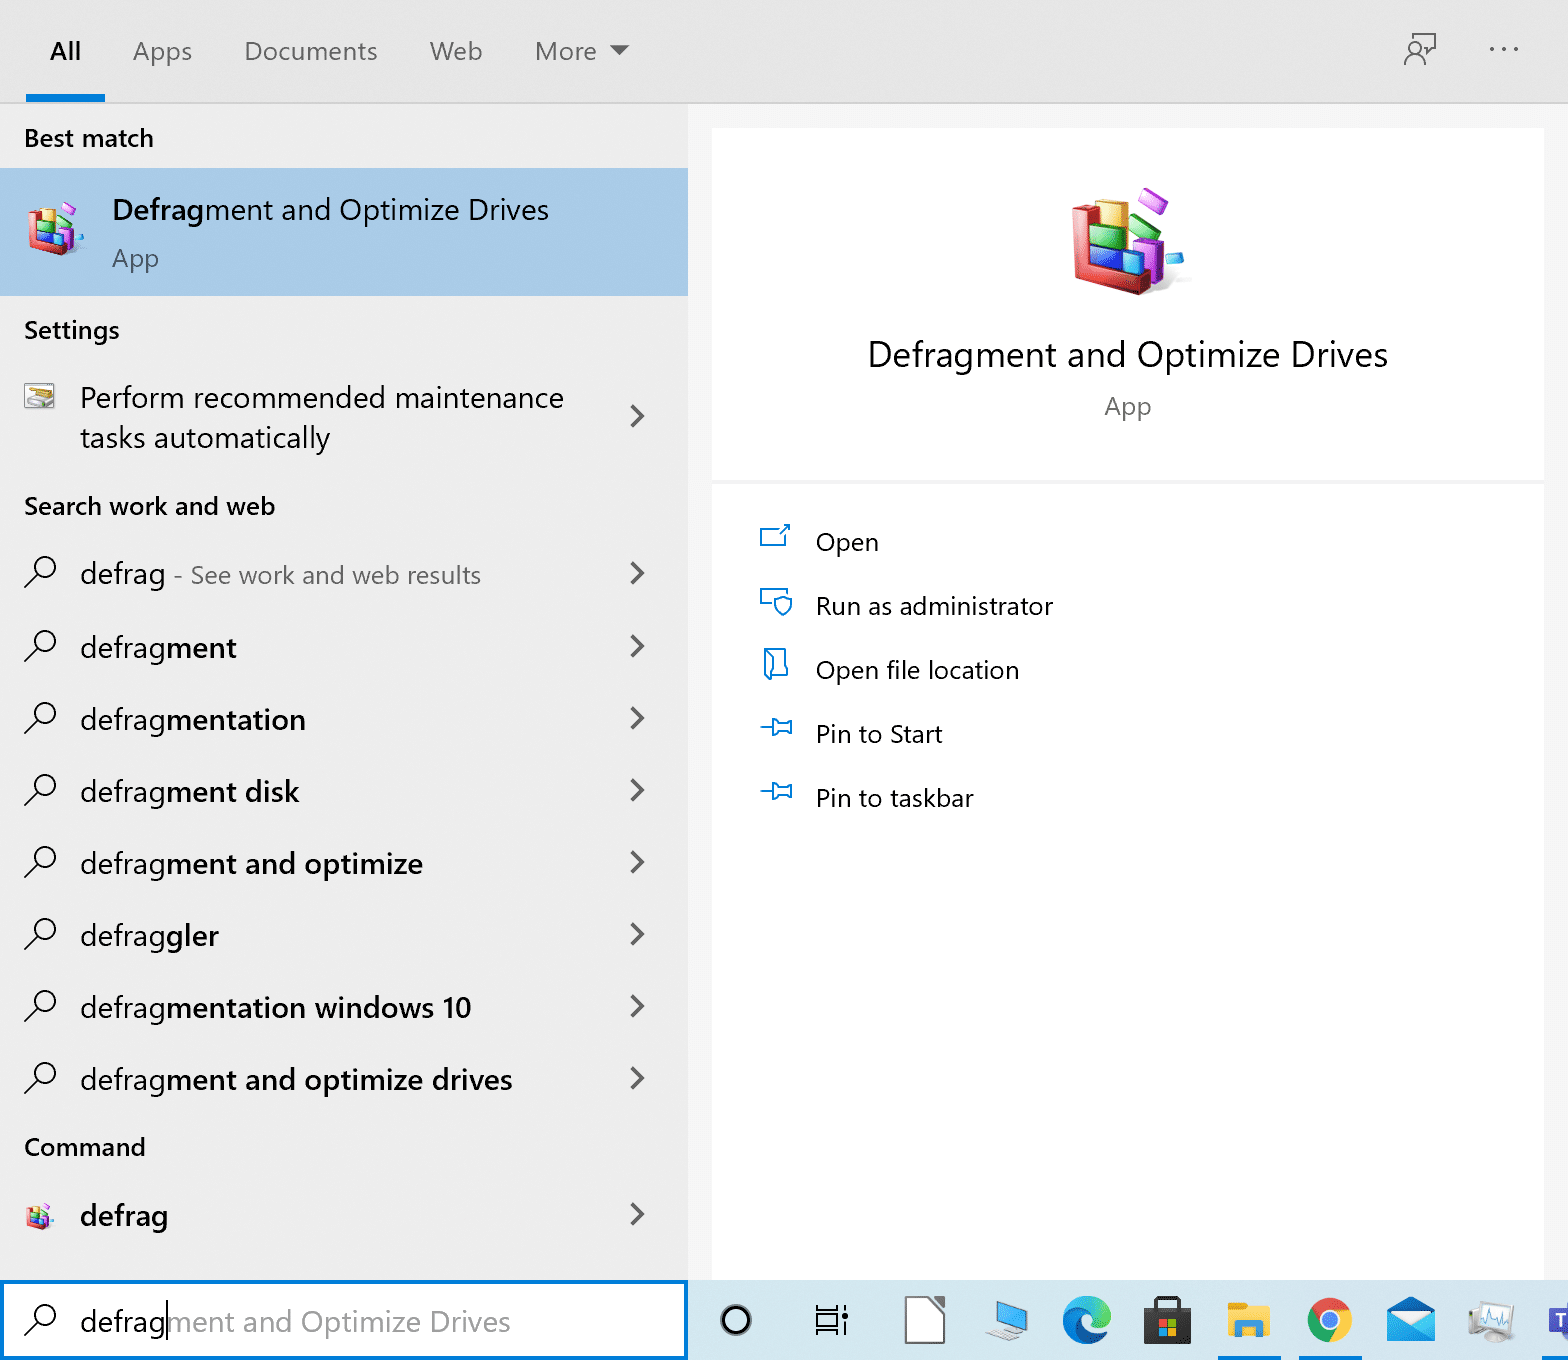
Method 17: Defragmentation of HDD
This is an inbuilt utility in Windows 10 that allows you to defragment your hard disk drive to work more efficiently. Defragmentation moves and reorganizes the data spread across your hard drive in a neat and organized manner. Follow the steps given below to use this utility to optimize Windows 10 for gaming:
1. ტიპი Defrag იმ ვინდოუსის ძებნა bar. Then, click on დრაივების დეფრაგმენტაცია და ოპტიმიზაცია.
2. აირჩიეთ HDD (Hard disk drive) to be defragmented.
შენიშვნა: Do not defragment Solid State Drive (SDD) because it can reduce its lifespan.
3. შემდეგ, დააჭირეთ ღილაკს ოპტიმიზაცია, როგორც ქვემოთაა ნაჩვენები.
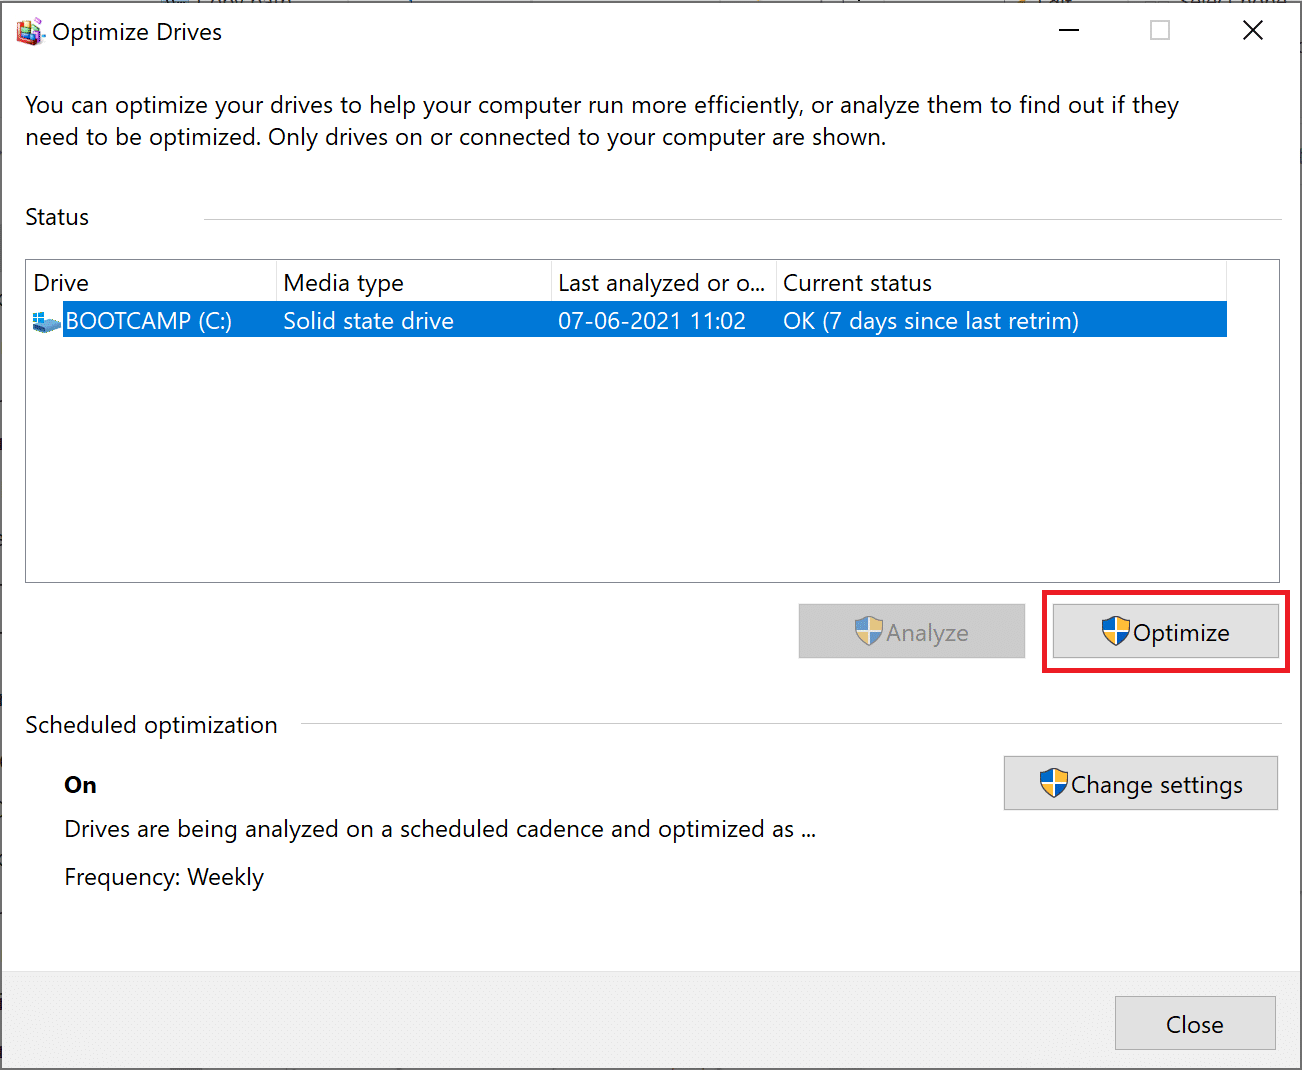
The selected HDD will be automatically defragmented for enhanced performance of your Windows desktop/laptop.
Method 18: Upgrade to SSD
- Hard Disk Drives or HDDs have a read/write arm that has to scour different parts of a spinning disk to access data, similar to a vinyl record player. This mechanical nature makes them slow and very fragile. If a laptop with an HDD is dropped, there are higher chances of data loss because the impact could disrupt the moving disks.
- Solid State Drives or SSDsმეორეს მხრივ, არიან შოკი მდგრადია. Solid State Drives are much more suited for computers being used for heavy and intensive gaming. They are also სწრაფად because the data is stored on flash memory chips, which are much more accessible. They are non-mechanical and consume lesser power, thus, saving the battery life of your laptop.
Therefore, if you are looking for a sure-fire way to improve the performance of your Windows 10 laptop, consider buying and upgrading your laptop from HDD to SSD.
შენიშვნა: Check out our guide to learn the difference between Mac Fusion Drive Vs SSD Vs Hard Drive.
რეკომენდებული:
ვიმედოვნებთ, რომ ეს სახელმძღვანელო დაგეხმარა და შეძელით optimize Windows 10 for gaming and performance. Let us know which method worked for you the best. If you have any questions or suggestions regarding this article, feel free to drop them in the comments section.
![Fix Printer Installation Error 0x00000057 [SOLVED]](https://lbsite.org/wp-content/uploads/2023/01/Fix-Printer-Installation-Error-0x00000057.png "Fix Printer Installation Error 0x00000057 [SOLVED]")
