Enable or Disable Secure Login in Windows 10: Secure Login is a security feature of Windows 10 which when enabled requires users to press Ctrl + Alt + delete on the lock screen before they can sign in using their username and password in Windows 10. Secure Sign just adds an extra layer of security to your sign-in screen which is always a good thing to make your PC is more secure. The main problem occurs when a virus or malware programs mimic a sign-in screen in order to retrieve username & password information from users. In such cases, Ctrl + Alt + delete ensures that you are seeing the authentic sign-in screen.

This security setting is disabled by default and thus you need to follow this tutorial in order to enable the secure logon. There are many additionals benefit of using secure logon so it’s recommended you enable it. So without wasting any time let’s see How to Enable or Disable Secure Login in Windows 10 which requires the user to press Ctrl+Alt+Delete on the lock screen before signing in to Windows 10.
Enable or Disable Secure Login in Windows 10
დარწმუნდით, რომ შექმენით აღდგენის წერტილი, თუ რამე არასწორედ მოხდება.
Method 1: Enable or Disable Secure Sign-in in Netplwiz
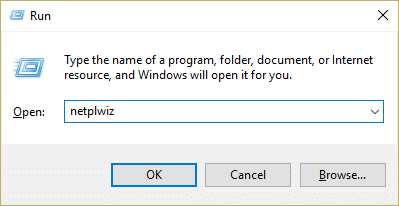
1. დააჭირეთ Windows Key + R და შემდეგ ჩაწერეთ netplwiz და დააჭირეთ Enter- ს გასახსნელად მომხმარებლის ანგარიშები.
2.გადართვა გაფართოებული ჩანართი მდე checkmark “Require users to press Ctrl+Alt+Delete” box at the bottom under the Secure sign-in to enable secure login in Windows 10.
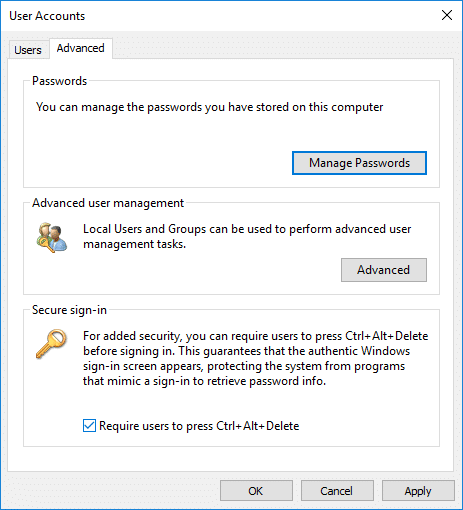
3. დააწკაპუნეთ Apply-ზე და შემდეგ OK.
4.If in future you need to disable secure login then simply მოხსნა "Require users to press Ctrl+Alt+Delete”ყუთი.
Method 2: Enable or Disable Secure Login in Local Security Policy
შენიშვნა: This method will only work for Windows Pro, Education and Enterprise edition. For Windows 10 Home users, you can follow skip tis method inseatd follow method 3.
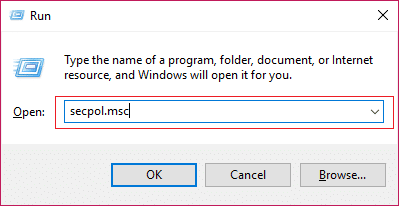
1. დააჭირეთ Windows Key + R და შემდეგ ჩაწერეთ secpol.msc და დააჭირეთ Enter.
2.Navigate to the following policy:
ადგილობრივი პოლიტიკა> უსაფრთხოების პარამეტრები
3. დარწმუნდით, რომ აირჩიეთ უსაფრთხოების პარამეტრები then in the right window pane double-click on “Interactive Logon: Do not require CTRL+ALT+DEL” to open its properties.
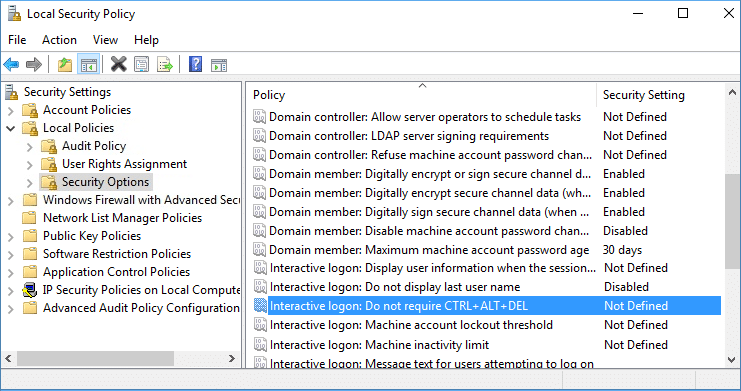
4.Now to enable secure login in Windows 10, აირჩიეთ ინვალიდები და შემდეგ დააწკაპუნეთ Apply შემდეგ OK.
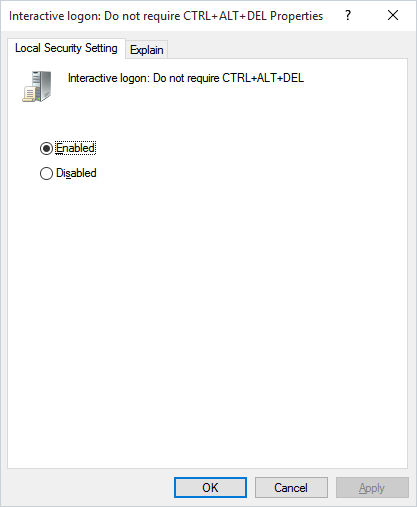
5.If you need to disable secure login then select Enabled and click OK.
6.Close Local Security Policy window and restart your PC.
Method 3: Enable or Disable Secure Login in Windows 10 using Registry Editor
1. დააჭირეთ Windows Key + R და შემდეგ ჩაწერეთ regedit და დააჭირეთ Enter.

2. გადადით შემდეგ რეესტრის გასაღებზე:
HKEY_LOCAL_MACHINESOFTWAREMicrosoftsoft- ი NTCurrentVersionWinlogon
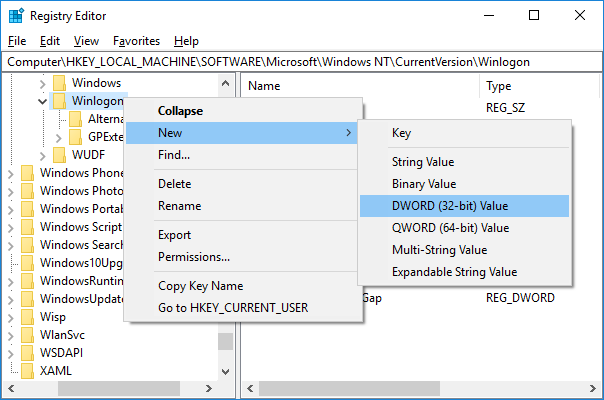
3. დარწმუნდით, რომ აირჩიეთ Winlogon then in the right window pane double-click on DisableCAD.

შენიშვნა: If you can’t find the DisableCAD then right-click on Winlogon then select ახალი> DWORD (32 ბიტიანი) მნიშვნელობა and name this DWORD as DisableCAD.
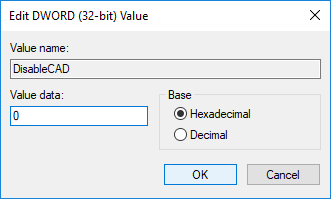
4.Now in the value data field type the following and click OK:
To Disable Secure Logon: 1
To Enable Secure Logon: 0
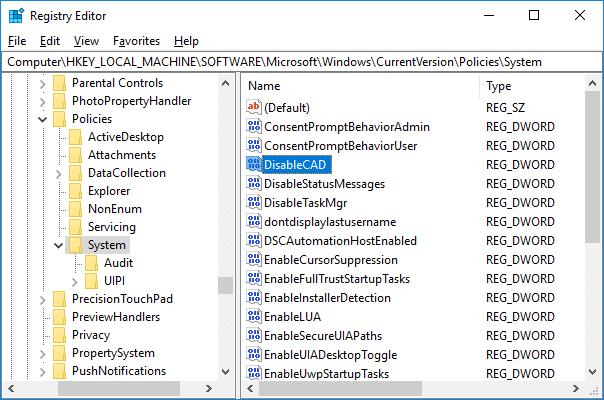
5.Next, navigate to the following registry key and follow the steps 3 & 4 here:
HKEY_LOCAL_MACHINESOFTWAREMicsoftWindowsCurrentVersionPoliciesSystem
6.Close Registry Editor then restart your PC to save changes.
რეკომენდებული:
ეს არის ის, რაც თქვენ წარმატებით ისწავლეთ How to Enable or Disable Secure Login in Windows 10 მაგრამ თუ თქვენ ჯერ კიდევ გაქვთ რაიმე შეკითხვა ამ გაკვეთილთან დაკავშირებით, მოგერიდებათ ჰკითხოთ მათ კომენტარების განყოფილებაში.

![Add a Printer in Windows 10 [GUIDE]](https://lbsite.org/wp-content/uploads/2023/02/Add-a-Printer-in-Windows-10.png "Add a Printer in Windows 10 [GUIDE]")