Logitech is one of the cheap and best platforms where you can get high-quality computing accessories. Few notable products of Logitech include headphones and headsets. If you are a pro player in your games, you would definitely know about Logitech G533. The Logitech G533 microphone provides a high-quality audio effect with more than 15 hours of battery life. One of the most lovable features of this Logitech G533 headphone includes a lightweight design and incredible noise cancellation technology. Amidst all these advantages, few Windows users have complained about Logitech G533 Mic not working issue on Windows 10 PC. If you are also facing the same problem, you are at the right place! This guide will help you fix Logitech G533 microphone not working issue with effective troubleshooting hacks. So, continue reading!
How to Fix Logitech G533 Mic Not Working in Windows 10
If you are facing Logitech G533 microphone not working while enjoying your audio contents, the most probable reason would be due to improper configurations of sound settings. Although this problem affects many versions of Windows, many users are struggling with this issue in Windows 10. Here are some common reasons that contribute to the discussed issue on your computer.
- The volume may be muted or very low.
- The Audio enhancement features are enabled on PC.
- Other applications on your PC are using audio.
- Outdated audio drivers in computers.
- Damaged cables, plugs, and ports.
- Access for using a Microphone is not granted.
- Outdated Windows Operating System.
- Outdated/incompatible audio drivers.
- Presence of corrupt files on PC.
- Few essential Windows Audio services are not enabled.
Now, move ahead to the next section to fix Logitech G533 microphone issue.
In this section, you will come to know about the troubleshooting methods that will help you fix Windows 10 Logitech G533 microphone audio issues. Implement the methods as instructed in the same order to get perfect results.
წინასწარი შემოწმებები
Before you head towards the advanced troubleshooting methods, a few simple hacks will help you fix Logitech G533 microphone sound not working issue within clicks. Make sure your PC meets all of these preliminary checks and still if you did not attain any fix, move to the next section.
1. რესტარტი თქვენი კომპიუტერი and any temporary glitches associated with the computer will be resolved.
2. Ensure you use a high-quality Logitech G533 microphone and it is set firmly with your PC.
3. Last but not least, ensure that you are not in a noisy environment with traffic sounds or crowd noises in the background.
Method 1: Basic Troubeshooting Methods
1A. Check Hardware Damage
If you have not attained any fix from the above preliminary checks, then it’s time to check if there is any external damage to the external speakers, microphone, and other audio devices contributing to the problem.
1. Check your Logitech G533 microphone for any damage or broken stage.
2. Disconnect your device from your computer and unplug all the external devices connected to it.
3. Wait for a while and გადატვირთეთ კომპიუტერი.
4. შემდეგ, connect your Logitech G533 microphone to your Windows 10 PC and check if this works. If not, move to the next troubleshooting method.
1B. Check Audio Output
When you are using more than one audio output device, you have to confirm when the device is used up as an output device. To check the audio output in your Windows 10 PC, follow the below-mentioned steps.
1. დაწკაპეთ დინამიკები icon at the bottom right corner of the screen.
![]()
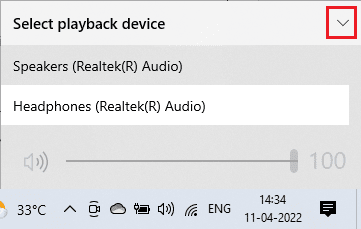
2. ახლა, დააჭირეთ ღილაკს ისრის ხატულა კომპიუტერთან დაკავშირებული აუდიო მოწყობილობების სიის გაფართოებისთვის.
![]()
3. Then, Select playback device (you prefer) and make sure the audio is playing through the selected device.
If this method doesn’t help you to fix Logitech G533 Mic not working issue, move ahead to the next one.
1C. Check Sound Settings
In this method, you have to check if the sound settings are correct and compatible with the audio device you are using. This helps you to fix Logitech headset mic not working issue as you follow the steps instructed below.
1. დააჭირეთ მაუსის მარჯვენა ღილაკს დინამიკები icon at the bottom right corner of the screen and click on გახსენით მოცულობის მიქსერი.
![]()
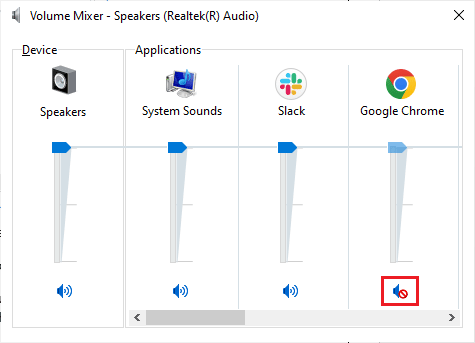
2. Now, a set of ხმის კონტროლი will be opened up. Make sure all volume levels are not muted. If you find any red circle with a line, unmute the volume level.
3. ახლა დააჭირეთ ღილაკს Windows + I კლავიშები ერთად გასახსნელად Windows- ის პარამეტრები.
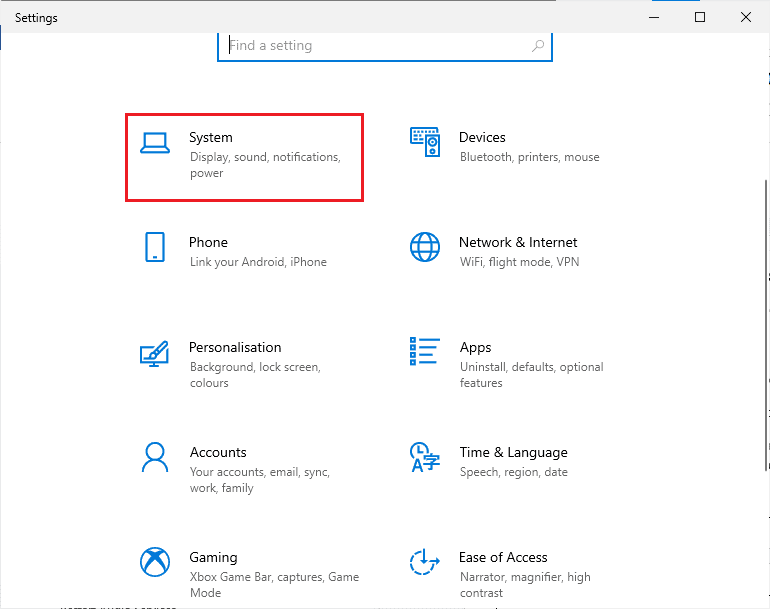
4. ახლა, დააჭირეთ ღილაკს სისტემის გარემოში.
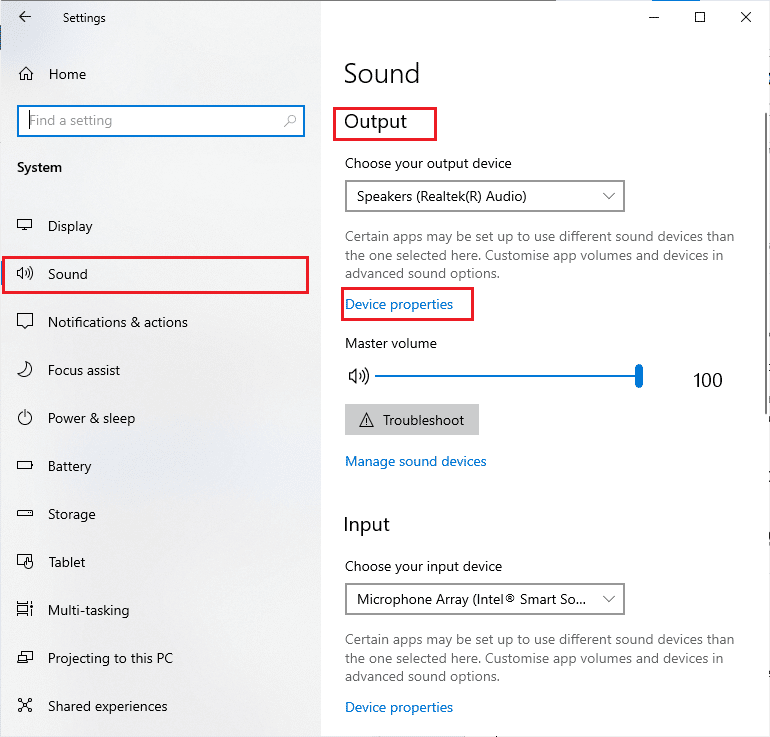
5. შემდეგ, დააჭირეთ ღილაკს გასწავლოთ მარცხენა სარკმლიდან და დააჭირეთ ღილაკს მოწყობილობის თვისებები ქვეშ გამოყვანის მენიუ, როგორც ნაჩვენებია.
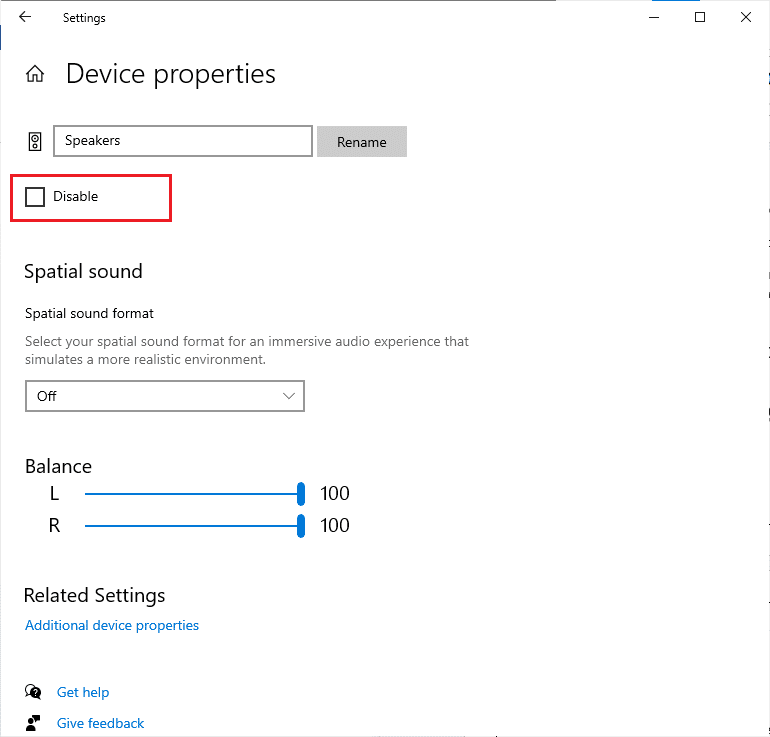
6. დარწმუნდით გამორთე box is not checked.
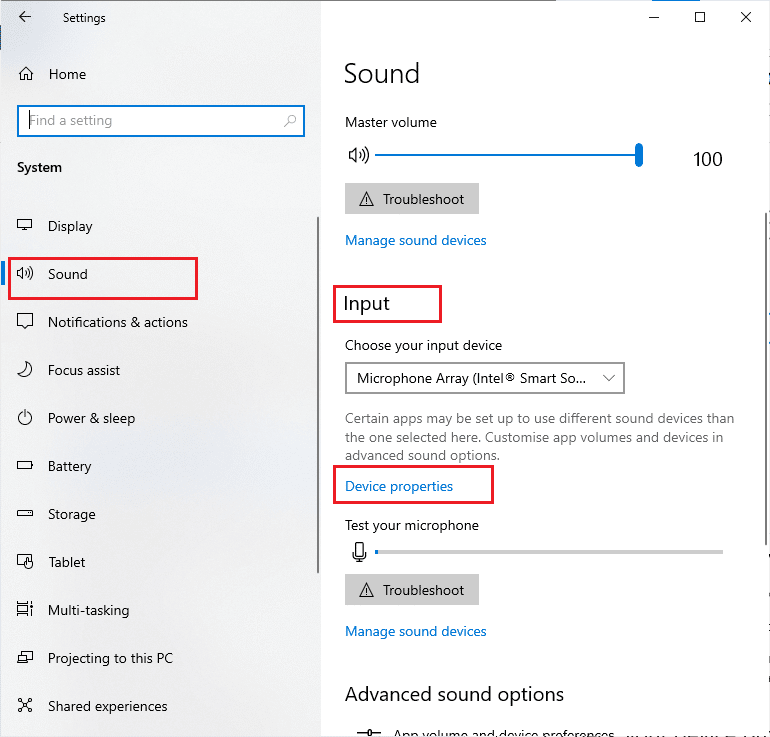
7. Repeat Steps 5-6 for input devices as depicted.
Now, check if you have fixed Windows 10 Logitech G533 microphone audio issues.
ასევე წაიკითხე: Windows 10-ზე Firefox-ში ხმის არარსებობის გამოსწორება
1D. Repair System Files
For perfect audio quality services, a few essential files and programs must be functioning on your PC. But, if they are corrupt or misconfigured, you will face Logitech headset mic not working issue. Fortunately, all these corrupt misconfigured files can be repaired by using the inbuilt utilities of your Windows 10 PC namely, სისტემის ფაილი შემოწმება მდე განლაგება Image მომსახურება და მართვა. წაიკითხეთ ჩვენი სახელმძღვანელო იმის შესახებ, თუ როგორ უნდა შეაკეთოთ სისტემის ფაილები Windows 10-ზე და მიჰყევით ინსტრუქციებს ყველა თქვენი დაზიანებული ფაილის შესაკეთებლად.
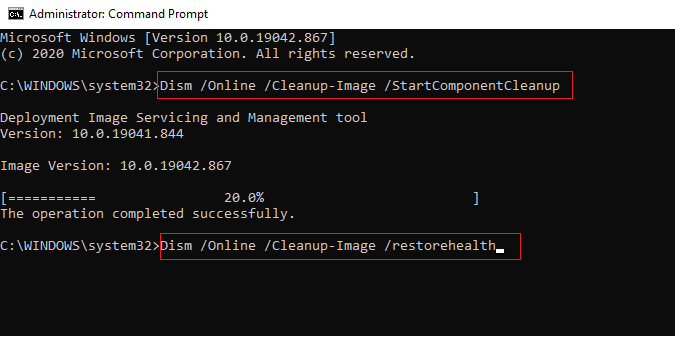
Wait for the commands to be executed and check if you have fixed Logitech G533 microphone sound not working issue.
1E. Windows-ის განახლება
If there are any new Microsoft updates pending to be installed on your PC, a few bugs and problems cannot be resolved on your computer. As suggested by many users, updating Windows 10 computers will help you resolve Windows 10 audio error Logitech G533 microphone not working issue. Follow our guide How to Download and Install Windows 10 Latest Update to update your Windows 10 computer.
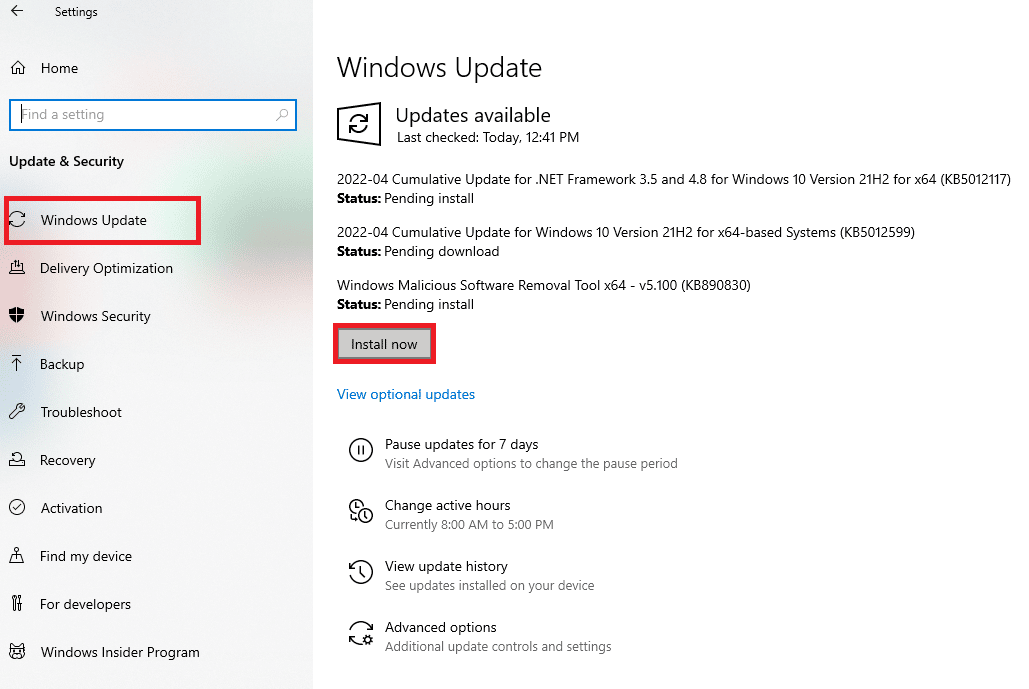
After updating your Windows Operating System, check whether you can access audio in your Windows 10 PC.
მეთოდი 2: გაუშვით აუდიო პრობლემების მოგვარება
You must be aware of the fact that your PC contains an inbuilt troubleshooting tool to fix any issues and errors arising automatically. The audio devices plugged into your computer and the inbuilt audio devices will be scanned and altogether the problems associated with the process will be sorted out.
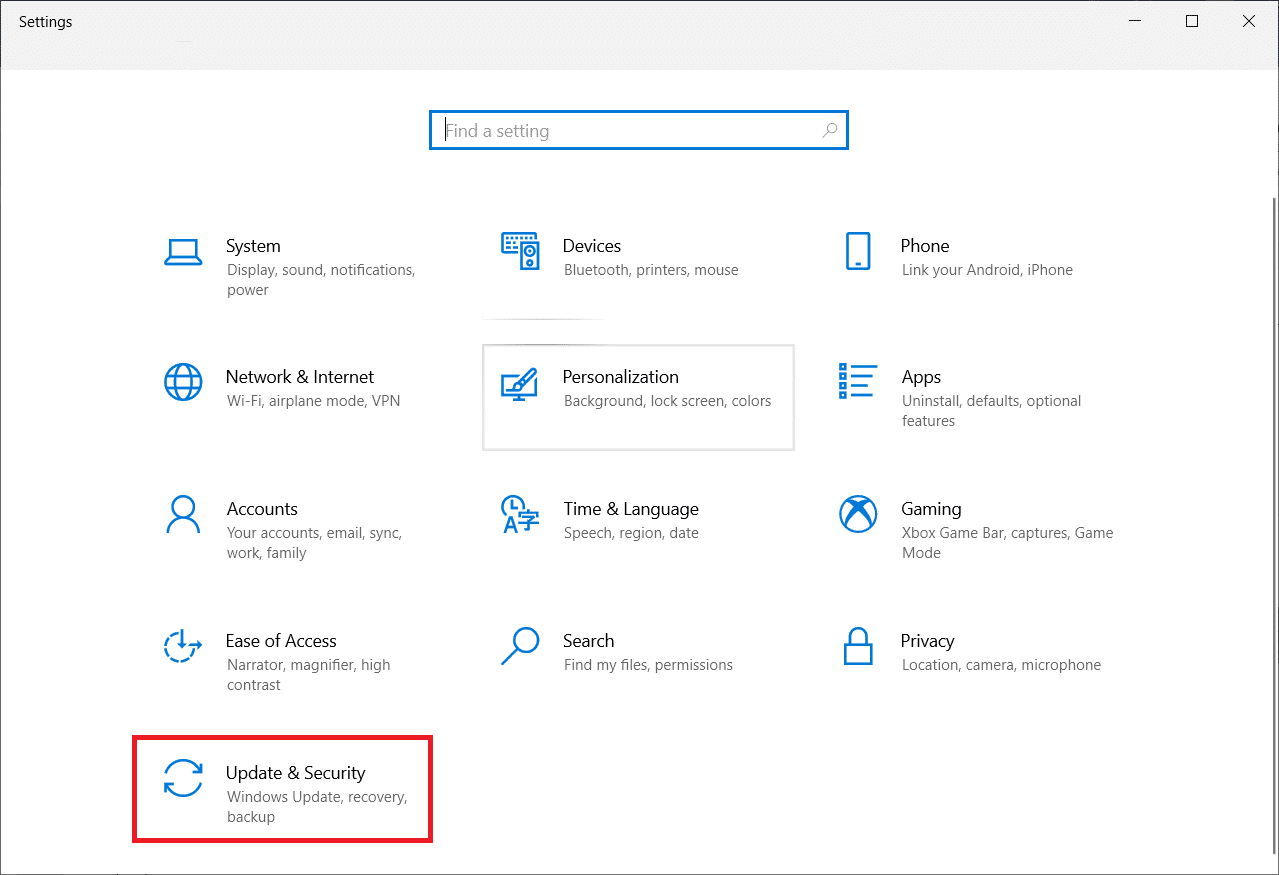
1. დაიწყეთ Windows- ის პარამეტრები.
2. დაწკაპეთ განახლება და უსაფრთხოება გარემოში.
3. აირჩიეთ პრობლემების მენიუ მარცხენა ფანჯრიდან.
4. შემდეგ, აირჩიეთ აუდიოს დაკვრა და დააკლიკეთ გაუშვით პრობლემის მოგვარება ვარიანტი.
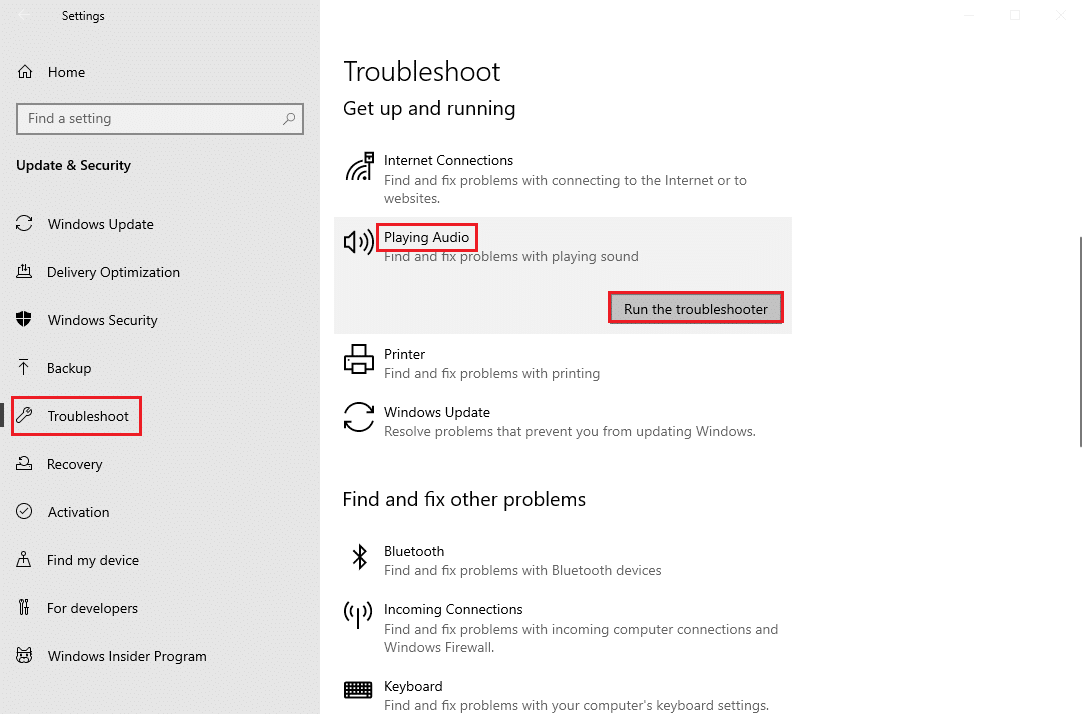
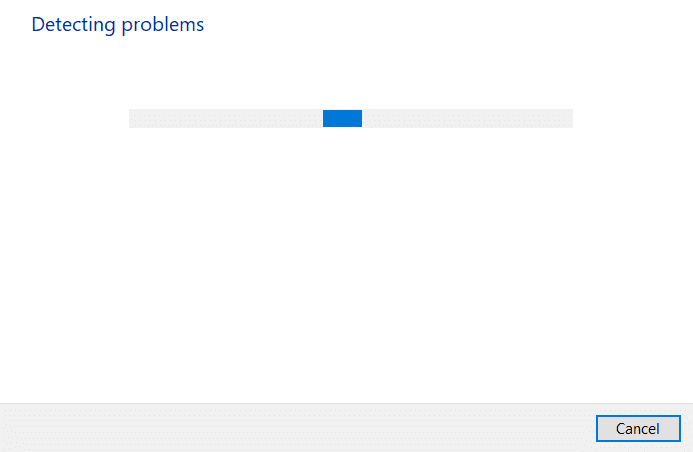
5. Wait for the troubleshooter to detect problems and follow the ეკრანზე მითითებები to apply the fix.
ასევე წაიკითხე: დააფიქსირეთ შეცდომა, რომ აუდიო გამომავალი მოწყობილობა არ არის დაინსტალირებული
Method 3: Close Other Programs using Audio
When the audio utility is used by other programs on your Windows 10 PC, then you may face Logitech G533 microphone audio issues. To resolve the problem, you are advised to close all other programs or applications running in the background one by one or force them to shut down by using Task Manager. To do so, follow our guide on How to End Task in Windows 10.

Method 4: Restart Windows Explorer Processes
Some users have reported that restarting Windows Explorer processes will help to resolve the Logitech G533 Mic not working issue. Follow the below-listed instructions to do the same.
1. დააჭირეთ Ctrl + Shift + Esc კლავიშები ერთად გავხსნათ პროცესების მენეჯერი (Task Manager) .
2. In პროცესები tab, დააჭირეთ Windows Explorer და აირჩიეთ რესტარტი ღილაკს.
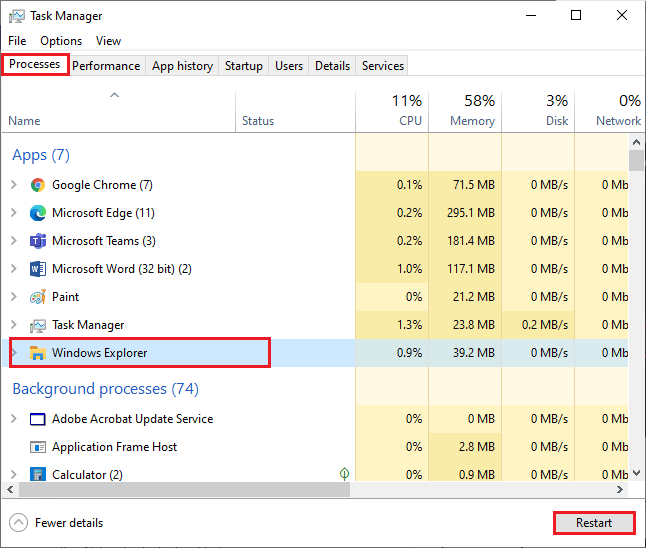
3. Now, Windows Explorer restarts and Windows 10 Logitech G533 microphone issue will be fixed now.
Method 5: Allow Audio Access for Audio Apps
There is a list of applications and programs on your computer that will have access for using audio devices. If your Logitech G533 microphone application is not on the list, you cannot hear any audio content contributing to the discussed error. Therefore, ensure the audio settings are enabled for your game on your PC by following the below-mentioned steps.
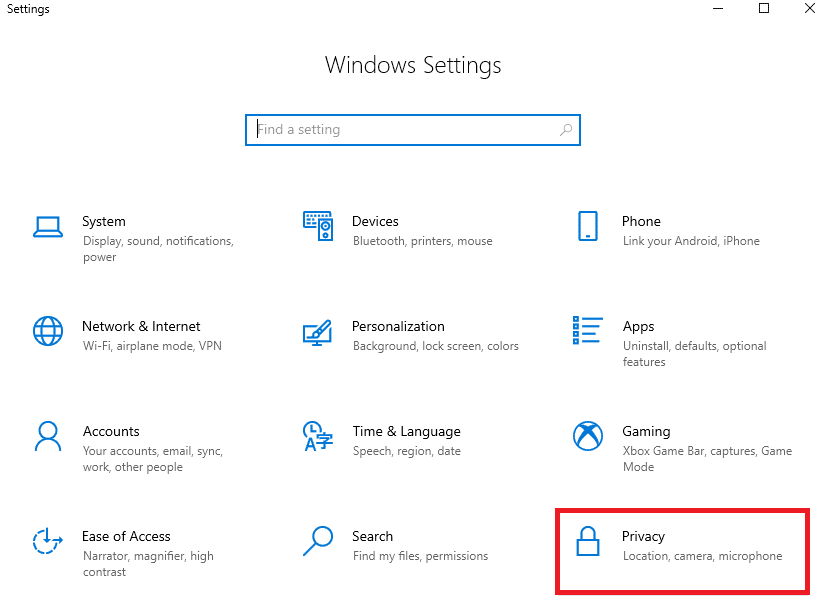
1. დაიწყეთ Windows- ის პარამეტრები დაჭერით Windows + I კლავიშები ერთად.
2. ახლა, დააჭირეთ ღილაკს Privacy გარემოში.
3. Here, scroll down left pane and click the მიკროფონი option. Ensure ნება მიეცით აპებს თქვენს მიკროფონზე წვდომა option are enabled as shown.
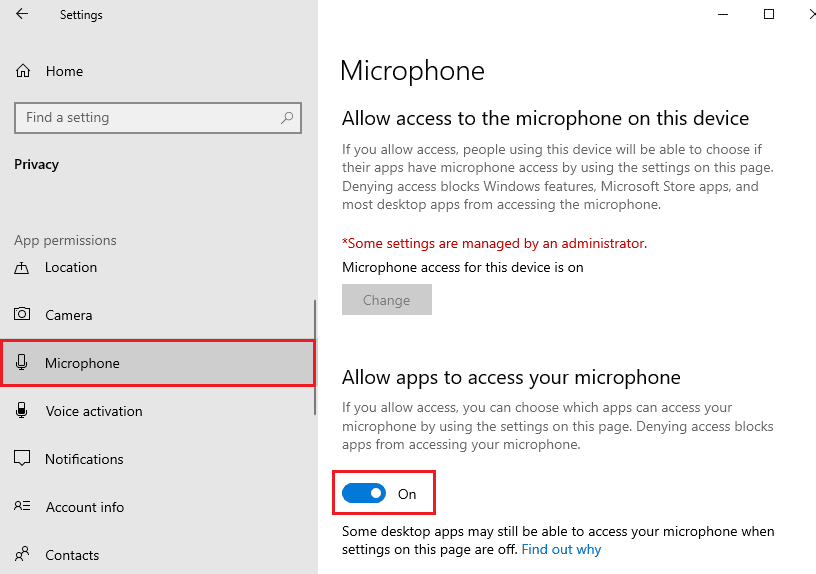
შენიშვნა: დაწყება ხმის პარამეტრები from the search menu and select the correct input device (Microphone (2 High-Definition Audio Device)) as default.
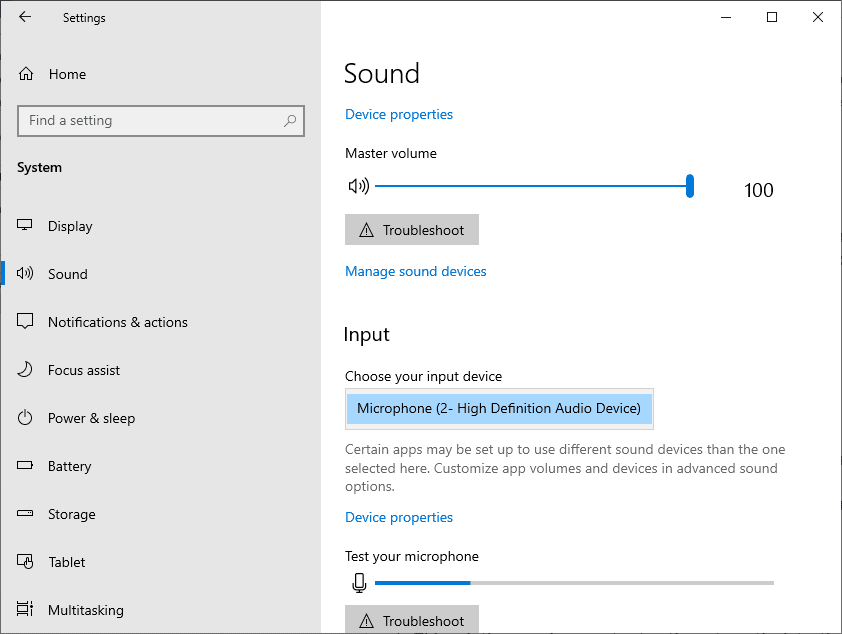
Then, check if you have fixed Logitech G533 microphone sound not working issue.
ასევე წაიკითხე: რა არის NVIDIA ვირტუალური აუდიო მოწყობილობის Wave Extensable?
Method 6: Set Audio Device as Default Device
If you are using an audio device like Logitech G533 microphone or speakers, you must ensure whether it is set as a default device or not. Let us assume a case of connecting an external monitor (that does not have built-in speakers) to your PC. If this monitor is set as a default output device, you cannot hear any audio. You have to set your audio device as the default device as instructed below to fix Logitech G533 Mic not working issue.
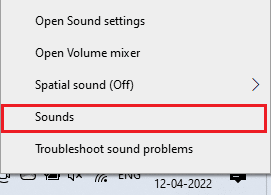
1. დააჭირეთ მაუსის მარჯვენა ღილაკს დინამიკები icon at the bottom right corner of the screen and select ხმები ვარიანტი.
![]()
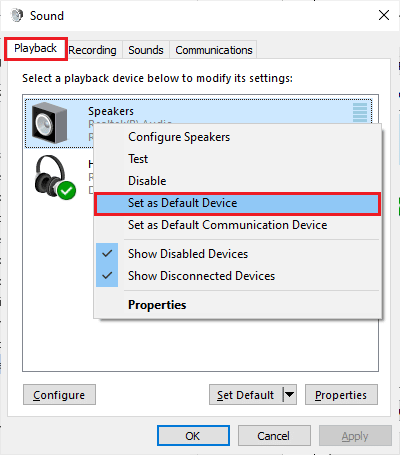
2. Then, switch to აღწარმოება ჩანართი და დააწკაპუნეთ მარჯვენა ღილაკით აუდიო მოწყობილობა გსურთ დააყენოთ ნაგულისხმევად.
3. ახლა, აირჩიეთ ნაგულისხმევ მოწყობილობად დაყენება პარამეტრი, როგორც მონიშნულია და დააწკაპუნეთ Apply>OK ცვლილებების შენახვა.
Method 7: Re-enable Sound Card
You can easily resolve Logitech headset mic not working issue by restarting the sound card as instructed below.
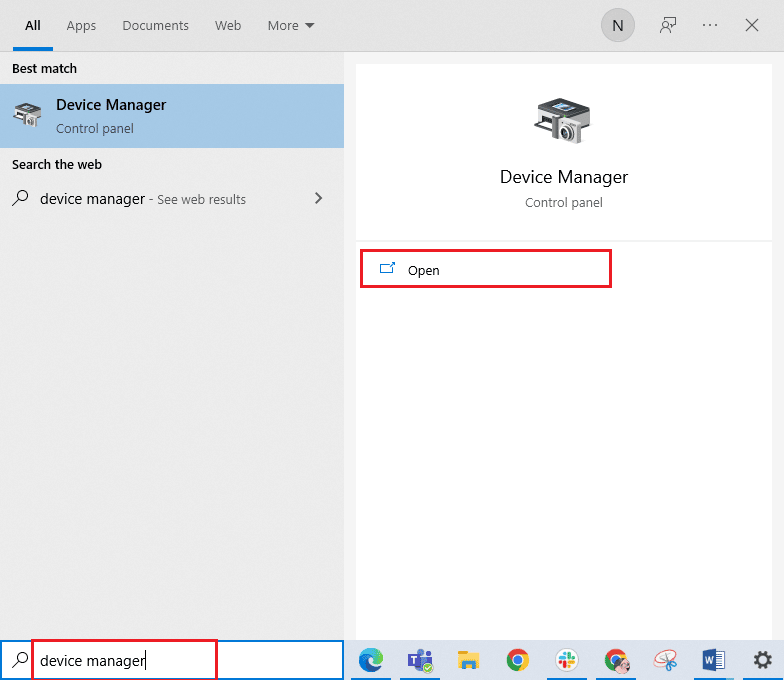
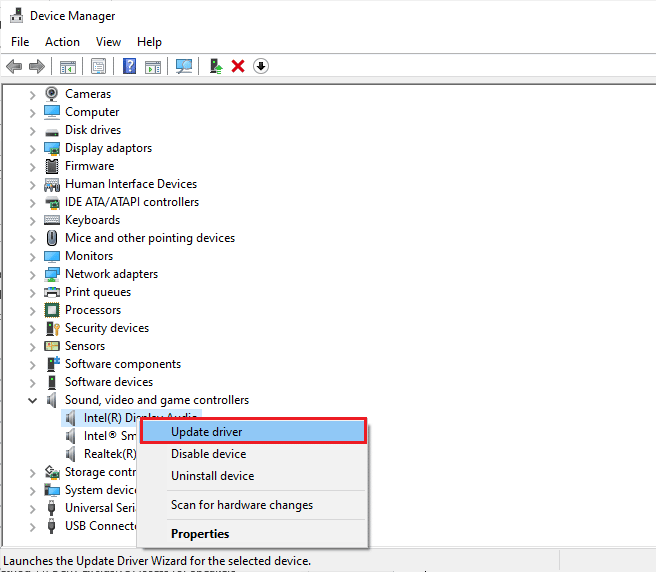
1. დარტყმა Windows გასაღები და ტიპის Device Manager, შემდეგ დააჭირეთ ღიაა.
2. Then, expand ხმის, ვიდეო და თამაშის კონტროლერები მასზე ორჯერ დაწკაპუნებით.
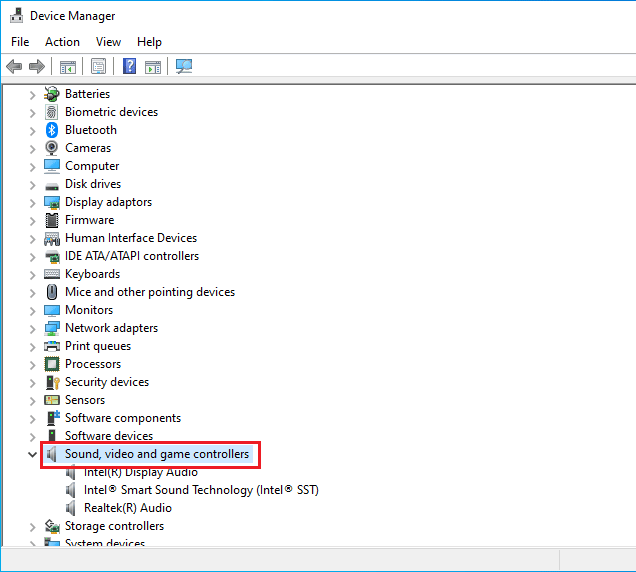
3. შემდეგ, დააწკაპუნეთ მარჯვენა ღილაკით თქვენს ხმის ბარათი და აირჩიეთ მოწყობილობის გამორთვა ვარიანტი.
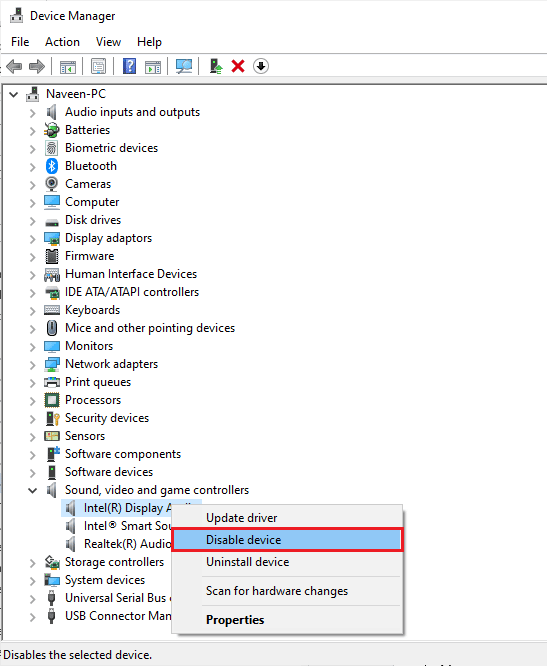
4. ახლა, დაადასტურეთ მოთხოვნა დაწკაპუნებით დიახ მდე გადატვირთეთ your computer. Then, repeat Steps 1-2.

5. შემდეგი, დააწკაპუნეთ მარჯვენა ღილაკით თქვენს ხმის ბარათი და აირჩიეთ მოწყობილობის ჩართვა ვარიანტი.
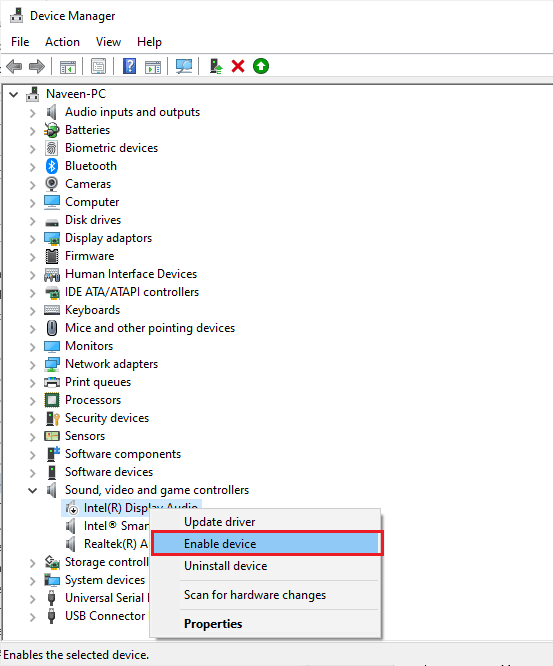
6. Now, try playing any sound in your audio application and check if the issue is resolved or not.
მეთოდი 8: გამორთეთ აუდიო გაუმჯობესებები
If you find your audio working well for other multimedia resources, but the sound seems to be of low quality or noisy in Logitech G533 Mic, you are advised to change the sample rate. A low-frequency sample rate may cause Logitech headset mic not working issue. You can select a higher frequency sample rate by following the below-mentioned steps.
1. დააჭირეთ მაუსის მარჯვენა ღილაკს დინამიკები icon at the bottom right corner of the screen and select ხმები ვარიანტი.
![]()
2. Then, switch to აღწარმოება tab and select audio device followed by განცხადებები ღილაკი, როგორც ნაჩვენებია.

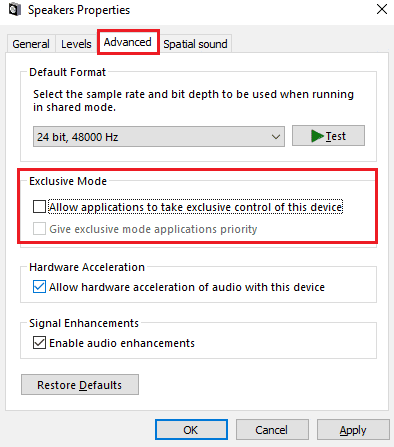
3. Then, switch to მოწინავე ჩანართი და ჩამოსაშლელი მენიუდან ქვემოთ ნაგულისხმევი ფორმატი, დარწმუნდით, რომ აირჩიეთ უმაღლესი სიხშირის დიაპაზონი (24-bit, 48000 Hz).
შენიშვნა: დარწმუნდით Enable audio enhancements option is unchecked under Signal Enhancements როგორც ნაჩვენებია.
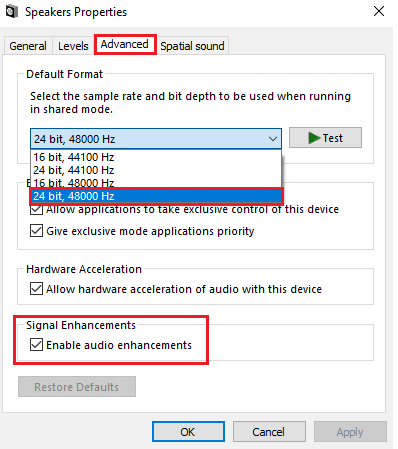
4. დაწკაპეთ მიმართვა და მაშინ OK ცვლილებების შენახვა.
Check if you face Logitech G533 Mic not working again. If so, adjust different levels of frequency ranges by repeating these steps and confirm which range solves the problem.
ასევე წაიკითხე: Windows 10-ის აუდიო ხრაშუნის გამოსწორება
Method 9: Restart Audio Services
Few essential Windows audio services will help you prevent Logitech G533 Mic not working issue. If in case, if these services are turned off, you may face several conflicts. Hence, you are advised to restart a few essential audio services as instructed below steps.
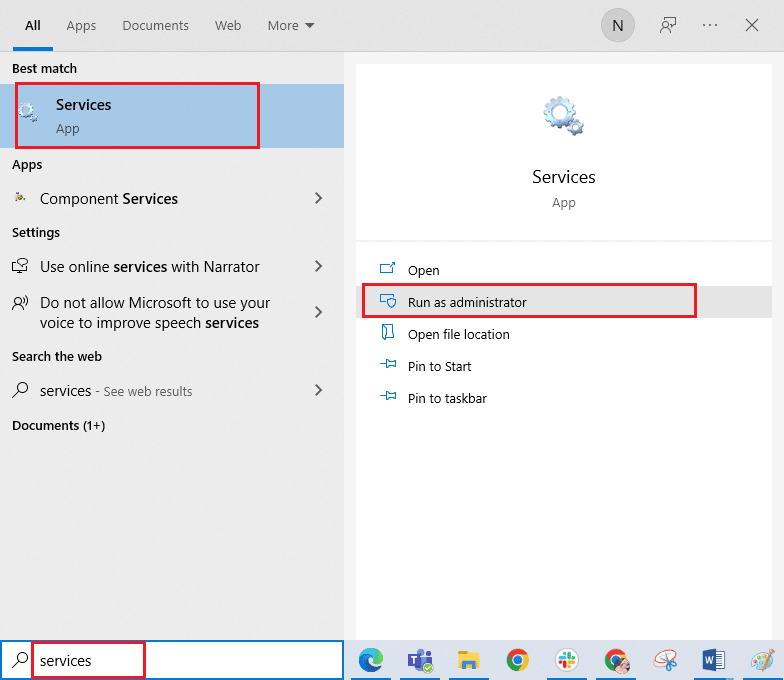
1. დააჭირეთ Windows გასაღებიტიპი მომსახურება და დააჭირეთ ადმინისტრატორის სახელით გაშვება.
2. ახლა გადაახვიეთ ქვემოთ და ორჯერ დააწკაპუნეთ მასზე Windows აუდიო მომსახურება.
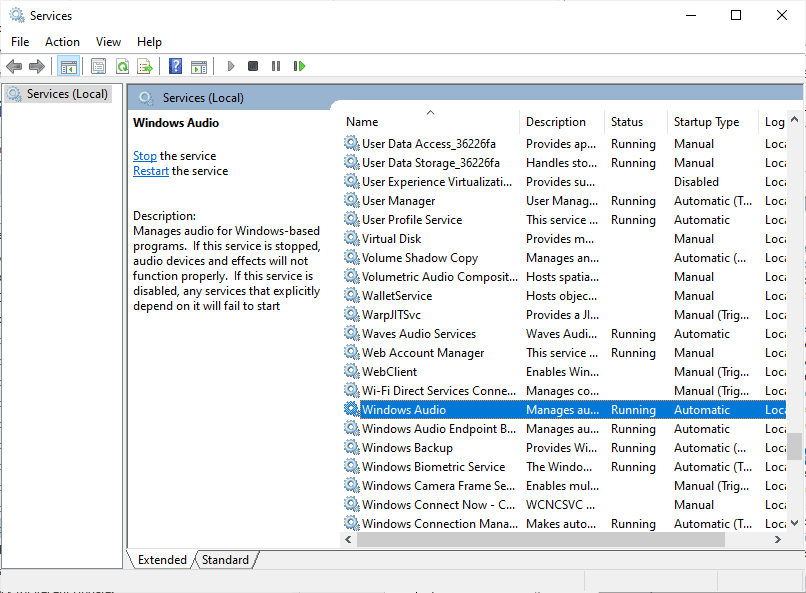
3. Now, in the new popup window, select გაშვების ტიპი to ავტომატური, როგორც გამოსახულია.
შენიშვნა: თუ მომსახურების სტატუსი is შეჩერებულია, შემდეგ დააჭირეთ დასაწყისი ღილაკი თუ მომსახურების სტატუსი is სირბილი, დააკლიკეთ გაჩერება და დაიწყე ისევ.
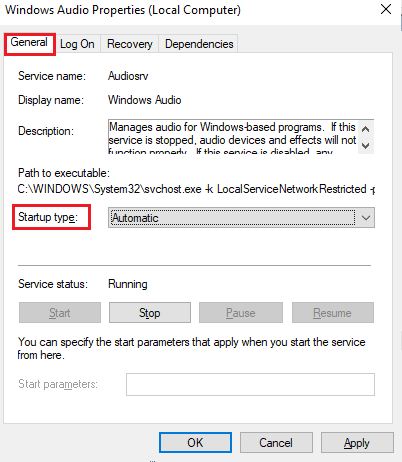
4. დაწკაპეთ მიმართვა> კარგი ცვლილებების შენახვა.
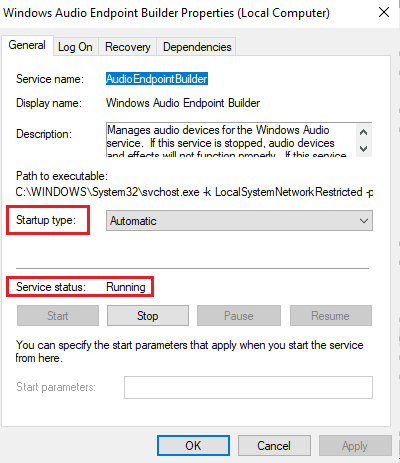
5. გაიმეორეთ ყველა ეს ნაბიჯი სხვა Windows სერვისებისთვის, როგორიცაა Windows Audio Endpoint Builder მდე დისტანციური პროცედურის ზარი (RPC) და შეამოწმეთ, მოაგვარეთ თუ არა პრობლემა.
Method 10: Deny Exclusive Access for Audio Device
Still, if you are struggling with Logitech G533 microphone not working issue, then you have to ensure no other program is taking the exclusive control of your audio device. You can disable the discussed feature by following the below-mentioned steps to fix Logitech headset mic not working issue.
1. დაიწყეთ ხმები გარემოში.
2. Then, select your audio device and click on განცხადებები ღილაკი, როგორც ნაჩვენებია.
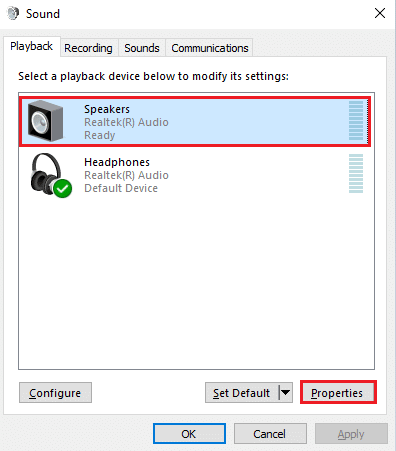
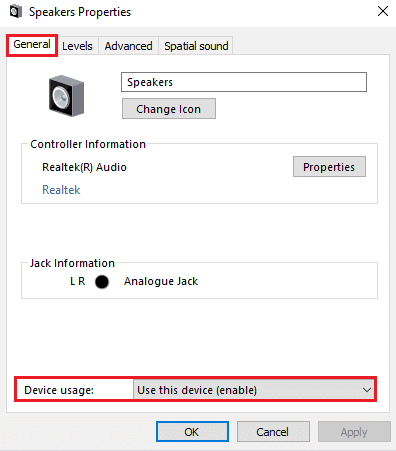
3. In ზოგადი tab, make sure the მოწყობილობის გამოყენება ვარიანტი დაყენებულია Use this device (enable) as shown. Click on Apply>OK if you have made any changes.
4. Now, switch to მოწინავე ჩანართი და ქვეშ ექსკლუზიური რეჟიმი menu, make sure the following options are unchecked.
- აპლიკაციებს მიეცით საშუალება, აიღონ ექსკლუზიური კონტროლი ამ მოწყობილობაზე.
- Give exclusive mode applications priority.
შენიშვნა: As soon as you uncheck აპლიკაციებს მიეცით საშუალება, აიღონ ექსკლუზიური კონტროლი ამ მოწყობილობაზე ვარიანტი, give exclusive mode applications priority option will be automatically unchecked.
5. ბოლოს დააწკაპუნეთ მიმართვა> კარგი to save the changes. Now, you would have fixed Logitech G533 microphone audio issues.
ასევე წაიკითხე: Windows 10-ზე Firefox-ში ხმის არარსებობის გამოსწორება
Method 11: Update or Roll Back Audio Drivers
Follow the given steps to update or roll back audio drivers to fix Logitech headset mic not working issue.
Option I: Update Audio Drivers
Outdated and incompatible audio drivers will always result in Logitech G533 Mic not working issue. Always ensure you use an updated version of audio drivers and if your computer lacks the latest drivers, you are advised to update them as instructed in our guide How to Update Realtek HD Audio Drivers in Windows 10.
Once you have updated your audio drivers to the latest version, check if you have fixed Logitech G533 microphone audio issues.
Option II: Roll Back Audio Driver Updates
Sometimes, the current version of audio drivers may cause any Logitech G533 audio conflicts and in this case, you have to restore previous versions of installed drivers. This process is called მძღოლების უკან დაბრუნება და თქვენ შეგიძლიათ მარტივად დააბრუნოთ თქვენი კომპიუტერის დრაივერები წინა მდგომარეობაში, თუ მიჰყევით ჩვენს სახელმძღვანელოს, თუ როგორ უნდა დააბრუნოთ დრაივერები Windows 10-ზე.
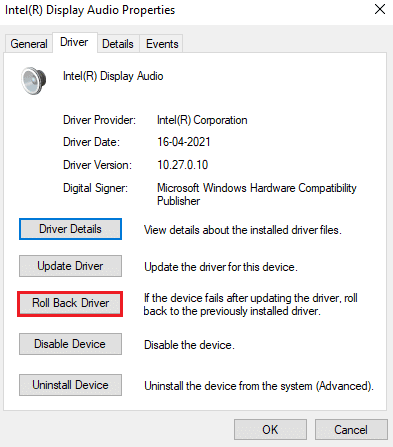
დაელოდეთ სანამ დრაივერების წინა ვერსიები დაინსტალირდება თქვენს Windows 10 კომპიუტერზე. დასრულების შემდეგ, შეამოწმეთ, მოაგვარეთ თუ არა პრობლემა.
მეთოდი 12: ხელახლა დააინსტალირეთ აუდიო დრაივერები
Incompatible drivers must be reinstalled to resolve all audio related problems. You are advised to reinstall device drivers only if you cannot attain any fix by updating them. Steps to reinstall drivers are very easy and you can do so by using a third-party application or by implementing the steps manually as instructed in our guide How to Uninstall and Reinstall Drivers on Windows 10
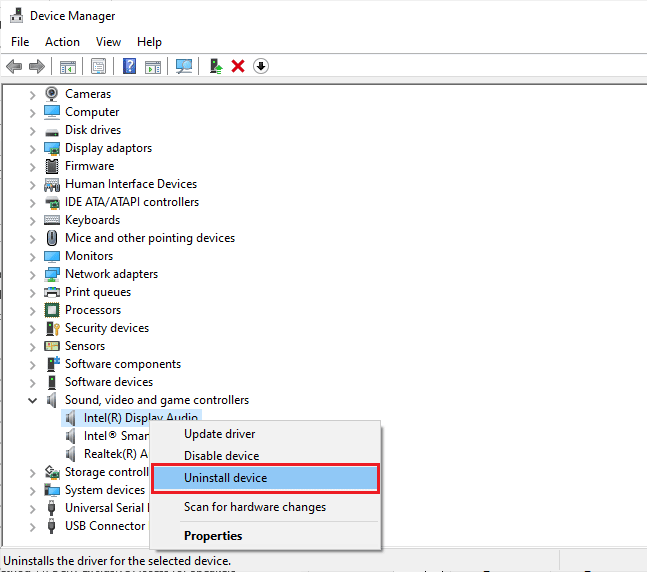
After reinstalling audio drivers, check if you can hear audio while playing them in Logitech G533 device.
ასევე წაიკითხე: Windows 10-ზე Firefox-ში ხმის არარსებობის გამოსწორება
Method 13: Reinstall Logitech Gaming Software
If none of the methods have helped you to fix Logitech headset mic not working issue, then try uninstalling the Logitech Gaming software and reinstall it again. Reinstalling this Logitech program may fix the bugs with your Logitech devices like microphone. Any common glitches associated with a software program can be resolved when you uninstall the application entirely from your computer and reinstall it. Here are few steps to implement the same.
Step I: Through Control Panel
1. დარტყმა Windows გასაღებიტიპი პანელი და დააჭირეთ ღიაა.
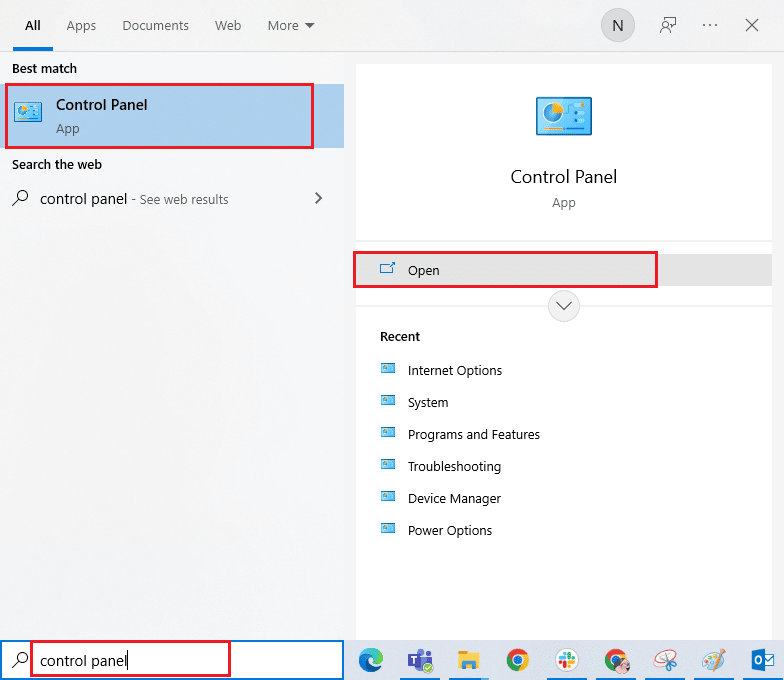
2. უცნობია ნახვა > კატეგორიის მიხედვით, შემდეგ დააჭირეთ პროგრამის წაშლა ქვეშ პროგრამები მენიუ, როგორც ნაჩვენებია.
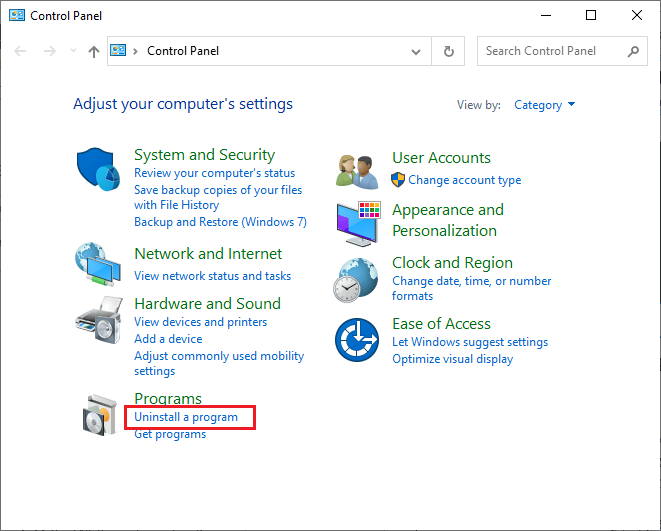
3. პროგრამები და ფუნქციები კომუნალური პროგრამა გაიხსნება და ახლა მოძებნეთ Logitech gaming software.
4. ახლა, დააჭირეთ ღილაკს Logitech gaming software და დაწკაპეთ დეინსტალაცია / ცვლილება option from top bar.
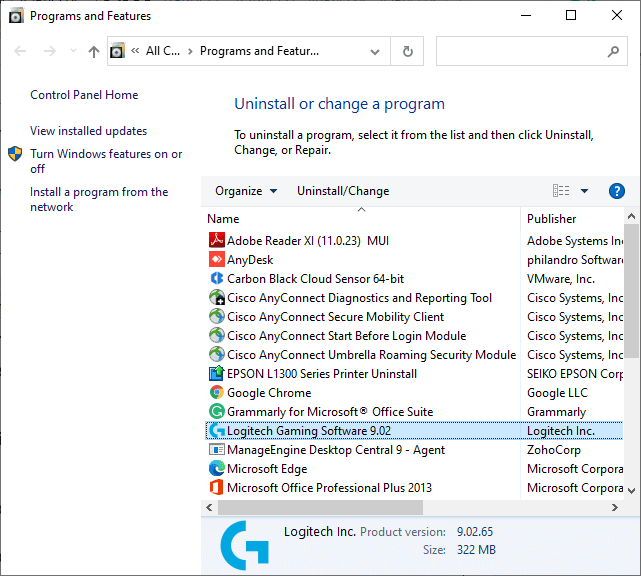
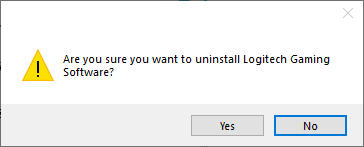
5. Now, confirm the prompt Are you sure want to uninstall Logitech Gaming Software? დაწკაპვით დიახ. Refer to the pic.
6. რესტარტი the computer once you complete all the steps mentioned above.
Step II: Delete Cache Files
1. click Windows საძიებო ველი და ტიპის % appdata%
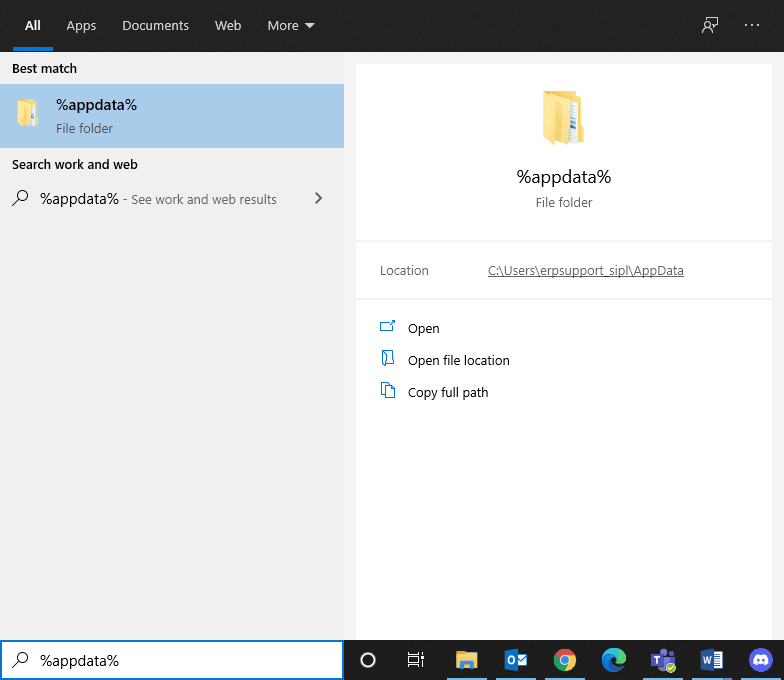
2. აირჩიეთ App Data Roaming folder and navigate to the following გზა.
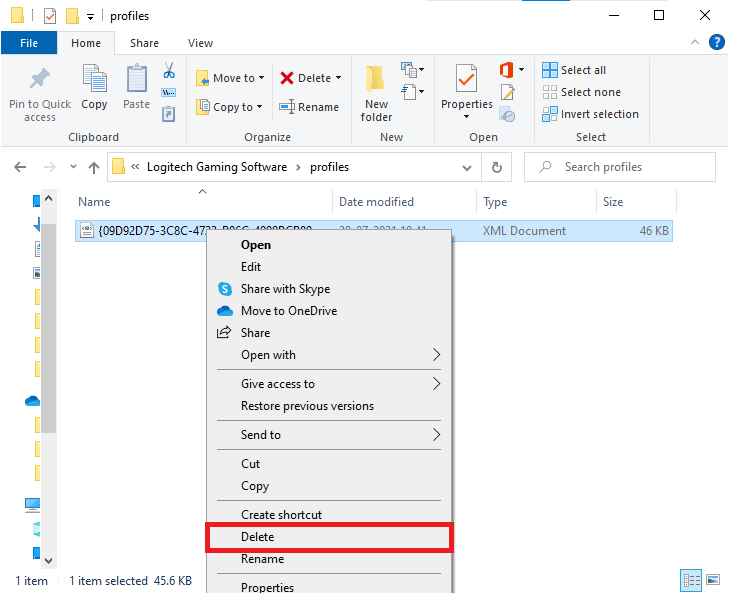
C:UsersUSERNAMEAppDataLocalLogitechLogitech Gaming Softwareprofiles
3. Now, right-click and წაშლა იგი.
4. click Windows საძიებო ველი ისევ და აკრიფეთ LocalAppData%
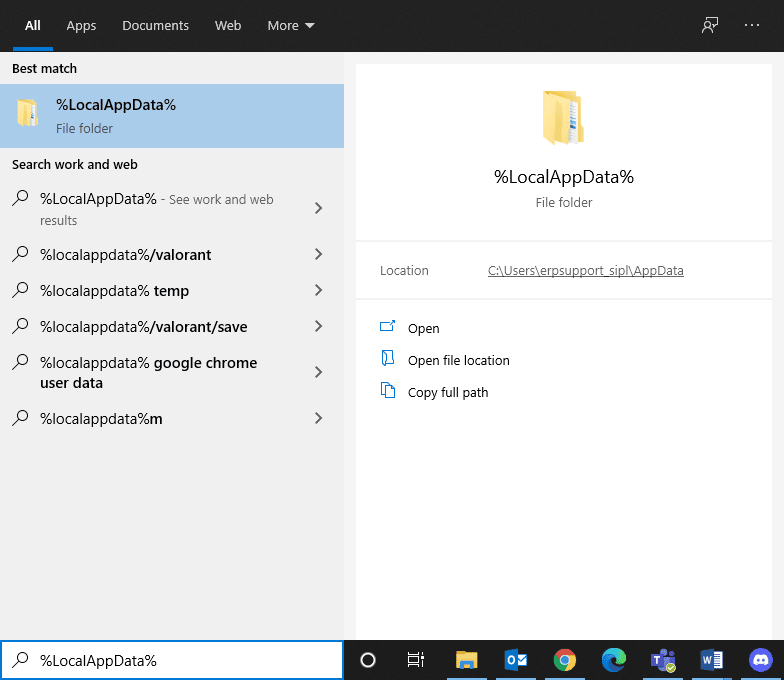
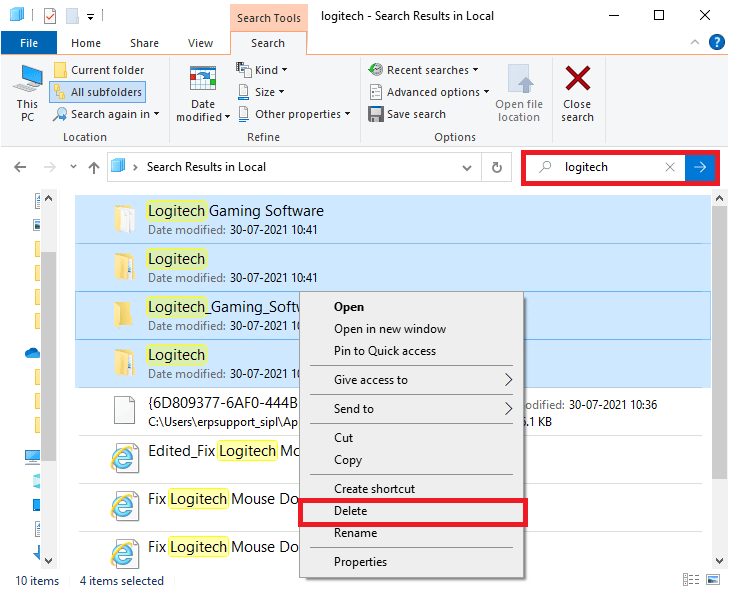
5. იპოვნე Logitech Gaming Software folder by using the search menu and წაშლა იგი.
Now, you have successfully deleted Logitech gaming software from your PC. Now, follow the below steps to reinstall the same.
Step III: Reinstall Logitech Gaming Software
1. ეწვიეთ official Logitech Gaming software site to ინსტალაცია პროგრამული უზრუნველყოფა თქვენს კომპიუტერში.
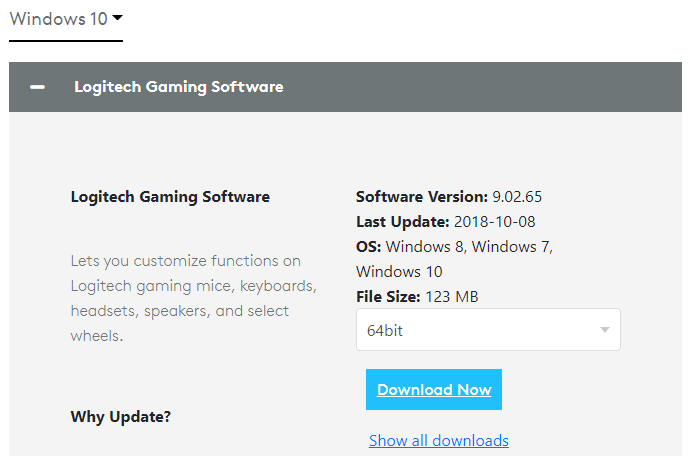
2. წადი ჩემი ჩამოტვირთვები and double-click on LGS_9.02.65_x64_Logitech (it varies according to the version you download) to open it.
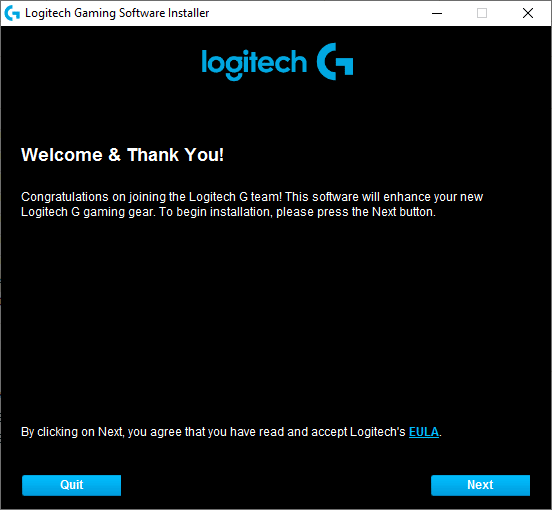
3. აქ დააწკაპუნეთ შემდეგი button until you see the installation process on the screen.
4. Now, once the software is installed, your system may undergo a restart process.
Now, you have successfully reinstalled the Logitech software program on your system. Next, check if Logitech headset mic not working is fixed on Windows PC.
ასევე წაიკითხე: დააფიქსირეთ Zoom აუდიო არ მუშაობს Windows 10
მეთოდი 14: სისტემის აღდგენა
If none of the methods have helped you, then the only option left is to restore your computer to its previous version. To do so, follow our guide on How to use System Restore on Windows 10 and implement the instructions as demonstrated in the section to perform a system restore.
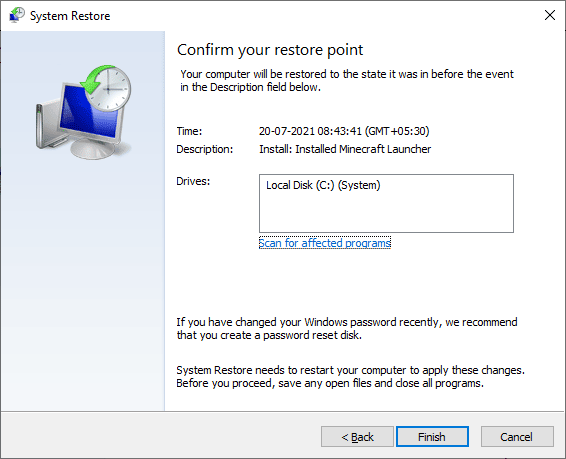
After restoring your Windows 10 PC, check if have fixed Logitech G533 microphone audio issues on your Windows 10 PC.
რეკომენდებული:
ვიმედოვნებთ, რომ ეს სახელმძღვანელო სასარგებლო იყო და თქვენ შეძლებთ გამოსწორებას Logitech G533 Mic not working in your device. Feel free to reach out to us with your queries and suggestions via the comments section below.

![Windows 10-ში არ მუშაობს WiFi-ის გამოსწორება [100% მუშაობს]](https://lbsite.org/wp-content/uploads/2023/02/Fix-WiFi-not-Working-in-Windows-10.jpg "Windows 10-ში არ მუშაობს WiFi-ის გამოსწორება [100% მუშაობს]")