Are you facing issues with Realtek High Definition Audio Driver? Is Realtek HD Audio Manager missing from your Windows 10 Taskbar? Or there is no sound coming from your speakers in Windows 10? If you are finding the answer to the above questions, then you’re in the right place as today we will see How to Fix Realtek High Definition Audio Driver Issue.
Realtek HD Audio Manager is one of the best tools available for managing all your audio/sound needs in Windows 10. But what happens when you can’t find the Realtek HD Audio Manager icon on the Taskbar? Most of the users facing this issue complain that they are only having this issue after the Windows 10 upgrade or update.
There can be numerous underlying causes for this issue, but the main problem seems to be corrupt or outdated Realtek audio drivers. And if that’s the case, this issue can be fixed by re-installing Realtek audio drivers. Anyway, without wasting any time, let’s see How to Fix Realtek High Definition Audio Driver Issue.
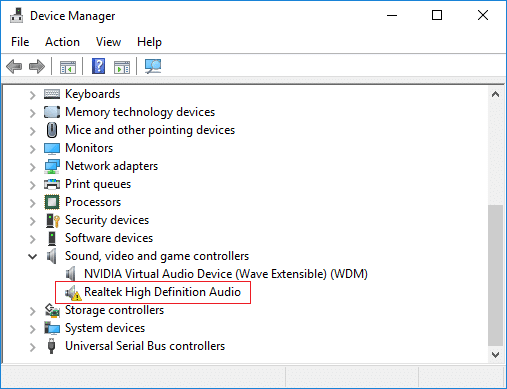
შენიშვნა: Open Device Manager by pressing Windows Key + R then type devmgmt.msc and hit Enter. Next, expand Sound, video and game controllers and then check if you can see a ყვითელი ძახილის ნიშნები on "Realtek მაღალი განმარტება აუდიო“. If you can see the yellow exclamation mark then its confirm that this is a driver issue.
Fix Realtek High Definition Audio Driver Issue
დარწმუნდით, რომ შექმენით აღდგენის წერტილი, თუ რამე არასწორედ მოხდება.
Method 1: Reinstall Realtek HD Audio Drivers
1. Open your favourite web browser, then navigate to this website.
https://www.realtek.com/en/component/zoo/category/pc-audio-codecs-high-definition-audio-codecs-software
2. Make sure to download the proper driver according to your system architecture.
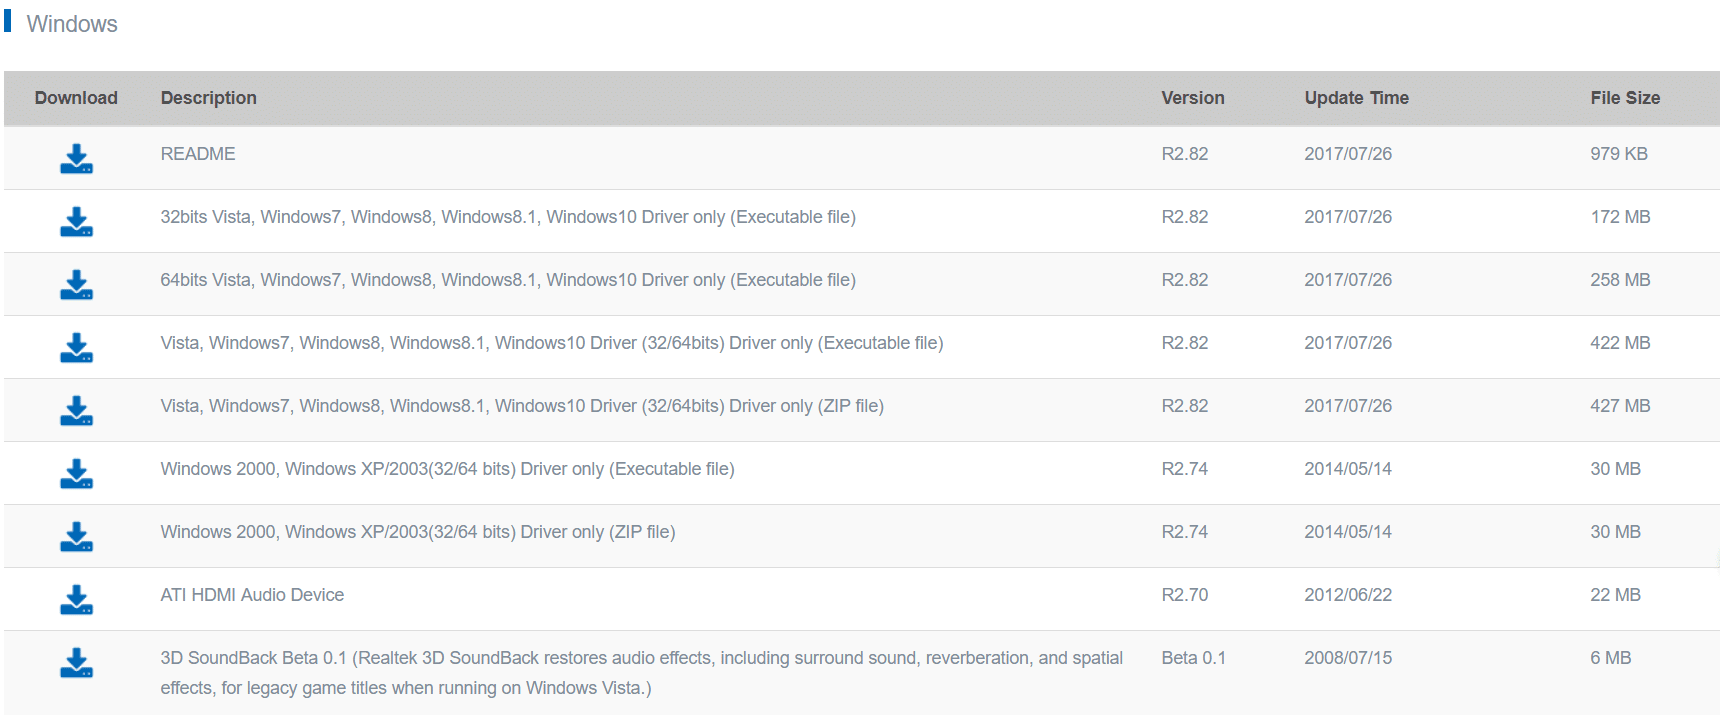
3. Once the file is downloaded, double-click on the setup file and follow the on-screen instructions to install the latest Realtek High Definition Audio drivers.
Method 2: Manually Update Realtek Audio Drivers
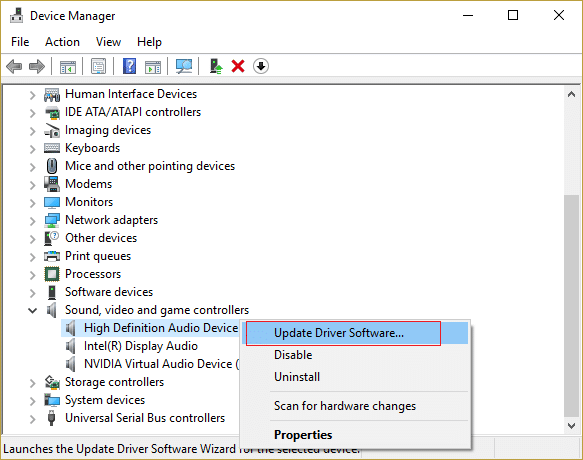
1. დააჭირეთ Windows Key + R და შემდეგ აკრიფეთ devmgmt.msc და დააჭირეთ Enter- ს გასახსნელად Მოწყობილობის მენეჯერი.

2. Expand “ხმის, ვიდეო და თამაშის კონტროლერები” and then right-click on “Realtek მაღალი განმარტება აუდიო” & select განაახლეთ მძღოლი.
3. On the next window, click on “ავტომატურად მოძებნეთ განახლებული მძღოლის პროგრამული უზრუნველყოფა".

4. In case you already have the updated driver, then the following window will appear. If not then Windows will automatically update Realtek Audio drivers to the latest update available.
5. Once finished, reboot your PC to save changes.
If you’re still facing the Realtek High Definition Audio Driver Issue then you need to manually update the drivers, follow this:
6. If it wasn’t able to update your drivers then again right-click on “Realtek მაღალი განმარტება აუდიო” & select განაახლეთ მძღოლი.
7. This time, select "იხილე ჩემი კომპიუტერი მძღოლის პროგრამული უზრუნველყოფა."

8. Next, select “ნება მომეცით ავირჩიოთ მოწყობილობის დრაივერების სიიდან ჩემს კომპიუტერში."

9. აირჩიეთ შესაბამისი მძღოლი სიიდან და დააჭირეთ შემდეგი.
10. Let the process complete and then restart your PC.
11. Alternatively, go to your manufacturer’s website and download the latest drivers.
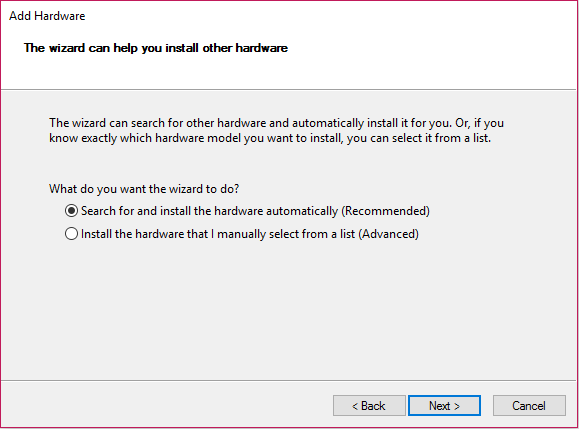
მეთოდი 3: გამოიყენეთ Add legacy დრაივერების დასაყენებლად ძველი ხმის ბარათის მხარდასაჭერად
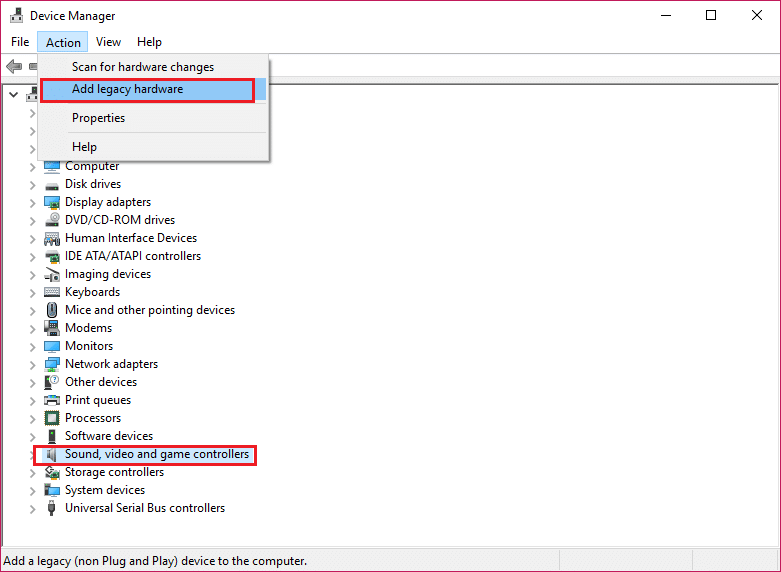
1. დააჭირეთ Windows Key + R და შემდეგ ჩაწერეთ „devmgmt.msc” (ბრჭყალების გარეშე) და დააჭირეთ Enter, რომ გახსნათ Device Manager.
2. In Device Manager, select ხმის, ვიდეო და თამაშის კონტროლერები და შემდეგ დააჭირეთ მოქმედება > ძველი ტექნიკის დამატება.
3. click შემდეგი, აირჩიეთ "მოძებნეთ და დააინსტალირეთ აპარატურა ავტომატურად (რეკომენდებულია)".
4. Reboot your system to save changes and see if you’re able to Fix Realtek High Definition Audio Driver Issue.
Method 4: Uninstall Realtek High Definition Audio Driver
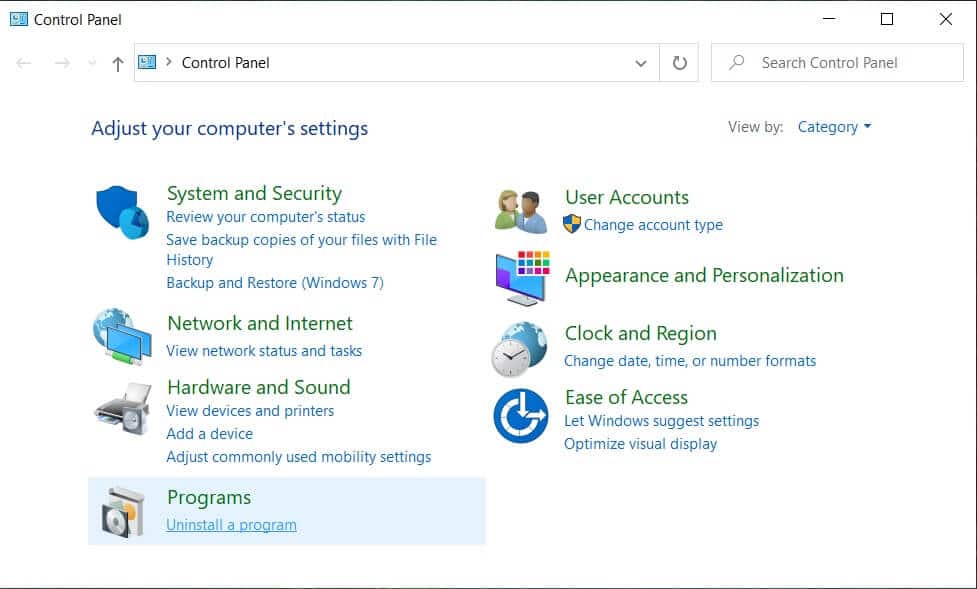
1. მოძებნეთ პანელი საწყისი მენიუს საძიებო ზოლიდან და დააჭირეთ მასზე გასახსნელად Მართვის პანელი.

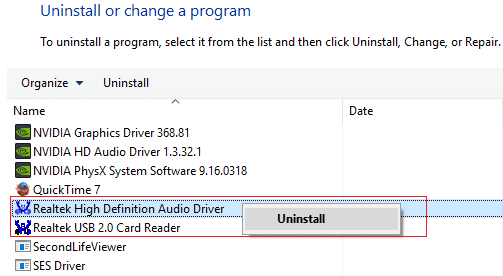
2. დაწკაპეთ წაშალეთ პროგრამა და შემდეგ მოძებნეთ Realtek High Definition Audio Driver entry.
3. დააწკაპუნეთ მასზე მარჯვენა ღილაკით და აირჩიეთ Uninstall.
4. Restart your PC and open Device Manager.
5. Click on Action then “სკანირება ტექნიკის ცვლილებებისთვის."

6. Your system will automatically install the Realtek High Definition Audio Driver.
Method 5: Disable Microsoft UAA Bus Driver for High Definition Audio
1. დააჭირეთ Windows Key + R და შემდეგ აკრიფეთ devmgmt.msc და დააჭირეთ Enter გასახსნელად Მოწყობილობის მენეჯერი.
2. გაფართოება სისტემური მოწყობილობები და დააწკაპუნეთ მარჯვენა ღილაკით Microsoft UAA Bus Driver High Definition აუდიო აირჩიეთ გამორთვა.
3. Now visit Realtek to download the latest driver, and it should now install without any problem.
რეკომენდებული:
ეს არის ის, რაც თქვენ წარმატებით ისწავლეთ How to Fix Realtek High Definition Audio Driver Issue მაგრამ თუ თქვენ ჯერ კიდევ გაქვთ რაიმე შეკითხვა ამ გაკვეთილთან დაკავშირებით, მოგერიდებათ ჰკითხოთ მათ კომენტარების განყოფილებაში.

