Chrome is one of the most-used browsers in the world. Millions of users love it because of its incredible customization and easy-to-use interface. But like a coin of two sides, Chrome also faces some errors sometimes. One such common error is Aw Snap! Chrome ran out of memory. As the name indicates, when Google Chrome consumes more RAM in your PC, you will face this error. We bring to you a perfect guide that will help you fix Chrome out of memory issues. So, continue reading!
How to Fix Chrome Ran Out of Memory in Windows 10
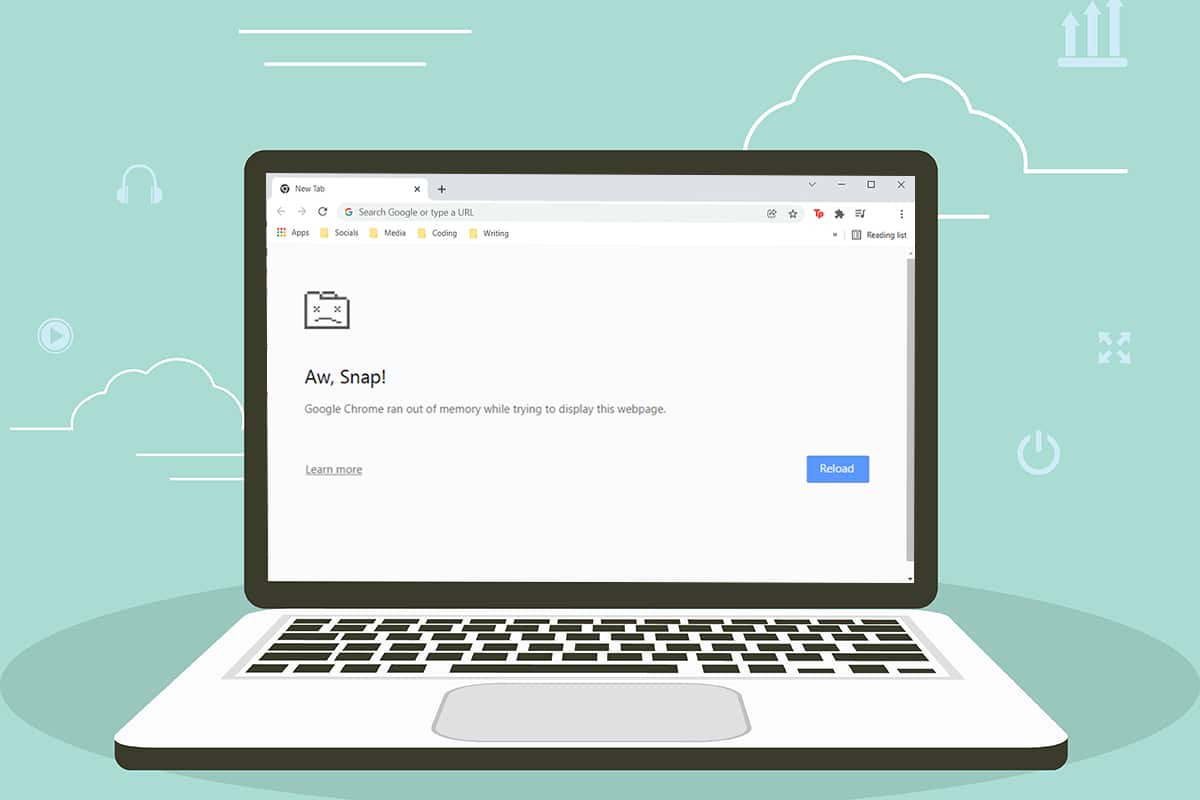
Following is the error that you may face if Chrome runs out of memory on Windows 10.
Aw, Snap!
Google Chrome ran out of memory while trying to display this webpage.
The reason for this error is not very obvious. Yet, there are some root causes for this Chrome browser out of memory issue listed below. Either random or specific, if you face this error in your browser, we will help you resolve the same by this guide.
- ინტერნეტთან დაკავშირების პრობლემები
- Damaged or bulky browser cache
- შეუთავსებელი გაფართოებები
- Bulged temporary files in PC
- A glitch in the User profile
- Unwanted or incompatible programs in PC
- მოძველებული ბრაუზერი
- Site blocked by firewall
ძირითადი პრობლემების მოგვარება
Here are some basic troubleshooting steps are given below to fix this error. You should follow these points before going through the methods given in this article.
- გადატვირთეთ თქვენი კომპიუტერი: Უმეტეს შემთხვევაში, a simple restart may fix the issue without any challenging layouts. Alternatively, you can entirely shut down the system using the Power options and turn it on again.
- Ensure Proper Internet Connectivity: This is the most apparent reason that causes the discussed error. When your internet connectivity is not optimum, the connection interrupts more frequently. You can run a speed test to know the optimum level of network speed required for the proper connection. You can also prefer a new faster internet package and buy it from your network provider.
- Close Unwanted Tabs: This might help in fixing the error. If none of these basic troubleshooting tips helped you, then close all the tabs and restart the Chrome browser.
Still, if you face the same error, go ahead with the troubleshooting methods given below. Follow them in the same order to attain quicker results.
Method 1: Update to 64-bit Version of Chrome
First, check if you use the 64-bit version of Chrome. If the browser consumes a lot of RAM from your processors, you must be sure of using a 64-bit version instead of a 32-bit version. This manages more computer resources, thereby resolving the said problem. Here are a few instructions to check and update the version of Google Chrome.
1. დაიწყეთ Google Chrome ბრაუზერი.
2. დაწკაპეთ სამი წერტილის ხატი and hover to დახმარება და აირჩიეთ Google Chrome- ის შესახებ ვარიანტი.
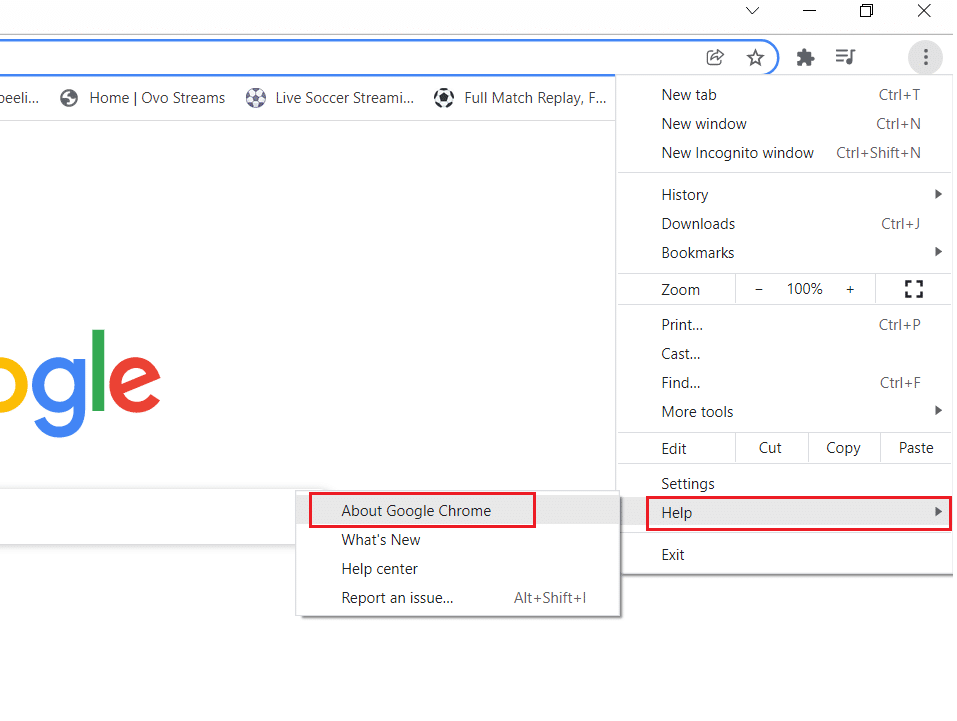
3. Here, check if Google Chrome is of 64-bit version or not.
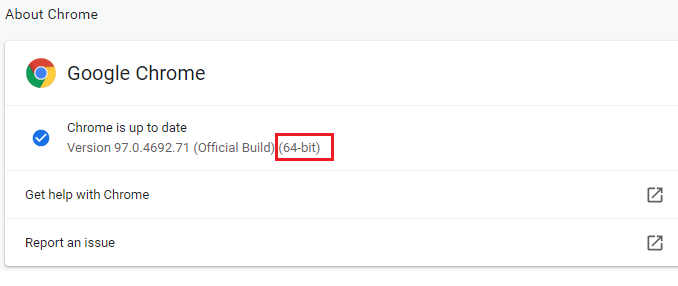
4. თუ არსებობს 32-bit given next to the version of Chrome, you have to download the 64- ბიტიანი ვერსია of Google Chrome.
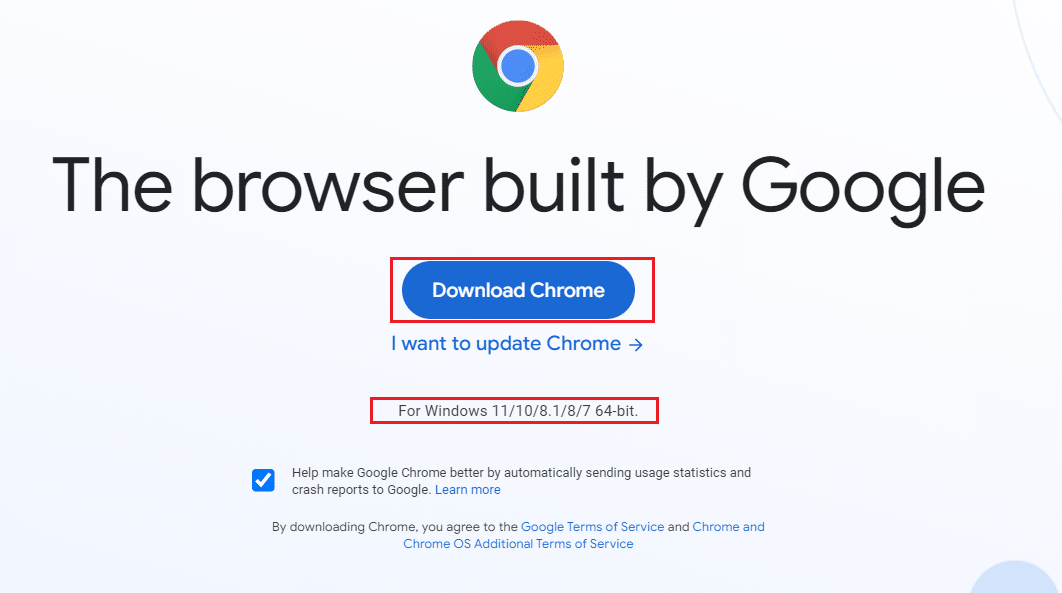
5. Run the downloaded setup file to install Google Chrome 64-bit version.
Method 2: End Google Chrome Processes
Like Windows, Chrome also has Task Manager that allows you to manage its tabs and extensions. The interface of this setting is very straightforward, and you can abort or end any high resource-consuming Chrome tasks. For example, you can distinguish which process consumes allocated memory contributing to this error. Thus, you can eliminate that particular tab instead of closing all the tabs. Here are a few instructions to manage tabs in Chrome.
1. ღია Google Chrome და დააჭირეთ Shift + Esc keys ერთად გასახსნელად Task Manager – Google Chrome.
2. Now, scroll down and check if you have an unusual მეხსიერების კვალი ღირებულება.
3. If so, click on the დასრულების პროცესი button for the respective სამუშაო.
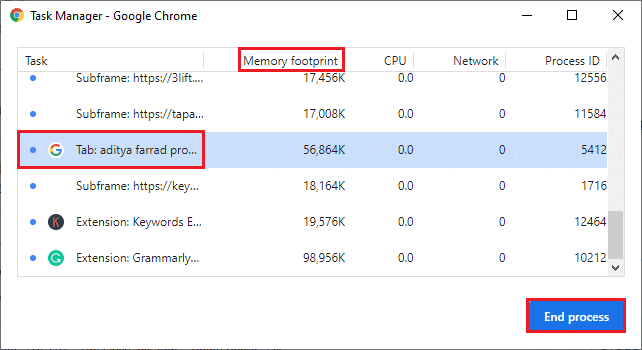
4. ახლა, განაახლეთ the site and check if you face the error again.
ასევე წაიკითხე: How to Fix Chrome Keeps Crashing
Method 3: Restart Google Chrome Process
If you did not attain a fix by terminating specific Chrome tabs and extensions from the above method, try to force shutdown all the Chrome tasks you do regularly in Task Manager. There may be plenty of applications that run in the background. This will increase the CPU and memory space, thereby affecting the performance of the system. Follow the below-mentioned steps to close the Chrome background tasks.
1. დაიწყე პროცესების მენეჯერი (Task Manager) დარტყმით Ctrl + Shift + Esc კლავიშები ერთდროულად.
2. In პროცესები tab, search and select the Chrome პროცესში.
3. შემდეგ დააწკაპუნეთ ბოლო დავალება button as depicted in the below picture.
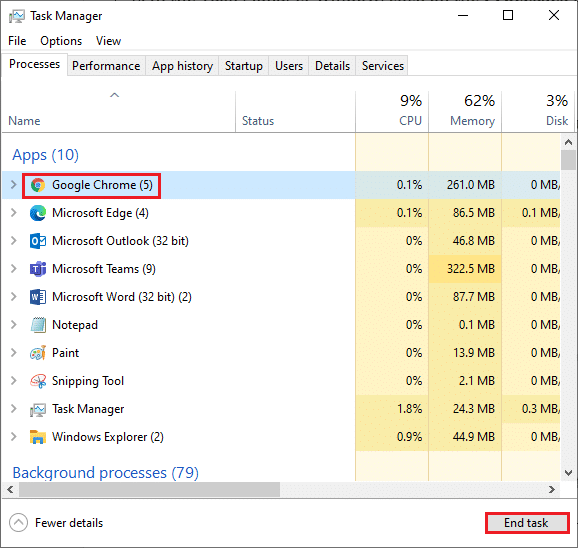
4. ახლა, Google Chrome- ის ხელახლა გაშვება and check if you have fixed the issue.
Method 4: Clean up Temporary Files
When your system has any corrupt temporary files or folders, you may encounter this Chrome out of memory error. You can sort out this error by clearing the temporary files in your system. Then, follow the instructions to implement the same.
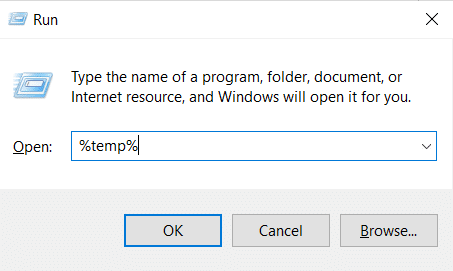
1. პრესა Windows + R გასაღებები ერთდროულად გასახსნელად გასაშვებად დიალოგური ფანჯარა.
2. ტიპი %ტემპი% და მოხვდა შეიყვანეთ გასაღები გახსნას AppDataLocalTemp საქაღალდე.
3. დაჭერა Ctrl + A კლავიშები together to select all the unrequired files and right-click on the file and select the წაშლა ვარიანტი.
შენიშვნა: Some files cannot be deleted coz they are being used, so you can skip these.
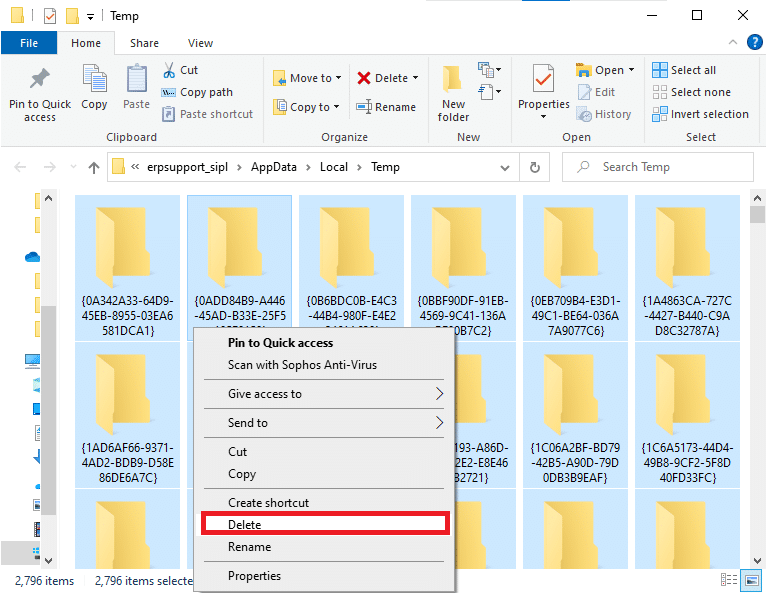
4. Finally, redirect to the ნაგვის ურნა and permanently delete the files and folders you have deleted now.
მეთოდი 5: გამოიყენეთ პირადი დათვალიერება
In some cases, using private surfing mode could resolve this error since some details of the web pages are hidden in it. Below are some advantages of using Incognito mode in Chrome. The Incognito Mode in Chrome & Edge browsers is primarily designed for secure and private browsing.
- ეს made for users who do not want their search history or recent pages saved on their device.
- Due to its privacy policy, this mode does not allow users to record their screens or take screenshots.
- It blocks cookies, hides search history, but provides the freedom to browse the desired website.
Follow the below-mentioned steps to open desired web page in private mode:
1A. Go to Google Chrome და დააკლიკეთ სამ წერტილიანი ხატი. Here, select the ახალი ინკოგნიტო ფანჯარა ვარიანტი, როგორც ნაჩვენებია.
![]()
1B. Alternatively, you can also press Ctrl + Shift + N keys ერთად გაუშვით ახალი ინკოგნიტო ფანჯარა.
ასევე წაიკითხე: როგორ დავაფიქსიროთ PDF ფაილები, რომლებიც არ იხსნება Chrome-ში
Method 6: Clear Cache and Cookies in Chrome
Try clearing cache and cookies to fix Chrome ran out of memory error by implementing the following steps.
1. დაიწყე Google Chrome.
2. შემდეგ დააწკაპუნეთ სამ წერტილიანი ხატი > მეტი ინსტრუმენტები > დათვალიერების მონაცემების წაშლა ... როგორც ილუსტრირებულია ქვემოთ.
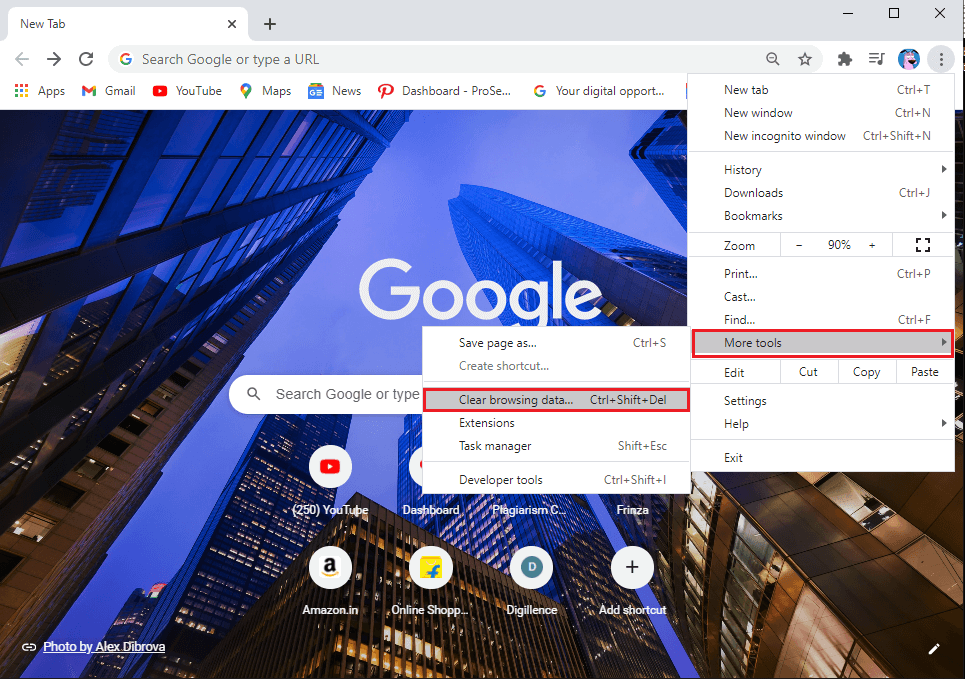
3. Check the following options.
- ქუქი – ფაილების და საიტის სხვა მონაცემები
- ქეშირებული სურათები და ფაილები
4. ახლა აირჩიეთ ყოველთვის ვარიანტი Დროის მონაკვეთი.
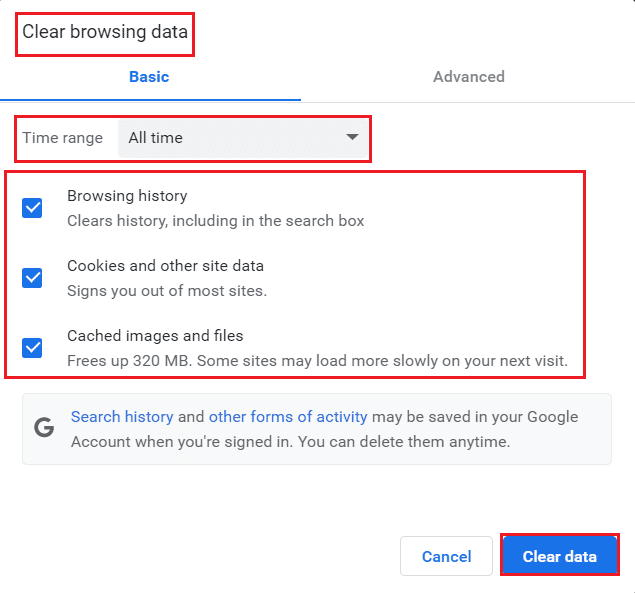
5. ბოლოს დააწკაპუნეთ მონაცემების გარკვევა.
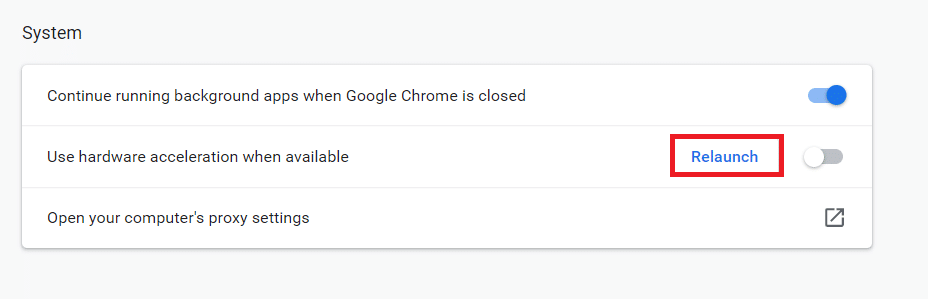
მეთოდი 7: გამორთეთ აპარატურის აჩქარება
Sometimes, web browsers may run in the background, and this will consume the CPU resources. Hence, it is better to disable the hardware acceleration in the browser to fix Chrome out of memory error.
1. დაიწყე Google Chrome და დააკლიკეთ სამ წერტილიანი ხატი present at the top right corner.
2. ახლა, დააჭირეთ ღილაკს პარამეტრები as depicted in the below picture.
![]()
3. ახლა გააფართოვეთ მოწინავე section in the left pane and click on სისტემის, როგორც ნაჩვენებია.
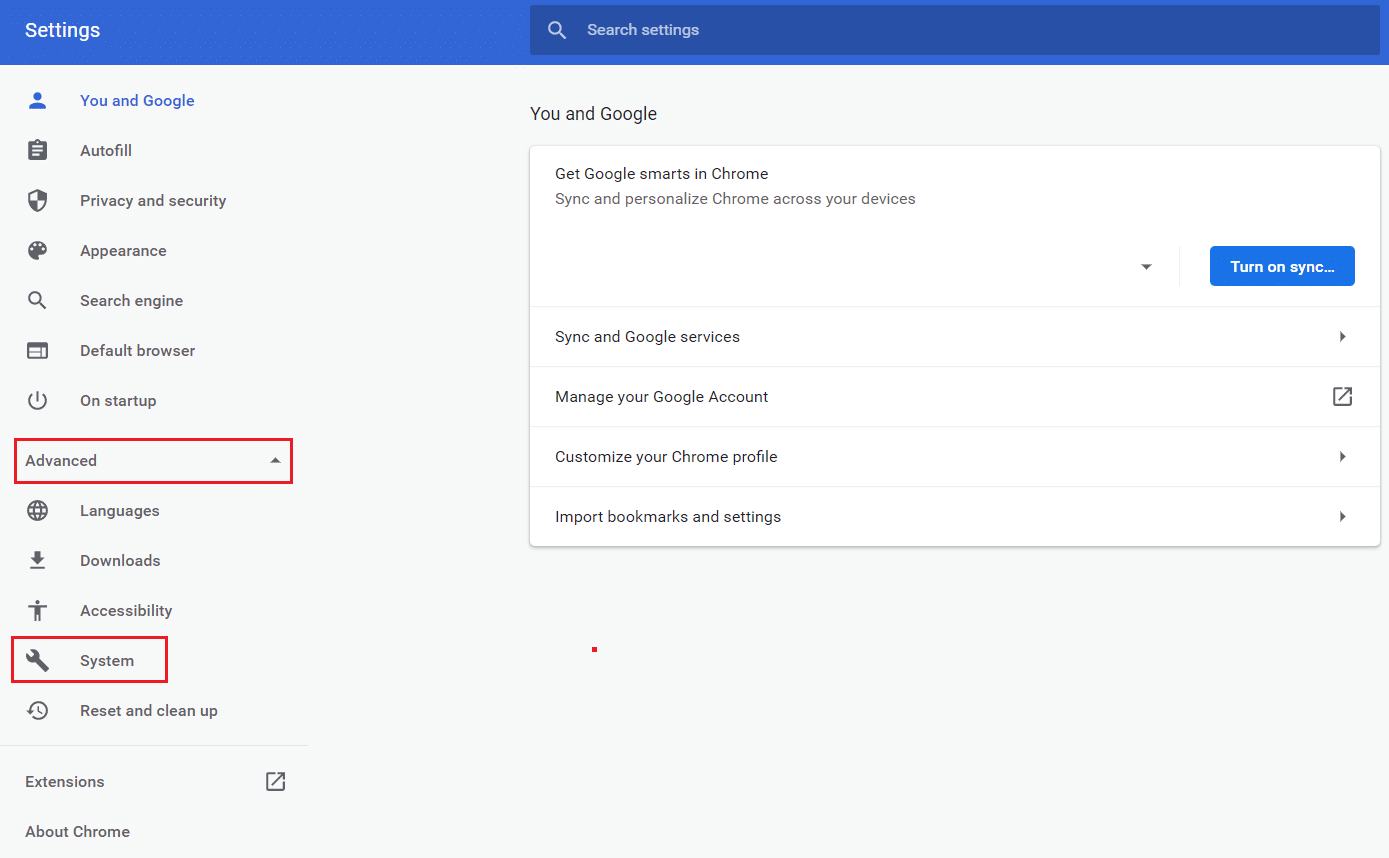
4. Here, switch Off გადართვა ამისთვის გამოიყენეთ აპარატურის აჩქარება, როდესაც ეს შესაძლებელია ვარიანტი.
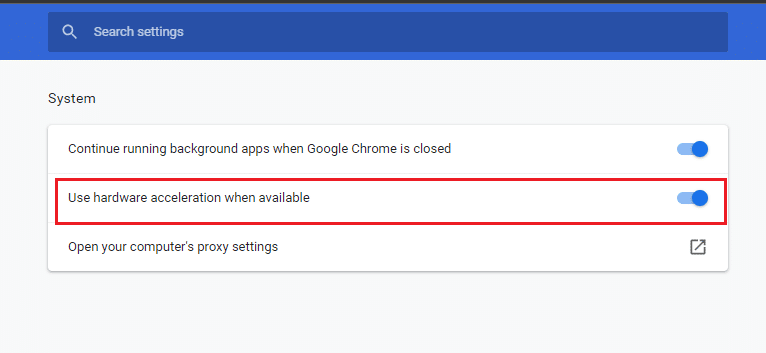
5. შემდეგ დააწკაპუნეთ ხელახლა ვარიანტი.
ასევე წაიკითხე: როგორ ამოიღოთ Chrome თემები
Method 8: Disable Extensions (If Applicable)
Follow these steps to disable the extensions which has high memory usage to fix Chrome out of memory error.
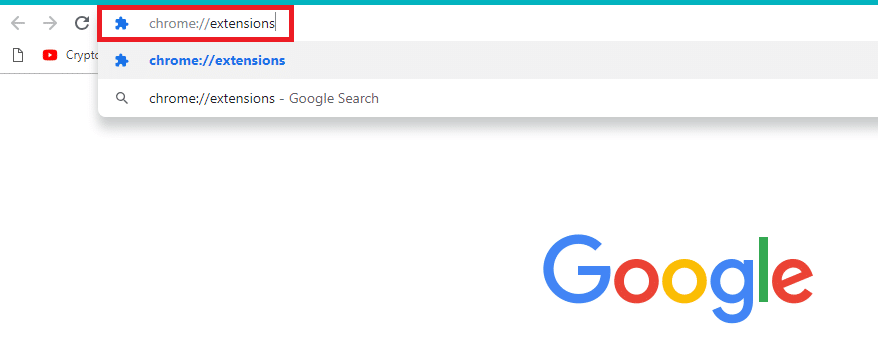
1. დაიწყე Chrome და ტიპის chrome: // გაგრძელება in URL Bar. დაარტყი შეიყვანეთ ყველა დაინსტალირებული გაფართოების სიის მისაღებად.
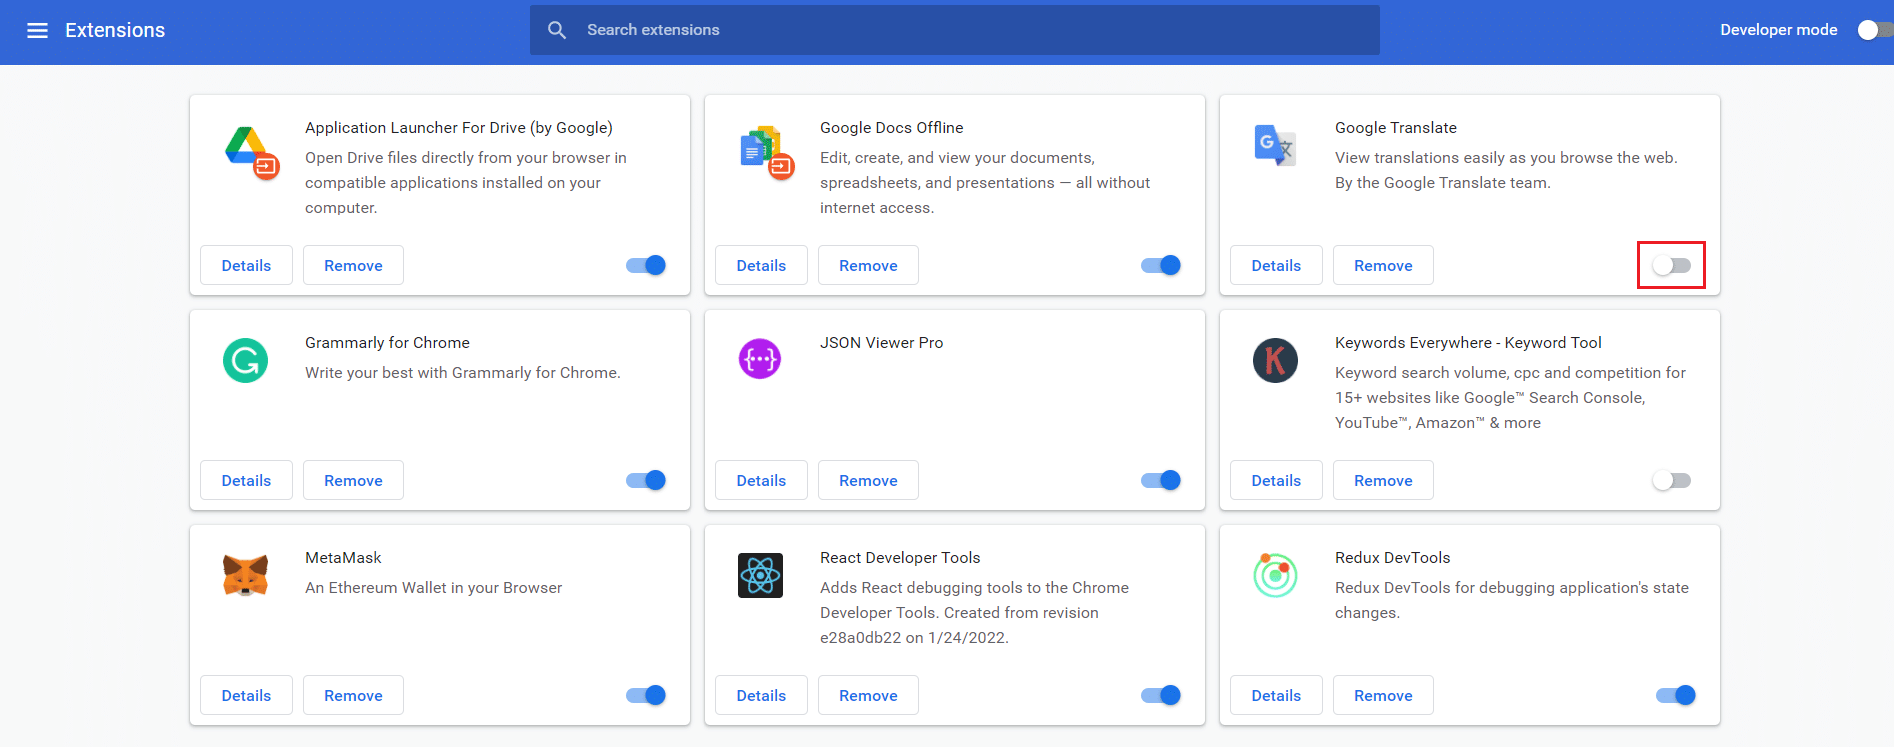
2. Switch Off the toggle for the extension you want to disable.
Method 9: Remove Extensions (If Applicable)
A web app extension in the Chrome browser might also cause this error. You should remove those unwanted apps extension individually to check whether the issue still persists or not. Follow the below-mentioned instructions to delete the extensions from Google Chrome.
1. დაიწყე Chrome და ტიპის chrome: // გაგრძელება in URL Bar. დაარტყი შეიყვანეთ ყველა დაინსტალირებული გაფართოების სიის მისაღებად.
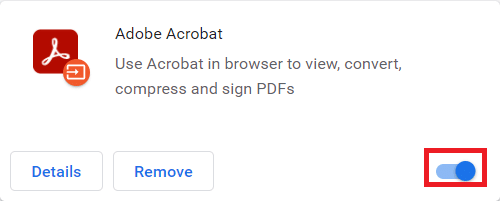
2. გადართვა Off გადამრთველი ამისთვის recently installed extension გამორთვა.
3. გაიმეორეთ the same one by one for each extension, until you find the corrupt extension.
4. Once found, click on the ამოღება button to uninstall the corrupt extension.
შენიშვნა: ჩვენ ვაჩვენეთ MetaMask extension as an example.
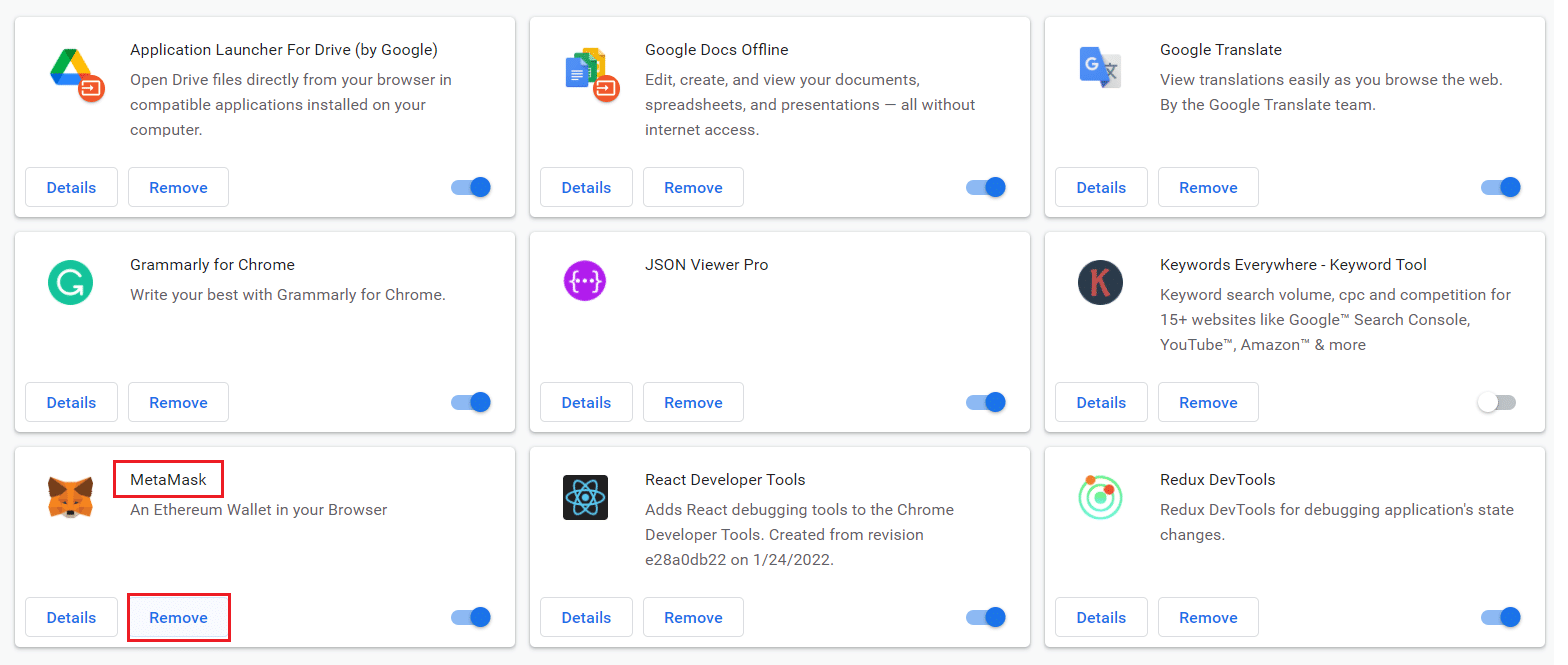
Refresh your browser and check if the issue is fixed now.
Method 10: Remove Harmful Software from Chrome
The Chrome Cleanup Tool is an antivirus program for your browser.
- It scans your PC for malicious programs that affect the browser.
- Since Google has assured privacy over data scanned by the tool thus, it cannot access them in any way.
Only the harmful programs are detected by the tool, and the tool warns you with an alert. Usually, the tool alerts you for malicious programs after sending the metadata files to Google. If you do not want your files to be sent to Google, you can uncheck the box დეტალების შესახებ Google- ში ყუთი.
Here’s how to run Chrome Cleanup Tool to fix Chrome ran out of memory issue:
1. დაიწყე Google Chrome და დააჭირეთ სამ წერტილიანი ხატი > პარამეტრები as shown highlighted.
![]()
2. აქ დააწკაპუნეთ მოწინავე setting in the left pane and select გადატვირთვა და გაწმენდა ვარიანტი.
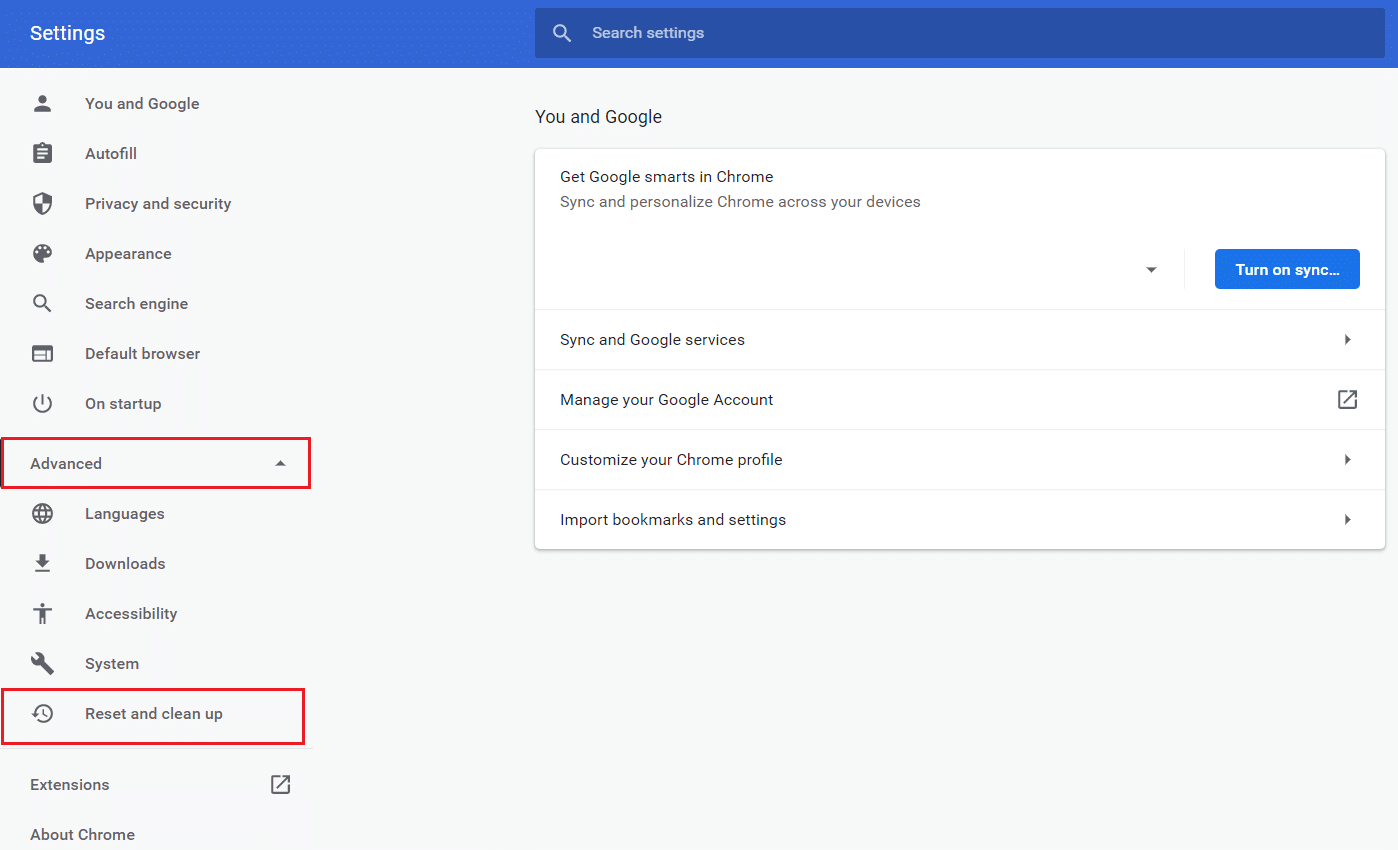
3. ახლა აირჩიეთ კომპიუტერის გასუფთავება ვარიანტი, როგორც ნაჩვენებია ქვემოთ.
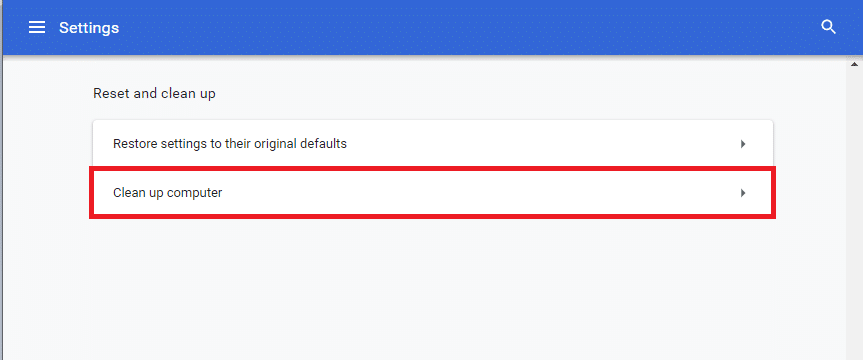
4. აქ დააწკაპუნეთ მოვძებნით button to enable Chrome to find harmful software თქვენს კომპიუტერში.

5. დაელოდეთ for the process to be completed and ამოიღონ the harmful programs detected by Google Chrome.
6. გადატვირთეთ კომპიუტერი და შეამოწმეთ პრობლემა მოგვარებულია თუ არა.
ასევე წაიკითხე: Fix Crunchyroll Not Working on Chrome
მეთოდი 11: შექმენით ახალი მომხმარებლის პროფილი
If there are any damaged files or glitches in data stored by Google Chrome on your PC, then renaming the default folder might help you resolve Chrome out of memory error. This may also occur when you have a damaged user profile. Here are a few instructions to rename your user profile folder.
შენიშვნა: Renaming the folder will not affect the functionality. The folder will be recreated once you restart the browser.
1. დააჭირეთ ღილაკს Windows + E კლავიშები ერთად გავხსნათ File Explorer.
2. Now, paste the following გზა მისამართების ზოლში და დააჭირეთ შეიყვანეთ გასაღები.
LOCALAPPDATA GoogleChromeUser მონაცემები
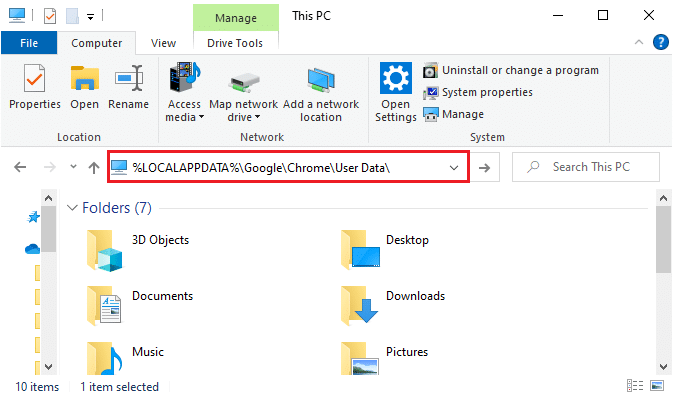
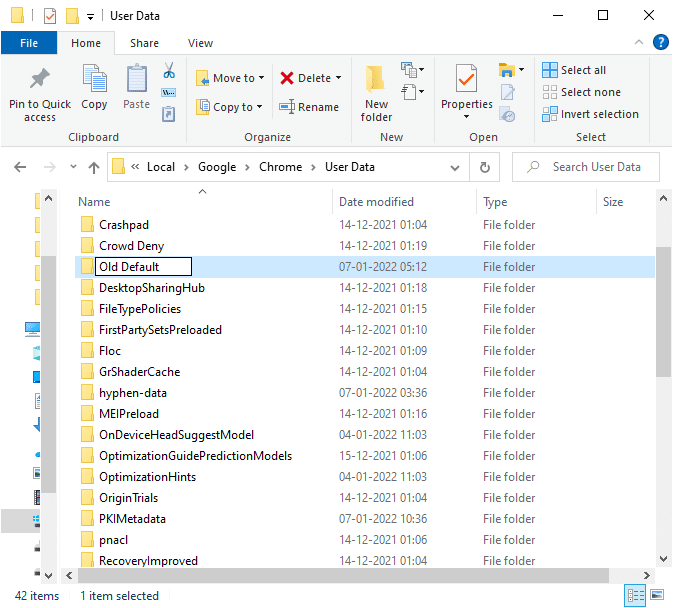
3. იპოვნეთ Default folder and right-click on it.
4. შემდეგ, აირჩიეთ გადარქმევა ვარიანტი, როგორც ნაჩვენებია.
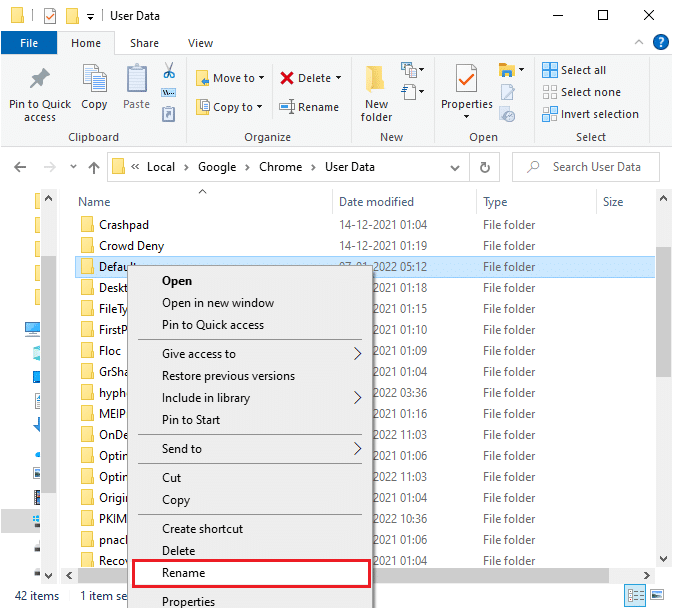
5. Next, rename the folder to ძველი ნაგულისხმევი და მოხვდა შეიყვანეთ გასაღები.
6. ბოლოს და ბოლოს, გადატვირთვა Chrome and check if you have fixed the issue.
Method 12: Increase Memory Limit of Chrome
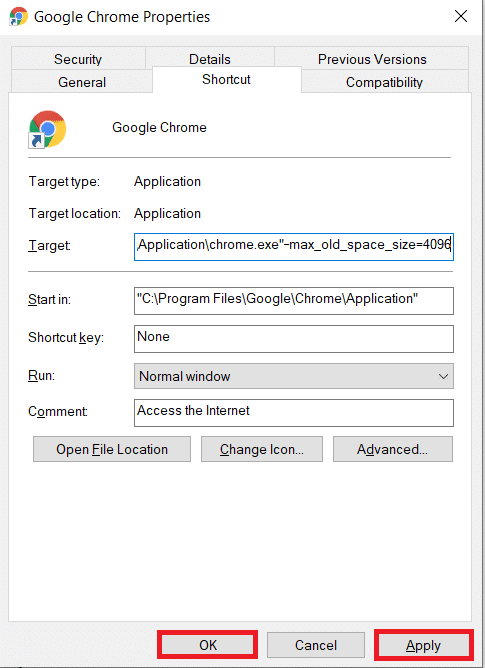
If you are handling web pages that require high memory, you can increase the memory limit of the browser by modifying the target link as instructed below to fix Chrome ran out of memory problem.
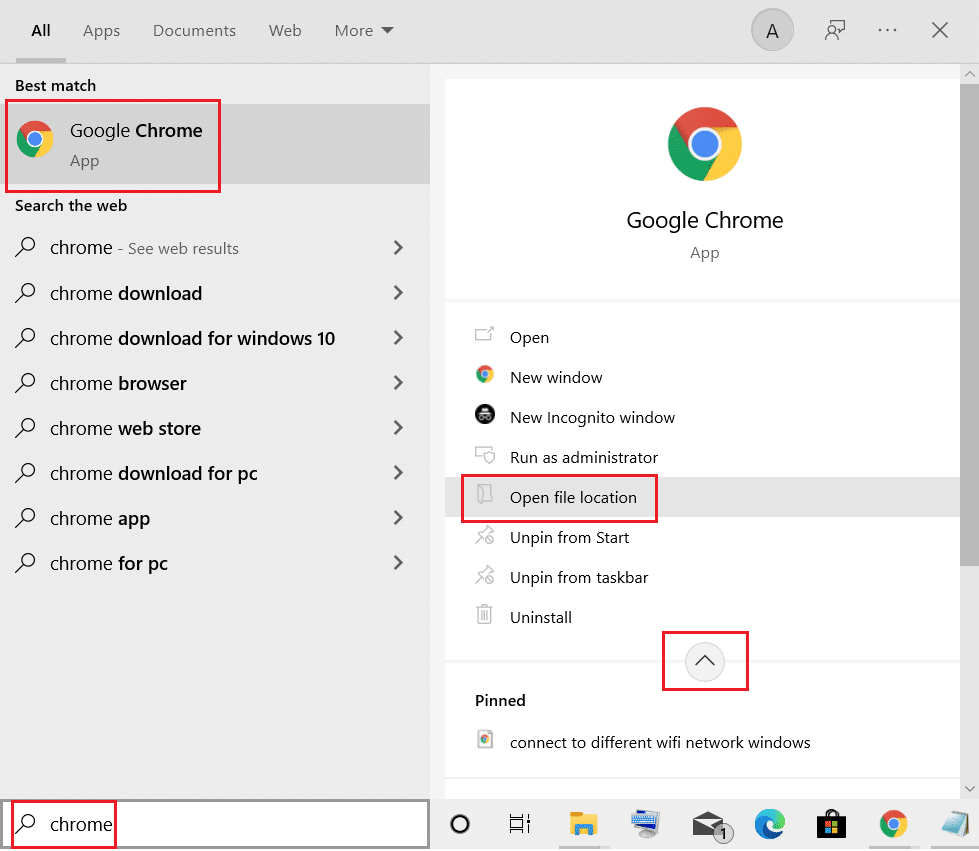
1. დააჭირეთ Windows გასაღებიტიპი Chromeდა დააკლიკეთ ღია ფაილი ადგილმდებარეობა ვარიანტი.
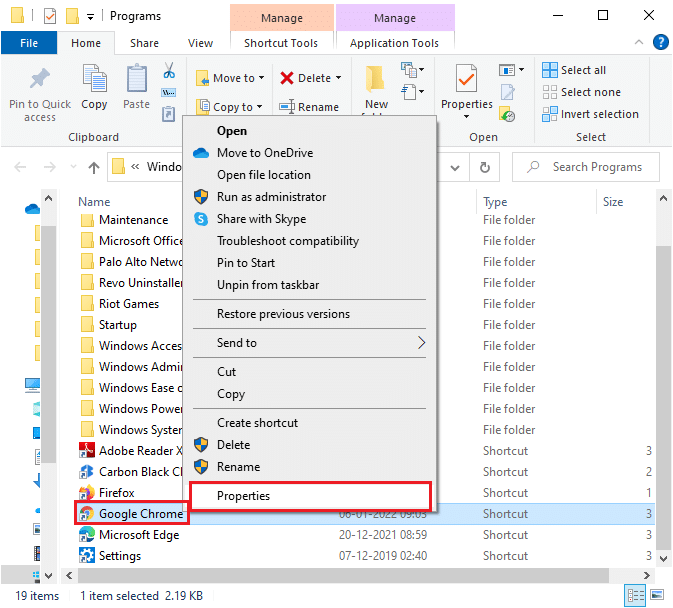
2. Then, right-click on Google Chrome და დააჭირეთ განცხადებები როგორც ნაჩვენებია.
3. In Google Chrome Properties window, add -max_old_space_size=4096 იმ სამიზნე field as illustrated below.
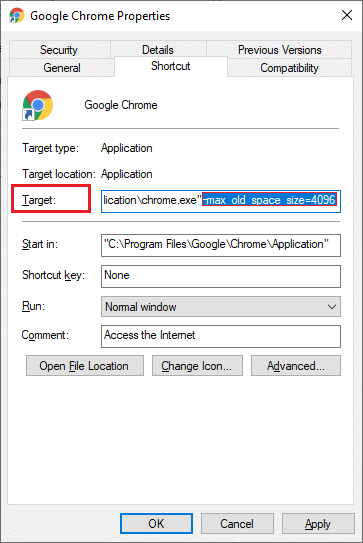
4. ბოლოს დააწკაპუნეთ მიმართვა და მაშინ OK ცვლილებების შენახვა.
ასევე წაიკითხე: როგორ ჩართოთ DNS HTTPS-ით Chrome-ში
Method 13: Update Chrome
If you have an outdated browser, the improved features of the OS will not be supported. This may also result in Chrome ran out of memory issues. To fix this error, you should update Chrome by following the steps below.
1. დაიწყე Google Chrome.
2. დაწკაპეთ სამ წერტილიანი ხატი გაფართოება პარამეტრები მენიუში.
3. შემდეგ, აირჩიეთ Help > Google Chrome- ის შესახებ როგორც ილუსტრირებულია ქვემოთ.
4. ნება Google Chrome to search for updates. The screen will display განახლებების შემოწმება message, as shown.
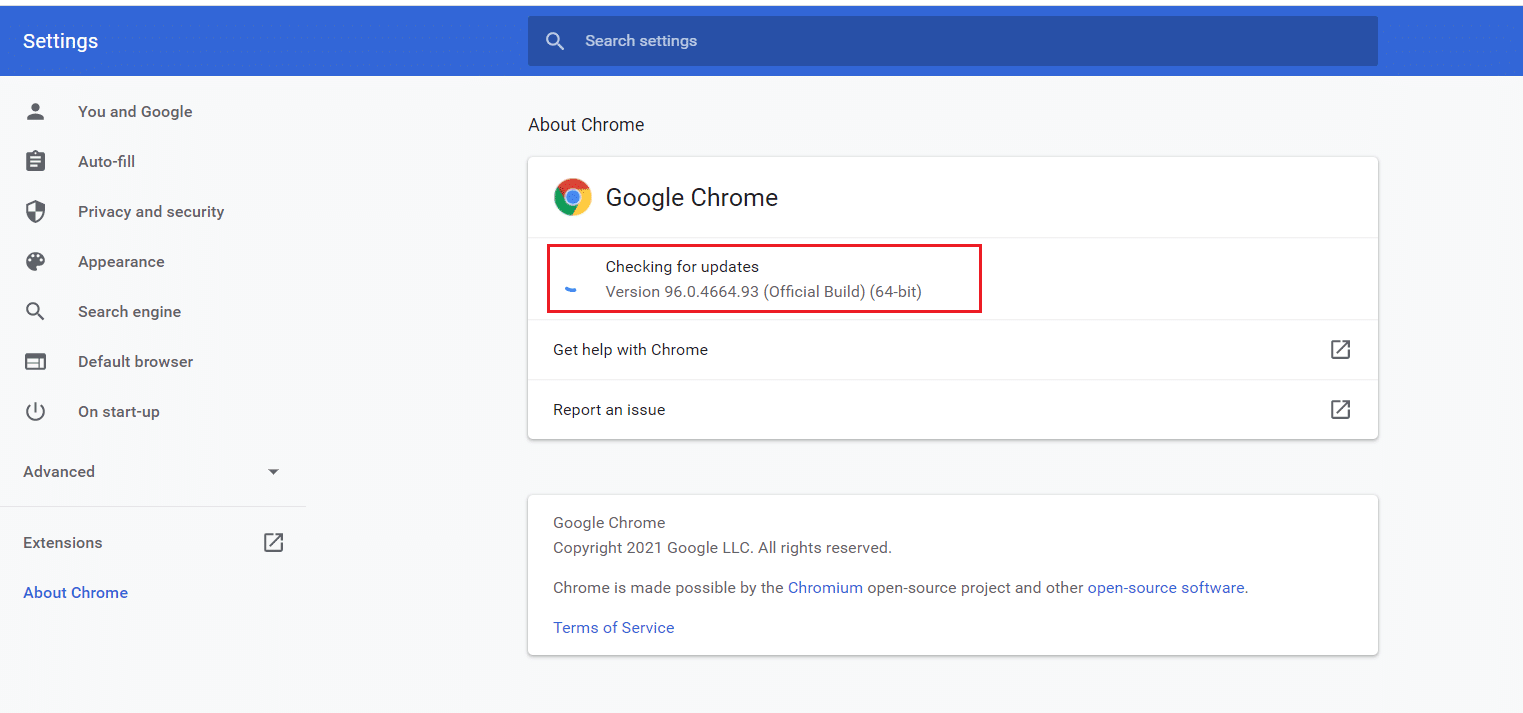
5A. If updates are available, click on the განახლება ღილაკს.
5B. If Chrome is already updated then, Google Chrome განახლებულია შეტყობინება გამოჩნდება.
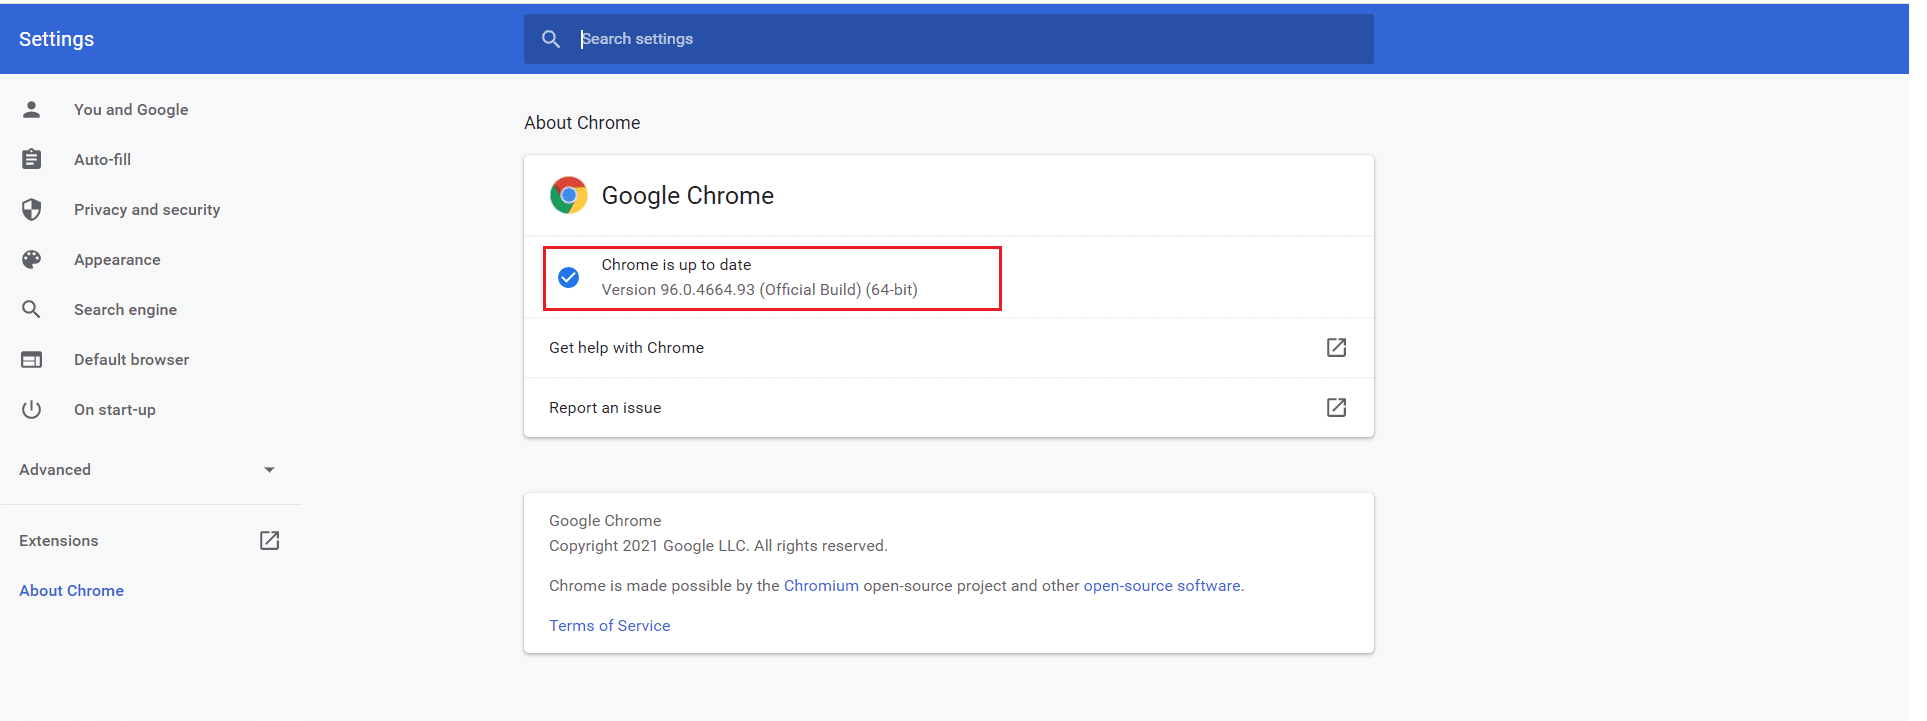
6. Finally, launch the updated browser and check again.
Method 14: Reset Chrome
Resetting Chrome will restore the browser to its default settings, and there are more possibilities that you can fix the discussed error. Follow the below-mentioned steps to reset Google Chrome and check if the issue is resolved.
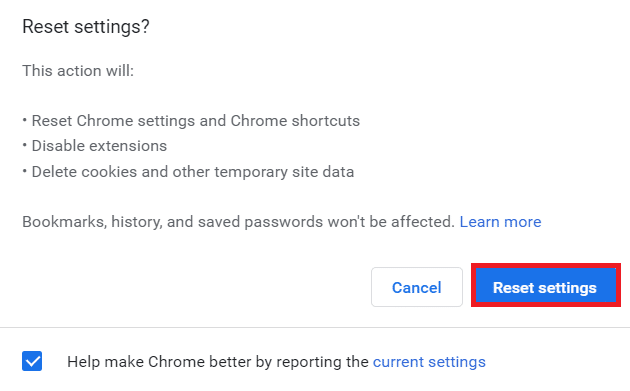
1. ღია Google Chrome და წასვლა chrome: // პარამეტრები / გადატვირთვა
2. დაწკაპეთ მათი თავდაპირველი დეფოლტის პარამეტრების აღდგენა option, shown highlighted.
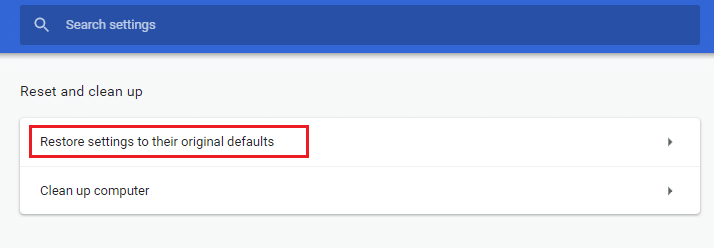
3. Now, confirm your action by clicking on the პარამეტრების შეცვლა ღილაკს.
Now, launch the website again and check the issue is resolved.
ასევე წაიკითხე: როგორ გავიტანოთ შენახული პაროლები Google Chrome-იდან
მეთოდი 15: ხელახლა დააინსტალირეთ Chrome
If none of those mentioned above methods have helped you, you can try reinstalling Google Chrome to fix Chrome ran out of memory issue. Doing this will fix all the relevant issues with the search engine, updates, or other related problems triggering this issue.
შენიშვნა: Back up all favorites, saved passwords, bookmarks and sync your google account with your Gmail. Uninstalling Google Chrome will delete all the saved files.
1. დააჭირეთ Windows გასაღებიტიპი აპები და ფუნქციები, და დაწკაპეთ ღიაა.
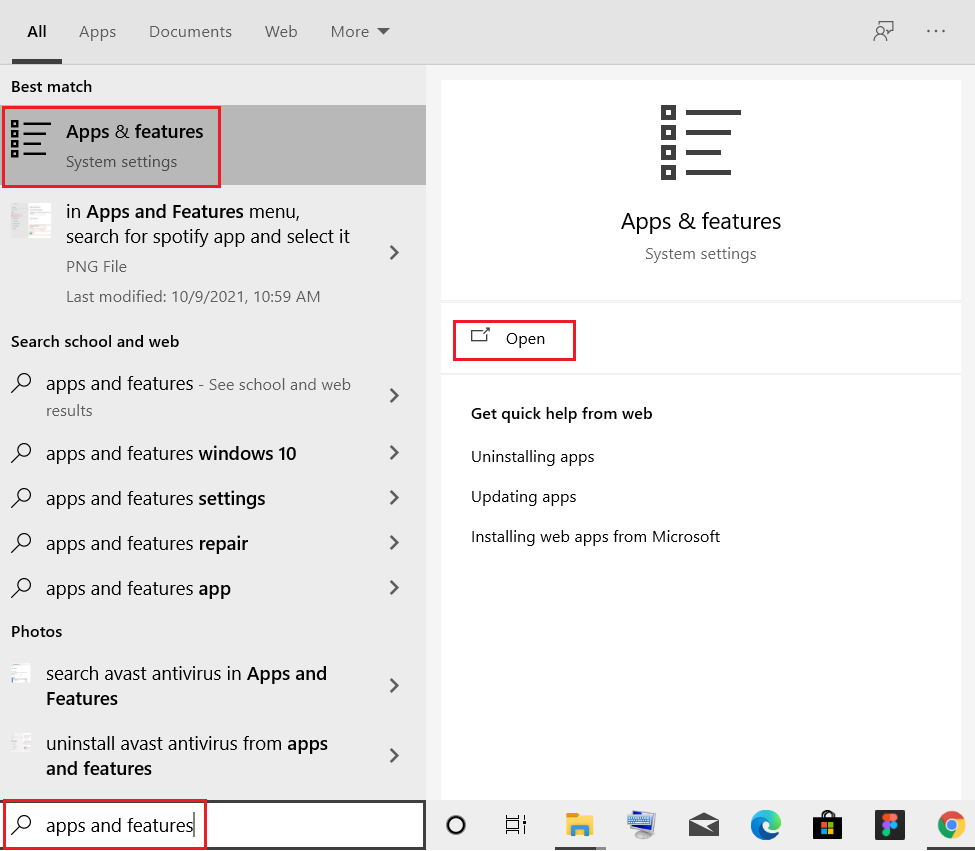
2. ძიება Chrome in მოძებნეთ ეს სია სფეროში.
3. შემდეგ, აირჩიეთ Chrome და დააკლიკეთ Uninstall ღილაკი ნაჩვენებია მონიშნული.
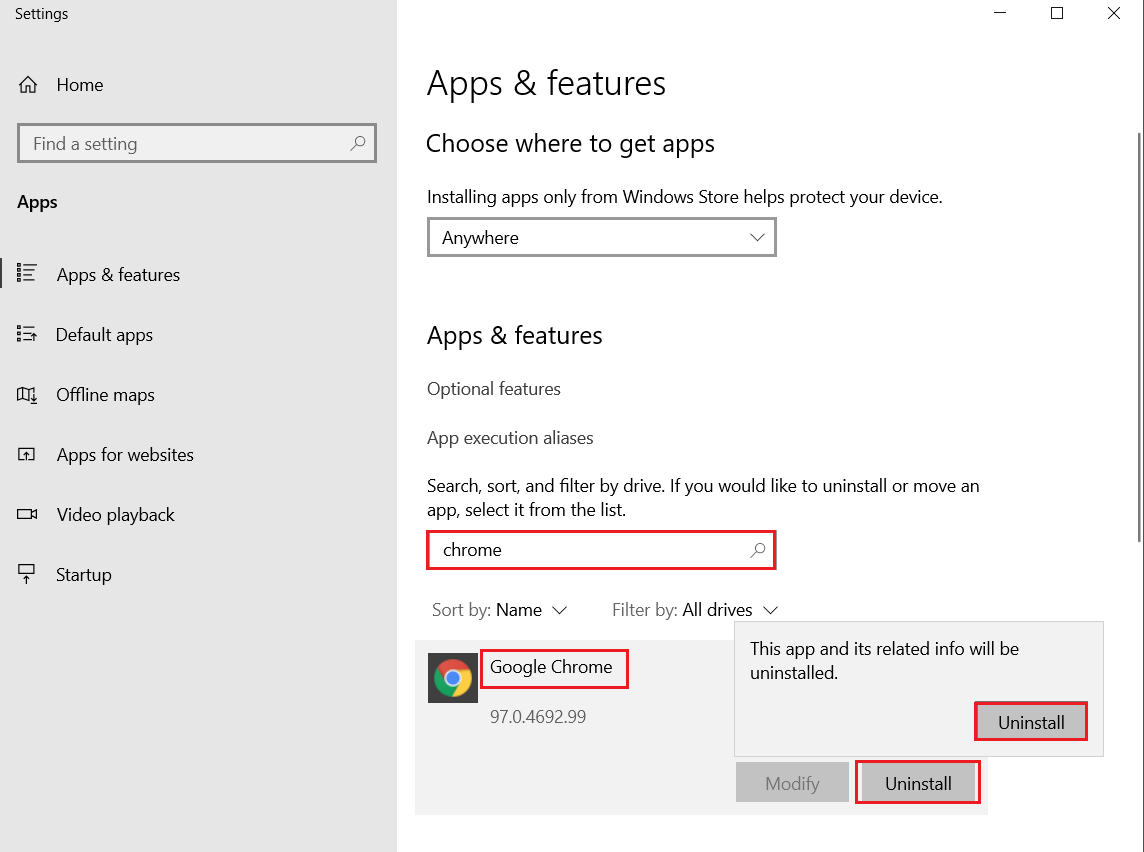
4. ისევ დააწკაპუნეთ Uninstall დაადასტუროს
5. ახლა დააჭირეთ ღილაკს Windows გასაღებიტიპი ადგილობრივი ლოკაცია, და დაწკაპეთ ღიაა წასვლა AppData ლოკალური საქაღალდე.
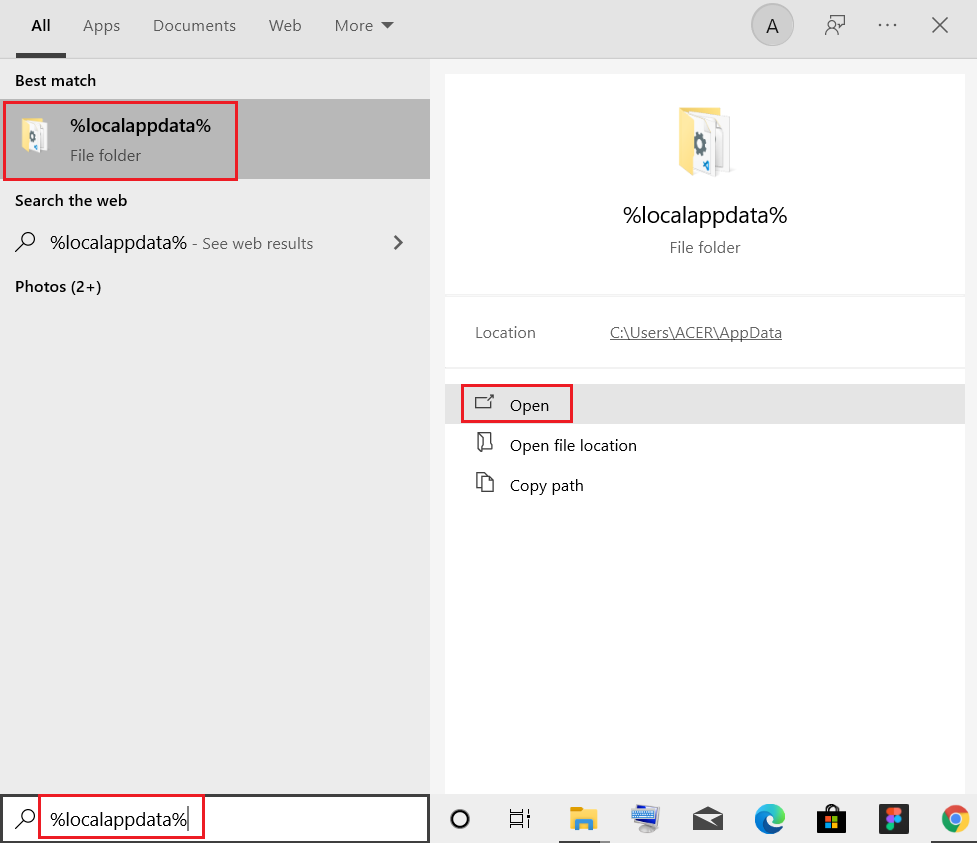
6. გახსნა Google საქაღალდე მასზე ორჯერ დაწკაპუნებით.

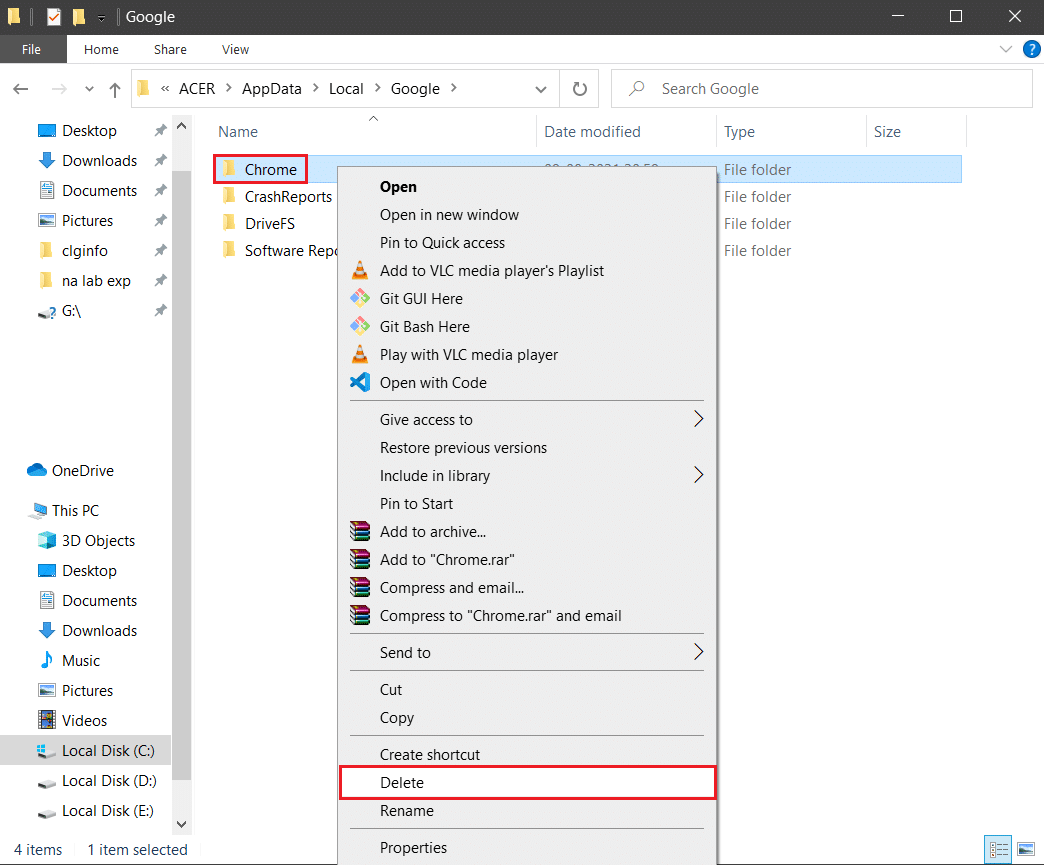
7. მარჯვენა ღილაკით დააჭირეთ ღილაკს Chrome საქაღალდე და აირჩიეთ წაშლა ვარიანტი, როგორც ნაჩვენებია ქვემოთ.
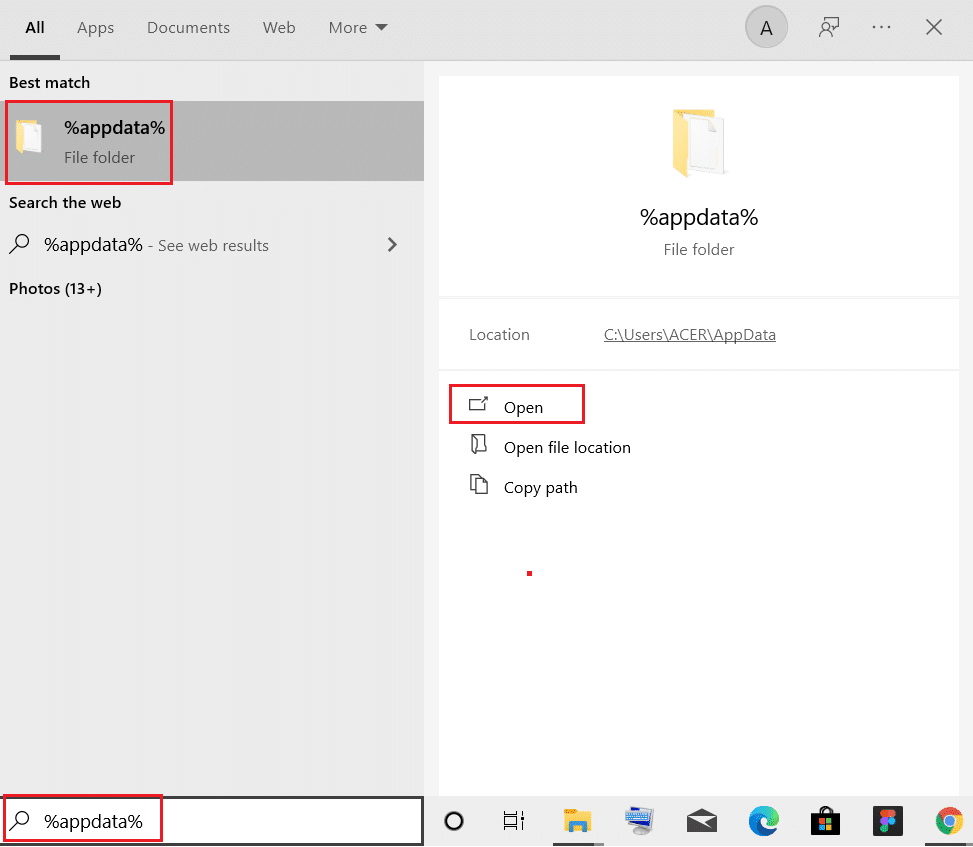
8. ისევ დაარტყით Windows გასაღებიტიპი % appdata%, და დაწკაპეთ ღიაა წასვლა AppData Roaming საქაღალდე.
9. ისევ წადი Google საქაღალდე და წაშლა la Chrome საქაღალდე, როგორც ნაჩვენებია ნაბიჯები 6 - 7.
10. ბოლოს და ბოლოს, გადატვირთვა თქვენი კომპიუტერი.
11. შემდეგი, გადმოწერეთ უახლესი ვერსია of Google Chrome როგორც ნაჩვენებია.
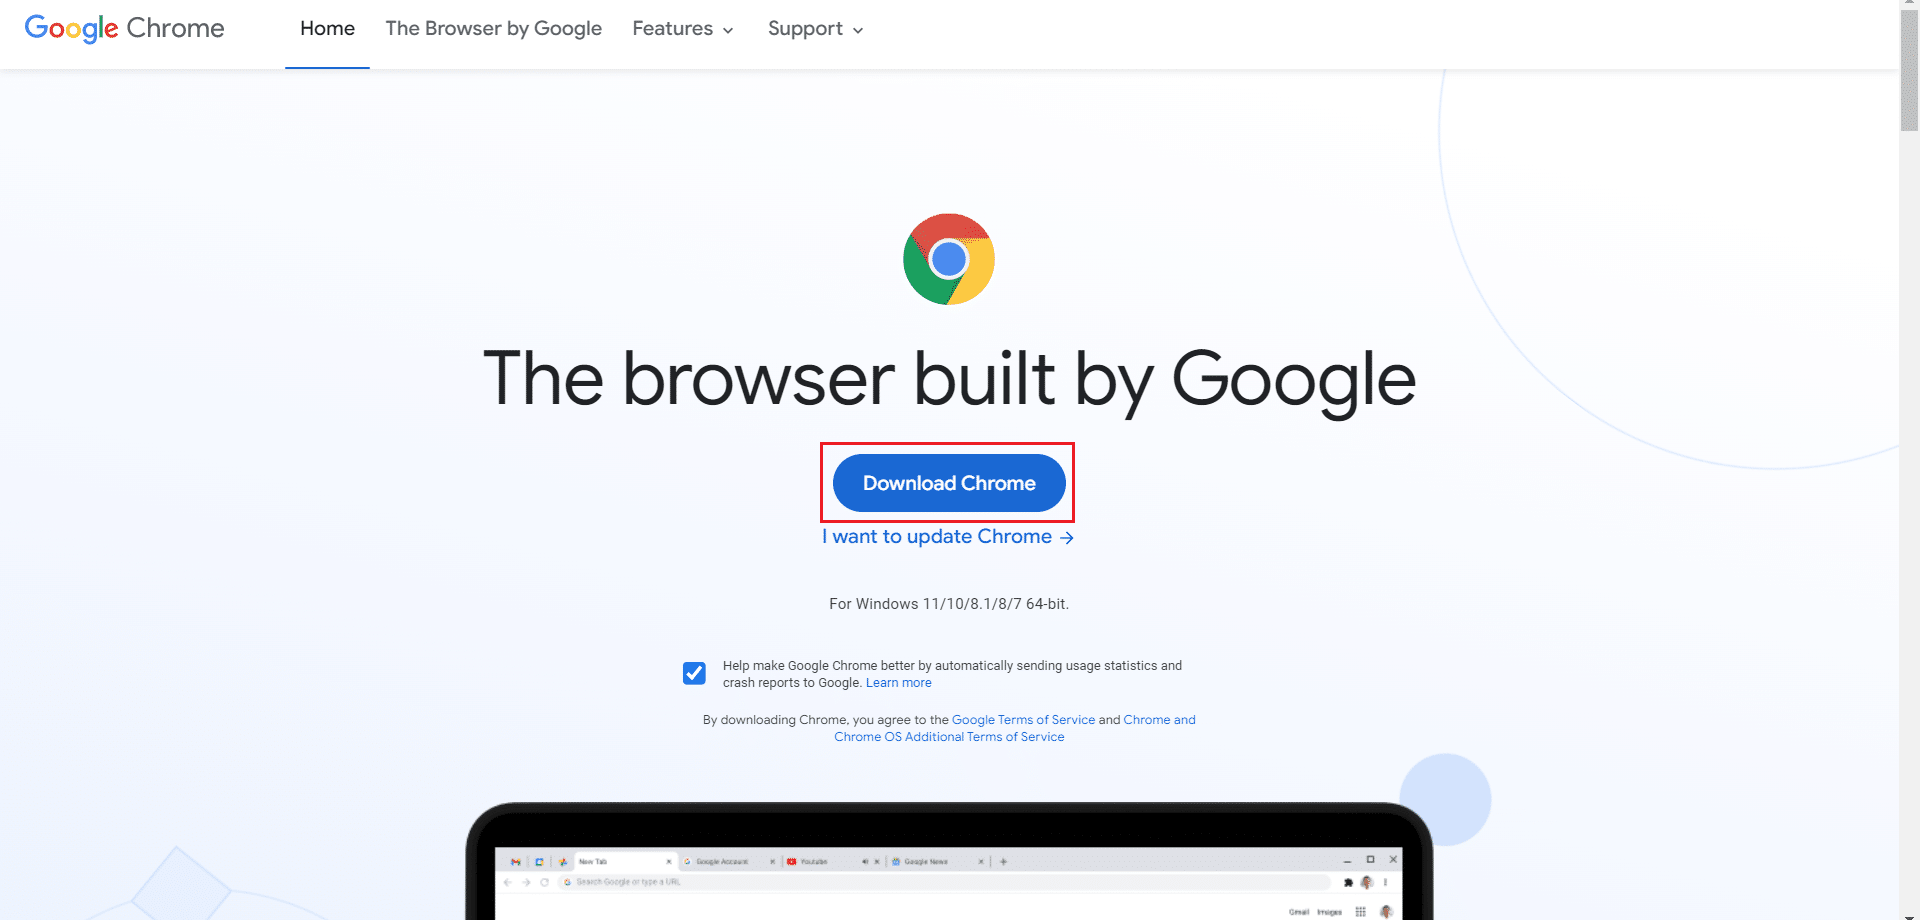
12. გაუშვით დაყენების ფაილი და მიჰყევით ეკრანზე მითითებებს დააინსტალირეთ Chrome.
რეკომენდებული:
ვიმედოვნებთ, რომ ეს სახელმძღვანელო სასარგებლო იყო და თქვენ შეძლებთ გამოსწორებას Chrome ran out of memory issue in your system. Let us know which method worked for you the best. Also, if you have any queries/suggestions regarding this article, then feel free to drop them in the comments section.

